

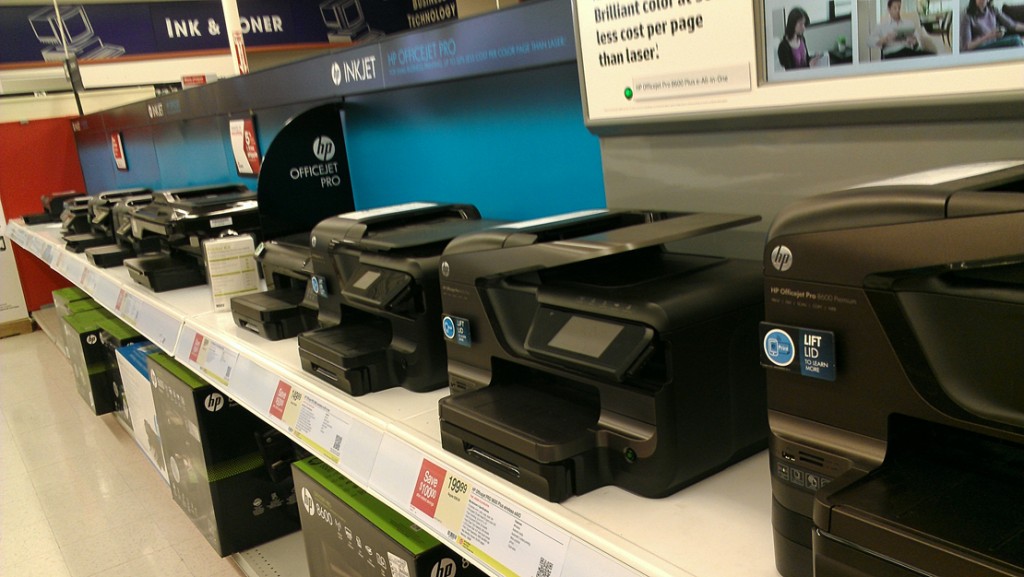
Living a glamorous life as a jet setter fashionista who also happens to be an Executive CEO is running rampant in my imagination while I walk through Staples, wearing my well worn flip flops from Trinidad, five-year-old faded yoga pants and a Converse T-shirt I got from Christmas last year. Definitely not a fashionista but hey, there’s nothing wrong with dreaming, right?! As for the Executive CEO… m-a-a-y-be she or he would be wandering around in Staples. So why am I at Staples in my gym clothes? Well, to either buy 2 tanks of ink OR a new printer. My ink guzzling printer has decided to not print in black, only color and is refusing to go into maintenance mode so I can do diagnostics until I feed it more ink! Yeah… there’s a rant brewing. You know the whole ink scenario. You can buy a printer for the cost of all the packages of ink that it needs to print! Well, I will resist the rant and say that I decided to toss my fate to the wind and sink $30.00 into ink with the hope that a nozzle cleaning after I fed the stupid thing would fix the black ink problem.
So let’s go back to my day-dream, the part about being an executive CEO. When I first saw the McCall’s 6028 pattern, I saw me, miss wishful fancy pants, wearing the sheath dress in royal blue with black trim shown on the envelope, in my fancy office with a fancy desk and lots of windows overlooking a city! I know…I’ve got a really big imagination 

That happened close to 2 years ago and I did buy the pattern, the fabric and made the dress. AND, it has hung in my closet since, unworn, because I made it too big and couldn’t convince myself to re-do it or toss it!
Then about three months ago I decided it was time to make a decision. Hmmm… it was tough but yep, I took it out of the closet and proceeded to remove all the trim, took out every seam and then.. then.. folded it up and put it in my future projects basket. Okay, so I was still stalling BUT… I had made a decision. Then last week, I am happy to say, I took all the pieces out of the future project basket and f-i-n-a-l-l-y went to work! I made a few discoveries in the process. 1) My fitting skills have improved immensely since I made that dress… obviously since it didn’t fit! 2) Some of my sewing skills have improved. 3) I have developed a lot more patience!
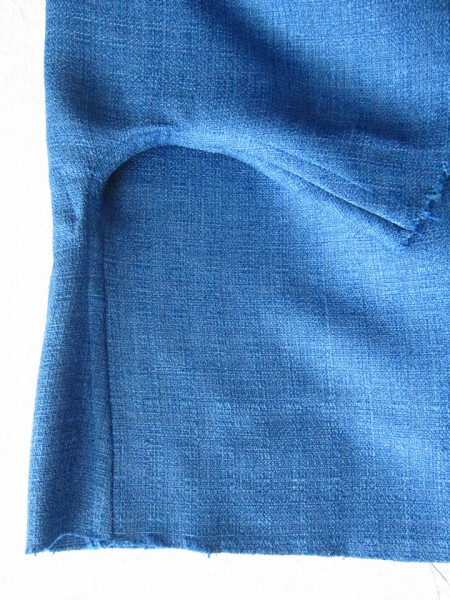
Okay… so the fabric is not quite royal blue but close. It’s a medium weight loose weave, sort of like a linen, but not! And the trim is a 1/2 inch twill that I learned you have to be careful of ironing because it’s very sensitive to heat! As you can see in the picture, I chose to not apply trim to the armholes because they fit so comfortably the way they are and I wanted no more boo boos!
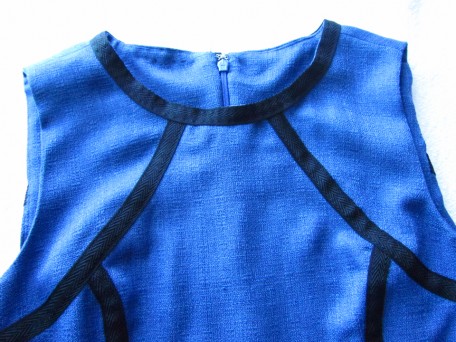
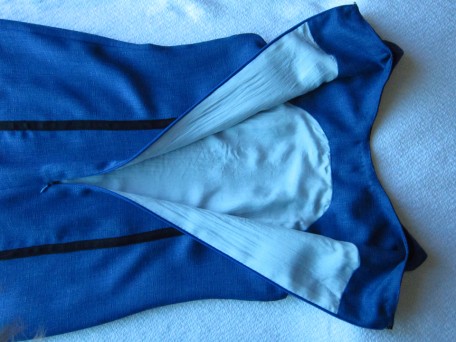
A lining is not called for in the pattern however, you know me, the queen of lining, decided otherwise so I chose a soft blue china silk.
If you want to make this dress, no worries, the pattern instructions are fairly easy. I might offer a tip: Baste all the trim before you edge stitch it with your sewing machine. Its extra work but worth it since you have more control with the placement of the trim being centered over the seams. Learned this because I tried to short-cut it the first time!
I installed an invisible zipper, my fav.
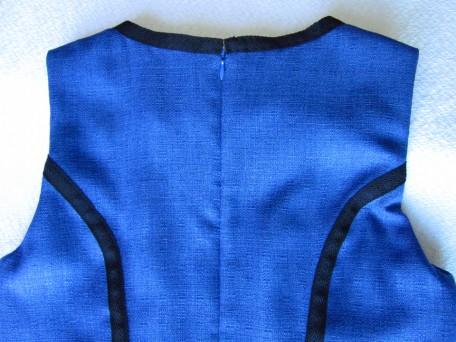
I think the dress was designed for Amazons. I had to take 3 inches of fabric off the bottom before hemming it. This is where my height of 5 foot 3 inches shows itself! I had to get a little creative with the back vent because of the lining I put in.
Now, to go with this dress, I got this crazy idea to pair it with the jacket from the Simplicity 1797 dress that I did the pattern review Simplicity 1797 on.

The really cool part was that I still had some of the blue fabric left that I made the dress from, so last week I dug it out from one of my stash piles. I laid it out and placed the pattern pieces on it to see if I had enough and indeed I did!
The instructions were easy and I thought the jacket was fun to make. It has some interesting features. There are two pleats on each front, on the outside. When you sew the darts, you have to be careful when coming to the point of the dart. You have to be able to pull the threads to the inside and tie them in knots.
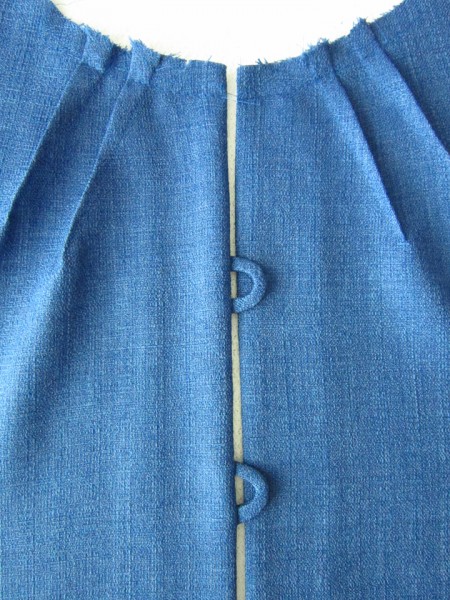
Basting the fasteners on is easy, it’s making them that can be a bit tricky. The easiest way I have found is to tie the thread from one end of the 3/8 inch stitching to a BIG hand sewing upholstery needle and then feed it into the casing eye first.
You next sew on the front bands by first finishing the edge which I did by pressing under 1/4 inch and then edge stitching.
Here is a close up…
This is how it looks after you turn it to the inside. I went ahead and carefully tacked it down after hemming the jacket.

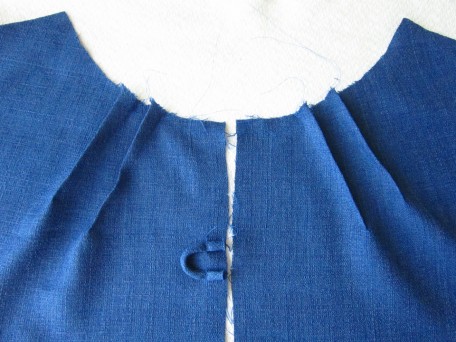
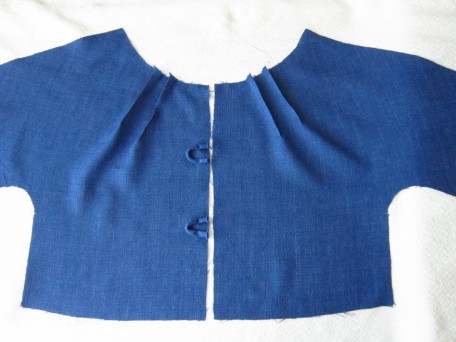
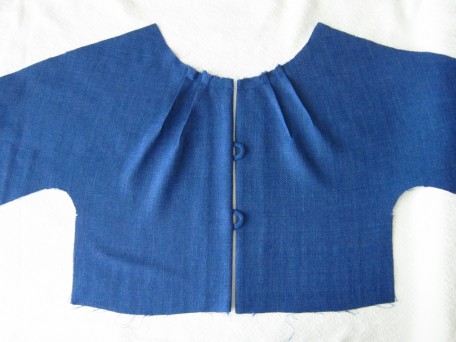
Putting the pleat in the back confused me a bit at first, but once I figured it out, I felt like a dummy. On the inside, you simply create a pleat like a box pleat on a mens shirt.
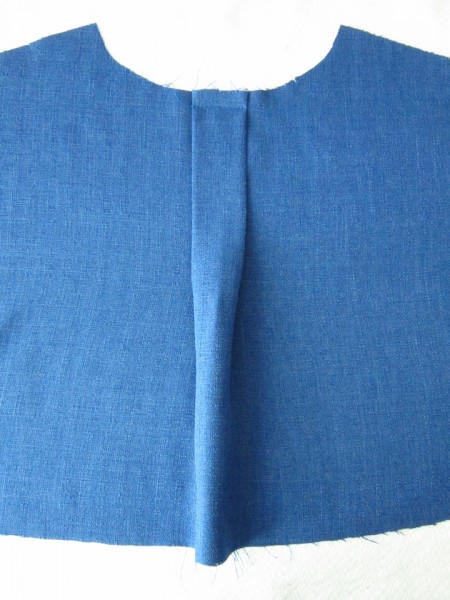
On the outside it looks like this…
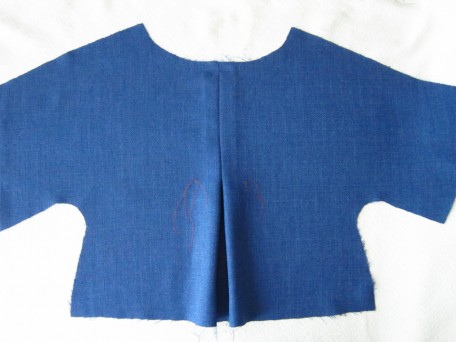
and close up…
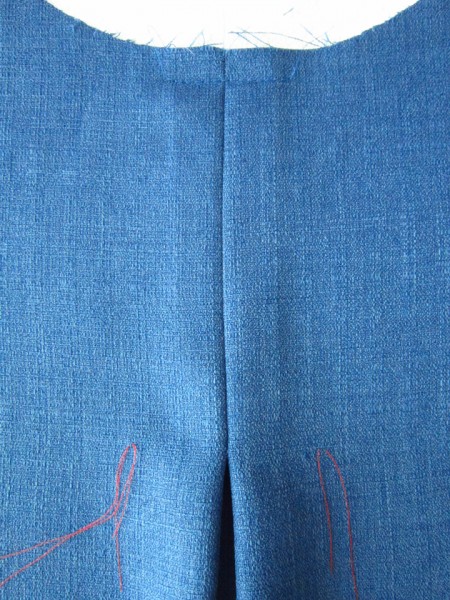
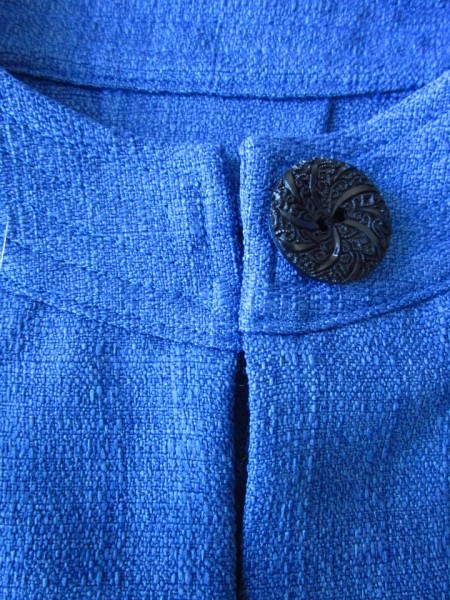
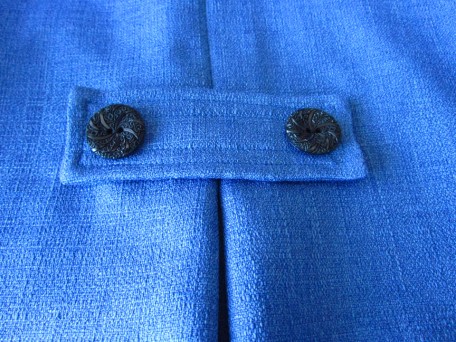
The red thread is marking the placement for the tab that goes across the back and holds 2 buttons. Of course somewhere along the way the red thread came out!
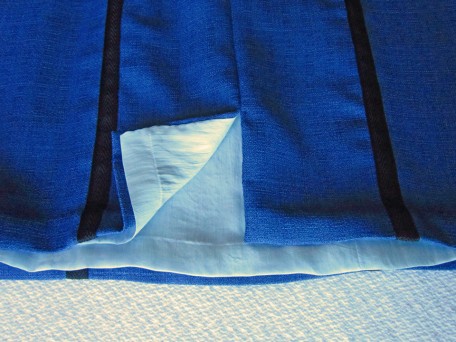
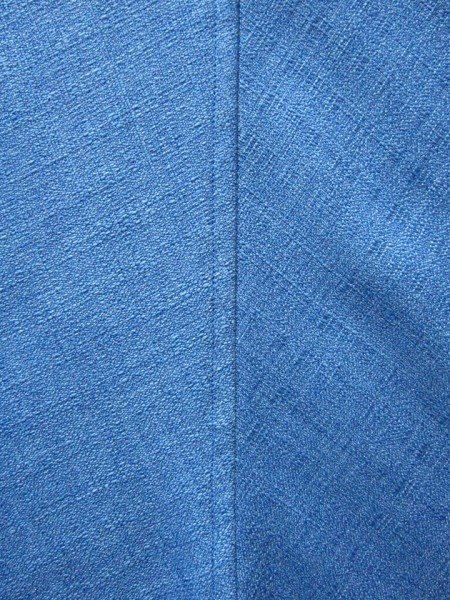
Shoulder seams were the next part of the construction. I decided to finish the edges in a flat-felled seam because the fabric is real unstable and frays easily not to mention that I just wanted it to look pretty inside. This is the outside seam.
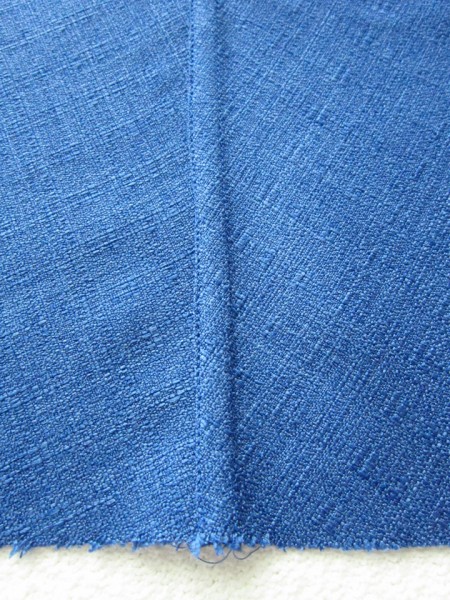
And my not so attractive inside seam. I do have a flat fell seam foot but this fabric is so loosely woven that it’s hard to take out a seam if I make a mistake and given that my flat fell seaming skills stink using the said foot (but not forever!), I decided to flat-fell by hand.
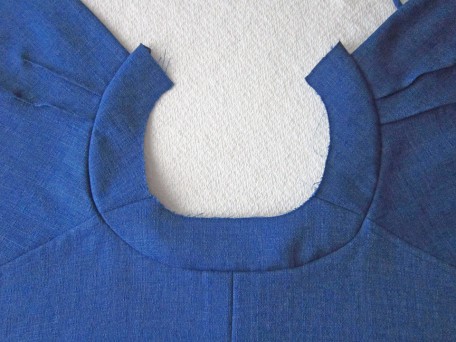
Applying the neck band I found a little tricky, partly it was just due to me but also I think because of the fabric. It easily stretched in all directions. I guess it’s that loose weave issue again! Or else I’m a DERP! Ehhh, I think I’ll blame it on the fabric!
Be careful when applying the facing band over the front edges…specifically the one with the fastener! I made sure the lengths were equal on both the left and right but then I got fussy with how bulky the fabric was looking on the side with the fastener so started messing around with it. When I was done, I should have checked the length of each neck band front one more time before top-stitching all the seams around the band but didn’t! I just hate it when that happens!
Underarm seams are a bit unnerving when flat felling seams. I maintained as much composure as I could and patiently worked on them for what seemed like hours. I first basted them down, and then edge stitched them just like with the shoulder seams.
And the inside…

The sleeves were easy enough. You machine hem and then top-stitch 4 additional rows. I forgot to take a picture of the sleeves to show you. They turned out fine though I noticed sort of a bell shape thing happening along the end of the sleeves. I could have pulled to much but I think I’ll stay with the fabric being stretchy excuse! Maybe with the next washing I can press this out.
I have some advice on making the tab. Don’t cut off the corners like you are instructed to do in the pattern directions. And stitch from edge to edge rather than pivot on the corners.

I learned this valuable tip from Peggy Sagers of Silhouette Patterns and forgot it when I made the first tab! Fortunately I had enough scrap fabric and so made another one. Also, if you can do what I will attempt to explain next, you should be able to get nice looking outer corners on your tab. For starters, don’t try to turn the whole tab right side out through the opening at once but rather work with one corner at a time. I found it easiest to start with an end corner that is not on the side of the opening. Fold down the top seam allowance of the corner at the stitch line towards the underside of the tab and while holding it in place, fold the side seam allowance of that corner at the stitch line over the top of what you are holding. Then while holding the two edges pinched together begin turning them right side out, leaving the inside of the other corner of that same end of the tab visible. If you have the look you want, then do the same thing to the remaining corner of that end. You will do the same for the other end of the tab. It’s not rocket science but it requires patience. I hope my explanation makes sense and is not confusing.
The finished tab…
The rest of the construction of the jacket is pretty uneventful. Some hemming and a little tacking of the front bands if you choose to though the instructions don’t call for this.
So here is me in the dress with all the “executiveness” I can muster after a visit to the doctor and some skin wounds!

The back of course…

AND with the jacket…

The back of the jacket…
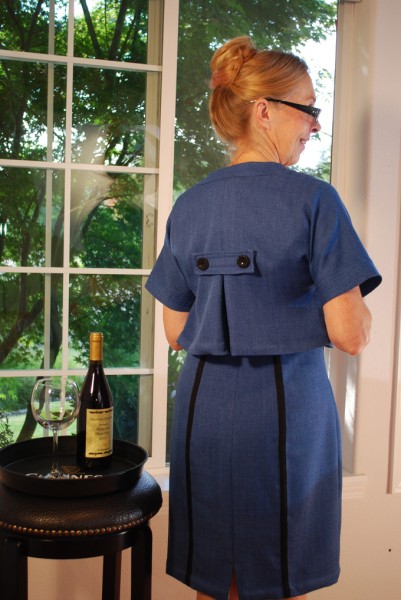
And a tadaaaa!!!!!

I’m still not sure about the combination, but I love the jacket and will undoubtedly make other things I can pair it with! Oh… and by the way, almost forgot, my fiendish printer works again!
Salute! Jessica
2 Comments
Leave a Reply to jessebrandon Cancel reply
About Me
 Portland, Oregon,
 United States
Hi there! I’m Jessica Brandon and I am a clothes-loving sewing artist. When I am not sewing, blogging or shopping for shoes for my creations, I fill in the remainder of my days spending time with my children, playing ice hockey, gardening and making and drinking wine!


Up Coming Projects:
Vogue 1426

Vogue 7881

McCall's 7089

Vogue 8997

Vogue 1431

Vogue 9006

Vogue 8991

This post is fab. I’ve just bought this pattern and your notes on the stages are so helpful. I like to line dresses too so I’ll be using your tips!!
Lucy
Hi Lucy and thank you! I’m glad that I could be of some help. I think you should know that you have helped me too. Your words have inspired and encouraged me to stay on course with what I’ve been doing at Sewlikeinparis. Take care and have a wonderful 2015!
Jessica