

Pattern Review Simplicity 2703
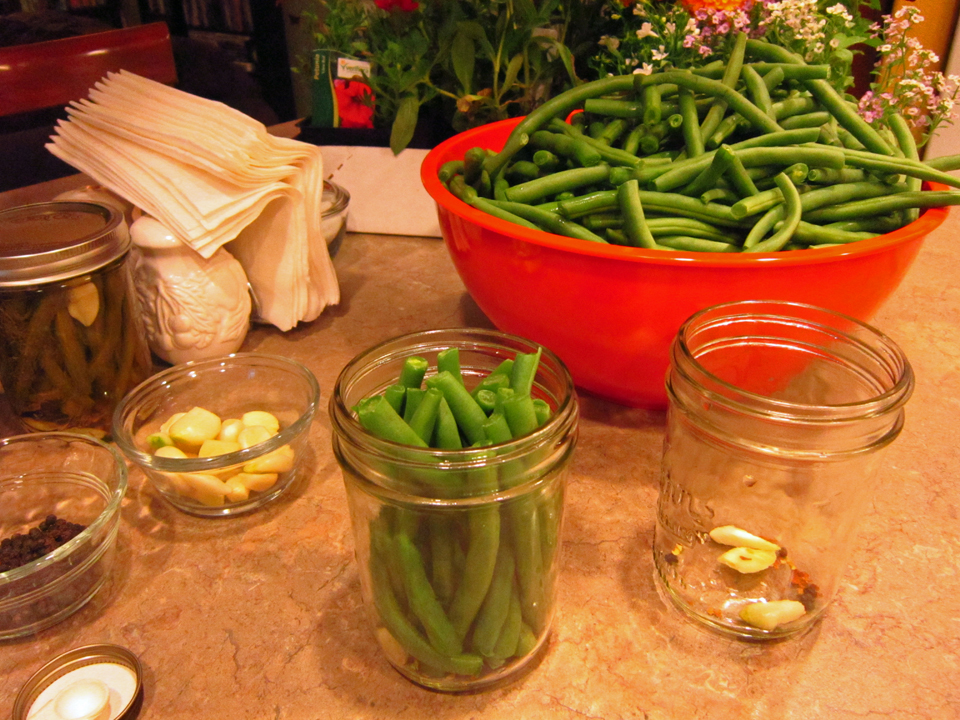
Hope you all are enjoying your summer. Likely taking a holiday to some special place…the beach, the mountains, going home to another state or country, or visiting family and friends you haven’t seen for a while. If so, tell them I said hi! 🙂 As for me, well – not seeing a holiday in the near future… there just seems to be more work that needs to be done! My herbs, flowers, bushes and grass are in constant need of watering, especially in the 90 degree days we seem to be having quite a bit of. Who said we were approaching an ice age? Honestly though, I’m not really complaining because I love doing these seasonal things. It means that I get to spend more time outdoors, I get to appreciate the smell of flowers (though there is something with hot days and dog poop that I don’t especially appreciate) and I also get to do my yearly canning. Canning, you ask? What’s that! You know, I think it’s becoming a lost art. I was fortunate enough to learn it from my grandmother. I remember my visits to her house so clearly. The first thing I always did was hit the pantry, strategically planning my meals based on what grandma had canned since my last visit. My favorite was peaches! Naturally my children have been indoctrinated into canning and will help me (most of the time) when the fruits and vegetables start rolling in. Every year the pantry gets filled with the usual items for the winter months; peaches of course, raspberry, strawberry and boysenberry jam, apple butter, spaghetti sauce, spicy tomato and mango chutney, and of course pickled dill green beans which explains the picture above.
Somewhere though in all of this chaos, I still manage to find time to do my sewing which brings me to my latest project, a dress I made using the Simplicity 2703 pattern.
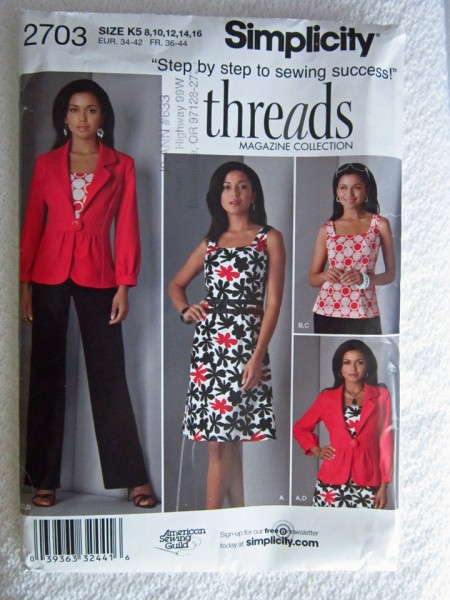
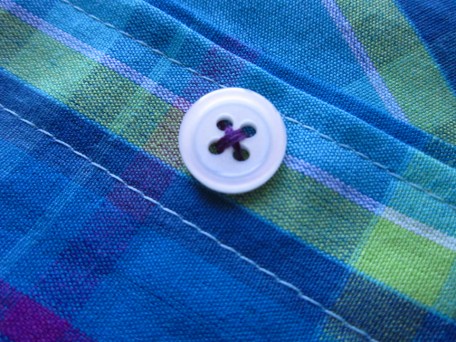
I bought the pattern back in February or March, I think, and then added it to my “collection” and forgot about it. I hope I’m not the only one that does that! Anyways, then in the beginning of June, when I was buying fabric for the McCall’s 6745 dress that I made, I stumbled across another fabric that I had no idea what I would do with but had to have. Now I know I’m not the only one that does that! There was only 2 1/6 yards left and I made it mine. So last week when it was time to start a new project, I pulled out this fabric and pondered again on what I should do with it. I contemplated designing something of my own, but it was hot, I was tired and so I decided to take the easy road and rummage through my pattern “collection” (notice how I’m avoiding the word stash – collection sounds more artsy fartsy!). Lo and behold, I found the Simplicity 2703 pattern and wow…my fabric looked almost the same! The point here is to say that I didn’t mean to do that! But… since it happened, I decided to go all the way and I even added the two rows of twill tape. So here’s the fabric which turned out to NOT be fine cotton which I had originally thought but instead sateen. The white fabric is a pongee.
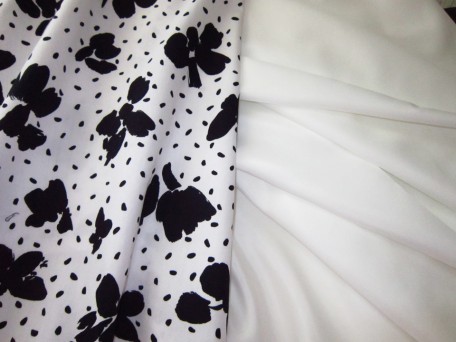
The pongee is for the lining. Yes… I am a liner! I don’t line my garments to hide ugly seams since I am pretty particular with how I finish seams. I like to consider myself sort of an “haute couture” kind of girl. I should be clear though that I don’t always use haute couture techniques for finishing seams, but I am fussy. There is something about a lined garment that gives me the feeling of quality – maybe it’s what the RTW (ready-to-wear industry) has done to me! But it’s also that it just feels nicer to wear. I like to use china silk, but when I”m not sure I’m going to like a garment I’m making, I hesitate to splurge and spend the extra money so pongee is always my fall back. At $3 to $4.99 a yard, it’s a no brainer! Pongee does sort of feel like silk to me, is nice to sew and since this makes me happy I’m good with it!
It is such a pain in the derriere every time I start a new sewing project because there is a whole fitting process that I have to go through. My shoulder width across the front is about 1/2 narrower than most standard patterns, my bust cup size is somewhere between an A and a B and my torso length is about an inch shorter, especially noticeable in the back if I don’t shorten the pattern pieces in length. I have learned this through trial and ERROR! Depending on the style line, all of these details can be easy to remedy or become challenging. This dress did create a bit of a challenge for me because the darting happens in the neck line. I started off thinking I might not like this dress but after three muslins, I finally nailed it down and thought otherwise.
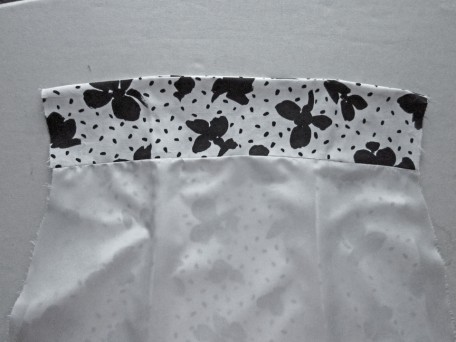
The pattern instructions are easy to follow. I did make one change – I added a skirt lining made from my white pongee by sewing it to the bodice facings that I cut out of the dress fabric.
The back tripped me up a bit. I initially sewed darts in the skirt back lining and then when I went to attach it to the bodice back facing, the skirt part was too narrow. It was a total DERP moment! I removed the darts, though now have dart markings that hopefully will wash out but hey… now they fit together perfectly!
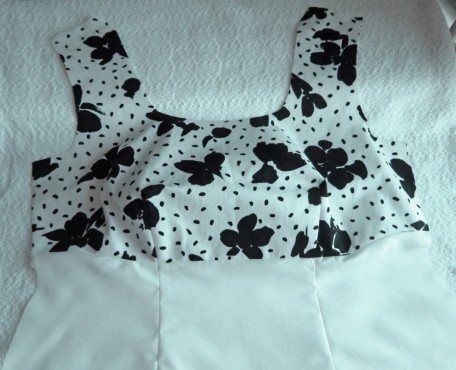
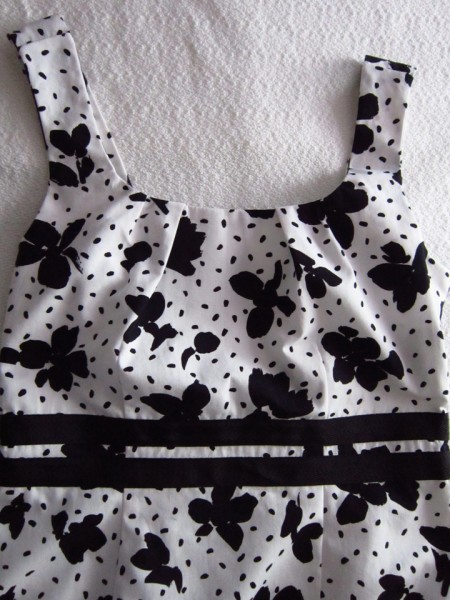
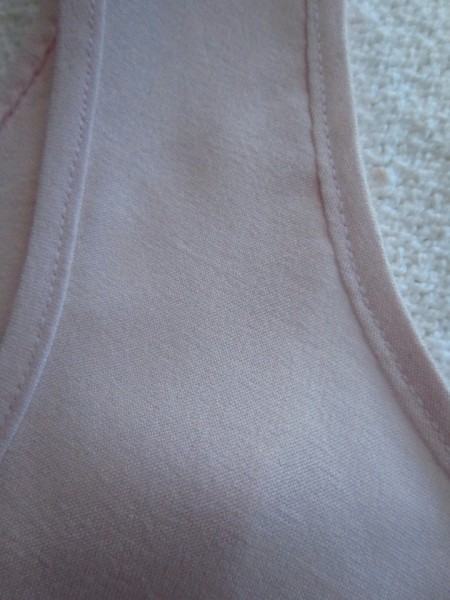
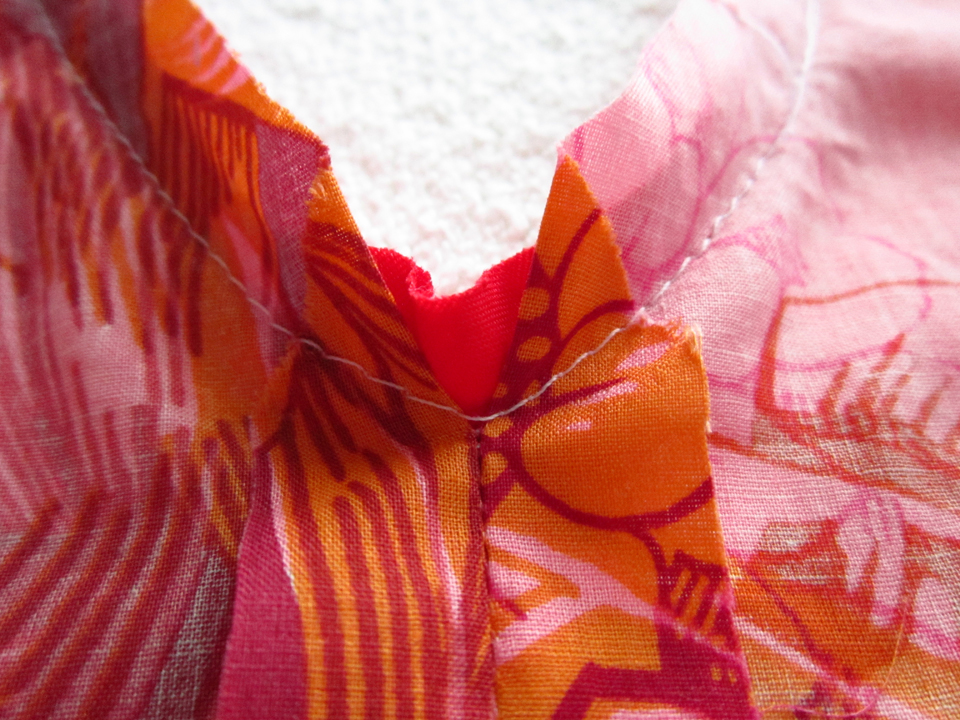
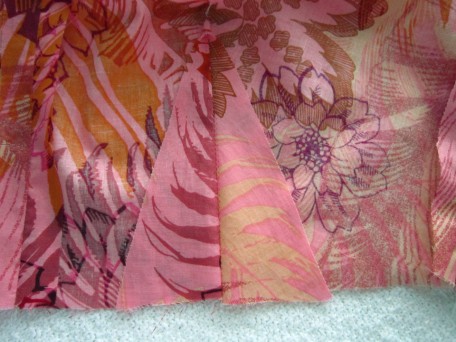
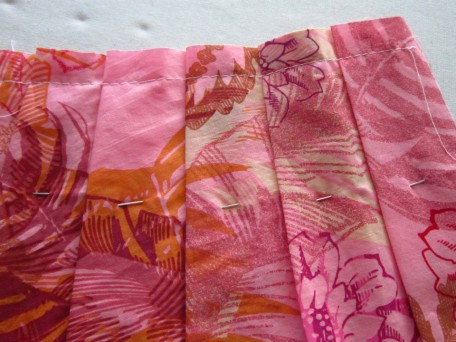
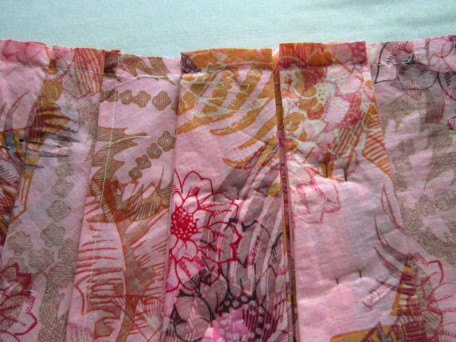
Whether it was the fabric or the pattern, or both, sewing this dress went very smoothly other than the lining foo-bar. I wish all my sewing creations went this way. (I’ve still not gotten over the experience of sewing the Simplicity 1797 dress) As to some of the details – here is the bodice showing the neck line pleats and the two rows of 1 inch twill tape. The pattern calls for 1/2 inch but I wanted the trim to be more bold! What’s new huh!
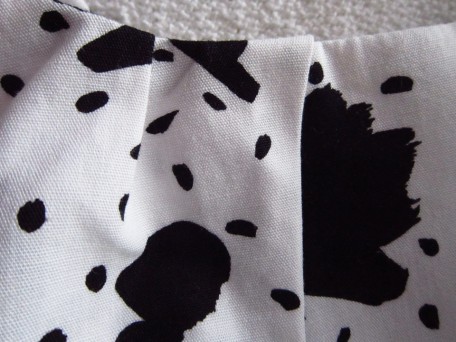
Here is a close up of the neck line pleats.
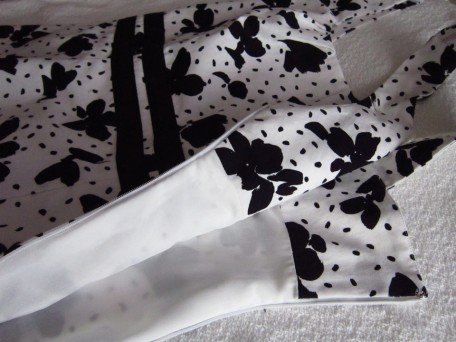
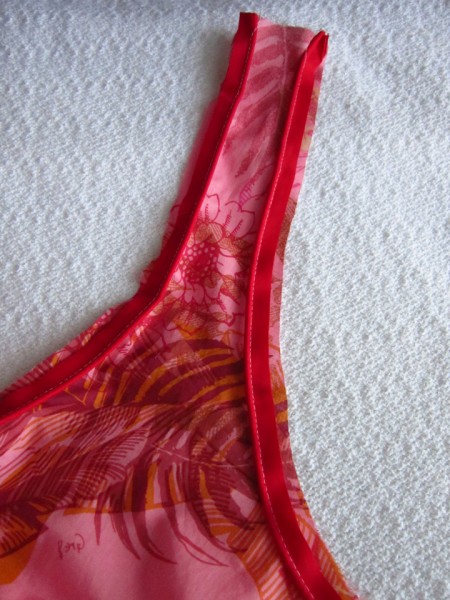
The dress closes on the left side with a zipper. I used my favorite, an invisible zipper and so I did not sew the fabric and lining seams below it until after it was installed.
Well there you have it – a dress made from the the Simplicity 2703 pattern.
Now the moment of truth, a picture of moi wearing it.

The back of course!

And one for fun!

So there it is, another new dress! A special event is coming up this next month that I might wear it to unless I think of something else before then… it’s called “Dragging the Gut”. My youngest son and daughter are going to drive their cars and I’ll drive mine of course. Probably have some friends join our herd and we’ll all drag the gut for part of the evening, along with hundreds of others on a route that will take us down a main street of a town we live near. After a bit of dragging we will cruise on back home, have dinner and I will indulge myself with a glass of wine! Or maybe two! A hot August night adventure … can’t wait!
Salute! Jessica
Read More
Dressmaking or Shirtmaking
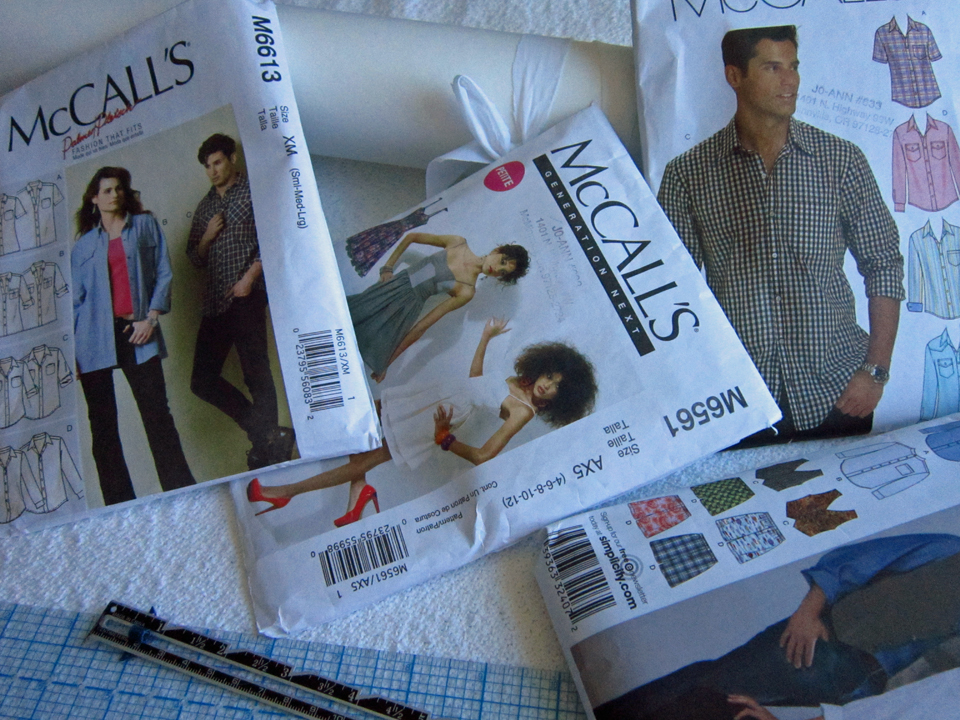
So I have traversed back and forth across a bridge that connects two arts in the sewing world, dressmaking and shirtmaking and the question is… which do I prefer to make? I’ll have to say it’s a hands down… BOTH! Each satisfies my creative passion and both help me to develop more skills to stuff in my “tool box”. Not to mention that it’s just awesomely cool to also know how to make mens clothes!
In the last several weeks, I have been hard at work (when I’m not elsewhere like Blues Festivals, smacking pucks around at the rink or working in my yard trying to keep my herbs, vegetables and flowers alive through this ongoing hot spell) designing a shirt pattern for my loveable beer connoisseur and sewing a glamor dress for my adorable pencil. Today I am going to share these tales with you! Sorry about the length. I know blog articles should be short, sweet, to-the-point, and not novels! However, if you meet me in person, the first thing you will learn is that I love to talk to people. Yes, I am a social butterfly 🙂
I’ll start my tale with the glamor dress. The pattern is McCall’s 6561.

McCall’s 6561
I’ve made this dress before in white embroidered cotton and lined it with cotton silk. It has a 10 piece bodice that I had to totally re-design for my daughter because she was smaller than a 4 but a bit bustier. There is a post here at Sewlikeinparis, Pattern Review McCalls 6561 with more details and pictures but in short, while it’s not horribly difficult, it is a bit time consuming to make.
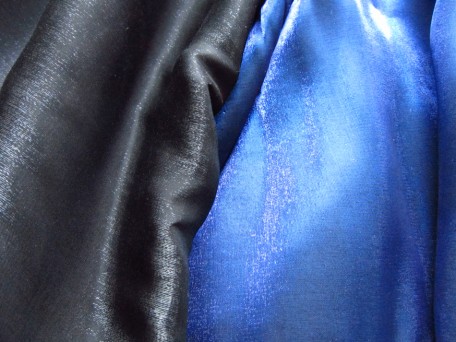
The fabric I used this time is shimmer satin in black and royal blue.
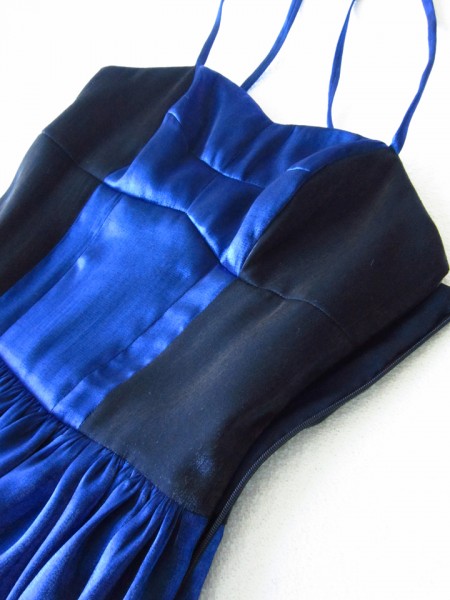
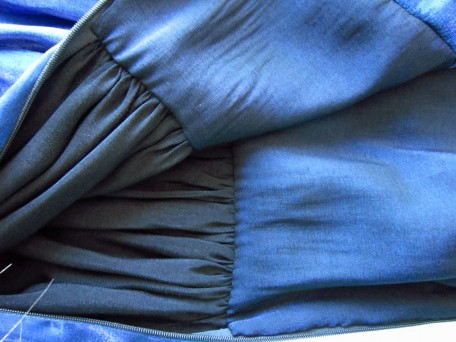
The pattern provides instructions for which pieces of the bodice should be cut from the fabric or the contrast fabric but we ditched those and my daughter marked the muslin bodice with her desired color scheme. This is the bodice front finished.
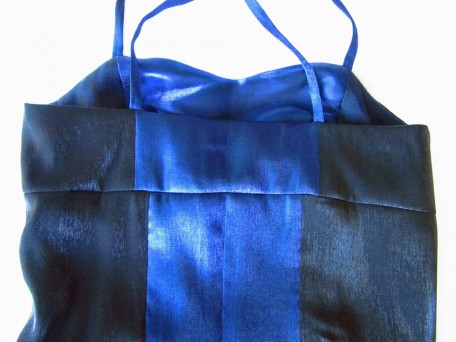
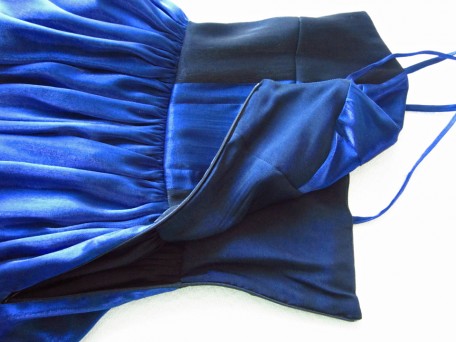
And the view of the back…
The dress has two gathered skirts, the instructions tell you to attach one to the bodice and one to the bodice lining. My daughter didn’t like the feel of the two separate skirts so I attached both to the main bodice this time. I didn’t sew the side seam and put in the zipper until after I had sewn both skirts to the bodice. There was a lot of basting going on.

Next, I installed the zipper first, then sewed the side seams. To be on the safe side, I decided that before going any further, I would make the straps and attach them so my daughter could try it on. OOOOh, it seemed a bit too snug for my liking but she felt it would be just fine. With hesitation, I went ahead and applied the lining and did the finish work.
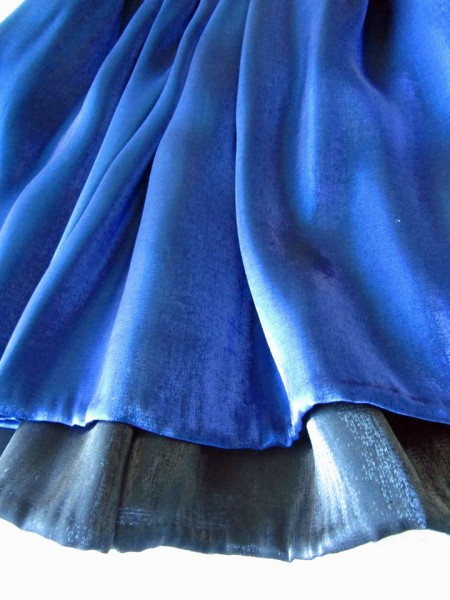
This is the bottom of the dress with the layered skirts, one being a little longer than the other.
So yesterday was the official photoshoot for the McCall’s 6561 glamor dress but guess what? My pretty little pencil…

had at some point very recently, turned into a fine point Sharpie!
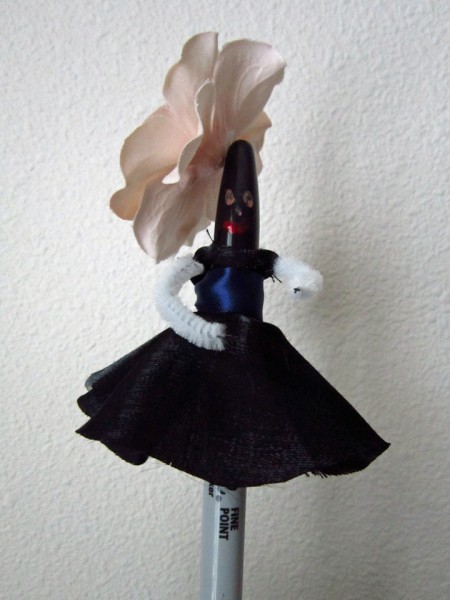
Yep, you got it… the glamor dress did not fit! Not even close! Because of this, there are no pictures to share this gorgeous little number with you because there is NO body that can fit into it. I had to go downstairs for a drink… of water, and when I went back to my room I found the dress hanging on my closet door frame. This is a nonverbal form of communication that as a mother I have learned to understand. My daughter is saying, “if you want me to wear this dress, you can fix it if you want, but I don’t want it in my closet taking up space if I can’t wear it.” I love my lovely fine point Sharpie very much and so believe it or not, there will be no more words and I will return to the fabric store in search of more matching fabric for a new bodice. I will see this experience as an opportunity for me to get better at alterations! (even though I really HATE altering anything!)
So, I bet you are wondering how the shirtmaking went huh? It too was quite an adventure. I have designed a final pattern which is a melting pot of three patterns, a draping, and a number of additional features that I discovered after studying one of my son’s better well-made RTW (ready-to-wear) shirts. It was after 3 muslins, an official attempt at shirt #1 which was an epic fail and my son’s fading hope that he would ever get a shirt when my bull headed determination saved the day and I finally figured it out! The next day after the celebration 🙂 , my son and I went to the fabric store and he chose this fabric.
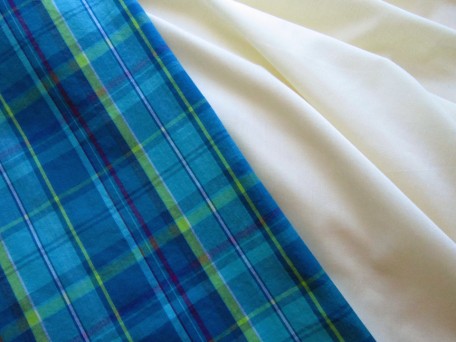
It is 100% cotton plaid and the pale yellow is broadcloth which will be the contrasting neck stand (band). I think my son has figured out the magnitude of his good fortune because he picked out some additional fabric as well for his next shirt!
Cutting shirt pieces out in plaid fabric, I think, is an art of its own! The 1st shirt that was a bomb took me all day to cut out because of the matching game I was trying to play with all the horizontal and vertical lines. It wasn’t too long before I figured out that the more pieces you had, the harder it was to match things up! Therefore, I devised a method through my pattern design that made things much easier. I drafted two separate pattern pieces, one for the right front and one for the left front. Each piece includes enough yardage at center front that will fold over itself several layers, creating an interfaced placket for the buttons and buttonholes. Mind you, folding over the right side that holds the buttons is pretty easy, but it was the left side that holds the buttonholes where I got a bit creative. Ultimately you fold the center fabric edge backwards, right side to right side, then forwards and then under 3/8 inch, allowing for a 1/8 inch overhang of the left side over the right side when lapped and wide enough for 1/4 inch top-stitching along both edges. And on another note, if sewing on only one pocket, that goes on the left and good luck with that matching! Argh!!!!!
So many details… and this is only the beginning. I find myself feeling a little overwhelmed right now explaining since it was just yesterday when I finished the shirt. Maybe we’ll just look at some more pictures for now. Pictures that I could take!
This is the collar and neck stand.
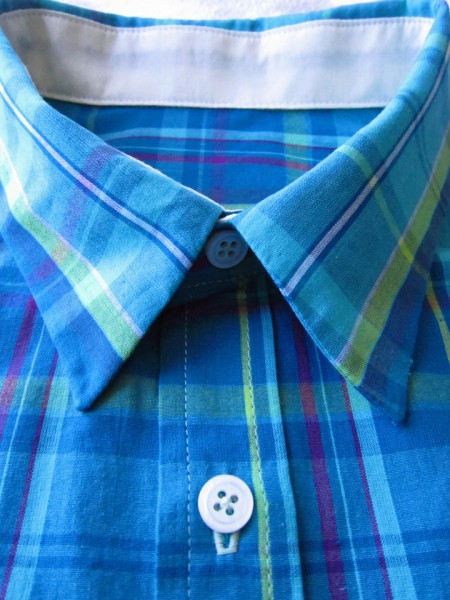
I don’t have any specialized shirtmaking tools yet… like a point presser clapper for collar edges but I was satisfied with what I did. Holy crap! Just realized when looking at this picture that I didn’t top-stitch the collar yet! I am going to have to sneak it out of my son’s room and do that ASAP!
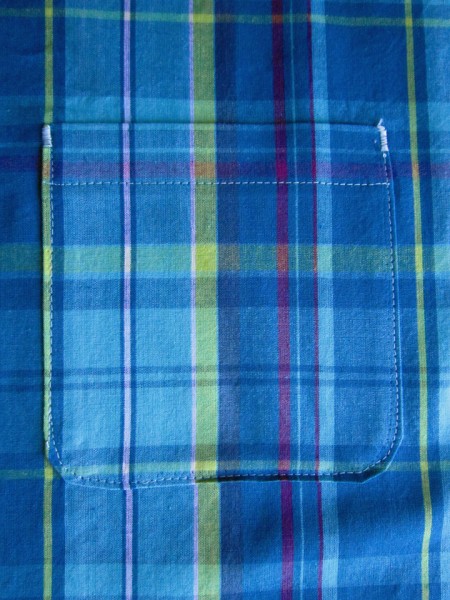
Pockets are not really traditional in high quality mens shirts but… with sportier shirts they are considered okay. I found it a bit challenging to match up all the lines so I decided to try first with one pocket. And… with an attempt to show off, I decided to go with a rounded bottom and while I didn’t do half bad, I think I am in need of some more practice!

Closer view of pocket…
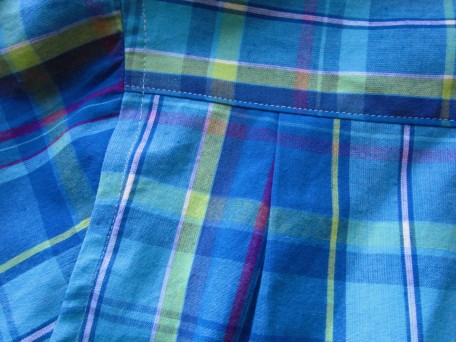
I like the knife pleats I used in this one but with the next shirt, I am going to do box pleats instead which are done exactly at center point below the yoke and see which my son likes better. I also felled the seams on the inside around the armscyes. That was a dangerous time during the sewing of this shirt! That’s all I am going to say about that.
Speaking of felling seams… because the author of “Shirtmaking”, David Page Coffin recommended doing them using a foot rather than by hand, I heeded his advice and went and purchased one for my sewing machine.
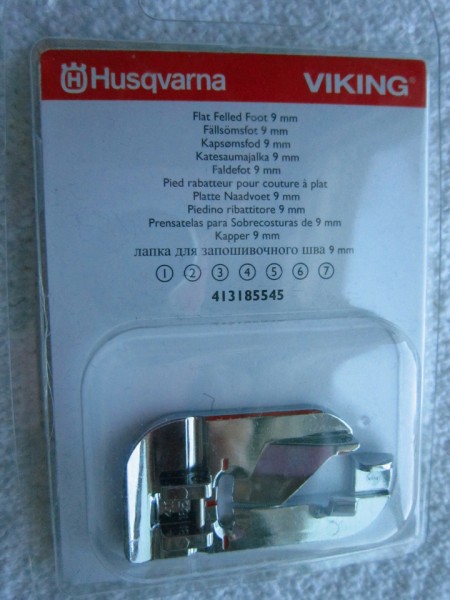
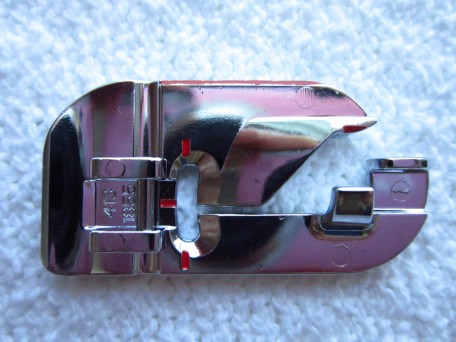
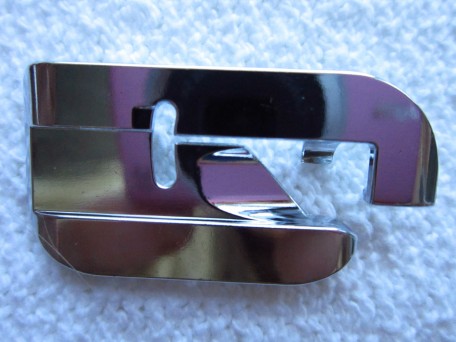
I’ve concluded that if I did nothing but flat-fell seams every time I sewed, then I might eventually become a master flat felled seam sewer when using my felling foot! However, because I am really hating that damn foot right now, I don’t have much hope!
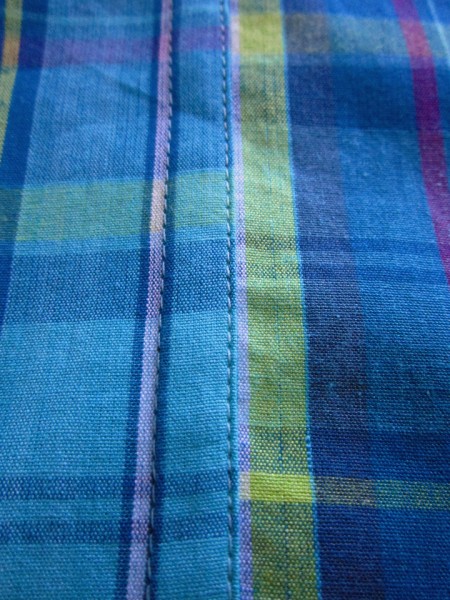
Ahem…. I did eventually succeed at flat-felling the side seams using the felling foot (It’s almost time to raid the wine rack!) I sewed the wrong sides of the shirt together and then flat felled the seam allowance. I will re-visit flat-felling for you in another post and explain it more in detail when I am over it!
Finally, you have to hem the shirt using a rolled hem. I did NOT use a foot for this (even though I have one). I have a technique that works well for me and so I stayed with it.
Step 1:
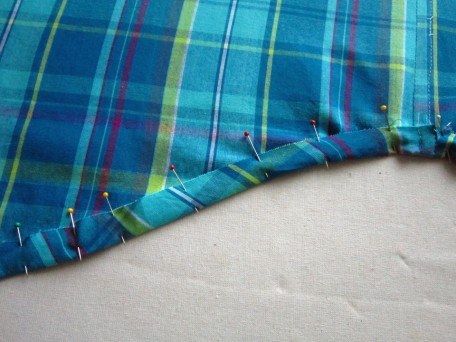
First – I fold up the hem 5/8″ and pin.
Step 2:
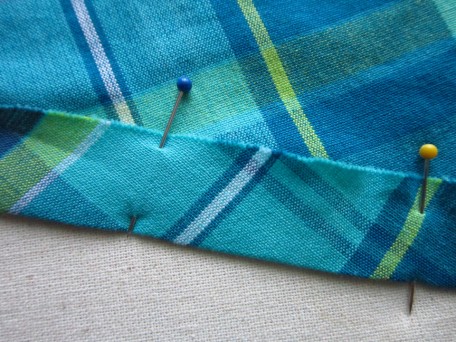
Next, I press, just setting the iron flat against the edge of the folded hem, going slowly and doing it section by section.
Step 3:
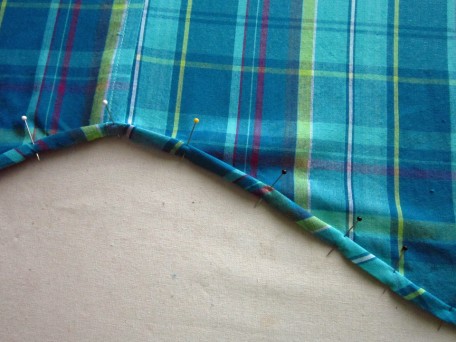
I fold the fabric over and under with the edge touching the inside bottom of the fold and pin again.
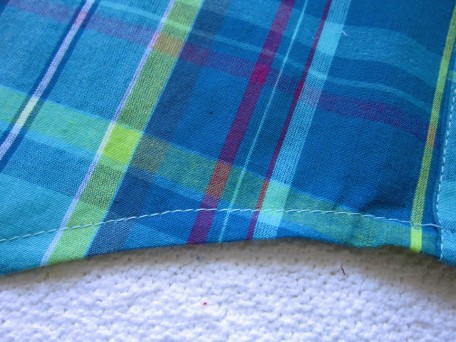
After step 3, I sew a 1/4″ seam along the bottom, then press again and this is the final look.
Of course, as a thoughtful addition I sewed on an extra button!
So the grand finale, my son with a hind sight view!

Being that he is sort of bashful, after some coercion and a bit of bribery, I got him to sit on a stool and smile!

To get this cheezy grin, he was thinking of his older brother who in a few hours will be off to a rally race competition in California. My son, Dylan, is a rally race driver with a passion for rally racing like I do for sewing… and obviously a personality that makes Jared smile!
Salute! Jessica
Read MorePattern Review McCall’s 6751

Well I made it to the Blues Festival this last weekend and it was fabulous! There were so many different blues artists playing on stages all over the park in downtown Portland. At midday on Saturday, my chicadees and I left land and stepped on the Portland Spirit and took a blues cruise down the Willamette River. The Sister Cruise, it was called, with blues singing sisters that rocked that boat! For a short spell, we stepped out on the lower back deck to see some sights and that’s when I took the above picture. I wonder what it would be like to live in a houseboat? Lived on a sailboat once for about six months (that’s another story!) but I don’t think that’s the same.
Anyways, I wore my latest dress, the McCall’s 6745 halter dress for this day and guess what? It happened again. When I was standing on the deck taking my pictures, the wind whooshed in and blew up the hem of my dress, I mean UP! It took me a couple of seconds to realize, but by then it was too late! I quickly grabbed the skirt of my dress and pushed it down, turned around and there was an elderly woman and her husband sitting in chairs watching me. I asked her how much I flashed and she said “well, quite a bit, but don’t worry, it didn’t look bad.” Hmmm… I wasn’t sure what she was saying but with as much dignity as I could muster, while holding onto my skirt, I gave my best smile and headed back into the cabin.
Maybe I should have worn a top and shorts instead of “the flashing dress” to the Blues Festival… if I had, I think I might have worn my new McCall’s 6751 top.

Mind you, I haven’t made the top shown above – it is top B. I made top A which shares the same front, but has a different back. Below is the drawings that includes top A.
Since the pattern is drafted for x-small through XX-large, I decided to throw my fate to the wind, pass on sewing a muslin, and just cut and sew! I was using some fabric that I had in my stash so other than the time I would spend sewing it, I wouldn’t be out anything so why not. I usually wear a size small so I decided to stay with this size, but I did adjust the pattern pieces to be medium at the waist because sometimes RTW (ready-to-wear) tops tend to be a smidge tighter in this area than I like.
The fabric that I used is a pale pink rayon and has a slight stretch to it. I didn’t particularly like sewing it. It was kind of like sewing peach skin fabric which I will never be sewing again, don’t like to sew that stuff at all! This rayon was not quite that bad, nonetheless, the 2 yards I have left may never see my sewing machine.

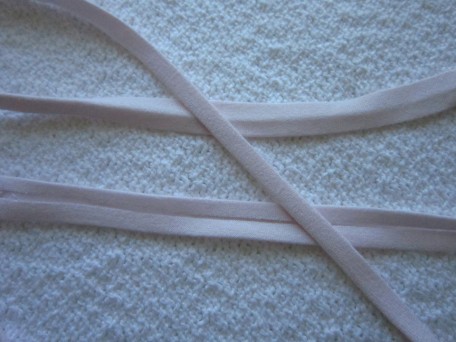
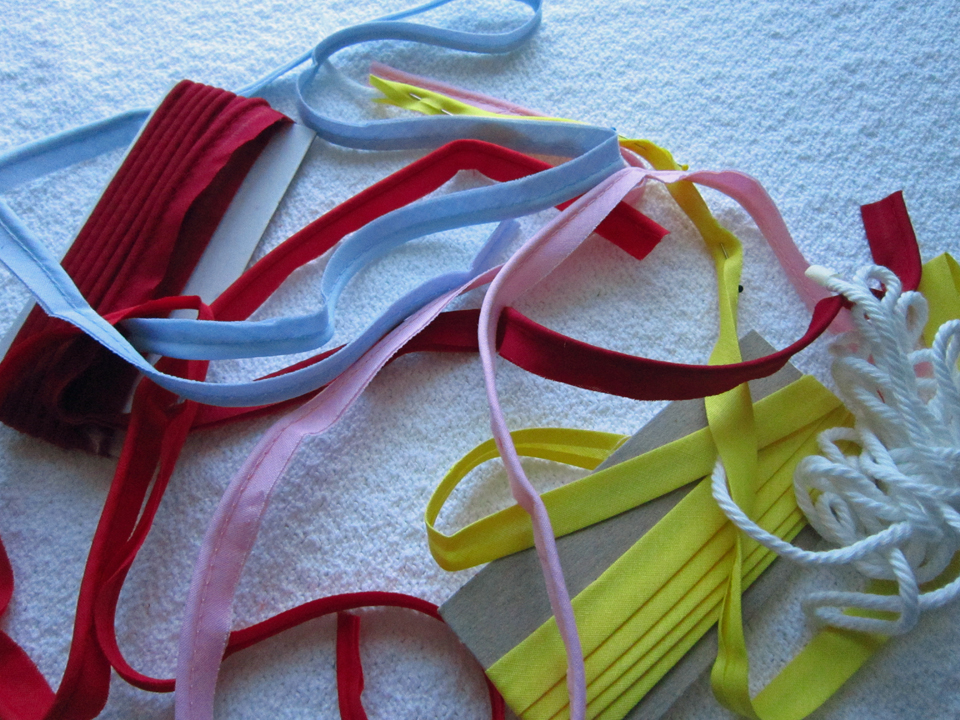
The pattern instructions are really easy to follow, however, I am not real fond of the finishing technique used for the neck and armholes. Maybe it’s me, but I cannot get a nice finish in these curved areas by simply folding the fabric into a narrow hem. The second technique they suggest is to use bias tape. I am not a big fan of packaged bias tape – yes, I have used it, but it feels and looks sort of cheezy to me. Instead of either of these, I opted to make my own bias tape, which I made from the pink rayon and used my Clover Bias Tape Maker.

It comes in two sizes, 1/2 and 1/4 inch. I have the 1/2 inch. Using this little gadget is the easy part of making your own bias tape. The work comes with cutting out your strips and sewing them together. An important point in your success is making sure you cut every strip a width of exactly 1 inch. Sewing it to the neck and arms can be a bit tricky too, especially with certain fabrics like pale pink rayon.
When it was time to apply the bias tape, I baled on the instructions and attempted to do my own thing. While writing this review and re-reading the pattern instructions, I now realize that I made it harder than it had to be so I will not even explain what I did but I’m such a dork! You can still follow theirs using your own bias tape and be just fine.
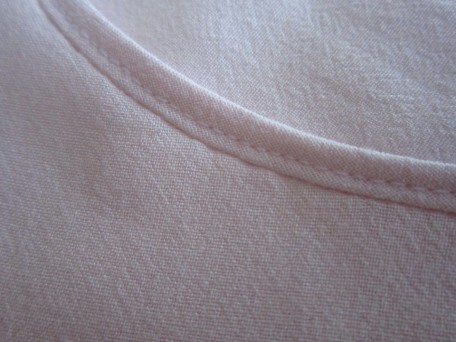
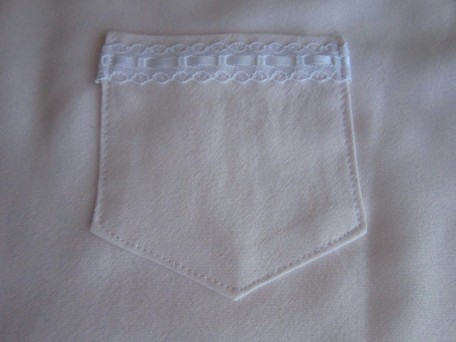
I wanted to add my own touch so I opted on making a pocket different than the one given with the pattern. This is what I ended up with.
The back is interesting. I’ve seen lots of tops in clothing stores in this style and really like the look.
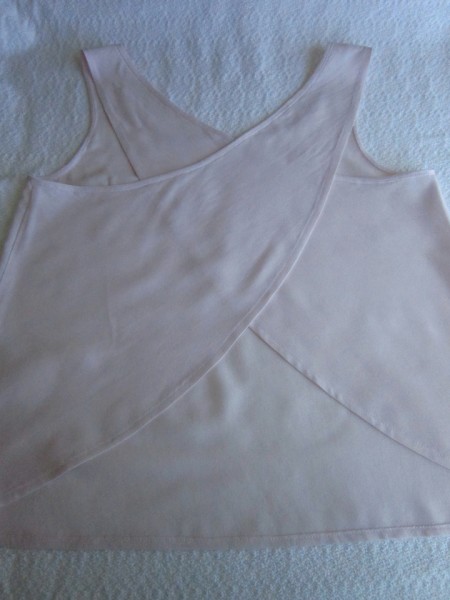
Wearing them is sort of different though. Still not sure what I think, but this is it.

And then there is the front view of course!

I still haven’t decided whether I want to make top B or let it rest. If I did make it, I’d get more practice making bias tape and applying it… hmm… guess I will be making top B after all! When we started our photo-shoot, my daughter informed me that she wants one of these too. I guess you know what that means… it’s time to start drinking this glass of wine!
Salute! Jessica
Read MorePattern Review McCall’s 6745
We are having a heat wave here in Oregon, first one for the summer and given that this is Oregon, it could be the only one. Some dismiss us Oregonians as whiny because our warmest days don’t usually get much higher than 99 to 103, but keep in mind that we have few of them, so how can we get use to them. AND there are many of us who do not have air conditioning! Why? Well, most of the time we are wearing fleece so why do we need air conditioners?!! This is heat wave day 4 (89 , 91, and 95 for the last 3 days) and my house is barely cooling down enough to be able to sleep at night. I have looked so forward to the summer because I was tired of cold and rain… I am determined not to get grouchy, to stay positive, to stay cooooool. Speaking of cool, this weekend is the Blues Fest in downtown Portland and since the temperature prediction is the high 80’s, I plan on wearing a dress that I recently finished, one that I really love, made with the McCall’s 6745 pattern.

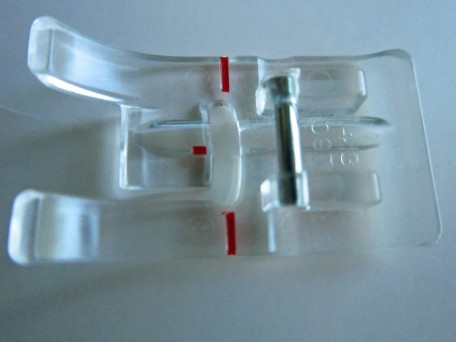
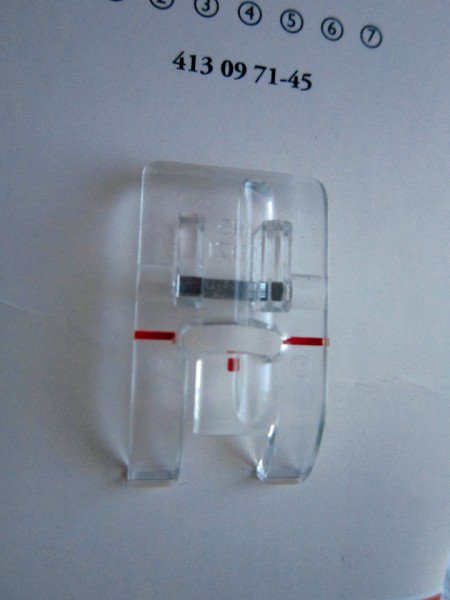
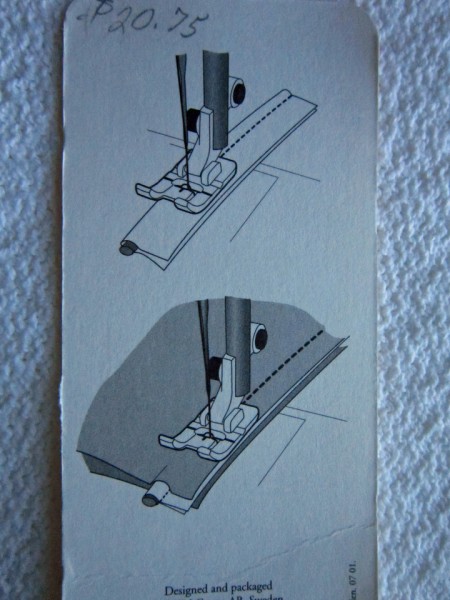
I think what fascinated me most about this dress pattern was that piping was used to trim the bodice. Piping creates a look that has always caught my eye when it is sewn into a garment. I have used it enough times that I eventually purchased a piping foot for my sewing machine and it makes the job much easier. The pattern instructions say to use a zipper foot…I don’t know about that. I would love to hear from anyone that has tried sewing piping with one.
This is what my piping foot looks like. I have a Husqvarna 750 Platinum.
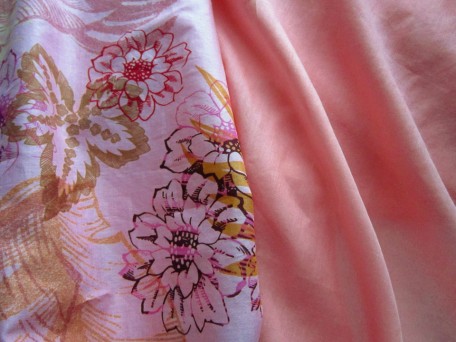
It took me over a month to find fabric that I could see this dress in. I loved the colors in the fabric of the dress shown on the pattern envelope but I’m not big on the southwest look. I do love teals as well as the deep cobalt blue that I’ve been seeing in lots of RTW (ready to wear) garments shown in magazines but alas, no printed fabrics with these colors in either fabric stores or on-line fabric stores. What’s with that! I probably know why but I won’t go there because it could cause me to rant.
I eventually decided on this, far from blue, but I really love this color too. (wow-I just rhymed) The fabric is fine cotton and for the lining I chose a salmon colored voile.
Before cutting into my beautiful fabric, I did what has become habit, made a muslin. With experience I have learned how much circumference I need for my hips and waist so I chose not to make the skirt part of the dress, just the bodice. Thank goodness because there was naturally a fitting issue. It seems to always be the same for me, the area just above the bust and next to the armhole. I need a size 8 everywhere but this spot. I decided to try something different since up until now I have remedied this problem by making adjustments to either the shoulder and/or center front neck, though neither really fix the problem that well. I have to share this even though this is suppose to be a pattern review because it was a major revelation for me!
I first traced the front pattern bodice piece on tracing paper. Next, I marked a spot 2 inches up from where the armhole starts. From here, I made a second mark 1/4 inch further up from this mark. Using these two marks, I created a dart drawing a line from each all the way to the top point of the waist dart. After briefly admiring my lovely new dart, I cut it out! I then drew a line from the bottom of the waist dart at the center between the two dart legs, all the way up to almost the tip of the lovely new dart I cut out, leaving a smidgen of tissue paper to act as a hinge. (the standard method is to cut the waist dart leg closest to the side seam but I was was in experimental mode, and being a rule breaker, as usual!) Using the hinge, I then swung the section of bodice nearest center outwards closing my lovely dart! Essentially what I did here was to remove the extra fullness at the armhole I didn’t want by first drawing in a dart that would remove it but then moving that dart and it’s fullness to the waist dart. It was then the final test. I made a 2nd muslin and when I tried it on, I tasted sweet success (like eating chocolate if you are chocoholic like me). It worked!

I love chocolate!
Now back to our review. The pattern instructions are clear enough to understand, but I would consider this pattern to be an intermediate skill level, partly due to the piping, but also because of the pivoting that happens in the center front of the bodice and all the pleating in the skirt. I am not sure if I pivoted properly, but did achieve a look I could live with. It might have been easier if piping had not been involved! (Sounds like I’m dancing)
The darts are to be cut open and ironed flat. By doing this, you distribute the extra fabric of the dart evenly creating balance. This is an haute couture technique which I love, but you certainly need to be sure that you have done your fitting because once it’s cut, there’s no changing anything!
I basted the piping to the bodice but had a difficult time removing the thread after sewing the bodice and bodice lining together. I used the loosest stitch my machine sews. I try to always remove any temporary basting after the final seam is sewn because the fabric seems to lay smoother, especially when there are a number of layers.
With the bodice finished, I was ready to move on to the skirt. Be warned, you will need some patience for this. I made all my markings for the pleats on the wrong side of the fabric but the picture instructions show you how to do the pleats on the right side of the fabric. Maybe the best way to do this would be to make tailor tacks (marking all the large and small dots with thread) on the right side but because I was not paying a lot of attention to the pictures when I first read the instructions, I missed this kind of important detail. There was a whole lot of pinning and I think a whole lot of swearing going on and fortunately the fabric I was using was forgiving of the pins and me!
The two back pieces each have four pleats.
The front has two double (yes double) pleats on each side of center.

Here is a close up so you can see what I mean when I say double. It may be a bit confusing looking at the picture, but the main point here is that I want you to know that two pleats are stacked on one another which I found sort of confusing at first when following the instructions. I need to find out the techy way of putting pointers on my pictures so your eyes are directed to what I’m talking about. I’ll get there, soon, promise 🙂
I was a little worried about the thinness of my fabric and the skirt without a lining since it was not called for but when I finally finished my skirt, I knew exactly why there was no lining. And I certainly didn’t need to worry about see through. There’s a lot of fabric in that skirt, especially when it came to having to hem it. I made a 1 inch hem instead of a 5/8 inch like the pattern recommends since dresses are usually too long for me. Now I wish I would have made it a 2 inch hem but it took me an hour to sew by hand so I think I’m good with how it is!
So here’s my dress!

And the back.

Notice the interesting color line on my back. Got this after 20 minutes in the sun watering my plants on Saturday. Lots of Aloe Vera Gel for the first 24 hours!

So there it is – McCall’s 6745. I’m not sure if it’s the fabric or the style of dress but I feel girly when I wear it. Several weeks ago I wore it to an American Sewing Guild Garment Lunch and when I left the restaurant, the wind caught my skirt and blew it up. I mean UP! It was sort of a Marilyn Monroe moment but I wasn’t feeling very Marilyn. I was worried more that someone saw my butt! Oh well – it made for an interesting moment. Wonder what I should expect this next weekend at the Blues Festival. Part of the day I will be on a boat cruise floating up the Willamette River listening to Blues singing women and drinking wine and the remainder of the day sitting in my beach chair, listening to more blues singers and socializing. Hmm…I’ll have to get back to you on that!
Salute! Jessica
Read MoreAbout Me
 Portland, Oregon,
 United States
Hi there! I’m Jessica Brandon and I am a clothes-loving sewing artist. When I am not sewing, blogging or shopping for shoes for my creations, I fill in the remainder of my days spending time with my children, playing ice hockey, gardening and making and drinking wine!


Up Coming Projects:
Vogue 1426

Vogue 7881

McCall's 7089

Vogue 8997

Vogue 1431

Vogue 9006

Vogue 8991
