

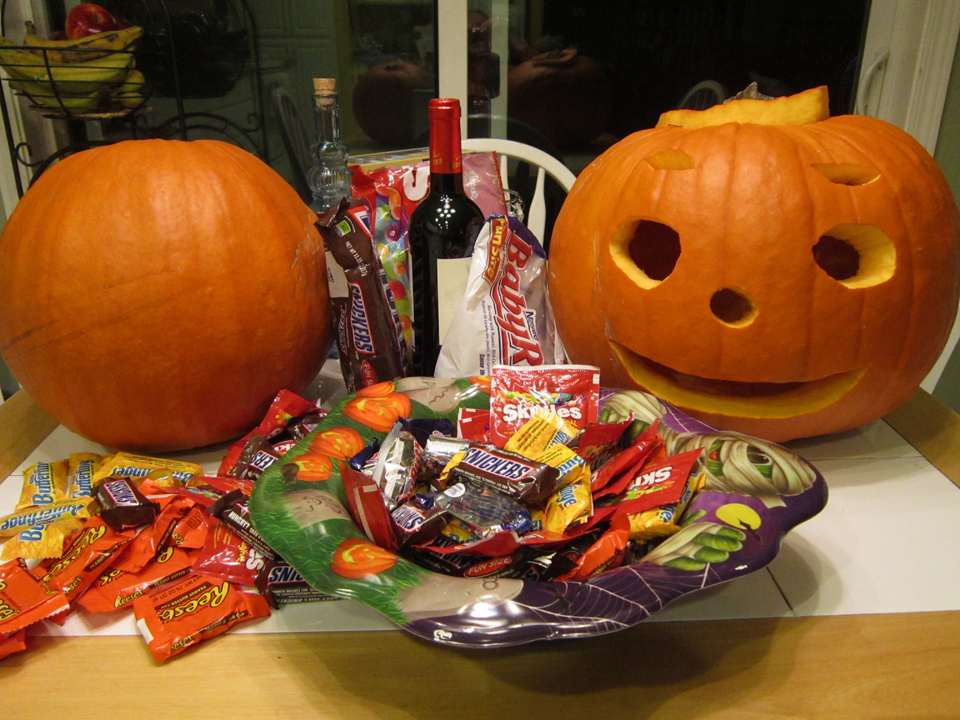
That special evening is almost here! The count down has begun and we are preparing. Carved pumpkins will be our sentries standing guard at the threshold of our front door and there will be candy treats for our evening visitors. This is only part of the evening of fun. At our house, everyone dresses up on Halloween and we celebrate with a harvest supper! This year, turkey and stuffing, rosemary potatoes with gravy, candied yams and baked apples! So what is my costume going to be? Well… have you seen the movie “Moulin Rouge“?
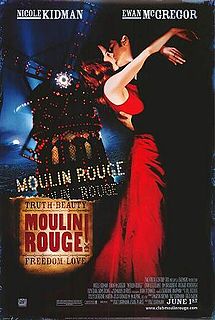 Photo: Wikipedia.org
It is an Australian-American musical that came out in 2001. At the time, I was attending Linfield College and this movie was one of the hottest topics around campus! I have watched it enough times through the years that I’ve lost track of just how many. Why? Because I loved the songs and I loved the acting, but even more, the costumes were phenomenal! The one that caught a lot of eyes was this one… the Black Diamonds costume.
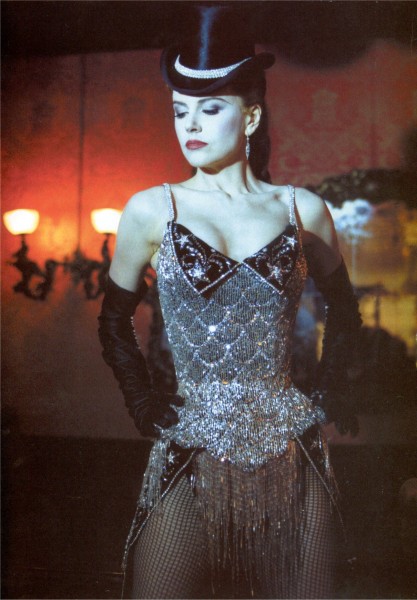 Photo from: Costumer’s Guide to Movie Costumes
You can find it done up on a number of costume maker sites in their renditions, each as gorgeous as the other. I am therefore certainly not alone in my “black diamonds costume” infatuation.
I do have to share a word of warning though to any of you that would be interested in creating this costume. It requires lots and lots and lots of bugle beads, rhinestones and bugle bead fringe so be prepared to bead heavily for weeks,unless you are one of those super-dooper beaders, and plan on spending some money.
There is obviously not a pattern for this costume. I spent a great deal of time searching the internets and studying pictures and any other postings that shared any details relating to it. My version is what I thought I saw, utilizing what I could find available. I purchased my supplies as I moved through the making of the costume so that it wasn’t a cash crunch all at once. I have worked on it for several years now… wore it to one of my costume parties. But… the tails were never done properly to my liking because I got tired of beading and couldn’t justify spending any more money. Then several months ago, I decided that I wanted to share it with you and so knew what I needed to do first. I removed the tails from the corset, rebuilt them, purchased MORE 3 inch bugle bead fringe from Fultons Trims, then attached them back onto the corset. My “Black Diamonds” costume is now ready to wear tomorrow night and to share with all of you!
So starting at the beginning… the shape and style of my corset came from Simplicity 5006.
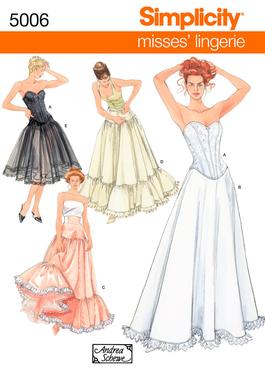
It’s made up of 10 pieces, three for each front side and two for each back side. I didn’t follow any of the constructions directions since I spring boarded off into my imagination after cutting out the pieces! I used 11 (eleven) strips of 1/4 inch spiral steel boning (center, front, front sides, back sides, back and back edges) cut from yardage I purchased along with casings from Corsetmakingsupplies.com. The outer layer of the corset and the tails were made with Faille fabric that I purchased from Mill Ends in Beaverton, Oregon. I underlined the Faille with Coutil from Tutu.com. For the lining, I used black Batiste though I don’t remember where I purchased that.
Before I lined it, I begin sewing the rows and rows and rows of strings of bugle beads. After this, I used sew-on Lochrosens Austrian Crystals in 4mm, 5mm, 6mm and 7mm sizes purchased from Fulton’s Trim, in sort of a fish scale pattern over the entire corset and the binding along the bottom after the corset was finished. I noticed that my link shows these crystals to be closing out. 🙁
 Photo: from Fulton’s Trim
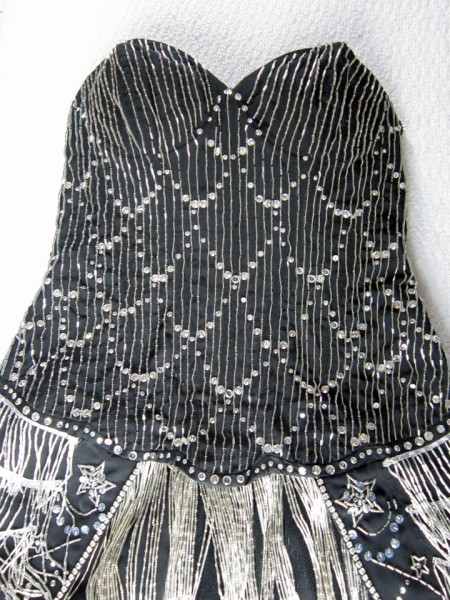
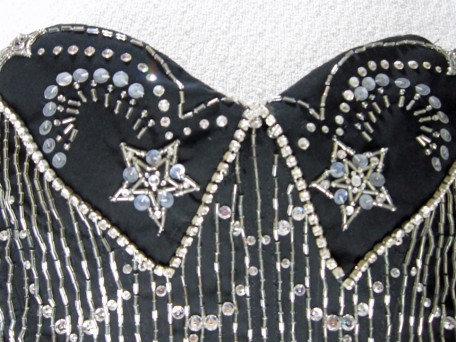
It is hard trying to take pictures of the corset with all its amenities but for starters, here is the front of the corset itself.
And the back.. I chose hooks instead of lacing.

The lapels are shaped similar to a peter pan collar but are actually individually sewn onto the corset. The pattern of beads, sequins and glue-on flat back rhinestones from Fulton’s Trim are in a pattern that I felt somewhat matched images I’ve seen.
 Photo from: Fulton’s Trim
They are trimmed with silver crystal rhinestone chain #24 purchased from JoAnn Fabrics, however I purchased it in the store in the trim section.
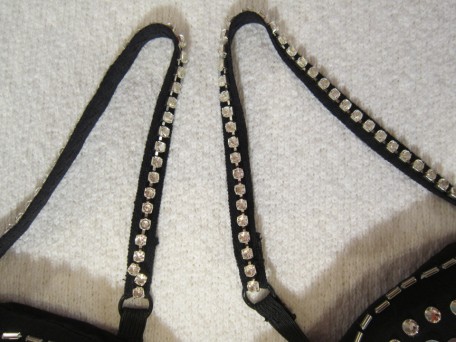
The straps are constructed from the same silver crystal rhinestone chain. I sewed a strip of it on each strap made from the faille fabric I made the corset from. I also sewed a short strip of elastic on the back end of each strap for comfort before applying them to the corset.
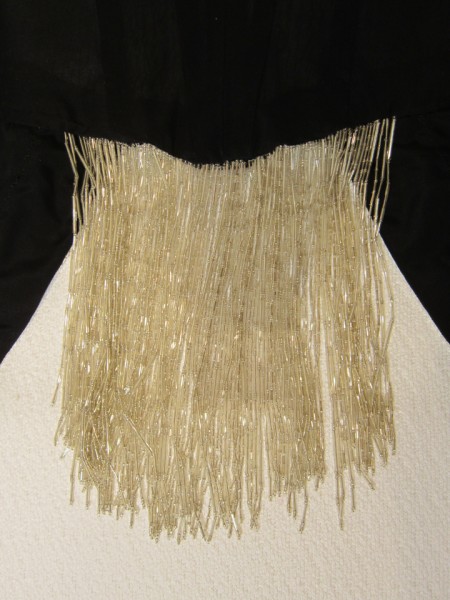
At the lower front you can see a mass of layers of bugle beads strung in individual lengths. Yes… I beaded it all! My understanding is that this is called a modesty panel. I made my fringe modesty panel using 1/2 inch heavy twill tape.
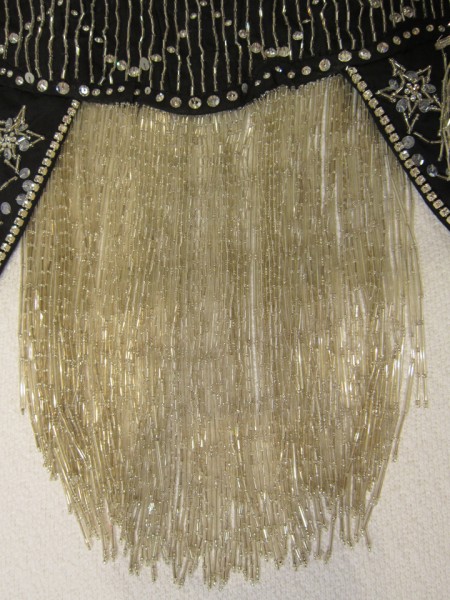
There are several layers that I sewed together before attaching the whole unit to the front of the corset. The lining comes down over the twill band so it looks finished inside.
The tails start at center back, following the bottom edge of the corset towards the front of the hips. They are covered with layers of 3″ bugle bead fringe that I also purchased from Fulton’s Trim. Hey! I was tired of sewing bugle beads… I think you can totally understand!
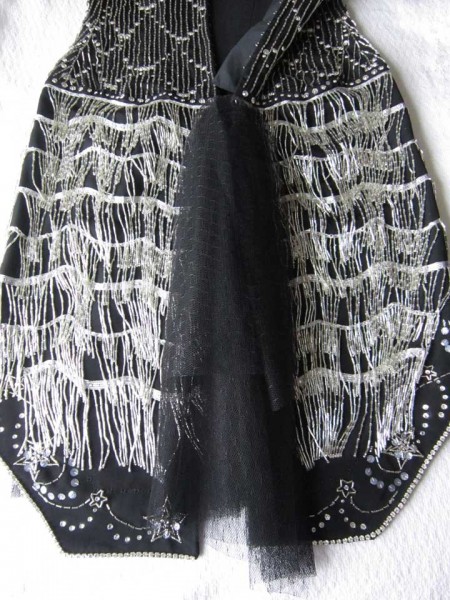
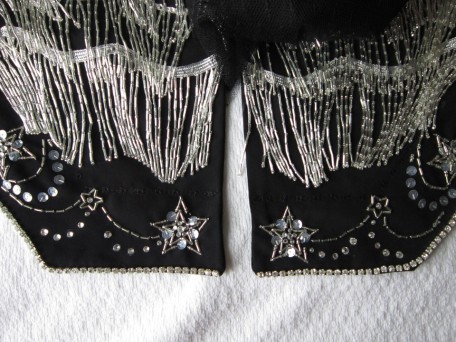
Glued along each band of fringe (except for the top band) are rhinestones in 3mm, 4mm, 5mm and 6mm sizes, all purchased from, yes, Fulton’s Trim again. But I did order a second batch from Dreamtime Creations. Clearly I needed a form of modesty for the back so I made a bustle of netting that snaps to the corset on the inside but peeks out between the two tails in the back that you can see above. The original costume tails were more narrow leaving a wider space between them for JUST the netting! I decided to not be so bold except I think I should have made the netting shorter.
There is a border around the tails made up of bugle beads, regular crystal beads, more rhinestones and french sequins. The edges are trimmed with the silver crystal rhinestone chain #24 that I used on the lapels and straps.
Now… it is time for the accessories! Oh yes… they are what bring it all together!
You have to have stockings of some sort. I was going to wear fish net but I can’t locate my pair. Ended up wearing Hue hosiery in stripes.

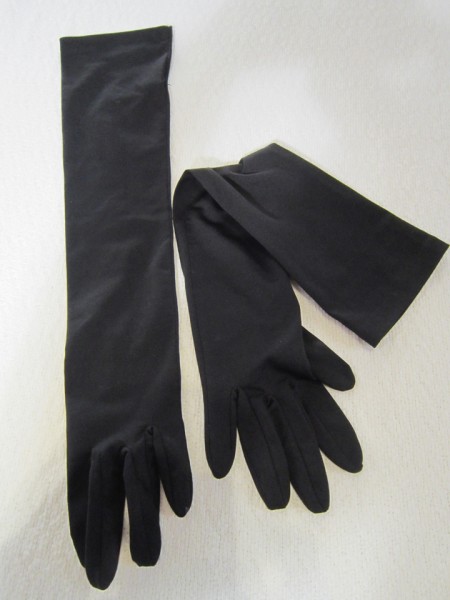
Long opera gloves are in order. The actual gloves for this costume were leather which would have been sweet but too spendy for my budget. Besides, I never wear gloves… except for snowmobiling!
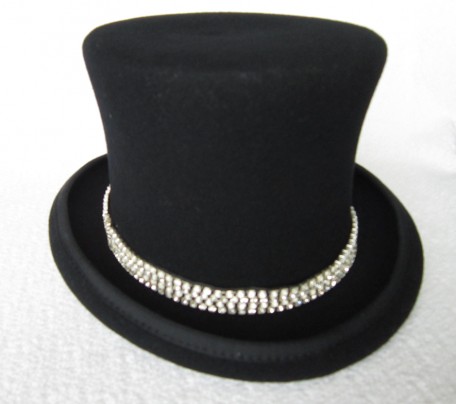
Of course when there are tails involved, you must include a top hat! I needed a fancy hat band so this required a bit more of the silver crystal rhinestone chain that I sewed together into a triple strand.
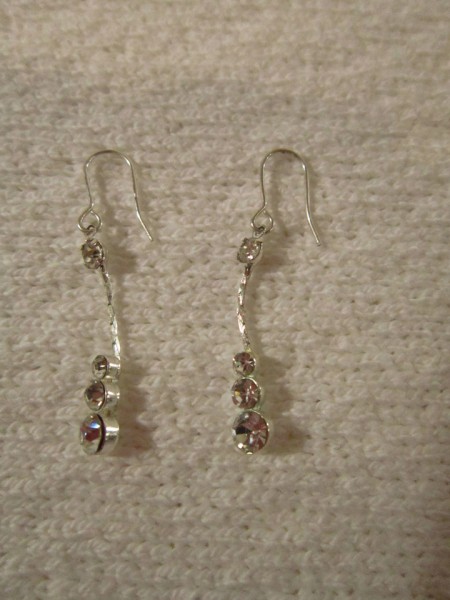
Jewelry most definitely! Earrings to be exact. My daughter got them for me and they are so perfect for this costume.
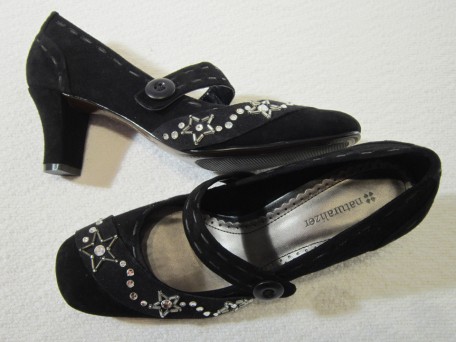
There is still one more important thing needed… shoes! This was a bit of a challenge for me. I hunted a while and finally found the perfect pair of bare black suede shoes from Famous Footwear. Then.. the real fun began when I started decorating them.
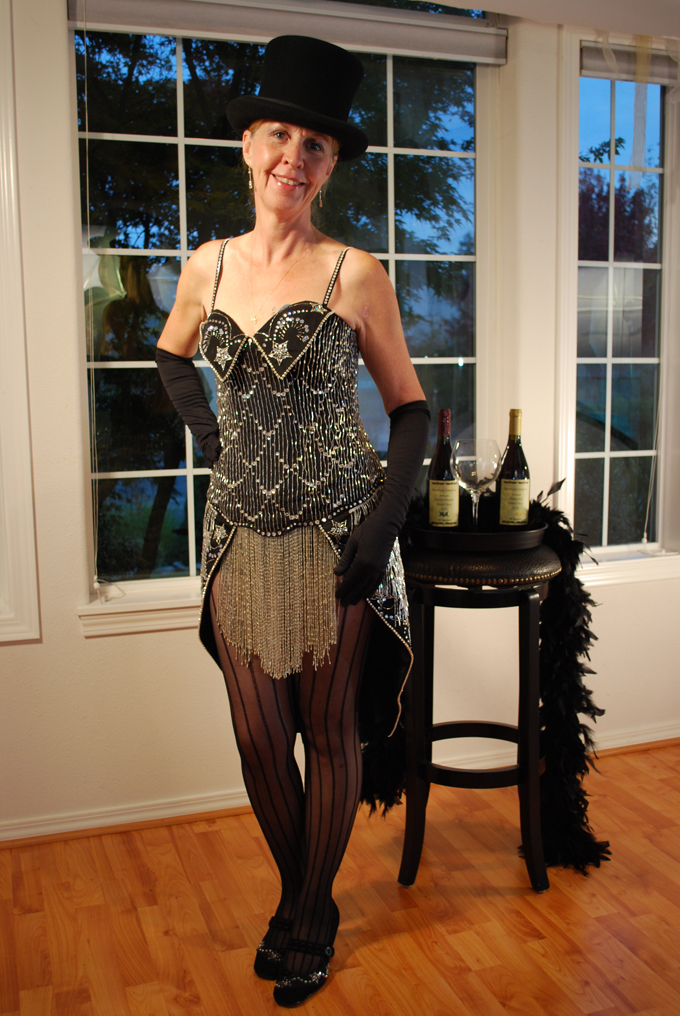
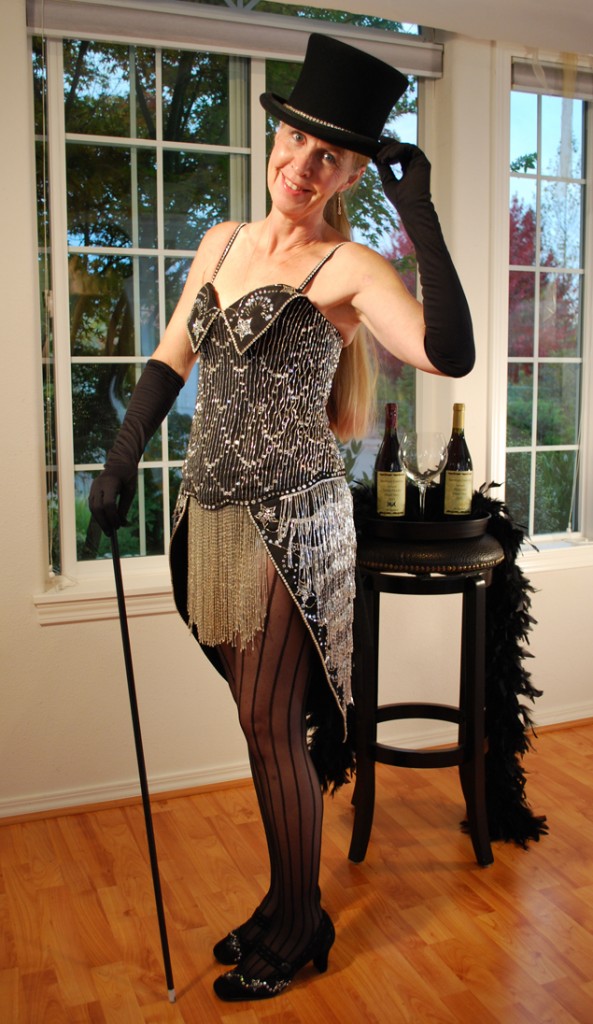
Now all that’s left is showing you the real deal. I just love blingy glitzy glam! It’s too bad that Halloween is only once a year!
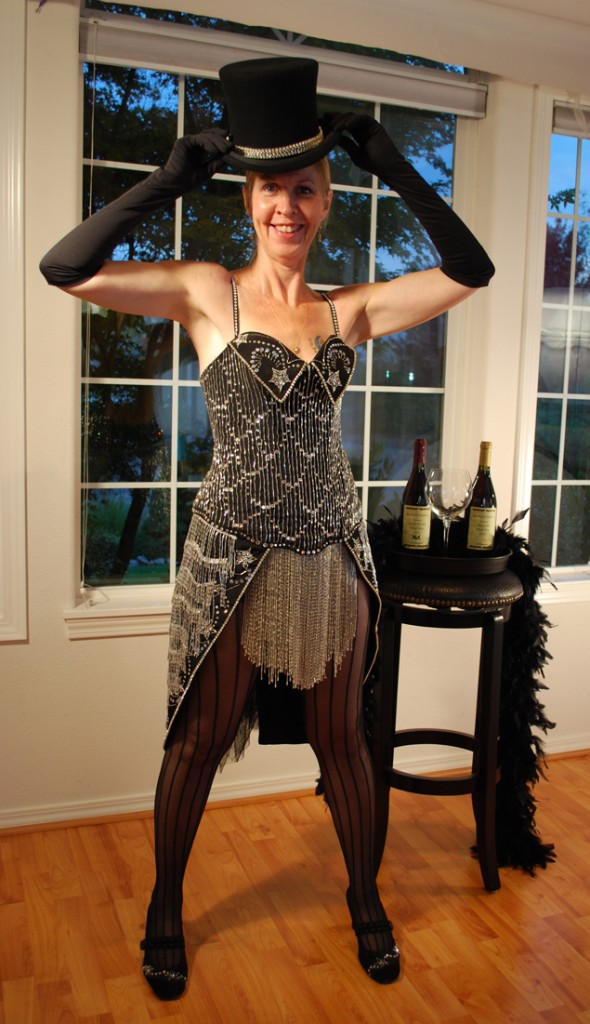
Okay… guess I’m having too much fun. How about this?
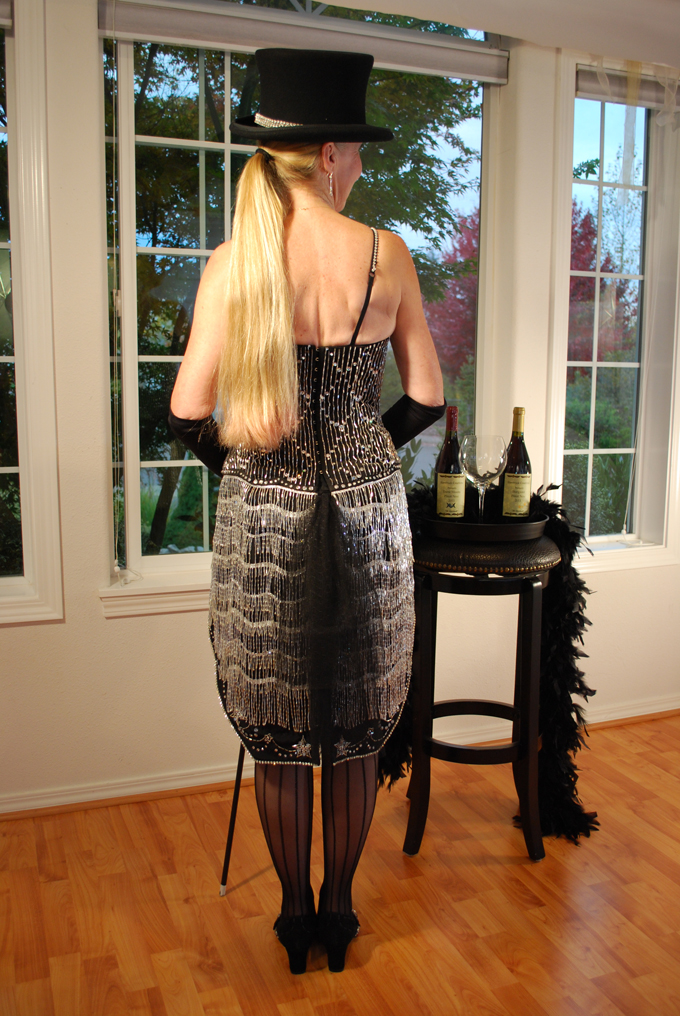
The tails from the back… still not liking what I see. Maybe a bow? Hell! Who likes to see their back side!
Fun is increasing with self-medicated chardonnay!
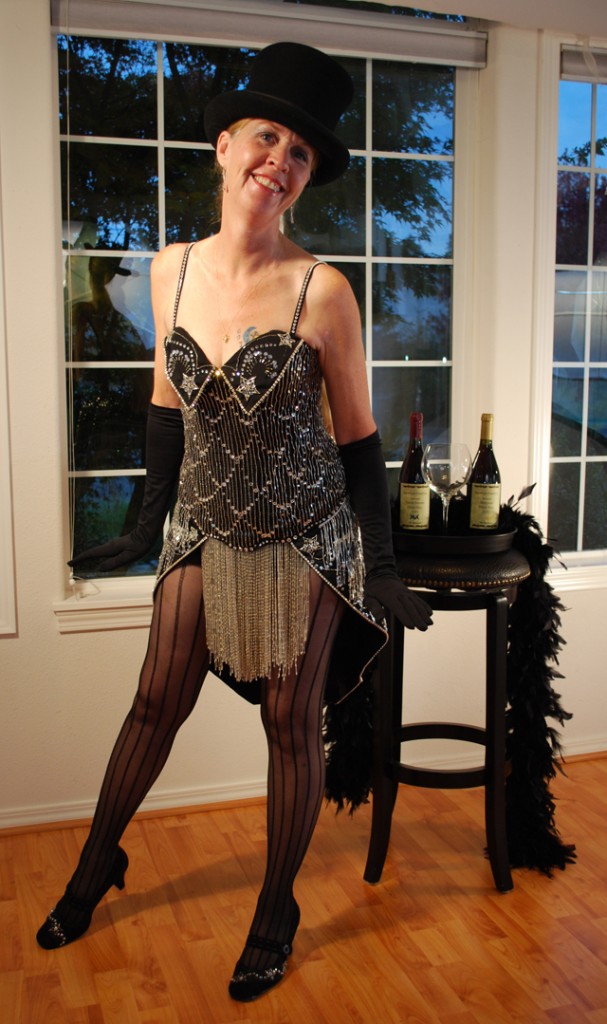
Just having way too much fun!
So I guess this is the end of my 2013 Costume Fashion Show. Hope you have enjoyed it. It’s been a lot of fun but I am getting sort of antsy to get back into sewing clothes that can be worn in public!
As a side note, all my grape must has gone through primary fermentation and quietly resting until it finishes its business. In a couple of months we will be bottling it up and then let it lay until it’s time for the official coming out party. Mmm… can’t wait! With that.. Have a fun Halloween!
Salute! Jessica
About Me
 Portland, Oregon,
 United States
Hi there! I’m Jessica Brandon and I am a clothes-loving sewing artist. When I am not sewing, blogging or shopping for shoes for my creations, I fill in the remainder of my days spending time with my children, playing ice hockey, gardening and making and drinking wine!


Up Coming Projects:
Vogue 1426

Vogue 7881

McCall's 7089

Vogue 8997

Vogue 1431

Vogue 9006

Vogue 8991
