


So… as you may have already figured out, the shirtmaking continues and it’s quite Da Bomb! (slang for excellent 🙂 ) My son is eager for me to make shirts for him so he has been very cooperative and so far, patient. Hopefully our recent live draping will help get me to the point where I have a working pattern so I can get busy and be a shirtmaker! You are wondering how the live draping went huh? Well that’s what I am about to talk about but first I need to bring you up to speed.
Like I said in my last article, I made a muslin using the McCall’s 6044 pattern.
MCALL’S 6044
When I had my son try it on, he was swimming in fabric. So…while stewing on what to do, I perused the internets and stumbled across “Drafting The Men’s Shirt Block” on the BurdaStyle.com forum website. It was provided by gedwoods, a Canadian scientist who has a passion for sewing. It took me a bit but I was able to figure out the instructions and drafted a decent pattern. For giggles, I laid the McCall’s 6044 pattern pieces on it and they were quite close. Too close, so I didn’t see any point in repeating history by making another epic fail muslin. At this point I was sort of at a loss, so I threw in the towel that day and went to the library with my son.
My spirits however, were lifted on that library excursion. I FOUND the book “Shirtmaking” by David Page Coffin. I could kiss that man! He shared so many words of wisdom in that book and even provided instructions on how to drape a live person! I had a hallelujah moment! I just recently finished taking some draping classes, and while not a master draper as of yet, I could easily see how draping a real person could be so beneficial. I would just have to go easy on the pinning!
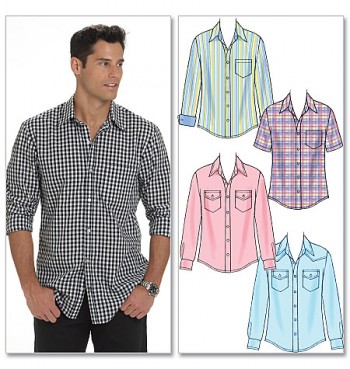
Mr. Coffin gives a list of things needed for his draping method that of course requires muslin, of which I was fresh out of, so this meant a trip to the fabric store. While there, I thought I would check out the Simplicity patterns since they were 5 for $5.00. Guess what?!! They had a mens shirt pattern (also for ladies) and so I picked it up as well.

This new pattern comes in medium, large and extra large which was another OMG moment because it turns out that my son’s shoulder width is about medium, even though his neck is an extra large. We were both pretty surprised by this discovery.
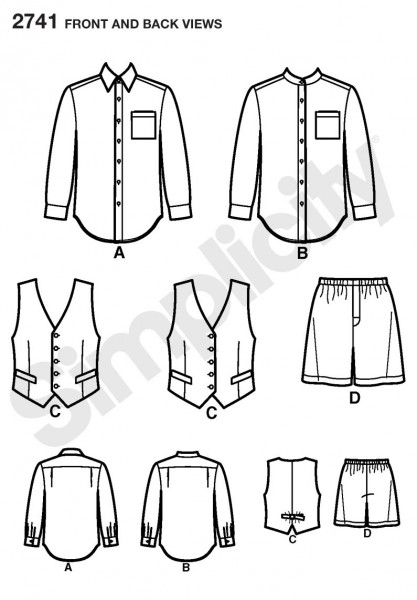
Mr. Coffin’s draping method starts with first fitting the yoke on your subject. He feels the yoke is a basic element of a shirt and so feels it’s an important starting point. The McCall’s 6044 pattern did not have a yoke that you sewed onto a back piece section to make a whole back piece, but rather a decorative western yoke that you sew on the full back. However, the Simplicity 2741 pattern did have the actual yoke so I opted for using it as my jump off point. In the picture below, the back of the shirts show the yoke that I am talking about. In the diagrams, just below the yoke are knife pleats. Another version is the box pleat where the same ease of fabric is pleated exactly at center point.
So it was last night, after I prepared my front, back and yoke that the draping commenced. Oh yeah! Almost forgot. There was also another item on the supply list. The bribe!

So with all my supplies gathered up, yesterday evening my son and I headed for the kitchen. The place a guy doesn’t mind being stuck in for a while. I think a kitchen is sort of like a man cave in that you can find comfort in the food and beverages located there!
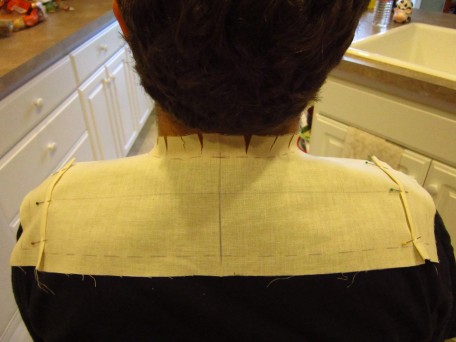
Step 1: We started with the yoke of course!
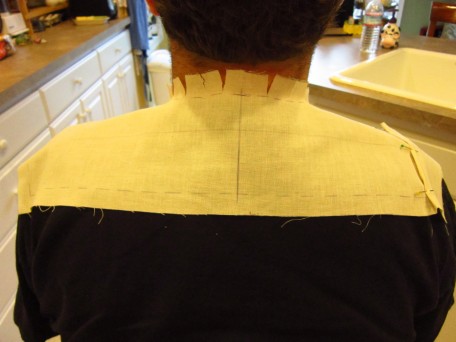
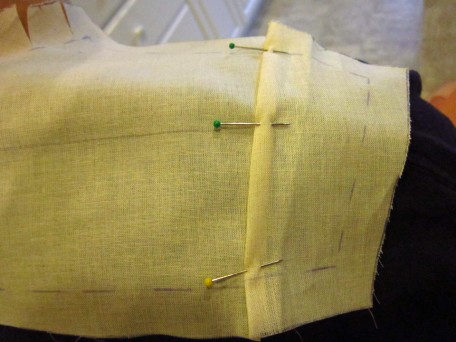
See (above) how the yoke was too wide. The left side is still hanging down over the shoulder but on the right I have already pinned in a pleat which I will do for the left side too. This is not really the proper way to do this but I didn’t want to leave my son sitting and waiting and take the risk of losing him as my model. I pinned out the length as you can see on the right.
I simply made a 1/4″ pleat on each side making a total of 1″ that I removed from the width of the yoke.
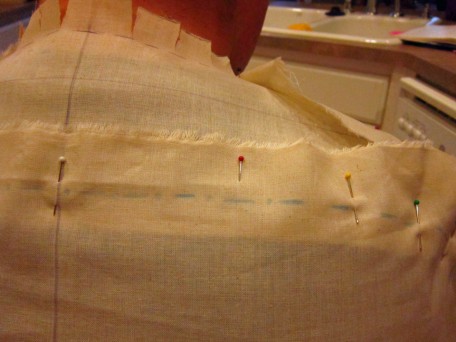
Also, when cutting out the muslin yoke, I allowed for 5/8″ seam allowance on all sides except for the neck which was 3/4″. As I smoothed the fabric down from the center point, working outwards towards the shoulder ridges, I clipped down the allowance around the neck one section at a time, being careful not to clip below the actual seam line. As you clip, you can see where the fabric begins to relax and smooth out. Eventually I ended up with what you see. Here is the yoke at the proper width and positioned in place with pins…
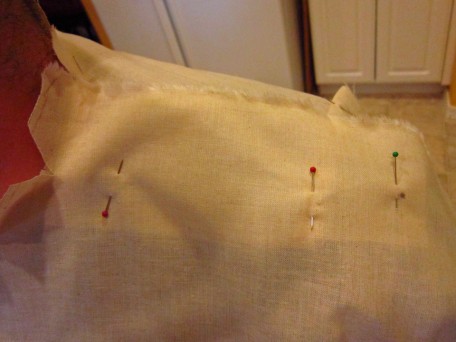
All ready for step 2: Draping the front
So to do this, you have to prepare a piece of muslin that is the half the circumference of the fullest part of the body (chest or waist) plus several inches extra on each side and the length desired plus about 3 inches. Next, fold the fabric exactly in half lengthwise and draw a center line starting at the neck and drawing downwards. (The author gives so many details that sometimes I think the directions get a little confusing. I am trying to share with you as much as I can about how you do this, but some of it, while not really hard, is just hard to explain. You need to actually see it being done) Anyways, I drew the line the full length of the muslin piece. This line is not only your center-front but also your grainline or point of reference. When you are pinning it to the front yoke sections, that line should always stay perpendicular to the floor when your model is standing. Mine actually sat a lot! He sort of had to though because I am 5″3″ and he is 6″3″.
Mind you the neck I found to be a bit tricky. I am still not sure what Mr. Coffin was telling me to do. You are suppose to use your thumb and forefinger to measure the distance around the front half of the neck and then apply that measurement minus 1/2 inch for drawing your neckline. I sort of winged it. The important thing here is that you will need to draw a small u- shape or more of a half circle at the neck position, but the fabric needs to fit as snug as the model will allow! My son was feeling like he was wearing a bag and wouldn’t let me take pictures of his face and neck. I get it though and I won’t fault him.
Next, you want to pin the front fabric piece at the center front line you drew, to the model’s center front TIGHT t-shirt that you have conned them into wearing for this wonderful experience! A second pin should be placed as well at center waist holding the fabric to the t-shirt.
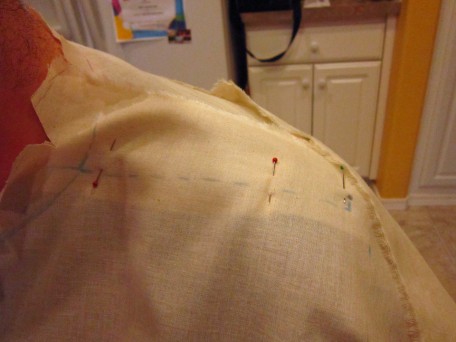
So here is the front piece pinned to the right front of the yoke. I started by taking that corner on that side of the fabric and lifting it to remove drooping and smoothed it up over the yoke front, making sure the grainline was perpendicular to the floor. While doing this I had to snip the neckline a bit just like I did in the back of the yoke to get the results I wanted. Notice next to the green straight pin on the right that I marked his shoulder ridge. I did this just because I wanted it as a reference point for any reason I may need it for!
When you have finished fitting the front on both sides, you need to mark at the point where the yoke seam meets the front from neckline to the armscye ends with dots or dashes. Also make sure to crossmark at the armscye ends. I also marked as best I could, the center front armhole (armscye) point (where the center screw is in a dressform) and the underarm point where it meets the side-seams.
Step 3: Draping the back
Now you need to cut or tear a piece of fabric that is the other half of the full circumference of the widest point of the body (chest or waist) plus several inches extra on each side that you will also mark with a center line like you did for the front. You don’t need to worry about building in pleats at this point in time. Those can be added later when drafting the final pattern. The center line has to stay plumb or perpendicular just like with the front, only this time it should be a bit easier because you are only fitting to the bottom of the back yoke. Start by pinning the fabric at the marked center line to the center back yoke seam line with about a 1 inch over-lap. Also pin the fabric at the level of the back waist to that tight t-shirt. Then continue draping by lifting up the corners, one side at a time and gently pulling them up and over the yoke pinning as you go.
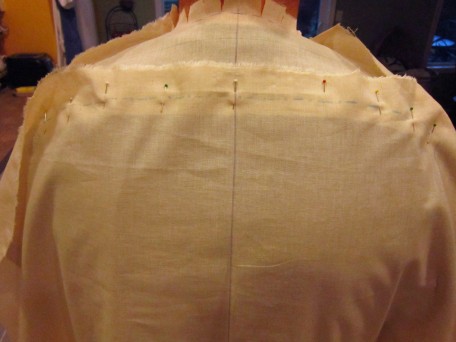
Once you have the back piece fitted and pinned the way you like, then mark with dots or dashes or both like you did on the front yoke shoulders. Also be sure and cross-mark at the end of the armholes (armscye). Here again, it is helpful to mark a point at the underarm and center back armhole (armscye). It won’t be super accurate, but at least you have a reference point.
The beauty of Mr. Coffin’s shirt draping method is that after you finish these steps, you have essentially finished with the draping. The next step is to return to the shirt pattern of your choice and transfer the armholes (armscyes) from the pattern to your draped shirt muslin. He gives instructions on how to do this, but his instructions get a little murky for my understanding so I will have to leave you to it at this point. As for the sleeves, cuffs, collar and type of front closure, there are an abundance of suggestions and tips in the book, but as a designer, you are on your own or you can fall back on a commercial pattern if you want to. I know this doesn’t help those of you who need further directions and I am sorry about that. You see, I am totally at the winging stage now and so I don’t want to take you off course or give bad instructions. Actually, I didn’t know I was going to write a “how to”. It just sort of happened! Consequently there may be some weaknesses in my instructions so please send me an e-mail with any questions you may have and I will do my best to help you out.
My draping muslin is hanging on Elizabeth (my dress form) right now waiting for my son to get home from work so we can put it to the test! I will give you an up-date soon along with a pattern review for McCal’s 6754 and McCall’s 6745. But for now, I have to go make tacos for dinner. Hmmm…wonder what kind of wine goes with tacos?
Salute! Jessica
About Me
 Portland, Oregon,
 United States
Hi there! I’m Jessica Brandon and I am a clothes-loving sewing artist. When I am not sewing, blogging or shopping for shoes for my creations, I fill in the remainder of my days spending time with my children, playing ice hockey, gardening and making and drinking wine!


Up Coming Projects:
Vogue 1426

Vogue 7881

McCall's 7089

Vogue 8997

Vogue 1431

Vogue 9006

Vogue 8991
