

Drafting a Peg-Top Waist Skirt

My Wisteria in full bloom
We are having such beautiful weather and to think that it is Oregon, and in April! I have had more energy in the last 3 days than I feel I’ve had in the last 3 months. I guess I’ve got the “spring fever”.
So while cleaning, cleaning, and cleaning…
I have been thinking about a dress I am going to make, a summer dress in yellow and white. Part of my inspiration came from the T.V. show “Revenge”. Yes…I am watching it but I blame it on Netflix. Believe it or not, I don’t watch television. I do however watch my “talking books” on Netflix but it really stinks when they put the first season of something on it; you watch it, and then you’re hooked and have to continue watching it on T.V. or Comcast On-Demand, both with all those obnoxious irritating crappy advertisements… uh-oh, rant coming on, shut it down- shut it down! Ahem…
Anyways, there were several dresses that the leading actress, Emily VanCamp, wore that caught my eye. One of course was a yellow and white one, and the other was what might have been a white brocade but it was the skirt of that dress that grabbed my attention. Instead of the standard darts that start at the waist and go straight down, these were diagonal. I thought, okay, that would be easy enough — I’ll just use my skirt pattern that fits me perfectly and fold the darts diagonally. But I was so wrong! Mind you I had already drawn out my vision on a croquis…
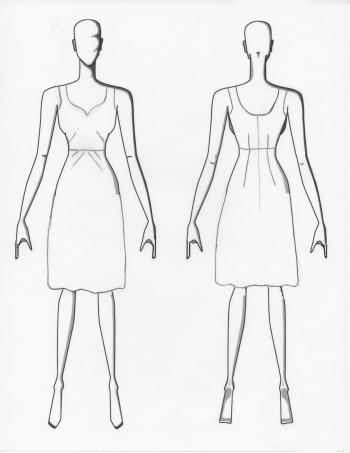
and have been mulling it around in my head, trying to figure it all out. It was in one of those moments when my brain was fully functioning properly that I remembered a book I have. The author is Adele P. Margolis and the book is titled “How to Design Your Own Dress Patterns”.
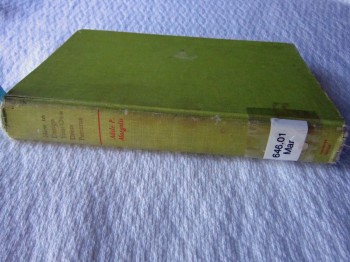
The diagonal darts that I needed to create she terms in the book as a “peg top” skirt with actual instructions for drafting it. What a score!
I was so excited that I
stopped breathing for several
seconds…
This was so big that it
demanded a glass of wine with
a toast!
So now that I am back on my feet, I thought I would share with you how it’s done. There are 12 steps to drafting the peg-top skirt and hopefully with pictures, some from Adele Margolis’s wonderful book, it will be easy for you to follow. Here goes…
DRAFTING A PEG TOP WAIST SKIRT in 12 EASY STEPS
** Please note that my pictures and the book illustrations are opposite views. I did this intentionally but realized half-way through that it would be conflicting for this “how to” but I had already spent a bit of time with the drafting and pictures so decided to keep my dingy sailing in the same direction!
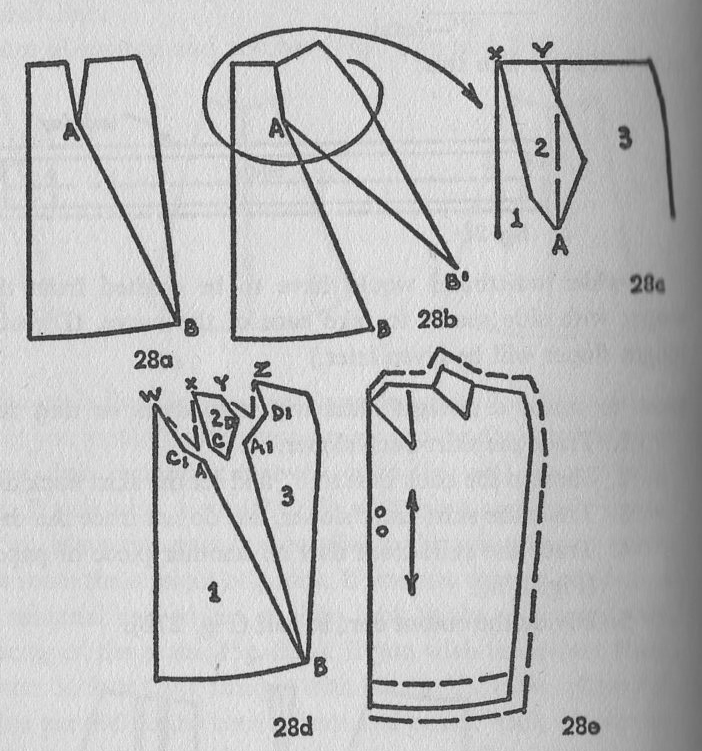
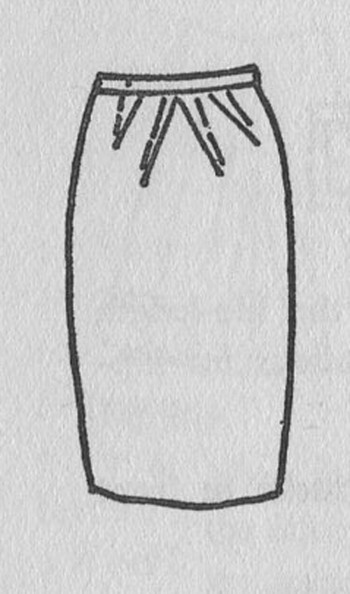
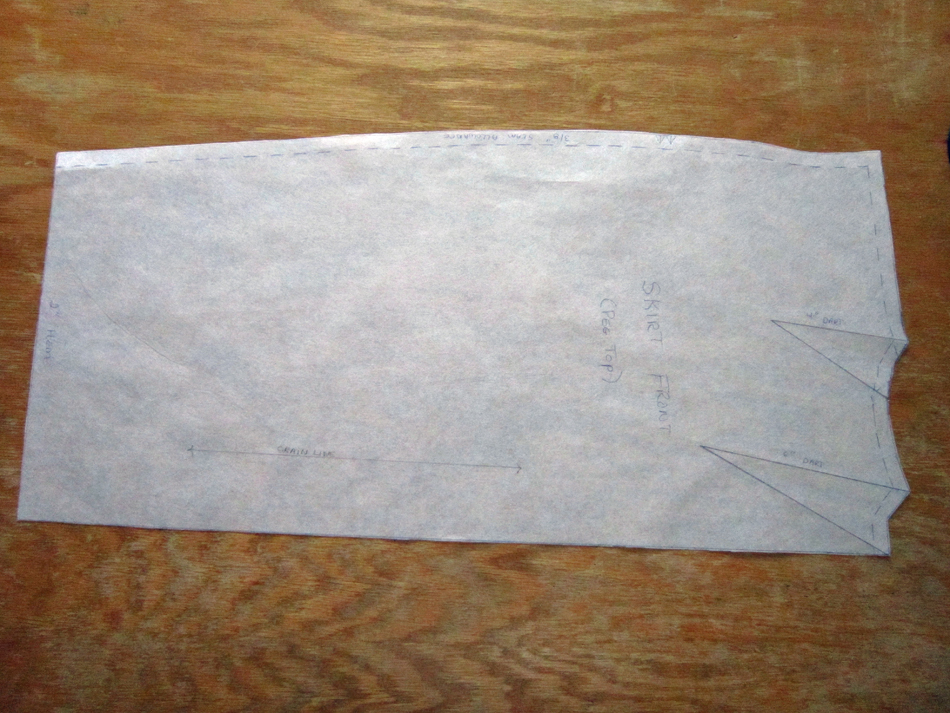
This is the whole sha-bang of illustrations for the peg-top skirt, all on one page. I have re-illustrated them individually in the following steps to make it easier to understand. Hopefully you will be inspired to go hunting for this little treasure to add to your collection if you don’t already have it. It certainly has saved my butt!
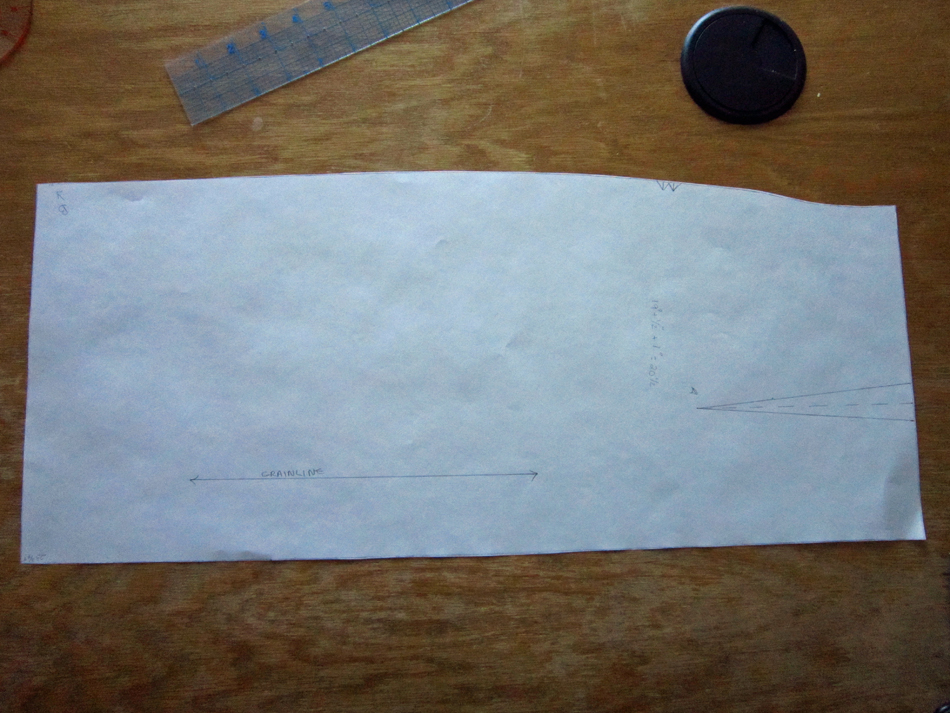
Step 1:
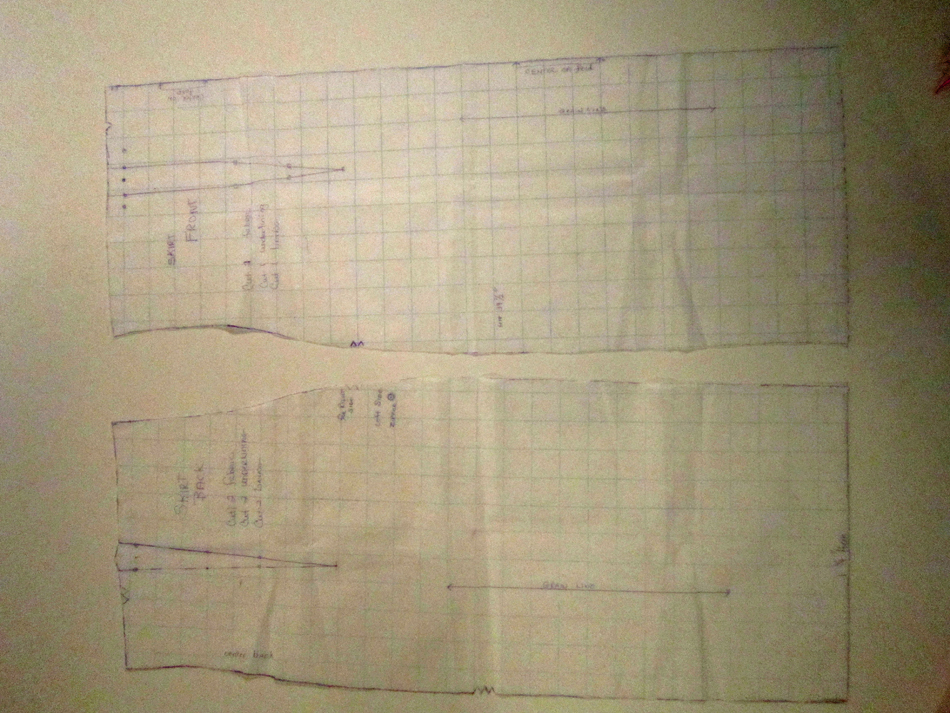
You start with a skirt front block that fits you nicely but because you’ll be cutting it up, you will likely want to trace one from your original. I traced around my original skirt block onto a piece of art paper and then drew in the dart and grain line. Keep it simple and do what works best for you.
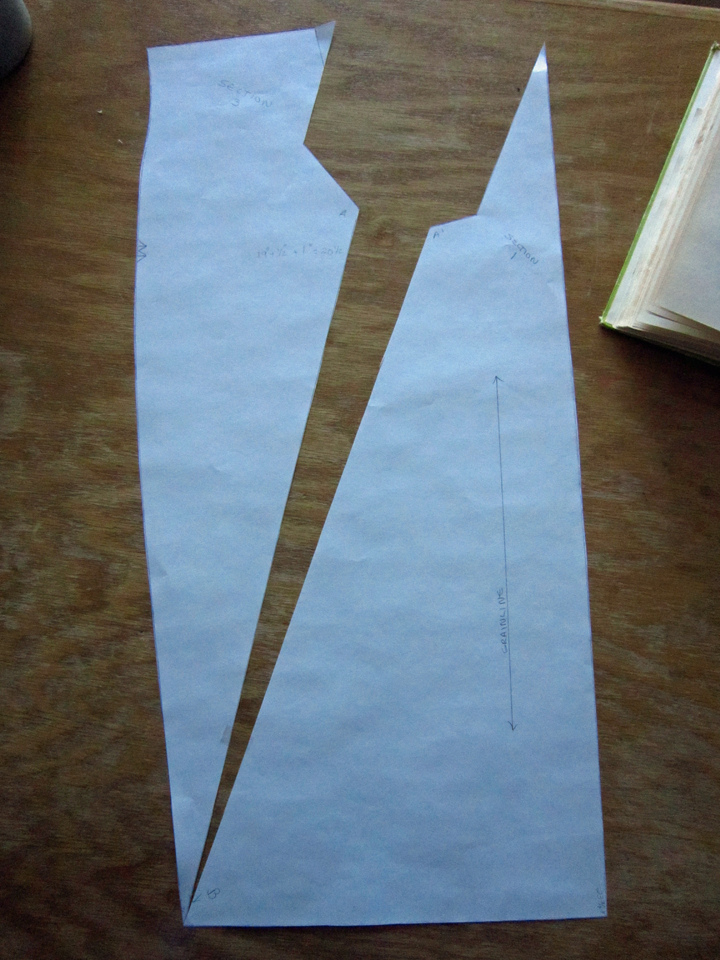
Step 2:

Draw a line from the bottom corner of the side seam to the dart point. Then label these B and A respectively. (See above and below)

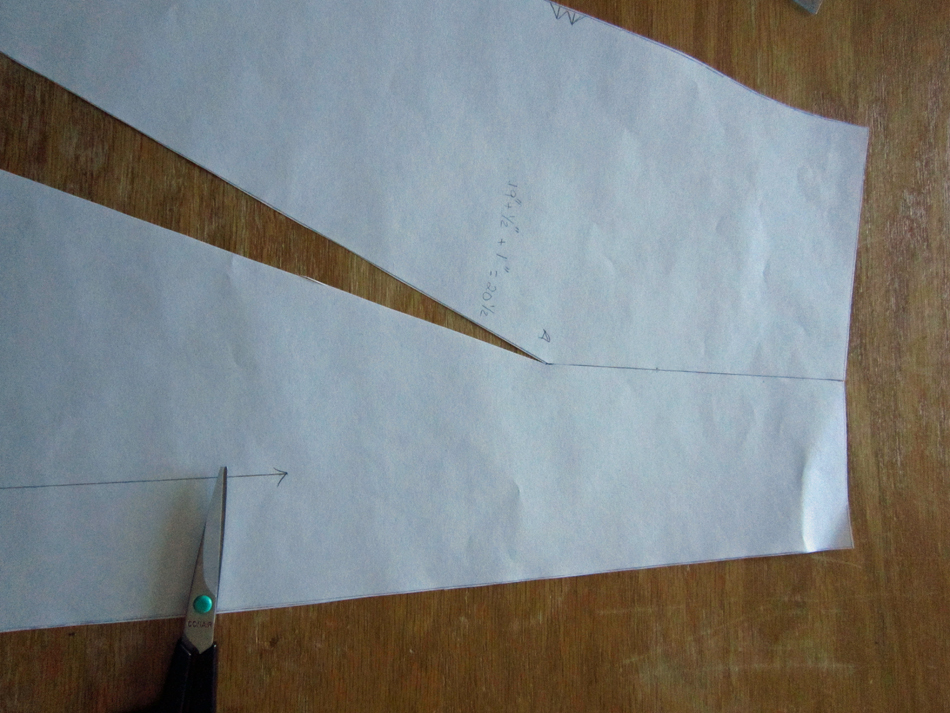
Step 3:
Cut out the original dart at the top of the waist. There is no picture for this because for some reason I forgot to take one. (It was an awe crap moment when I realized this)
Step 4: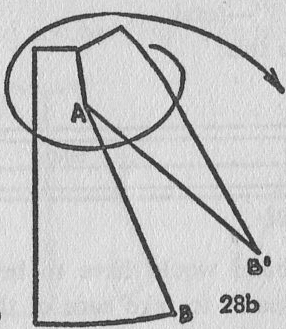
Now you are going to slash the line you drew from Point B to Point A but leave just a smidgeon of paper at Point A so the 2 sections are still connected. Then pivot or shift Point B, closing up the dart at the waist; then tape in place. Label the hem line points B (already there) and B1.
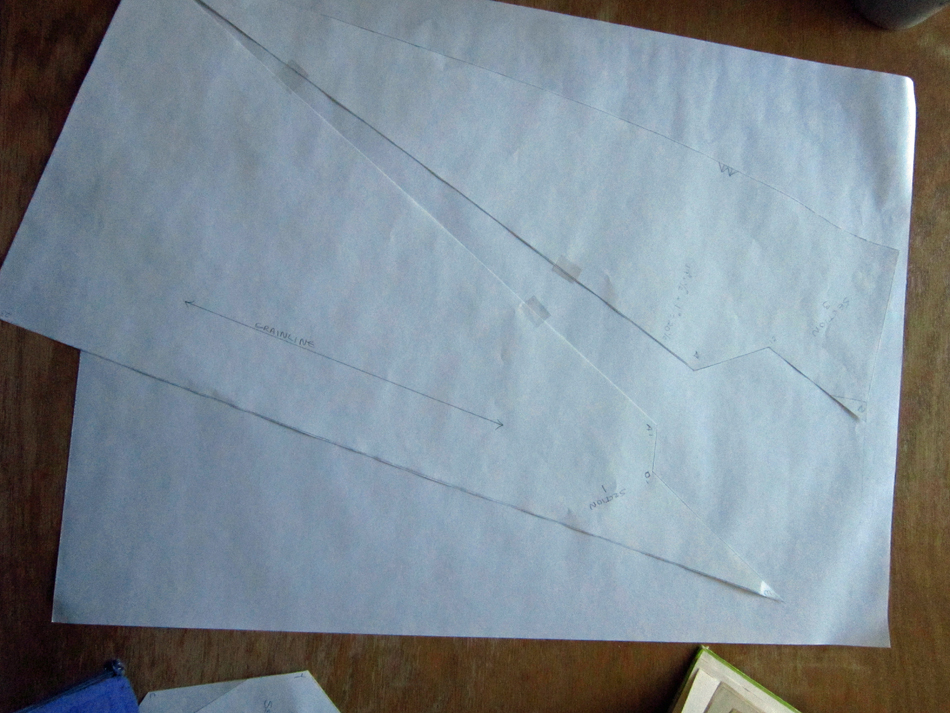
Step 5:
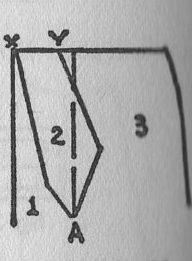
You will need to draw “style lines” as shown and label them X and Y

This is a bit tricky. There is no precise placement for these lines and no specific lengths. It is entirely up to the designer. I worked from the sample that is shown in the book and drew my lines 4 and 6 inches in length.
Step 6:
Next, connect each of these lines to A.
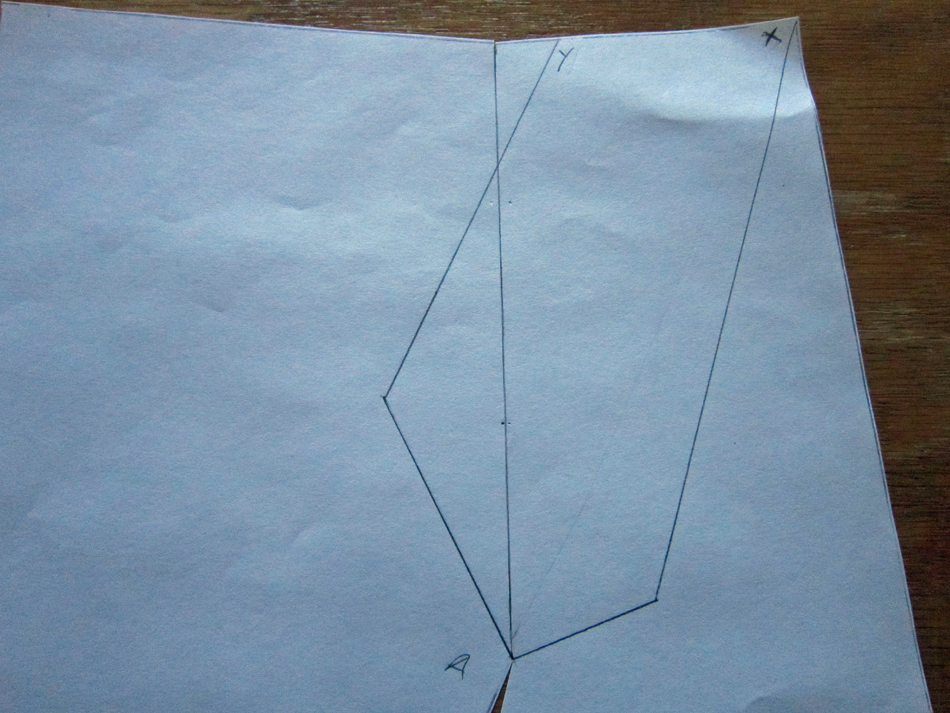
Step 7:
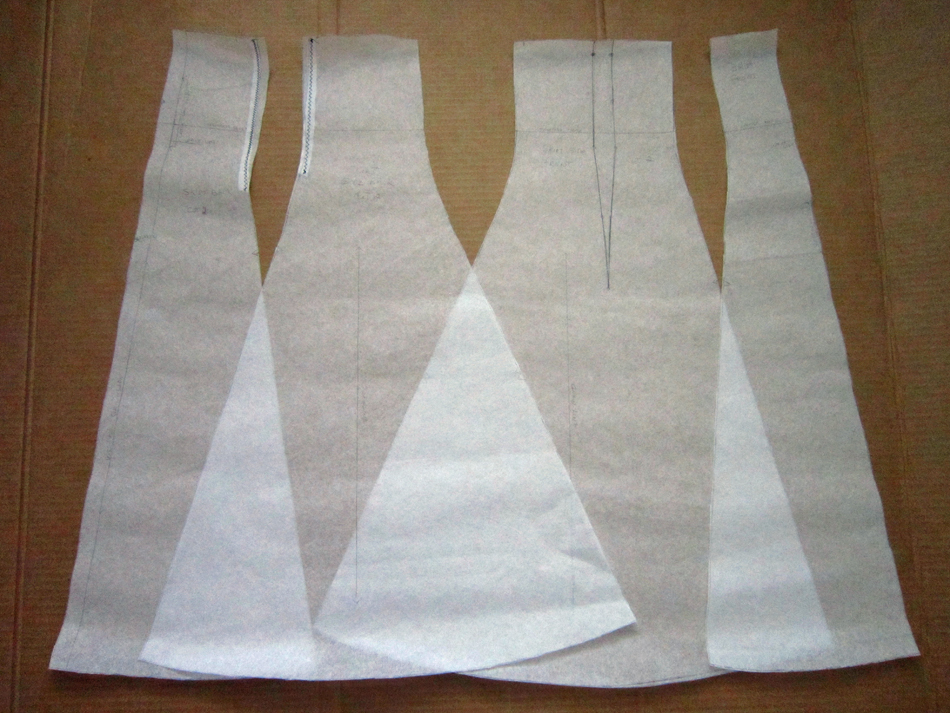
Label these sections 1, 2 and 3. Then cut them completely apart from one another. Across from A, you will want to mark A1 though not shown in the photo below.
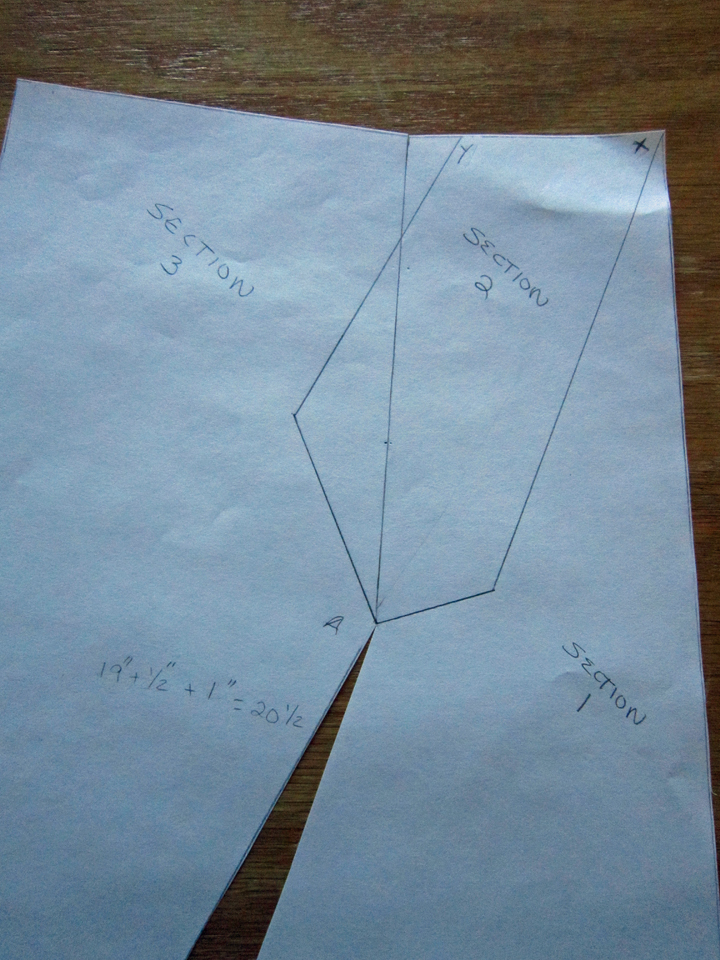
The next steps I found to be easier to manage by placing my 3 sections on another sheet of paper. There were no instructions given to do this and I struggled for a bit until I got it sorted out.
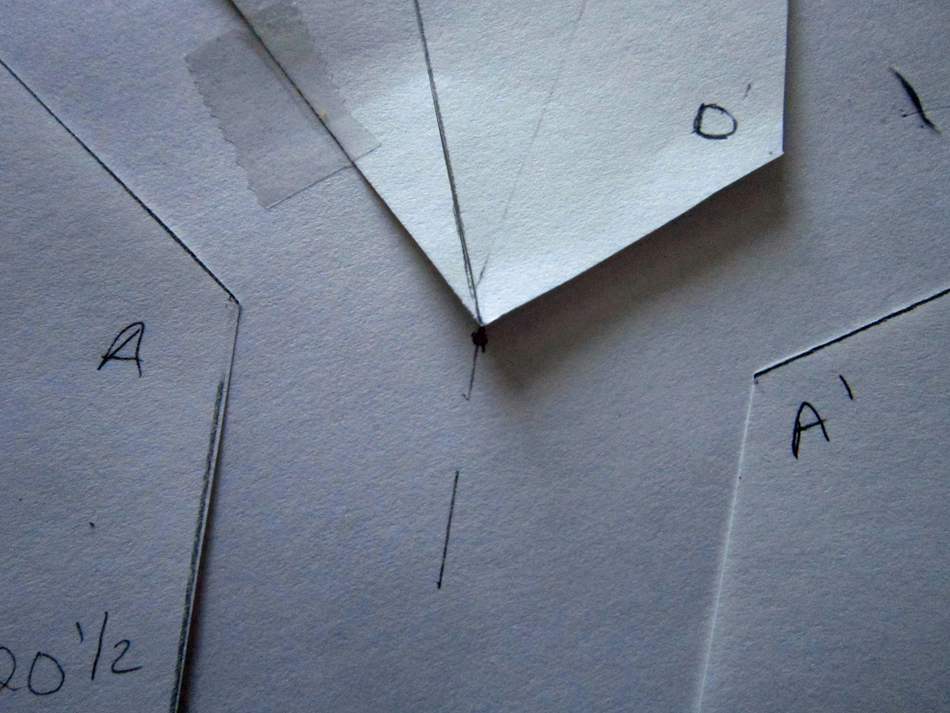
Step 8:
You start with placing sections 1 and 3 with the bottom points B and B1 touching and positioning A and A1 two inches apart. Below is how they look before I taped them on my additional sheet of paper.
Then after…
Step 9:
Place Section 2 between 1 and 3 so that the darts will be equal on each side at the waist line with the point touching midway between A and A1.
I don’t have a picture for the top of section2 between 1 and 3 so refer to the book illustration. It will look wonky but as long as the tip is at the mid-way point of A and A1 and you maintain an equal width for each side of Section 2, you will be fine.
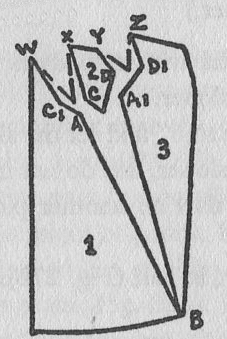
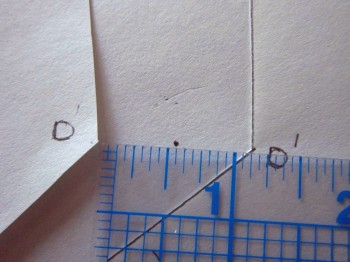
Step 10:
Find the center points between C and C1 and D and D1. Nothing beats a good eraser when you can’t make up your mind!
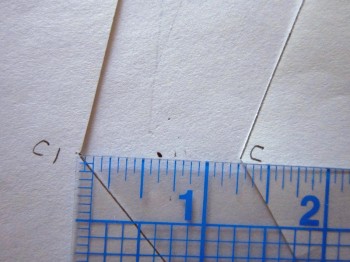
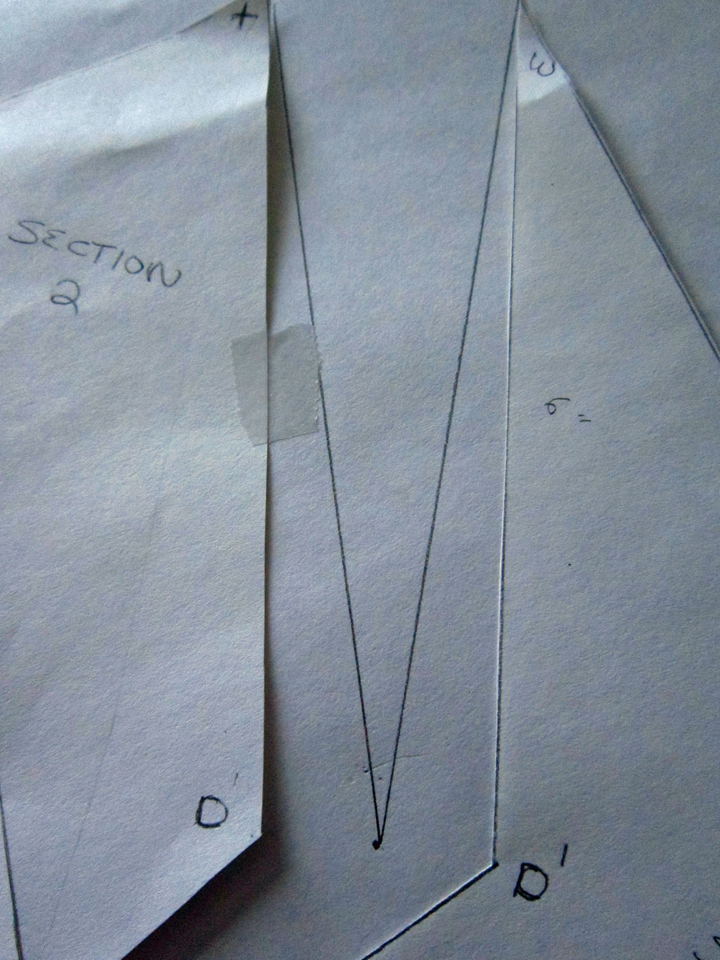
Step 11:
Draw in the 2 new darts. The dart legs need to be of equal length when measuring from the midway points at C and C1, and D and D1 to ZY and XW respectively.
Dart ZCY
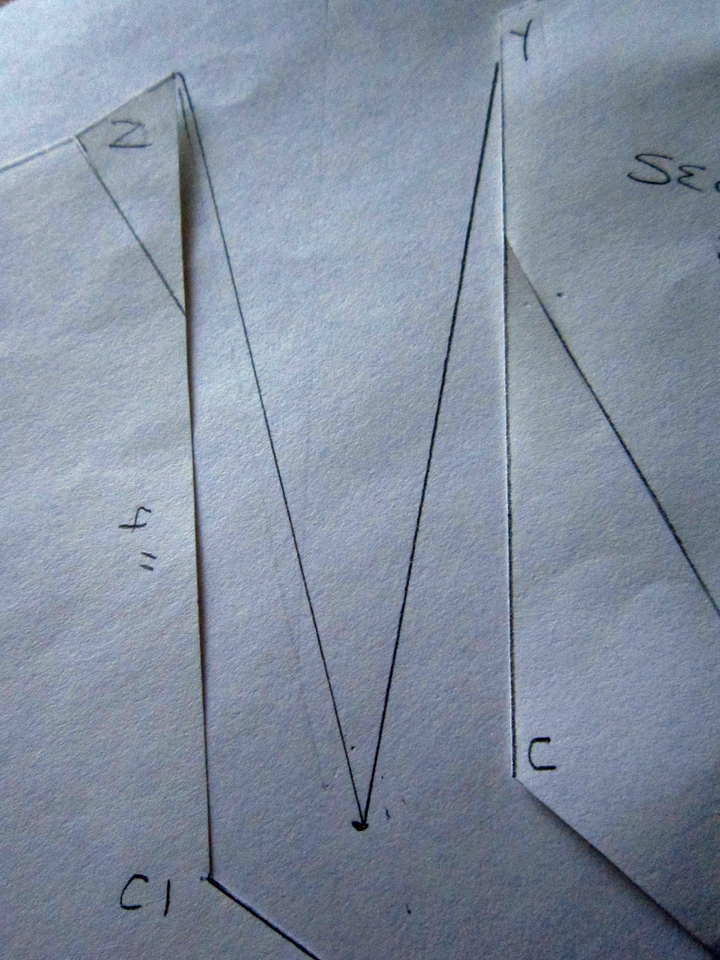
and Dart XDW
Step 12:
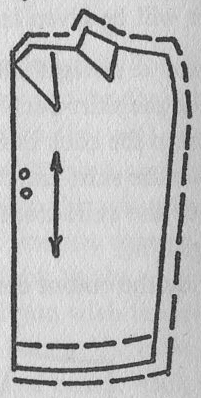
Fold the new darts to the center and draw in the waist line. Now finish up by tracing your draft onto pattern paper and be proud. You did it! Of course you still need to draft a skirt back or obtain one that matches this one at the side seams and supplies the remainder of the waist measurement that is needed. The waist and sweep of the hem line should remain intact when doing this peg top style. Only the hip fullness is affected. It does not change, just relocates!
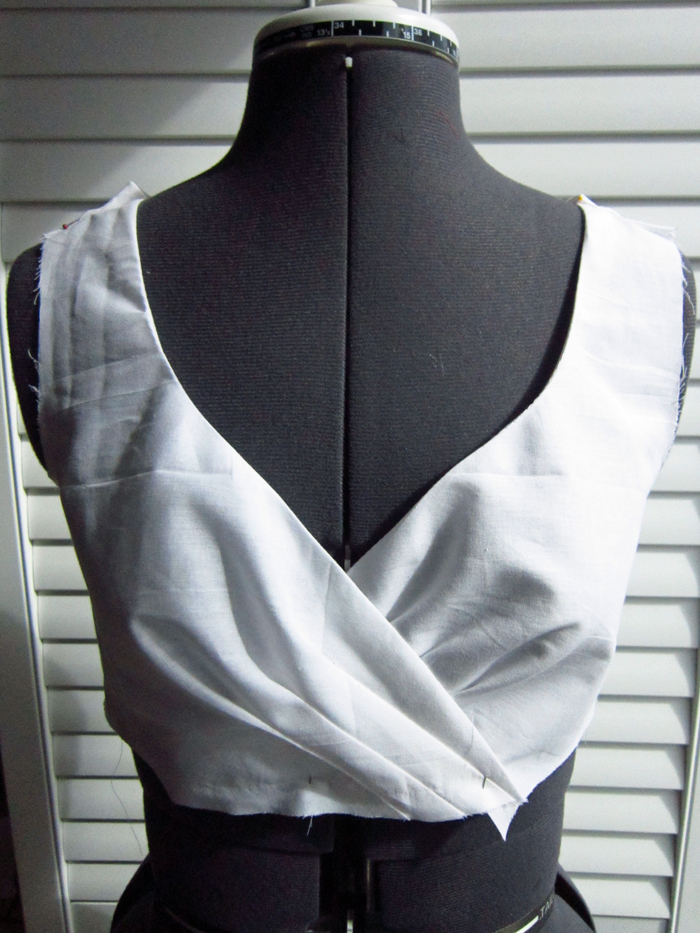
This is mine finished. I didn’t create little tabs extruding from the center part of the darts because I wanted them to be even with the waist line when they were folded. Right or wrong, it’s what I wanted and besides, I’ve always liked living on the edge!
In the near future you’ll be seeing that yellow and white dress I’ve been talking about, with this peg top skirt sewn into it of course. I am really excited about it because I have truly created my own dress pattern this time around. The bodice I designed off of my own drafted bodice block; then I did style changes giving it french darts, a sweetheart neck line and a scooped low back. I hope I haven’t shot myself in the foot by announcing this! Ehh, what’s life without a bit of adventure right? Stay tuned! Now it’s time to go enjoy the rest of my day with no cleaning!
Salut! Jessica
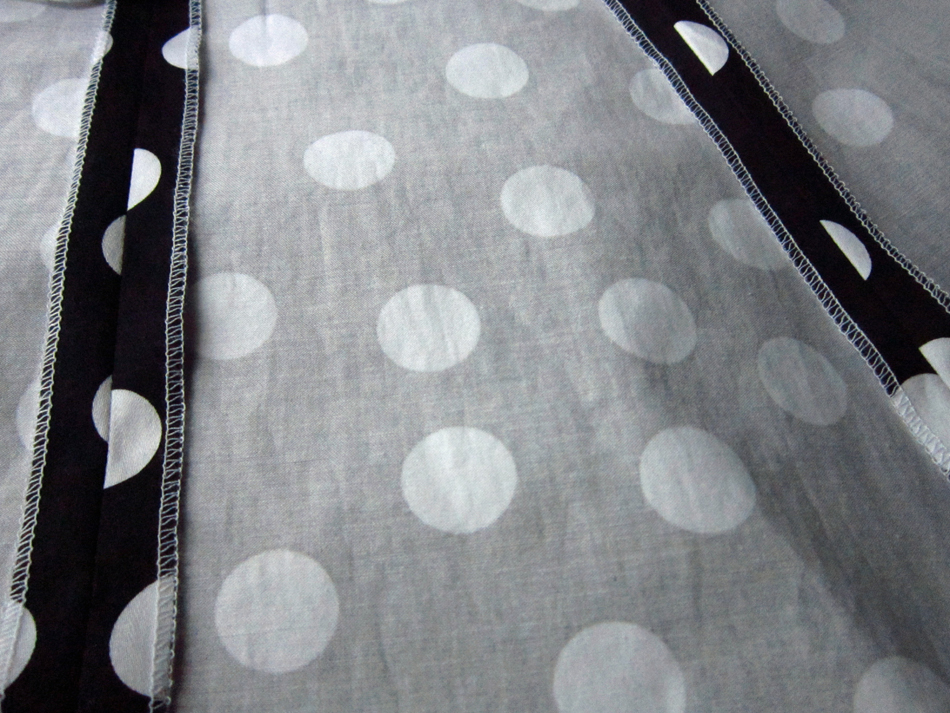
Read MoreBetsey Johnson Polka Dots
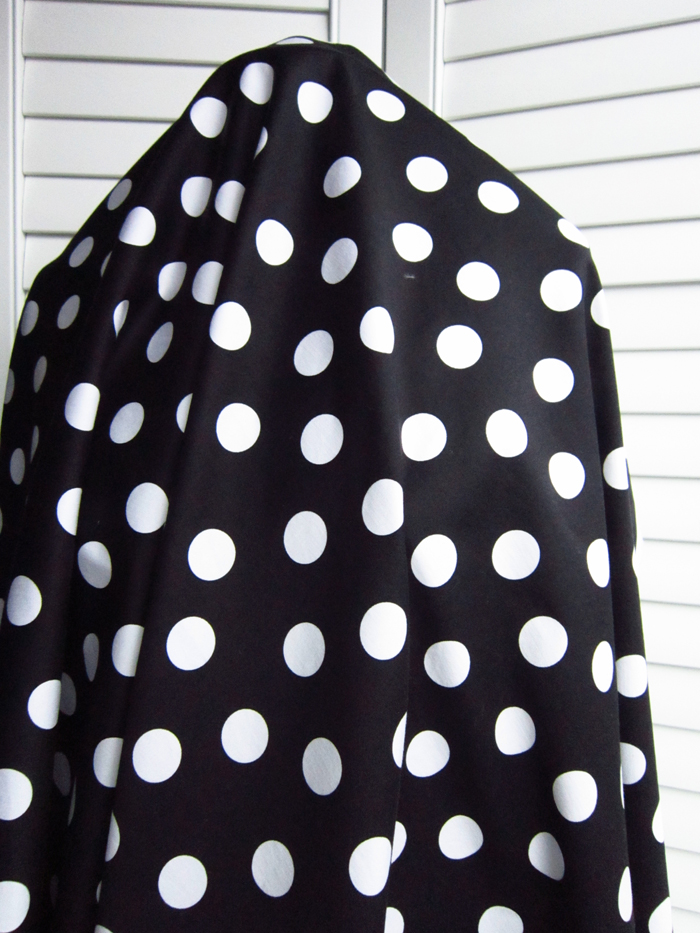
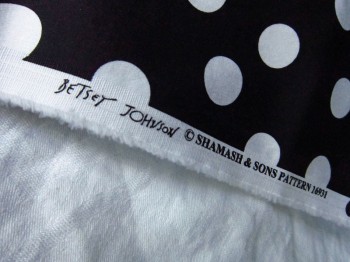
Yes, this is Betsey Johnson polka dot fabric! Lady Luck was on my side when I saw it available at Gorgeous Fabrics. I snagged 2 yards, then later thought about getting some more, but alas…it was all gone! It is Sateen and has a slight stretch to it; definitely has the feel of bottom weight fabric but perfect for what I had in mind. I washed it on the gentle cycle in my washing machine, bypassed the dryer and hung it to dry instead.
Some of you might say, “who the heck is Betsey Johnson?” Well, she is an American clothing designer who loves color, adores costumes and likes to design fashions that are playful, whimsical and edgy. I bet she would be a lot of fun and I would so love to meet her! So when I saw this fabric with the big polka-dots, I caved!
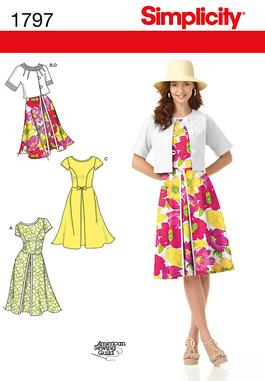
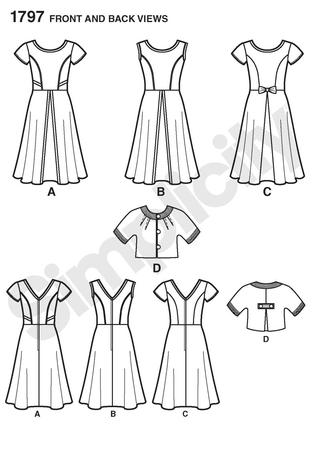
My original plan for this fabric was to make a dress from the Simplicity 1797 pattern. However… crap happened! There is really no other way to say it and that was the nice way. If you are one of my regular readers, then you know the story. If you are new here, it had nothing to do with the Simplicity pattern but the fabric I was practicing with before I started cutting pattern pieces out of my polka dot fabric. The pattern review for Simplicity 1797 tells all!
My new game plan was to draft my own dress. I wanted to make a skirt with an empire waist and it would have a whole lot of flare! I envisioned the bodice as sleeveless with a criss-cross front. Oh yeah – I thought I was brilliant until it was time to start drafting. I begin to lose my courage and started the transformation into a big chicken!
I deduced that maybe I needed to stimulate my imagination so for ideas I went rummaging through my patterns. It was sort of like panning for gold; a lot of “not what I wanted”. Then all of a sudden, there it was, the gold nugget, Simplicity 3783. What I saw sparkling was the bodice…it was exactly what I saw in my mind. The skirt I was not sure about though I loved the bubble hem idea. I had time before I had to make up my mind so I swept the skirt business aside, eager to check out the bodice scene.
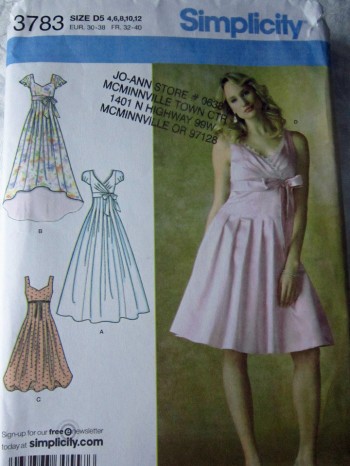
I can’t remember when I bought it but it is old enough that if you search Simplicity’s website, you can’t find it, not even in the out-of-print section.
I selected the bodice pieces of tissue from the pattern envelope and began. Here it is… my muslin. I loved the fit…it was perfect!
Elizabeth, my dressform, is probably a little embarrassed by the wrinkles that you can see on the muslin so I should apologize. Not sure when it happened, but I did iron it at some point! 🙂
Now it was time to figure out what to do about a skirt. The bottom of the skirt pattern seemed wide enough to do a subtle bubble hem (though I wanted more than subtle) but it was the darts that ran from the top of the skirt to down below the waistline that were troubling me. Not to mention I wasn’t sure I wanted all that fabric folded around me and wasting those beautiful polka dots! That was when Simplicity 3783 was no more but my courage had grown and drafting a skirt didn’t seem to be as scary a business. I had a skirt pattern I drafted last year that I used to make several other dresses and it had an empire waist so I dug it out. I know it’s a crummy picture, but it’s hard photographing tracing cloth.
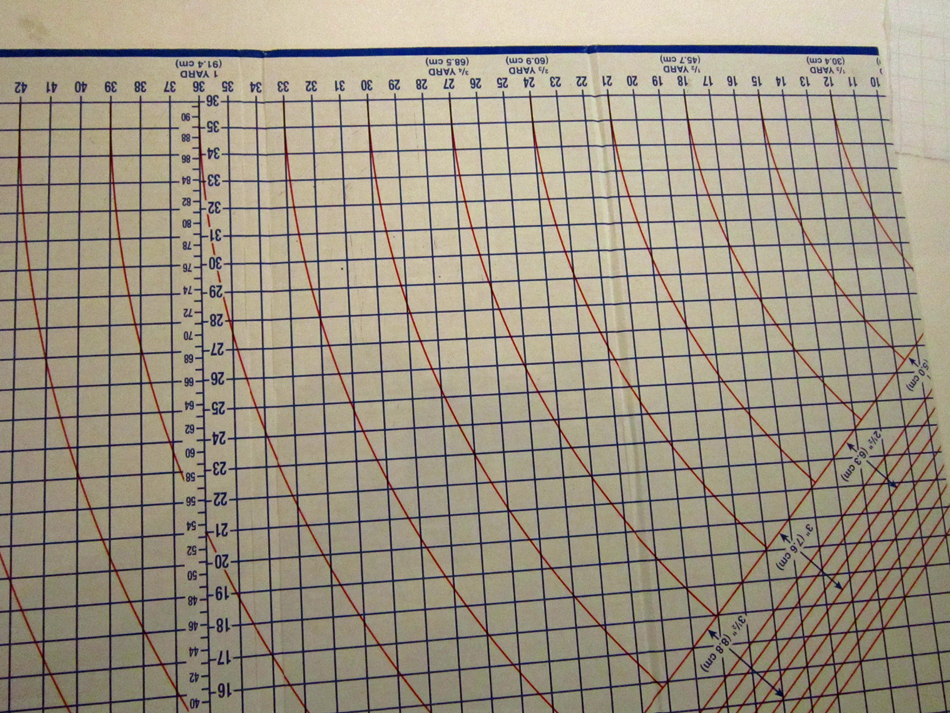
I fit me perfectly, a front and a back, each side with two darts. I wanted fullness, not as much as a circle skirt, but just lots of flare at the bottom. I knew that I couldn’t get the flare I wanted with only a front and back piece; I was going to have to split them into a center front and side front, and center back and side back. After having a mental struggle with whether I was on the right track or not, I gave in to my creative side and dug out my pattern tracing paper, my mechanical pencil and my Dritz cardboard cutting board with the quarter circle lines on it.
The drafting commenced for what seemed like hours and then it was time to cut my new skirt pieces out. Once again the wave of uncertainty hit me! I hate it when that happens! Everything looked good; all the sides that were to be seams were of equal length. The waist matched the bodice…but I needed some support so back to my pattern stash I went. It was the Butterick 5603 pattern that slapped me in the face! The skirt was exactly what I wanted.

I pulled out the tissue pieces and compared them to my drafted pieces. I was close! Several of my curves needed a little correction, but outside of this, I was good to go!
With the pattern/designing war over, I went to work cutting out the pieces from my beloved polka dot fabric. Sewing the dress together was like a fantastic dream! I loved the way the fabric handled and it all went so smoothly. I made the bodice first.
As you may note, the bodice is already attached to the skirt in the following pictures. I forgot to take pictures during the process. I also forgot to eat that day –I’m sorry but I get so involved!
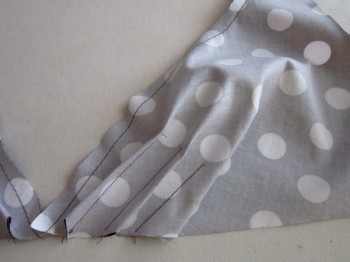
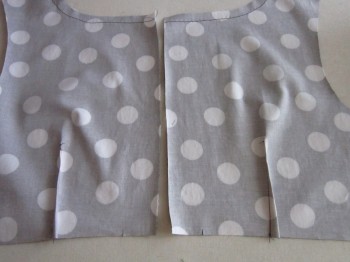
Then it was on to the skirt. I serged all the edges before I sewed the seams.
I made a lining. I used the one from Simplicity 3783, It was nothing more than a front with 4 darts and 2 pieces for the back, each with 2 darts. I serged all the edges on these too before sewing it together, then I machine sewed a 5/8 inch hem in it. Next, I basted it to the skirt, wrong sides together. I didn’t sew the back seam of the skirt so basting in the lining was easy. I usually do it this way anyway because I find it easier to put the zipper in first, THEN sew in the back seam.
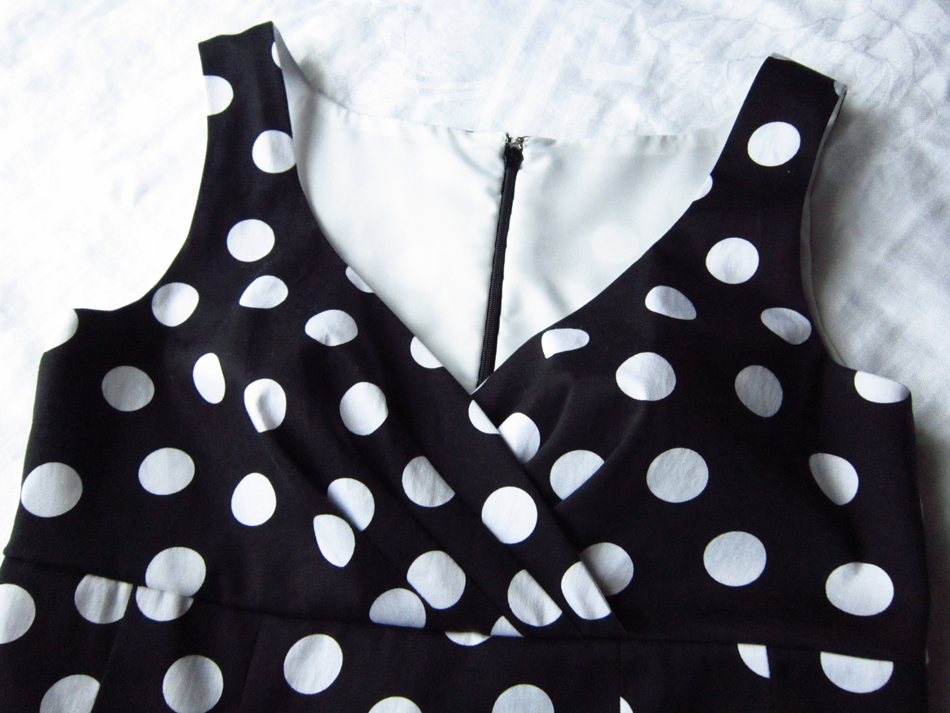
Now with the skirt lining installed, I was ready to attach it and it’s mate the skirt to the bodice. It went very smoothly. I was definitely needing a confidence boost and this was it! Now, all that was left was to set in the invisible zipper, sew the back seam and turn under and hand sew the edges of the lining. This was a little tricky on the front of the bodice where the two sides crossed. I had to get a little creative but still managed a nice finish.


All that was left was to hem it and Shabam!


Check out the earrings if you can see them. They are my daughter’s…red guitars! How awesome is that!

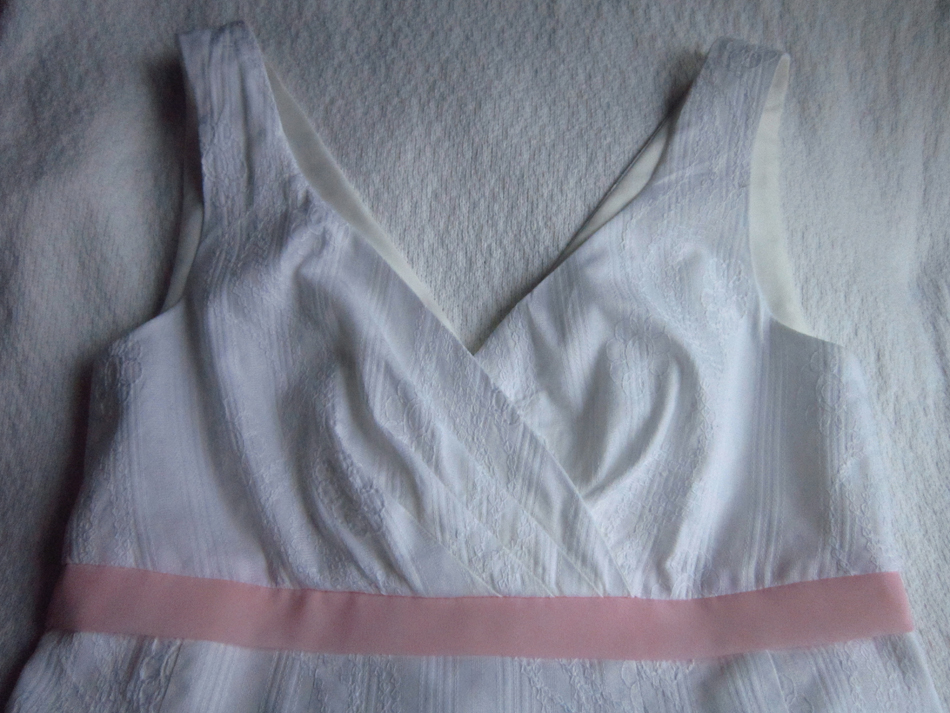
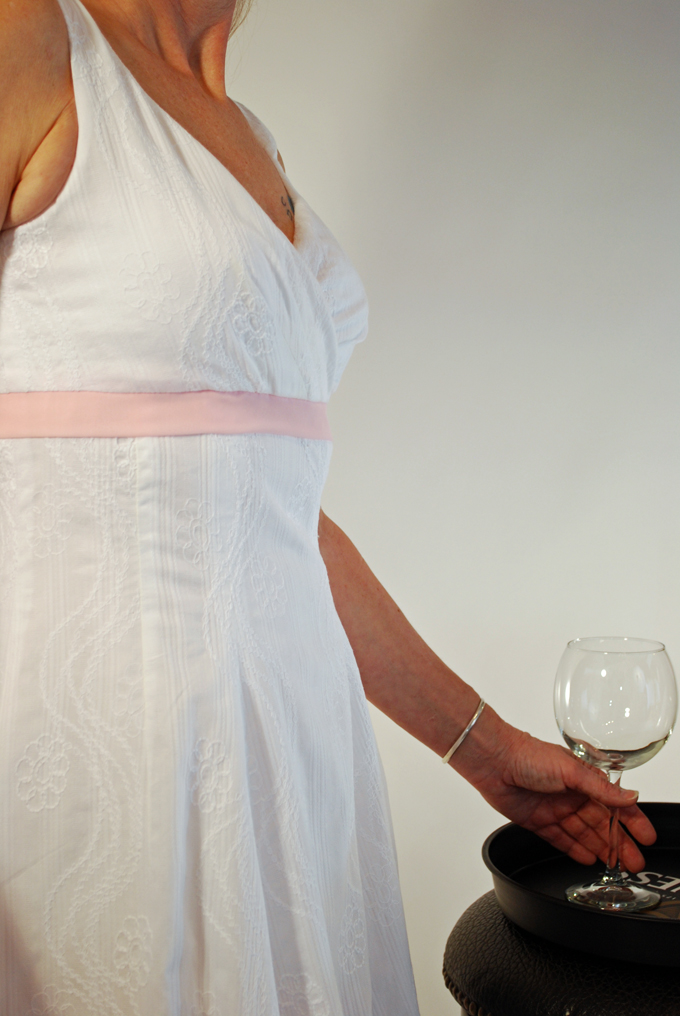
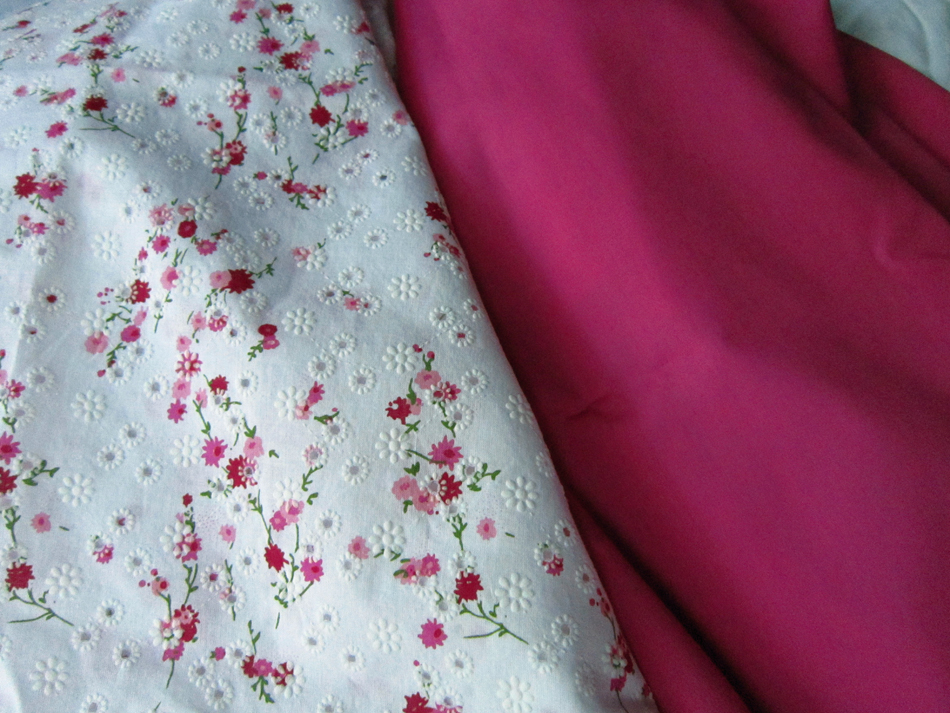
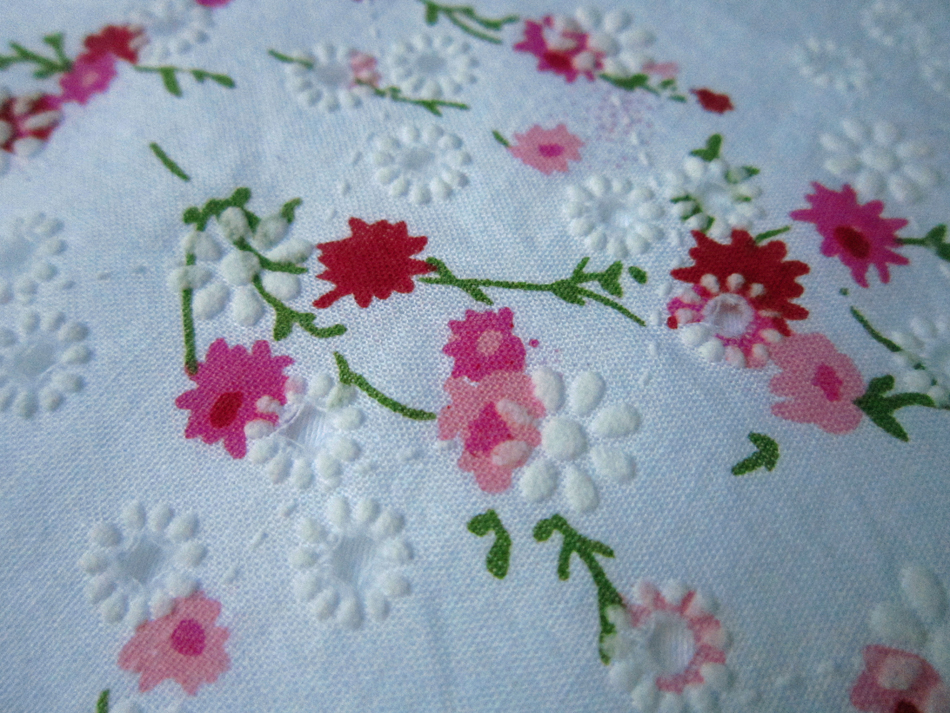
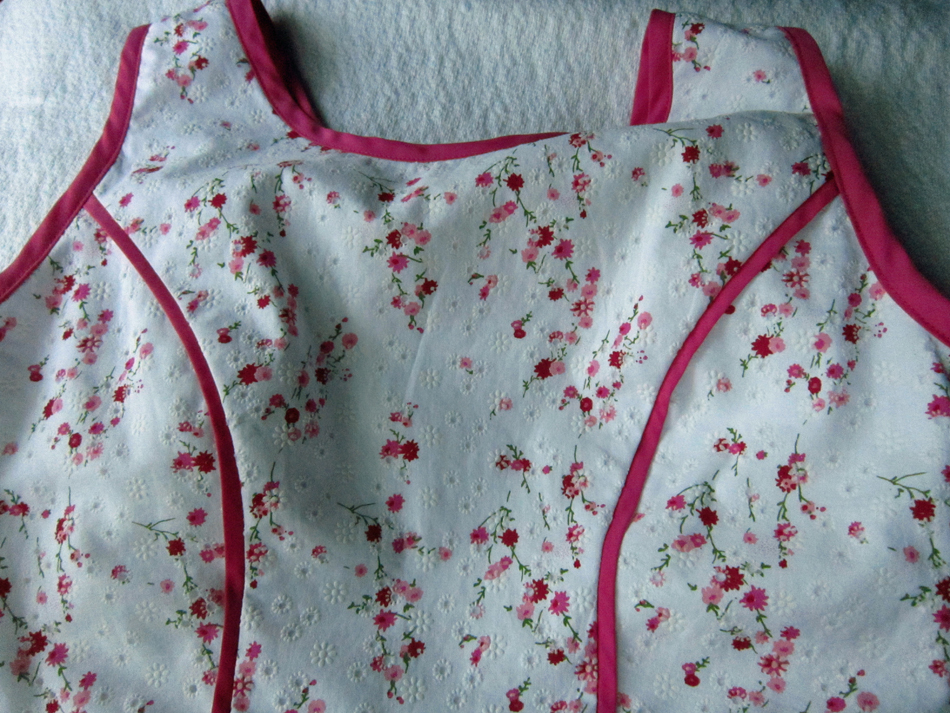
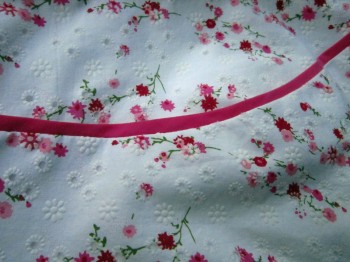
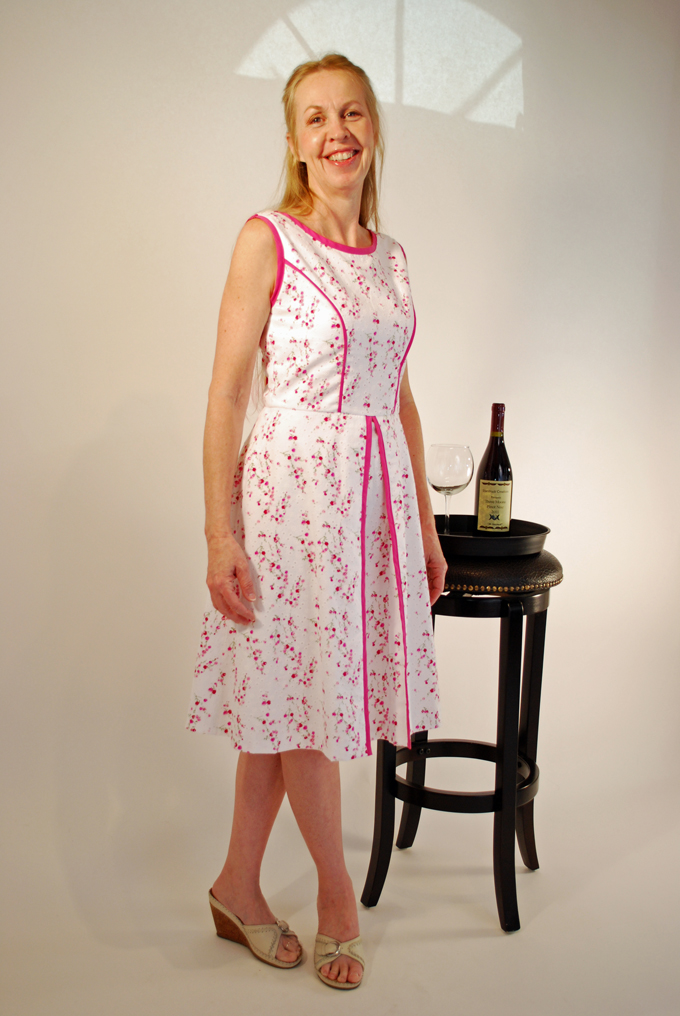
So there you have it. My creation with a little help from B & S! (That doesn’t sound right does it?) I call it my Jessica Betsey dress. I love this style so much, especially because while being somewhat form fitting, it is oh so comfortable. So comfortable that I made a second one, a “little white dress”. The fabric has pretty embroidered flowers and I used a bit of pink chiffon I had on hand.
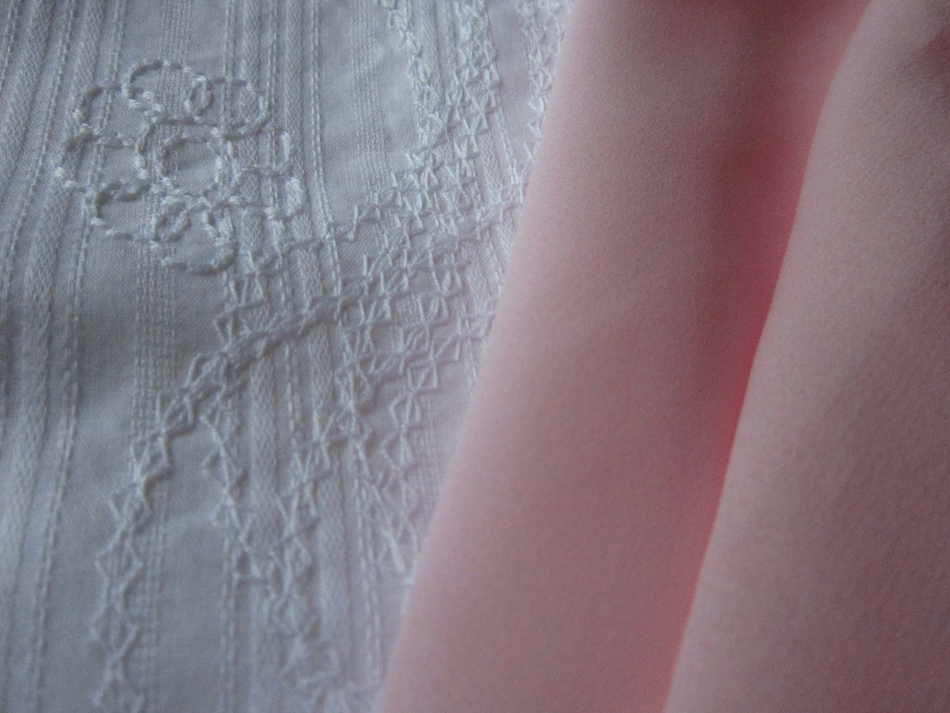
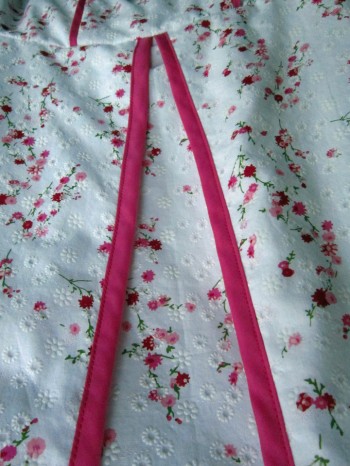
I did change it up a bit though. A pink band of chiffon sewn between the bodice and skirt.
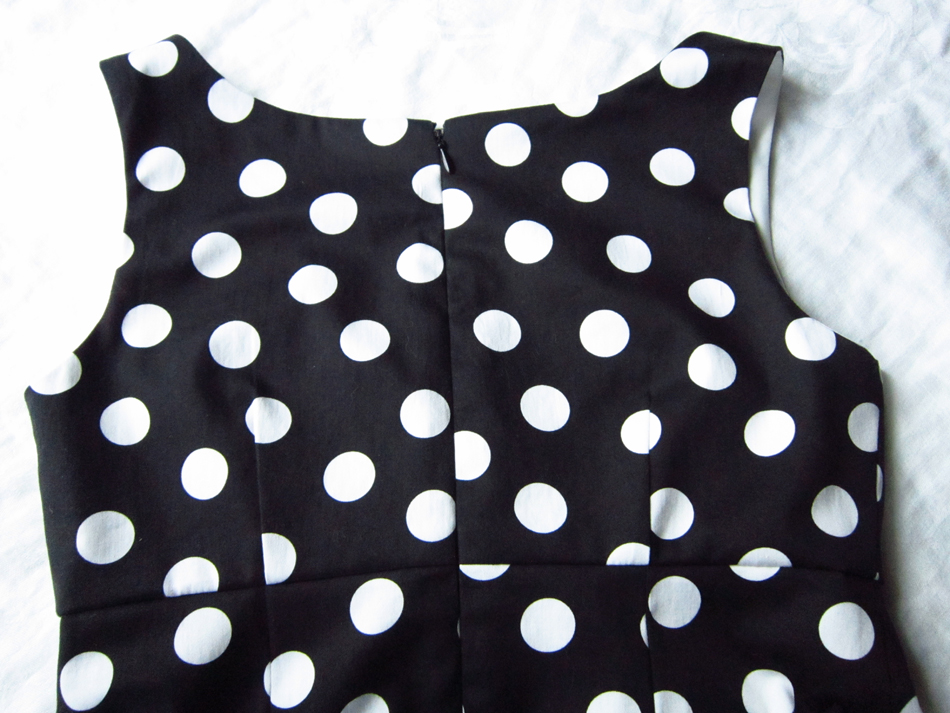
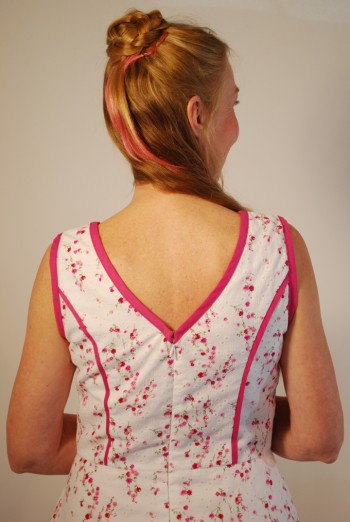
And a v-neck in the back.
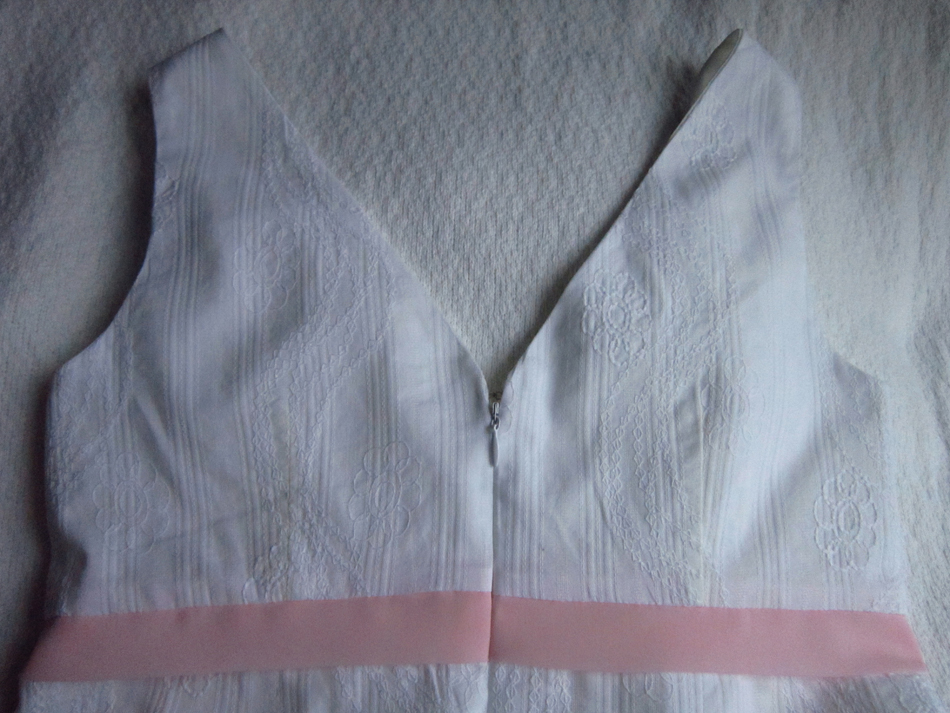
and the full deal…


I have several occasions in mind for wearing my dresses and I can’t wait. Coco Chanel once said, “Dress women in black or white at a ball. They will catch the eye”. I don’t know about catching the eye, but I certainly will feel like I’m going to a ball. I can’t wait!
Salut! Jessica
Read MorePattern Review Simplicity 1797

SPRING IS HERE! But…I live in Oregon and — well let’s just say that we Oregonians are still planning our wardrobes for that mildly warm sunny spring weather that will actually be here when it’s almost summer. However, I am not complaining…much. This is actually a good thing because it means that I have a little more time for sewing projects that include those pretty summer dresses that I envision myself wearing to parties, the Blues Festival, wine tasting, birthday parties, or just because!
Since we are on the subject of dresses, I believe it’s time to talk about Simplicity 1797. I decided to make this dress for several reasons. The obvious one of course is that it’s cute! I really liked the sample displayed on the pattern envelope and so I purchased it when it came out last year. Somehow it ended up in my future project stack of patterns and…I sort of forgot about it. Then last month when I was reading the American Sewing Guild Newsletter I made a discovery. A national sewing contest is just getting underway and to participate, you can sew one or all of the patterns from a a selected list and the Simplicity 1797 is on that list! The grand prize and 2nd reason to make this dress…a Babylock! I was so excited that I think I drooled on the newsletter.
My plan was to make this dress from a special designer fabric that I purchased, but I wanted to do a test run first so I chose a floral eyelet that I found in the local fabric store’s linen section along with a pretty rose-red cotton for the piping. The eyelet was regularly $12.99 a yard but with the 30% discount that I noted, I figured what the hey, I can handle this. Keep in mind that during this time my phone was ring-a-ding-dinging text messages from two of my kids. When I left the cutting counter it turns out the fabric was not on sale! I was already late for meeting my son at a local pub for lunch so with as much calm collective-ness I could muster, I purchased my NOT-ON-SALE fabric and left in a dash!
Later, when I got home and started looking at my eyelet, I realized that it was not embroidered threads in pretty flower patterns but rather glued on rubber stuff that looked like eyelet. Sort of flocked, but not! All I could do at this point was hope that this wasn’t a tell-tale sign of what was to come!
I went ahead and pre-shrunk the fabric (if rubber can shrink) reminding myself that it was suppose to be a test-run. By this point I was a little irritated and so I just threw the fabric in the washing machine and then the dryer. Turned out fine so off I went to iron it. That was when I hit the next speed bump! I couldn’t iron it on the right side. Okay I said to myself, “self, don’t let this fabric beat you!” And I didn’t. I ironed it on the wrong side which worked out fine… until it was time to press seams. But I would not lose this battle either so I broke out the press-cloth ammo! During all the frenzy in a room full of colorful expletives, my daughter came in to see what was going on and her only comment…”that’s pretty fabric”. At that moment I swear I saw the eyelet blowing a raspberry at me!
Moving along…I had already made a muslin before I purchased my rubber fabric. With only a few adjustments I was able to find my desired fit; the usual size 8 grading to a size 12 at the waist (yes, I am the shape of a triangle) so I was ready to go. I made style B. I love the look of the little jacket that goes with it and plan on making it with some beautiful white boucle I purchased recently.
The instructions were pretty easy to follow. I left out the pockets because of my previous side-seam pocket ordeal with the floral silk fabric dress that I had to re-do because of the big butt scenario but we won’t go there! I’m sure it would be fine in this dress, but my trauma has not quite passed yet.
I chose to do the piping which was 2 inch strips of fabric folded in half length-wise. The instructions asked you to baste the strips to the bodice and skirt with raw ends together before actually sewing the bodice and skirt sections to one another permanently. The width allowed for a 5/8 seam and 3/8 for trim. I thought it was fun to apply so no problems here.
The only thing that I found difficult was when I was applying the fabric bands around the neck and arm holes. The first part was easy. You simply pinned the binding to the neck and sleeve edges and then stitched a 3/8 inch seam. It was the next step that got me. You were to fold the edge of the binding to the inside, pin and then stitch on the outside in the the groove of the seams. The fabric was not cooperating at all. And…being to fussy, I finally ended up sewing along the top along the inner finished edge catching the underside of the band with it. I don’t know if this is when it happened but the shoulders and bust area seemed to grow a bit larger. My muslin fit so well, so I am not sure what happened, but hey…with that extra space, there is always room for the Wonder Bra!
Well…this is it!


I don’t know if I will make the dress again though I still plan on making the jacket. I think the dress pattern is great but due to the fabric issues, I kind of lost some of the wind in my sails on this project. I will definitely submit a picture to the American Sewing Guild contest. It is totally a long shot but… winning a new Babylock to replace my dinosaur serger would be stupendous!
Well, time to go and enjoy a beautiful overcast day in this pretty springtime dress. Where am I going? My daughter and I are going shopping for shoes! Then go have lunch and with a glass of wine for me at the Cheesecake Factory!
Salut! Jessica
Read MorePattern Review McCalls 6708
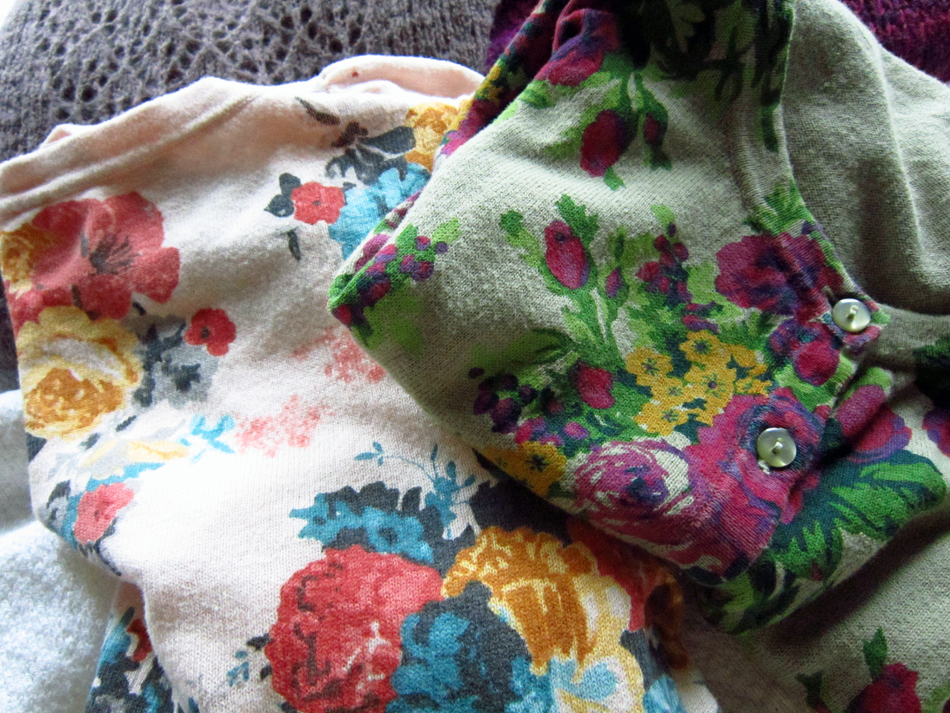
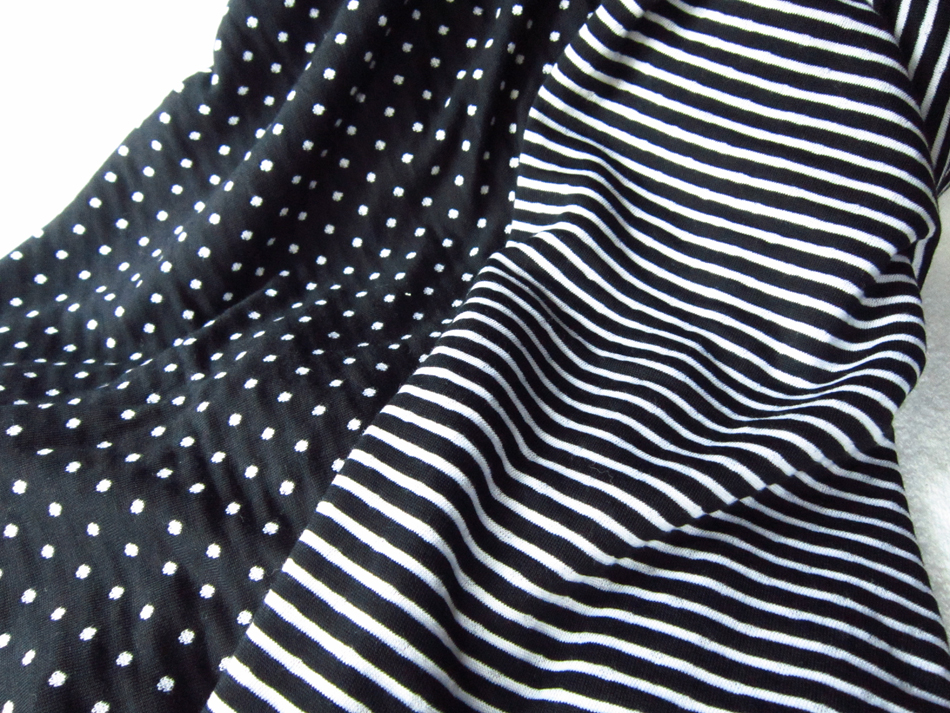
I’ll start by saying… I love sweaters! The weird thing though is that I don’t have very many, however that’s going to change because I just figured out that I can sew them! Up until now, I never dared to consider making these wonderful little wardrobe necessities. I figured sewing knits would be an experience from hell and happily chose to never go there. Then after spending some time with some wonderful women in ASG (American Sewing Guild), a door has opened and knit fabric has hit the fan so to speak! I won’t say that I am totally comfortable sewing knits now but my confidence is growing, especially after making the McCalls 6708 sweater.

For the fabric I chose a double-ply knit, black and white stripes on one side with small polka-dot like markings on the other.
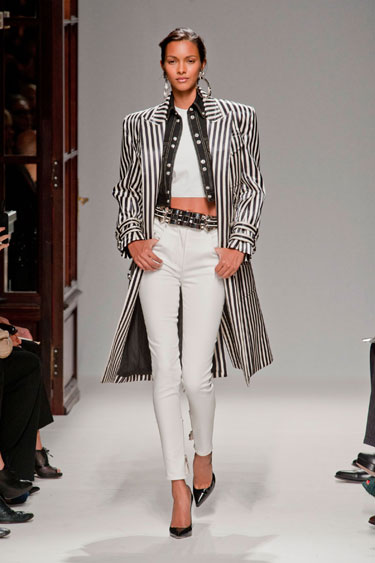
My inspiration for this fabric came from the Spring 2013 Ready-to-Wear Fashion Show number by Balmain which drew me in and renewed my interest in the black and white theme, and especially stripes.
The sweater I made was a mash-up. I wanted the neckline of A and the length of the bodice and sleeves of E. It wasn’t difficult at all. By overlapping the front A tissue piece over front E tissue worked perfectly. I used the back pattern piece for E. Long sleeves were not a problem either since both sleeves come as one tissue.
McCalls 6708 Options
For size, here again I chose small based upon the circumference of the bust provided on the pattern for that size. I didn’t make a “knit” muslin. I do like adventure and given that there would be some stretchy going on, I decided to throw caution out the window and just sew!
The instructions were very clear and quite easy to follow. Double-stitched seams were suggested for most of the construction. For this I used a twin-needle, a 3.5 mm. stitch and my standard sewing foot. It wasn’t called for but I decided to serge all the edges that would be exposed to make a nice finish.
I was fascinated with the knit that I used because it was double-sided and not too thin. It seems that thin fabric is the norm in store bought garments these days and doesn’t last long but I will save that for another rant! Due to my stripe inspiration, for some fun and to make it interesting, I decided to use the opposite side of the fabric for the neck, front and bottom bands.

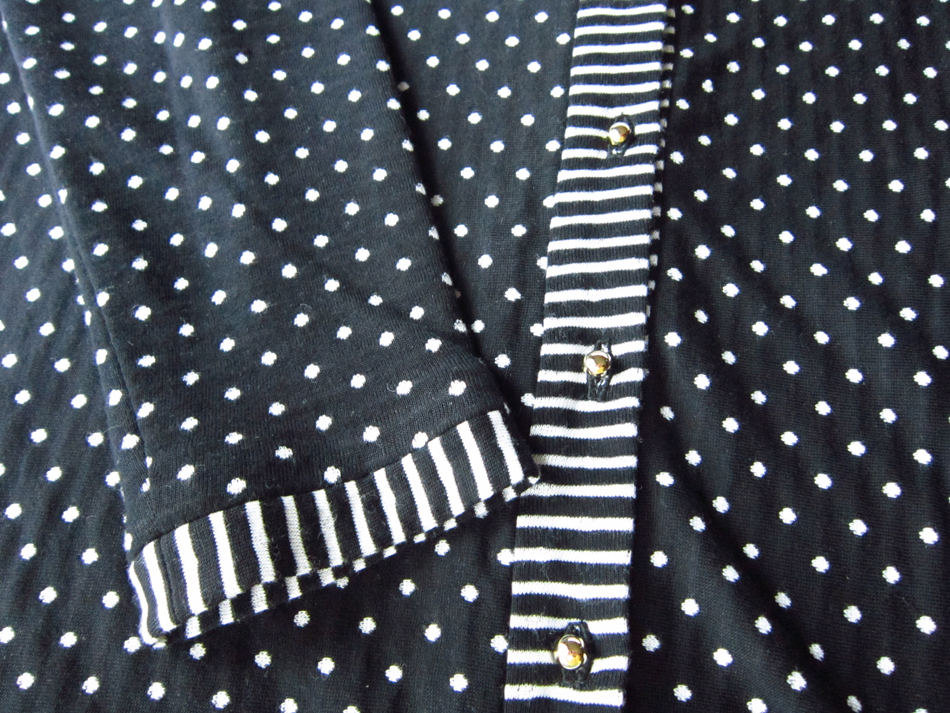
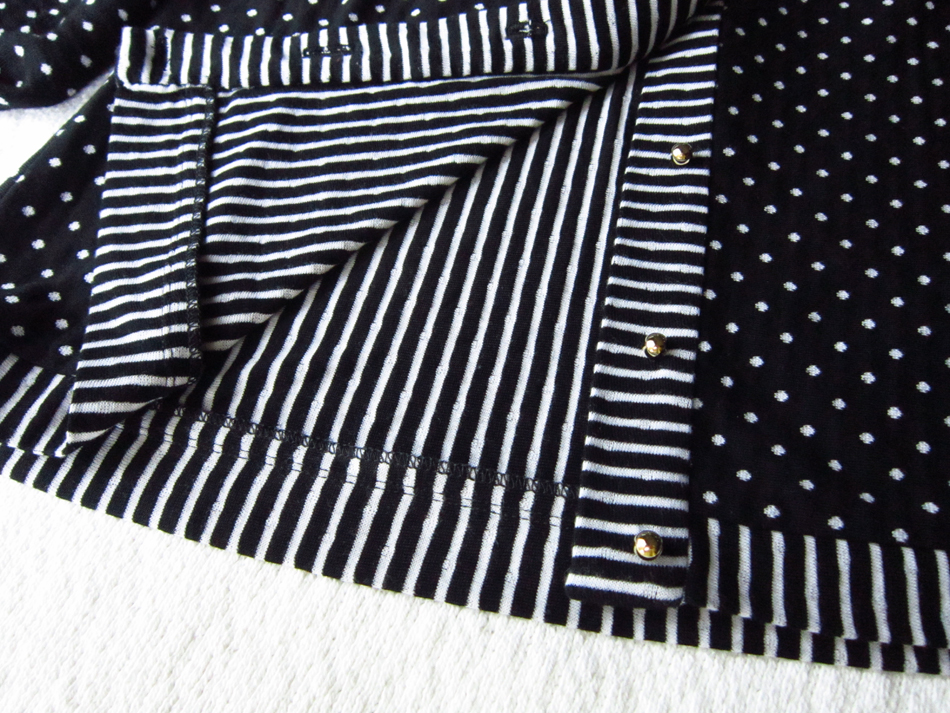
All the bands fortunately turned out pretty good, but because of the method of construction with the neck band and my double-ply not-too-thin fabric, it was a real pain in the… derriere to get the finish I wanted. The thickest area was where the top and bottom buttons go. It doesn’t help that I tend to be a perfectionist, sometimes very problematic for me!
As a side note, always up for a challenge, I decided to cut out the sleeves and bands cross-grain so I could have the stripes in the direction that they are as well as to utilize the fabric and eliminate waste. There were no problems with doing this and I have a chunk of fabric left, for what I don’t know, yet…
So…here it is


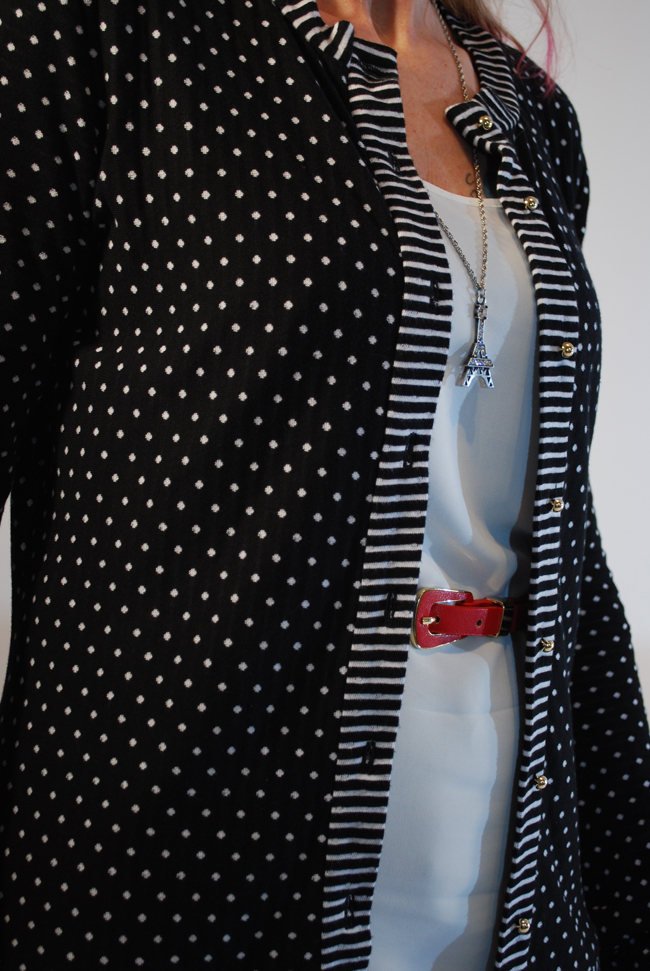

I have to say, I really like the way knit responds when a seam is sewn in it and I love how it feels to the touch – oh so soft. It is pleasurable to sew! I’m still a bit skittish when it comes to doing buttonholes. It’s a real pain to remove all the threads when the buttonhole is a total bomb and requires a do-over! Moving right along… yes I’m discovering that sewing knits can be a pretty fun thing to do, and that’s why I plan on sewing this sweater again. However, I would like to try and figure out another method for applying the neck band…I need to put on my thinking cap. If you have any suggestions, I would love to hear them. Until then…it’s off to go wine tasting!
Salut! Jessica
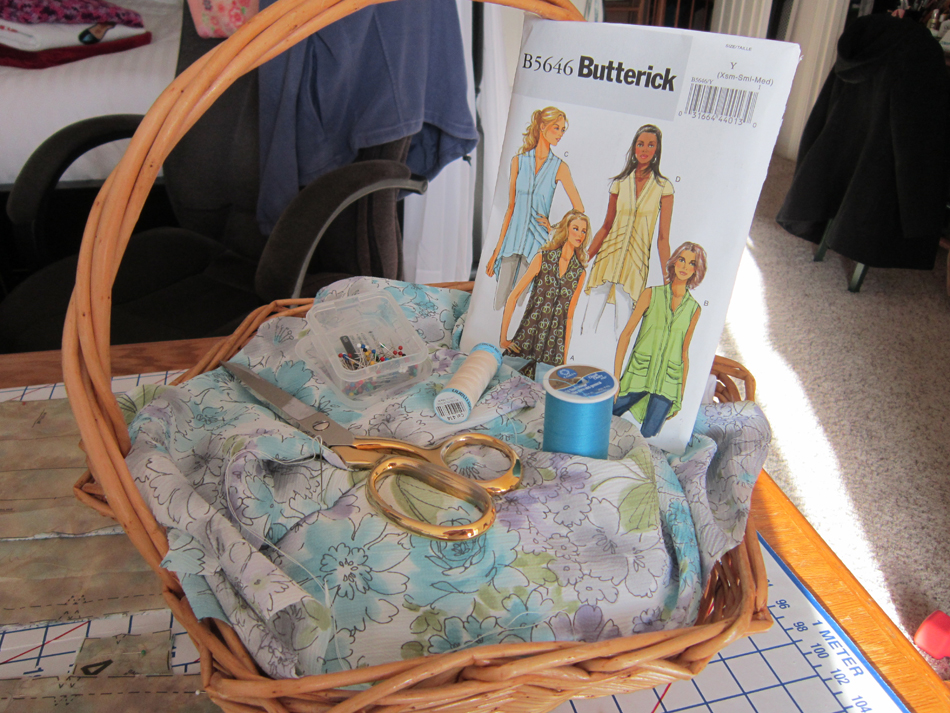
Read MorePattern Review Butterick 5646
Believe it or not, I have been sewing while I have been chit chatting on this blog for the last few weeks! And… outdoors soaking up the sun and working in the yard cuz spring is here and it’s time to plant! Even mucked out the small pond and waterfall in my backyard leaving it sparkly and pretty…until next year when I have to do it again! Here I am though, faithfully sitting here at my desk on this beautiful sunny April 1st Monday morning, writing because this is important too. No fooling!
So what have I been sewing? Well, actually a few things, with three more projects in the makings. Sometimes I make myself crazy! Today I am going to start by reviewing Butterick 5646 and with the next several posts McCalls 6708 and Simplicity 1797. I am splitting them up because I think I talk to much and end up making monster posts that you may not want to sit and read! See, here I am, yaking!


Butterick 5646 McCalls 6708 Simplicity 1797
Before diving in, let me first say that each of my projects gets to go through muslin consideration. There’s nothing worse than finding out that something doesn’t fit properly that you were dreaming of wearing when you finished sewing it. Been there, done that!
Also, sewing for myself is sort of like dressing a triangle! I find it a constant challenge with any pattern I choose to make, because my shoulders are a little more narrow than standard shoulders. My bust… well I won’t complain; I am far from gifted in this area, but it could be a lot worse. Then there’s my waist, it’s two sizes up as compared to my bust measurement; what’s with that! Hips are hips; they are always the fullest area but the numbers just keep getting bigger. See… a triangle! What has worked best for me is to cut a size 8 at the top with still a bit more adjusting, then ease this size into a 12 at the waist. Most of the time size 12 is good for the circumference at the hip line, but sometimes I will cut out a 14 just to be sure! I try not to pay a lot of attention to size though, just actual circumference; notice I said try. And go figure, my store bought clothes are entirely different sizes! We are all in this mess together so I’ll just leave it at that 🙂
Okay…so here goes: The Butterick 5646 top
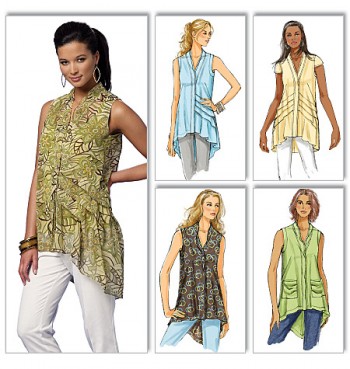
Butterick – 5646 Options
Let me start by saying that I picked this top because I like the long v-shaped back business that’s going on. Besides looking very feminine, it’s a butt cover when I don’t want my butt seen. (have no idea why I sometimes feel this way) 😉
The pattern is sized by XS, S, M, L, XL, and XXL
I chose size Small for several reasons. First, the bust circumference was closest to mine. Second, the waist and hip measurement with ease was printed on the pattern pieces, a number of inches more than I needed. And third, I pinned all the tissue pieces together to see what I was working with and could easily tell that it was going to be loose fitting all the way down; so…with much contemplation, I decided there would be no muslin done and size Small it would be. After the fact, I could have made an XS, since I almost feel like I am wearing a painting smock, but…I am not gonna fret!
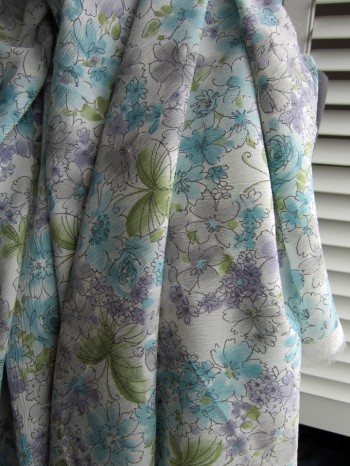
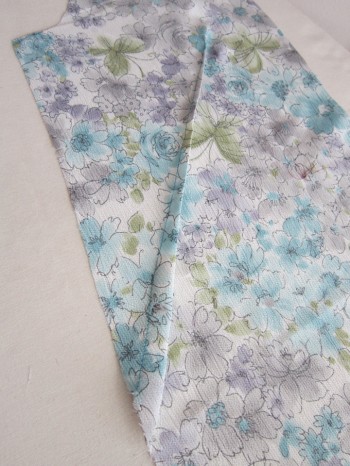
I made style B because it has pockets which I thought would make the front more interesting. Chiffon and georgette were two of the recommended fabrics which was why I chose to make it in the first place. I love to wear things made of these light flowy fabrics, but… I thought I would do a test drive with some fabric I discovered in my stash that I bought a year or two ago to make a skirt out of, don’t know what I was thinking, anyways, decided to use it for this top.
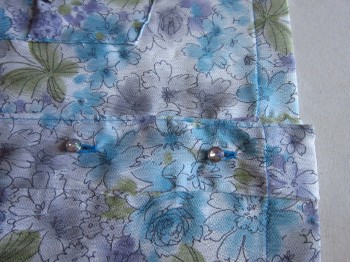
The instructions for the most part were straight forward. The band around the neck tripped me up at first, likely because I have not sewn a lot of tops. You had to sew 2 bands allowing for a hidden band where the buttons and buttonholes are to be placed. As usual, I went off the beaten path because I wanted blingy buttons and didn’t want to hide them! The 2 bands got to become one band for my whim. All I did was slip stitch them together along the center edge and then top-stitched 1/4 inch from the edge all around the entire band.
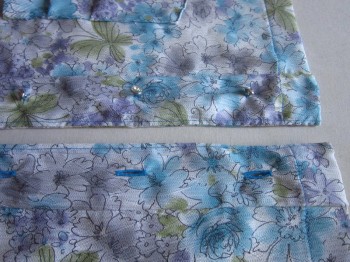
I loved sewing the french darts. I have read that they can be a bit tricky at times. I can see how this might be, especially with certain kinds of fabric but the finish line is so complimenting that I can’t wait to sew them in future garments.
Also, french seams were a suggestion for finished edges which is one of my favs so I did this too. Maybe I will make this again in an XS if I can find some pretty georgette fabric.
The back…

And the front!

Salut, Jessica
Read MoreAbout Me
 Portland, Oregon,
 United States
Hi there! I’m Jessica Brandon and I am a clothes-loving sewing artist. When I am not sewing, blogging or shopping for shoes for my creations, I fill in the remainder of my days spending time with my children, playing ice hockey, gardening and making and drinking wine!


Up Coming Projects:
Vogue 1426

Vogue 7881

McCall's 7089

Vogue 8997

Vogue 1431

Vogue 9006

Vogue 8991
