


My Wisteria in full bloom
We are having such beautiful weather and to think that it is Oregon, and in April! I have had more energy in the last 3 days than I feel I’ve had in the last 3 months. I guess I’ve got the “spring fever”.
So while cleaning, cleaning, and cleaning…
I have been thinking about a dress I am going to make, a summer dress in yellow and white. Part of my inspiration came from the T.V. show “Revenge”. Yes…I am watching it but I blame it on Netflix. Believe it or not, I don’t watch television. I do however watch my “talking books” on Netflix but it really stinks when they put the first season of something on it; you watch it, and then you’re hooked and have to continue watching it on T.V. or Comcast On-Demand, both with all those obnoxious irritating crappy advertisements… uh-oh, rant coming on, shut it down- shut it down! Ahem…
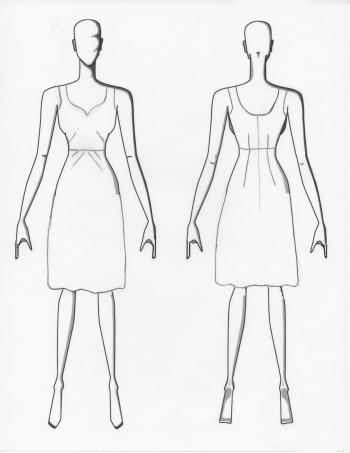
Anyways, there were several dresses that the leading actress, Emily VanCamp, wore that caught my eye. One of course was a yellow and white one, and the other was what might have been a white brocade but it was the skirt of that dress that grabbed my attention. Instead of the standard darts that start at the waist and go straight down, these were diagonal. I thought, okay, that would be easy enough — I’ll just use my skirt pattern that fits me perfectly and fold the darts diagonally. But I was so wrong! Mind you I had already drawn out my vision on a croquis…
and have been mulling it around in my head, trying to figure it all out. It was in one of those moments when my brain was fully functioning properly that I remembered a book I have. The author is Adele P. Margolis and the book is titled “How to Design Your Own Dress Patterns”.
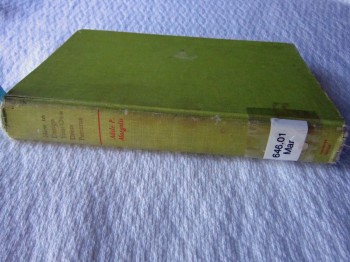
The diagonal darts that I needed to create she terms in the book as a “peg top” skirt with actual instructions for drafting it. What a score!
I was so excited that I
stopped breathing for several
seconds…
This was so big that it
demanded a glass of wine with
a toast!
So now that I am back on my feet, I thought I would share with you how it’s done. There are 12 steps to drafting the peg-top skirt and hopefully with pictures, some from Adele Margolis’s wonderful book, it will be easy for you to follow. Here goes…
DRAFTING A PEG TOP WAIST SKIRT in 12 EASY STEPS
** Please note that my pictures and the book illustrations are opposite views. I did this intentionally but realized half-way through that it would be conflicting for this “how to” but I had already spent a bit of time with the drafting and pictures so decided to keep my dingy sailing in the same direction!
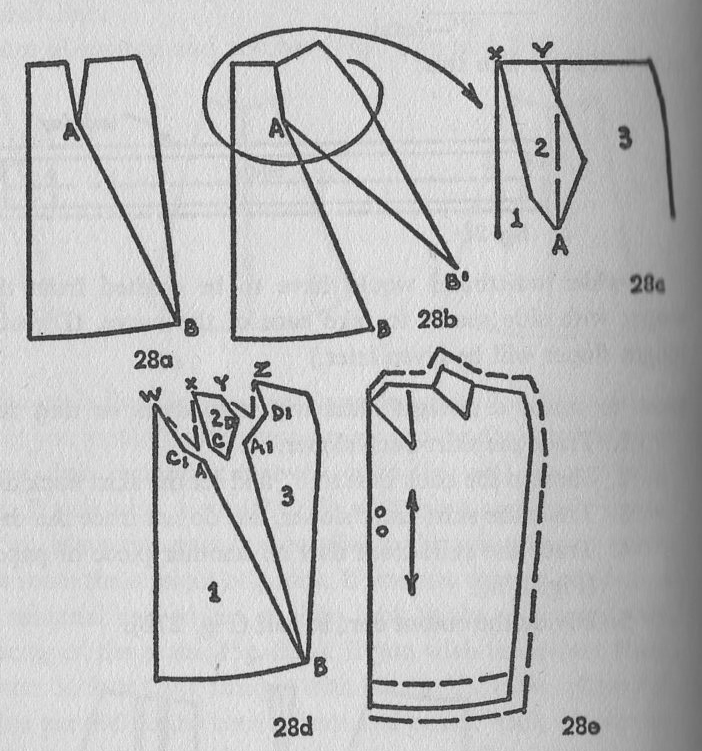
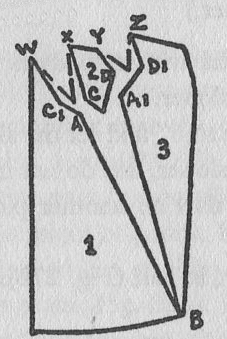
This is the whole sha-bang of illustrations for the peg-top skirt, all on one page. I have re-illustrated them individually in the following steps to make it easier to understand. Hopefully you will be inspired to go hunting for this little treasure to add to your collection if you don’t already have it. It certainly has saved my butt!
Step 1:
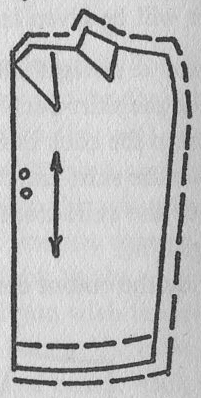
You start with a skirt front block that fits you nicely but because you’ll be cutting it up, you will likely want to trace one from your original. I traced around my original skirt block onto a piece of art paper and then drew in the dart and grain line. Keep it simple and do what works best for you.
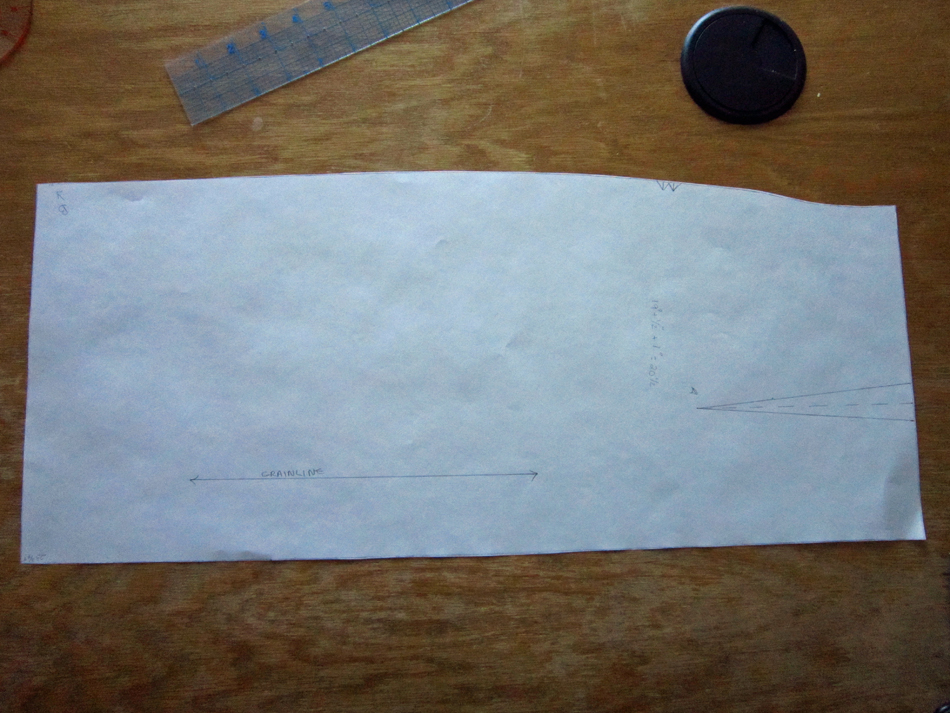
Step 2:

Draw a line from the bottom corner of the side seam to the dart point. Then label these B and A respectively. (See above and below)

Step 3:
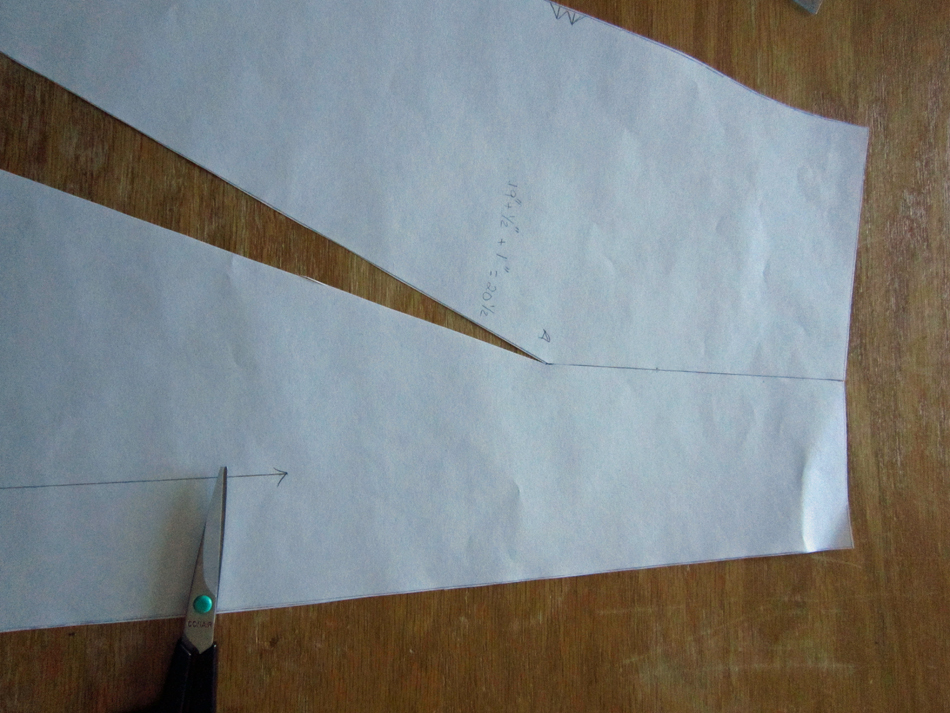
Cut out the original dart at the top of the waist. There is no picture for this because for some reason I forgot to take one. (It was an awe crap moment when I realized this)
Step 4: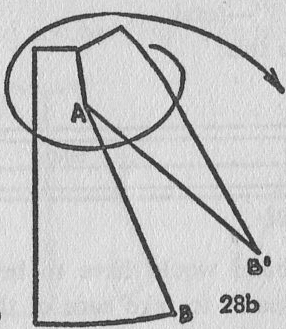
Now you are going to slash the line you drew from Point B to Point A but leave just a smidgeon of paper at Point A so the 2 sections are still connected. Then pivot or shift Point B, closing up the dart at the waist; then tape in place. Label the hem line points B (already there) and B1.
Step 5:
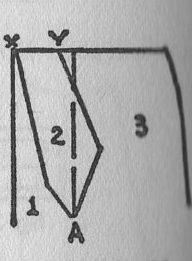
You will need to draw “style lines” as shown and label them X and Y

This is a bit tricky. There is no precise placement for these lines and no specific lengths. It is entirely up to the designer. I worked from the sample that is shown in the book and drew my lines 4 and 6 inches in length.
Step 6:
Next, connect each of these lines to A.
Step 7:
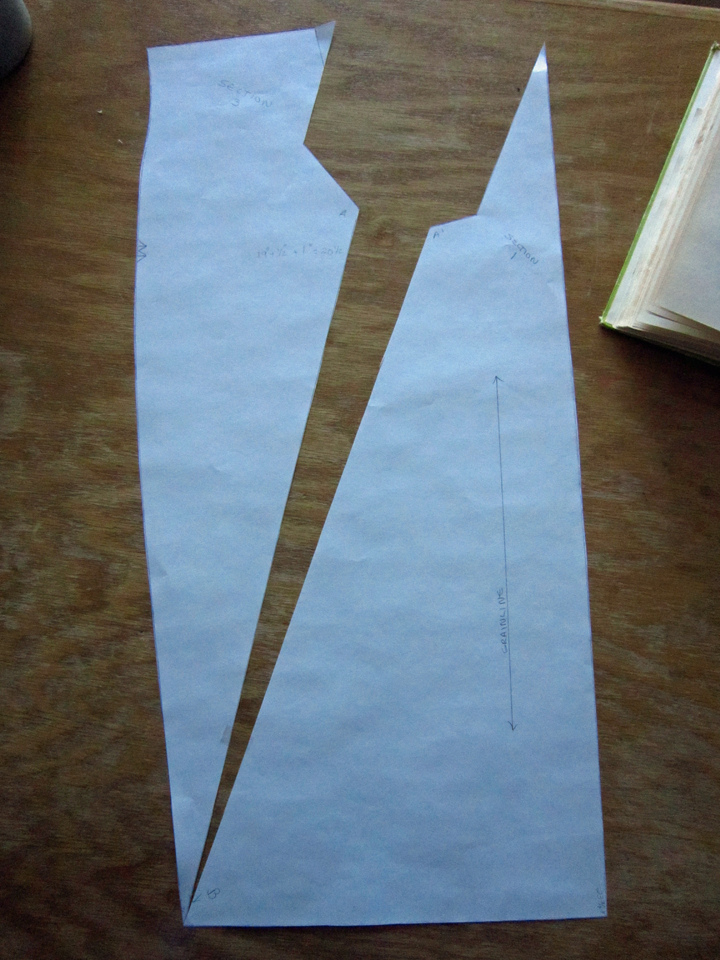
Label these sections 1, 2 and 3. Then cut them completely apart from one another. Across from A, you will want to mark A1 though not shown in the photo below.
The next steps I found to be easier to manage by placing my 3 sections on another sheet of paper. There were no instructions given to do this and I struggled for a bit until I got it sorted out.
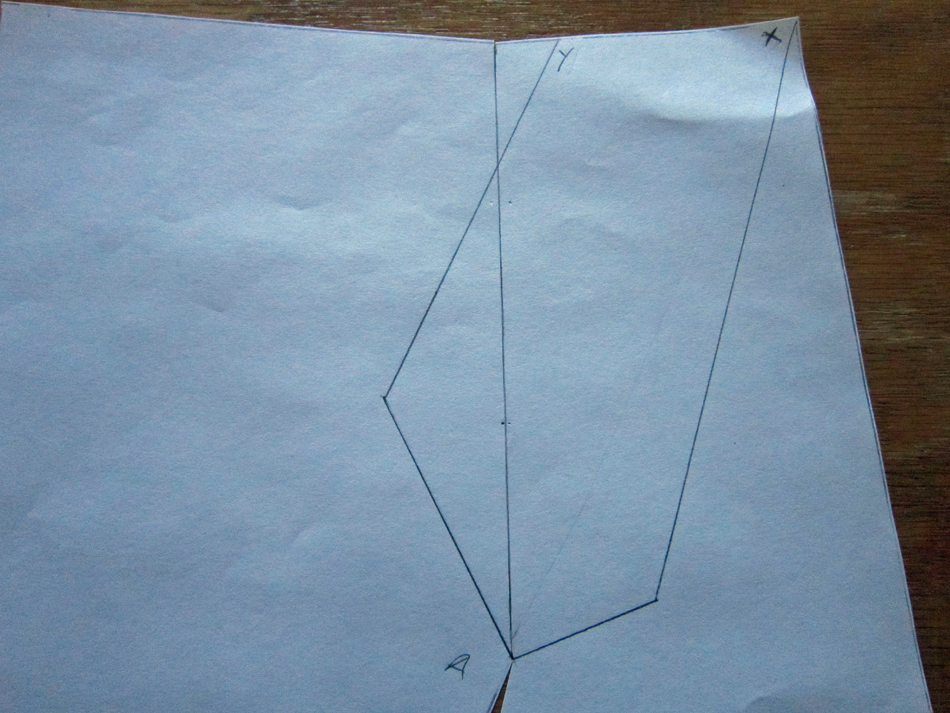
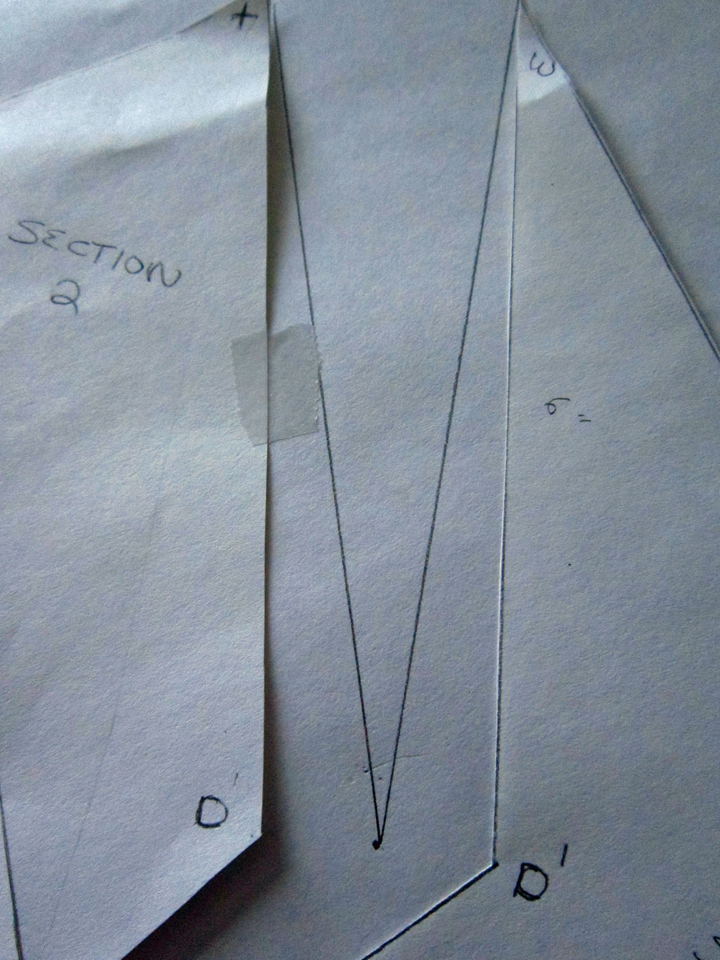
Step 8:
You start with placing sections 1 and 3 with the bottom points B and B1 touching and positioning A and A1 two inches apart. Below is how they look before I taped them on my additional sheet of paper.
Then after…
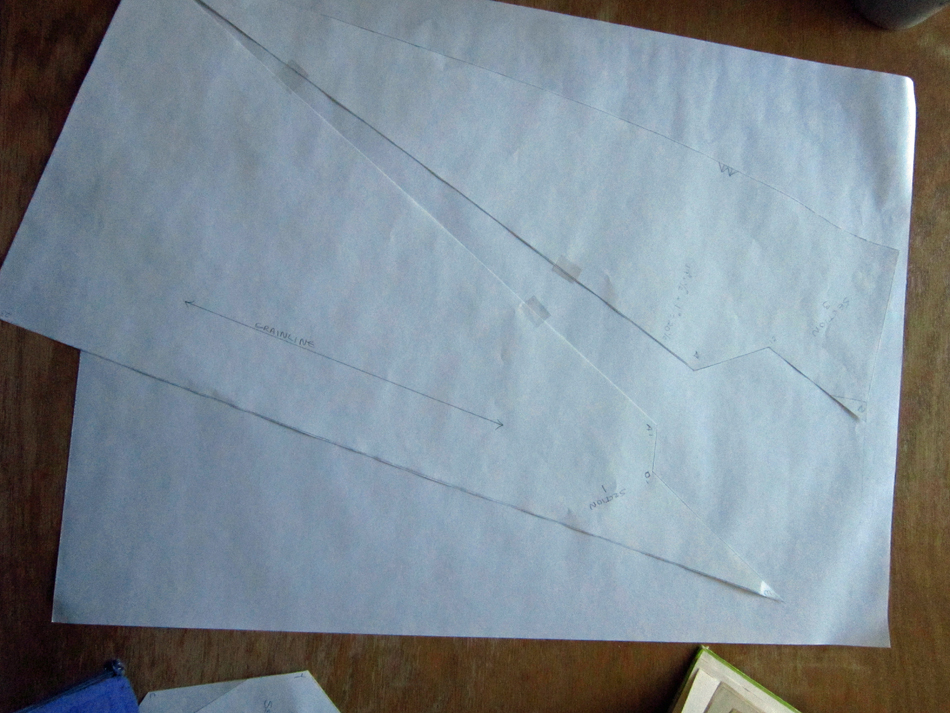
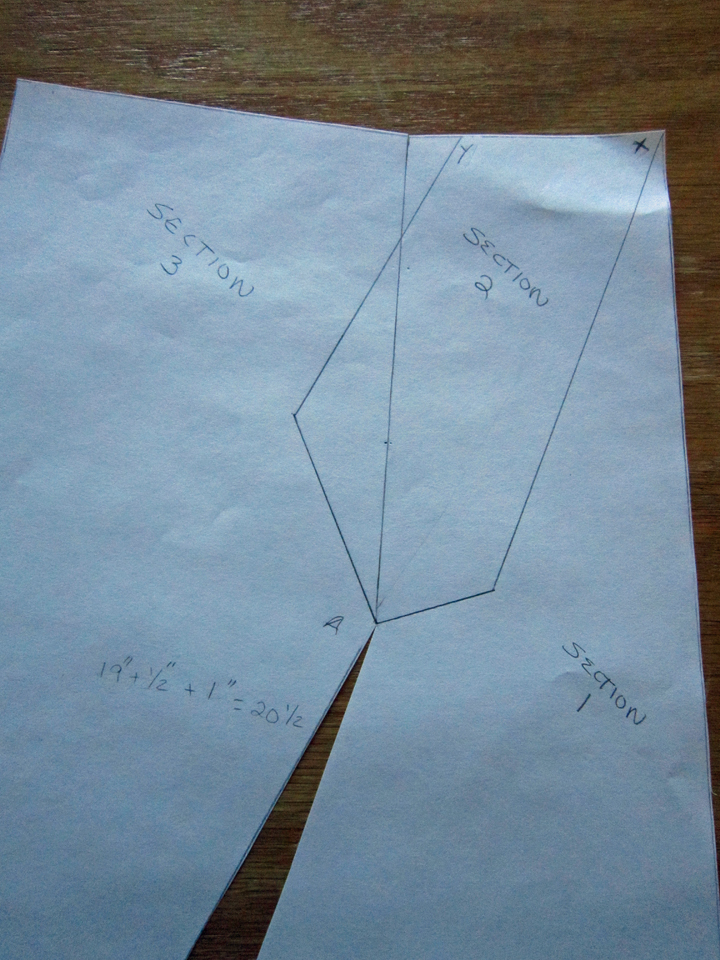
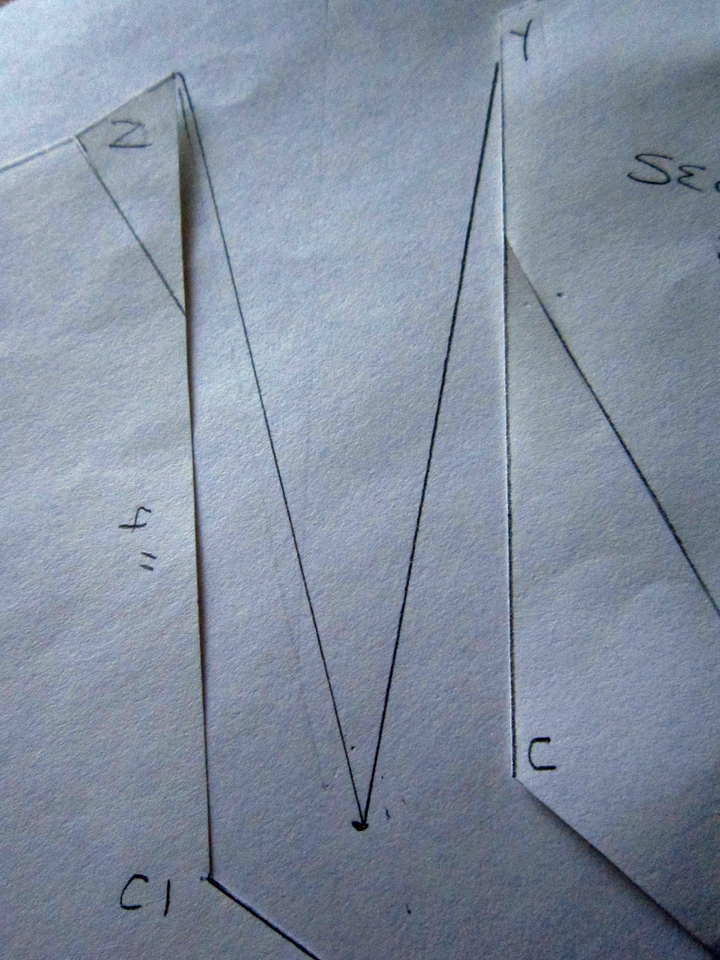
Step 9:
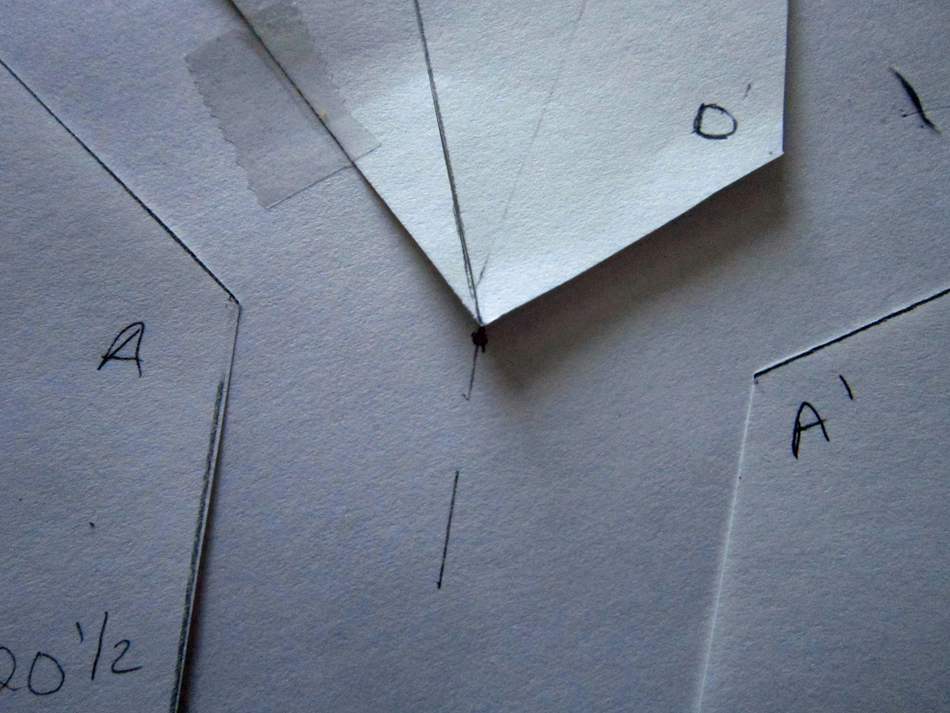
Place Section 2 between 1 and 3 so that the darts will be equal on each side at the waist line with the point touching midway between A and A1.
I don’t have a picture for the top of section2 between 1 and 3 so refer to the book illustration. It will look wonky but as long as the tip is at the mid-way point of A and A1 and you maintain an equal width for each side of Section 2, you will be fine.
Step 10:
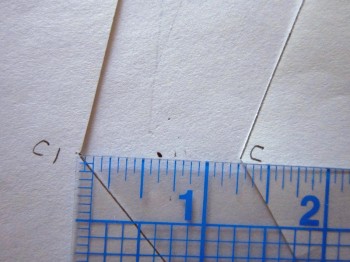
Find the center points between C and C1 and D and D1. Nothing beats a good eraser when you can’t make up your mind!
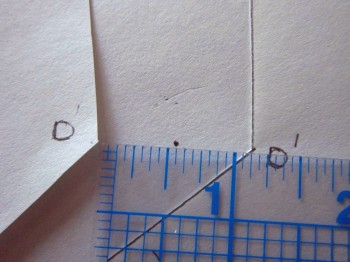
Step 11:
Draw in the 2 new darts. The dart legs need to be of equal length when measuring from the midway points at C and C1, and D and D1 to ZY and XW respectively.
Dart ZCY
and Dart XDW
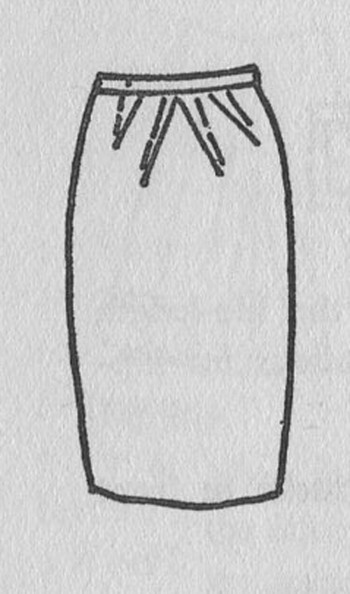
Step 12:
Fold the new darts to the center and draw in the waist line. Now finish up by tracing your draft onto pattern paper and be proud. You did it! Of course you still need to draft a skirt back or obtain one that matches this one at the side seams and supplies the remainder of the waist measurement that is needed. The waist and sweep of the hem line should remain intact when doing this peg top style. Only the hip fullness is affected. It does not change, just relocates!
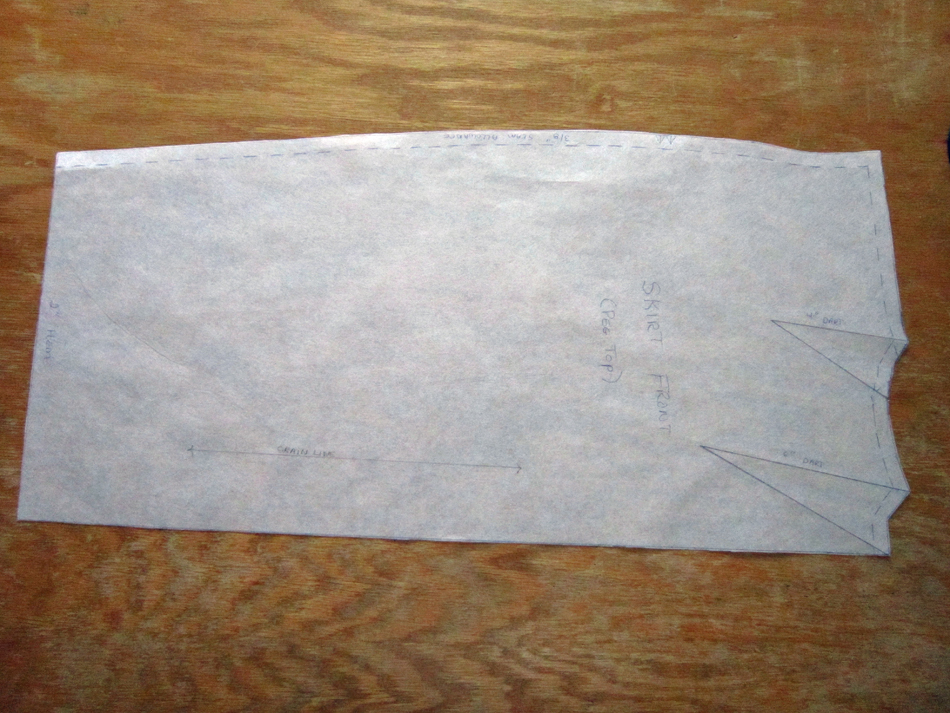
This is mine finished. I didn’t create little tabs extruding from the center part of the darts because I wanted them to be even with the waist line when they were folded. Right or wrong, it’s what I wanted and besides, I’ve always liked living on the edge!
In the near future you’ll be seeing that yellow and white dress I’ve been talking about, with this peg top skirt sewn into it of course. I am really excited about it because I have truly created my own dress pattern this time around. The bodice I designed off of my own drafted bodice block; then I did style changes giving it french darts, a sweetheart neck line and a scooped low back. I hope I haven’t shot myself in the foot by announcing this! Ehh, what’s life without a bit of adventure right? Stay tuned! Now it’s time to go enjoy the rest of my day with no cleaning!
Salut! Jessica
About Me
 Portland, Oregon,
 United States
Hi there! I’m Jessica Brandon and I am a clothes-loving sewing artist. When I am not sewing, blogging or shopping for shoes for my creations, I fill in the remainder of my days spending time with my children, playing ice hockey, gardening and making and drinking wine!


Up Coming Projects:
Vogue 1426

Vogue 7881

McCall's 7089

Vogue 8997

Vogue 1431

Vogue 9006

Vogue 8991
