

Blouse in Silk plus Vigoss Skinny Jeans Renewed
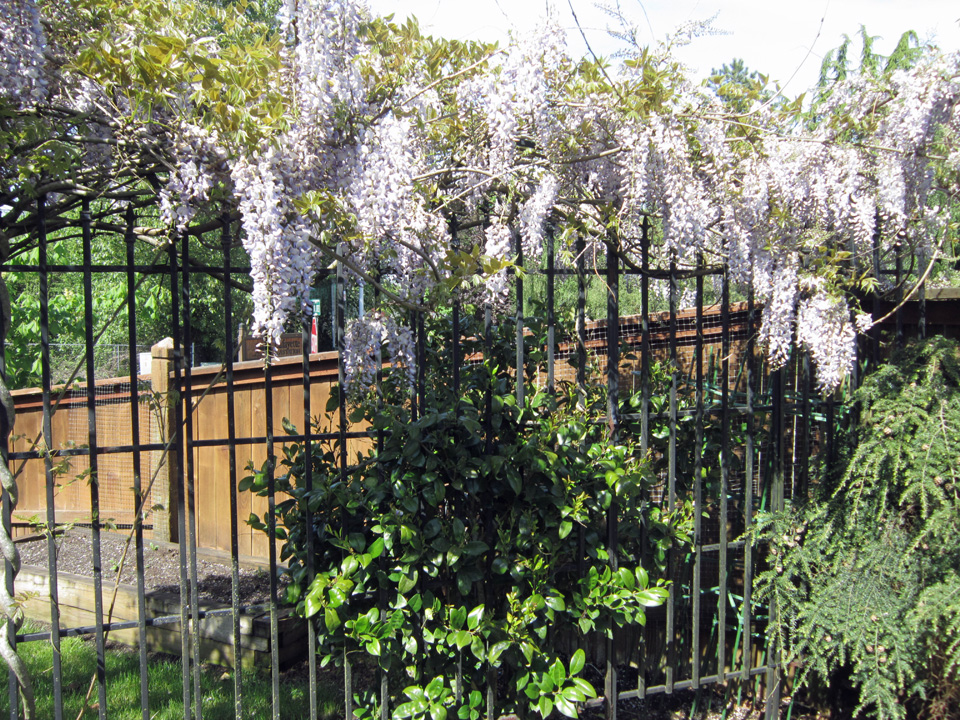
My Wisteria is blossoming!
There is so much I want to share and I’m not sure just where to start. I try so hard to not write monster blogs. I’ll do my best to try and keep it minimal. But I’m drinking wine while I do this so I really can’t make any promises! With the absolutely beautiful weather we are having, it seemed such a nice idea to sit on the patio, sip Chardonnay and write to you.
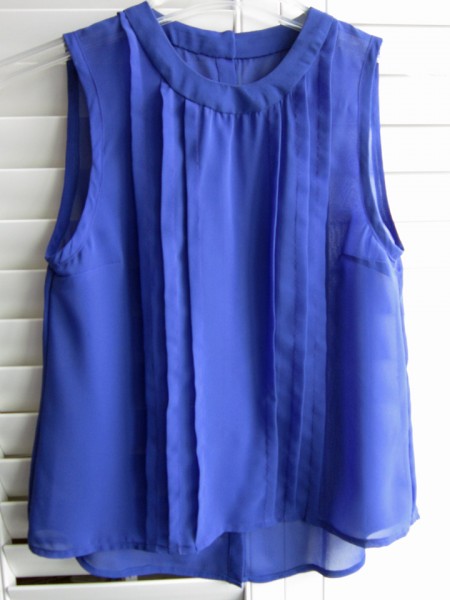
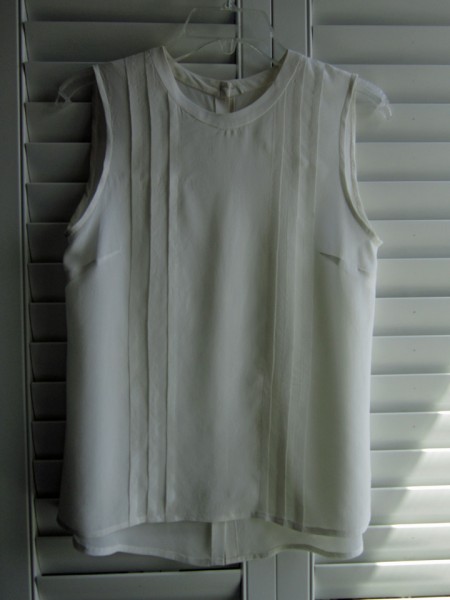
OKay… so… let’s start with the blouse that I designed, drafted and made in some inexpensive fabric that I posted about a while back. I was inspired by a blouse that Emily VanCamp wore on the TV show, Revenge. I can’t believe I’m still watching it… I hate TV because of all the commercials! It’s Netflix’s fault because that’s where I got hooked on it! No rant, promise! Anyways, there were a few discrepancies when it was finished, but overall I was happy with it. After putting it on the back burner for a bit to work on Vogue 8972 dress project, I decided to go back at it so that’s where I’ll dive in.
Here is a picture of it and if you want, you can go here to read more about it..
 There were a few things that I needed to change.
1) The front was a little shorter than I wanted. When I extended it in length on my pattern, I also had to redraw the back at the side seams to match the front side seams but that was pretty simple.
2) The pleats were in sort of weird positions when I had to apply the neck yoke so I moved them more towards the side and away from center.
3) Instead of a 1 inch neck yoke, I reduced it to 3/4 inch. Not sure if I like it the way it is now or better when it was an inch wide, but…it’s just a minor detail, nothing to get excited about. (still not super happy with how the yoke lays around the neck but that just may be the way I am sewing it on)
4) The last two changes were lowering the front and back neck lines, 1/4 inch for the front and 1/2 inch for the back.
So this time when I made it up, I used some cream silk Crepe De Chine that I had. I love sewing with silk because it feels so luscious! And it feels so nice to wear, though I did discover that it’s still pretty shear. Will wear a cami under it unless I feel really bold on a night out with the girls! Woo hoo!
Haute Couture fascinates me, so while I was making this top, I decided to pretend I was a famous fashion designer, sewer kind of person (I think the wine is starting to kick in! :P) and have some fun. I used tailor tacking to mark my pleats. It was still a bit of a challenge to get all the folds equal, and running evenly straight from top to bottom but I managed.
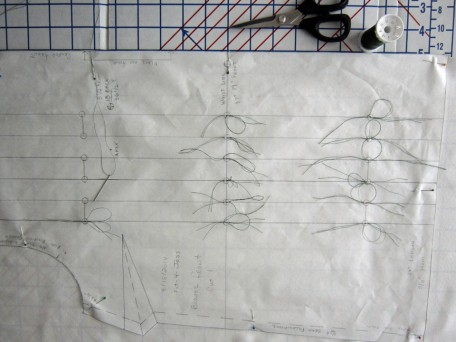
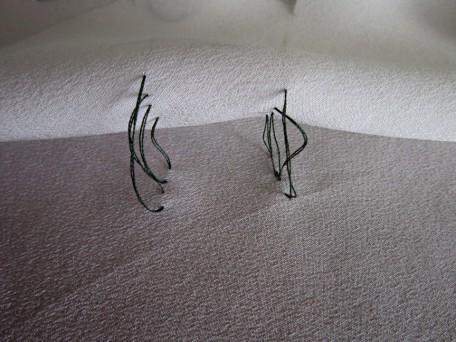
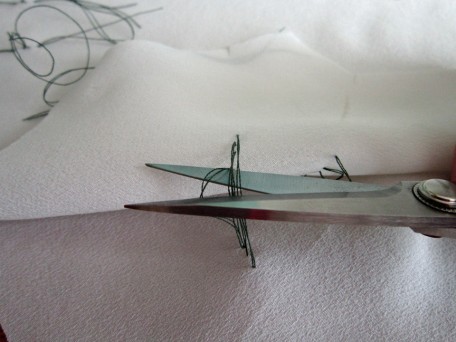
I took these pictures to show you what they look like. If you look at the picture on the right, it’s a closer view. For those that aren’t sure how to do this I’ll try to briefly explain.
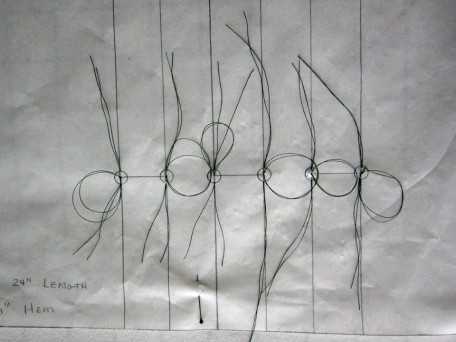
I insert my sewing needle downward (like I am sewing) about 1/8 alongside the center point (this can be whatever side you want to start at) and then push the needle back up through the center point, then I push the needle back down through the center point again, and bring it back up about 1/8 inch away from the center opposite from where you started. Through this process, from the start when I first pull my thread through, I leave several inches at the end where I started, a big loop at the center and leave several inches at the end where I finished. (see the picture above on the right)
When you have finished, you pull the pattern tissue/paper away. Most of the time the tissue just slips off unless it hangs up at the center point where you stitched in and out. When this is done, you then have to clip the thread that lies between the two sides of cut fabric pieces, leaving equal parts of thread for each side.
So when it was time for me to make my pleats (on the outside), I used these tailor tacks for my guides.
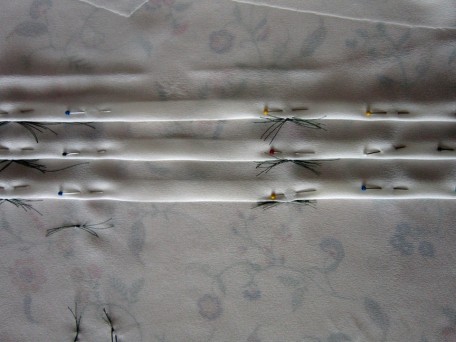 The tacks under the pleats are for the dart.
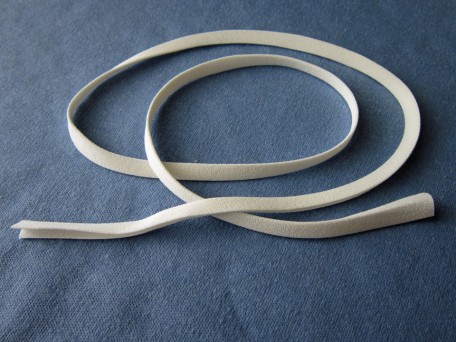
A Hong Kong finish on the seams was my first plan but I didn’t have any silk organza on-hand so I ended up using my pinking shears on the seam allowances. I did finish my armholes with bias I cut from my Crepe De Chine and then used my 1/2 inch Daisy Bias Tape maker. Silk looks so smooth so I didn’t want to use any top-stitching in my construction. This meant a lot of hand sewing but hey, I’m a famous designer sewer person and I do like to hand sew so this worked out just fine.

My silk bias tape turned out very nice… thank goodness!
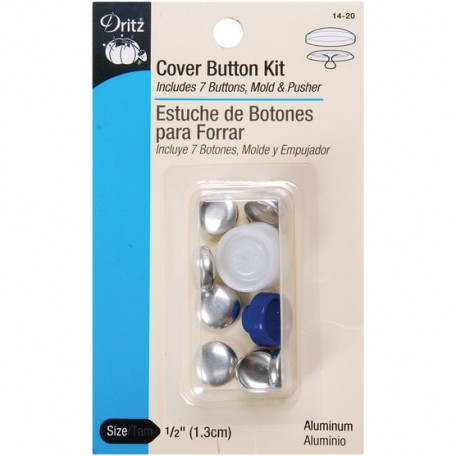
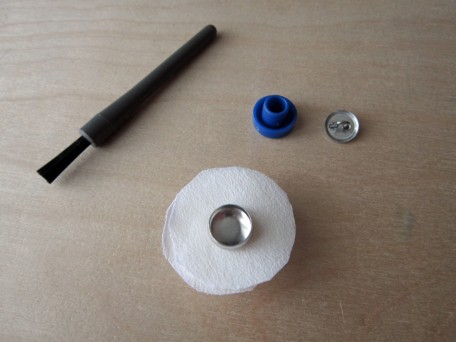
Covered buttons look so elegant so this was also a feature that I wanted to include in my silk blouse. They are not hard to do. You can buy the metal buttons and the tool to make them. Here’s how it works.
1) First, you have to cut out circles of fabric. The package that the buttons come in has a template. They don’t have to be perfect, just large enough to cover the round metal cap. I did a double layer because the Crepe De Chine was too sheer.
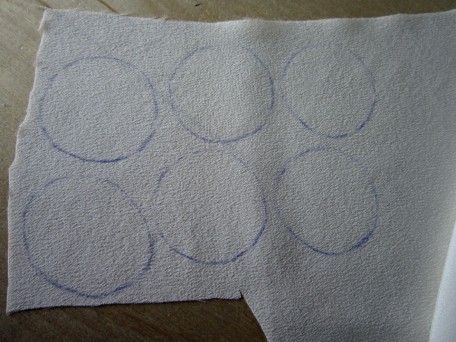 One of my circles looks a little oval. I was not drinking wine at the time!
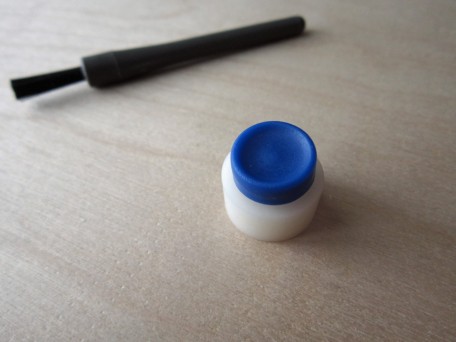
2) You gather up all your widgets. The metal button dome and matching back, the blue pusher and white mold tools that you can purchase in a package from most sewing stores including JoAnn Fabric. My sewing machine fuzz remover is my tucking weapon! You’ll see in a minute.
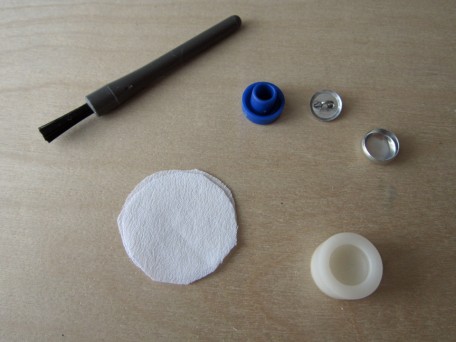
I used the #20 which is 1/2 inch.
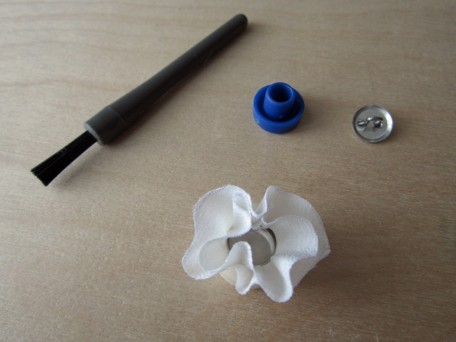
3) Next – Center the white mold over your fabric. You’ll probably figure out your own technique for doing this. I’m just trying to explain this in steps so bear with me.
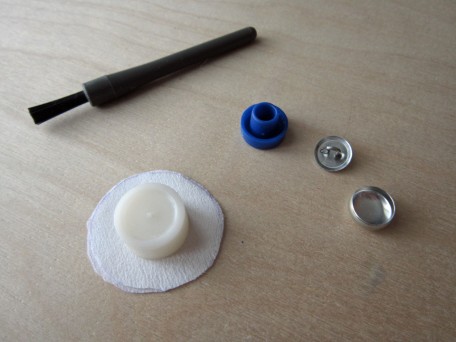
4) Now flip it over and place the dome part of the button, top down over the top of the fabric.
5) With the fabric sandwiched between the mold and the button top, now push the metal button top down into the mold.
6) Here is where my fancy fuzz tool comes in. Oh… and my circles of fabric are larger than they need to be. Yes, there is a template and I could have cut out the exact size from my fabric but this is where things can go bad. The exact template size j-u-s-t fits and if the circles aren’t perfect and if everything is not centered, then it’s a bomb! I purposefully cut the circles larger to see what I could get a way with. With the non-fuzz removing end, I tuck in all the fabric as neatly and smoothly as I can.
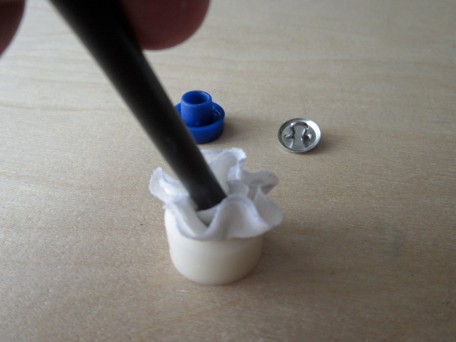
7) The button bottom is now placed with the flat end down over the folded fabric.
8) While holding everything in place, you take the blue pusher and place it with the opening over the top of the hook part of the button bottom and then squeeze it and the white mold together.
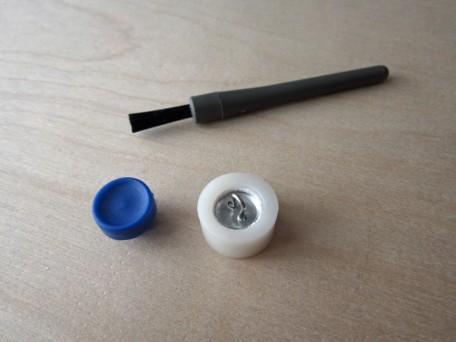
9) When you are done squeezing, then comes the moment of truth… did it work. This is how it feels to me almost every time!
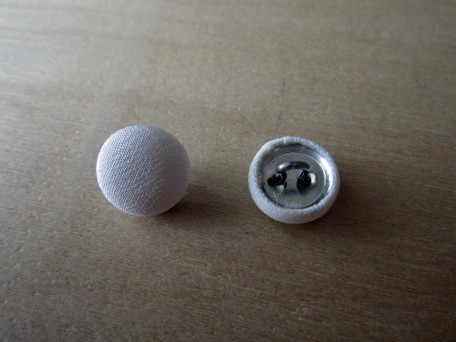
Voila! Silk covered buttons. If I was really going all out Haute couture,
I would have also covered the button bottoms.
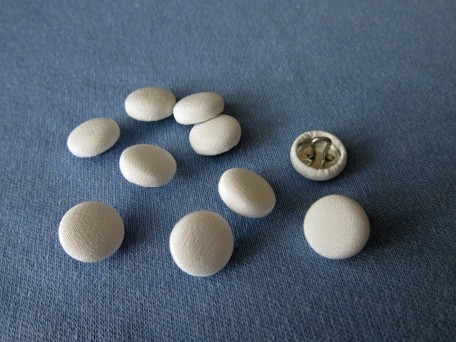
Here are all my finished buttons with several extra if one comes apart or I lose one!
Here they are sewn onto my blouse.
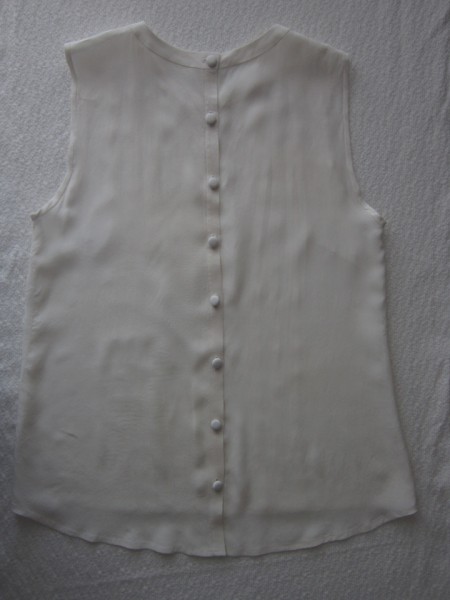
Oh yes, and I also hand bound all my button holes. They are not too bad, but with practice I know I can get better!

The front of the blouse with all the pleats…
Well I think I’ve written a monster, but… it’s all for you! With that I’m going to just keep on going because the next part is the cool part! At least I think it is!
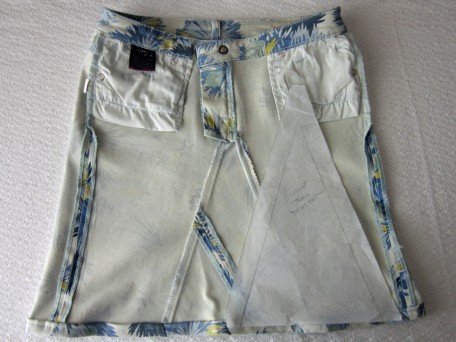
Remember the title of this post that included Vigoss Skinny Jeans Renewed. Well… I purchased a pair last year, several pair in fact. Getting skinny jeans that fit me is tricky business. In order to get them over my thighs, I have to get a slightly larger waist. On one particular occasion, I decided to buy a pair in a waist size that fit so I wouldn’t have to wear a belt. I proudly wore them shopping for the first time a few weeks later and the legs were so too tight that as I walked, they would pull down. It was awful! My coolness that day melted into a day of hell! My first thought when I got home was to hurk them in the garbage. Then I thought, maybe I can fix them to somehow fit me so I tossed them in the “later days” project pile and forgot about them! Then, last month at the American Sewing Guild garment lunch bunch group meeting, one lady who I so adore, Lottie, suggested we do a sewing challenge. Different ideas were tossed around but I think what was most important was that we try to remake, or renew something showing our creative side. I went home and pondered this while digging through the “later days” pile and there they were, those evil skinny jeans! I knew what I was going to do… I was going to make a skirt out of them.
I took out the inseams first. Then I calculated how long I wanted the skirt to be including the hem, then cut off the legs! Served them right! There was now missing fabric in the center of the front and back shaped like triangles. Using pieces of tracing paper that I laid under the edges, I drew these shapes. Then I added an inch on the two sides for my seam allowances. and used them as pattern pieces. After removing the inseams from those evil skinny legs, I played with my pattern pieces until I figured out how I wanted them to look. I decided to stay on the side of caution and only cut out the back side first because it was the larger section and I wanted room for error. It took several tries on both sides until I got the fit I wanted but it wasn’t much trouble. I think the hardest part was sewing in the tip of the triangle on the top because I was sewing through the felled seam on the jeans. It’s all experimental so you just have to go with the flow.
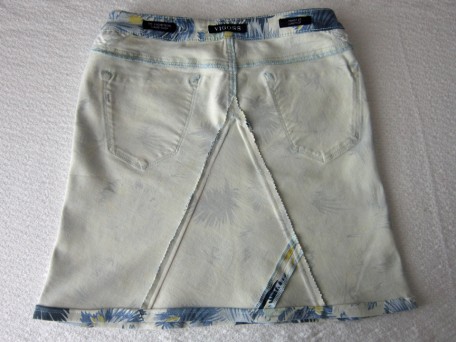
Here is my new skirt on the inside and the template.
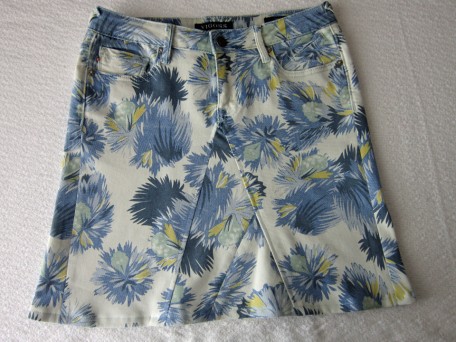
On the outside. I top-stitched along the two sides of the triangle at 1/4 inch.
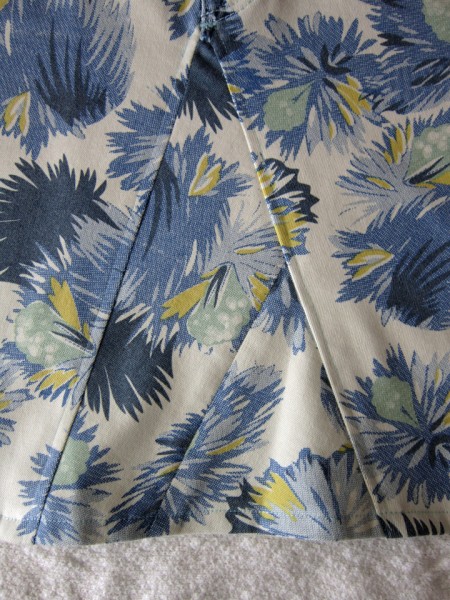
Close-up of the V
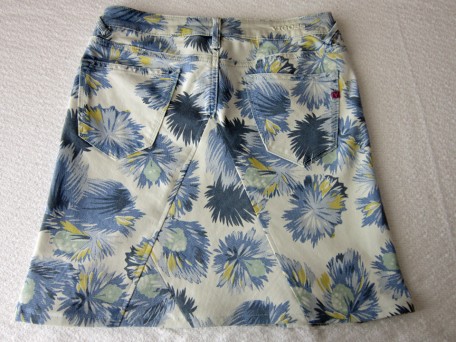
And the back on the inside…
And on the outside…
Well, there it is! My very own silk blouse and newly invented Vigoss skirt! It took me a trip around Africa to explain it all but there are so many things that I wanted to share with you and by golly I did it! Take care and will be back soon!
Salute! Jessica
Read More
Vogue 8972 Out in Yellow Daisies
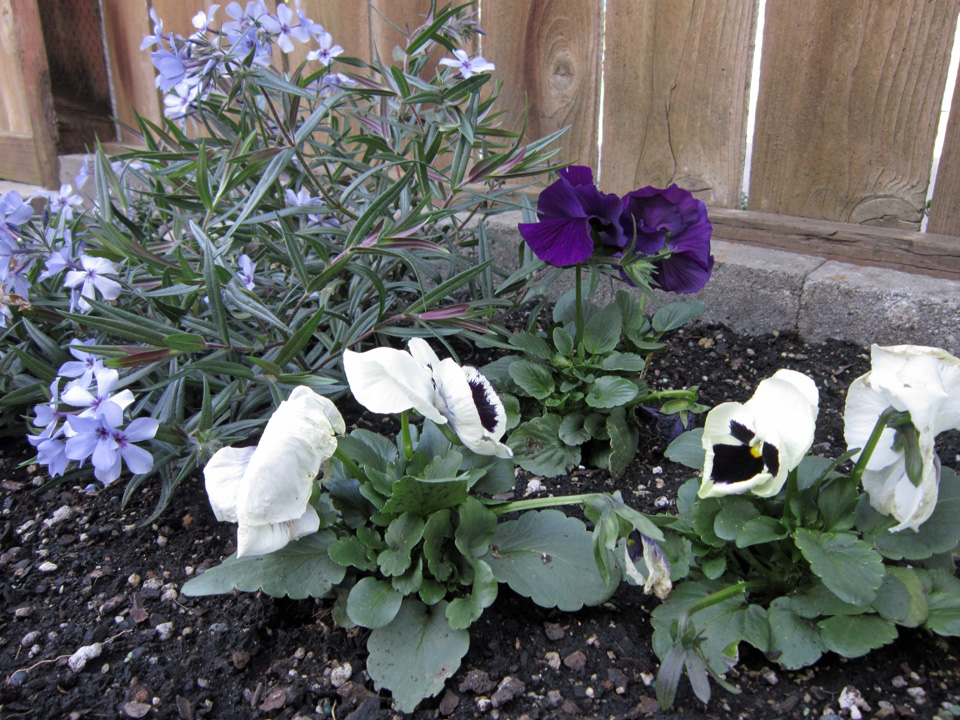
All the spring showers we’ve been having are destroying the only flowers
I’ve got to plant so far this year.
We’ve had oodles and oodles of rain in the last few weeks. It can get a little old after a while, but on a positive note, this means lots of beautiful flowers for summer… provided they survive! Rain, however, has really been the least of my worries. I must of jinxed myself or something! I should have known better than to say “look out 2014, here I come”! It seems like it’s been one thing after another. The latest attack came about three weeks ago when I came down with a creeping crud that has made me sicker than I have felt in a number of years! Well… on the bright side, the sun is suppose to shine all this week… so maybe everything is going to start coming up daisies? My fingers are crossed and since we are talking about daisies, I would like to share with you my latest sewing project(s).
Yep, I’ve somehow managed to get some sewing time in during this miserable plague, in between the fevers, the fiery sore throat and major coughing fits. I’m probably not a trooper, but rather an obsessed nut case when it comes to sewing! Fortunately I was stocked up on sewing supplies I needed since I had visited my local JoAnn fabric store just before this damn crap virus hit me! On that particular day, it was pouring down raining, as usual but it felt like the sun had started shining when I stumbled upon this fabric… it was beautiful white daisies on a background of sunny yellow, reversible no less and I knew that I just had to have it.
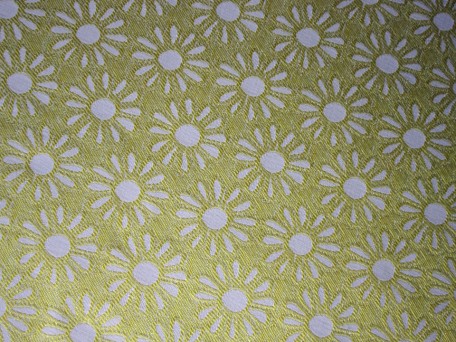
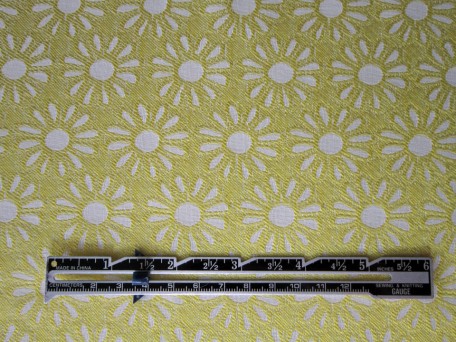
The daisies are about 1 1/4 inches in size.
The really cool thing though was that this fabric looked like maybe it was what was used to make this Vogue 8972 dress.
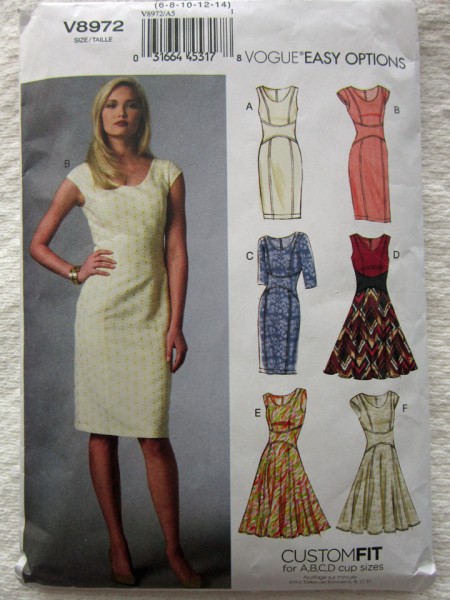
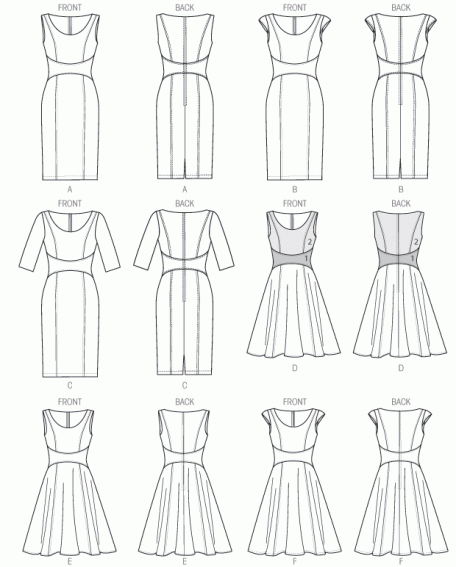
There are various options in making this dress. Princess seam sheath style or flared style, no sleeves, little sleeves or 3/4 sleeves and then there is a contrast yoke.
I loved the sheath style shown on the envelope but I’ve always had a fondness for flare because they are so comfortable and allow easy sitting! I consulted my fashionista assistant, my daughter of course, and after much discussion, I decided to make dress B (sheath style) and dress D/E (flared with contrast). And… since my sunshine daisy fabric was reversible, I would make both dresses out of it! This meant another fabric run to Jo Ann’s and fortunately my son, who grew up with a sewing mother, had no fear with doing this favor for me, especially given that I was quarantined!
The pattern instructions are very easy to follow and the design made assembling it quite easy. Admittedly though, I did swear a few times when putting in the little sleeves. Trying to match things up was a bit tricky but eventually I had it under control.
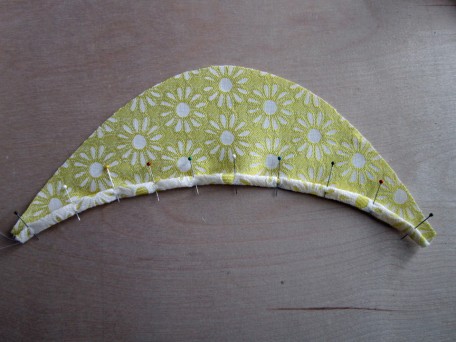
Putting the bodice together is a breeze. There is the front with left and right side fronts that are then sewn to a yoke. The pictures below are dress B on the inside.
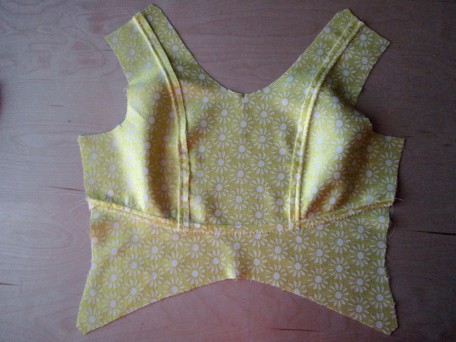
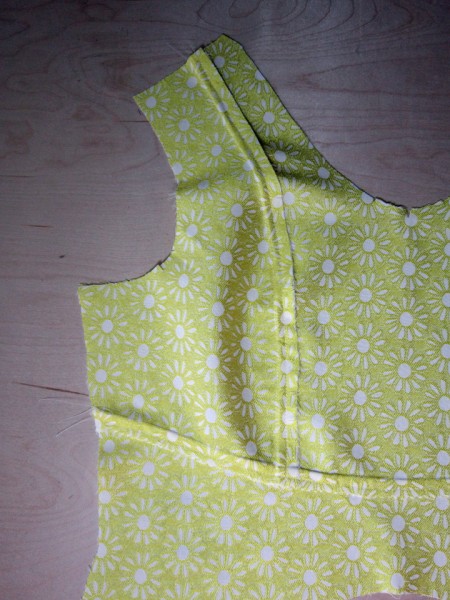
The back is attached to a yoke like the front, only there are left and right sides, later connected by a zipper. The princess seam skirt attaches to the lower edge of the front and back yokes. All the seams, except for the back and sides, are pressed towards center and then edge-stitched on the outside along the front and back seams.
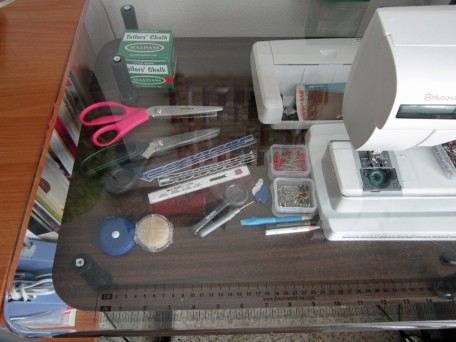
A fabulous technique incorporated into this Vogue pattern is that in the assembling process, you are instructed to install the zipper before sewing the back to the front. In this way, the back section gets to remain flat while you are sewing in the zipper. This is a very important thing in any sewing project you do… that is, being able to keep whatever pieces you are sewing, flat in the process. And of course it also helps if you are working on a flat surface rather than letting the fabric hang over the arm of the sewing machine. Hence, sewing machine tables, or acrylic sewing machine extensions like the one I have.
View A
ViewB
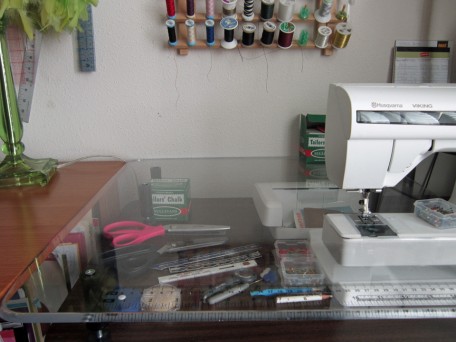
There are little legs under the acrylic extension that can be adjusted so that the table can be aligned to the arm of the sewing machine. As you can see in the pictures above, I store various tools that I can quickly grab when I’m sewing. There is a table, a computer table in fact, to the left side of my acrylic extension, creating a continuous flat surface.
I had mentioned earlier that the sleeves challenged me a bit, but this was during the insetting of them. Before doing this, things went super. You first have to make a narrow hem along the bottom of the sleeves. I have developed my own tried and true method for a narrow hem and though it uses extra thread, I think it’s worth it because I avoid headaches later.
The pattern instructions call for a 5/8 inch narrow hem so
1) I basted a 5/8 inch seam along the bottom of the sleeve.
2) Then pressed up the fabric along the basting. I pressed carefully so my 5/8 inch hem width was equal along the entire edge.
3) Next, I turned under the edge so that it touched the inside crease of the 5/8 inch fold and pinned it in place all along the hem fold. I love pins and I use them a lot!
4) With the side that I pinned, facing up, I stitched a 1/4 inch seam along the edge. *Note: If I am worried about how it will look on the outside, I will baste this first a smidge in from where the actual seam will go, remove the pins, and then turn the piece over to the right side and sew in my 1/4 inch seam along the edge, then remove basting. Extra work, but in the end, it always turns out nice!
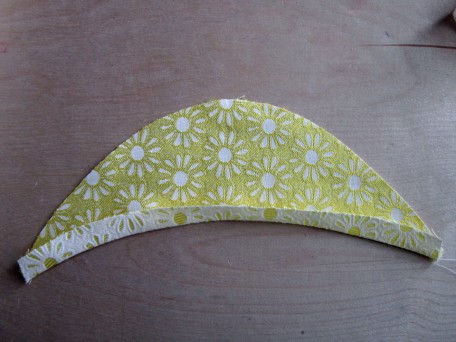
Underside and outside of sleeve for Dress B Option …
As I said early, insetting the sleeves tripped me up a little. They have to fit at the usual marked spots on the armholes while also matching the lining that you have already sewn in and understitched via the neck and lower armholes. I think the understitch step was the pest! But, my fabric was also sort of stretchy which may have also attributed to some of the problem. Nonetheless, I weathered the storm and figured it out.
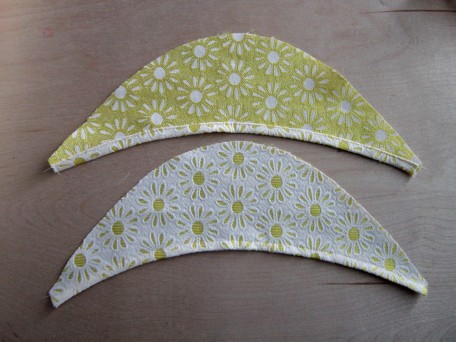
My second dress, option D/E turned out gorgeously lovely and and to think I was worried about it being a little heavy! My beloved sunshine daisy fabric is a denim and I was concerned when I started. But I have to admit, I am almost more partial to it than the option B dress!
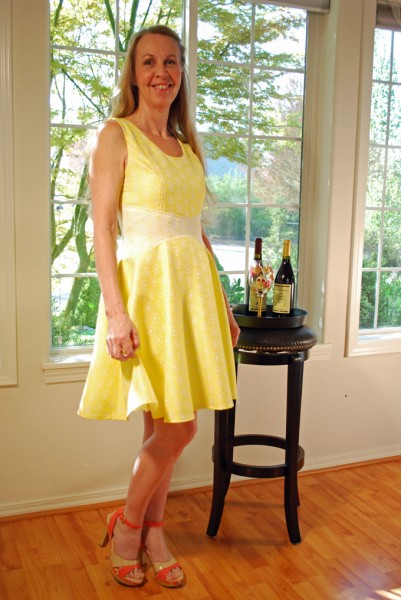
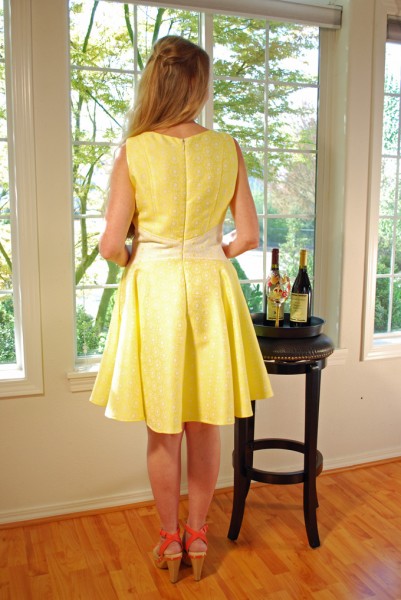
So here are the twins!
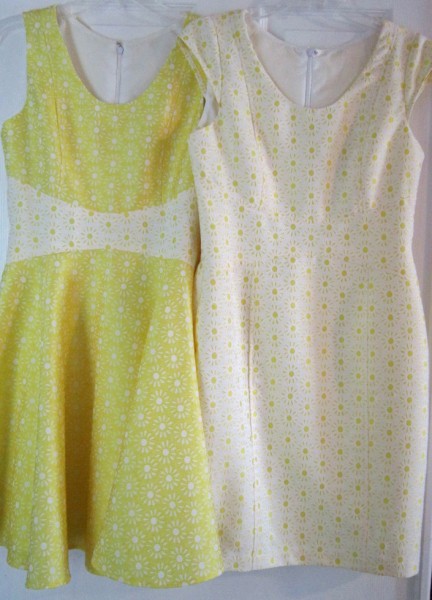
And here they are with me wearing them.
Introducing Vogue 8972 Dress Option B

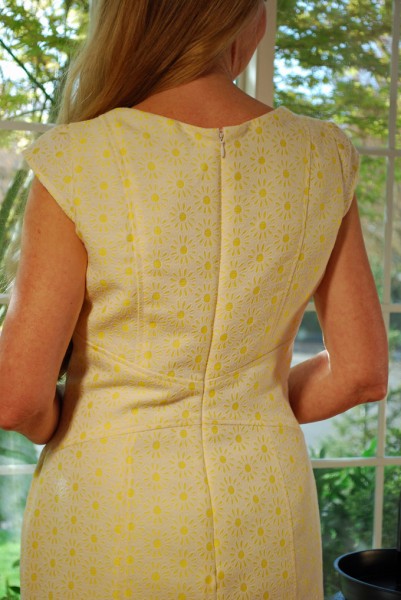
The back of the skirt has a slit at the hemline.
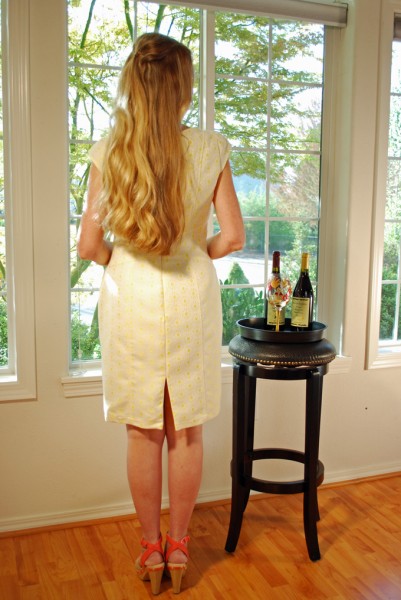
Here is a close up of the back so you can see the yoke. I think I was twisting so there is a wrinkle on the left side but it’s just due to the twist! You may note that I use invisible zippers. I really love the finished look!
Then… this is Vogue 8972 Dress Option D/E
The back of course! And there’s that damn twist thing going on again!
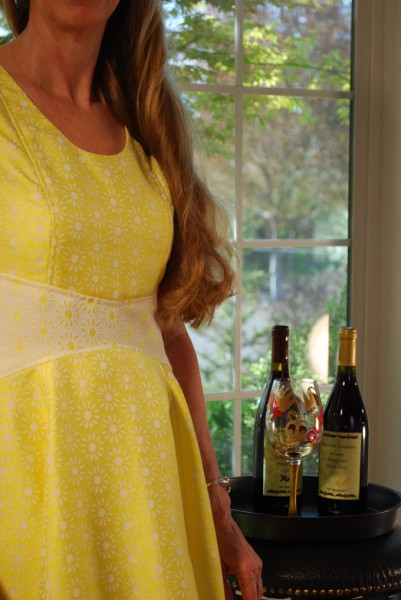
A close-up of the yoke in front. I used the underside of the fabric for the main part of this dress but cut the yoke out on the right side. Of course, you might say all of this in reverse because it is… reversible fabric!
And one more cuz !

I’m pretty sure I’m on the mend at this point in time. The doctor said that this goofy stuff hangs on, sometimes for a month! EWWWW… YUCK! Well I’ve about logged in my time and looking forward to this weekend. It’s gonna be a day with the girls… and… Curtis Salgado again! Thinking about wearing one of my new dresses, unless it starts raining in which case it’s my good old stand by… leather! Ooh la la!
Salute! Jessica
Read MoreAbout Me
 Portland, Oregon,
 United States
Hi there! I’m Jessica Brandon and I am a clothes-loving sewing artist. When I am not sewing, blogging or shopping for shoes for my creations, I fill in the remainder of my days spending time with my children, playing ice hockey, gardening and making and drinking wine!


Up Coming Projects:
Vogue 1426

Vogue 7881

McCall's 7089

Vogue 8997

Vogue 1431

Vogue 9006

Vogue 8991
