


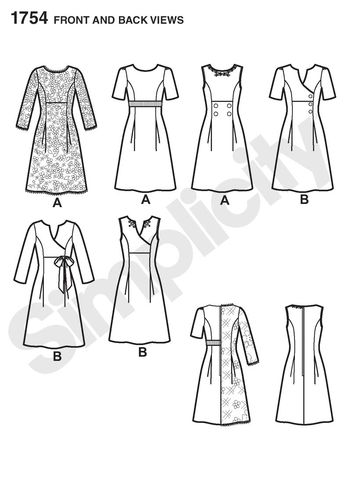
To start this party, I think I should first say that 2015 was sort of a tricky year for me in oh so many ways. Honestly, I think it left me drained as we rolled into 2016. My desire to sew took a hit but because I love to create new things to wear…well, it’s my passion so I just had to transition back into the sewing mood. I’m happy to say…I’m back on track! And in an attempt to keep things simple, I dug out an old pattern that caught my interest, but as I said, it was old, tucked away in a big bucket of patterns and unfortunately no longer in print though I found it still available through Joann Fabric on-line. It’s Simplicity 1754 with an interesting style.

I got creative and went for option B, the little green drawing of it in the bottom right corner. Below is the pattern instruction diagrams.
To make this dress, I had to go on a hunt for fabric. Is it just me or is there a lot of nothing available to us non-commercial sewers?! I combed through some of my local fabric stores, and had almost given up when I stumbled across this.
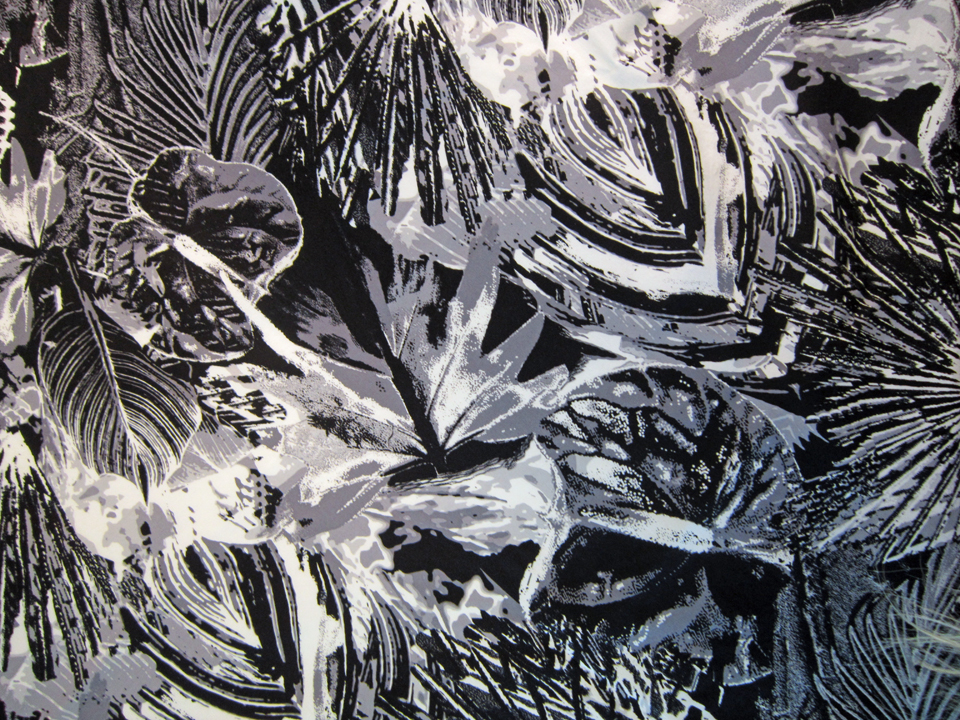
It is cotton with spandex so has a wee bit of stretch. It is soft and was very nice to sew but it does make a rumpling sound that kind of annoys me!
I have no idea why…but the lining queen forces within just won’t let me make something with visible raw seams. It would be easier to not line, but for whatever reason, my brain thinks that a garment feels so much better to wear and is more special if it’s lined! I’ve decided to not fight it, it’s truly easier that way! Naturally the pattern construction did not provide for this pin head notion so I had to be very creative. To top it off, I also decided that I wanted to use piping and of course there were no instructions for that either.
To get the job done, I relied on this…a fabulous handy dandy tool to have for sewing piping…a piping foot!
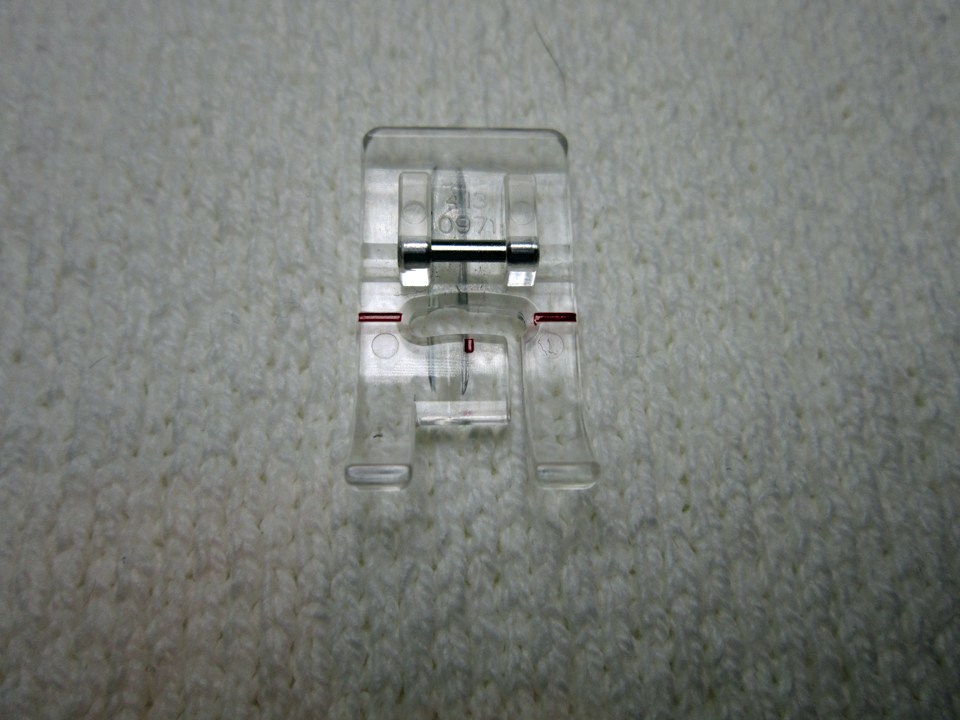
1. It took some extra time, but I first positioned the piping under my piping foot and using my 5/8″ guide on my machine, basted the piping in place, however, I moved my needle to a more narrow stitch, maybe 1/2″ because I didn’t want my final seam to overlap this basting seam because the threads get tangled and it’s sometimes difficult to pull the basted seams out.
2. I then sewed together the two fabric pieces with the piping sandwiched between, again using my piping foot and sewing the usual 5/8″ seam. I took my time and did this slowly.
3. After checking to be sure it all looked good, I removed all the basting and then clipped the piping to the seam along all the curves and sharp corners.
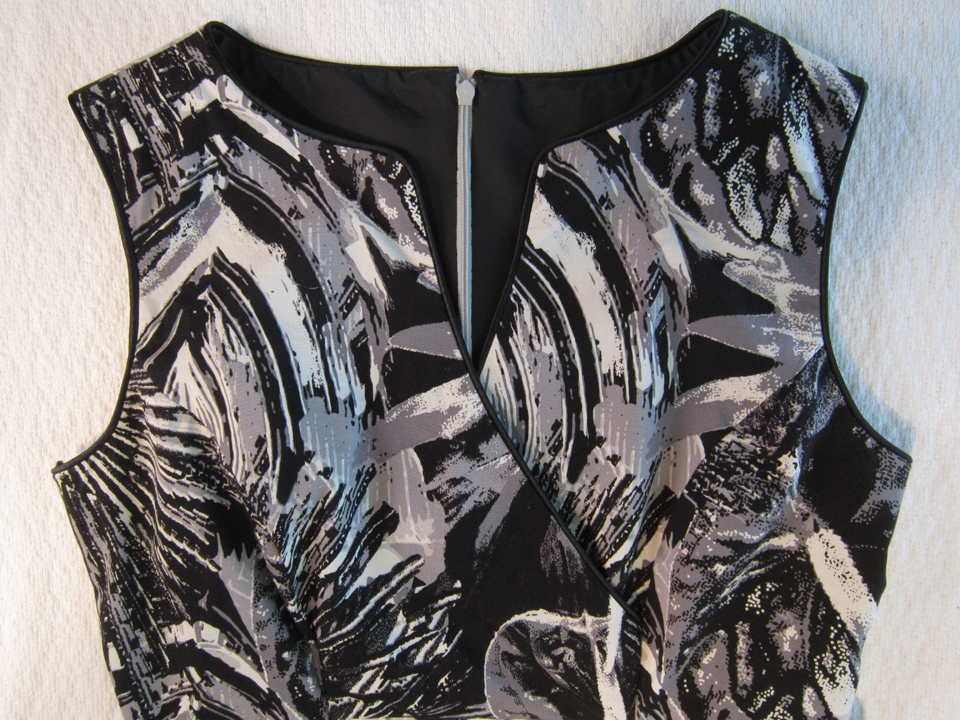
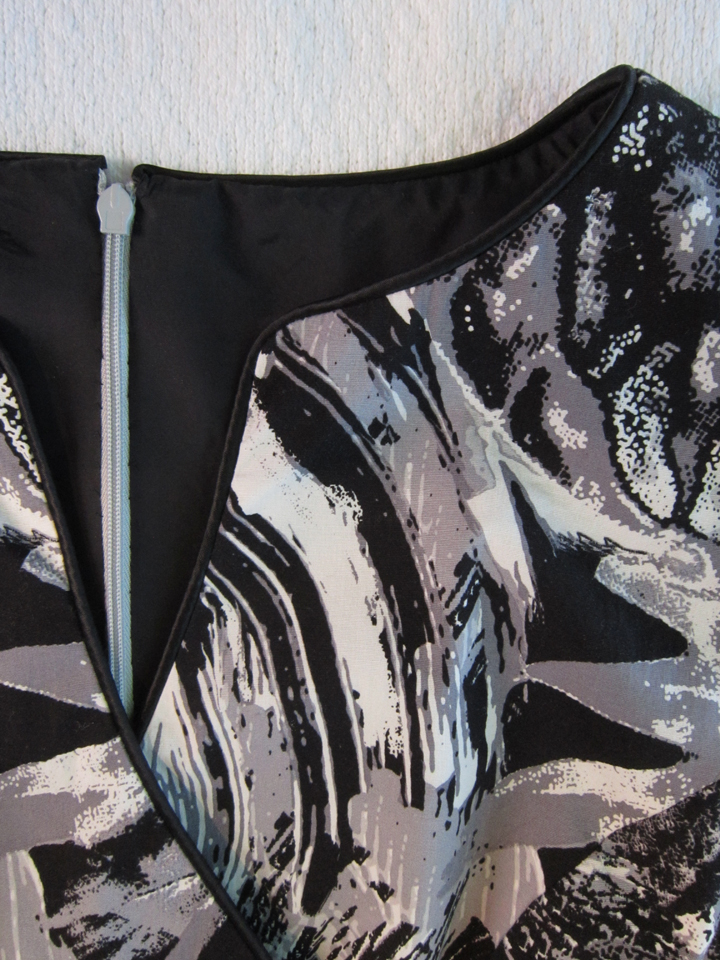
Dare I say…I finally learned how to apply piping properly to clothing. My corners and edges at the back of the neck were a success!
I didn’t take any pictures of the construction process because what I was doing would have made no sense in pictures. I had to throw the instructions out the window and totally think it through like it was my own design. It was slightly unnerving at first but once I sold myself on the idea that this was no different than when I make my own designed garments, I let go of any fear and just figured it out! I think that’s why I had fun…it was like not having to worry about coloring in the lines!
This is the front bodice of the dress. I’m thinking of adding buttons diagonally along the right front but it has to be just the right ones! HA!
This is a close up of the neck with the piping.
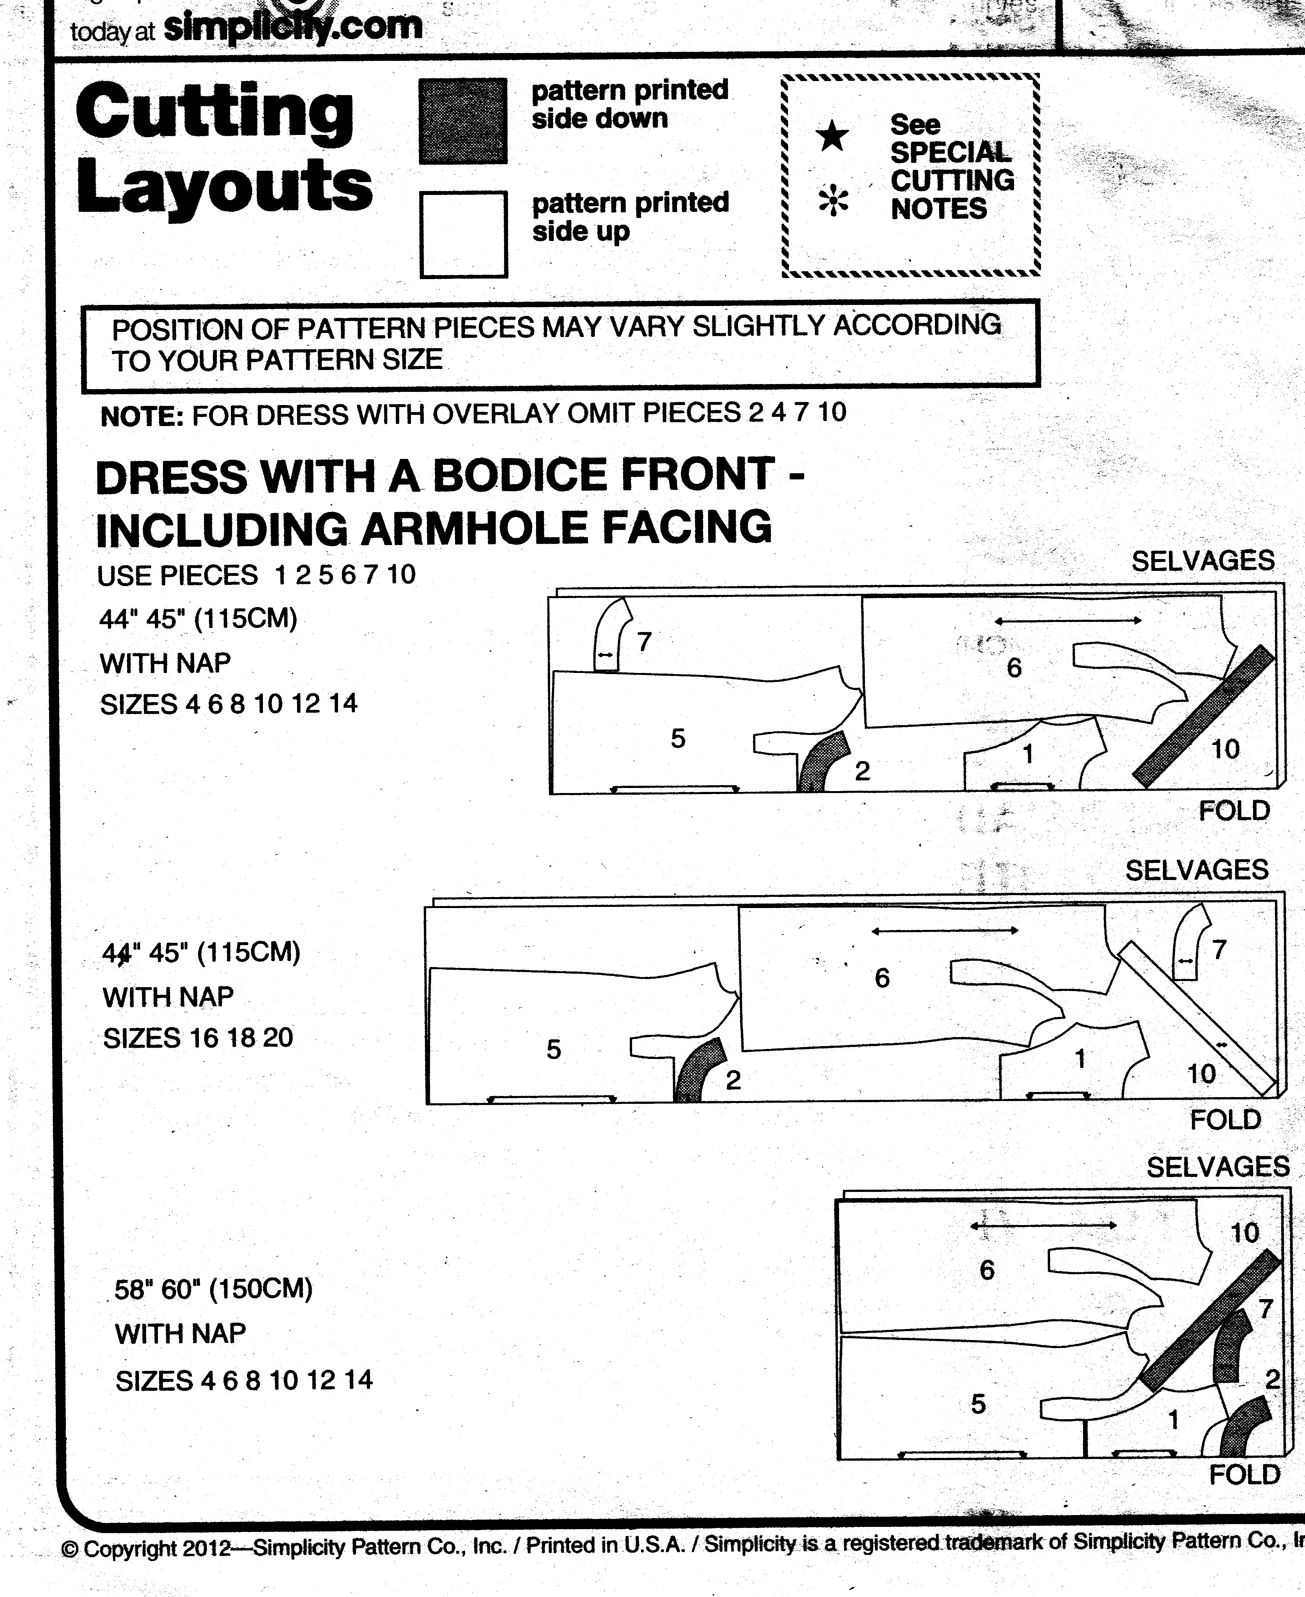
The dress is designed like a sheath but the front and back cut fabric pieces are split just below the waist. When sewn closed, the seam is a princess line in the bodice of the front and back. Here is a picture of the fabric layout to show the pattern pieces. At the bottom of the split, a pleat is created when sewing the two sides together.
I lined just the bodice and zigzagged the seam edges below it. This is what the bodice looks like inside.
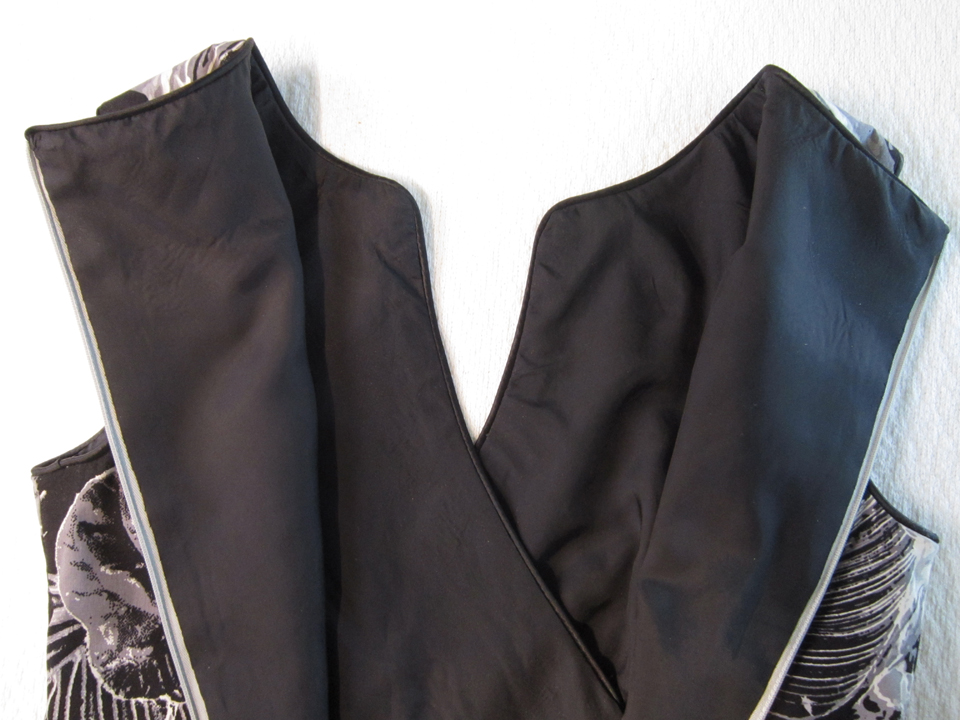
A second picture to illustrate that just the bodice has lining. I should mention that I only tacked the lining along the front bodice seam and at the center back where the zipper is placed. I finished the remaining untacked areas with a silk thread hem. I love using silk thread!
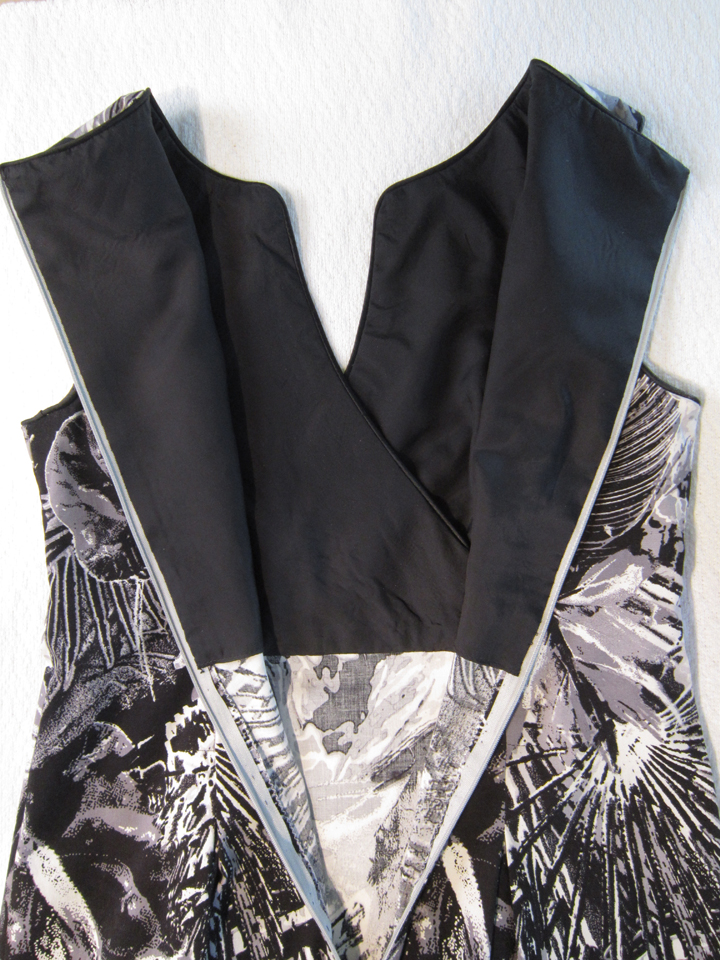
The back princess seams start just below the waist line area and are kind of hard to see because of the fabric design, but they end at about the middle of the back of the armhole.

Okay…yes, I’m going to model it. Here it is!

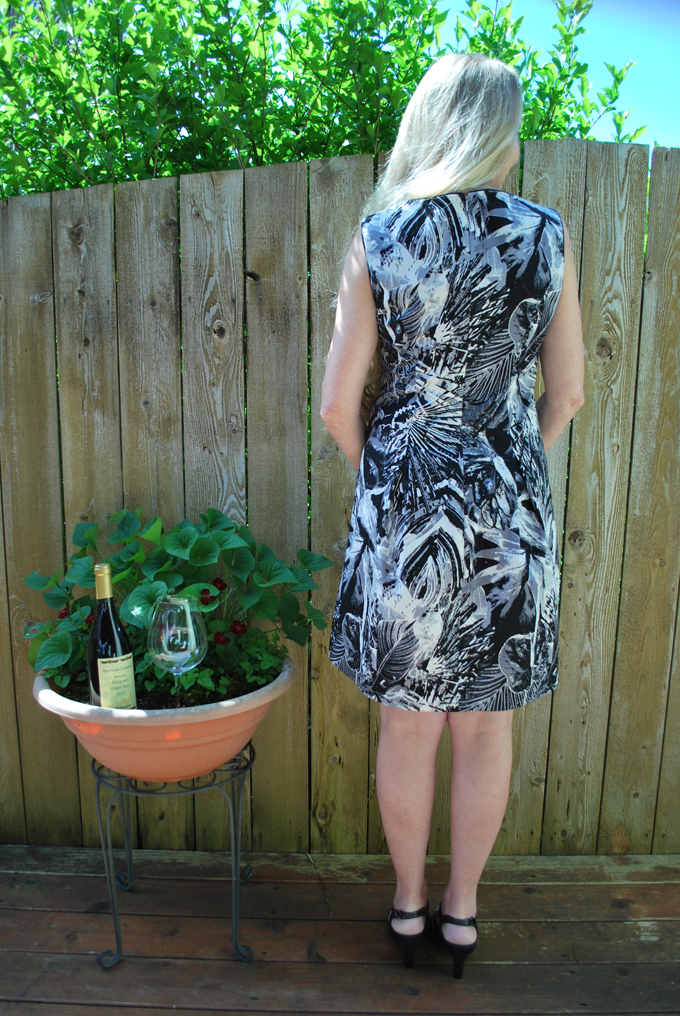
The back…
It’s going to be a nice day!

Just to much fun!

So there you have it…and thank goodness I’m back on track. I’ve really missed my sewing time; I find myself feeling more balanced in everything else I do when I’ve spent some time with my creative side! And on the subject of sewing…news flash… I just received my package from Mood Fabric, it’s arrived! Enough fabric for two different… yep… dress projects and I may even have a little extra left for several cute little summer tops! Of course, on the back burner has been the pants saga which I’m getting ready to return to! Stay tuned for that adventure!
Happy Mother’s Day to all the moms that visit Sewlikeinparis!
À la vôtre! Jessica
About Me
 Portland, Oregon,
 United States
Hi there! I’m Jessica Brandon and I am a clothes-loving sewing artist. When I am not sewing, blogging or shopping for shoes for my creations, I fill in the remainder of my days spending time with my children, playing ice hockey, gardening and making and drinking wine!


Up Coming Projects:
Vogue 1426

Vogue 7881

McCall's 7089

Vogue 8997

Vogue 1431

Vogue 9006

Vogue 8991
