


This picture illustrates clearly how I feel as I start my pants challenge!
Happy New Year! We’ve just pushed off from the starting line of 2015 and personally, I’ve got my fingers crossed that this year is gonna be the best ever yet!
With regards to years, while writing this, I’ve realized I just passed my 2nd anniversary of starting up Sewlikeinparis. It’s hard to believe that I’ve been banging away on my keyboard for that long! I remember when I started… I was so scared. It felt like I was jumping off a high dive into a pool with no clothes on in front of a grandstand of spectators, worrying I would belly flop! And I felt bombarded by all the warnings about the dangers of the internet! On occasion I found myself entertaining the thought, “what if there are internet boogie men who try to steal my personal information and expose me in Facebook, Twitter, Spokeo or some other sensitive information vacuum sucker up-er! Well I’m over that now! It’s been an awesome experience that I’ve truly enjoyed… and I’m certainly not done yet!

I’ve shared many things through my posts, feelings of success, frustrations accompanied by rants, a few disasters, songs, jokes and toasts, but I’m not sure if I’ve shared enough epic fails! Believe me, I’ve had my share, especially when it comes to making “PANTS”! I know there are those that get to enjoy the sweet taste of success from accomplishing this great feat, I’ve met some of them and they say it’s easy. I call BULL. I think making pants is rocket science. I’m sure of it! I’ve lost track of the number of muslins I’ve made, say…7, maybe 10, nah… more like 15! I’m actually not sure – I quit counting after 6. I’ve even sewn from good fabric 4 pair of trousers and 2 pair of jeans, and all ended up in the trash! Certainly sounds like an “epic fail” to me. But I’m tired of failures and ready for success so I’m challenging myself to learn how to make pants that fit!

In order to meet this new challenge, I decided to start from the basics; meaning, no fitted jeans, no low-rise waist, no skinny legs, but rather, plain classic women’s trousers. And I’m not going to draft my own… I’ll save that for later. I’m going to take baby steps on this project, meaning that I’m not going to be in a hurry and the perfect pattern for this, I think, is Vogue 7881.

Claire Shaeffer’s Vogue 7881
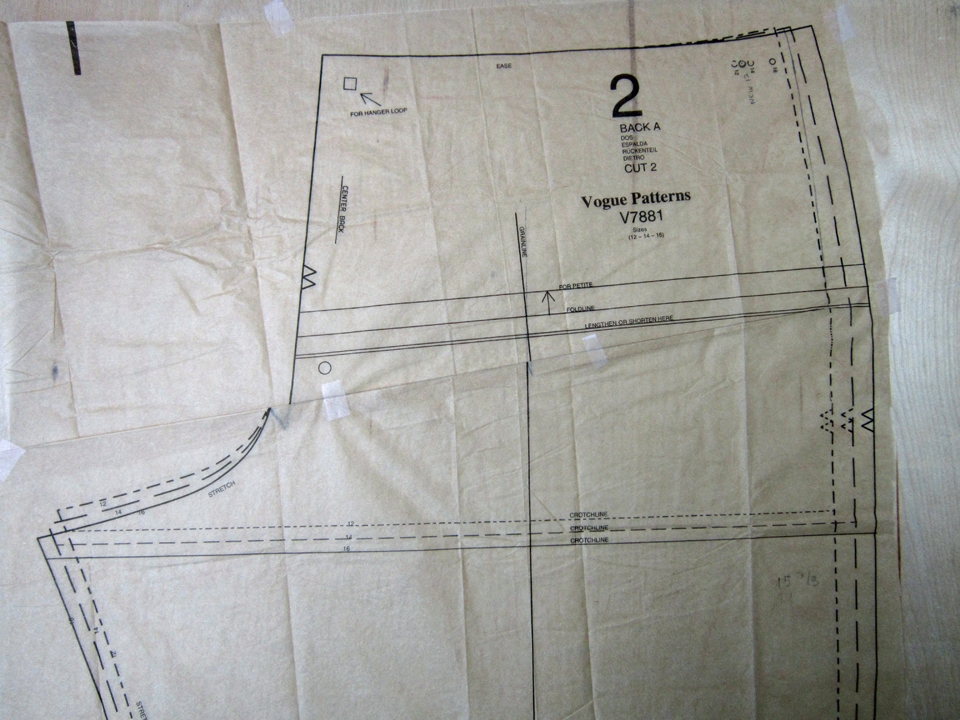
These pants are straight-legged with a contour yoke waistband. They can be made as dart-less (option A) or with darts (option B). The pattern is part of the Claire Shaeffer Couture Collection so couture techniques and construction are given for option A and stream-lined instructions for option B for quality ready-to-wear. I know I said baby steps… but to me, this is baby steps. Yes, there is lots of hand sewing involved, specifically, thread tracing the major construction lines but I see this as really digging in, one baby step at a time. All the thread tracings will show me what is going on when I’m trying to fit the pants to my butt! Yes, the butt! This is where all the action is happening… all the unwanted wrinkles, or pooling bagginess, or uncomfortable tightness! Getting pants to fit my butt is the maker or breaker here!

I have a friend who studied pattern design at Parsons in New York and she sat with me this last week and explained how the “pitch” of the curve of the back center seam affects the fit of a pair of pants. Hopefully I’ve understood it well enough to explain. The curve of the back center seam of a (back) pattern piece for a pair of pants is at a “pitch” that matches the shape of the model’s derriere. Since no two butt shapes are alike, the pitch of the curve will vary. Darts, go figure… are what is used to adjust the curve and change the pitch. With every pair of pants I’ve made, it’s always the same; there’s a pooling of fabric to the right and left side of the center back seam under my butt cheeks! This I’ve learned, may be a pitch of the curve problem. I guess I’ll just fly by the pitch of my pants and see what happens!
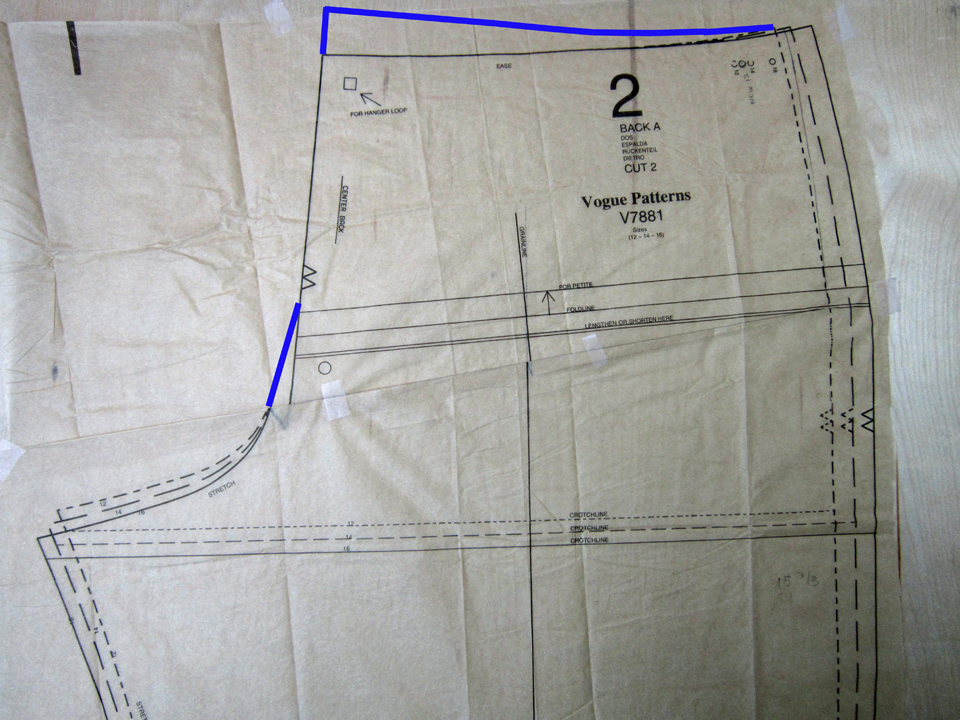
Below is a picture of my pattern piece with a fold (dart) at the center back seam. It’s 1″ inch that decreases to nothing at the side seam. I don’t want to change the side seam because it has to match the front side seam. My friend warned me that this dart may cause some tightness a little up from it’s location and if so, I will need to add back in some of what I just took out! It’s all about the dart!
Because I’ve taken out 1″ inch on the back center seam length, I need to add that 1′ inch back to the top of the back center seam, and from that point re-draw the waist ending at the top of the original side seam. See picture below. I will also need to re-draw the crotch area seam line where the fold (dart) creates a discrepancy.
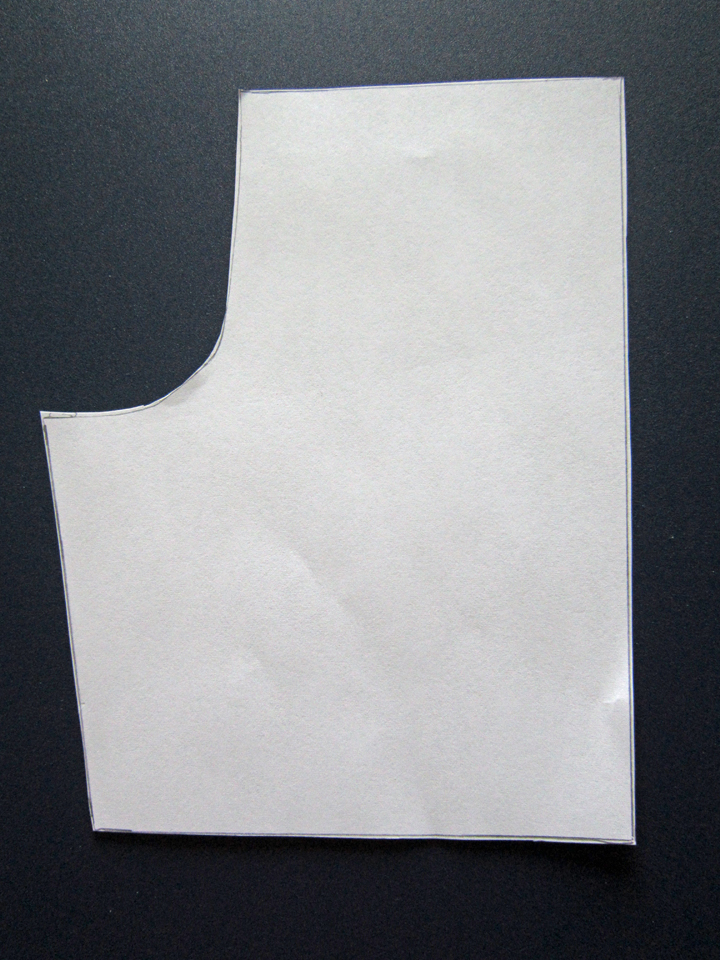
Below are some miniature pants back examples to provide visuals of what happens to the pitch of the curve on the back center seam when a dart is added.
Picture #1: The pants back pattern piece before doing anything.
Picture 2: I have drawn lines on the example to show how the fold (dart) is created that will change the pitch of the curve.

**Note: The lines I drew on my actual pattern piece were not arbitrary. I’ll explain:
At the back center seam, I started the bottom line at the point where the bagging is most problematic and drew it diagonally upwards to the side seam at the point where I’ve found through fitting with muslins that it seems to start. The point is about 4 to 5 inches down from the top of the side seam, including the waistband.
The top line I started 1 ” above the bottom one at the back center seam, ending at the same side seam point of the bottom line.
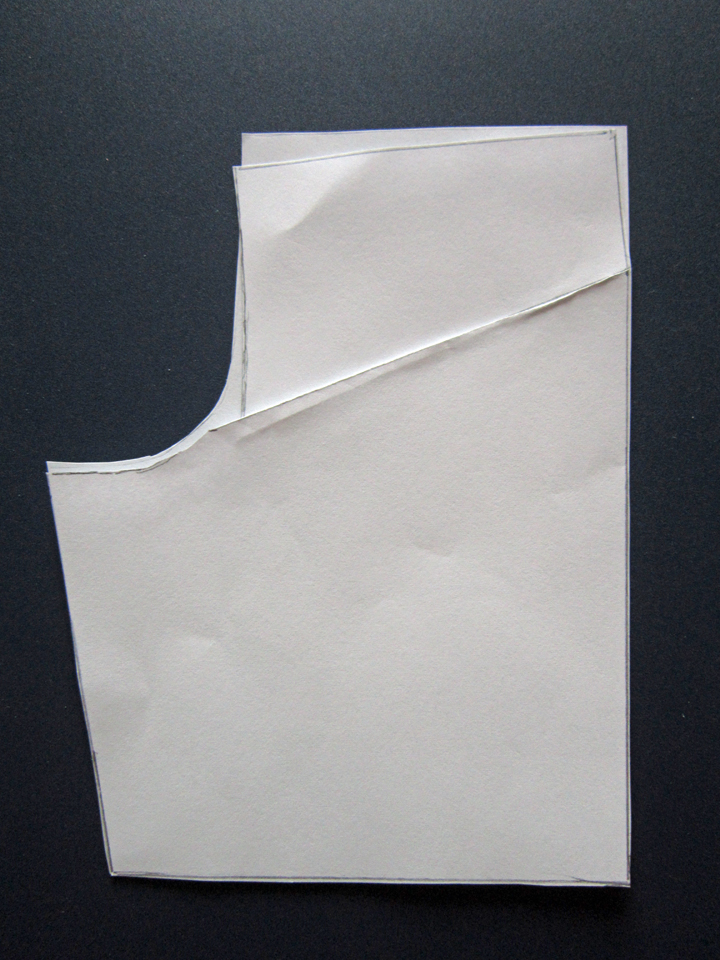
Picture #3: I’ve folded the bottom line up to the top line. Now the top of the back center seam has dropped lower and so the amount folded out will have to be added back to the top and a segment of the curve will need to be filled in to correct the discrepancy.
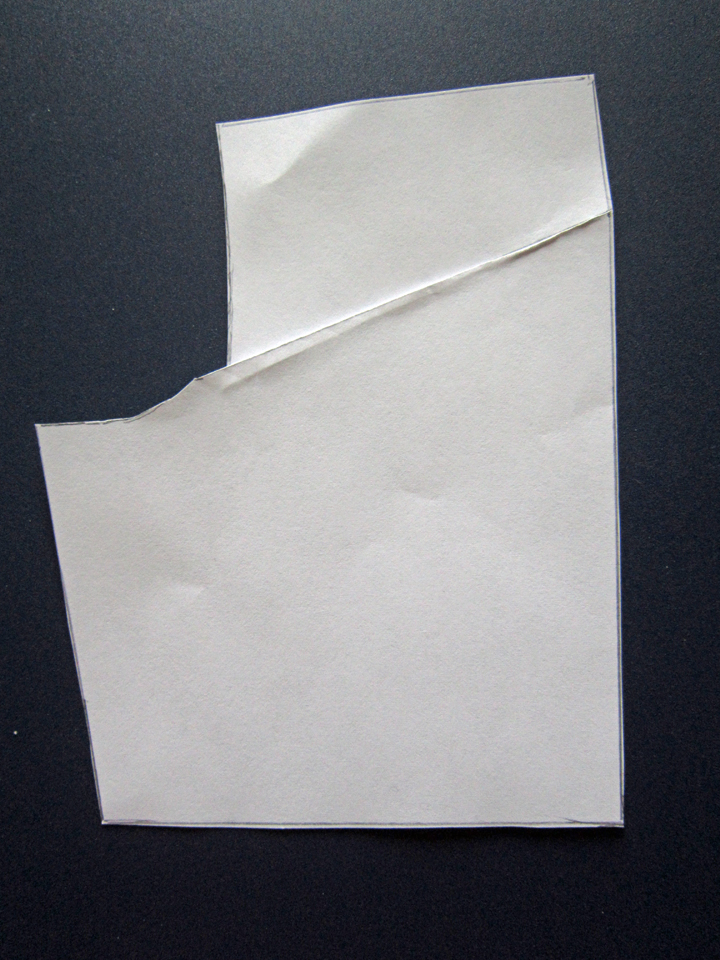
Picture #4: I have laid the folded pant back on the top of the original one that has not been changed which gives a visual of what is happening with the pitch of the back center curve. This change does not change the width or circumference of the back of the pants, just shifts the curve in the seat area. This adjustment will hopefully clear up the bagginess I get in the back. It will be with the fitting of my muslin when I will know for sure!
**Note that because my fold in the miniature example is roughly 1/4″ inch instead of 1″ inch, the change is not as drastic.
After I completed the adjustment I just discussed, I then traced my back pattern piece using tracing paper I purchased by the roll from Nancy’s Notions, and also drew in the corrections resulting from the adjustment. I went ahead and traced the front pattern and waistband pieces as well, preserving them in their original form in the event this fails and I have to start over!
I think I’ve reached a stopping point for this post but no worries… I’ll be back with Part 2 after I’ve met with my friend who is going to help me with my fitting! It will either be on to making my fabulous pants or back to the drawing board!
Salut! Jessica
About Me
 Portland, Oregon,
 United States
Hi there! I’m Jessica Brandon and I am a clothes-loving sewing artist. When I am not sewing, blogging or shopping for shoes for my creations, I fill in the remainder of my days spending time with my children, playing ice hockey, gardening and making and drinking wine!


Up Coming Projects:
Vogue 1426

Vogue 7881
McCall's 7089

Vogue 8997

Vogue 1431

Vogue 9006

Vogue 8991
