

Wolf Dress Form Draping
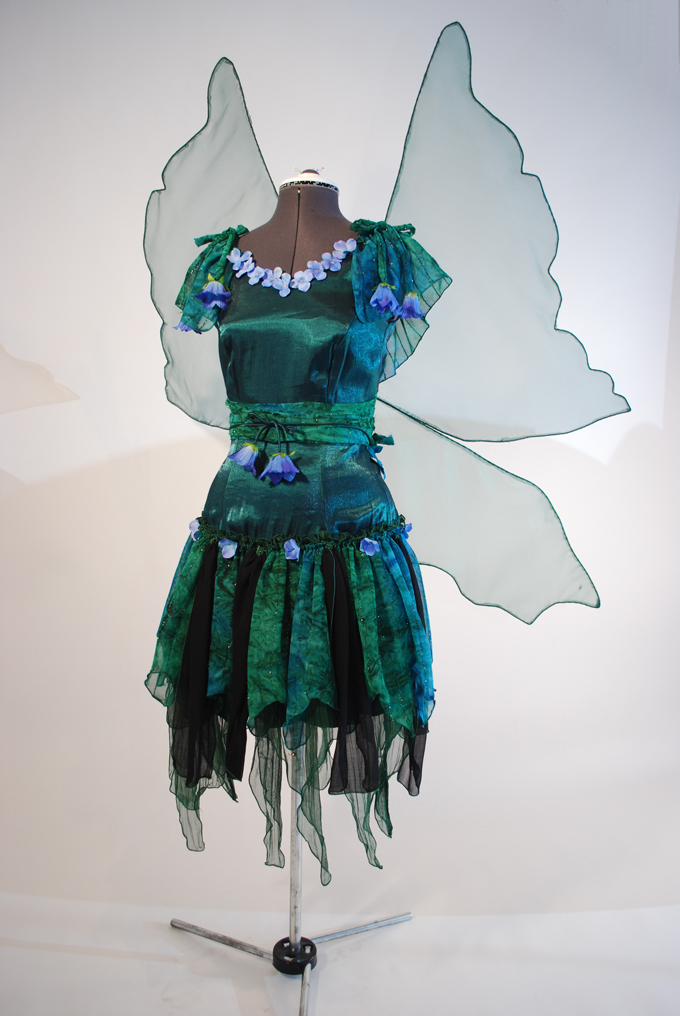
This is Elizabeth. Yes, I am referring to my dress form in the picture above. She is not vintage, but she is a bit aged, about 17 years to be exact. We have collaborated together for many many projects over the years, never fighting or arguing… and she has patiently stood for hours while I repeatedly shove pins in her, never complaining. I know she would be crushed if she knew I have been working with another dress form! The dress form is a size 8, has long slender legs and her name is “Wolfee” (my pet name for her).
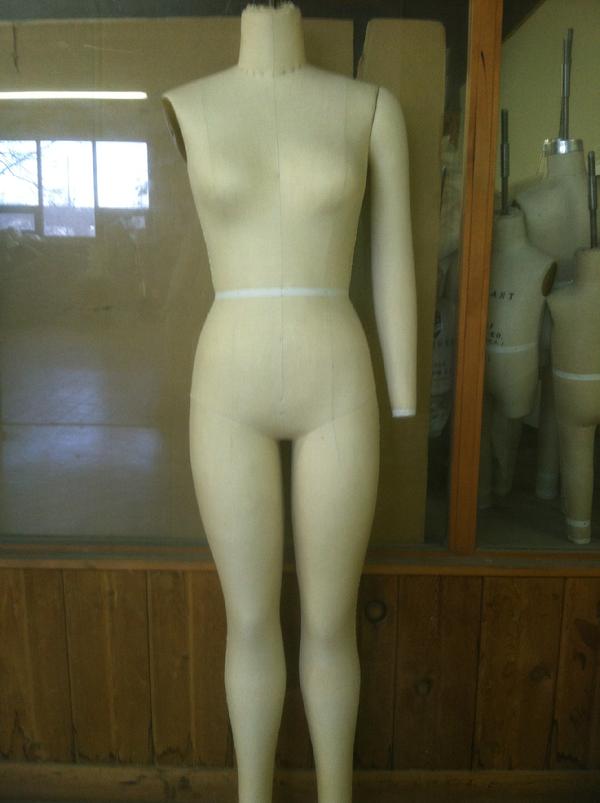 This photo is from Wolf Form Company, Inc. web site.
“Wolfee” and I have been working together in my draping classes. She was assigned to me the beginning of the first class and we will be working together till the end. I have learned that Wolfee’s kind is considered the industry standard for dress forms, meaning of course that they are considered the best. I can buy a sister of Wolfee for $1600 from the Wolf Form Company, Inc. , or the traditional straight skirt dress form for $825 (below).
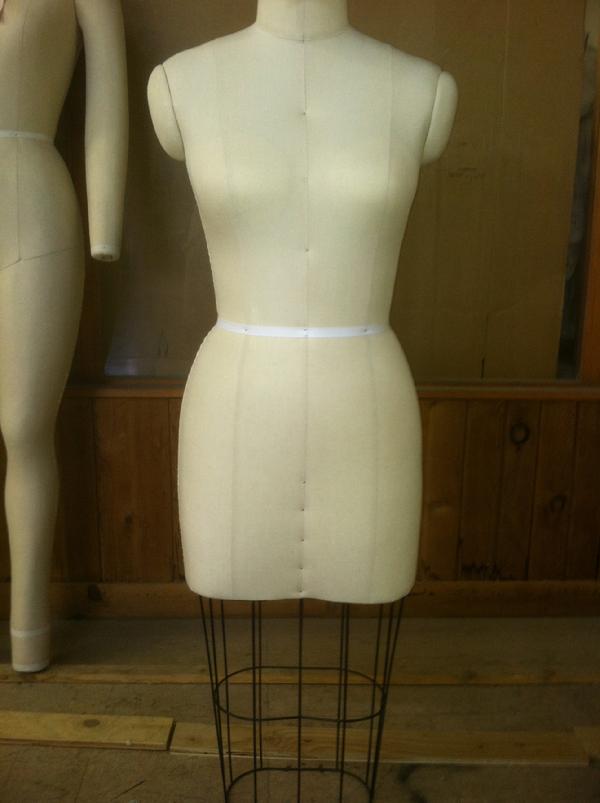 This photo is from Wolf Form Company, Inc. web site.
Yes, they are expensive and so unfortunately I may never have the luxury to own one but you just never know! See…I told you Elizabeth would be really upset if she knew.
So how are my draping classes going? Well, up to this point they have been incredible! We have draped a bodice, skirt, circle skirt and a princess seam dress. And… as usual, I have managed to get myself into a challenge project. I am not sure how this exactly happens. My best explanation is that I am sort of a visionary that can’t keep my imaginative ideas quietly to myself! I certainly can’t turn down a challenge; sometimes I think they are the reason for my existence. The challenge… making a dress for myself out of the princess seam dress that I draped and wearing it to my next draping class. Mind you the draping classes were split into two sessions of classes, Draping 101 and Draping 401 with a 3 week interval between…thank goodness for the 3 week interval! The 401 starts in four days from now so yes, I have been working hard on making the dress!
Okay, so last Tuesday my daughter and I hit one of my favorite fabric stores in search of challenge dress fabric and guess what? Oh yes, we found fabric for my dress but Calley found fabric for hers too, specifically the McCall’s 6561 pattern with the 10 piece bodice and the tons of gathering.! Yep – I am going to be doing more sewing for my beloved pencil!
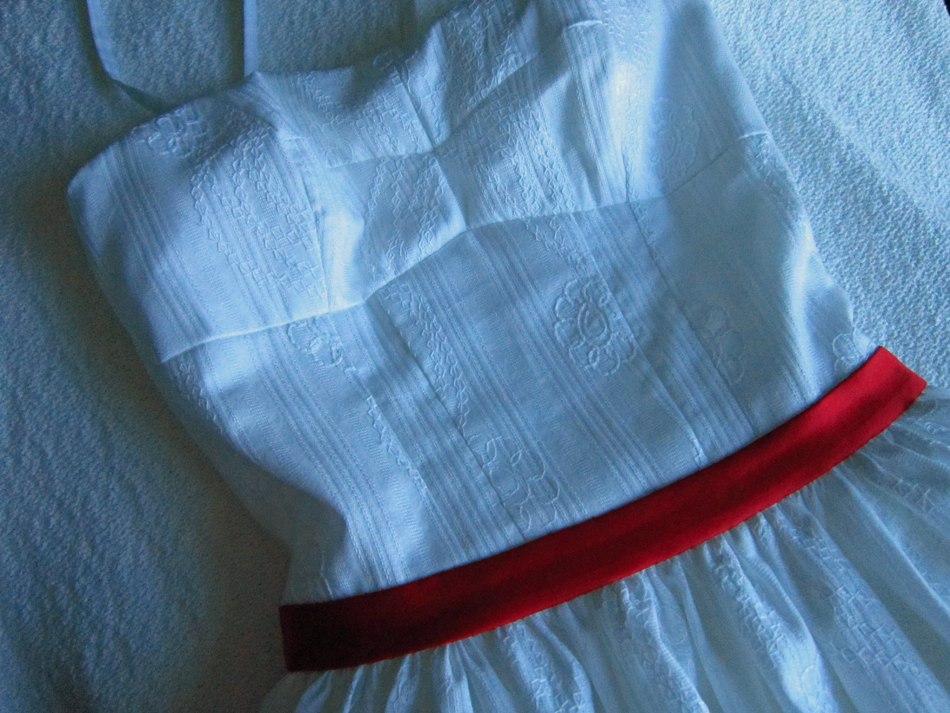
This is the fabric and trim for my princess seamed summer dress.
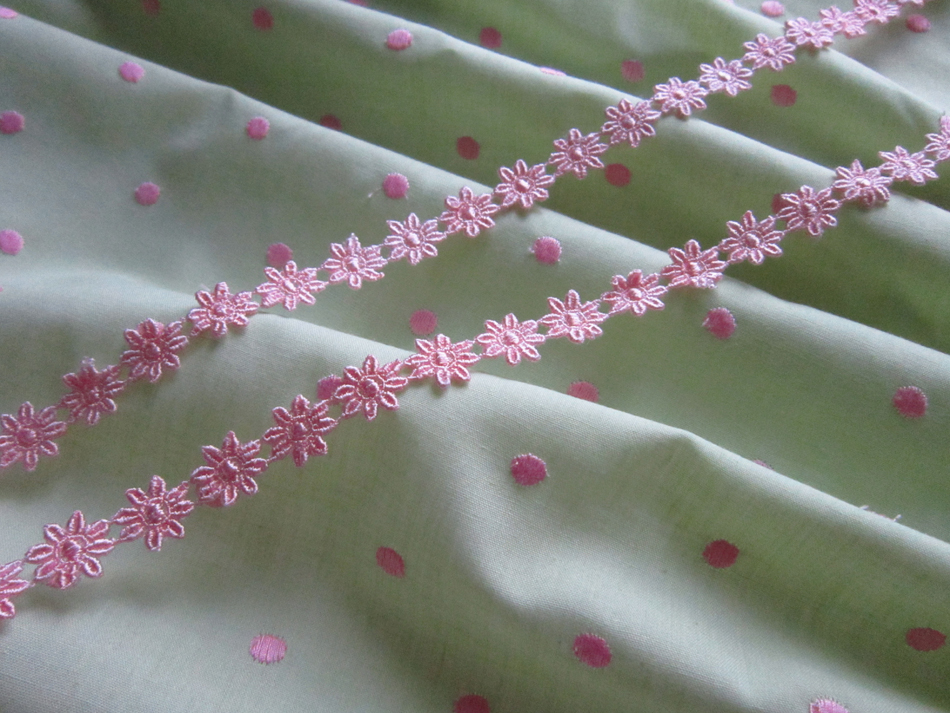
It is a fine cotton in a pastel green with embroidered soft pink polka-dots. The trim is little pink daisies in glossy thread. I am trying to steer clear of the dots but the colors were exactly what I was looking for so I just had to!
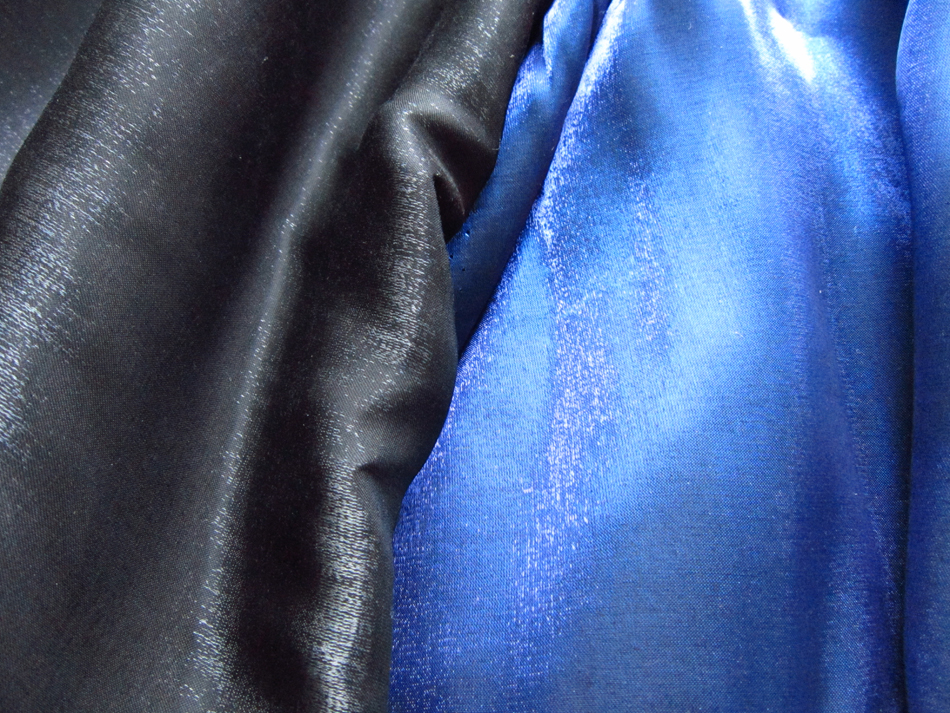
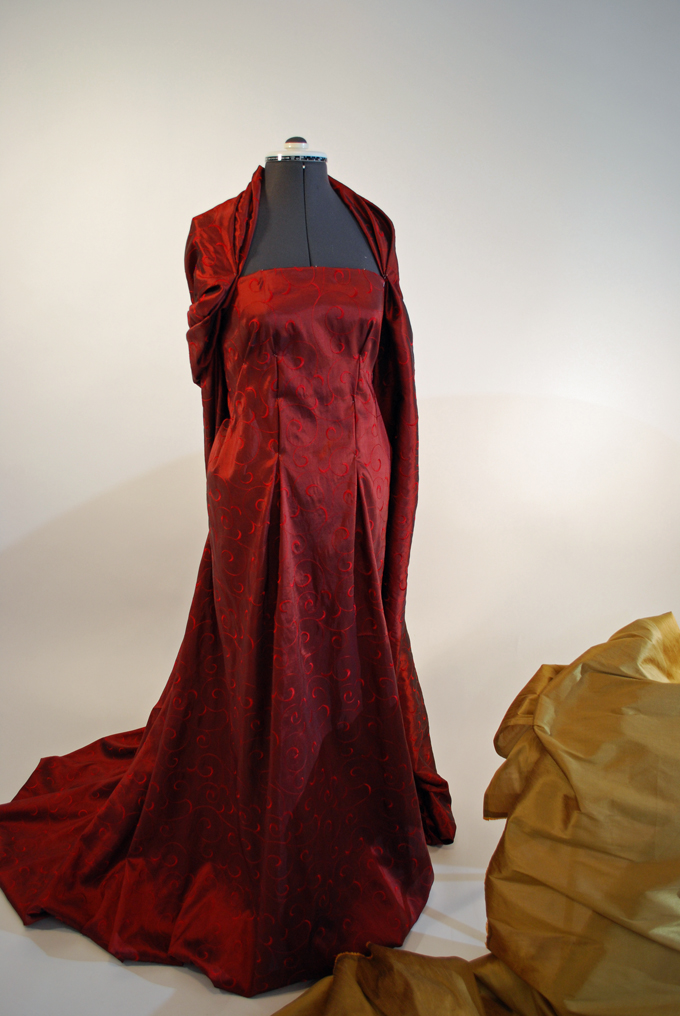
And this is the fabric for Calley’s dress. It is called shimmer satin and I am truly excited to sew it, the fabric feels luxurious!
So I guess I have a lot of sewing to do. What’s really crazy is that I am already thinking about other projects that I can’t wait to dive into! My son, Jared, really wants shirts! Shirts made by me! You will definitely hear all about it when I get there but for now, I guess I better sign off. It’s Monday, Memorial Day, and time to reflect with a glass of Chardonnay!
Salute! Jessica
Read MoreDress Designing
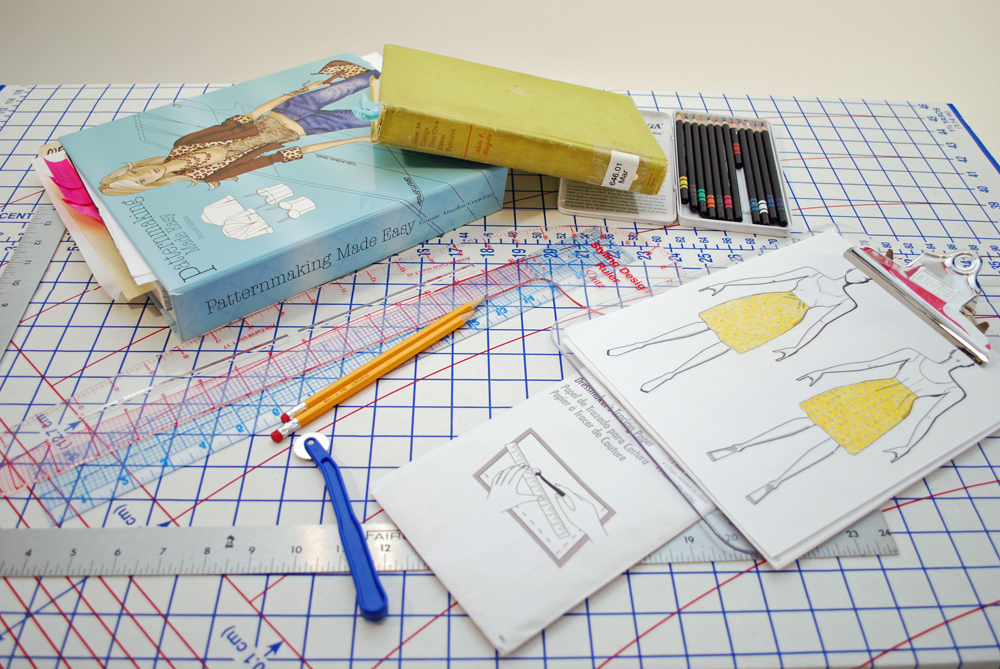
Pattern Design Tools
Well…here I am, back to share another story with you. Hope you had a wonderful week. I would like to start off with a sharing moment…I have learned from a sister sewing artist in the American Sewing Guild Chapter that I belong to, that she has brought aboard followers who live in Florida. Hello to you “Floridians” and I hope you are enjoying your wonderful sunny weather while I am here in Oregon still freezing my… butt off and trying to enjoy our rain! Just teasing 😛 Truly, thank you for reading my posts and by all means enjoy that sunny weather, someone has to right!
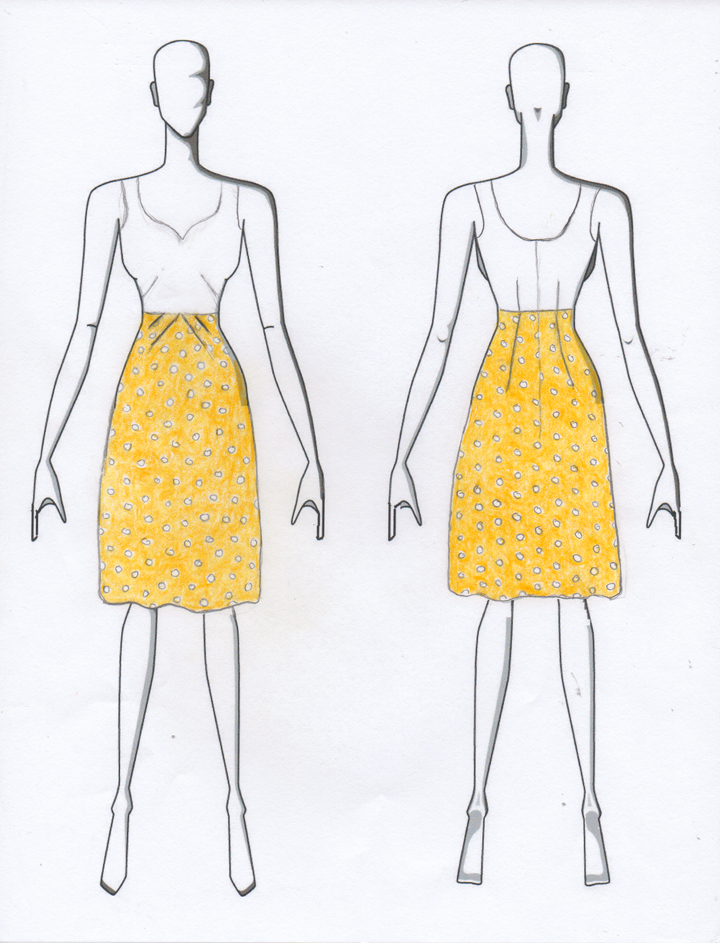
So…Last Sunday, Mother’s day, was a pretty awesome day for me. There were some unexpected surprises including brunch and lots of yellow roses. I always get yellow roses on each of my children’s birthdays but generally not on Mother’s Day. How does that work you may ask? Well, I was smart and taught my children at an early age that giving flowers to your mother on your birthday is an honor (well it is!). Pretty brilliant huh! Why yellow…well I just happen to love yellow. Maybe it’s because it reminds me of the beautiful daffodils that grew in our front yard when I was a little girl. I don’t know but for whatever reason, the color yellow is calming to me. That is why I decided to make a yellow and white dress; a certain yellow and white dress that I designed myself.
SEWLIKEINPARIS
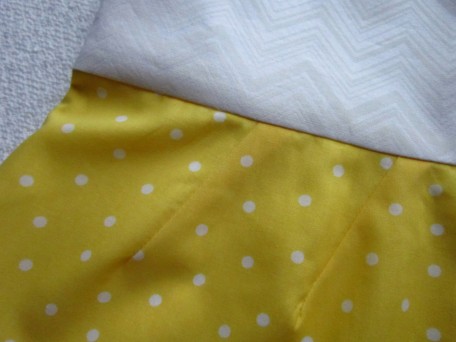
I went with inexpensive cotton, given that this was my first try at completely drafting a dress by myself. It has been my experience that if there is potential for something to go wrong, then it probably will! So here’s the fabric for the skirt of my dress.
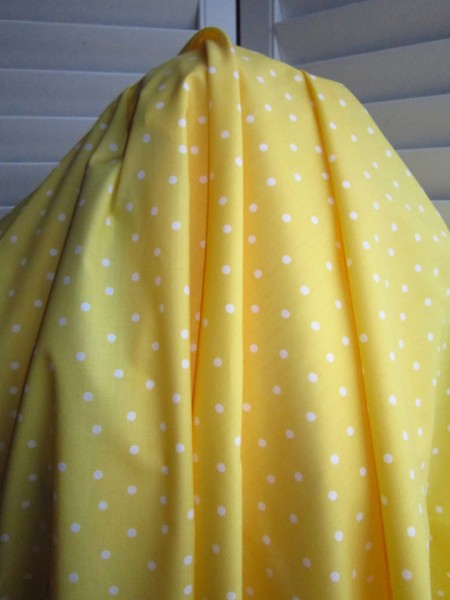
Yep…polka dots again! I think I loved the colors more than I did the fabric. It is 100% cotton but doesn’t have quite the textured feel I would have liked.
This is what I used for the bodice.
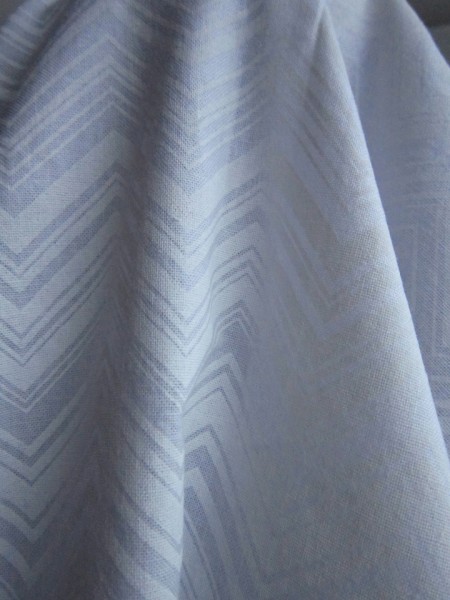
It is also 100% cotton, a slightly heavier hand than the polka-dot yellow, with chevrons on it. I had hoped to find the yellow in a fabric of this grade, but it was just not happening.
I think I spent several days drafting the different pattern pieces before I figured it all out, but when I did, I was feeling like the world was oh-so-right! I chose to use 3/8 inch seams which is just too cool! There was no trimming involved, no wasting of fabric and a nice even finish.
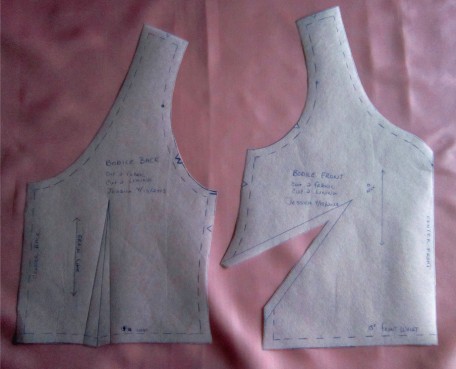
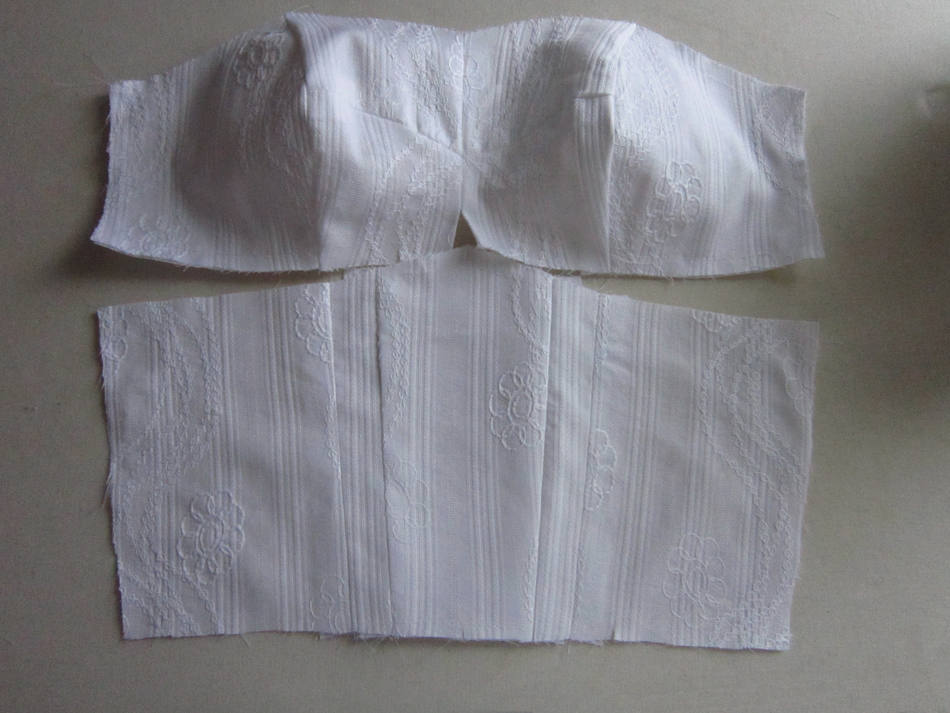
Bodice Back and Front Pattern Pieces
French darts fascinate me. I think they look more subtle than traditional darts and seem to flow more gracefully along the contours of the body. That being said, I chose to use them for my design.
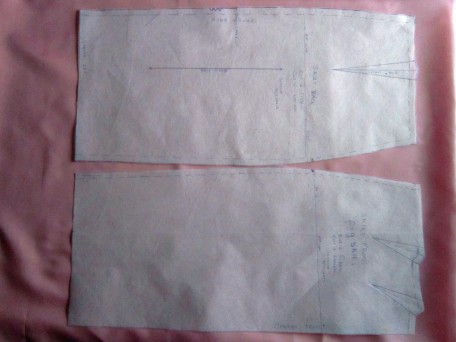
Skirt Back and Peg-Top Skirt Front
I love the look of diagonal darts on a skirt and so included them in the design of my dress skirt. Fortunately I have a book that shows you how to do this. It is titled “How to Design Your Own Dress Patterns” and written by Adele P. Margolis. My edition was printed in 1959! It’s a treasure to add to your library so by-all-means try to find a copy. A few weeks ago I posted instructions on how to do these diagonal darts in an article called “Drafting a Peg-Top Waist Skirt” which will explain it in more detail.
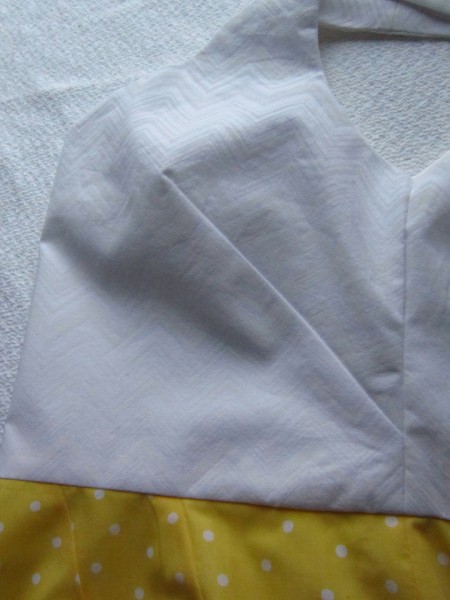
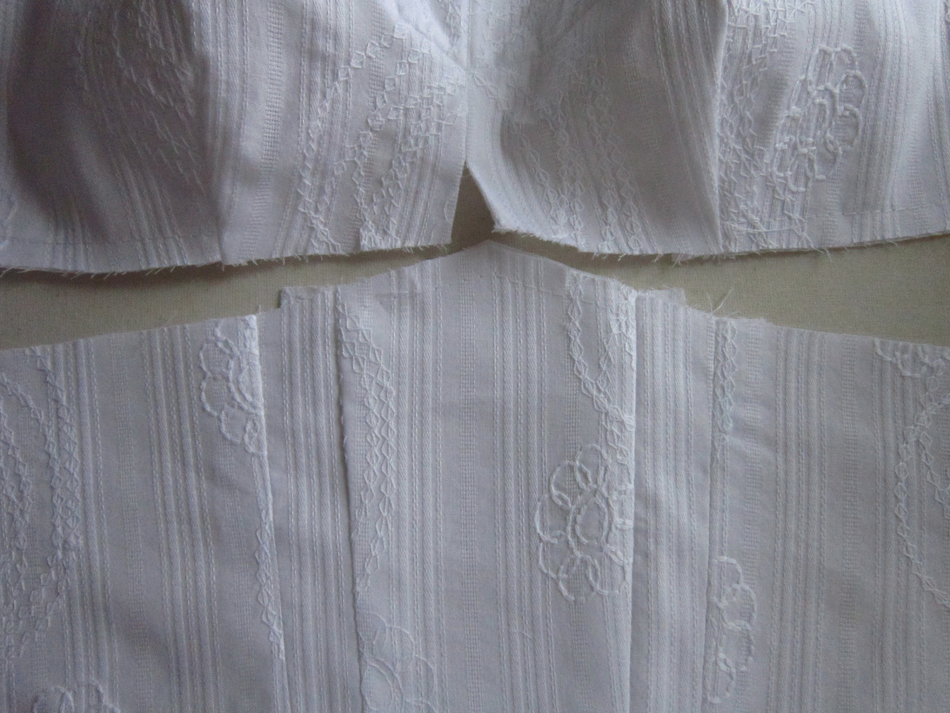
After having all my pieces drafted, seam allowances added and fabric pre-shrunk, I was ready to sew my first dress muslin. The bodice fit well though the sweetheart neck-line felt a little loose making me feel somewhat uneasy. I decided to be sure and stay-stitch the neck first thing when I begin my actual dress construction. I didn’t care for the large darts that I ended up with in the skirt front. It turns out they were large because of the 2 inches of space that the instructions say to use between the skirt sections at the top of the slash as shown below. (Please read Drafting a Peg-Top Waist Skirt to get the full skinny!)
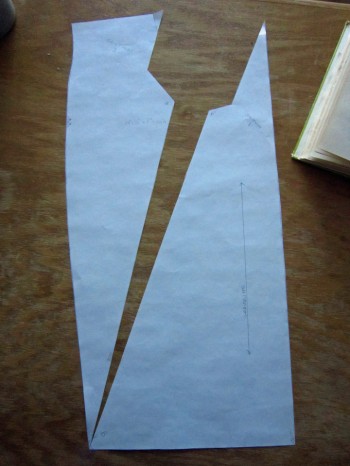
To eliminate these large darts, I tried using a 1 inch space instead of the 2 inches. Also, I didn’t draw my darts the same way they were illustrated in the book. Instead I made both the darts 3 1/2 inches long and angled them parallel to one another with 2 inches between them and 1 inch away from center. The results were exactly what I was looking for.
The front and back of my muslin with the peg-top waist.
The back is a normal one-dart block fitted for moi!
Okay…so now I’m reaching the point in my story where I talk about the “if it can go wrong, it will” part. Yes it happened… it went wrong…it was of course the sweetheart neck-line. I had tried the dress on several times through the sewing process. My thinking was that once the seams were finished by means of the lining, the looseness I was having would be tightened up. WRONG! The bodice really does fit me quite well. It was awesome sewing it to the skirt…all the darts matched up perfectly, the seams were true, but… it was that gaping neck-line that set me ablaze! To say it honestly, I was p-i-s-s-e-d! I wanted it to fit perfect the first time so I could relish in my success. Alas – there would be no relishing. I took a few deep breaths, went to the kitchen still wearing my dress, got myself a glass of wine and then went and stood before the mirror, glass in hand and pondered it all. I had three options:
1) Bail completely.
2) Redo the bodice on the dress after I re-designed the pattern.
3) Rather than tear it apart, sew an encased 2 inch section of elastic on the seam allowance on each side of the center of the neck-line to fix the gap, close up the lining, wear it and be proud… then re-draft the pattern and make another dress.
Yeah, you guessed it…I thought it best to go with option 3. So do you want to see?
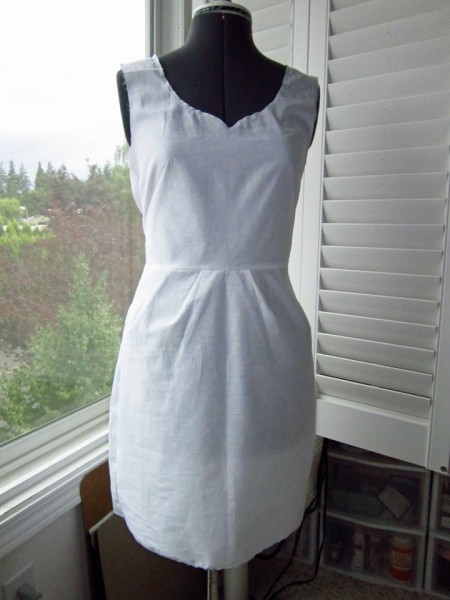
Well here it is!
French Dart
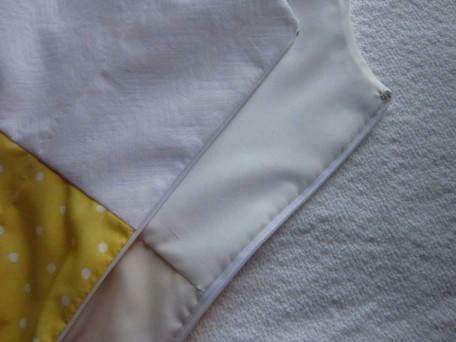
Invisible Zipper ( I love these )
- Peg Top Darts
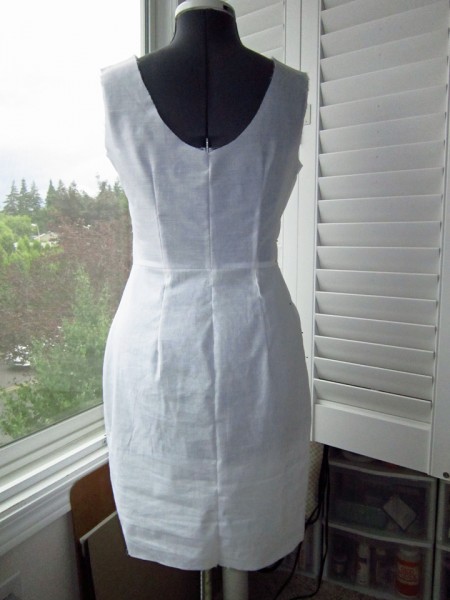
Then there is me. I sure hope you don’ get tired of the me shots, but it’s the only way I know how to show you that I can actually sew clothes that fit!

The back of course…


You know – I knew it was risky business trying to draft a sweetheart neck line. It seems that they are notorious for doing the gap thing. I still think I can beat it…maybe. If all else, my skirt draft was a success and I can always come up with a new design for my bodice front and still use my beloved french darts. So… I think it’s fair enough to say, “I have officially “designed a dress ” AND this is only the beginning! Au-revoir!
On yeah, by-the-way…have you ever sat on a straight pin?
Salute! Jessica
Read MorePattern Review McCalls 6561

A table fit for Mother’s Day
When we went into Joann’s fabric store to look at patterns I had this funny feeling. As we sat and perused the pages of the McCall’s pattern catalog, I watched her scanning, looking for that perfect…unique dress and when I saw her zero in on it, I knew right then that I had my work cut out for me. My daughter chose McCall’s 6561. Don’t misunderstand me. I have nothing against the pattern, they definitely had a cool idea in mind but… 10 pieces just to make the bodice? Just saying.
McCall’s 6561

Needless to say, she had her heart set on it and so I said yes! So the first thing I did was make a muslin. Remember those 10 pieces! We tried it on her and I had an “Oh Crap” moment. I made the muslin up in a size 4 but my daughter is like trying to dress a pencil!

She is lovely, healthy and the eating machine in my household. How she gets away with it I have no idea. Her brothers harbor a little resentment since they have to count their calories, as do I. Somehow she manages to maintain a 24″ waist! We’ll see just how many years this lasts. (that sounds evil huh)
Well… anyways, besides the fact that my daughter is a pencil and size 4 was too large, she was still fuller busted than the pattern allowed for so I had to do some major pattern changes to all 10 pieces! It took me two muslins before I got it right!
While it doesn’t say it on the envelope, if you look at it on McCall’s website, it is considered “easy”! Well yeah…it’s easy to understand how to sew it; the instructions are pretty clear. But it’s a “sewer beware” pattern. I think most of the difficulty lies in the fitting but for new sewers, I think constructing the bodice is not a cake walk. If any of you readers are new to sewing and have already taken on this challenge and did it, I have two words to say to you.. You ROCK!!
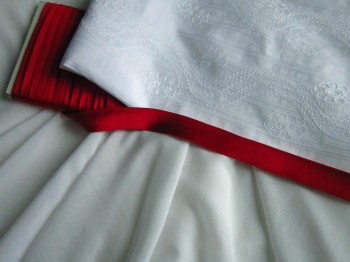
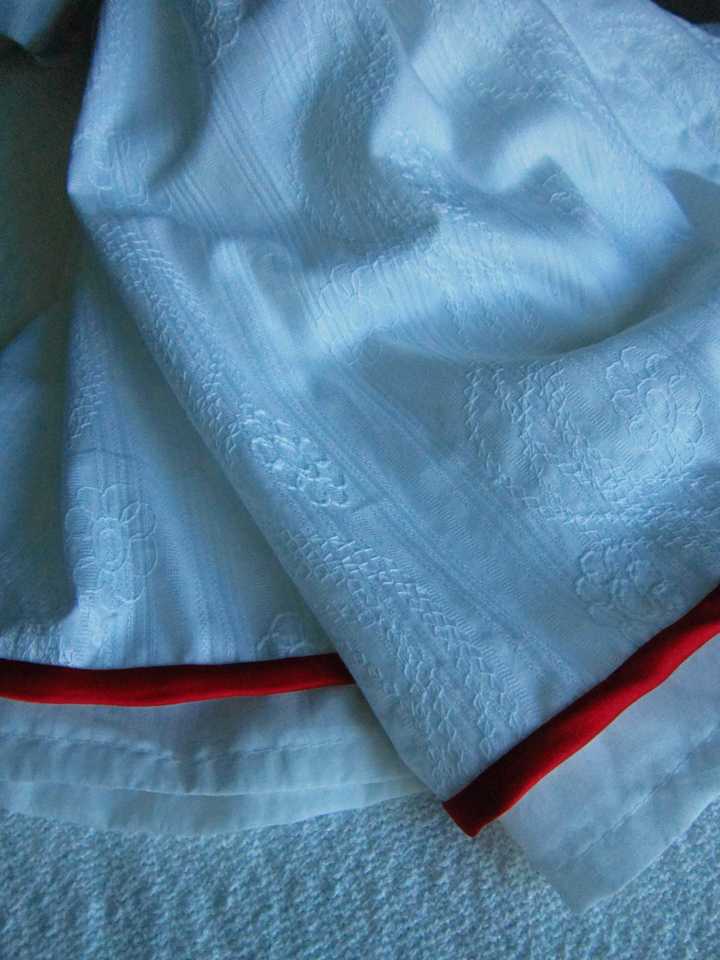
Anyways, with the fitting out of the way, we were ready to choose fabric. It was a unanimous vote, white with a splash of red. The fabric is white embroidered cotton and the lining which Calley chose is a white silk cotton. We found some beautiful red satin trim but my concern here was whether it would bleed onto the white fabric when it’s laundered so several pieces had to undergo testing. Cold water brought out red making the water pink, but hot water was worse. I decided to wash the trim in my washing machine on gentle cycle, hang to dry and press it before applying to the dress. (Heavy sigh; more work)

After pre-shrinking all the fabric, I was ready to start construction. Assembling the bodice wasn’t too bad though like I mentioned earlier, there were several pivots in the top and bottom of the front pieces that took me a bit but eventually I got them.
I took this close-up picture so you could get a good look at the bottom pivot on the center front. I fussed with this one the most.
The main bodice is sewn to a gathered skirt and then there is a bodice lining that is sewn to a second or contrast gathered skirt. Suffice it to say, there was a whole lot of gathering going on! It wasn’t hard, just time consuming.
I decided to hand sew the red trim around the waist after the dress was constructed. I did try top-stitching it on first but I didn’t like the look.
To break up the layers, I sewed red satin trim on the top skirt.
And here it is being worn by my daughter.

The back of the dress…

And a just because picture!

The dress was a success, especially because it’s what Calley wanted but I am not real keen on making a 2nd or 3rd one. Unfortunately I think she wants more of them and since she let me make her something versus buying it, how can I say no? I’ll make 10 if I have to. 🙂 I truly love being her and her two brothers mom, and sewing for them is such an honor to me. You can expect to see more of my family creations in the future.
With that, I think I will now go and enjoy Mother’s Day with my children. If you are a mother, a child who has a mother, or know someone who is like a mother to you, take advantage of the opportunity today to give your love. We don’t know what tomorrow will bring, but today is here, so live it to it’s fullest. That being said, I’m now signing off to go and enjoy a glass, or two, of champagne!
Salute! Jessica
Read MoreButterick See and Sew 5741
When you look at the above picture, you are suppose to think I am draping but I actually have absolutely no idea what I am doing! However, hopefully I will know when I finish with the draping classes I registered for a little over a month ago. I’m so excited! There is not a definition for draping in my 1978 Webster dictionary though under drape it reads “arrangement in or of folds. Then there is the on-line Merriam Webster version that says that “draping is a present participle of drape”. I guess this means that soon I will be “present participel-ing” fabric into a garment! I can’t wait.
I received a student supply list when I registered, so I have been rounding up all the things I am required to have. Of course I was gong to need something to put all of it in and that’s when I remembered a pattern I had, Butterick See and Sew 5741.
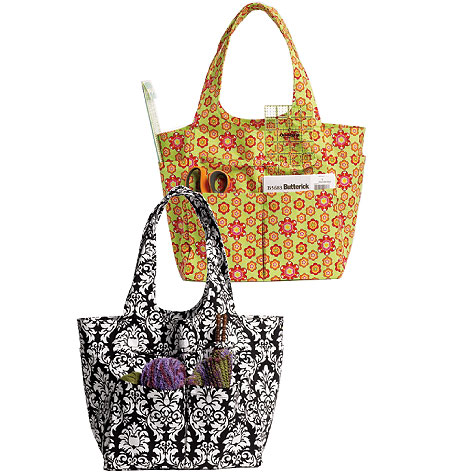
I bought this pattern about a year ago thinking that I would do a sew-along with my kids for something cool to do. It’s a good thing I never got around to doing that because I would have probably ruined our wonderful relationships! I don’t think the construction of the bag is quite as easy as the Butterick designers claim it to be.
The fabric I chose is Home Decor…
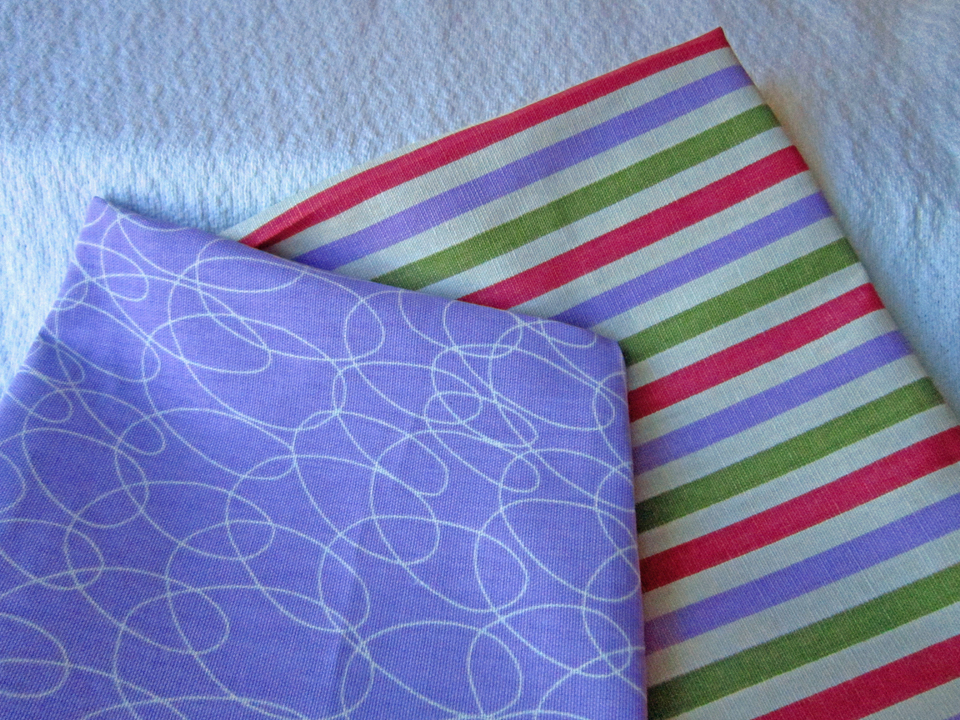
I fell in love with the purple because it made me think of my blog site (what a dork huh!) and I thought the stripes would be a complementing contrast for the lining and the variations I was planning. (I can never leave a pattern design alone, I’m always messing with it, I don’t know why?)
The bag instructions are easy to understand, but the further into the project you get, the more challenging it seems to become. Admittedly, part of the difficulty might have been my doing. One of the materials called for is hair canvas. I have felt it once in a store 40 miles from where I live, but I couldn’t remember how stiff it was so I opted to head to the local Joann’s and see what they had. I ended up buying Pellon Peltrex 70 Ultra-firm stabilizer. (It sounds like something dangerous!) It turns out it was. My headache really started once I had to assemble the pieces. The worse was when I was nearing the end and still had to do the top stitching on the handles and around the top edges. Words were flying along with spools of thread and various other objects that happened to be to close to my working space.
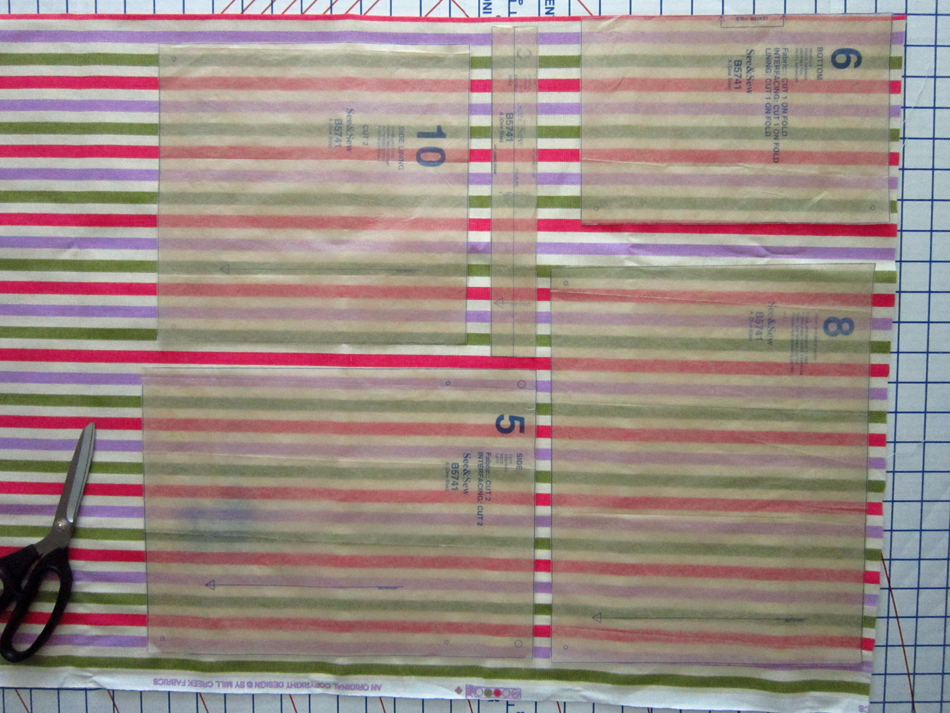
As to those variations I was talking about…I decided to change the fabric of one of the end pockets from the main fabric to the fabric I used as lining (Piece #5). I did this too for the band that goes across two of the sides (Piece #3 that is barely printed on the tissue).
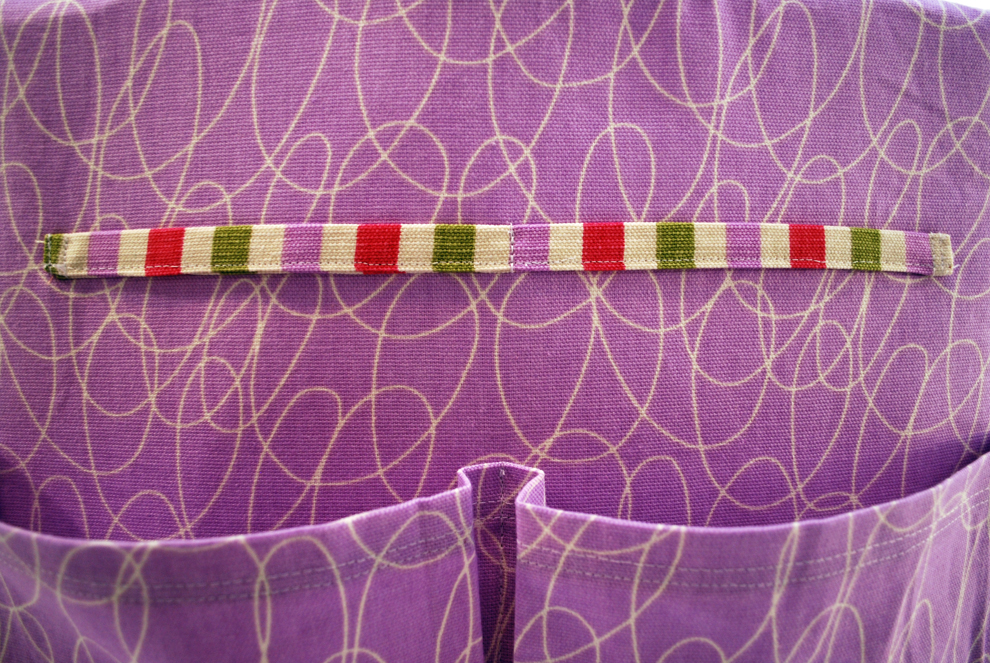
That narrow band incidentally, was a b…. bear to sew! You had to stitch across 4 layers of home decor fabric which is rather heavy.
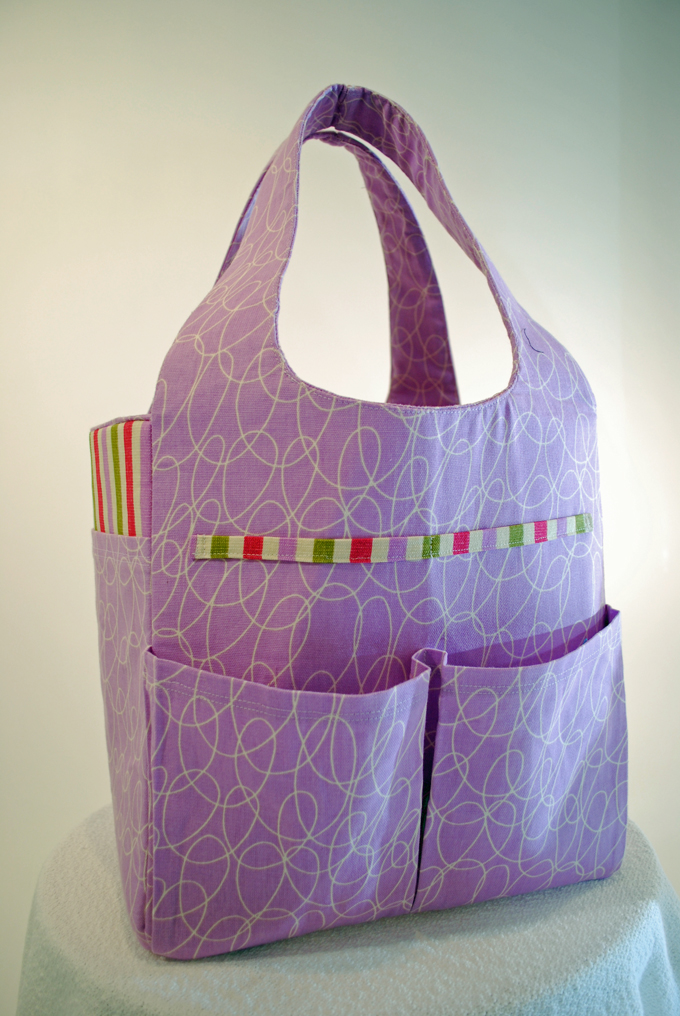
Well this is it… I was after firmness and boy did I get it. The handles hold themselves up!
My #5 pocket that is the same fabric as the lining…

And that nasty little band…
I’m really happy with how it turned out despite the Peltex 70 accident! It is an awesome “TOTE” bag. Mind you, nowhere on the envelope did I see the word “tote” bag. I did read that the finished size was 12 1/2″ x 12 1/2″ x 9″ and I did look at a ruler and contemplate this. A “tote” bag caution sign never started flashing before my eyes so I didn’t give it another thought. I just hit the “see and sew” road and never looked back!
Now I am all ready to go to my draping class…
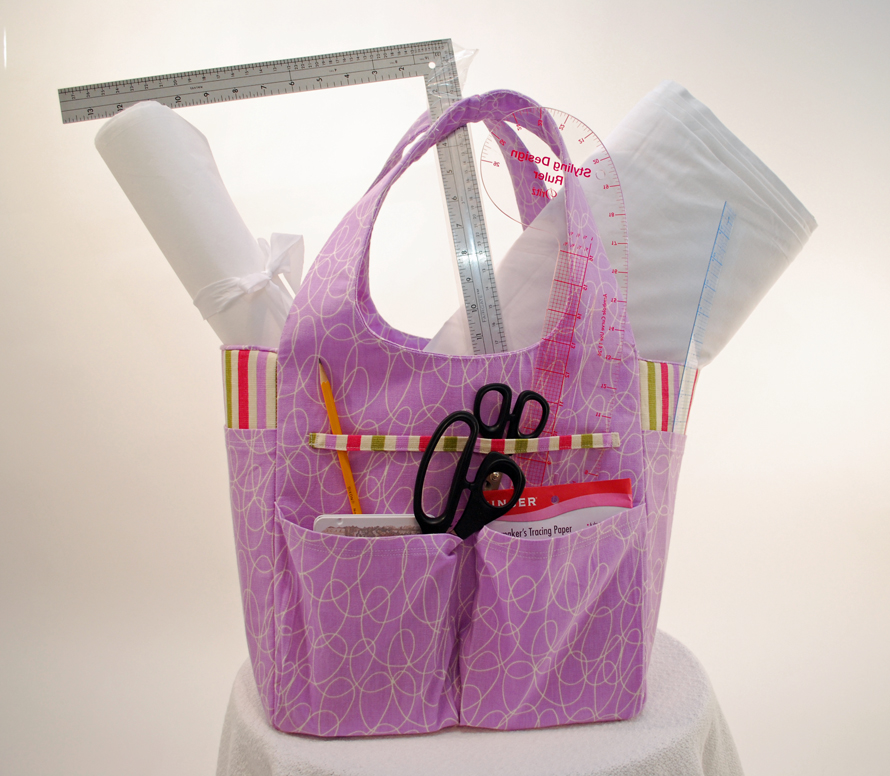
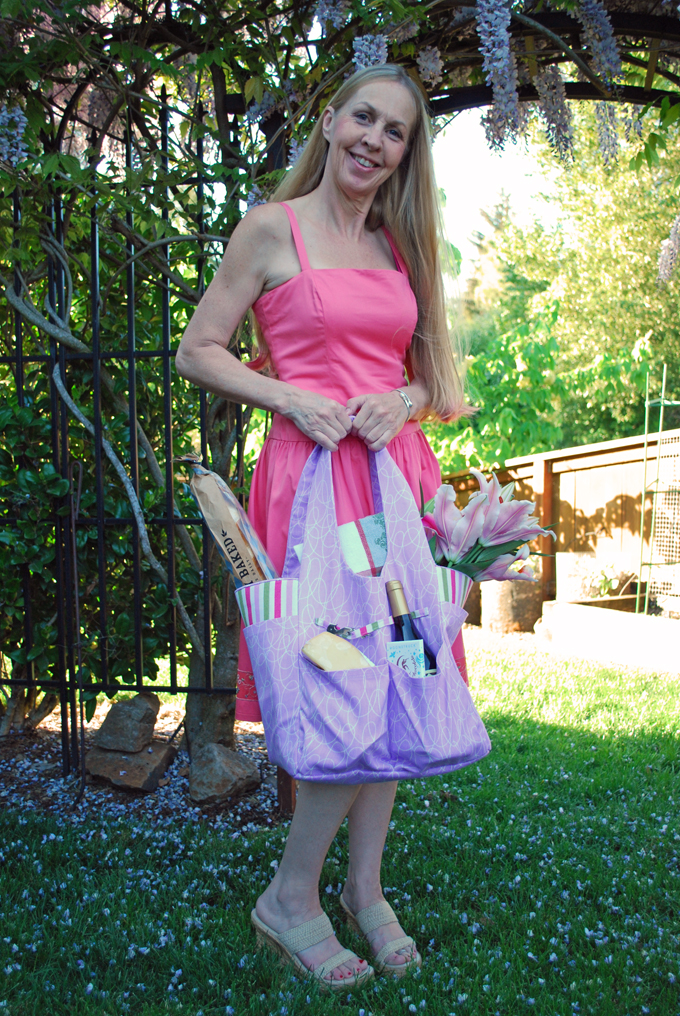
I got to thinking though… it sure would be a bodacious “tote” bag for carrying all the french-ness accessories I would need for a picnic or meal!

Well… that was it and now I am ready for dinner! Oh… and yes, I made the dress. It’s another one of those patterns I have that’s out of print. It’s Simplicity 4224. I am thinking that maybe I should make another one like this. I love the dropped waist.
À tout à l’heure! In English, see you soon! Now it’s time to prepare my French cuisine but first… an apéritif. I think I will start with a refreshing glass of Chardonnay. 🙂
Salut! Jessica
Read MoreAbout Me
 Portland, Oregon,
 United States
Hi there! I’m Jessica Brandon and I am a clothes-loving sewing artist. When I am not sewing, blogging or shopping for shoes for my creations, I fill in the remainder of my days spending time with my children, playing ice hockey, gardening and making and drinking wine!


Up Coming Projects:
Vogue 1426

Vogue 7881

McCall's 7089

Vogue 8997

Vogue 1431

Vogue 9006

Vogue 8991
