

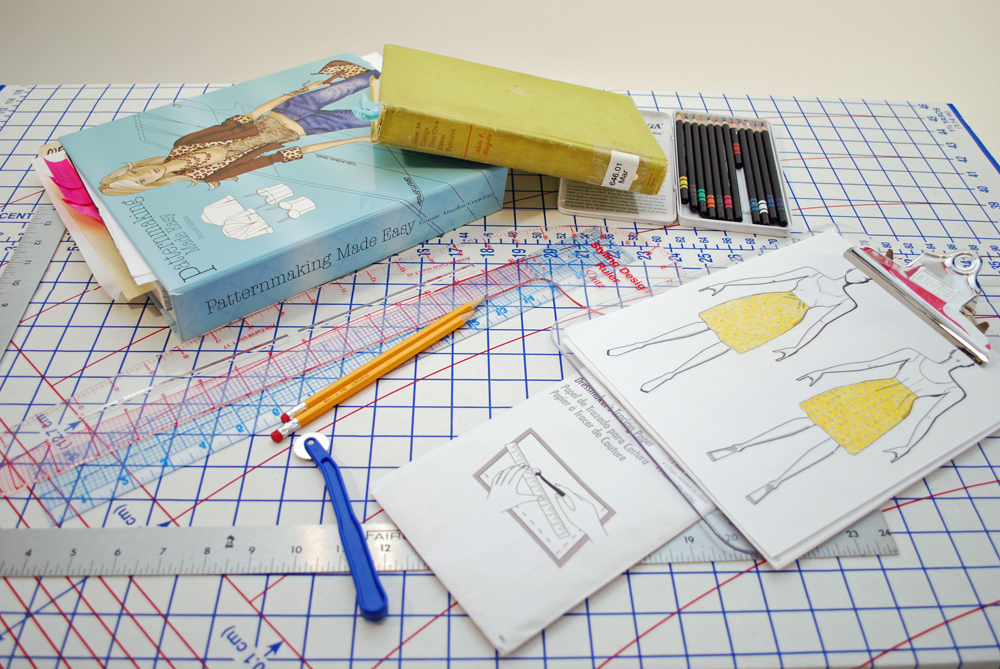
Pattern Design Tools
Well…here I am, back to share another story with you. Hope you had a wonderful week. I would like to start off with a sharing moment…I have learned from a sister sewing artist in the American Sewing Guild Chapter that I belong to, that she has brought aboard followers who live in Florida. Hello to you “Floridians” and I hope you are enjoying your wonderful sunny weather while I am here in Oregon still freezing my… butt off and trying to enjoy our rain! Just teasing 😛 Truly, thank you for reading my posts and by all means enjoy that sunny weather, someone has to right!
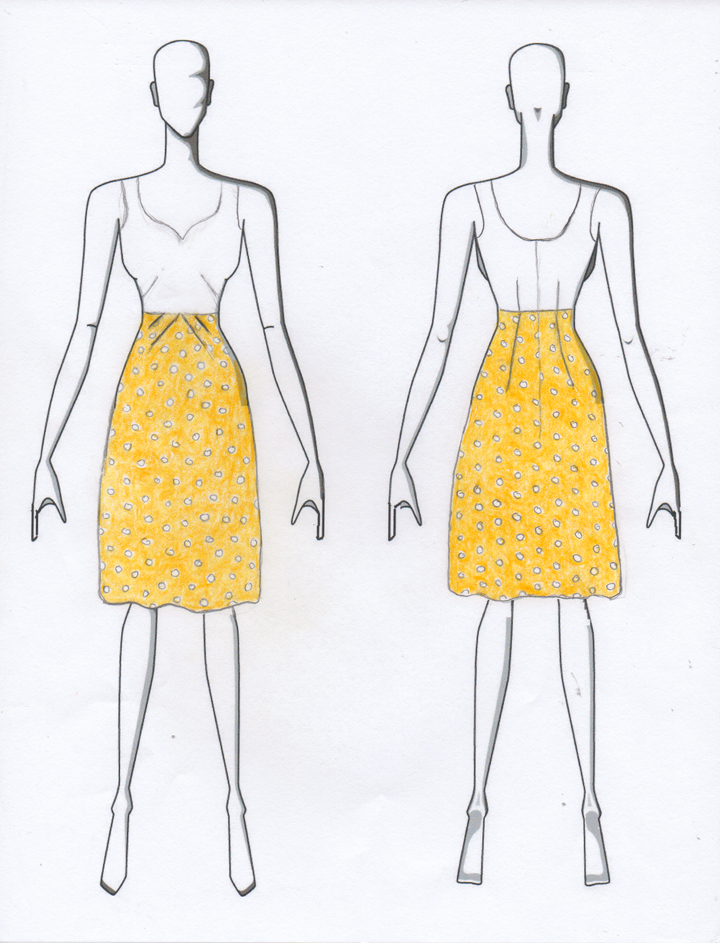
So…Last Sunday, Mother’s day, was a pretty awesome day for me. There were some unexpected surprises including brunch and lots of yellow roses. I always get yellow roses on each of my children’s birthdays but generally not on Mother’s Day. How does that work you may ask? Well, I was smart and taught my children at an early age that giving flowers to your mother on your birthday is an honor (well it is!). Pretty brilliant huh! Why yellow…well I just happen to love yellow. Maybe it’s because it reminds me of the beautiful daffodils that grew in our front yard when I was a little girl. I don’t know but for whatever reason, the color yellow is calming to me. That is why I decided to make a yellow and white dress; a certain yellow and white dress that I designed myself.
SEWLIKEINPARIS
I went with inexpensive cotton, given that this was my first try at completely drafting a dress by myself. It has been my experience that if there is potential for something to go wrong, then it probably will! So here’s the fabric for the skirt of my dress.
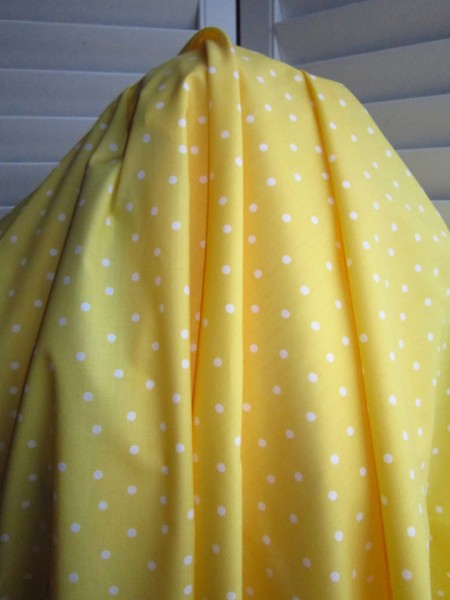
Yep…polka dots again! I think I loved the colors more than I did the fabric. It is 100% cotton but doesn’t have quite the textured feel I would have liked.
This is what I used for the bodice.
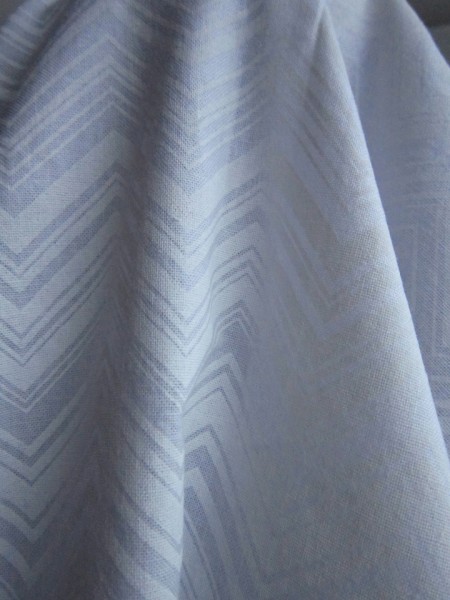
It is also 100% cotton, a slightly heavier hand than the polka-dot yellow, with chevrons on it. I had hoped to find the yellow in a fabric of this grade, but it was just not happening.
I think I spent several days drafting the different pattern pieces before I figured it all out, but when I did, I was feeling like the world was oh-so-right! I chose to use 3/8 inch seams which is just too cool! There was no trimming involved, no wasting of fabric and a nice even finish.
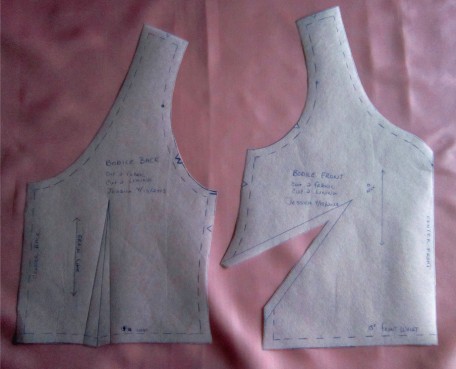
Bodice Back and Front Pattern Pieces
French darts fascinate me. I think they look more subtle than traditional darts and seem to flow more gracefully along the contours of the body. That being said, I chose to use them for my design.
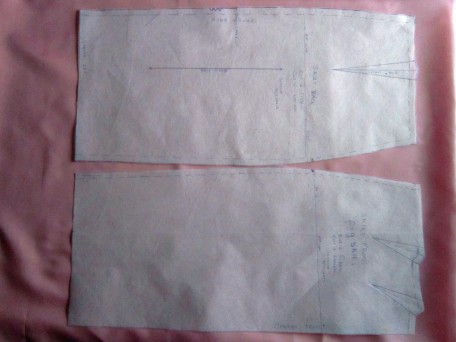
Skirt Back and Peg-Top Skirt Front
I love the look of diagonal darts on a skirt and so included them in the design of my dress skirt. Fortunately I have a book that shows you how to do this. It is titled “How to Design Your Own Dress Patterns” and written by Adele P. Margolis. My edition was printed in 1959! It’s a treasure to add to your library so by-all-means try to find a copy. A few weeks ago I posted instructions on how to do these diagonal darts in an article called “Drafting a Peg-Top Waist Skirt” which will explain it in more detail.
After having all my pieces drafted, seam allowances added and fabric pre-shrunk, I was ready to sew my first dress muslin. The bodice fit well though the sweetheart neck-line felt a little loose making me feel somewhat uneasy. I decided to be sure and stay-stitch the neck first thing when I begin my actual dress construction. I didn’t care for the large darts that I ended up with in the skirt front. It turns out they were large because of the 2 inches of space that the instructions say to use between the skirt sections at the top of the slash as shown below. (Please read Drafting a Peg-Top Waist Skirt to get the full skinny!)
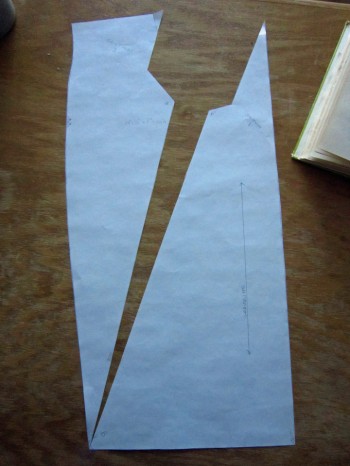
To eliminate these large darts, I tried using a 1 inch space instead of the 2 inches. Also, I didn’t draw my darts the same way they were illustrated in the book. Instead I made both the darts 3 1/2 inches long and angled them parallel to one another with 2 inches between them and 1 inch away from center. The results were exactly what I was looking for.
The front and back of my muslin with the peg-top waist.
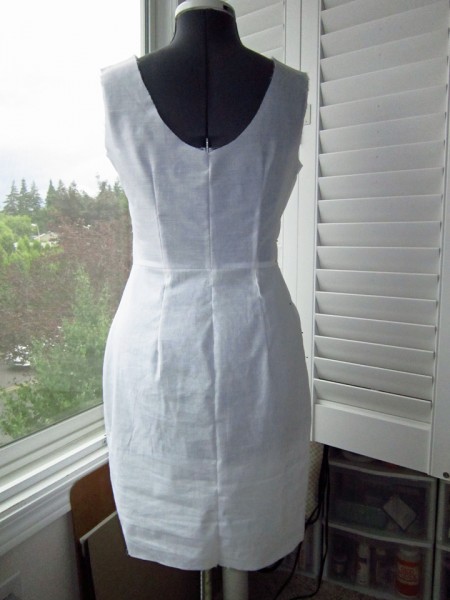
The back is a normal one-dart block fitted for moi!
Okay…so now I’m reaching the point in my story where I talk about the “if it can go wrong, it will” part. Yes it happened… it went wrong…it was of course the sweetheart neck-line. I had tried the dress on several times through the sewing process. My thinking was that once the seams were finished by means of the lining, the looseness I was having would be tightened up. WRONG! The bodice really does fit me quite well. It was awesome sewing it to the skirt…all the darts matched up perfectly, the seams were true, but… it was that gaping neck-line that set me ablaze! To say it honestly, I was p-i-s-s-e-d! I wanted it to fit perfect the first time so I could relish in my success. Alas – there would be no relishing. I took a few deep breaths, went to the kitchen still wearing my dress, got myself a glass of wine and then went and stood before the mirror, glass in hand and pondered it all. I had three options:
1) Bail completely.
2) Redo the bodice on the dress after I re-designed the pattern.
3) Rather than tear it apart, sew an encased 2 inch section of elastic on the seam allowance on each side of the center of the neck-line to fix the gap, close up the lining, wear it and be proud… then re-draft the pattern and make another dress.
Yeah, you guessed it…I thought it best to go with option 3. So do you want to see?
Well here it is!
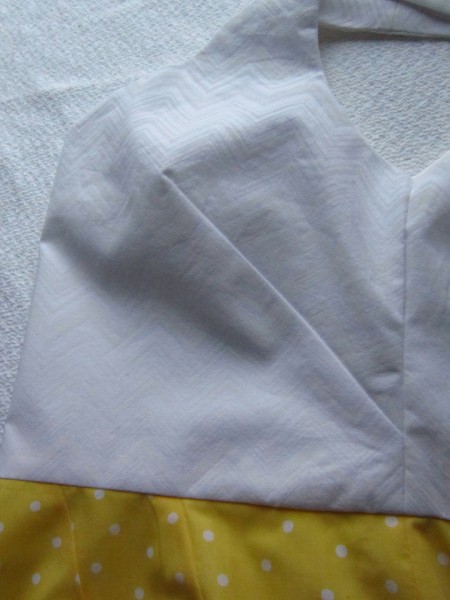
French Dart
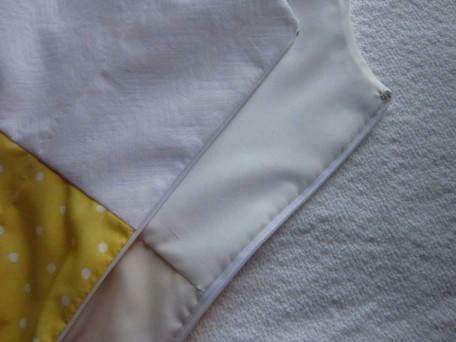
Invisible Zipper ( I love these )
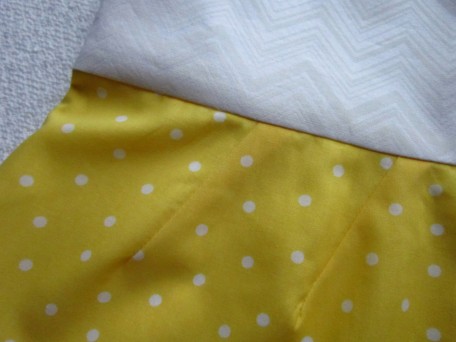
- Peg Top Darts
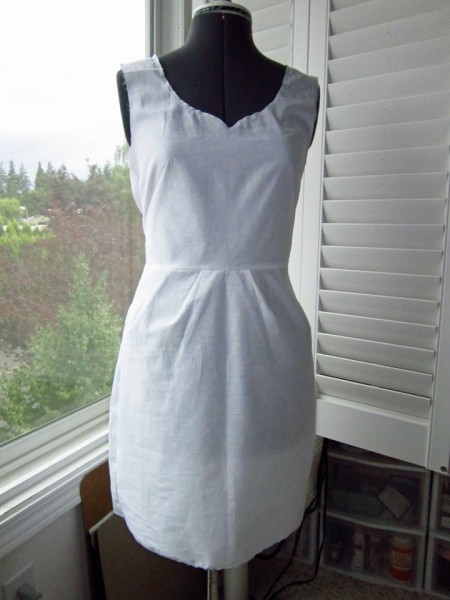
Then there is me. I sure hope you don’ get tired of the me shots, but it’s the only way I know how to show you that I can actually sew clothes that fit!

The back of course…


You know – I knew it was risky business trying to draft a sweetheart neck line. It seems that they are notorious for doing the gap thing. I still think I can beat it…maybe. If all else, my skirt draft was a success and I can always come up with a new design for my bodice front and still use my beloved french darts. So… I think it’s fair enough to say, “I have officially “designed a dress ” AND this is only the beginning! Au-revoir!
On yeah, by-the-way…have you ever sat on a straight pin?
Salute! Jessica
About Me
 Portland, Oregon,
 United States
Hi there! I’m Jessica Brandon and I am a clothes-loving sewing artist. When I am not sewing, blogging or shopping for shoes for my creations, I fill in the remainder of my days spending time with my children, playing ice hockey, gardening and making and drinking wine!


Up Coming Projects:
Vogue 1426

Vogue 7881

McCall's 7089

Vogue 8997

Vogue 1431

Vogue 9006

Vogue 8991
