


Dresses, and more recently skirts, are my favorite things to make because I really like wearing them, especially in the spring and summer months. They are comfortable (most of the time) and when I wear them, I feel pretty… even with no make-up and hair from hell! But, dresses and skirts don’t stand well alone… they must be accessorized with shoes! Me and my girls feel shoes make or break the outfit! We try to hold onto comfort, but if going to an event that involves mostly sitting, comfort often goes out the window and instead we wear what we term “fashion shoes“.
Recently I went on the hunt for a pair of black strappy heels which my wardrobe is lacking. I was hoping to find comfortable ones that still looked like “fashion shoes“. I started with wandering through the pages of internet shoe shops looking for my black jewels but there were none to be found. Then, on a brief trip to my local Macy’s, hence the heading picture above, I stumbled onto my dream shoes. Why I didn’t see them on-line is beyond me but now that I have a style name, up they pop on a brief search!

They are Anne Klein’s Akopolize, 3″ heel (comfortable) yet still simple gorgeous high heels! On the discount rack no less! It was a total hands down win in my book and I can’t wait to wear them with a few of my new dresses that are in the works. One that I’m just finishing is made from Simplicity 2362.

The instructions are not too difficult though trying to match up dots in the pocket areas and bodice to bodice seams may make one want to throw things… only temporarily! It’s a pretty cool design and there are a number of variations that make it a jewel to have. My plan for its first test run was a “little black dress” My inspiration for an LBD (little black dress) started with a magazine my kids gave me for Mother’s Day, Designer Techniques, from The best of threads Collector’s Edition.

There is an article in it by Susan Khalje titled “Make your own Little Black Dress from Start to Finish” that includes step-by-step couture details. It was after reading this article, that I decided to make myself an LBD and incorporate some couture techniques while I was at it! Admittedly, there was another reason for wanting to do this… I realized after rummaging through my closet several weeks ago, that I didn’t have any LBD’s! I do have several long black evening gowns and a casual yet dressy pair of flared pants with a matching sleeveless top made from black cotton lycra but no LBD’s! Can you believe it! Not one! Truthfully, I kind of feel embarrassed. I am going to change that though. I have plans for more LBD’s in the near future so be prepared to see a bit of black!
As to why I would want to bother with all the extra work of couture methods… well, because I’m worth it! And an added benefit is that many of the techniques really help to improve sewing skills. Plus you get the pleasure of creating with beautiful fabrics, especially silk. I absolutely love working with silk. Yeah, it can be a pain in the butt to cut your garment pieces out of but I love the way it feels and the ruffling sound it makes when I handle it.
So on with my LBD. The fabric of course is black though unfortunately not silk (the couture idea came after purchasing the black fabric) I didn’t bother taking a picture of the fabric because… well… it’s black! The texture was the reason for my choice. Let me explain… when I think of a black dress, I envision a tuxedo — more specifically, a man wearing one. There is a breathtaking elegance that resonates from the wearer which can pull in eyes from every direction. The white shirt looks crisp, the bow tie perfectly held in place and the black coat and pants so complimenting. So when I was choosing my fabric, I kept these thoughts in my mind and settled for a black sateen which has a subtle diamond shape pattern in it, is a deep black (is there such a thing?), and has a small bit of stretch yet holds it shape.
 http://davidreevesbespoke.wordpress.com/2011/05/16/tuxedodinner-suit-special/
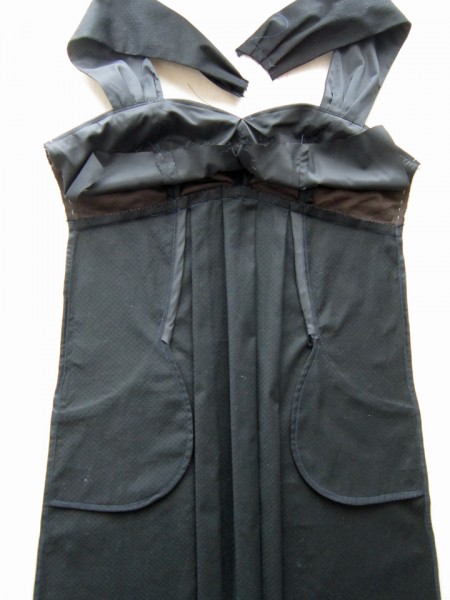
To start the process, a muslin was in order. I usually always do a muslin. Yes, I know it’s extra work but so worth it! There’s nothing worse than sewing your heart out and dreaming of wearing the garment when it’s finished and then discovering that it doesn’t fit properly and likely will never get worn! Been there done that! For this dress, I only made one muslin and it was just the bodice since the skirt I felt confident wouldn’t be a problem. This is because I have made so many dresses that I pretty much know how much circumference I need in the waist and hip area but if I was sewing for someone else, I would have made the whole enchilada! Here is the front of it.
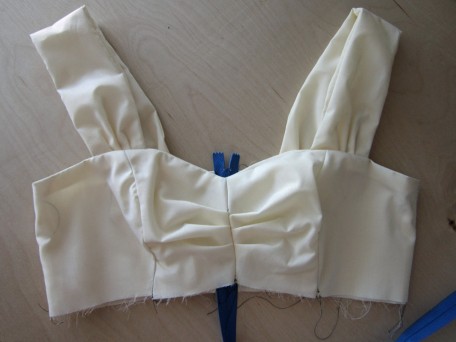
I basted in a 22″ blue zipper so I could close up the back properly, to check for fit.
Notice that the pleats are not matching up. I didn’t even think about matching pleats when I sewed it, and then when taking pictures, they got my attention. This is an example of a good reason for a muslin. I was now aware to pay more attention when sewing my actual bodice.
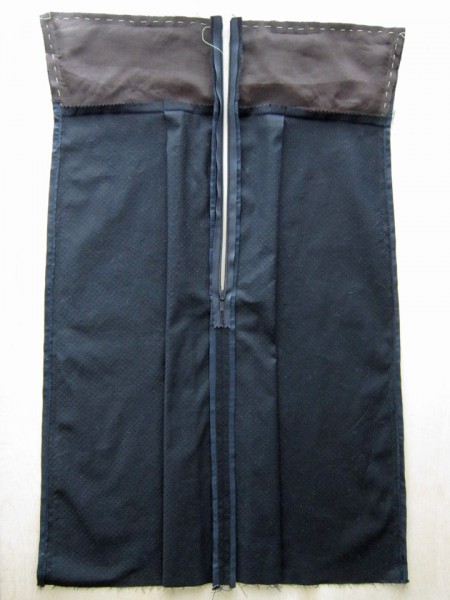
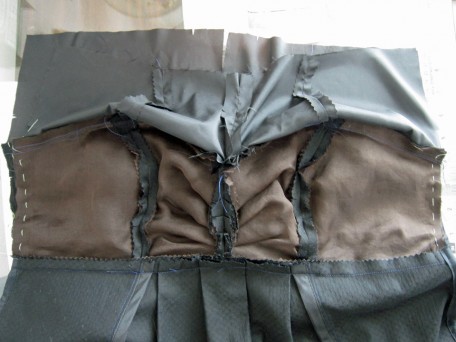
For interfacing, I used dark brown silk organza. I chose it for three reasons. 1) It was silk organza, 2) the color brown wouldn’t interfere with my black fashion fabric, and 3) the brown was 60″ wide at $15.99 a yard whereas the black was only 44″ wide and $15.99 a yard. It was a no brainer!
The pattern instructions have you interface the lining, probably because the pleats in the bodice front could get to bulky, but I wanted those pleats to hold their shape, remember the bow tie and white shirt crispness… so I hand-basted my silk organza interfacing pieces to the actual bodice pieces.
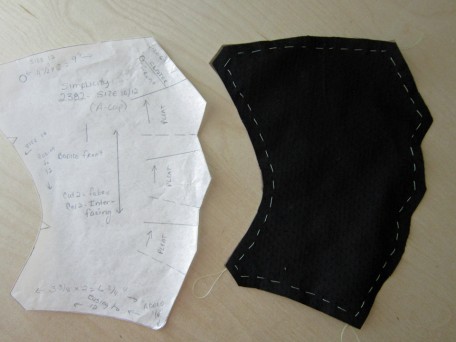
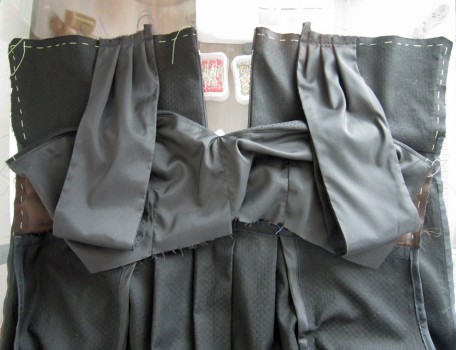
The right side of the bodice front.

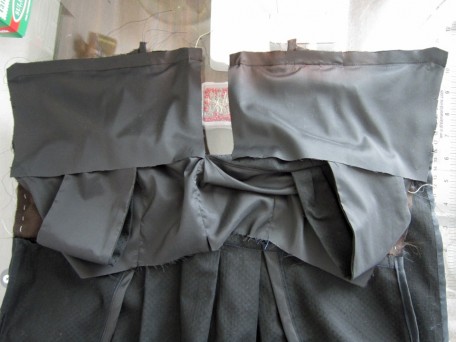
The back side of the front.
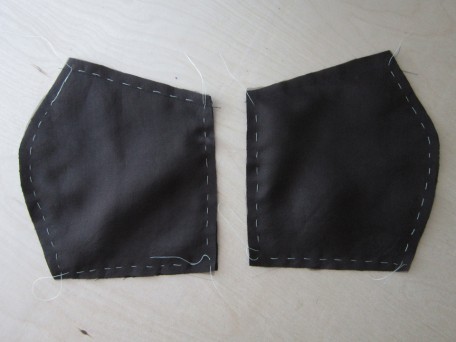
I applied interfacing to all my other bodice pieces in the same way, using the silk organza. Below is a picture of the front bodice side pieces. I didn’t take a picture of the back bodice pieces because I think you’ve got the idea! 🙂
Okay, so this is where I have to confess… I didn’t follow the pattern instructions for assembling the dress. Yeah… what’s new! I’m such a rule breaker! I did start off in the right direction. I sewed the bodice front pieces together… but the back bodice pieces I set aside. I did attach the straps next only there is an important point here… with “visions of tuxedos dancing in my head”, I had decided to create pleats rather than gathers at the ends of the straps. I planned for this when cutting them out of my fabric. Lastly, I then applied the front bodice lining, not silk, but rather a $10.99 a yard beautiful drapey perfect shade of black lining fabric. I did not understitch. I decided to do the understitching after I sewed the front and back bodice together.
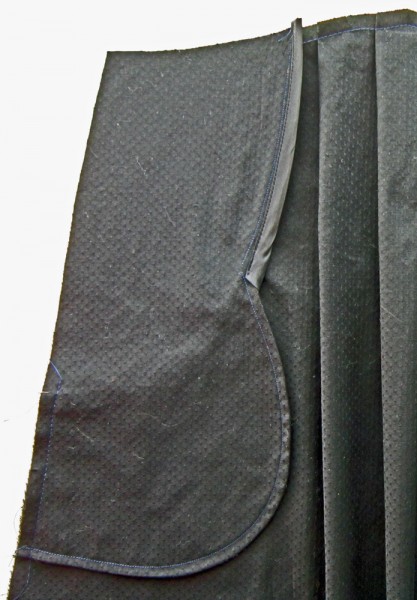
With the front bodice finished, I was now ready to tackle the assembly of the pockets #7 to the front yoke #8 pattern piece and then attach this to the skirt front. Keeping couture techniques in mind, I first sewed the pockets to the pocket sides in french seams. I did this by matching the left and right pockets to the front yokes, wrong side to wrong side. I sewed a 3/8″ inch seam, cut off all but 1/8″ inch, pressed the seams flat, then turned each right side in and sewed a 1/4″ inch seam as far as possible to the dot that matches up to the skirt front dot. It’s a little tricky but the finish is worth it. I then finished the upper pocket/skirt seam allowances using my own method which I explain in more detail shortly. The underside seam allowance of each pocket that doesn’t show when it’s folded towards the front, I trimmed with pinking shears. This fabric really attracts lint. It doesn’t look especially black in the picture below.
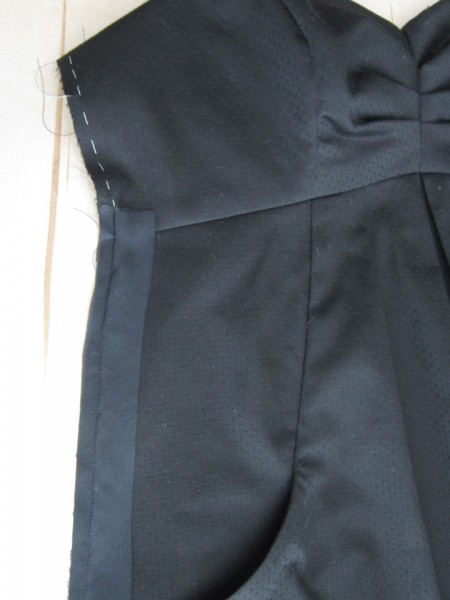
Now I was ready to finish the edges of the side seam allowances. I do have a serger and yes, I have serged many an edge but this is my couture LBD so we can’t have that! I have several books on couture that describe the technique for finishing seam allowances but because I have never really done it, I was a bit confused. So I do what I always do when I am not sure, I wing it! With that, I cut 1 and 1/4″ inch strips of black china silk for this task. I use the real china silk, not the polyester. Silk chiffon is the fabric of choice for doing this as mentioned in my books, but I didn’t have any of that on hand so I decided the china silk would suffice. I first sewed the strips to the outside edge of the seam allowance, raw edge to raw edge in a 3/8″ inch seam.
Next, I pressed the seam flat, then turned it out and pressed again.
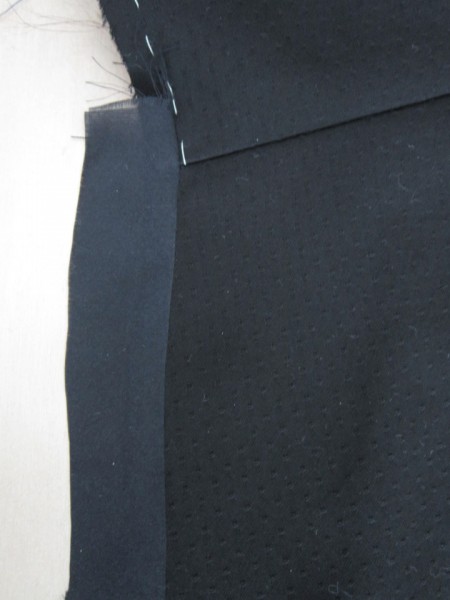
Then I turned the skirt over and turned up the edge of the silk strip to the edge of the skirt seam allowance edge, creating a fold, and then pressed again. It’s hard to see the fold in this picture.
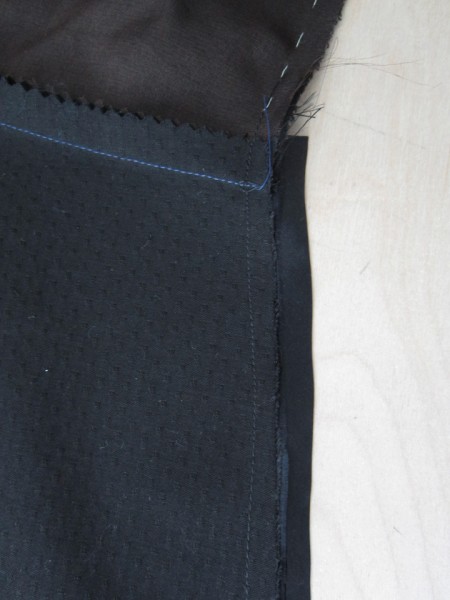
Lastly, I folded the strip one more time, up and over the edges, holding it firmly in place and at the same time stitching a 1/4″ inch seam.
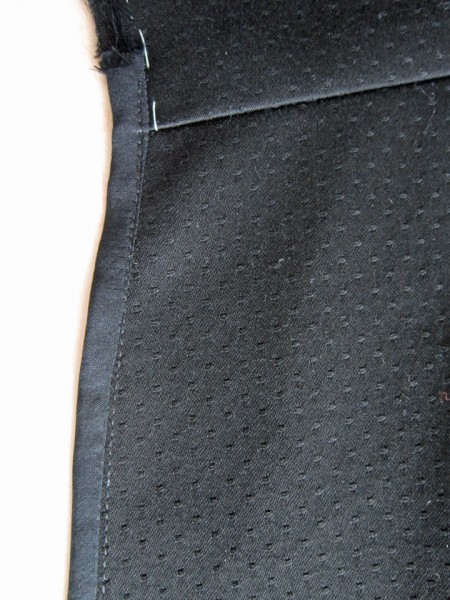
As you can see, my work looks a little lacking. The seam should follow along the inner edge of the strip, and it doesn’t, even though I think I sewed a pretty even stitch. I must not have been exactly accurate when first sewing my strips on. Also, I may not have cut my 1 1/4′ inch strips with good precision either. At least I now have an idea as to how finishing seams work, so I will go back and read the instructions again… it may make more sense now. It certainly seems anal retentive to be so fussy about seam allowances, but in the couture world, perfection seems to be one of the reasons for why a garment is so expensive. As to my efforts… well, they will improve with practice but what I’ve done here is acceptable and I can live with it and feel good about it, so end of story!
After finishing the raw edges but without disrupting the 5/8″ inch seam allowance, I was then ready to assemble! I first attached the front bodice to the skirt front.
Assembling the back of the dress started with first sewing the 2 bodice backs to the 2 skirt backs but I did not sew the center back seam. Instead, I finished the edges of the seam allowances like I explained earlier. Now I was ready to install the zipper. I am an invisible zipper addict, so this was my closure choice. Regardless of the kind of zipper, they are easy to install when you are working with flat pieces which is why I chose to assemble the dress the way I did. After the operation zipper closure installation process was completed (whew, that’s a hefty bunch of words!), I went ahead and sewed the center back seam.
Now I’ can finally attach the front and back of the dress together. Here are a few pictures to show you how I did it.
Step 1: With the back side face up and the front side face down (right side to right side), laying on my sewing table by my sewing machine, I was ready to baste the straps to the top of the back bodice pieces.
Step 2: Before I sewed the back bodice facings permanently on, I first basted the sides and tried on my dress. Two things I discovered were: The straps needed a bit of adjusting, and I wanted a little closer fit in the bodice. Both of these issues were easy peasey to fix! After removing the basting stitches from the sides, I laid the two parts back on my sewing table like I did before, adjusted the straps and then basted them in place again. Now I was ready to sew on the facings.
Step 3: Next were the side seams. I wanted to tighten the bodice up a smidge so instead of 5/8″ seams, I sewed 6/8″ inch (3/4″) seams. It was a little tricky at the bodice level because of the angle at the top of the side seams, but with patience, I got it. Actually, I DID do a bit of swearing… mainly because I couldn’t get the seams of the bodice front and back to match up on one side. Okay, I did a lot of swearing! I sewed a seam starting at the bottom of the lining (top of the picture), continuing on through the bodice and down to the bottom of the skirt in a continuous seam.
After pressing all my seams, I was now ready for another try-on. I was happy! It fit perfectly. However, there was this little nagging thought that I just couldn’t shake. What about a skirt lining. The pattern doesn’t call for it but… but… I am the queen of lining! How can I not line? And lining feels so soft against the skin, especially if it’s silk… or Bemberg lining fabric… Bemberg would be nice. Of course, this meant another delay getting this post posted! Hmmm……. well crap… sorry to do this but I can’t help myself… I am going to have to post this in two parts. I will be back really soon! Right now it’s time to go to the fabric store!
Salute! Jessica
About Me
 Portland, Oregon,
 United States
Hi there! I’m Jessica Brandon and I am a clothes-loving sewing artist. When I am not sewing, blogging or shopping for shoes for my creations, I fill in the remainder of my days spending time with my children, playing ice hockey, gardening and making and drinking wine!


Up Coming Projects:
Vogue 1426

Vogue 7881

McCall's 7089

Vogue 8997

Vogue 1431

Vogue 9006

Vogue 8991
