

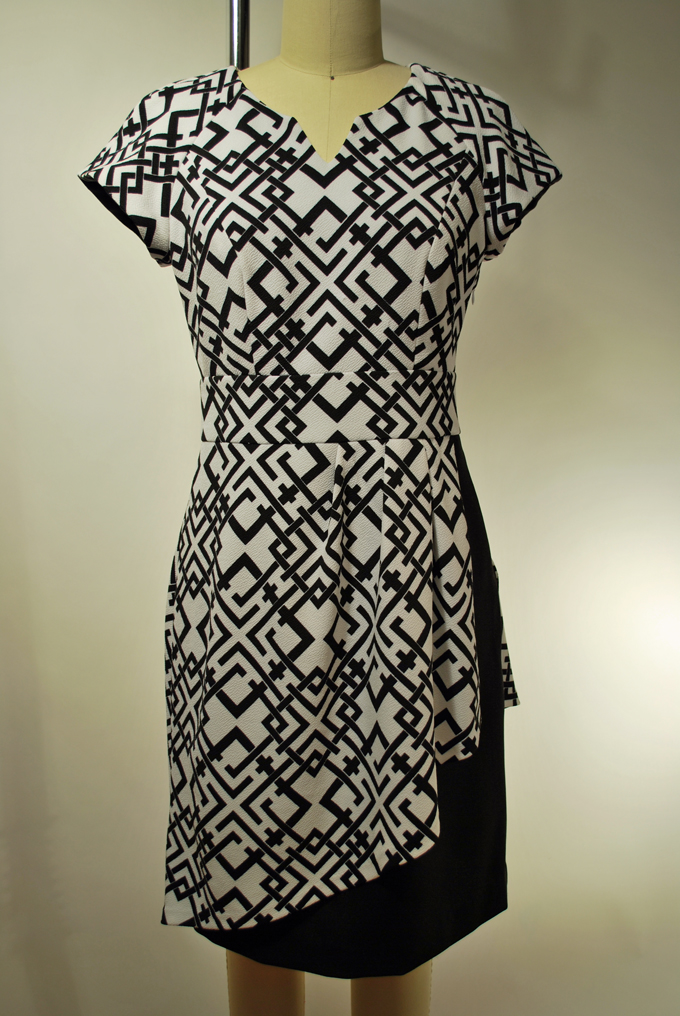
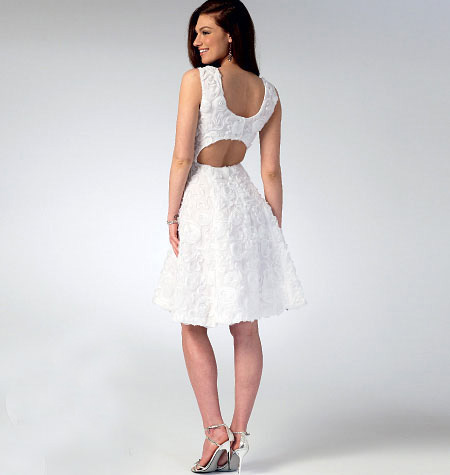
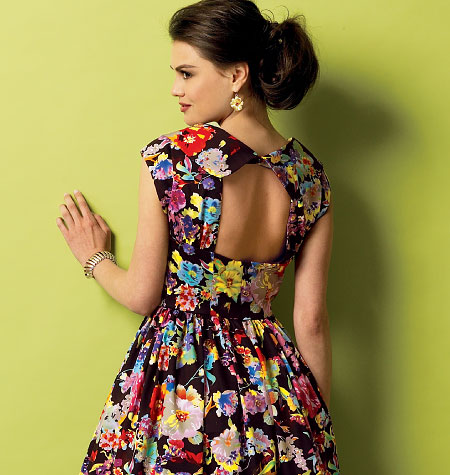
Back on Track with Simplicity 1754

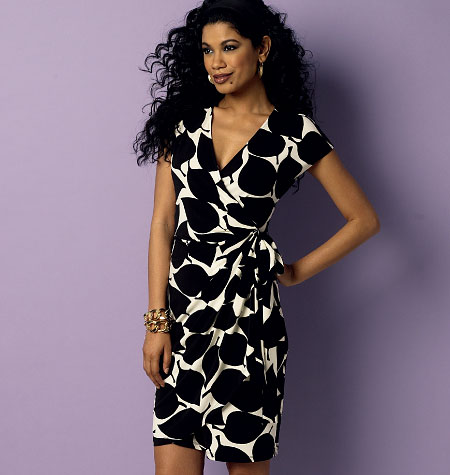
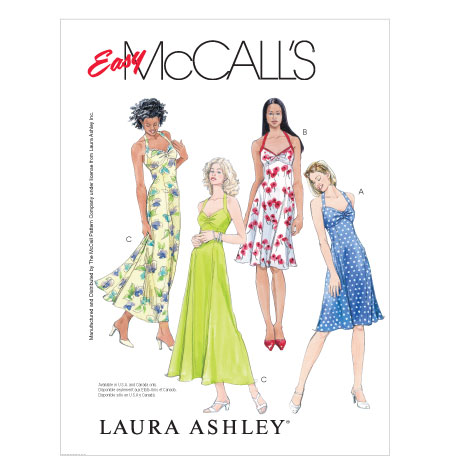
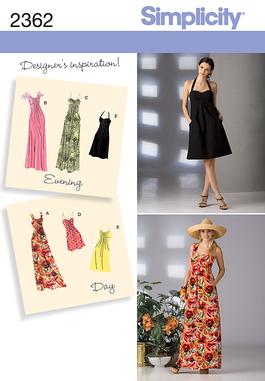
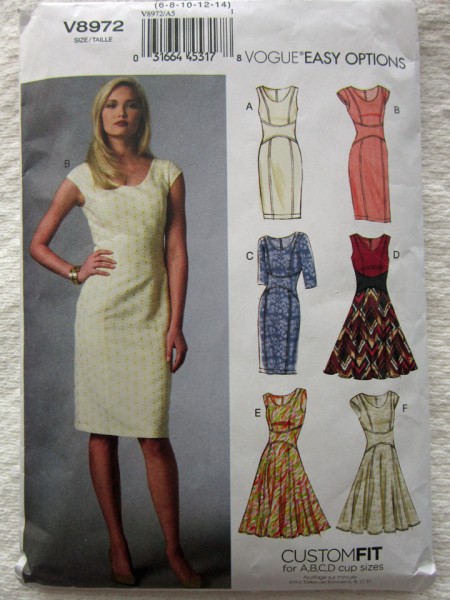
To start this party, I think I should first say that 2015 was sort of a tricky year for me in oh so many ways. Honestly, I think it left me drained as we rolled into 2016. My desire to sew took a hit but because I love to create new things to wear…well, it’s my passion so I just had to transition back into the sewing mood. I’m happy to say…I’m back on track! And in an attempt to keep things simple, I dug out an old pattern that caught my interest, but as I said, it was old, tucked away in a big bucket of patterns and unfortunately no longer in print though I found it still available through Joann Fabric on-line. It’s Simplicity 1754 with an interesting style.
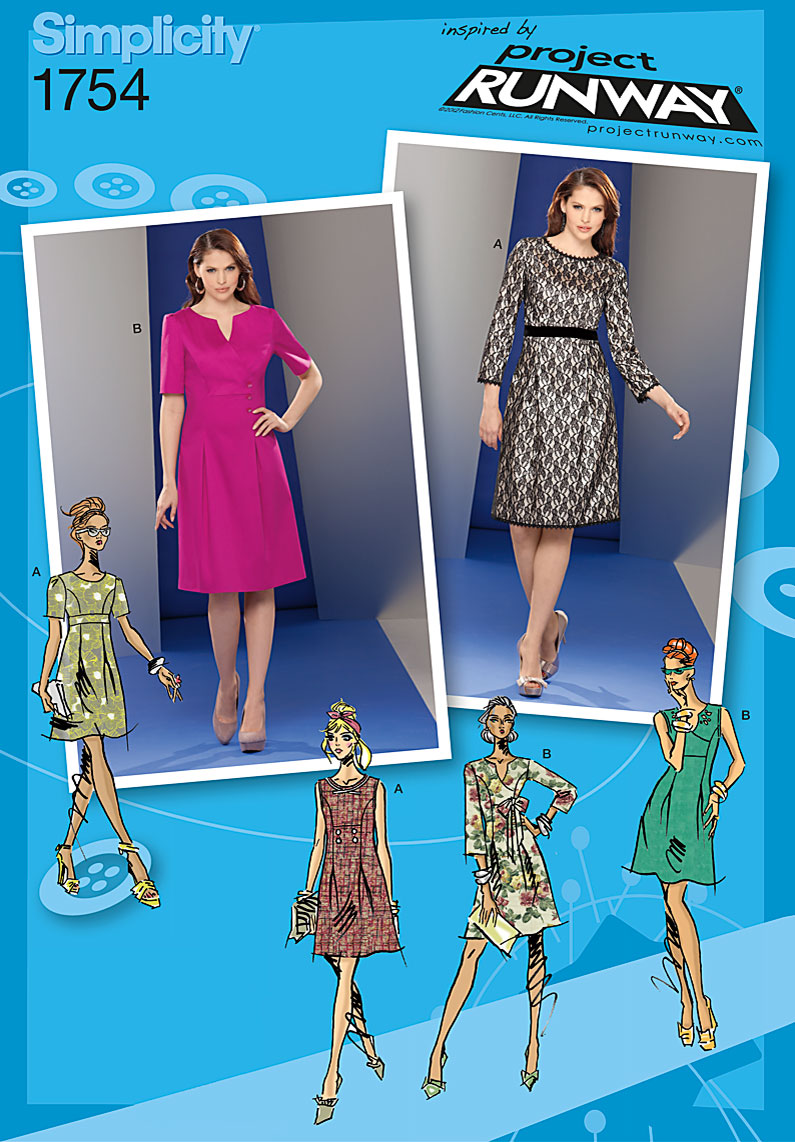
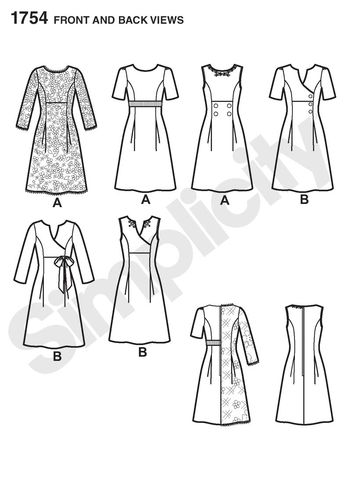
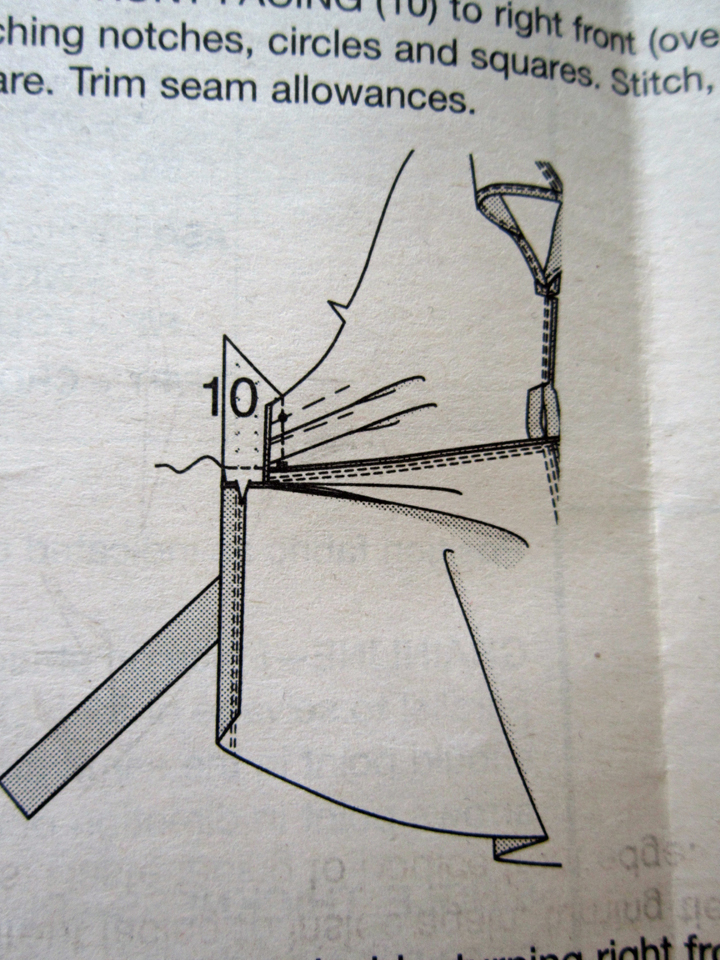
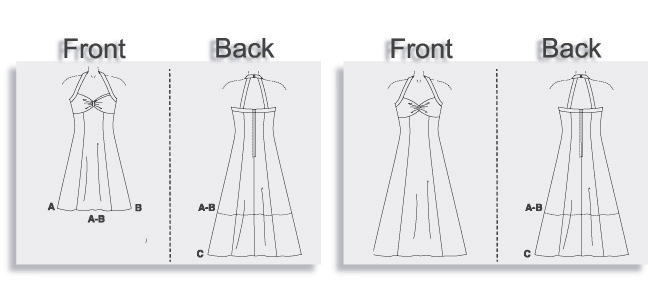
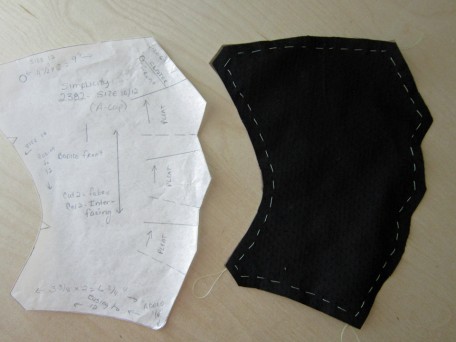
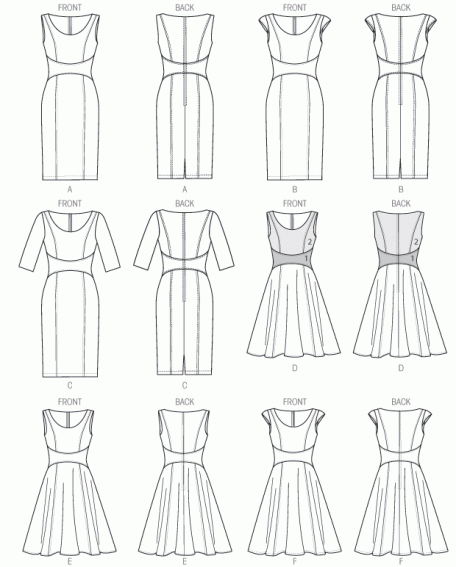
I got creative and went for option B, the little green drawing of it in the bottom right corner. Below is the pattern instruction diagrams.
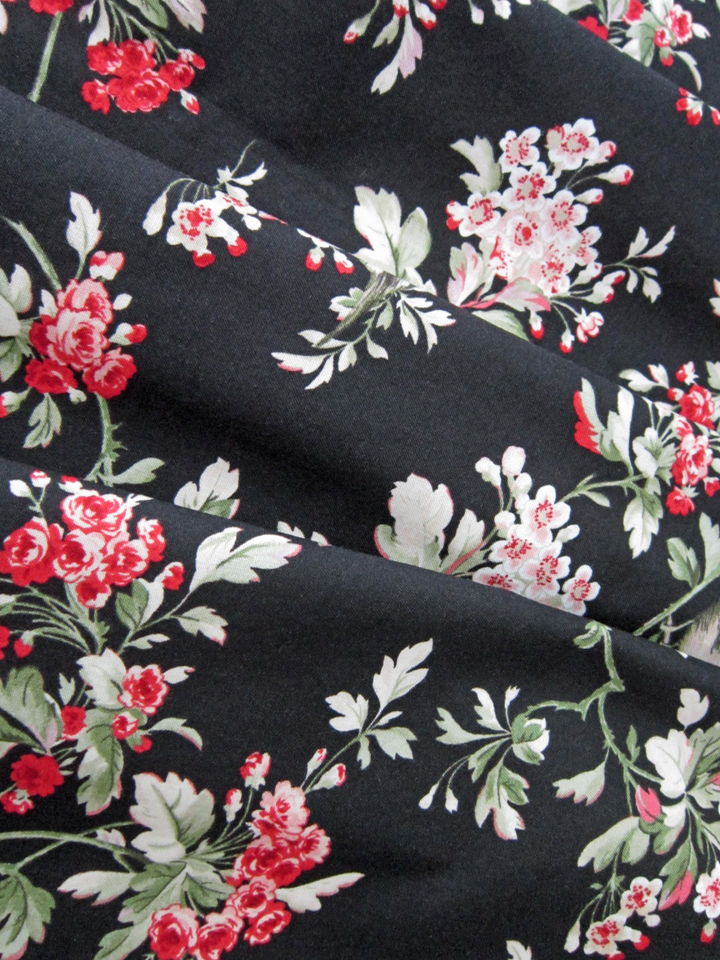
To make this dress, I had to go on a hunt for fabric. Is it just me or is there a lot of nothing available to us non-commercial sewers?! I combed through some of my local fabric stores, and had almost given up when I stumbled across this.
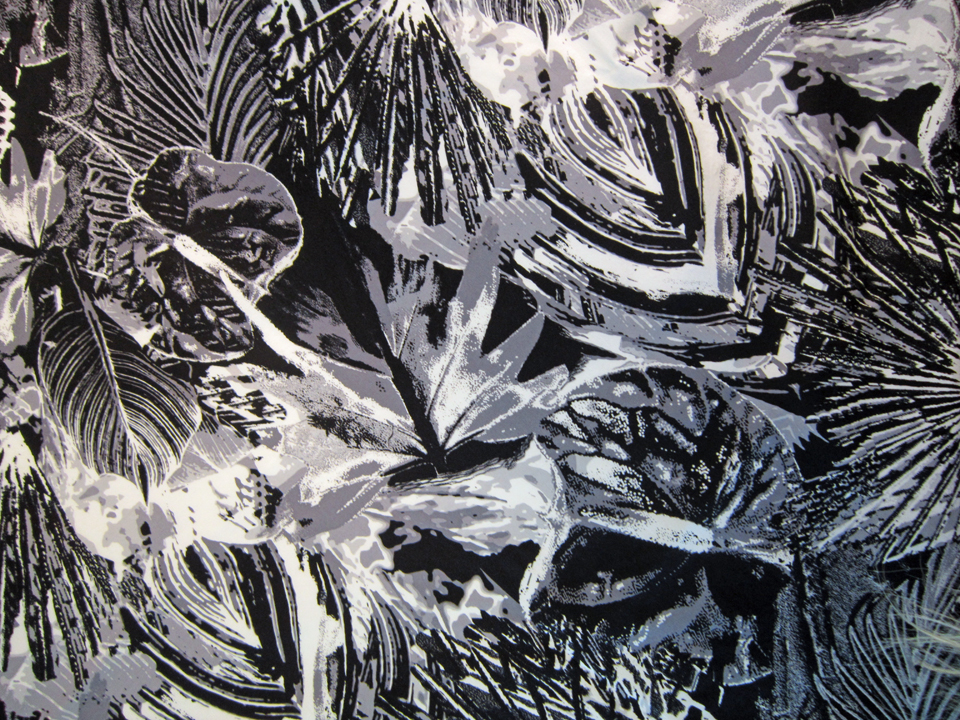
It is cotton with spandex so has a wee bit of stretch. It is soft and was very nice to sew but it does make a rumpling sound that kind of annoys me!
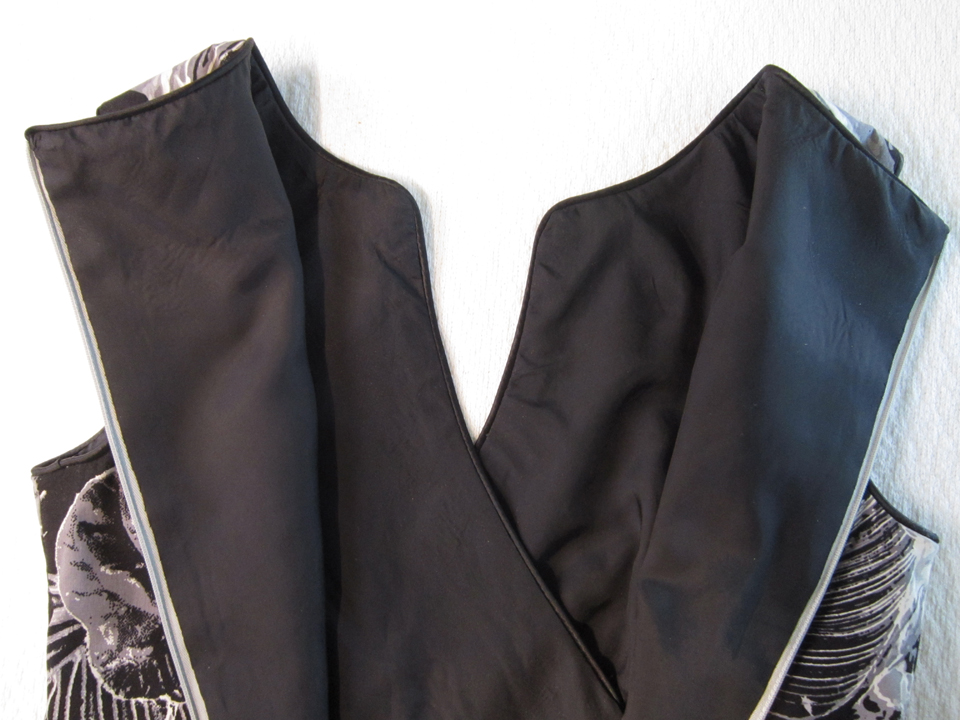
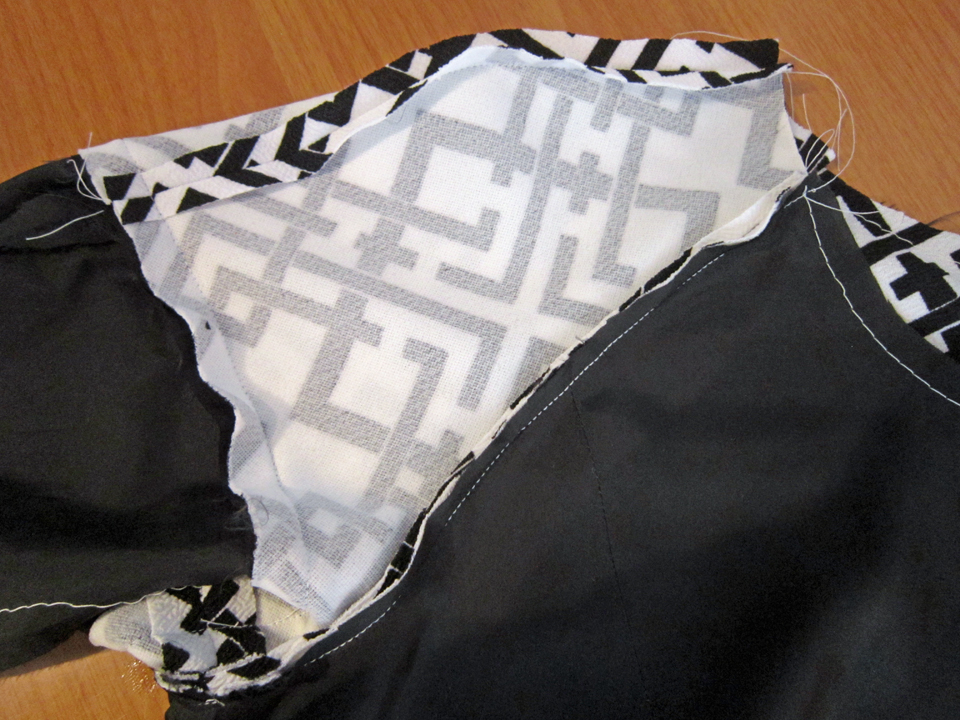
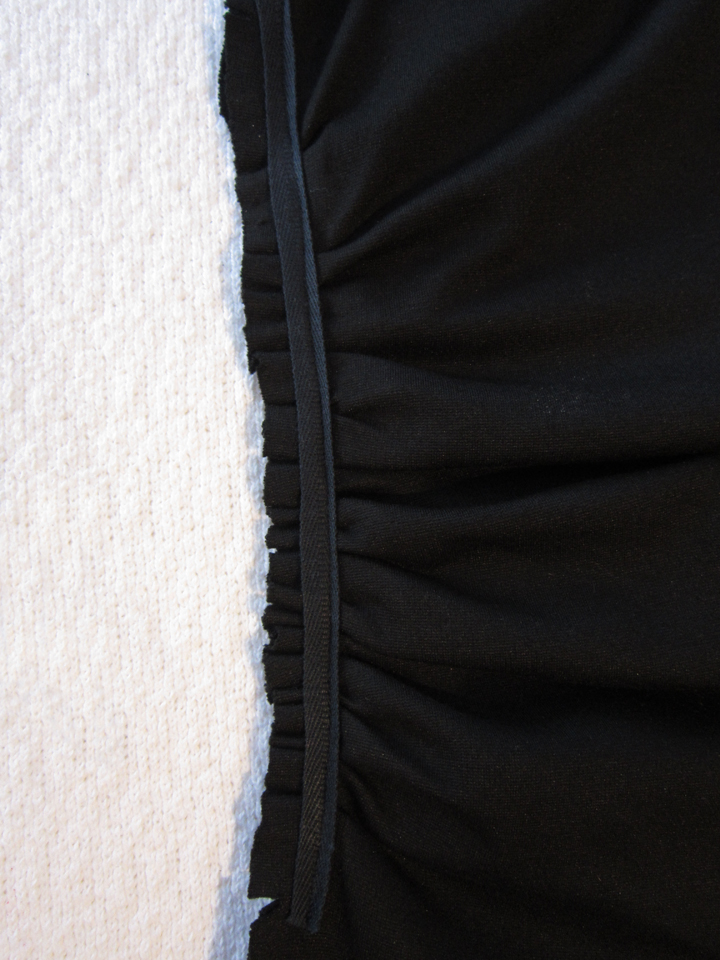
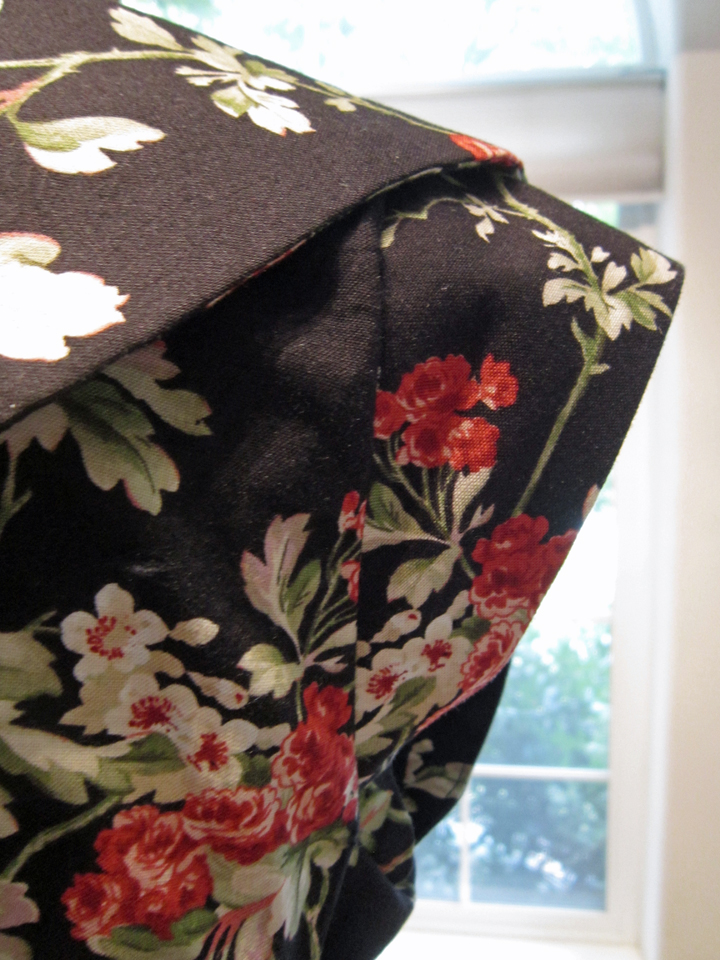
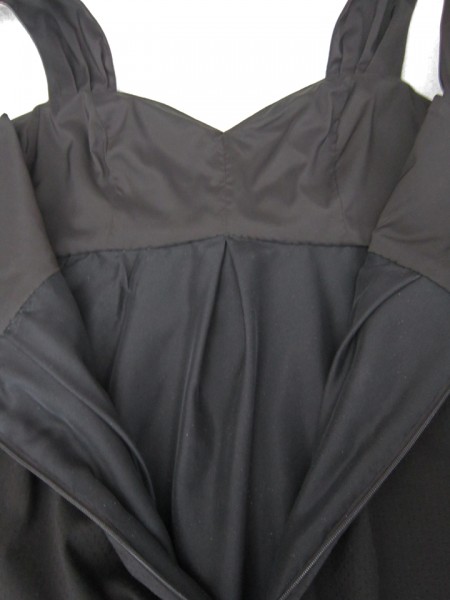
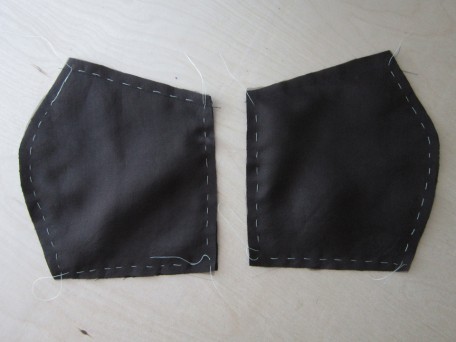
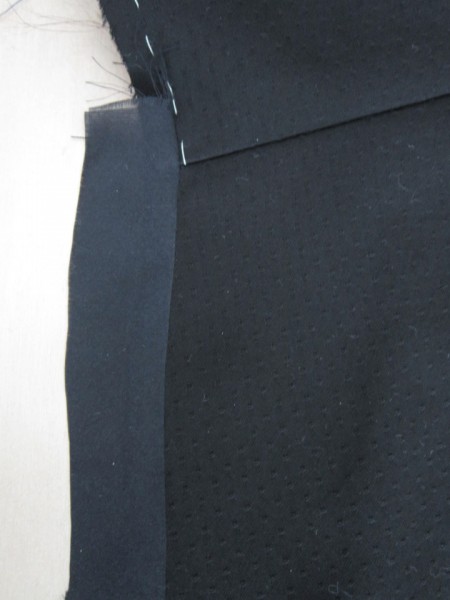
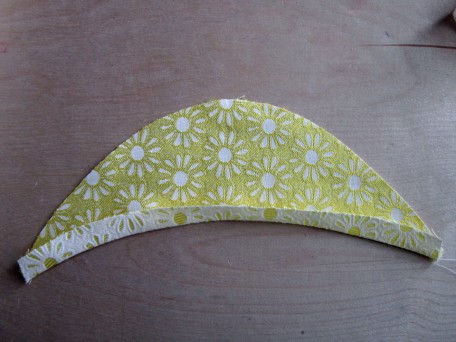
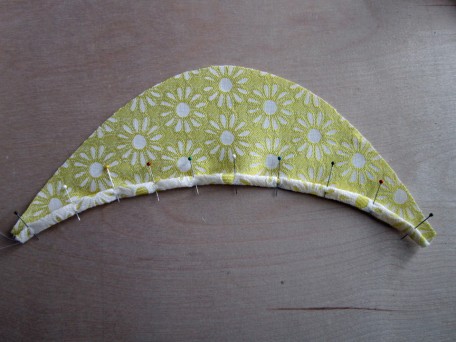
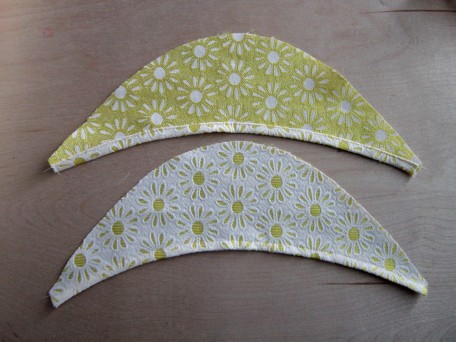
I have no idea why…but the lining queen forces within just won’t let me make something with visible raw seams. It would be easier to not line, but for whatever reason, my brain thinks that a garment feels so much better to wear and is more special if it’s lined! I’ve decided to not fight it, it’s truly easier that way! Naturally the pattern construction did not provide for this pin head notion so I had to be very creative. To top it off, I also decided that I wanted to use piping and of course there were no instructions for that either.
To get the job done, I relied on this…a fabulous handy dandy tool to have for sewing piping…a piping foot!
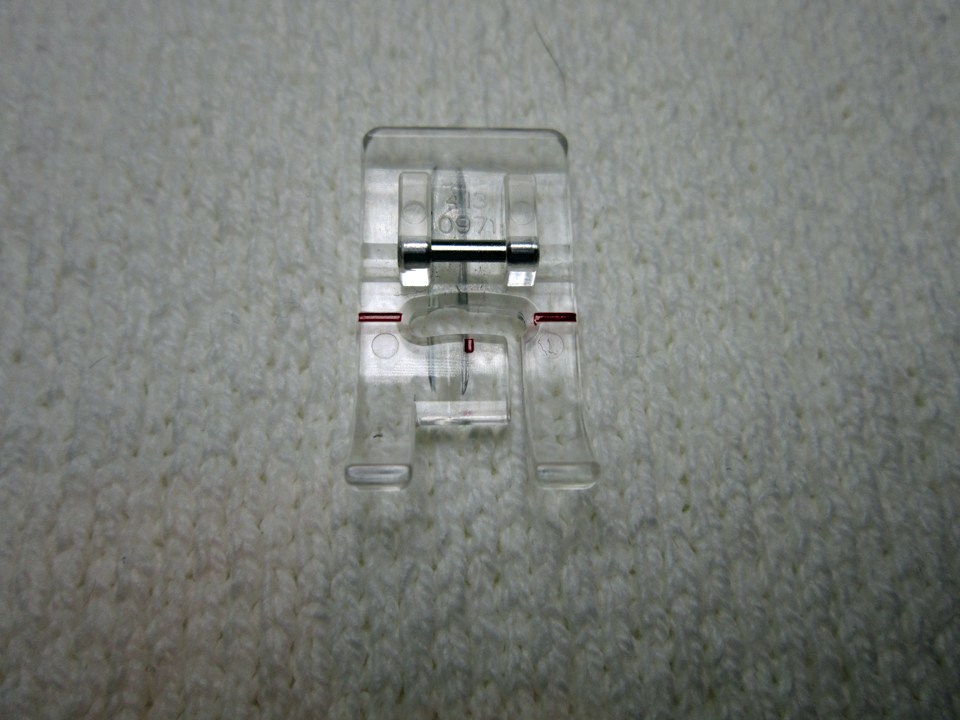
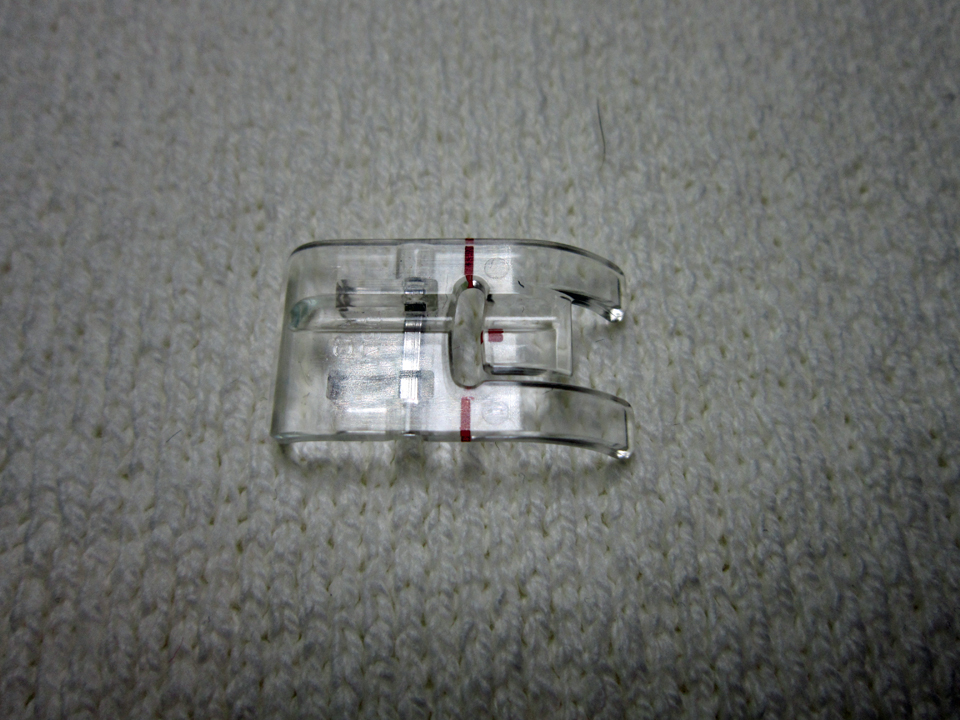
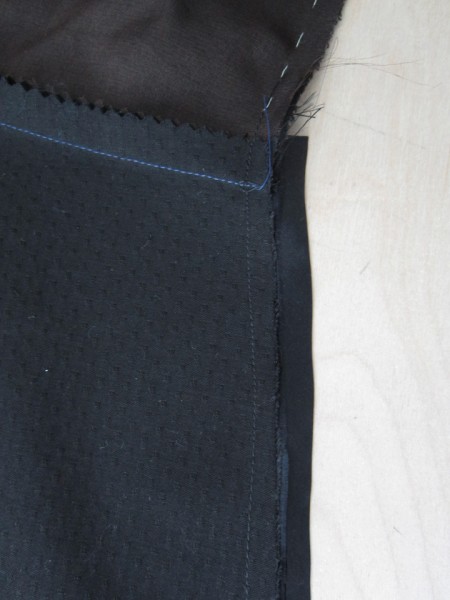
1. It took some extra time, but I first positioned the piping under my piping foot and using my 5/8″ guide on my machine, basted the piping in place, however, I moved my needle to a more narrow stitch, maybe 1/2″ because I didn’t want my final seam to overlap this basting seam because the threads get tangled and it’s sometimes difficult to pull the basted seams out.
2. I then sewed together the two fabric pieces with the piping sandwiched between, again using my piping foot and sewing the usual 5/8″ seam. I took my time and did this slowly.
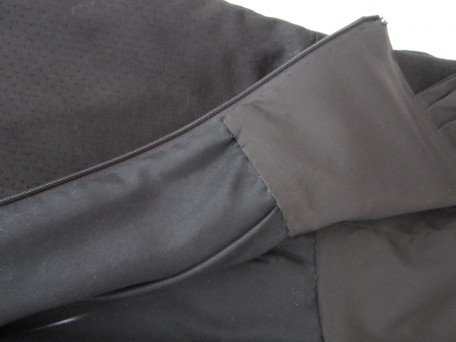
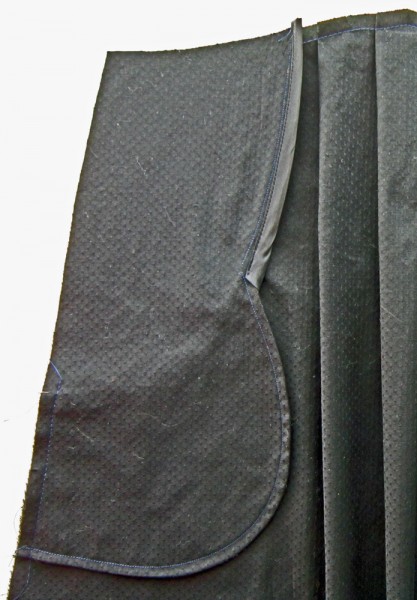
3. After checking to be sure it all looked good, I removed all the basting and then clipped the piping to the seam along all the curves and sharp corners.
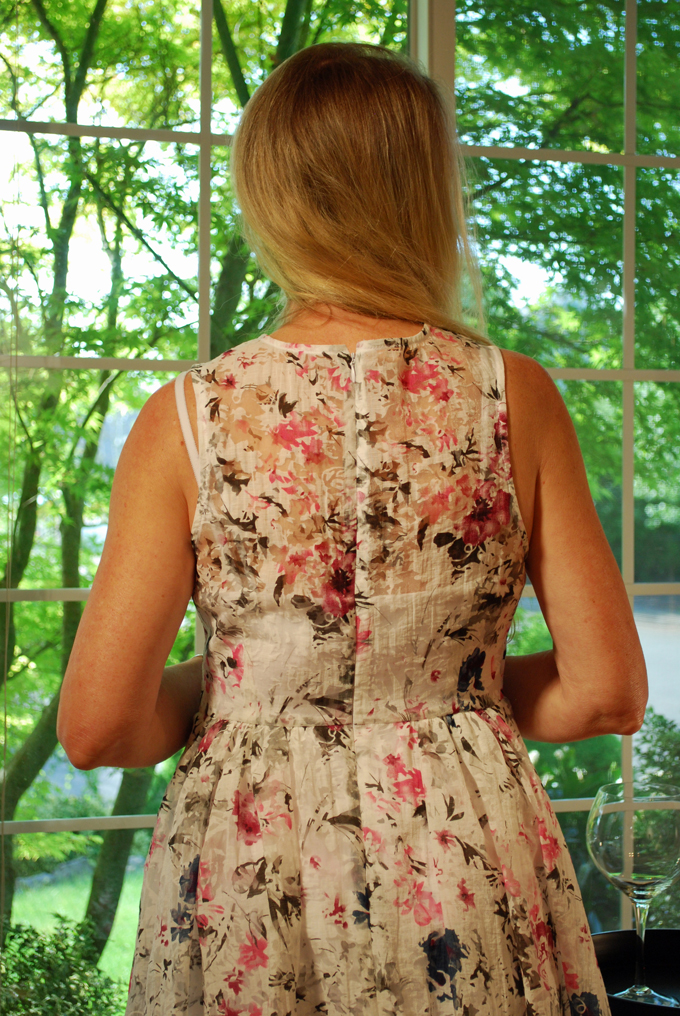
Dare I say…I finally learned how to apply piping properly to clothing. My corners and edges at the back of the neck were a success!
I didn’t take any pictures of the construction process because what I was doing would have made no sense in pictures. I had to throw the instructions out the window and totally think it through like it was my own design. It was slightly unnerving at first but once I sold myself on the idea that this was no different than when I make my own designed garments, I let go of any fear and just figured it out! I think that’s why I had fun…it was like not having to worry about coloring in the lines!
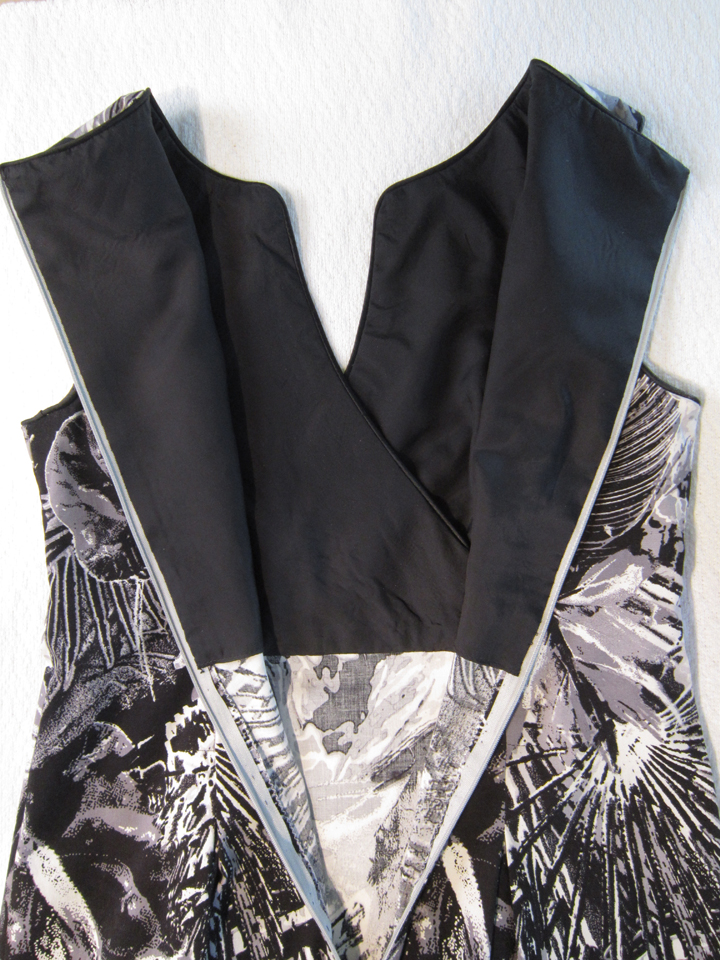
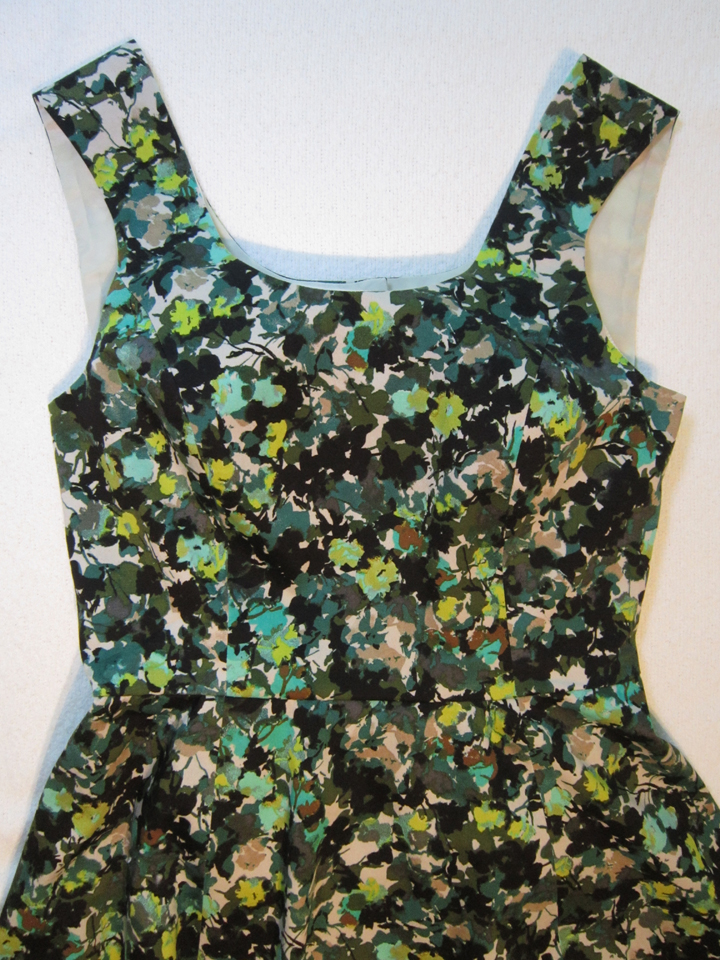
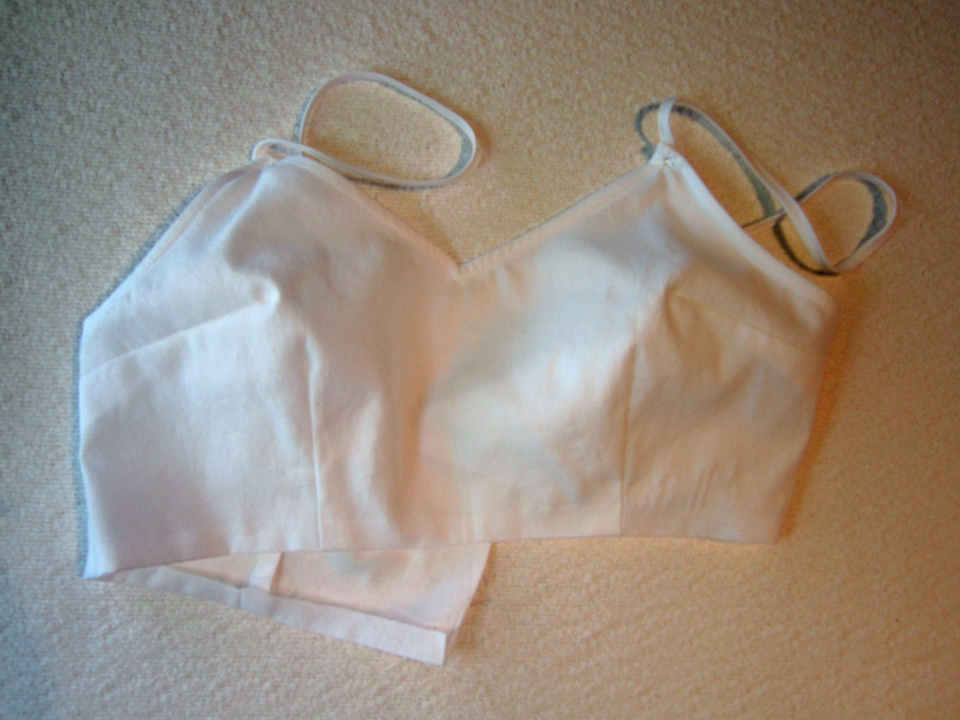
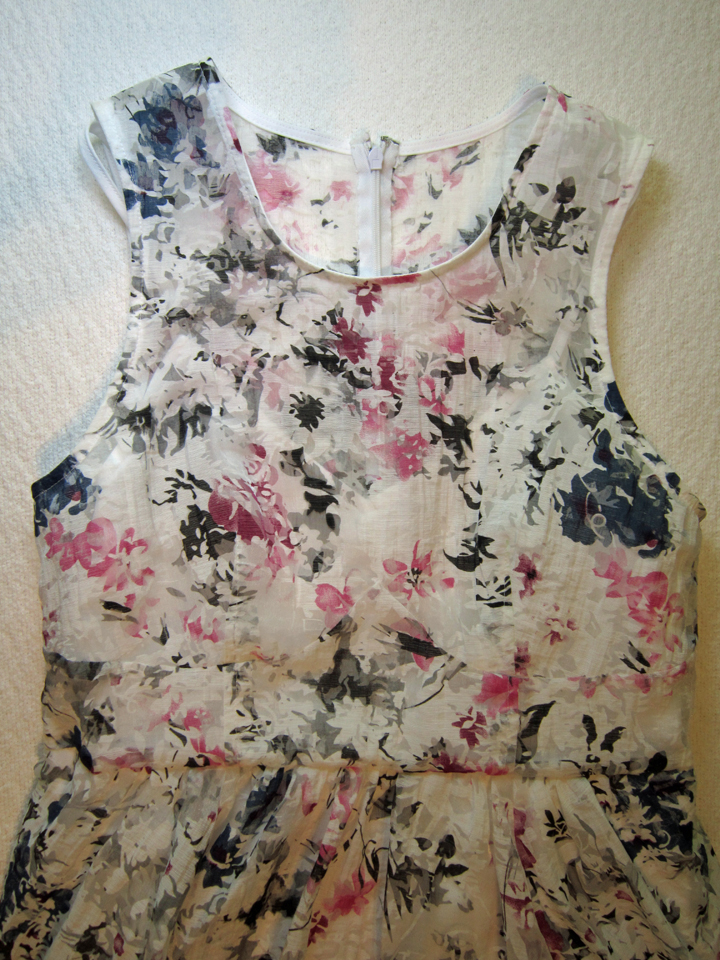
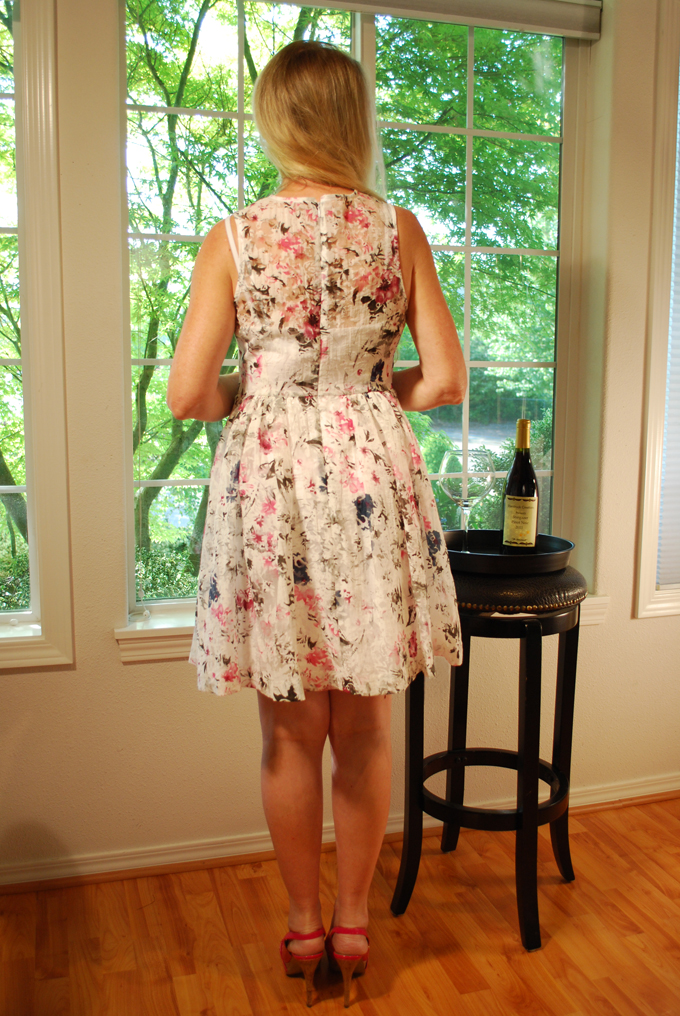
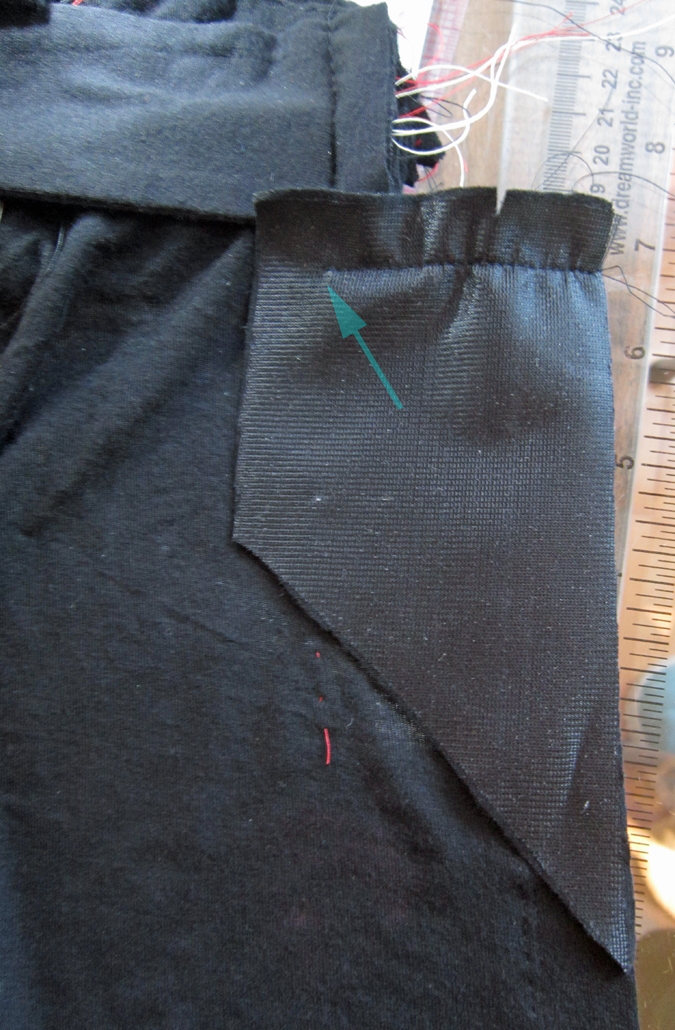
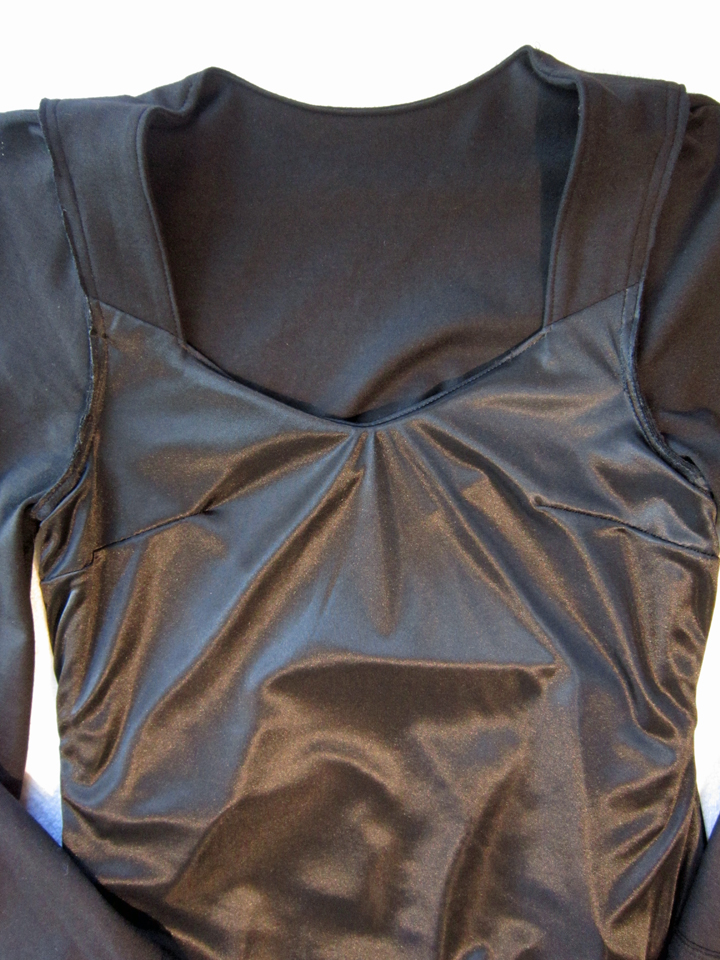
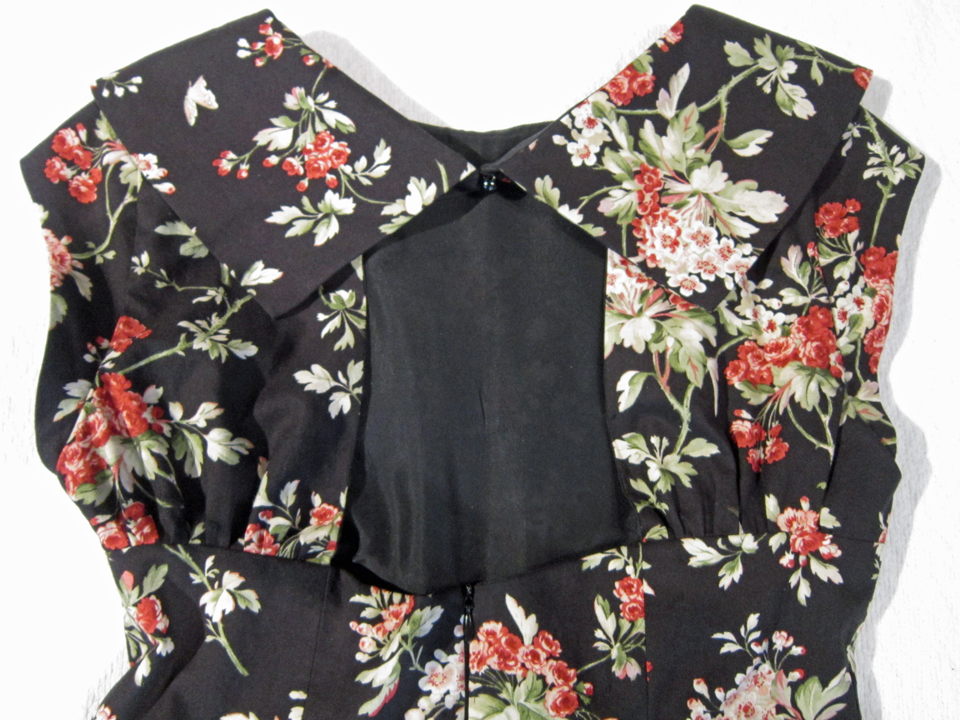
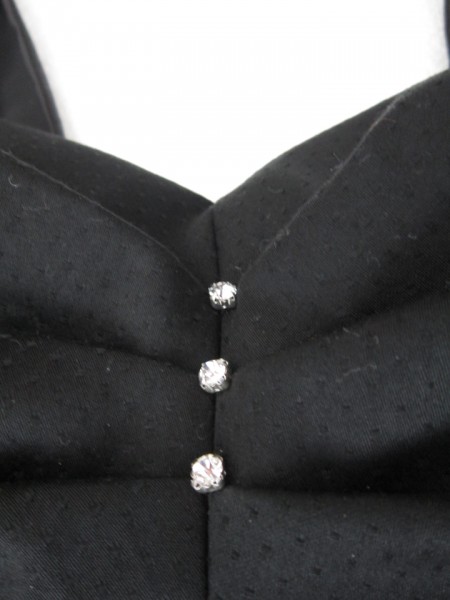
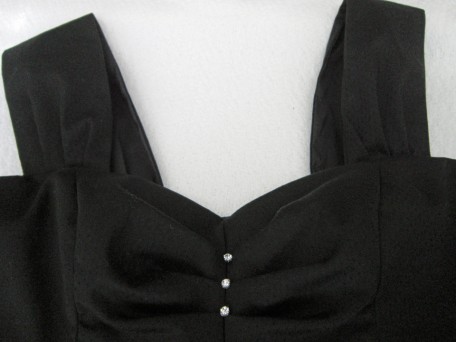
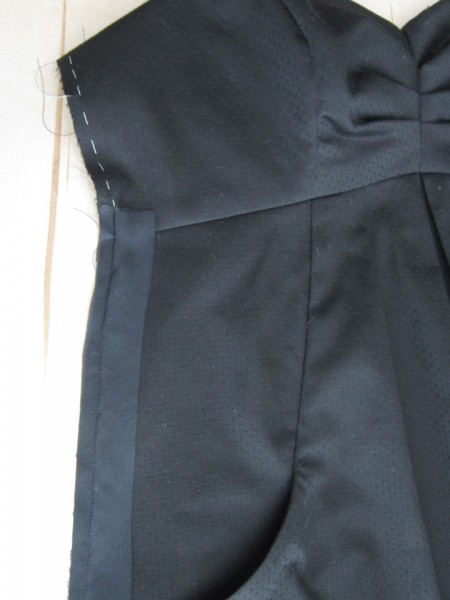
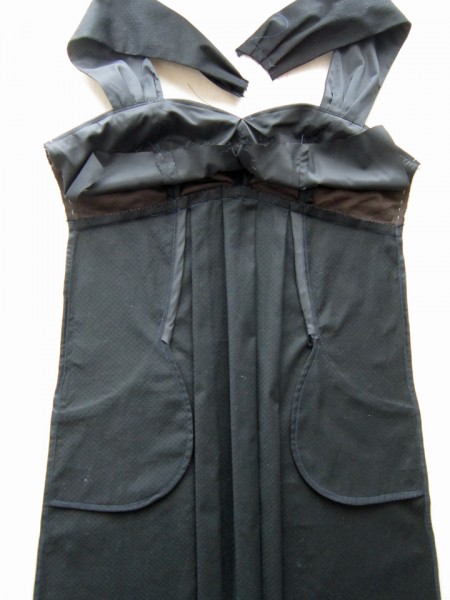
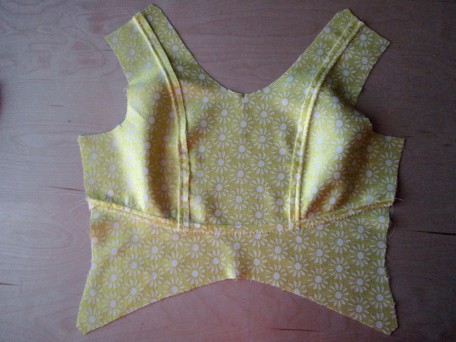
This is the front bodice of the dress. I’m thinking of adding buttons diagonally along the right front but it has to be just the right ones! HA!
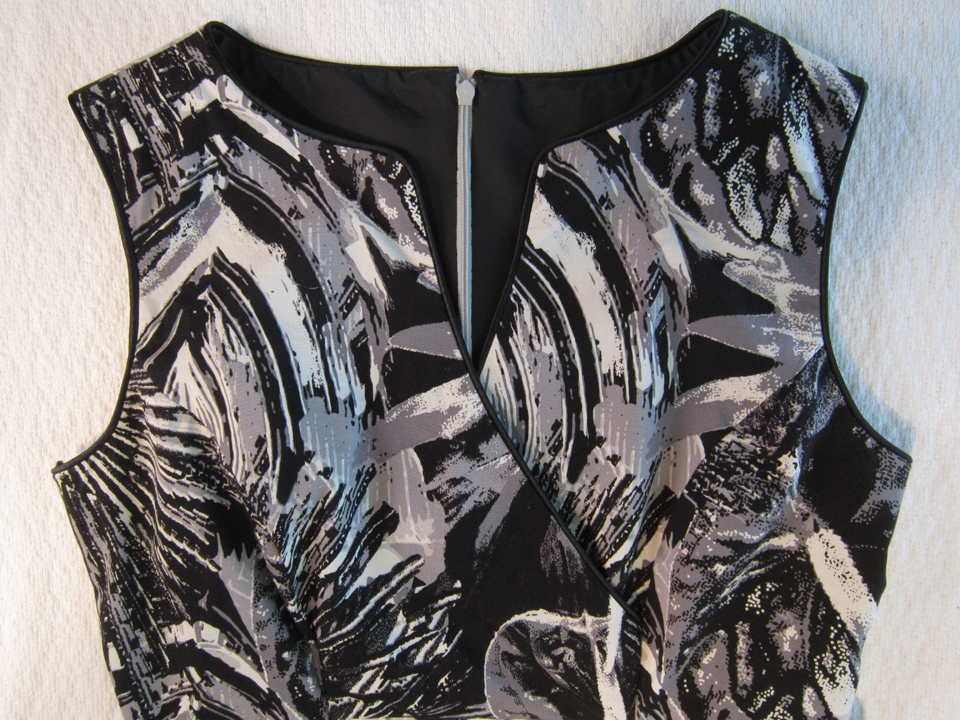
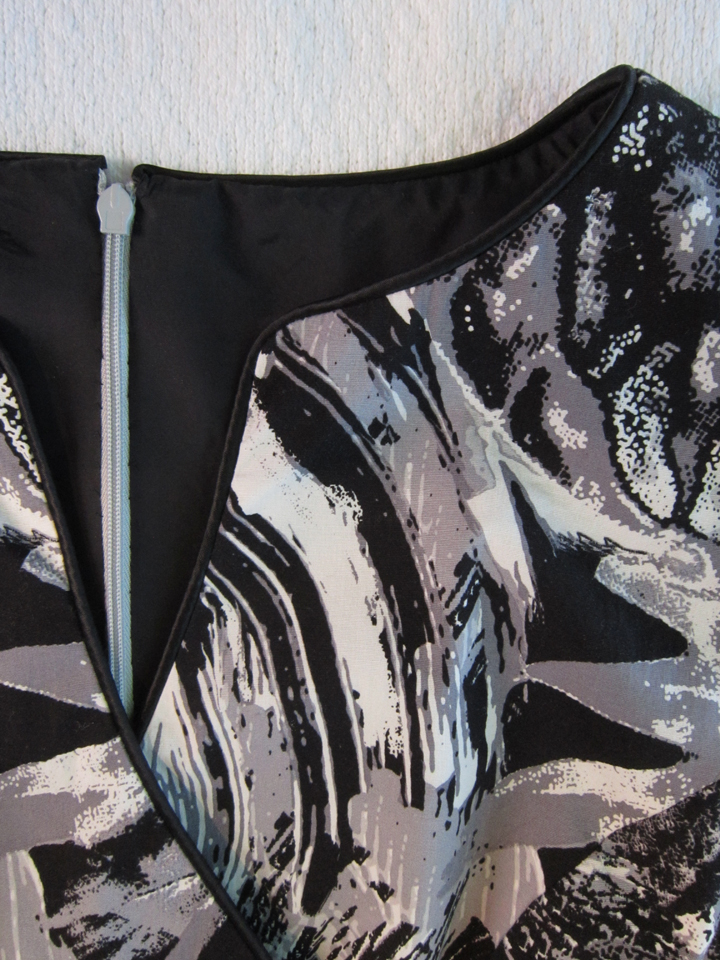
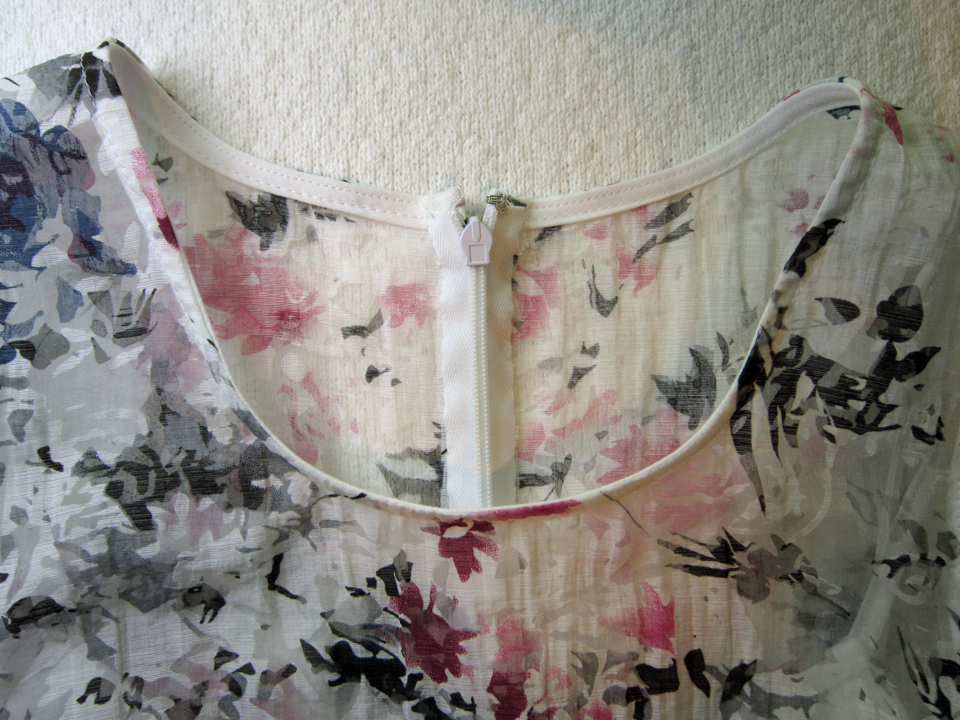
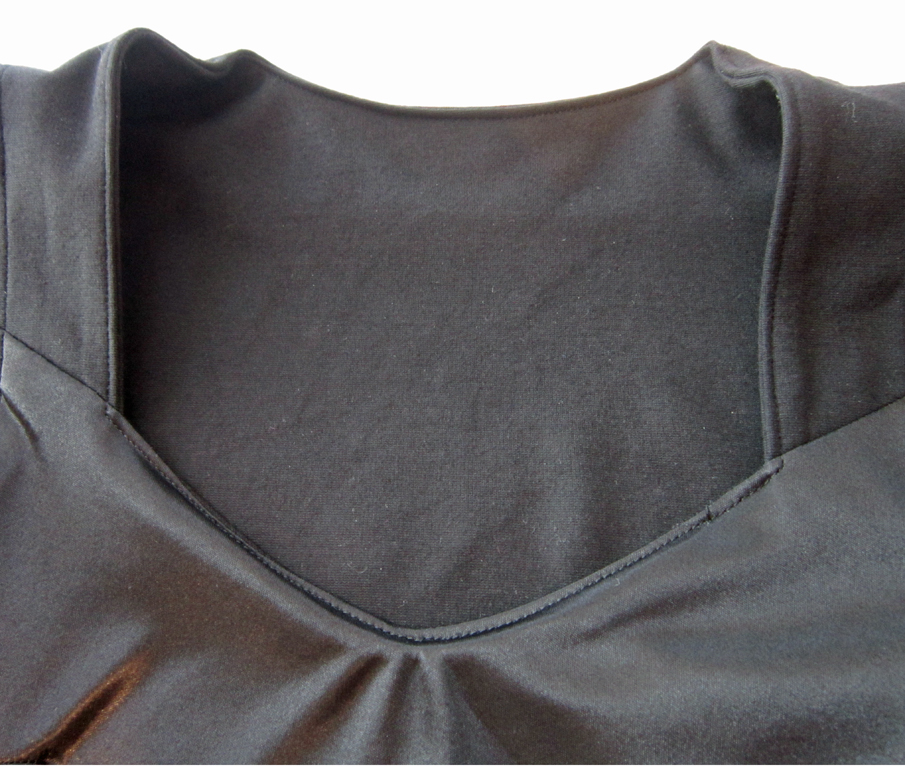
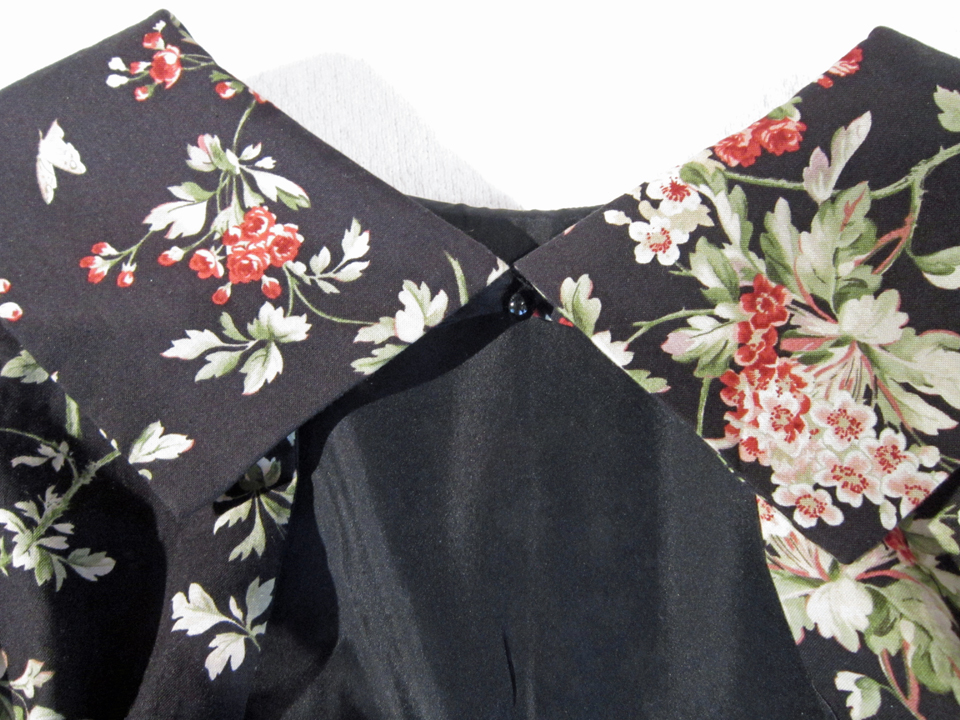
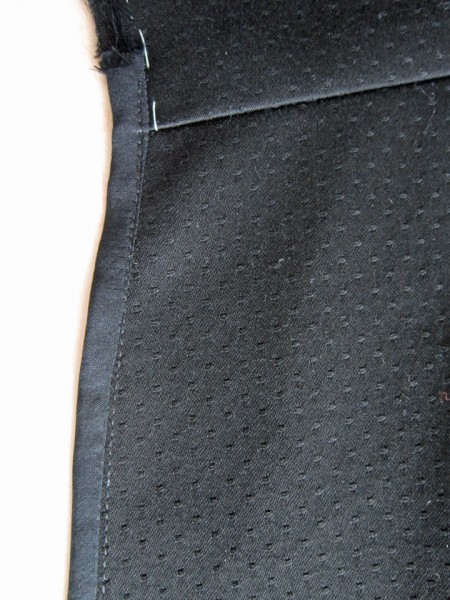
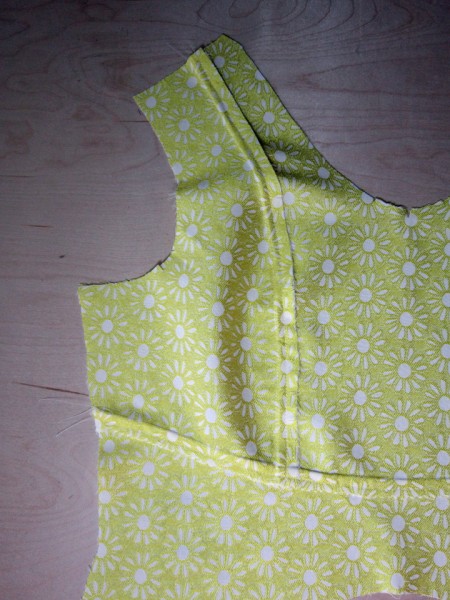
This is a close up of the neck with the piping.
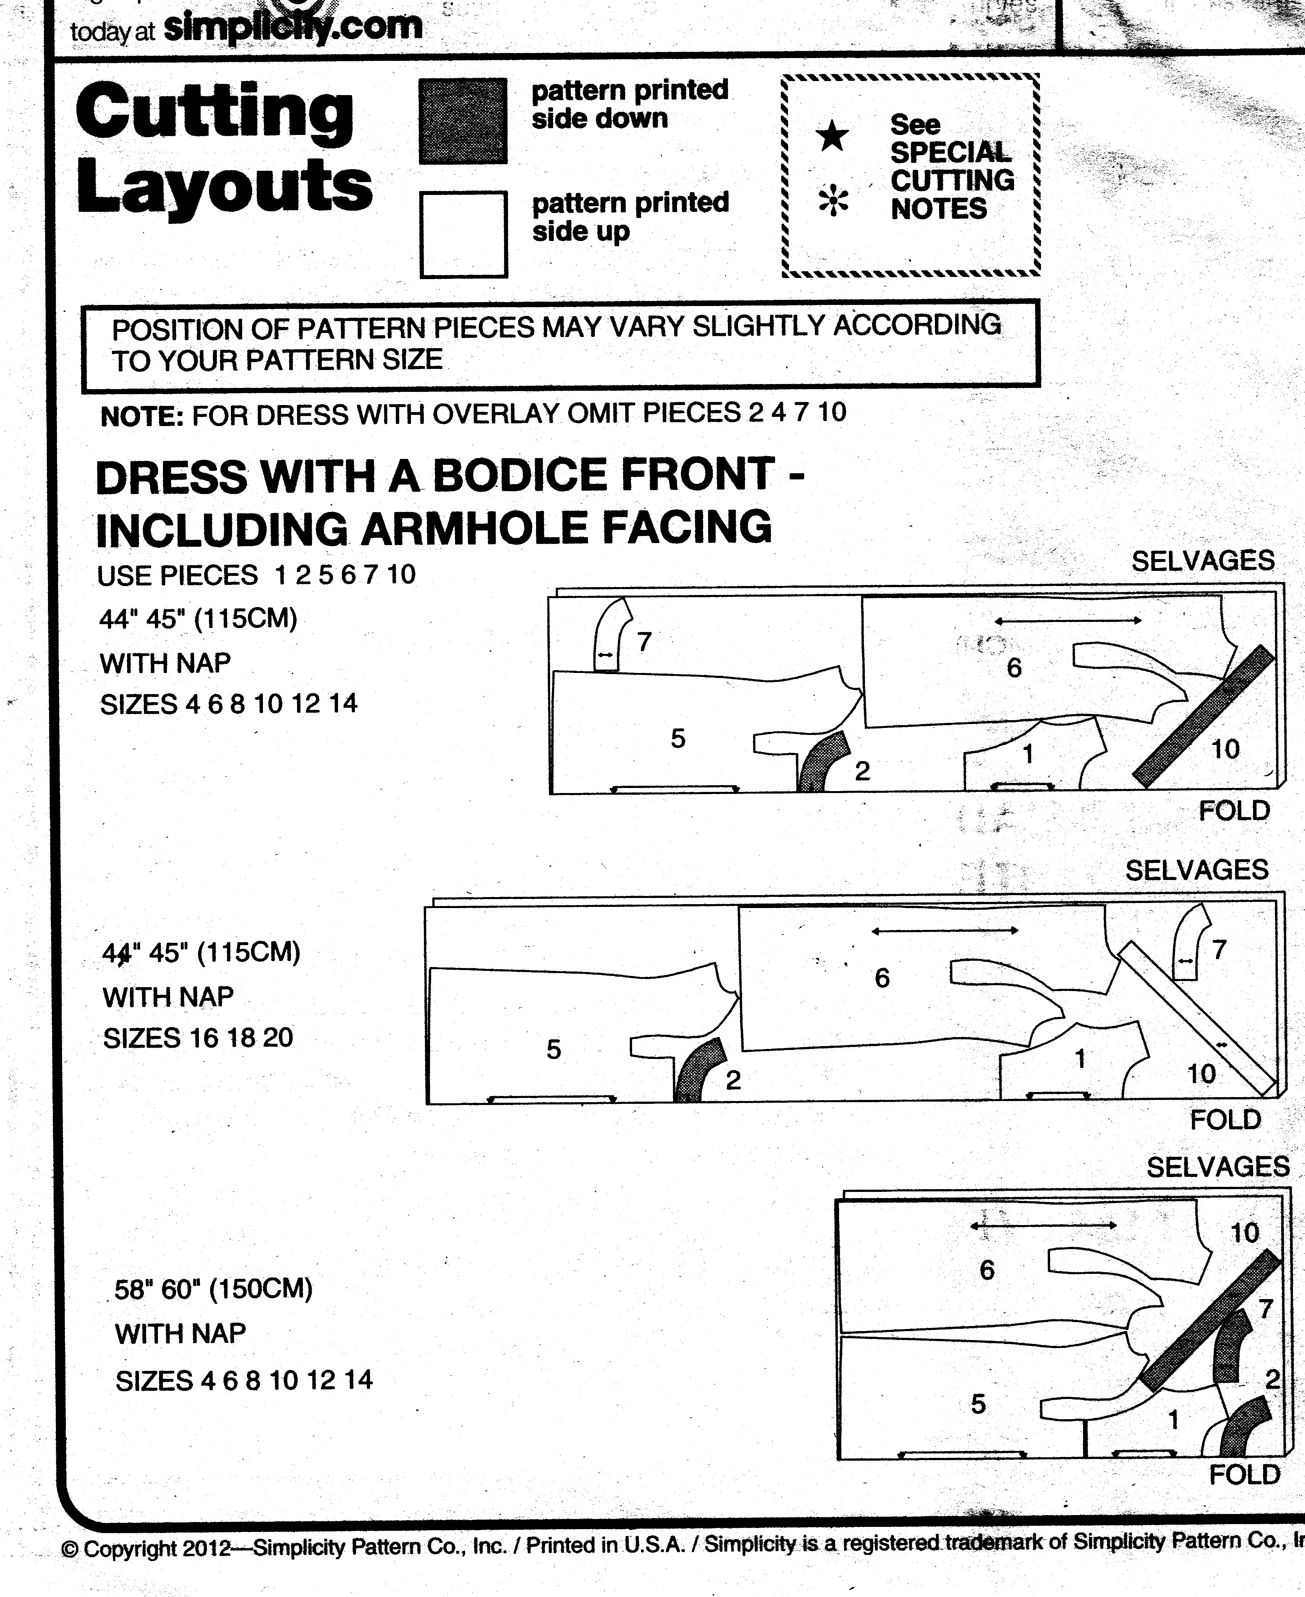
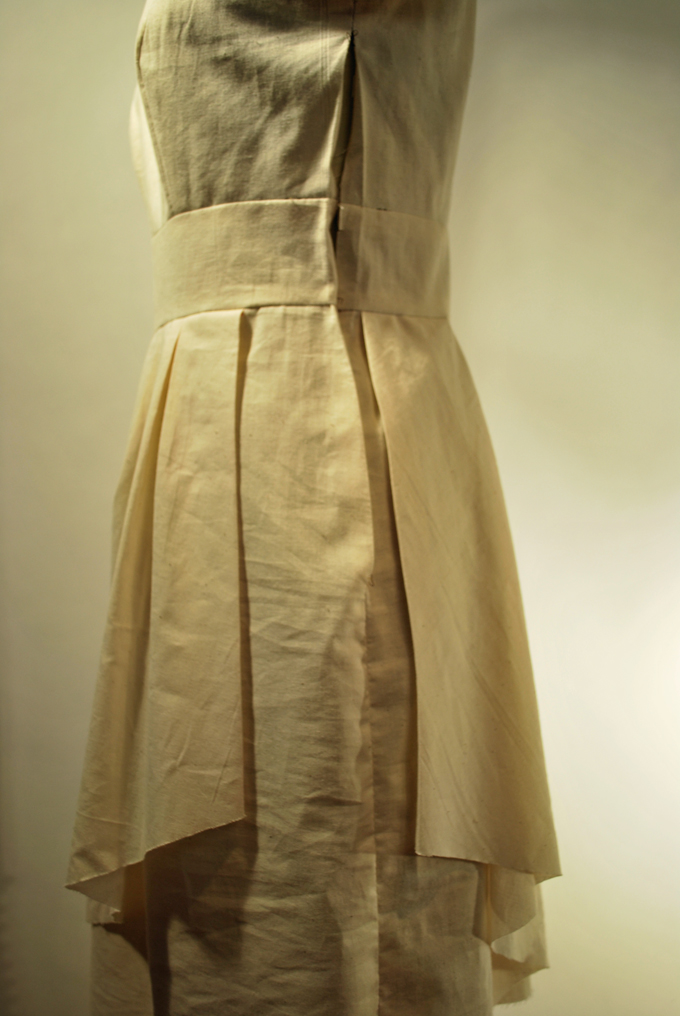
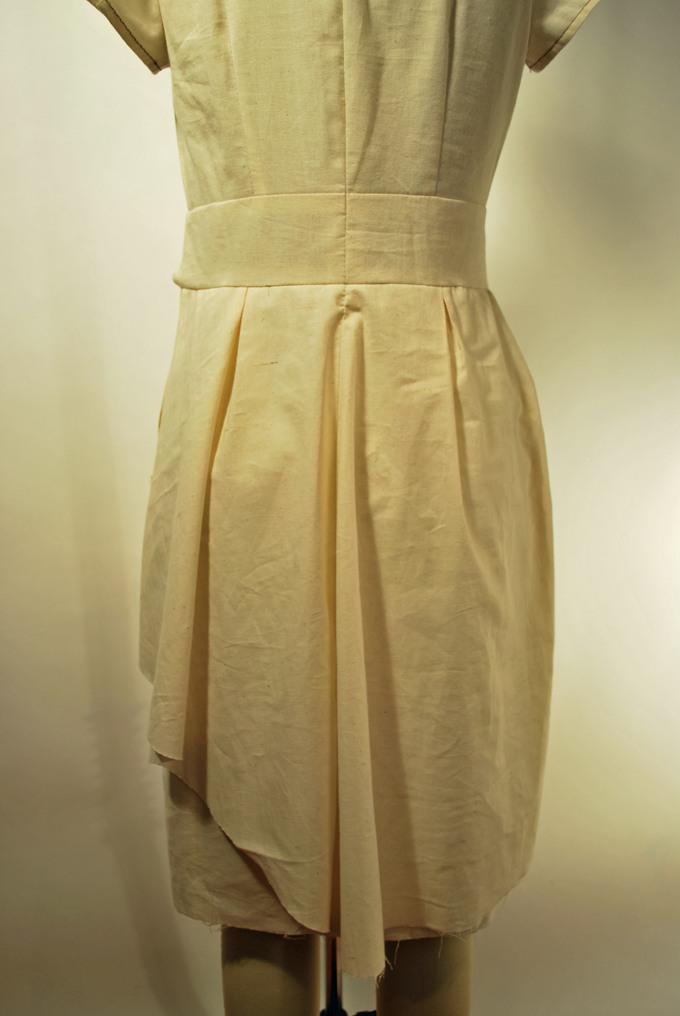
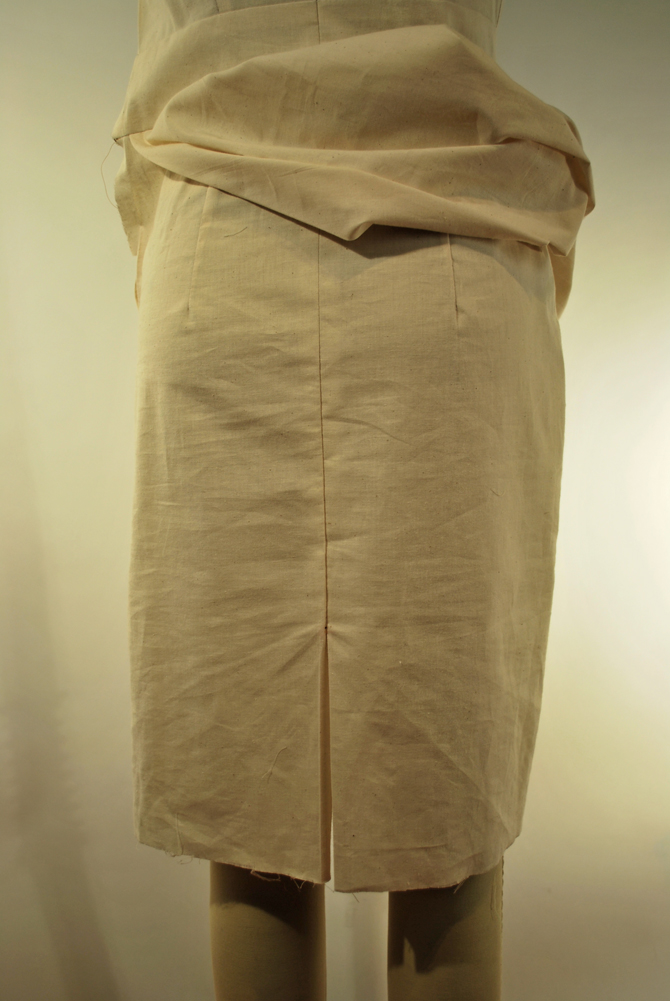
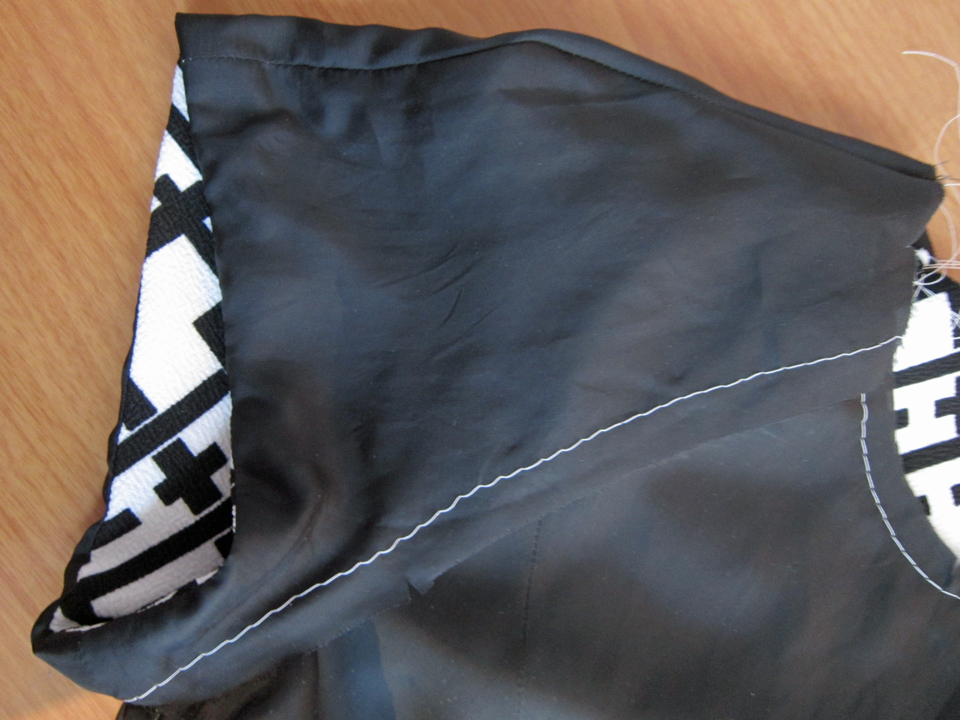
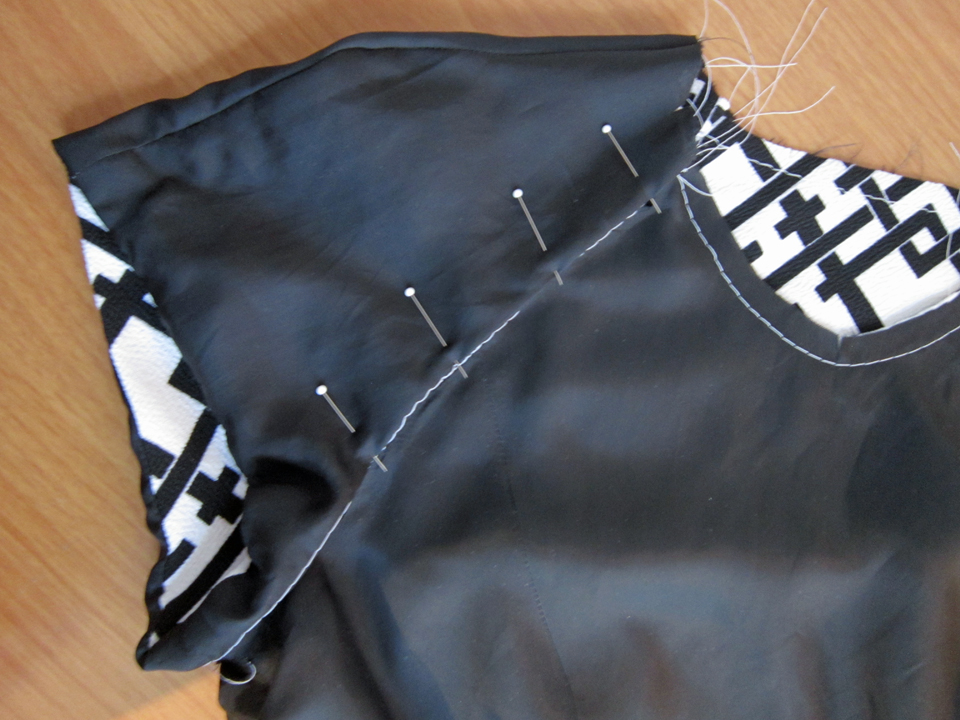
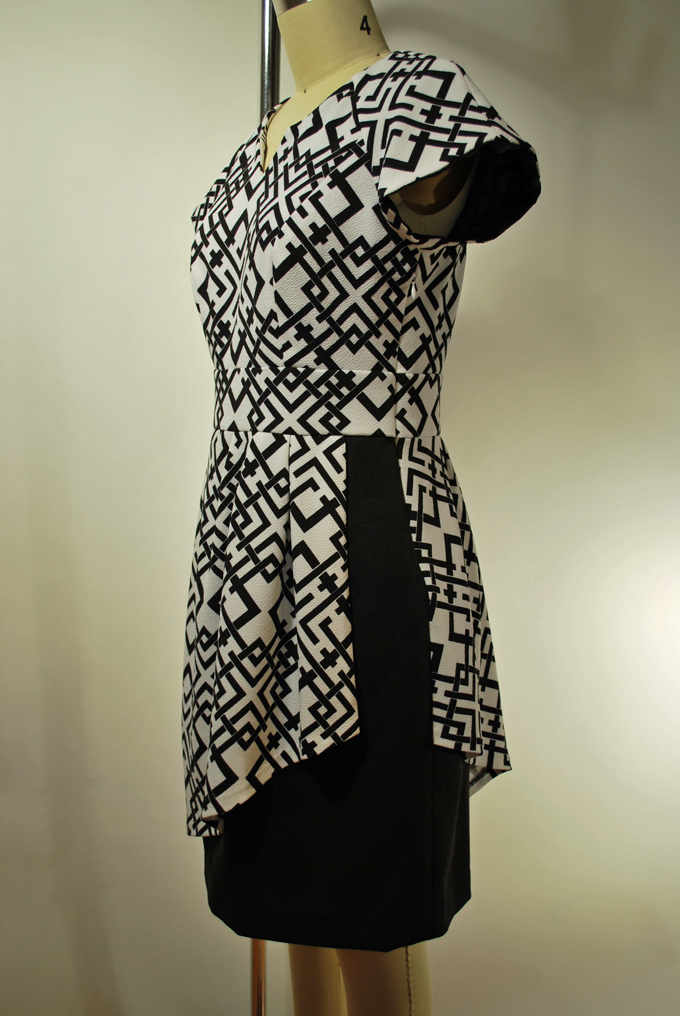
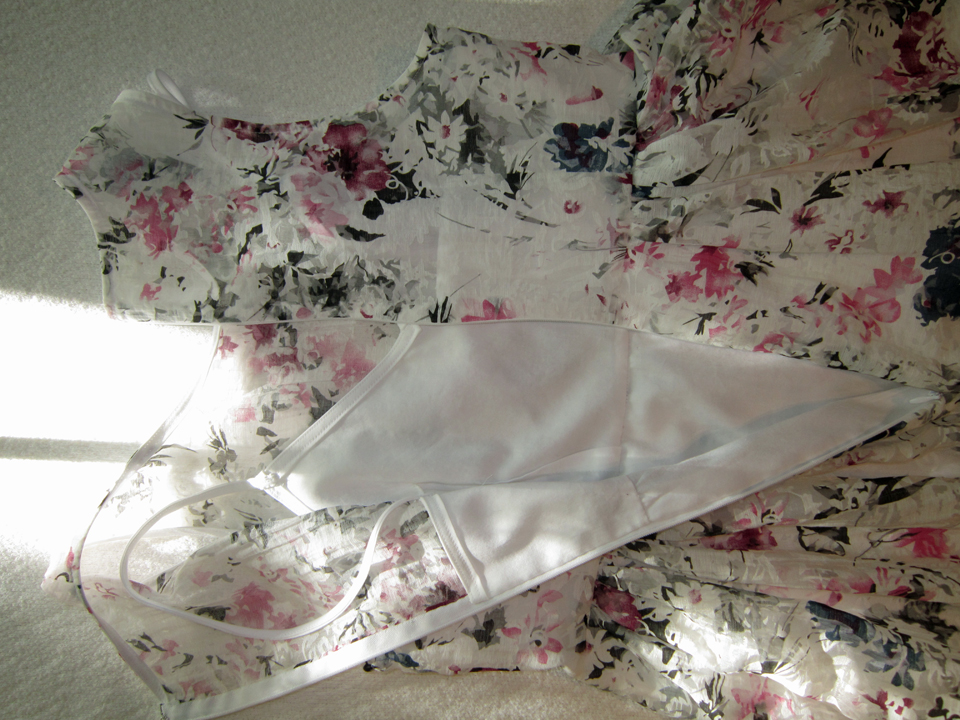
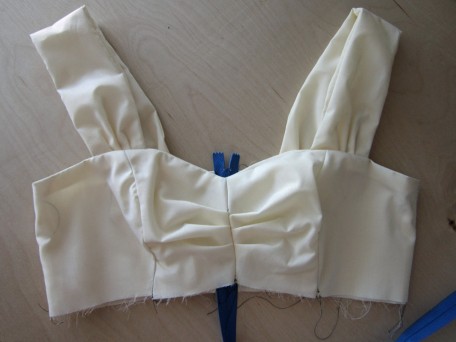
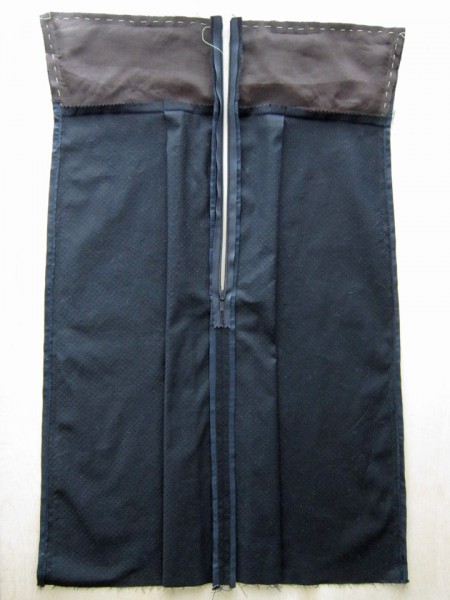
The dress is designed like a sheath but the front and back cut fabric pieces are split just below the waist. When sewn closed, the seam is a princess line in the bodice of the front and back. Here is a picture of the fabric layout to show the pattern pieces. At the bottom of the split, a pleat is created when sewing the two sides together.
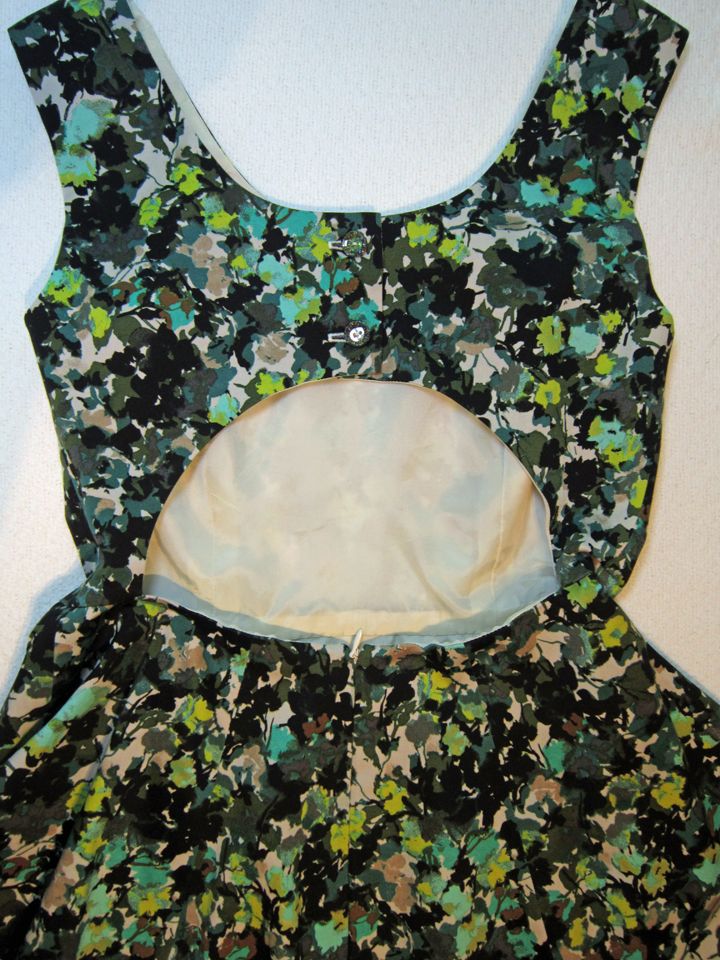
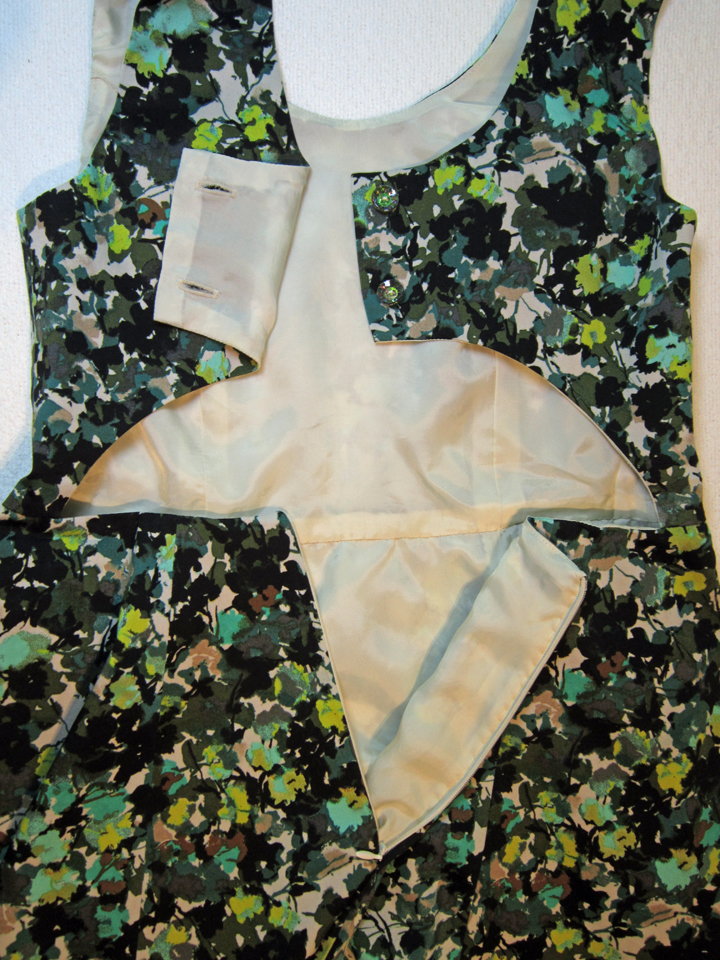
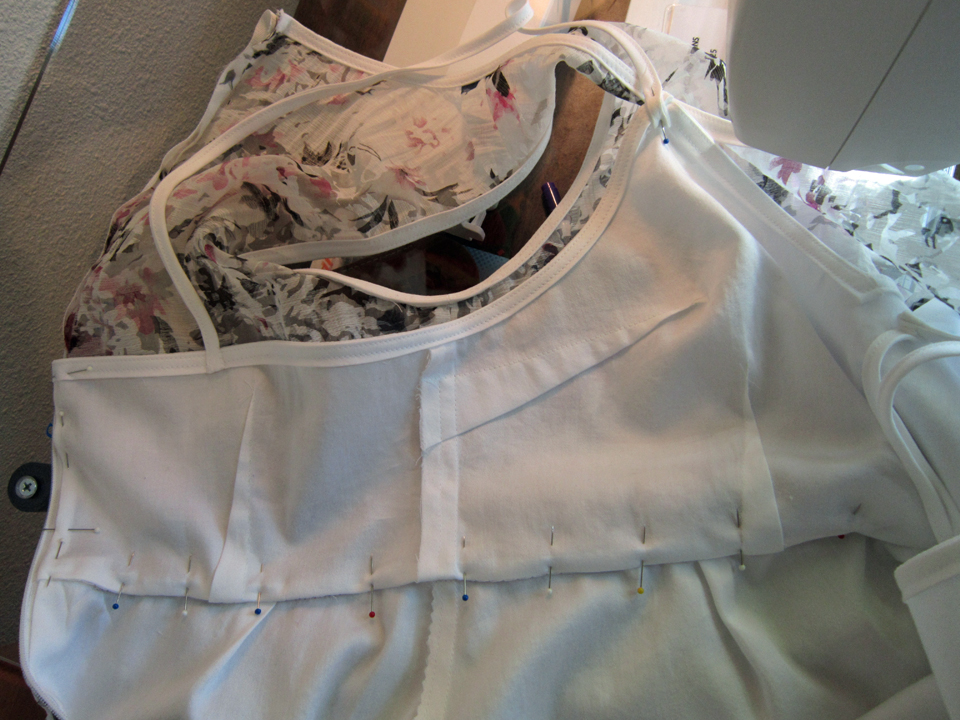
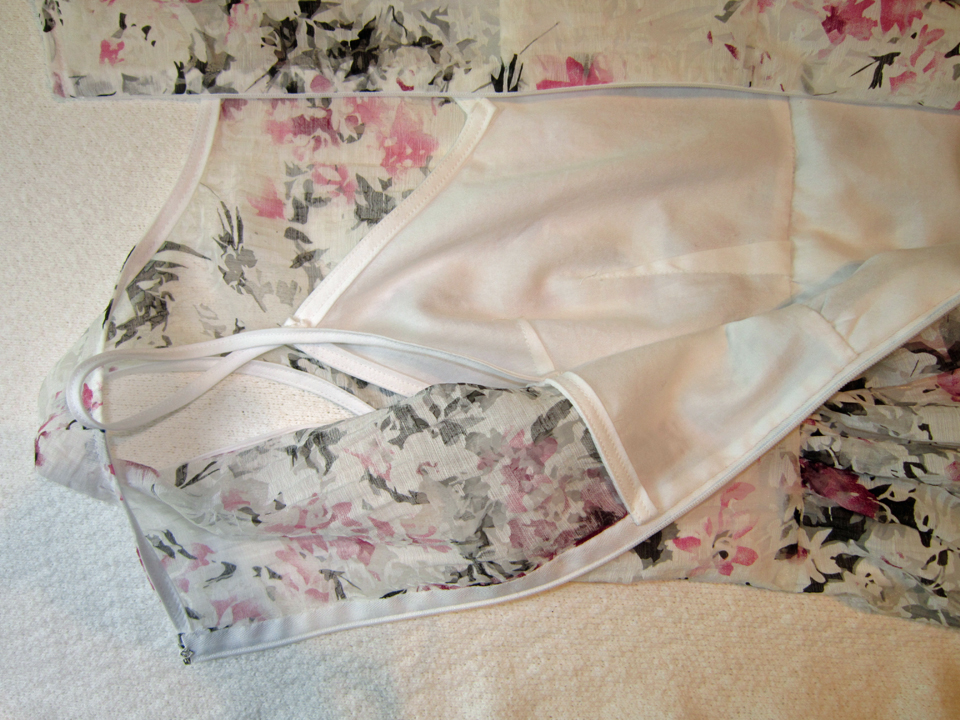
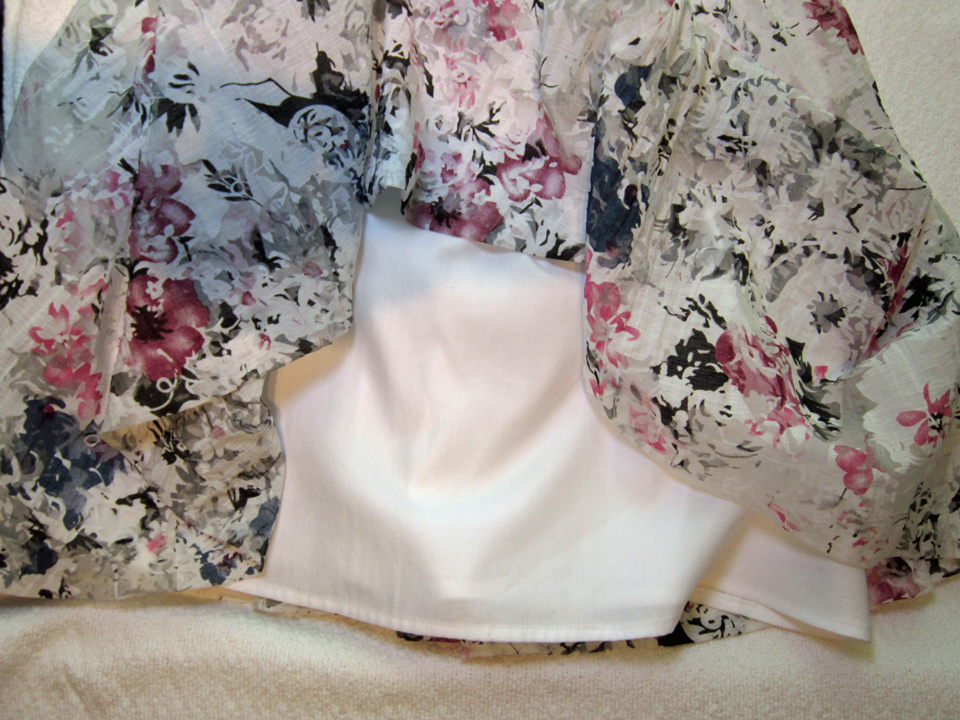
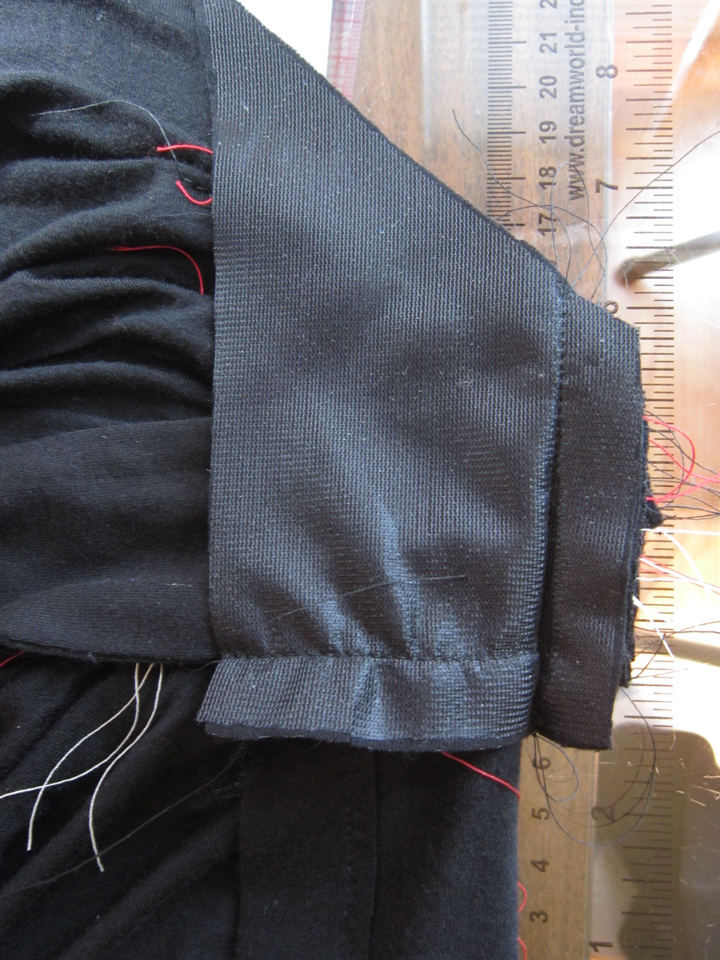
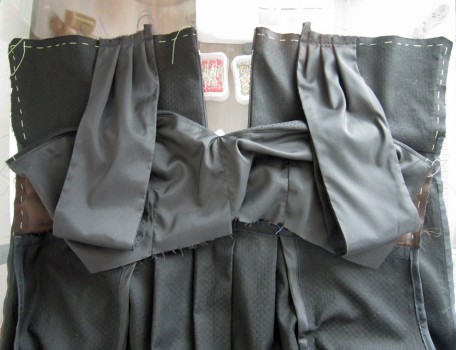
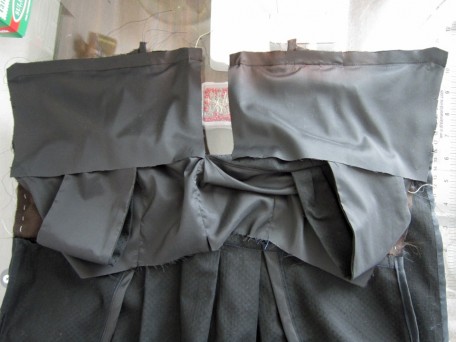
I lined just the bodice and zigzagged the seam edges below it. This is what the bodice looks like inside.
A second picture to illustrate that just the bodice has lining. I should mention that I only tacked the lining along the front bodice seam and at the center back where the zipper is placed. I finished the remaining untacked areas with a silk thread hem. I love using silk thread!
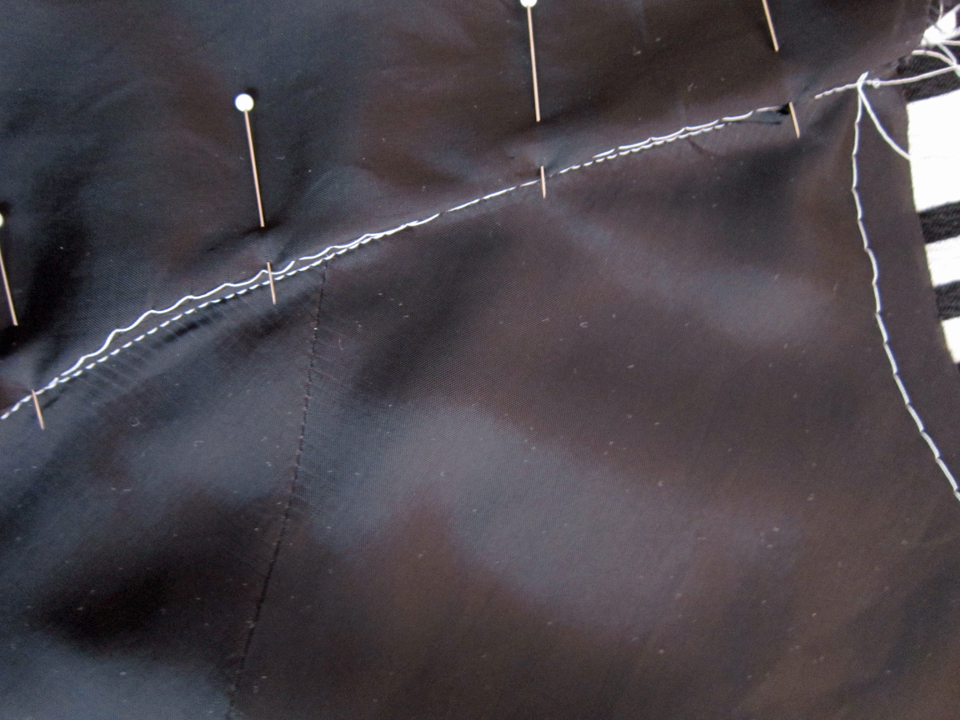
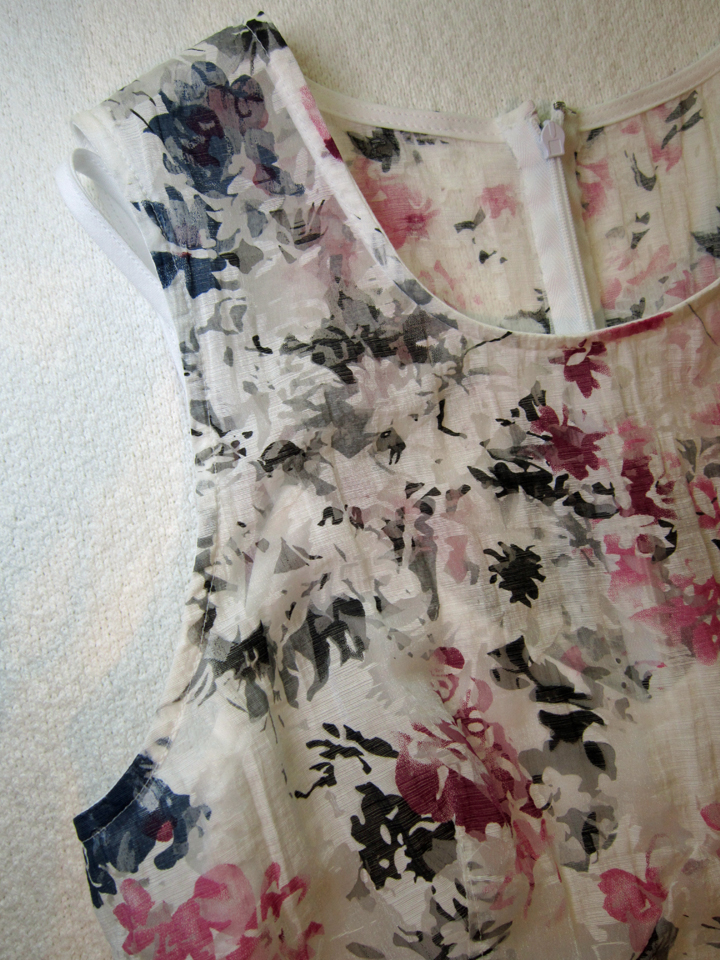
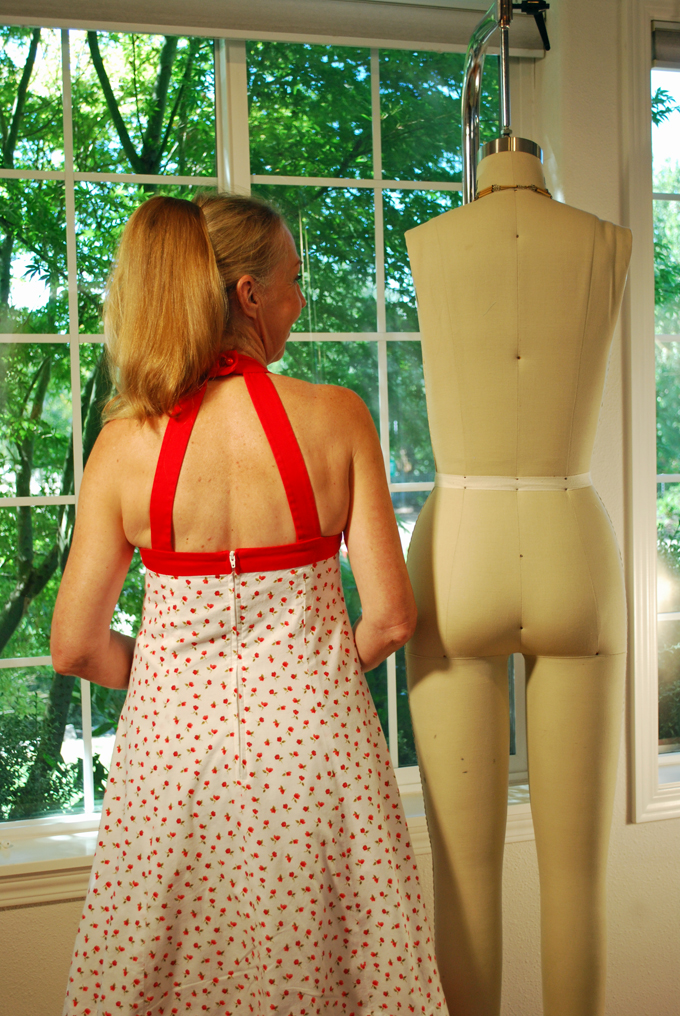
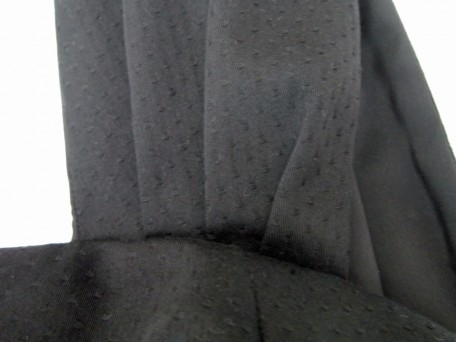
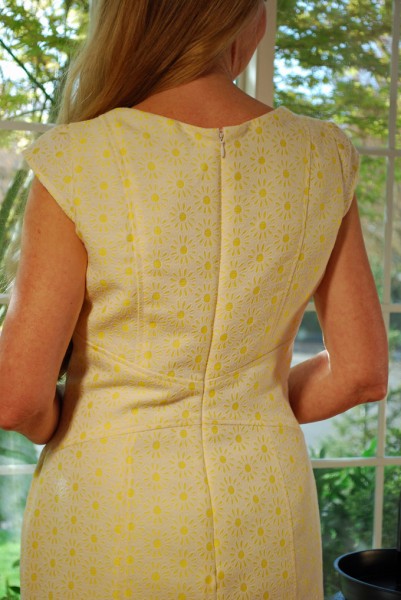
The back princess seams start just below the waist line area and are kind of hard to see because of the fabric design, but they end at about the middle of the back of the armhole.

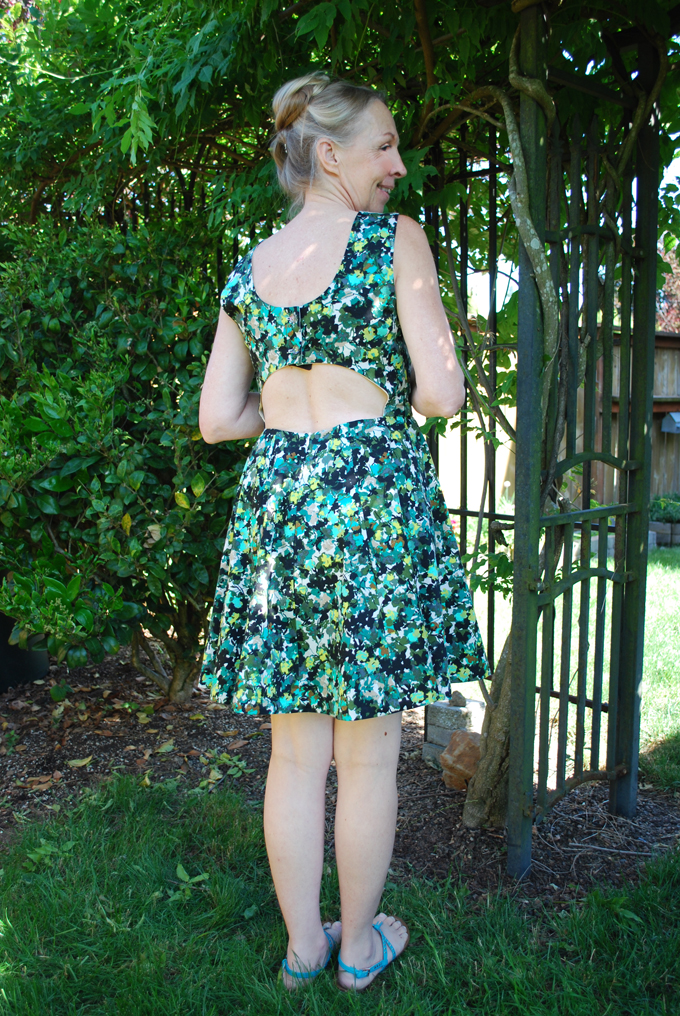
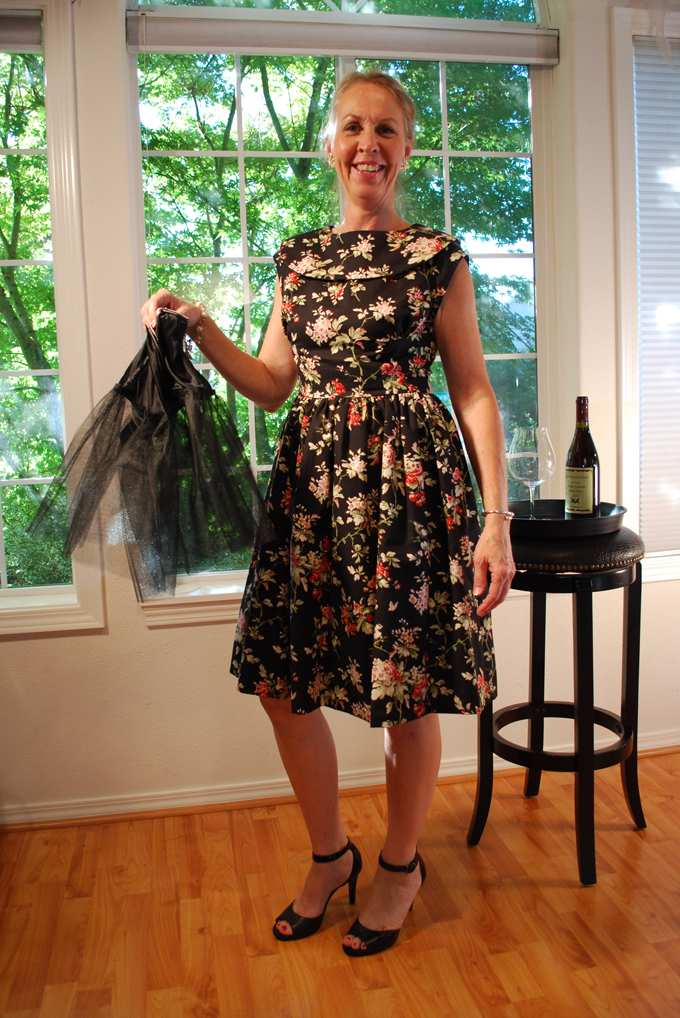
Okay…yes, I’m going to model it. Here it is!

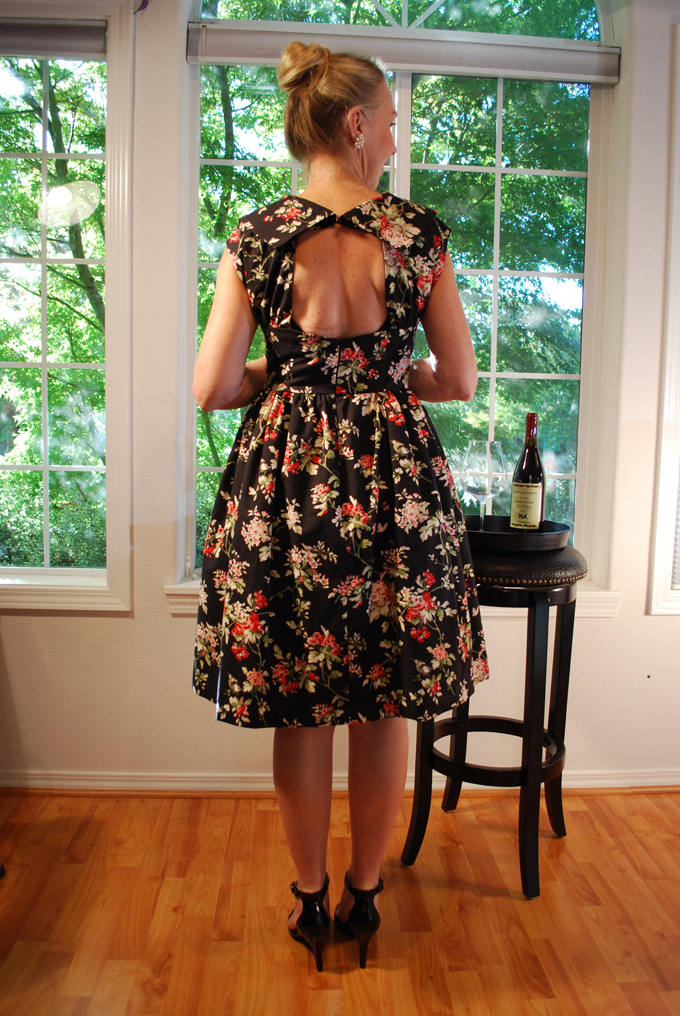
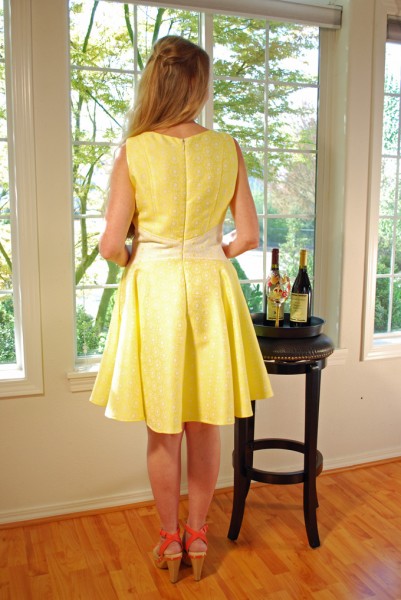
The back…

It’s going to be a nice day!

Just to much fun!

So there you have it…and thank goodness I’m back on track. I’ve really missed my sewing time; I find myself feeling more balanced in everything else I do when I’ve spent some time with my creative side! And on the subject of sewing…news flash… I just received my package from Mood Fabric, it’s arrived! Enough fabric for two different… yep… dress projects and I may even have a little extra left for several cute little summer tops! Of course, on the back burner has been the pants saga which I’m getting ready to return to! Stay tuned for that adventure!
Happy Mother’s Day to all the moms that visit Sewlikeinparis!
À la vôtre! Jessica
Read MoreRestyled Simplicity Runway 1798
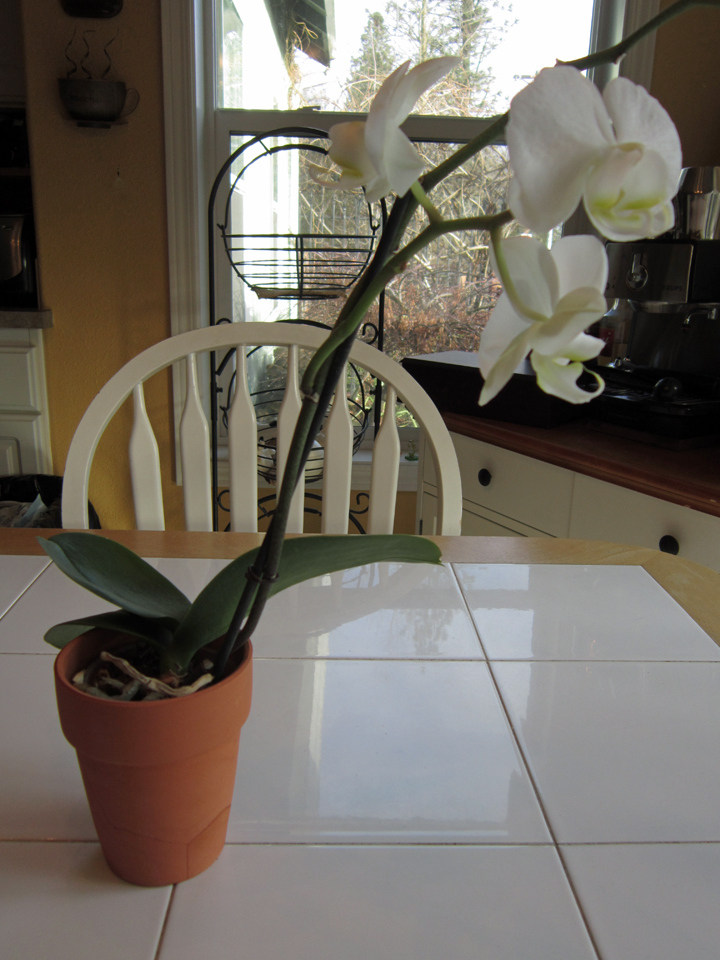
My daughter bought this orchid for me on Mother’s Day of 2015. It bloomed the most beautiful flowers again this month, January 2016! I hope this is the case for my new nose too!
Now that we are well on our way into 2016, I’d like to start things off by saying in today’s post that if you find yourself developing basal cell carcinomas on your face…take care of it immediately! Don’t fall into the medical insurance deductible trap and put off taking care of it until later, giving it time to spread! Just earned that T-shirt! I suppose I should be thankful that it was only basal cell, the “nice cancer”… but in all honesty, at this point in time, being thankful is not really working for me since my nose which is where the cancer was, is a “third eye on a cyclops” sort of scenario after the dermatologist and plastic surgeon got done with me. If Rudolph the Red Nosed Reindeer met me face-to-face, he would feel a lot better about himself! On a foggy night in the dead of winter during a snow storm on the arctic ocean I could hang off the prow of a ship as big as the titanic and lead the way! Yes…my nose is red! Bulbous! And it Glows!! And I’m four weeks post surgery! I have no idea why anyone would want to willfully endure a nose job to look better? The black eyes, swollen face and bruised cheeks that I got with the deal kept me housebound until a little over a week ago. And get this, tonight I have a concert to go to and on Sunday, a fashion show in Seattle! Yep…in the words of my daughter…”it sucks to be me!”
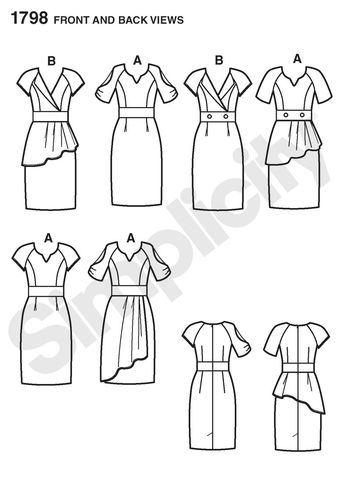
Well… ME got pretty tired of the whole ordeal about a week ago and decided to pull up my big girl panties, quit whining and get on with the program. I hit my sewing room and started a project which I had planned before Christmas. I purchased this pattern some time ago and what I really liked was the dress that had a front drape. It is the Simplicity 1798 and it is actually still available on their website!
It is the one in the bottom right corner in pale red?

Here is the pattern drawings. I made Option A with cap sleeves and a front drape (second row of A’s). BUT…I wanted a drape on the back as well which did not come with this pattern so I did a little re-designing!
*Note the back flounce on the bottom dress is just a peplum flounce, not the kind of drape I wanted.
With this style and design in mind, I purchased the fabric for it back in late November which is shown in the picture below. The underskirt I decided to make out of black crepe which has a similar texture as this fabric. I envisioned wearing this new dress with black tights, black booties and a little red purse! I had absolutely no plans about including a red nose into the package but…well…I guess we’ll leave it at that!
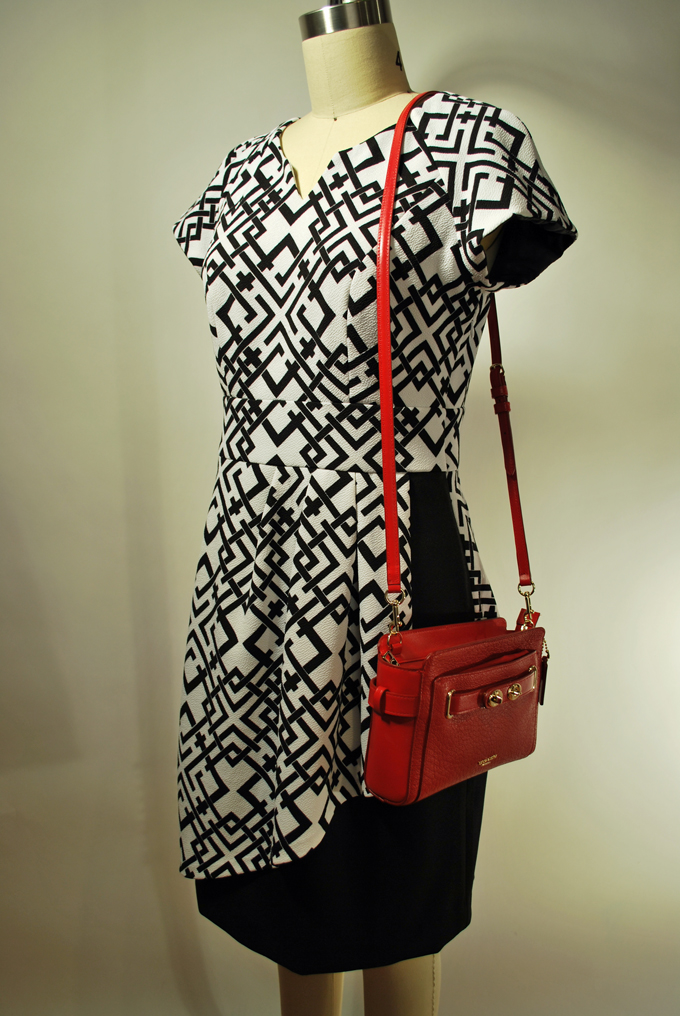
Remember the little red purse? Yes I did buy one, more specifically, a Coach Blake Crossbody Pebble Leather in Red. A little reward to myself for not committing harikari because of my seemingly impossible situation.

Because I planned to create a back drape, I knew that I definitely needed to make a muslin. Actually, an almost finished dress minus hems, interfacing or lining. Even though I started off with first drawing the pattern for my back drape, I didn’t realize until after I finished cutting out and sewing my muslin bodice that its back zipper design wouldn’t work for my plan. The zipper had to go! Having sewn enough dresses, I knew that with this design, I could put the zipper on the left side which meant that I would have to put the dress on over my head, and of course take it off the same way. Hey, no problem…just have to remember to fix my hair after putting on the dress!
Below is a picture of my muslin. As you can see, I left open a section of the left side seam where a zipper would go.

Of course, if I put the zipper on the side, this meant that when I cut out the pattern pieces from my actual fabric, I needed to cut the back bodice on the fold which I was a small bit nervous about since the back bodice center was more a natural curve than a straight line. I laid the pattern piece on the fold of my fashion fabric and fudged as much as I could and kept my fingers crossed! I also had to do the same for the back midriff band but this was easy peasy!
The front drape that came with the pattern, hung separately from the underskirt on the front with its hemmed side edge slightly distanced from the the left side seam where the zipper would be located. I liked this and had no plans on changing it! However, I wasn’t sure what to do with the left side of the back drape. Initially I thought I would have it hang separately like the front drape so made my muslin in that way. See the picture below. (There sure are a lot of wrinkles in the muslin aren’t there?! I did iron it as I was assembling it but it’s been through a lot since then!)
I discovered when I tried on the muslin that I didn’t like the way the left side of the back drape flared out. I worried it would make me look fat! Hey, I’m a girl and I think this way! So I decided that I would sew the left side of the back drape into the underskirt side seam on my actual dress.
After I finished with the muslin and looked at the back…I discovered that besides not having the shape and length exactly right, I also did not cut this piece on the right direction of the grain so it didn’t drape very well. I had a total “a-ha” moment and felt relieved that I had taken the time to do this mock up dress!
Here is a picture of the underskirt back view. The skirt is vented and I pondered whether I needed to include this feature if I had a drape over the top of it but decided to keep it in the design in case the hem of the skirt was at all narrow. The underskirt I will make out of my black crepe.
Okay…so after I figured out how to re-construct my new version of this Simplicity 1798 Project Runway Dress, I was ready to start on the real deal. One other major decision now occurred…to line or not to line! I’AM the liner queen but I knew I had to really think this through because I hadn’t built my muslin with a liner. Since my underskirt would be black, I discovered that when I put the black crepe under my fashion fabric, the white part of my fabric changed shades. I wanted consistency so I knew that I would have to at least line the bodice so I was off the hook for having to make an optional decision!
I still assembled the bodice per the pattern instructions though allowing for the side zipper placement. Remember… there was no need for a center back seam. I then cut out all the same pieces in the same way for the bodice lining, out of my black Bemburg lining fabric and assembled them. Next, I took the bodice and bodice lining and basted them wrong sides together.
Now it was time for the cap sleeves. Here is where I had to be a little creative. I essentially sewed the lining sleeve to the fabric sleeve the way the pattern instructions tell you to do with the “cold” sleeves. (Though still can’t figure out why you would even bother making these kind of sleeves if there’s going to be big holes in the shoulders of them!) Instead of folding the lining up and onto the sleeves and basting them together, I sewed only the sleeves to the bodice. Below is a picture of the sleeve lining sewn to the sleeve but not yet folded in and onto the wrong side of the sleeve.
Finally it was now time to fold the lining up onto the inside of the sleeve which is shown in the picture below. Hopefully this makes sense! The white 5/8″ basting stitch along the edge of the sleeve lining is my folding line. My plan was to hand sew the 5/8″ folded edge of the sleeve lining over the top of the bodice/sleeve seam that you can see back in the picture above.
*I use sewing machine basting stitches to mark hems which I will then press into the fabric that creates an even fold line. Then I remove the basting. It takes extra thread but it sure makes things easier! Sometimes I only finger press such as with these sleeve linings, because when a hand sewn seam is on a curve, fabric is a little more manageable when not pressed by an iron.
I pinned in place the folded edge of the sleeve lining, shown in the picture below.
I did remove the basting before hand sewing but I left it in for the picture so that it’s easier to understand what the heck I”m doing! Here is a close up picture where you can see the side seam where the bodice is sewn to the sleeve under the folded edge of the sleeve lining.
So that’s how I essentially made this dress. I’m not especially brave enough yet to plaster pictures of myself on the internets so I will show you my finished dress, worn by my other half, Phoebe!
This is the front…
The back…which I’m not sure the drape was all that important but it satisfied my want.

The side where the drapes are the most noticeable and where the zipper got moved to. The back drape left side is sewn into the underskirt left side seam.
And a little extra of what I saw in my imagination!
Well, that wraps up another long blog post. I’m sorry I do that! For those that don’t want to read, there are certainly some pictures to look at! Big smile!
Enjoy the last two days of the month of January, and I’ll be back soon to share more of my sewing shenanigans! Might even be able to show you my new nose!
À la vôtre! Jessica
Read MoreMcCalls 6887 Impressionist Dress
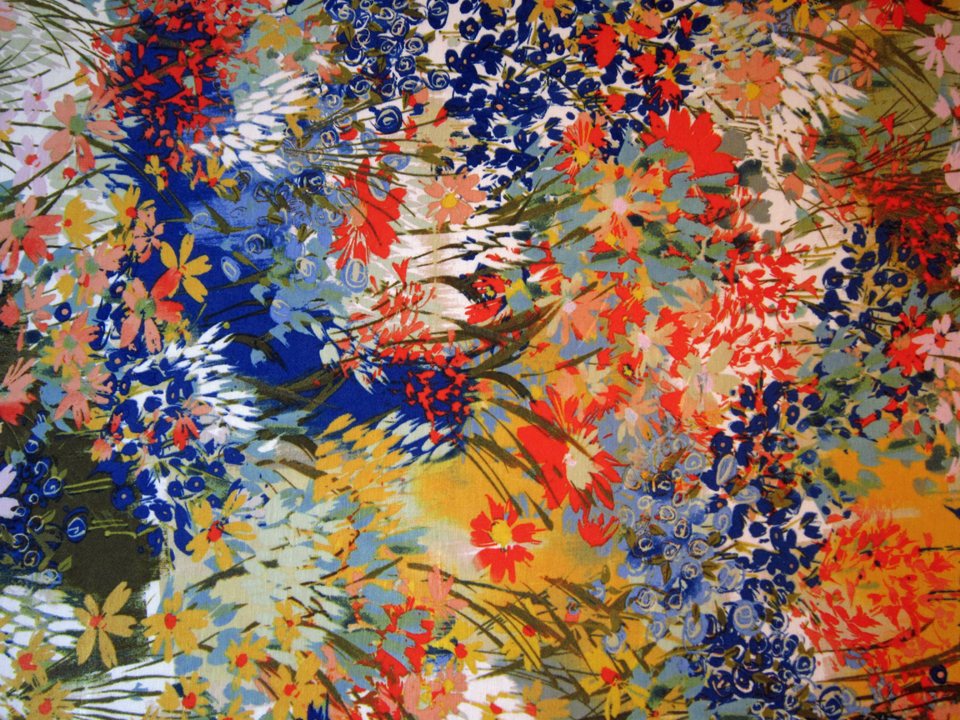
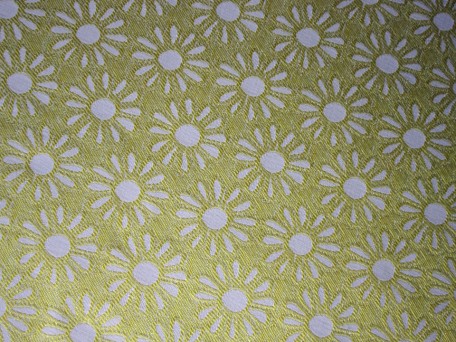
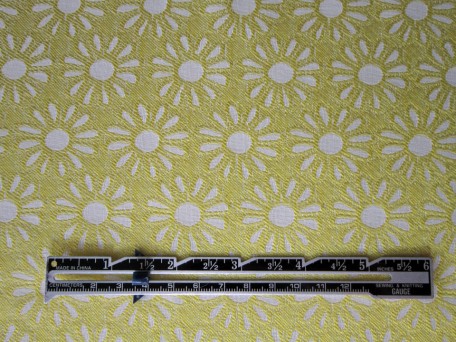
Impressionist Fabric
When I stumbled across some fabric at Joann’s (no I was not drinking!), for whatever reason, I saw it as perfect for making this McCall’s 6887 dress.
So what does the fabric look like? Well, the picture below is it.
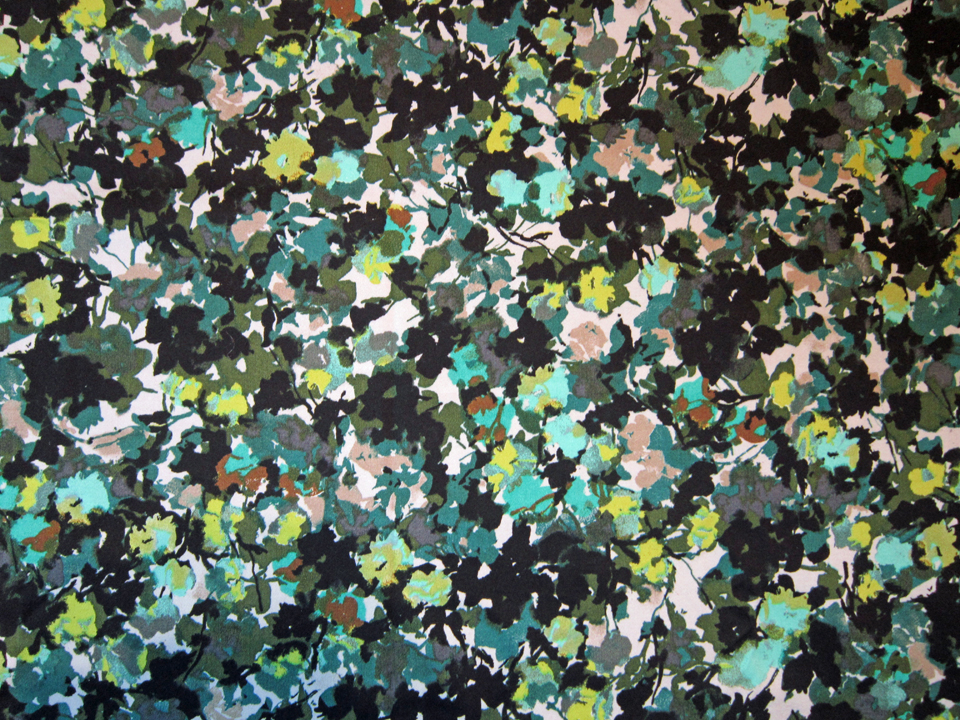
When my son, Jared, saw it, he said it looked like impressionist fabric! My mind was whirling away as I heard him say this… the word was familiar, it had to do with art, but who was I kidding. I never paid attention to the art part of any lecture in my college classes. Nothing is worse than when one of your children seems to have one up on you; so I decided I better investigate and educate myself quickly! Because I like to share, I’m going to present a cliff notes version of what I learned. A glass of wine to sip while perusing my ramblings would fit in nicely about now! Hint Hint!
QUICK BIT OF HISTORY:
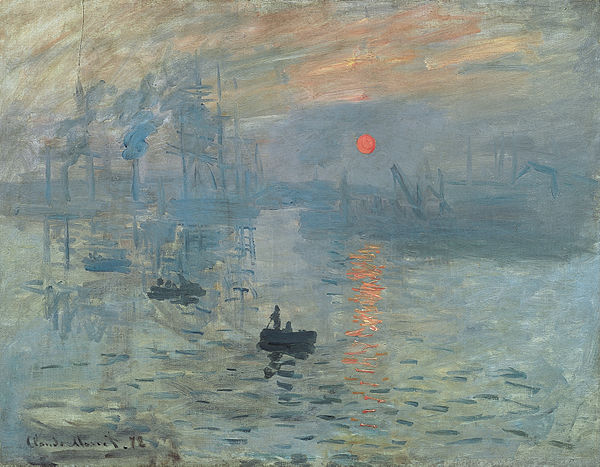
In the early 1860’s four young painters met while studying under a Swiss artist, Charles Gleyre. They were Claude Monet, Pierre-Auguste Renoir, Alfred Sisley and Frédéric Bazille. They were all interested in painting landscape scenes but wanted to accomplish this by paying less attention to details, instead using lighter brush strokes and brighter colors. It is said that at an exhibit, a reviewer-humorist Louis Leroy, who wrote his criticism in the Le Charivari newspaper, coined the word “Impressionist” from Monet’s painting entitled Impression Sunrise. He said that he considered Monet’s work to be nothing more than unfinished sketches.
He sarcastically wrote:
Impression- I was certain of it. I was just telling myself that since I was impressed, there had to be some impression in it… and what freedom, what ease of workmanship! Wallpaper in its embryonic state is more finished than that seascape.
What an A-hole right! Below is that picture, Impression Sunrise, Louis Leroy was speaking of.
Anyways, Impressionist art depicts scenes where there is less definition and specificity, with the intention of portraying an image that leaves some of the perception to the viewer.
Please keep in mind that my son is not an “art nerd”… he’s a “history nerd“! He’ll probably have some interesting words to describe me if he happens to read this particular blog article!
Since I’ve now talked a wee bit about Monet, I think I’ll go one step further and share one of his pictures that I think resembles my fabric. It is entitled “Garden at Bordighera, Impression of Morning” by Claude Monet, 1884.

One thing for sure, I’ve concluded that I most definitely made an Impressionist dress but not because of the fabric, but rather because I was less focused on detail, and instead paying more attention to the bright colors of the fabric! I was so mesmerized by it during the construction process, I don’t think my brain was functioning properly. There were tell-tale signs when I made my bodice muslin but I guess I was too eager to sew my Impressionist fabric!
The afterthought… should have made the whole damn dress out of muslin first and then I probably would have made something different out of my precious fabric! There were a number of problems. Here is the list:
1) The band across the back seemed a smidge too high when I put on my muslin, showing my bra strap but my thinking was that after I sewed the skirt to the actual bodice, its weight would pull it down. WRONG!
2) After finishing the bodice, I discovered that the shoulders had a weird curve that caused them to not lay right over my shoulders. So I would do what any creative soul would, I cut off the outer curve portion of the straps, AFTER I removed under-stitching seams and stitching seams. All that time and work and I was redoing it! This did not set well for me! In the end, the shoulders still aren’t right! In the picture, they do extend wider in the back and that’s what I slimmed down! I think I’m starting to hate this dress!
3) Attached the skirt and discovered that the back waist was 2 inches to much and sagged down my back. Lots of cussing commenced at this point! Since I had already put in the zipper this meant tearing it back out for my adjustments! More work!
4) When I was done hemming the skirt and skirt lining, I held my breath as I tried it on…the stinking back waist was still to big! I took 2 INCHES out of the center back! To top it off, the left shoulder was still doing something weird (probably because I have a weird left shoulder!) and the cross strap in the back did not cover my bra strap!
I left my sewing room, gulped down a glass of wine, and decided that I would sew elastic on the seam allowance in the back waist and call it good. Maybe when it’s 90 degrees I’ll wear it because it will feel cool on my back and everyone else will be so hot that they won’t pay attention to my wardrobe malfunctions!
Well I guess I better get this over with. I decided to do a photoshoot in my backyard. It’s beautiful outside and after a long winter indoors, I plan on spending as much time as I can outside!
Here it is!

Here is a view of the back which I am going to do some more work on but decided to share it and then tear apart later so I could get this posted! (Part of my bra strap in the back popped out – I didn’t Photoshop it out. This is one of the problems!
And just because…

Honestly, I did like the pattern and the instructions were easy to follow but because of the styling in the back of the dress, I sort of failed at getting it to fit properly so a word to the wise, be careful with this one!
Almost forgot… remember the picture at the very beginning of this post? Well that’s fabric for my next dress! Wish me luck!
Salut, Jessica
Read MoreMcCalls 7088 In Spring

My Wisteria in full bloom!
Finally…the rain has slowed down and April is turning out to be a very beautiful month! The setting at the winery I visited last weekend was fabulous. It was a beautiful 76 degree day and I got to enjoy time with friends while listening to Ty Curtis play the blues and of course, sipped a glass of lovely rose wine… or two…or –uh…we’ll stay at two! Needless to say, I had the feeling that life just couldn’t get much better!
Spring days like those at the winery always inspire and motivate me to push ahead through the winter drudgery mood that I develop, slap me in the face with new ideas and prod me on to the sewing machine to get back to creating clothes! I posted a picture of my Wisteria above because it kind of reminds me of my fabric for the McCall’s 7088 dress I just finished. Well sort of! I bought it from Mill Ends in Beaverton Oregon.
Now you’re thinking…What? What McCall’s7088 dress are you talking about? Well, here’s the pattern:

I really enjoyed making this dress. I got caught off guard with a surprise, but nothing disastrous. If I made this dress over and over, there would be no surprises, only perfection! But that’s how it is for us “home sewers”. The beauty of this though is that with all the surprises and mistakes, we get very good at problem solving which is where that lovely creative part of us really kicks in!
Instructions for the dress construction are pretty straight forward. I’m still working on improving SHARP pivots like that in the bodice so do whatcha gotta do! My fabric was sheer so I tread traced all the darts and used the pinking shears on all my seams. I would have done french seams but the fabric has a slight stiffness to it and I was concerned how the seams would hang so decided to avoid them.
The bodice lining was easy. I used a very fine white cotton that feels almost like silk. For the price it should have been!
You might notice in the picture above that the waist seam allowance is pressed under 5/8″ inches. I decided to not sew it into the waist with the skirt but rather sew it over the seam allowance of the skirt and skirt lining for a nicer finish. This is when I realized that the right side of the lining would not be facing my body, the wrong side would. Why? Because that’s what the pattern instructions tell you to do! I was okay with this here because my fabric was shear enough that I didn’t want the seams to show. I had to iron out the fold and press the fold to the outside. No problem though because I always baste a line of thread to follow when I press, which I remove later.
In the picture below, the dress bodice, skirt, and skirt lining have already been sewn together and the zipper installed. I went ahead and did the finish sewing that secured the skirt lining over the zipper tape. Now I was able to hand sew the bodice lining to the waist seam allowance and finish the sides along the zipper.
Here it is finished, laying on my working table with the sunlight shining in! Not a very good picture for displaying work but it just seemed right because it’s sunshine!
I decided not to sew the lining straps to the dress shoulder. If it becomes a problem, then I can easily do that at any time.
Here is the back with the zipper open.
This is the back with the zipper closed.

The front. In both this picture and the last one of the back, it is easy to see the lining.
A close-up of the neck. Notice how the zipper rolls ever so slightly. And I tacked it down!
This is the skirt and skirt lining. Really no purpose but I took the picture and figured, why not!
I simply loved how this dress went together. Probably the beauty of the fabric played an enormous role too. The colors and brightness of the white lining lifted my mood. I’m going to have to get back to a fabric store soon and buy some more cheery fabric and make another summer dress!
I suppose I better show you how it looks on me. I keep worrying that it may be the boring part of my post but from some feedback I’ve gotten, it seems that’s sort of like the drum roll! The question of what shoes I’ll be wearing is sometimes the grabber! I’ll probably never know for sure, but as the old adage goes, if it’s not broke, don’t fix it! So, until then, I bring you me!

Yes… hot pink shoes! Below is the back.
A close-up so you can see that the fabric is shear above the bodice back lining and of course, the strap that I chose not to sew to the inside of the shoulder is peaking out!
Back to the front…

And because I’m a ham!!!!

So there you have it… McCalls 7088 in Spring! Speaking of spring… the sun is suppose to grace us with it’s company for the next four days, as you can see behind me through the window but for the moment, it’s time for me to sit, relax and enjoy a glass of Nebbiolo Wine and decide where to wear my new dress!
A Votre Santé! Jessica
Read More
Butterick 6054

Spent this last weekend with 10 of my bestie gal pals at the February 2015 Seafood and Wine Festival in Newport Oregon. It was lots of fun… well maybe even more than that, especially when wine, champagne, Fireball and a bunch of “ladies” are involved! (please note the quotes, italics, bold print and underscore. Its important that I make this point clear – I want them to remain my forever gal pals!) Seriously though, one of the highlights for me was getting to spend time by the ocean. I love our ocean here in the Pacific Northwest… even if its not as warm as bath water and doesn’t have palm trees swaying in a toasty summer breeze around it. Heavy sigh… gonna have to leave that thought behind though because now it’s time to talk about important stuff… like sewing!
It was my hope that my next post would be about pants but with work schedules, time… life, my friend and I have not gotten together yet to do my fitting but no worries, the pants post will arrive soon! In the meantime I’d like to talk about a project that I just finished and involves the Butterick 6054 pattern.
The fabric and look of this dress is what immediately drew me in. You know… that comfortable summer look… it reminded me of those swaying palm trees and sipping a tropical drink on the beach while lying on a lounge chair! You’re really getting the picture now… I’m ready for summer! And a vacation!

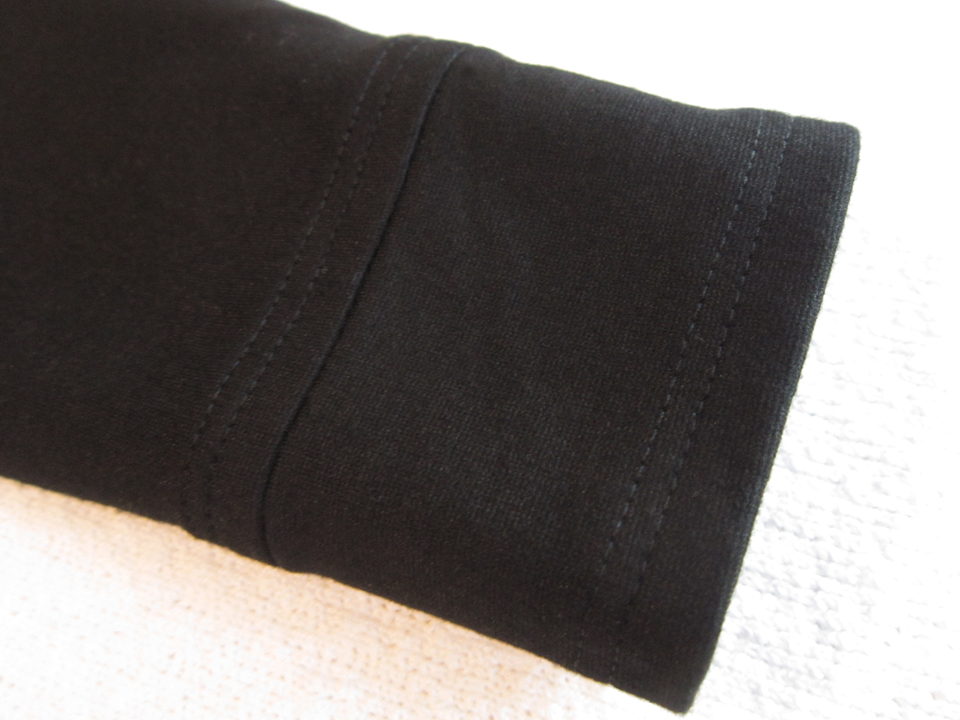
But honestly, the biggest reason for why I bought this pattern was because the Buttericks were on sale, 5 for $5.00! Anyways, light weight jersey is the suggested fabric to make this dress out of and it just so happened that I had some. And can you guess what color… yep, black. I had actually bought the fabric to make a top out of but never did! Yeah, I bet many can say, been there, done that!
At this point I have to admit something… though I really like wearing garments made out of jersey, I don’t especially like sewing with it. And, I really don’t like cutting pattern pieces out of it. It’s so s-t-r-e-t-c-h-y!!! However, this was not the worst of my problems. I had to figure out how to cut all the pieces from my 1 and 3/8 yards of black jersey when the pattern instructions called for 1 and 7/8 yards. For several hours, maybe more, I arranged and rearranged. At one point I had to walk away and decided that a glass of wine might ease my frustration! Because my cutting table is not very large, I attempted laying the fabric on my big cardboard cutting mat on the floor where there was more space but discovered that my knees were gonna hate that idea so moved the mat and fabric back up onto my table. I persevered and in the end, won! There was barely any waste which I was actually quite happy about!
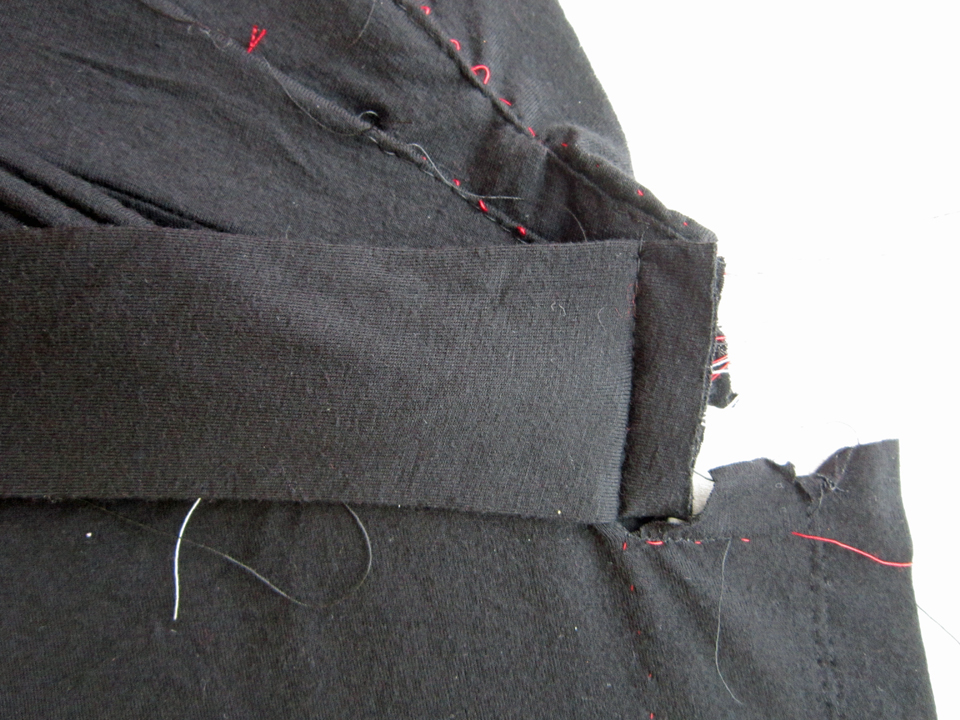
The instructions for putting this dress together, for the most part, were easy to understand but I would say that it is not the easiest dress to make. There are 5 pleats in the top of the right side of the skirt, 4 that stack one on another requiring a lot of basting, and then after the skirt is sewn to the bodice which I found a little tricky doing when I reached the glob of pleats section, the 5th pleat is then folded over the top of the others. The tie comes next which is basted over the top of all this.
This picture shows my beautiful black jersey as a gray… with fuzz balls on it! I so hate that!

With the tie folded to the left, it’s easier to see along the edge of the bodice and skirt.
It was at this juncture that I understood why “light weight” jersey is suggested because the next step was to sew on the front right facing which layers over the top of the other ?? layers at the waist area that I’ve lost track of at this point!
This was when I got a little confused but… right or wrong, this is what I did and it worked fine. I laid the facing over the top, right side to right side, matching the waist and facing edges and notches, and sewed across in a 5/8″ inch seam but stopping on the left at the pivot point where the arrow is pointing.
Then I pivoted the facing upwards to match along the bodice edge and then sewed a 5/8″ seam along that edge. Important point: I did discover that this seam has to stop at the pivot point otherwise the facing doesn’t turn to the inside properly.
After I took out part of the seam which is a pain in the derriere when the fabric is black and stretchy jersey, this is how it looks turned to the inside. Note the big glob of fabric hence the light weight jersey!

Just got to thinking that I forgot to mention one important little detail that was suppose to happen after sewing the skirt to the bodice. The pattern instructions call for plastic elastic to be sewn into the waist seam allowance. I hate wearing elastic in most anything I wear, bras I suppose are the exception to the rule and so I avoid making garments that require it. However, just to be a good sport, I did try once to apply the elastic. When finished, it was my opinion that it looked like crap, would probably feel like crap to wear, so removed the crap! Since the dress already fit me like I liked, I determined that I didn’t even need elastic so end of story! We’ll see how I do on my wear test… hopefully there will be no regret!
The rest of the construction process went smoothly. There is a bit of double top stitching but I like the look and it’s easy sewing! Well I guess it’s time to share. Oh yeah… there is one other tiny little thing about light weight jersey… it’s very thin! Still trying to work out what to wear underneath but at least in a controlled environment like in my studio, there’s no worries! After looking at the pictures, maybe I don’t even need to worry!

Forgot to move my hair but the back looks like a back for whatever that’s worth.

Was trying to do a side shot so the tie would be visible but since the dress is all black it’s hard to see.

And as far as I can tell, there’s no undies showing so light weight jersey certainly rocks this dress!

Tomorrow is February 28 and then we roll into March… and Spring! I’m getting antsy to start sewing my summer dress wardrobe and will share of course. Also just finished up my pants fitting so have some up and coming news about that too. Until next post!
Salut! Jessica
Read MoreMcCalls 6801 Little Black Dress
The beginning of my collection of LBD’s
For the last several months, it feels like time boarded a jet that’s flying at mach speed with absolutely no definite destination! The holidays are screaming their way in and right now, I have utterly no idea about anything! Well… I do know one thing. I’m still in “little black dress” mode which is really perfect for the up and coming holiday season!
There is something about black that I just love! Black shoes, black coats, black leather jackets, black underwear… maybe I shouldn’t have mentioned that last one… Anyway — black dresses are just way cool to wear so I just keep making them. And the good news that comes out of this ongoing extravaganza is that my eyes are getting better adapted to seeing the black thread in the black fabric! So then, what of the latest LBD or the little black dress? It came about from the McCall’s 6801 pattern.

I think you could call this a “wiggle” dress. I like the fabric of the one on the pattern envelope but I felt certain that it would look stunning in black. I found some beautiful knit at Mill Ends in Beaverton, Oregon but that was probably the first mistake I made. I wanted a heavy enough knit that It would compliment my derriere and other things, rather than illuminate the weaknesses that I don’t think I want to talk about anymore! Ahem… so that mistake I said I made; well, I think the fabric was too heavy for the design of this dress. It started off not too bad, but I think the disaster happened after I finished the step where you sew in the two drapes (strips of fabric) that crisscross over the bust. When I went to try the dress on, I looked like the Michelin man! In simple terms, I looked like a big black blob! Somewhere in all the folds was me!
 *All rights belong to Michelin
I speak the truth even though I have no picture to prove it. I was very disappointed to say the least. In sort of a fury, I took the damn dress off, rolled it in a ball, threw it on my work table in my sewing room and poured myself a glass of wine and sat down to watch a show on Netflix. By the second glass of wine I had decided that I could make some sort of a top out of my “little black flop”!
After a week of stewing, I got to thinking… maybe I can still make the dress… I just had to let go of the idea of having those cool drapes across the bust. AND, the dress is shown on the pattern envelope without drapes. Why didn’t I notice that before! Anyways, did I mention that the bust of the dress does not drop as sharp in a V in the front as on the pattern envelope. My only assumption is that the model has big… Nevermind!
It took me a day to remove all the stitching. Try pulling black thread stitches out of black stretchy knit fabric! Thank goodness for my Ottlite Magnifier Lamp I got at JoAnn Fabric Store. Mind you, I did not drink wine while doing this! I ended up with only a few little holes (with wine I’m pretty sure there would have been more). Also, because I’m still learning to fit when sewing knits, fortunately the dress was a little big so my new seams would land beyond them! Yeah! Finally I felt like I was winning this battle!
 My Hero!
The next day, I turned on my sewing machine, sat down and once again began to create a little black wiggle dress. I didn’t tear apart the lining, just left it the size that it was. After a few calculations I figured out that I needed to make the bust and shoulders a little smaller so I made adjustments on the pattern pieces and then laid them over the dress front and back pieces and removed the extra fabric. Fortunately I still had a little fabric left as well as those damn drapes so I was able to cut out a new yoke front and back neck facing pieces. Now I was ready to start sewing!
The pattern instructions say to pin a strip of seam binding to the side seam allowances, one for each side, after marking them to match notches on the front and back fabric pieces. They ensure that the gathers in the front and back are equal in length and match. Yes, it sounds confusing and yes, it is sort of a pain, but if you make this dress, when you get to this step, you’ll understand. Besides acting as guides, these strips are a definite plus for holding all the gathers and making the seam more sturdy and stable. I used a good quality black twill and was happy with the results.
Here is what the side gathers look like on the inside.
As I mentioned earlier, the lining I left intact just as it originally was. Here’s how it looks on the inside in the bodice area. Tricot catches all the light so it looks like it’s glowing!
The outside neck, like I mentioned earlier, is not a plunge like it looks on the pattern envelope.
The shoulders of the sleeves are gathered and a little poofy. I wasn’t sure if I would like it but when I wore it to a Wine & Cheese pairing party recently, they were one of the features of the dress that I got compliments on so I decided they were totally cool!

Sleeves on most garments tend to be a bit long for my arms so I reduced the length 1″ inch. Shouldn’t have done that! I ended up with sleeves shorter than I expected! However, even if I hadn’t shortened them, I wouldn’t have got the length I wanted which was long! So… I made cuffs!
So here it is!

See! The fabric is thick enough to pull off the derriere look!


This dress is very comfortable to wear so I am really happy that I didn’t give up and make a top out of it! Once again, I’ve had another lesson in patience!
Take care and have a wonderful Thanksgiving! Until next post…
Salut! Jessica
Read MoreDKNY Vogue 1160 as Little Black Dress

It looks like summer is about over here in Oregon. How do we know this… it’s raining! And when it starts, it seems like it never stops. But the good news… this is when I find myself sitting at my sewing machine quite regularly, forgetting the cold wet dreary weather outside and focusing on what I can create to wear that will pick-up my mood through the winter months. I think bears have it made! They just hunker-down in a cave and sleep until the sun comes back out. However, it’s hard for me to to picture myself hunkering down in a cave… well I do love to sleep, but I’m a social creature who loves to spend time with family and friends, love my wine drinking activities and don’t want to miss out on any fun stuff! Hmm… Better re-think the hibernation business. One thing for sure though, I will definitely continue to cling to my Little Black Dress mode because the LBD makes me think of the warm summer evenings, sipping wine or champagne, laughing, eating and dancing the night away!
This is where the sound of a needle dragging across a vinyl record is heard…..and a voice in the distance crying out “BACK to EARTH JESS! Ahem…. So — the point to my ramblings is that I am ready to share my new LBD I made using the DKNY Vogue 1160 pattern. I had fun making it! Well… most of it was fun… except for all the “n-a-r-r-0-w” hems… especially on the slip that is cut on the bias. But this too I eventually conquered and I think will not be as big a deal with future projects. Most of the seams are “french seams” so plan to use lots of thread!
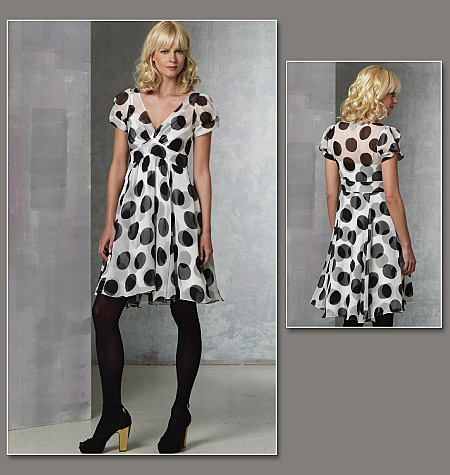
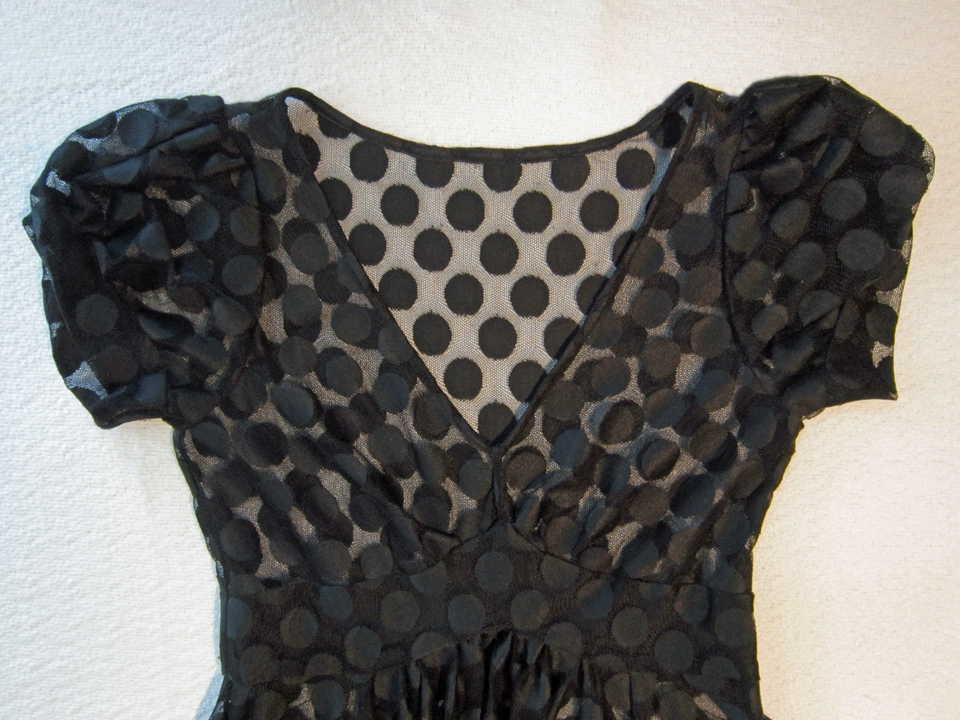
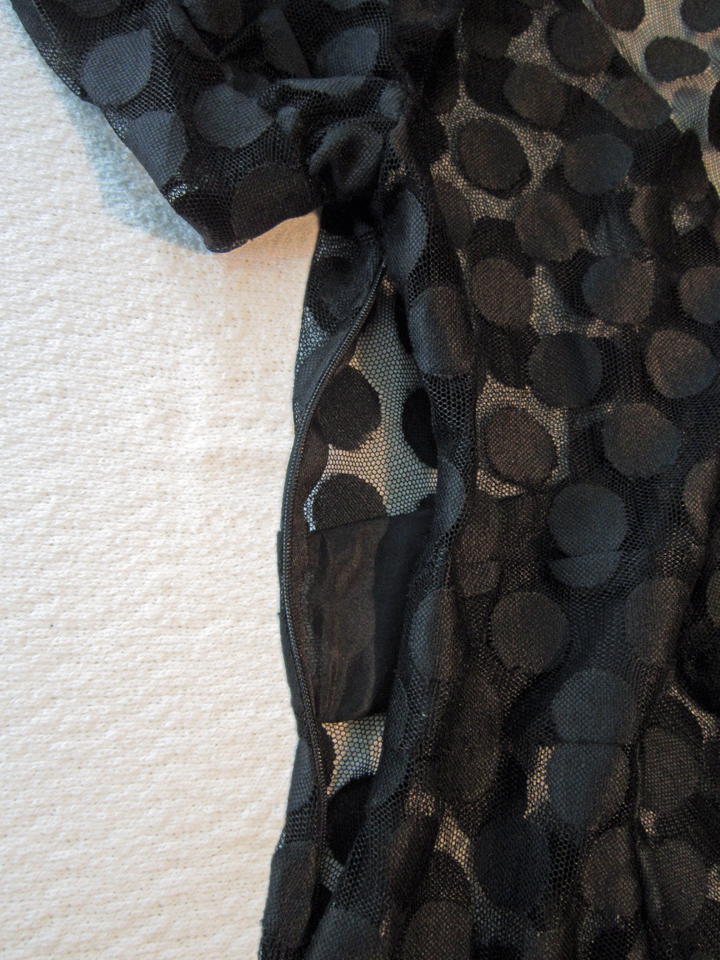
Recommended fabrics are Chiffon or Georgette for the dress and Silk Twill or Charmeuse for the slip. Definitely jumped ship at this point. For the dress, I used a rather stretchy mesh. Why?! Well because it’s polka dots, it’s sheer enough to see the slip underneath, it’s black… and because it’s just plain cool!
 The dots are not much larger than a dime!
The sleeves are an interesting design, but unfortunately my picture could not really capture what’s going on. Nonetheless, here it is.
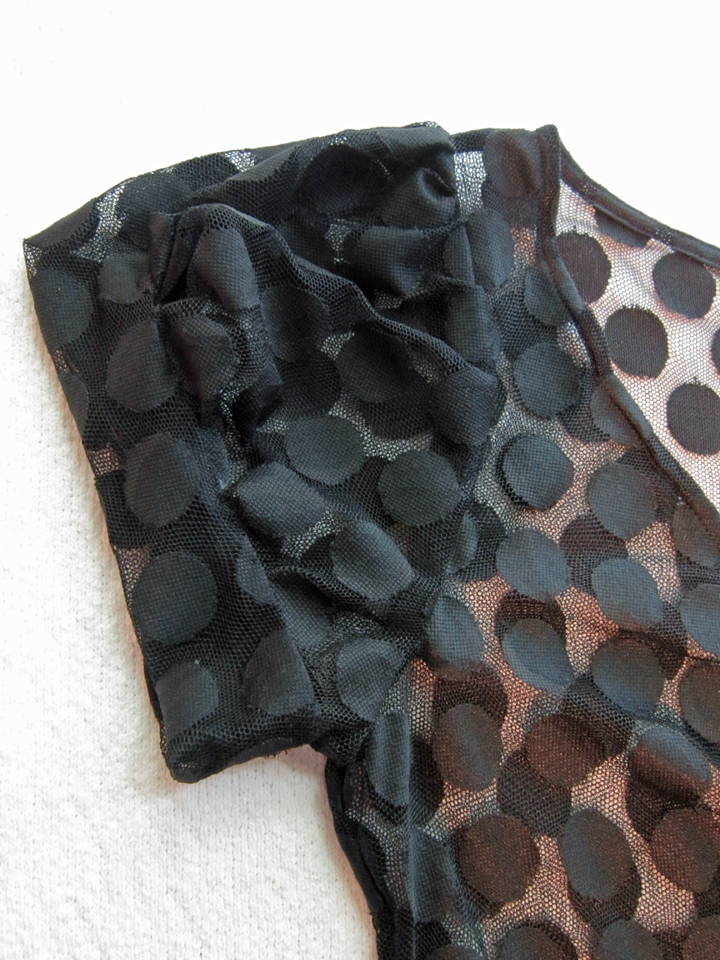
The bodice midriff piece is suppose to be lined with the same fabric as the dress, but I chose to use China Silk because I didn’t want all the seams to show.
There is a side zipper which fortunately isn’t real long, 7 ” inches to be exact! Kind of a pain because of the fabric I used.
So I was zipping along, making good progress, though all the while thinking… there’s a LOT of skirt to hem… in a “n-a-r-r-0-w” hem. Don’t get me wrong, the skirt is really neat. It’s a little shorter in the front than the back… but there is a lot of gathered fabric that creates it! I never measured it, didn’t want to know! When I finally made it to the hemming step, I had concluded there was only one way to take on this bad girl! I was gonna do a “rolled” hem! Do I know how to do this. NO! Not really! But one of my ASG (American Sewing Guild) friends, Suzanne, shared a most awesome link with our group that was gonna save my butt!
What’s a hand sewn rolled hem? Watch this video and you will see! This is a gem done by Ami Simms, who is a quilter, teacher, author and fellow blogger, who has most graciously allowed me to share it with you.
Pretty nifty huh! And here is a picture of my “rolled” hem. I know you can’t really see the stitching, but truthfully, I couldn’t either! That’s mesh for you!

Yes, I did use Silk Charmeuse for the slip and overall, it went smoothly. Admittedly there was a wee bit of hair pulling but I persevered!
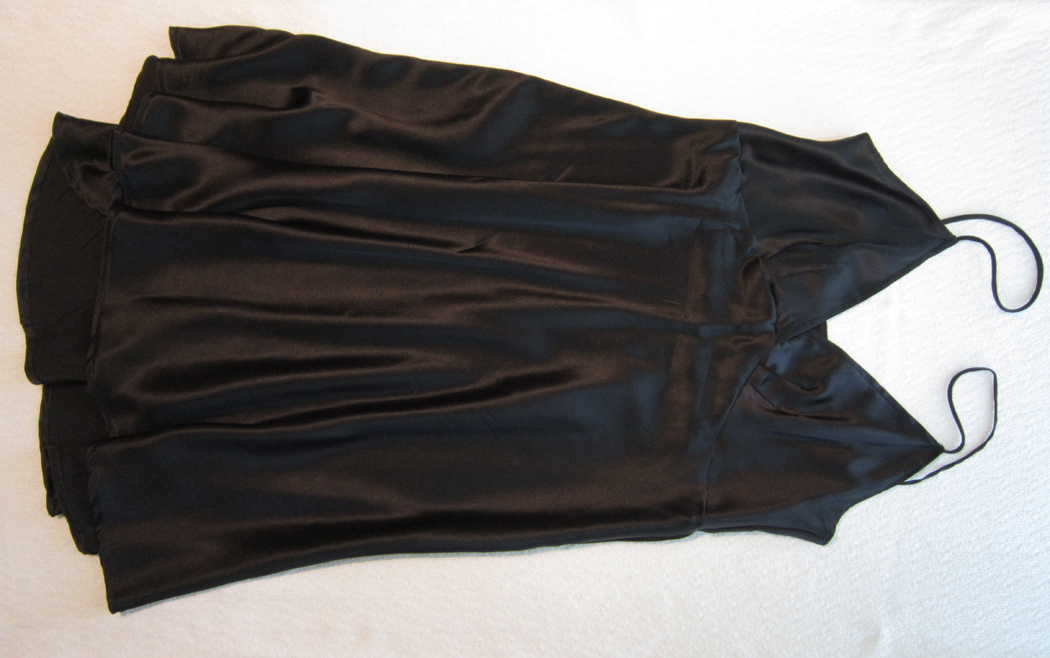
The straps which I call “spaghetti” straps (cuz that’s what I learned growing up) were really really really easy to do with Charmeuse! This fabric has lots of “slippage capability”! Yes, it slips when cutting it, it slips when sewing it, it slips when “n-a-r-r-0-w” hemming it! But don’t be afraid. We must dive into pits of horror to learn that we CAN get out! And it makes us better sewers!
I contemplated not doing a photo shoot with me as the model and using Phoebe instead. She’s so easy to work with. Just hangs around and doesn’t talk back! Phoebe is my full bodied dress form for anyone wondering what in the world I’m talking about. I sometimes wonder if I come across as narcissistic, with all the pictures of myself. Truly I’m not, I am actually quite camera shy and so it usually takes a glass of wine to put my mind at ease. Okay… you figured me out. I guess photo shoots are wine drinking opportunities! Well, on with the show!
Moi in my LBD!

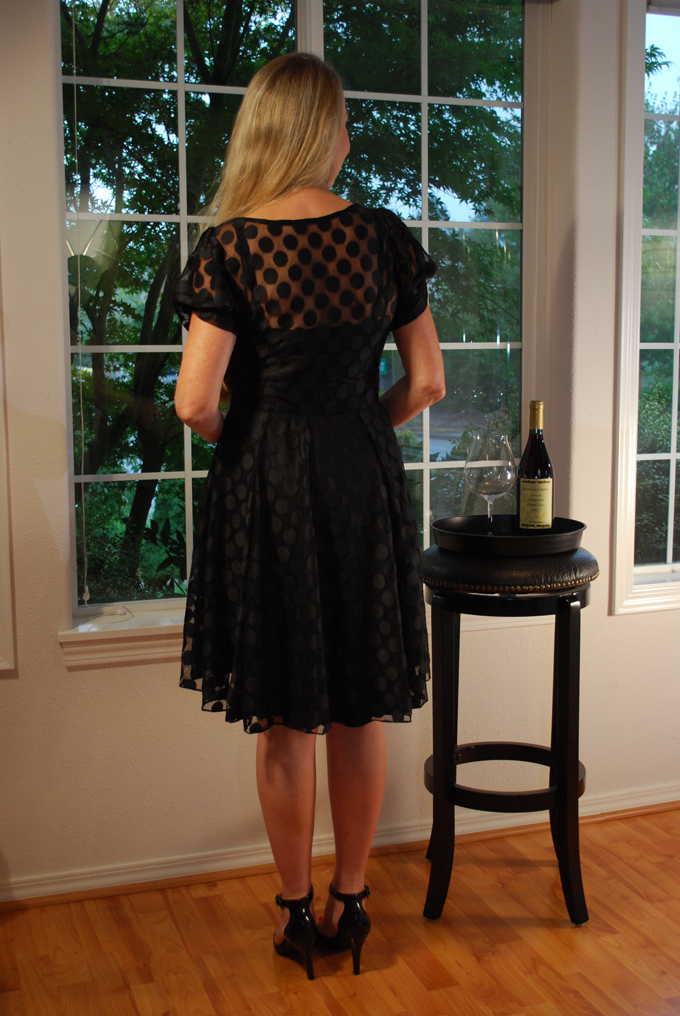
See how the back is a little longer than the front.

The back of course!
Cheers to another photo shoot!

Right around the corner is one of my favorite times of year… Halloween! To everyone sewing costume(s)… I raise my glass to you. This is when the artist in each of us gets to really shine! I am presently working on mine like a mad fool in order to get it done pre-Halloween and posted to share with you. Be back soon!
Salut! Jessica
Read MoreButterick 5919 with Petticoat

The photo above is me during a hockey game I was playing in last week. Mind you, at the moment it was taken, I wasn’t sure if I was going to skate off the ice when the game was over, or have to be carried off on a stretcher from total exhaustion. I took a break from hockey for a few months so being in game shape I am not! My options are to either adjust or bail and since I’m not a quitter, somehow I will endure!
So what’s the point of this image? Please note the orange jersey over the 10 lbs. of gear. First of all, the orange is a horrid shade, is not my color and I did not choose it! My apologies to whom it may concern. And good-by to any idea that I might be a female! Feeling like I look pretty? NOT! After an hour and half on the ice sweating profusely with a bunch of guys also doing the same, when I leave the smelly locker room, I mentally return to my pink fluffy unicorns and glitter mind palace, envisioning myself wearing a dress! Truly, I do love to play hockey but this is one reason why I like to sew dresses for myself. So that being said, now I want to share with you a really cute one that I’ve finally finished.
I first saw it last year on a Burda Style web page and no where could I find who the pattern maker was. Then on a pattern shopping day this last spring, you know, when you can buy 5 for $5.00, there it was, Butterick 5919 in their book and I knew I had to make it. It looks a little retro with the boat-neck and large peter pan type collar with a poofy skirt. Being short like I am, it’s maybe not the best style for me to wear but… I really liked it, it was pretty and so I was making it!
This was a design that definitely required a muslin. There was no way I was going to start chopping on the very beautiful fine cotton that I discovered at Mill Ends nor the silk that I chose to line it with until I did a practice run. Below is a picture of the fabric. I choose it from a selection the fabric store called the Downton Abbey collection. Get this… my choice of print was one of those thought characteristic of “granny” played by Maggie Smith. Hmm… I’m not talking anymore about this!
I ended up making 3 muslins of just the bodice before I was ready to make the dress. Why three? Well, it started off the way it should. I made the usual fitting adjustments and discovered when putting it on that the gathered bustline (see in picture below) didn’t feel right nor look right on me. It felt way too high! At least that was my opinion and that’s my story and I’m sticking to it!

Just to clarify, I have made so many dresses for myself that much of the time I don’t make a complete muslin because I have the feel for knowing what I need in circumference for my waist and hips and find it easy to adjust the bodice to those measurements. Plus, it’s less work! However, if I was sewing something really special, I would make a full muslin.
So Anyhoos, I’m pretty sure I was having a “derp” moment when I started making my 2nd muslin. I tweaked and adjusted the pattern pieces in order to drop the bustline and that’s when it happened! Thank goodness it was a muslin. I got to looking at my 2nd set of pattern pieces that I traced from the originals which included my new pattern changes and that’s when I saw the boo boos! Feeling totally frustrated, I quit working on the dress for several weeks… or more! When I once again felt the wind back in my sails, I broke out the tracing paper and then created muslin number three. Yeah! this time it worked and feeling happy and pleased, I was ready to make my dress!
Since I’ve already shared with you the “Happy” song by Pharrell Williams to express my happiness, I decided this time I would share this lovely postcard.

https://www.flickr.com/photos/jok22
It was fun sewing this dress because it had such a neat design. I did discover however that when sewing the bodice to the bodice lining, sewing the armholes first before the neck, opposite of the pattern instructions, made it easier to check that the sleeves didn’t need any fixing! For me, one sleeve was error free and the other I needed to fix a tiny imperfection that I didn’t like. This would have been harder to do if the neck had already been sewn. If you make this dress, you will totally understand what I’m talking about! Here is a view of the collar and one sleeve on the finished bodice.
The upper back opening at the neckline closes with a single button and thread loop. An afterthought… maybe an elastic loop?
Of course, the back has the center cut-out which is why I thought this design was so cool!
This is the front of the bodice. You can see the collar but unfortunately the gathers at the bustline are not easily seen due to the type of print on the fabric.

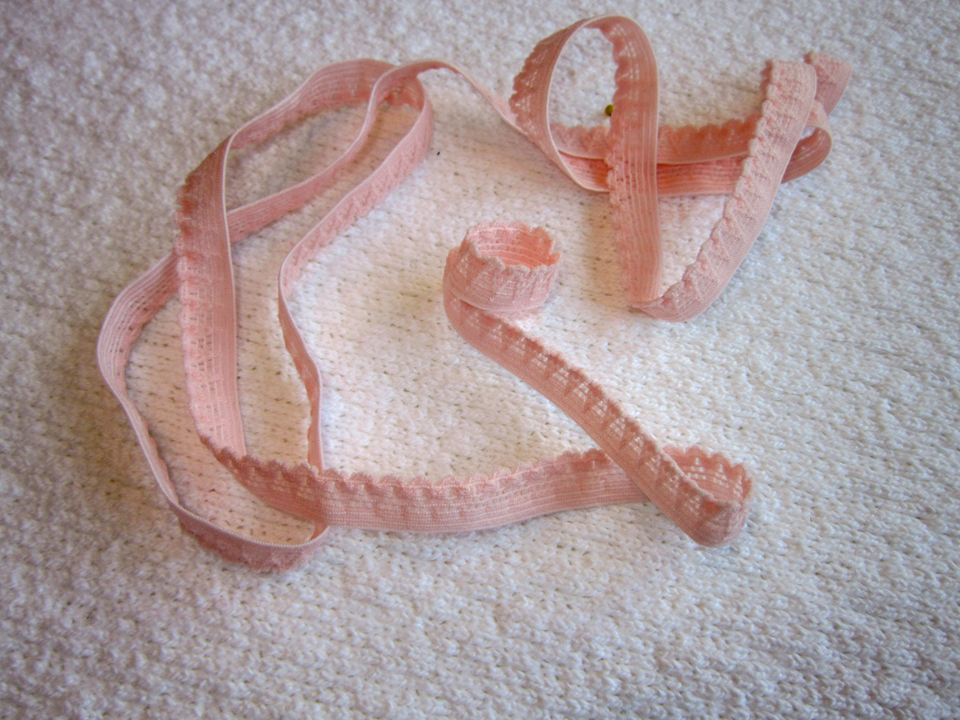
It is printed on the Butterick 5919 pattern envelope that the model in the picture is wearing a petticoat with the dress. This got me to thinking. I had just bought a McCall’s skirt pattern recently that included a petticoat, option F.


Before making it up, I wasn’t so certain that it was worth the trouble. Gathering petticoat netting! Yuck! It was actually not too bad though. I used black tricot and black petticoat netting and for some pretty, I chose this pink lingerie elastic.
I did discover a minor problem with the construction. The instructions have you sew the seam that connects the gathered netting to the upper section on the inside. I think it should have been on the outside. Why do I know this? Because when I wear it inside out… it doesn’t scratch!
Well, here’s my black petticoat, right-side out for the moment. It’s really not much to look at…
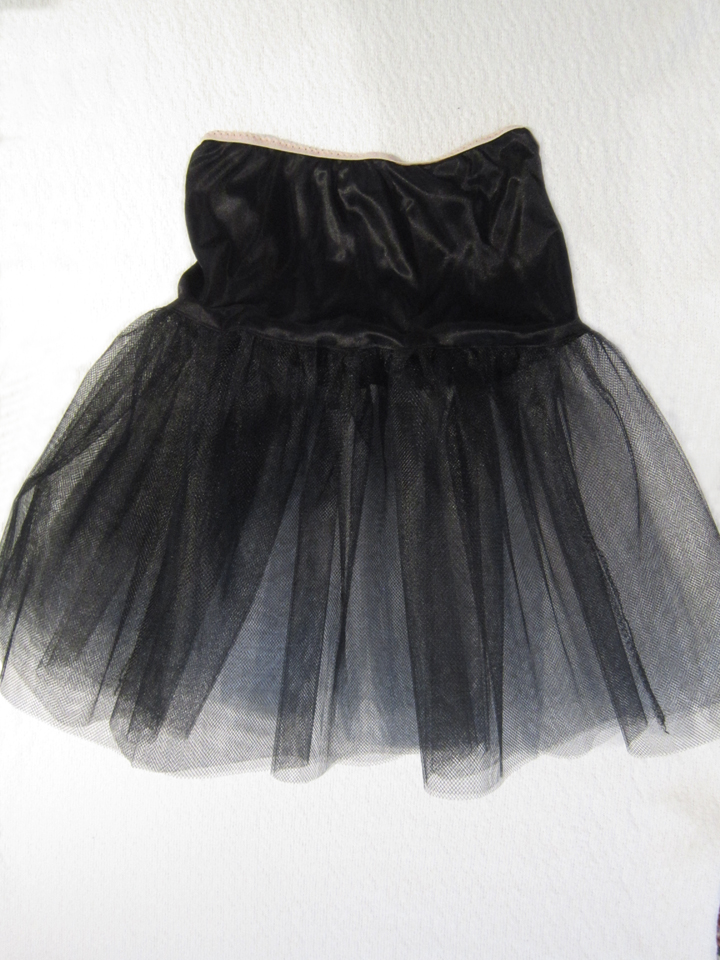
But when I wear it under my dress… it makes a difference!

The back is a lot of why I wanted to make this dress.
This is without the petticoat and there is a difference in how the skirt hangs!
Go Petticoat!


Yes… it’s champagne, not wine! What am I celebrating? Well… I think being alive, feeling pretty, and happy that I get to write about my wacky sewing adventures with you!
Salut! Jessica
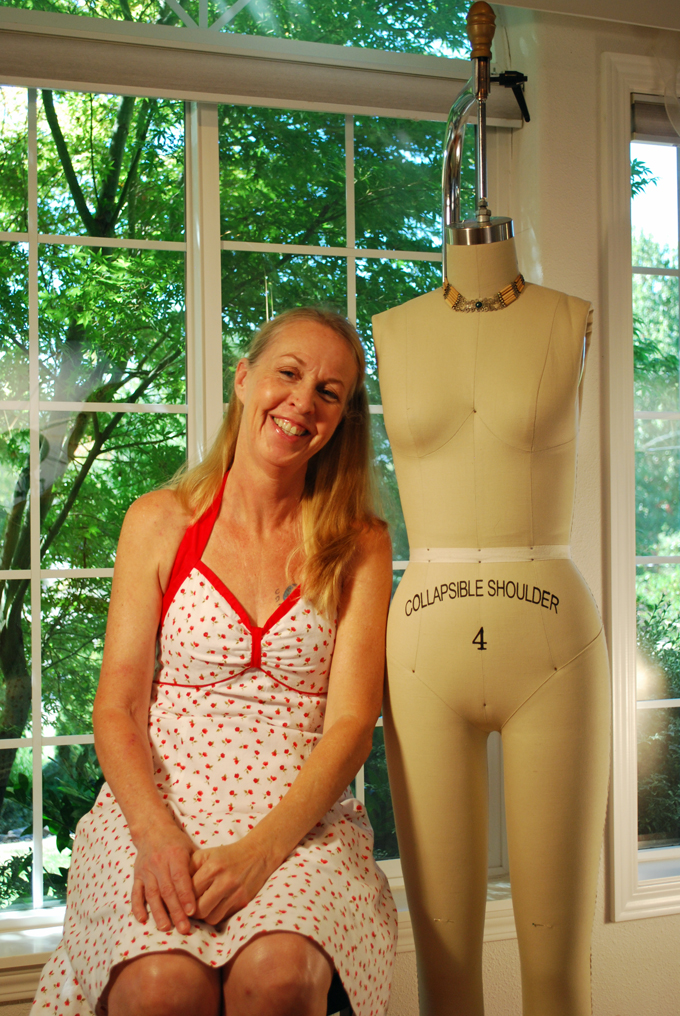
Read MoreMy New Dress Form Phoebe
It was “Girl’s Day” this last Friday for me and my daughter. When the time is right and we feel the need, off we go to do whatever we want to do for the day, spending time together talking, sharing dreams and laughing… a lot! This last Friday ended up being a shopping day for clothing staples and lunch that included a glass of wine for moi! Mind you, shopping for clothes is not a simple undertaking. When I look at a garment, not only do I look at the design but I also examine the quality of the fabric, the stitching, and query how well it will hold up with wearing. Even my daughter who doesn’t sew, shops according to these guide lines though she also operates under the premise that if she works it right, she can get me to make it for her! If I ever quit sewing, she’s doomed — unless she learns how to sew!
I should say that quitting sewing is the last thing I can imagine doing. For me, creating garments is like needing to breath air! Of course, in order to carry out this life force activity, a number of tools are required that include dress forms. These shapely life-size mannequins really have multiple purposes and the dialogue in discussing them can fill a book! For my post today, rather than doing a lot of explaining of their uses, I decided to keep things simple and introduce you to Phoebee!
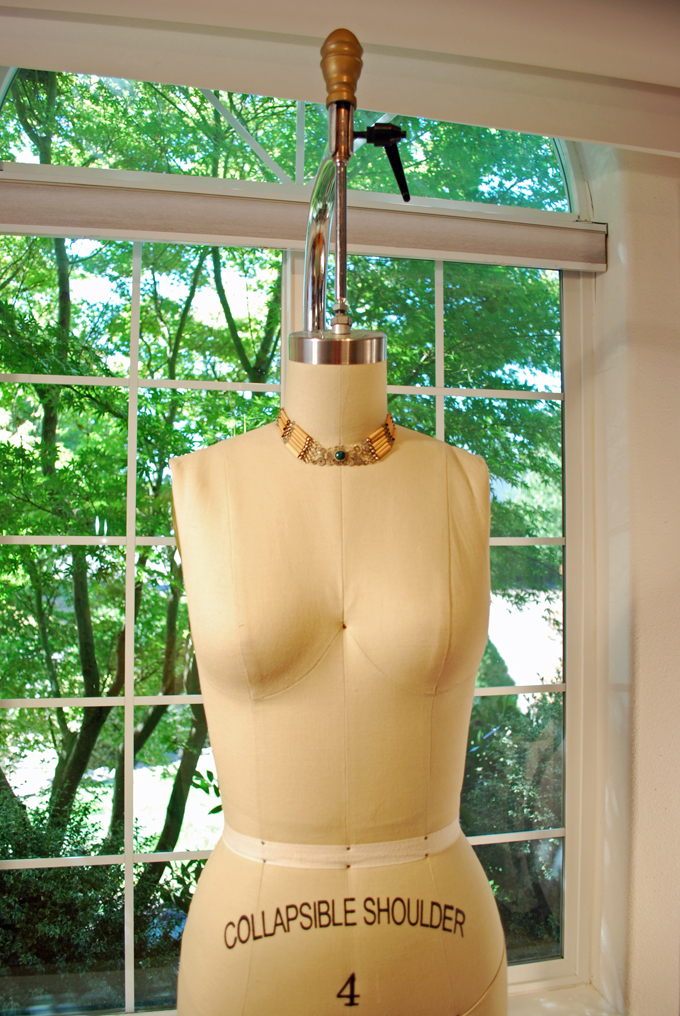 The choker Phoebe is wearing, I purchased from a Huaorani Indian Community in the jungle of Equador, South America.
Phoebe is a Full Industry Pro Female Roxy Dress Form that I purchased from …. drum roll…. you’ll never believe it… wait for it… Facebook! Yes, I am one of those Facebook socialites and I am not ashamed! Especially because it was FB that brought Phoebe and I together. Long story short, I belong to a fashion trade group on FB and one day last month, her previous owner posted her for-sale on the group site. Her sale price was $250.00 and it wasn’t very far to drive and pick her up. Wow! Now that was a deal I could not pass up! I was on it like flies on poop! I have dreamed of owning my very own Wolfie which I discussed in an earlier post, ‘Wolf Dress Forms’, but given the cost of one of them, it has been just that… a dream. I did some research on the “internets” and discovered that the Roxy Dress Forms are constructed quite similarly to the Wolf, and fortunately for me don’t carry the hefty price tag. As for the sizing, well… Phoebe is a size 4 which fits my daughter perfectly, fits me in the shoulders and bust perfectly, but I will have to add a couple of inches in the waist and hips! Yeah… gravity, babies and age do things to female bodies but let’s not go there!
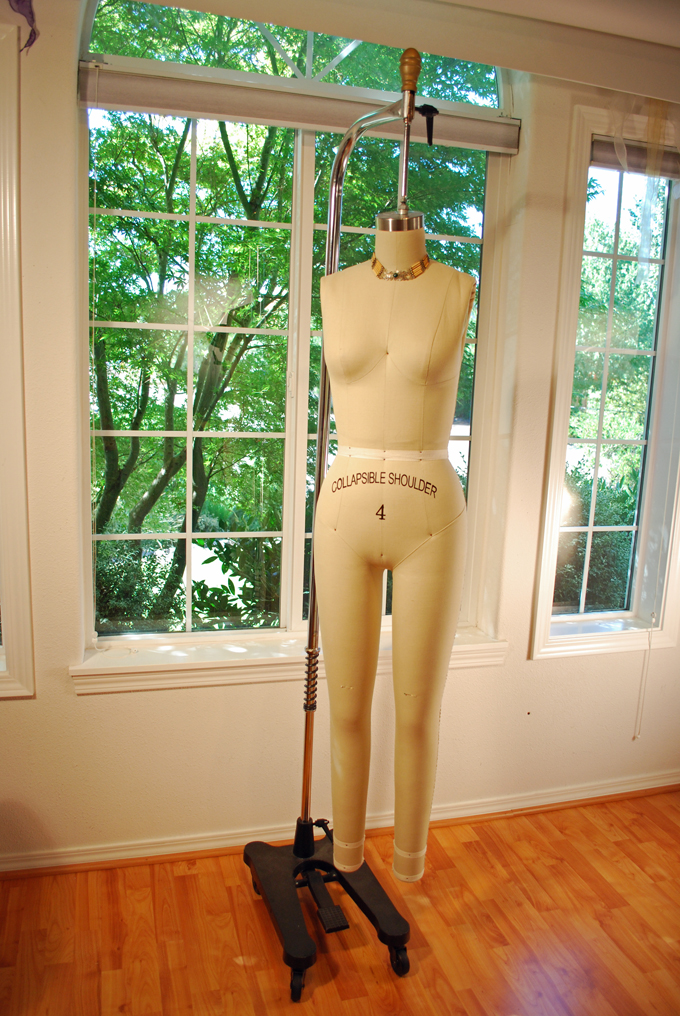
She of course is full length and hangs from a pole on a heavy cast iron horseshoe base with wheels.
We of course had to do a photoshoot together!
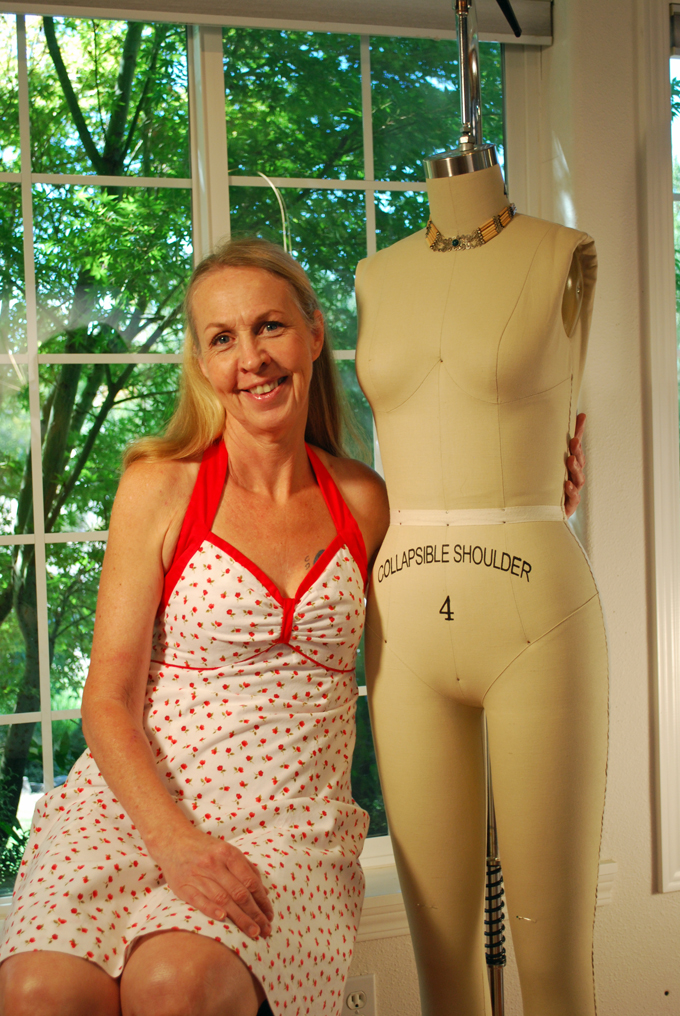
Now I finally have a dress form that is a near fit for me, but I discovered one thing that I really hadn’t given much thought to. Because she hangs, the post above her neck is in the way if I want to test fit for a pull-over-the-head kind of garment. It can be done but the dress form has to first be removed from the hanging apparatus. It’s manageable since the form is not drastically heavy, about 14.8 lbs. to be exact. It’s not often that this will happen so I’m not too worried about it. Besides, the idea for buying this dress form was for it’s true purpose, draping. I have all kinds of ideas that I want to explore, only first I need to purchase some cotton batting and pad out those several inches I mentioned earlier!
Yes, I did make the dress. It is an out-of-print McCall’s pattern, #4444.
This is what the back looks like.
The live back side now including Phoeb’s!
We are having a really warm summer this year in Oregon. The temperatures are heading back into the 90’s for this coming week. I will appreciatively and gracefully sweat through it since the rain season is just around the corner which I’m not quite ready for. Until then, more sunshine, more summer dresses to wear, more Chardonnay to drink and more time to get to know Phoebe before we begin our draping adventure!
Until next post…
Salut! Jessica
Read MoreSimplicity 2362 LBD Part 2

Waldport, Oregon
Okay… I’m back and ready to share with you my LBD (little black dress)! As to where I’ve been… well, the last few weeks have been pretty crazy. It’s summertime and that means spending time with family and friends, and going on adventures! Some of the highlights… Portland Blues Festival, a winery concert, and last weekend, a coast trip, hence the above picture taken at a beach in Waldport Oregon. What’s really cool is that we’re only about half way through summer, which means there’s still more time to play before the sun and its warmth leave us!
Believe it or not, amid all this fun, I have actually been sewing too! It’s been difficult at times though because my machine and work area are upstairs and on days when we have hit the high 90’s, it’s been too hot to sew! No, I don’t have an air conditioner. Maybe I’m nuts, but I like the windows open, rain or shine… or heat! And I like cheap electric bills! The worst is only about three weeks out of the year and so why not bond with mother nature a bit, even if it gets a little wickedly hot! I’ve been wanting to sew some of the Up-Coming Projects posted here on Sewlikeinparis so I can share them with you but alas… I’m kind of stuck in “little black dress” mode so I’ve decided to change things up a bit! This means… get ready to see a bit more black!
As for my LBD made from Simplicity 2362…
I purchased some black China silk from Mill Ends in Beaverton, Oregon, like I said I was going to do. Making and sewing in the lining was simple. I used the same skirt pattern pieces. Because the bodice was already attached to the main skirt, I just hand sewed the lining to the inside of the skirt, wrong side to wrong side, stitching in the seam allowance along side the actual seam. Then I folded the center back seam allowances under along each side of the zipper tape and sewed them in place.
Here is the inside…
The black isn’t as dark as it really is, but I decided not to change the lighting because it’s easier to see the details.
Along the zipper.
This is a close-up of the front of the bodice on the outside. I sewed a rhinestone button on each pleat. When I was preparing the pictures for this post, I noticed a lot of fuzz or lint! My excuse… I was out of lint roller paper which I like to use but I have more now!
The straps are pleated on both the front and back ends rather than gathered. Yes… I didn’t follow instructions but I’m notorious for this!
This is a close-up of the bodice though this picture came out more like its true color.
So now I’m ready for an evening out!

The back of course… hmm… got some weird tan lines going!

Back around…

The front again…with pockets!

And without pockets!

That’s a wrap-up for the 1st “little black dress”. I have already purchased the fabric for two more and the work is in progress. Also ready to share with you another one that is in the final stages of hemming. Lots to come! However… Right now it’s time for a glass of wine!… or two!
Salute! Jessica
Read MoreSimplicity 2362 LBD with Shoes I Love

Dresses, and more recently skirts, are my favorite things to make because I really like wearing them, especially in the spring and summer months. They are comfortable (most of the time) and when I wear them, I feel pretty… even with no make-up and hair from hell! But, dresses and skirts don’t stand well alone… they must be accessorized with shoes! Me and my girls feel shoes make or break the outfit! We try to hold onto comfort, but if going to an event that involves mostly sitting, comfort often goes out the window and instead we wear what we term “fashion shoes“.
Recently I went on the hunt for a pair of black strappy heels which my wardrobe is lacking. I was hoping to find comfortable ones that still looked like “fashion shoes“. I started with wandering through the pages of internet shoe shops looking for my black jewels but there were none to be found. Then, on a brief trip to my local Macy’s, hence the heading picture above, I stumbled onto my dream shoes. Why I didn’t see them on-line is beyond me but now that I have a style name, up they pop on a brief search!

They are Anne Klein’s Akopolize, 3″ heel (comfortable) yet still simple gorgeous high heels! On the discount rack no less! It was a total hands down win in my book and I can’t wait to wear them with a few of my new dresses that are in the works. One that I’m just finishing is made from Simplicity 2362.
The instructions are not too difficult though trying to match up dots in the pocket areas and bodice to bodice seams may make one want to throw things… only temporarily! It’s a pretty cool design and there are a number of variations that make it a jewel to have. My plan for its first test run was a “little black dress” My inspiration for an LBD (little black dress) started with a magazine my kids gave me for Mother’s Day, Designer Techniques, from The best of threads Collector’s Edition.

There is an article in it by Susan Khalje titled “Make your own Little Black Dress from Start to Finish” that includes step-by-step couture details. It was after reading this article, that I decided to make myself an LBD and incorporate some couture techniques while I was at it! Admittedly, there was another reason for wanting to do this… I realized after rummaging through my closet several weeks ago, that I didn’t have any LBD’s! I do have several long black evening gowns and a casual yet dressy pair of flared pants with a matching sleeveless top made from black cotton lycra but no LBD’s! Can you believe it! Not one! Truthfully, I kind of feel embarrassed. I am going to change that though. I have plans for more LBD’s in the near future so be prepared to see a bit of black!
As to why I would want to bother with all the extra work of couture methods… well, because I’m worth it! And an added benefit is that many of the techniques really help to improve sewing skills. Plus you get the pleasure of creating with beautiful fabrics, especially silk. I absolutely love working with silk. Yeah, it can be a pain in the butt to cut your garment pieces out of but I love the way it feels and the ruffling sound it makes when I handle it.
So on with my LBD. The fabric of course is black though unfortunately not silk (the couture idea came after purchasing the black fabric) I didn’t bother taking a picture of the fabric because… well… it’s black! The texture was the reason for my choice. Let me explain… when I think of a black dress, I envision a tuxedo — more specifically, a man wearing one. There is a breathtaking elegance that resonates from the wearer which can pull in eyes from every direction. The white shirt looks crisp, the bow tie perfectly held in place and the black coat and pants so complimenting. So when I was choosing my fabric, I kept these thoughts in my mind and settled for a black sateen which has a subtle diamond shape pattern in it, is a deep black (is there such a thing?), and has a small bit of stretch yet holds it shape.
 http://davidreevesbespoke.wordpress.com/2011/05/16/tuxedodinner-suit-special/
To start the process, a muslin was in order. I usually always do a muslin. Yes, I know it’s extra work but so worth it! There’s nothing worse than sewing your heart out and dreaming of wearing the garment when it’s finished and then discovering that it doesn’t fit properly and likely will never get worn! Been there done that! For this dress, I only made one muslin and it was just the bodice since the skirt I felt confident wouldn’t be a problem. This is because I have made so many dresses that I pretty much know how much circumference I need in the waist and hip area but if I was sewing for someone else, I would have made the whole enchilada! Here is the front of it.
I basted in a 22″ blue zipper so I could close up the back properly, to check for fit.
Notice that the pleats are not matching up. I didn’t even think about matching pleats when I sewed it, and then when taking pictures, they got my attention. This is an example of a good reason for a muslin. I was now aware to pay more attention when sewing my actual bodice.
For interfacing, I used dark brown silk organza. I chose it for three reasons. 1) It was silk organza, 2) the color brown wouldn’t interfere with my black fashion fabric, and 3) the brown was 60″ wide at $15.99 a yard whereas the black was only 44″ wide and $15.99 a yard. It was a no brainer!
The pattern instructions have you interface the lining, probably because the pleats in the bodice front could get to bulky, but I wanted those pleats to hold their shape, remember the bow tie and white shirt crispness… so I hand-basted my silk organza interfacing pieces to the actual bodice pieces.
The right side of the bodice front.

The back side of the front.
I applied interfacing to all my other bodice pieces in the same way, using the silk organza. Below is a picture of the front bodice side pieces. I didn’t take a picture of the back bodice pieces because I think you’ve got the idea! 🙂
Okay, so this is where I have to confess… I didn’t follow the pattern instructions for assembling the dress. Yeah… what’s new! I’m such a rule breaker! I did start off in the right direction. I sewed the bodice front pieces together… but the back bodice pieces I set aside. I did attach the straps next only there is an important point here… with “visions of tuxedos dancing in my head”, I had decided to create pleats rather than gathers at the ends of the straps. I planned for this when cutting them out of my fabric. Lastly, I then applied the front bodice lining, not silk, but rather a $10.99 a yard beautiful drapey perfect shade of black lining fabric. I did not understitch. I decided to do the understitching after I sewed the front and back bodice together.
With the front bodice finished, I was now ready to tackle the assembly of the pockets #7 to the front yoke #8 pattern piece and then attach this to the skirt front. Keeping couture techniques in mind, I first sewed the pockets to the pocket sides in french seams. I did this by matching the left and right pockets to the front yokes, wrong side to wrong side. I sewed a 3/8″ inch seam, cut off all but 1/8″ inch, pressed the seams flat, then turned each right side in and sewed a 1/4″ inch seam as far as possible to the dot that matches up to the skirt front dot. It’s a little tricky but the finish is worth it. I then finished the upper pocket/skirt seam allowances using my own method which I explain in more detail shortly. The underside seam allowance of each pocket that doesn’t show when it’s folded towards the front, I trimmed with pinking shears. This fabric really attracts lint. It doesn’t look especially black in the picture below.
Now I was ready to finish the edges of the side seam allowances. I do have a serger and yes, I have serged many an edge but this is my couture LBD so we can’t have that! I have several books on couture that describe the technique for finishing seam allowances but because I have never really done it, I was a bit confused. So I do what I always do when I am not sure, I wing it! With that, I cut 1 and 1/4″ inch strips of black china silk for this task. I use the real china silk, not the polyester. Silk chiffon is the fabric of choice for doing this as mentioned in my books, but I didn’t have any of that on hand so I decided the china silk would suffice. I first sewed the strips to the outside edge of the seam allowance, raw edge to raw edge in a 3/8″ inch seam.
Next, I pressed the seam flat, then turned it out and pressed again.
Then I turned the skirt over and turned up the edge of the silk strip to the edge of the skirt seam allowance edge, creating a fold, and then pressed again. It’s hard to see the fold in this picture.
Lastly, I folded the strip one more time, up and over the edges, holding it firmly in place and at the same time stitching a 1/4″ inch seam.
As you can see, my work looks a little lacking. The seam should follow along the inner edge of the strip, and it doesn’t, even though I think I sewed a pretty even stitch. I must not have been exactly accurate when first sewing my strips on. Also, I may not have cut my 1 1/4′ inch strips with good precision either. At least I now have an idea as to how finishing seams work, so I will go back and read the instructions again… it may make more sense now. It certainly seems anal retentive to be so fussy about seam allowances, but in the couture world, perfection seems to be one of the reasons for why a garment is so expensive. As to my efforts… well, they will improve with practice but what I’ve done here is acceptable and I can live with it and feel good about it, so end of story!
After finishing the raw edges but without disrupting the 5/8″ inch seam allowance, I was then ready to assemble! I first attached the front bodice to the skirt front.
Assembling the back of the dress started with first sewing the 2 bodice backs to the 2 skirt backs but I did not sew the center back seam. Instead, I finished the edges of the seam allowances like I explained earlier. Now I was ready to install the zipper. I am an invisible zipper addict, so this was my closure choice. Regardless of the kind of zipper, they are easy to install when you are working with flat pieces which is why I chose to assemble the dress the way I did. After the operation zipper closure installation process was completed (whew, that’s a hefty bunch of words!), I went ahead and sewed the center back seam.
Now I’ can finally attach the front and back of the dress together. Here are a few pictures to show you how I did it.
Step 1: With the back side face up and the front side face down (right side to right side), laying on my sewing table by my sewing machine, I was ready to baste the straps to the top of the back bodice pieces.
Step 2: Before I sewed the back bodice facings permanently on, I first basted the sides and tried on my dress. Two things I discovered were: The straps needed a bit of adjusting, and I wanted a little closer fit in the bodice. Both of these issues were easy peasey to fix! After removing the basting stitches from the sides, I laid the two parts back on my sewing table like I did before, adjusted the straps and then basted them in place again. Now I was ready to sew on the facings.
Step 3: Next were the side seams. I wanted to tighten the bodice up a smidge so instead of 5/8″ seams, I sewed 6/8″ inch (3/4″) seams. It was a little tricky at the bodice level because of the angle at the top of the side seams, but with patience, I got it. Actually, I DID do a bit of swearing… mainly because I couldn’t get the seams of the bodice front and back to match up on one side. Okay, I did a lot of swearing! I sewed a seam starting at the bottom of the lining (top of the picture), continuing on through the bodice and down to the bottom of the skirt in a continuous seam.
After pressing all my seams, I was now ready for another try-on. I was happy! It fit perfectly. However, there was this little nagging thought that I just couldn’t shake. What about a skirt lining. The pattern doesn’t call for it but… but… I am the queen of lining! How can I not line? And lining feels so soft against the skin, especially if it’s silk… or Bemberg lining fabric… Bemberg would be nice. Of course, this meant another delay getting this post posted! Hmmm……. well crap… sorry to do this but I can’t help myself… I am going to have to post this in two parts. I will be back really soon! Right now it’s time to go to the fabric store!
Salute! Jessica
Read MoreVogue 8972 Out in Yellow Daisies
All the spring showers we’ve been having are destroying the only flowers
I’ve got to plant so far this year.
We’ve had oodles and oodles of rain in the last few weeks. It can get a little old after a while, but on a positive note, this means lots of beautiful flowers for summer… provided they survive! Rain, however, has really been the least of my worries. I must of jinxed myself or something! I should have known better than to say “look out 2014, here I come”! It seems like it’s been one thing after another. The latest attack came about three weeks ago when I came down with a creeping crud that has made me sicker than I have felt in a number of years! Well… on the bright side, the sun is suppose to shine all this week… so maybe everything is going to start coming up daisies? My fingers are crossed and since we are talking about daisies, I would like to share with you my latest sewing project(s).
Yep, I’ve somehow managed to get some sewing time in during this miserable plague, in between the fevers, the fiery sore throat and major coughing fits. I’m probably not a trooper, but rather an obsessed nut case when it comes to sewing! Fortunately I was stocked up on sewing supplies I needed since I had visited my local JoAnn fabric store just before this damn crap virus hit me! On that particular day, it was pouring down raining, as usual but it felt like the sun had started shining when I stumbled upon this fabric… it was beautiful white daisies on a background of sunny yellow, reversible no less and I knew that I just had to have it.
The daisies are about 1 1/4 inches in size.
The really cool thing though was that this fabric looked like maybe it was what was used to make this Vogue 8972 dress.
There are various options in making this dress. Princess seam sheath style or flared style, no sleeves, little sleeves or 3/4 sleeves and then there is a contrast yoke.
I loved the sheath style shown on the envelope but I’ve always had a fondness for flare because they are so comfortable and allow easy sitting! I consulted my fashionista assistant, my daughter of course, and after much discussion, I decided to make dress B (sheath style) and dress D/E (flared with contrast). And… since my sunshine daisy fabric was reversible, I would make both dresses out of it! This meant another fabric run to Jo Ann’s and fortunately my son, who grew up with a sewing mother, had no fear with doing this favor for me, especially given that I was quarantined!
The pattern instructions are very easy to follow and the design made assembling it quite easy. Admittedly though, I did swear a few times when putting in the little sleeves. Trying to match things up was a bit tricky but eventually I had it under control.
Putting the bodice together is a breeze. There is the front with left and right side fronts that are then sewn to a yoke. The pictures below are dress B on the inside.
The back is attached to a yoke like the front, only there are left and right sides, later connected by a zipper. The princess seam skirt attaches to the lower edge of the front and back yokes. All the seams, except for the back and sides, are pressed towards center and then edge-stitched on the outside along the front and back seams.
A fabulous technique incorporated into this Vogue pattern is that in the assembling process, you are instructed to install the zipper before sewing the back to the front. In this way, the back section gets to remain flat while you are sewing in the zipper. This is a very important thing in any sewing project you do… that is, being able to keep whatever pieces you are sewing, flat in the process. And of course it also helps if you are working on a flat surface rather than letting the fabric hang over the arm of the sewing machine. Hence, sewing machine tables, or acrylic sewing machine extensions like the one I have.
View A
ViewB
There are little legs under the acrylic extension that can be adjusted so that the table can be aligned to the arm of the sewing machine. As you can see in the pictures above, I store various tools that I can quickly grab when I’m sewing. There is a table, a computer table in fact, to the left side of my acrylic extension, creating a continuous flat surface.
I had mentioned earlier that the sleeves challenged me a bit, but this was during the insetting of them. Before doing this, things went super. You first have to make a narrow hem along the bottom of the sleeves. I have developed my own tried and true method for a narrow hem and though it uses extra thread, I think it’s worth it because I avoid headaches later.
The pattern instructions call for a 5/8 inch narrow hem so
1) I basted a 5/8 inch seam along the bottom of the sleeve.
2) Then pressed up the fabric along the basting. I pressed carefully so my 5/8 inch hem width was equal along the entire edge.
3) Next, I turned under the edge so that it touched the inside crease of the 5/8 inch fold and pinned it in place all along the hem fold. I love pins and I use them a lot!
4) With the side that I pinned, facing up, I stitched a 1/4 inch seam along the edge. *Note: If I am worried about how it will look on the outside, I will baste this first a smidge in from where the actual seam will go, remove the pins, and then turn the piece over to the right side and sew in my 1/4 inch seam along the edge, then remove basting. Extra work, but in the end, it always turns out nice!
Underside and outside of sleeve for Dress B Option …
As I said early, insetting the sleeves tripped me up a little. They have to fit at the usual marked spots on the armholes while also matching the lining that you have already sewn in and understitched via the neck and lower armholes. I think the understitch step was the pest! But, my fabric was also sort of stretchy which may have also attributed to some of the problem. Nonetheless, I weathered the storm and figured it out.
My second dress, option D/E turned out gorgeously lovely and and to think I was worried about it being a little heavy! My beloved sunshine daisy fabric is a denim and I was concerned when I started. But I have to admit, I am almost more partial to it than the option B dress!
So here are the twins!
And here they are with me wearing them.
Introducing Vogue 8972 Dress Option B

The back of the skirt has a slit at the hemline.

Here is a close up of the back so you can see the yoke. I think I was twisting so there is a wrinkle on the left side but it’s just due to the twist! You may note that I use invisible zippers. I really love the finished look!
Then… this is Vogue 8972 Dress Option D/E

The back of course! And there’s that damn twist thing going on again!
A close-up of the yoke in front. I used the underside of the fabric for the main part of this dress but cut the yoke out on the right side. Of course, you might say all of this in reverse because it is… reversible fabric!

And one more cuz !

I’m pretty sure I’m on the mend at this point in time. The doctor said that this goofy stuff hangs on, sometimes for a month! EWWWW… YUCK! Well I’ve about logged in my time and looking forward to this weekend. It’s gonna be a day with the girls… and… Curtis Salgado again! Thinking about wearing one of my new dresses, unless it starts raining in which case it’s my good old stand by… leather! Ooh la la!
Salute! Jessica
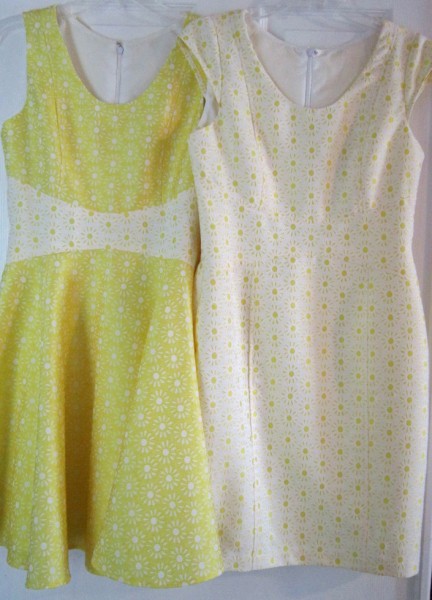
Read MoreBurda 8836 in Blue
 My new calendar for this year! I’m liking it!
Well I’m back! You were probably wondering if I fell off the earth… or something! Happy to say, nothing of the sort, just recovering from the holidays and adjusting to the beginning of a new year. It started off with a bang. Spent all day the 5th of January at Oregon Health Sciences University in the surgical waiting room… one of my sons had to have his gall bladder removed. Imagine that! He is a 27-year- old male and so this is sort of an odd thing. After the dust settled from that, I decided I better get busy and make my little Burda 8836 dress in blue. This project also ended up in the emergency room which is why I am so late in getting back to you. Oh… and did I mention that this same now gallbladder-less person is having a birthday at the end of this month and asked me to sew him a flannel shirt for a birthday present?!! Yes… I have definitely been feeling overwhelmed.
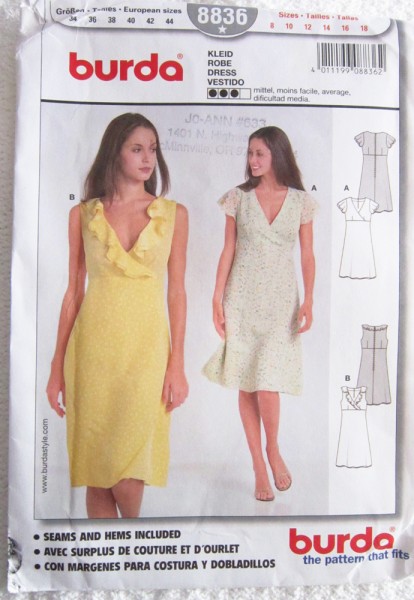
So I suppose you want to hear the grizzly details… of making my Burda 8836 dress, that is. Let’s see – where do I begin. Maybe a picture of the pattern first!
Originally I had imagined this dress in black, however I found myself not to excited to take on another black project since making the black jumpsuit, mainly because I need to improve on my lighting. I think what I need is one of those big bright lights you see at a road construction site! That would be so awesome! Okay, never mind, not logical, but you know where I’m coming from. Anyways, after much deliberation, I ended up deciding on blue. I have never owned a blue dress so I was feeling pretty jazzed about this idea. I spent about an hour at the fabric store wandering… and wandering… and…. then finally, I found a small bolt tucked in between several others that I just didn’t notice before. It was blue but with a red hue making it almost purple but not quite.
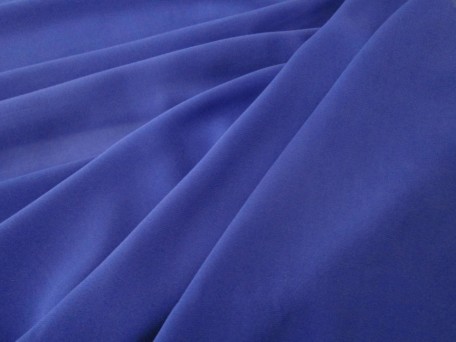
Interesting thing about this fabric. It was in the Georgette/Chiffon section which is the kind of fabric that I wanted but it feels like silk… sews like silk… even the lady at the cutting counter thought it was silk, but it was not in the silk fabric section. Hmm… maybe I got lucky and things are going to start shaping up!
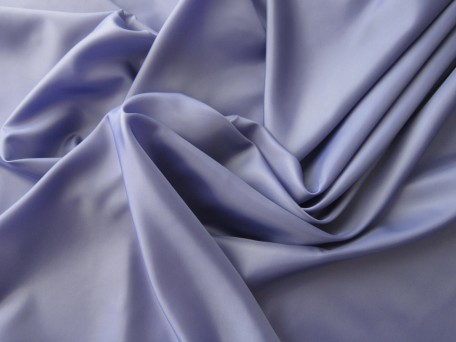
And this is my lining…
Okay… moving right along – this fabric business is where my disaster happened. The width of the fabric was less than 45″, can’t remember the exact measurement now… I think it’s intentional memory loss due to trauma! Anyways, I think what happened is that after much discussion with the lady at the cutting counter, I ended up with a converted amount of yardage and so I was a happy camper and off I went. After pre-shrinking, I laid out my fabric and as confident as can be, started cutting out the pattern pieces on the fabric. I really was paying attention in the process and it was when I got to the last piece, a skirt front to be precise, I realized that there was not enough fabric! Panic began to set in. My daughter had to go into Beaverton that day so I asked her if she would swing by the fabric store, in hopes that she would be able to buy me another yard of that same fabric. WRONG! No fabric, no where, no how!
Some days passed as I stewed on what I should do. Then the light bulb finally turned on in my head and I figured it out. You see, the dress pattern calls for two skirt layers and since I did get all the bodice pieces and one entire skirt layer cut, all I needed was to find a second fabric that blended, contrasted, or whatever, that I could use as a 2nd layer that is sandwiched between the top layer and the skirt lining! It wasn’t what I really wanted to do because I saw in my mind two matching layers flowing with each other along the hem but since that wasn’t going to happen, this was certainly a solution to the problem. I went back to the same fabric store and wandered… and wandered… you know how it works. I finally had to settle on my best option, a solid blue Georgette in a totally different shade, but it was not to dark or too light so it didn’t change the shade of my original fabric when I tested it with a scrap. This is a picture of my blue Georgette.
Alrighty! I was ready to sew now. I had already made a muslin of my bodice which I was happy with. The front…
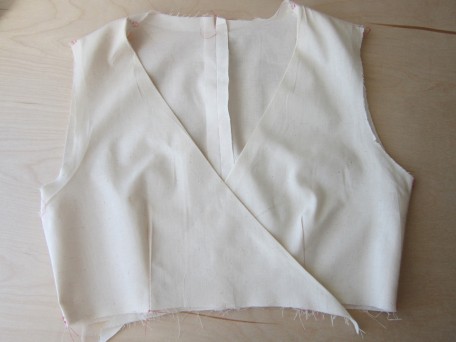
and the back…
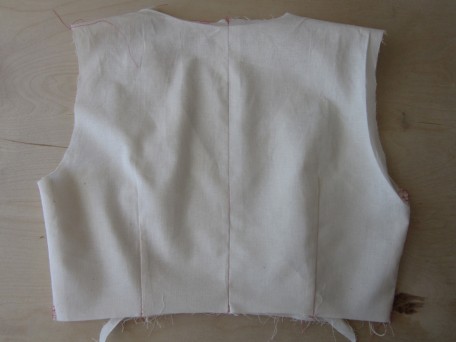
I am fussy with the inside of anything I make. I don’t think it’s an anal retentive thing! It’s just that when I feel my clothes are made really nice, then I feel good wearing them. Enough said right? So I really liked this Burda dress, but the design challenged me with finishing concerns. For the butterfly sleeves, I sort of did what was suggested in the pattern but not! I actually created an edge that looked sort of embroidered. Sort of…
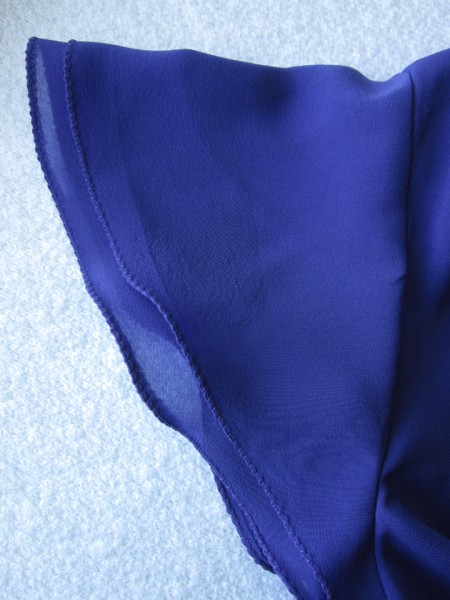
The way you put the bodice together does not allow you to use seam allowances to fold under to cover the stitching of the attached skirt or the installed zipper. I decided to use hemming tape to cover up both areas. I am not sure I am happy with the look of the hemming tape but I went with it.
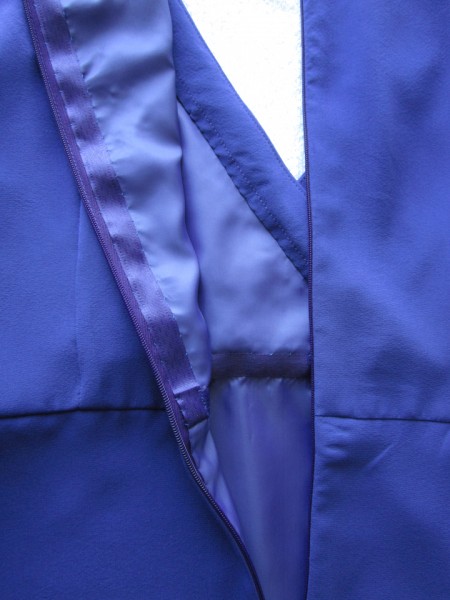
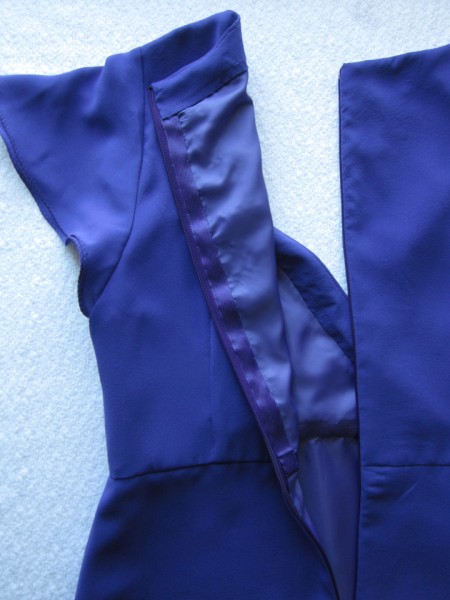
I am an invisible zipper addict and since I used one in this dress, I had to definitely bind the edges.
The pattern instructions said to finish the hem the same as the sleeves so that is exactly what I did. I did however make the Blue Georgette layer shorter because I wasn’t liking the contrast. It looked to me like the slip was showing!
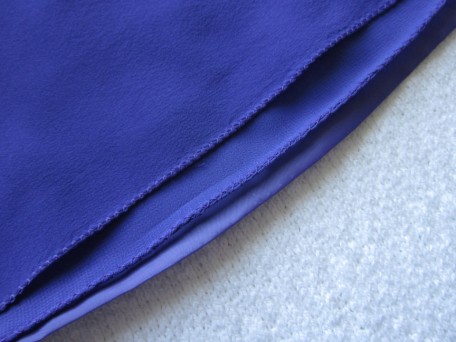
Alright then. I finished the dress and I really love it. I think sometime this spring I am going to make up the option A style with the ruffle around the neck… AND I think the fabric will be yellow!
Here is the finished Burda 8836 in Blue! The hat is a little goofy but I was having trouble getting into photoshoot mode…it was part of an outfit my son had to wear for his bachelor party!

The back of course….

Goofing off as usual…

Now I’m ready to head out to the Wine Cellar and celebrate! Feeling pretty good in my blue, maybe silk, dress. And lots to celebrate… including that I’m almost finished with my son’s flannel shirt, got my 2013 taxes done and started bottling my wine so everything is momentarily alright in the world. Look out 2014… Here I come!
Salute! Jessica
Read More
Butterick 4827 Medieval Dress

Here is my son in total bliss in the vineyard. You might think it’s because he is spending the afternoon outdoors on a beautiful day. But nope… that’s not it. He is laughing his derriere off because he knows that he’s dragging home 300 MORE pounds of grapes for me to make wine out of! As of today while writing this, I have almost 500 lbs of grapes fermenting in my kitchen! We are going to be very happy people for the next year!
So there it is… since I’m knee deep in grapes, I’m a little bit late posting costume number4 for you but better late than never eh! In my last post, I mentioned that I was going to show you something renaissancey! I should clarify that what I am actually going to show you is medieval. The difference between Renaissance and Medieval is really nothing more than two different periods of time in history with the medieval period coming before the renaissance period. There… now that I have that covered, we are off!
The Butterick 4827 pattern is a very nice put-together medieval dress ensemble.
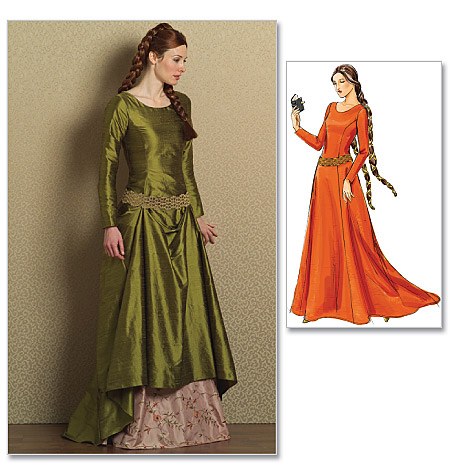
The only challenges to making it, from my perspective, are in the fitting and putting in the eyelets if you happen to get some of the crappy gold ones that I used! (Sorry to say it but I think they were a Dritz product) They did not set well and so have snaggy edges that are messing up the cording that laces up the back, replacing the need for a zipper. Yes! No zipper, but… be eyelet aware! They have some very nice grommets in assorted colors at corsetmaking.com which I have used since making this dress and they are definitely worth the trouble ordering. Grommets are just a little bit more heavy duty than eyelets but so is a zipper! Oh.. also a bit of warning… since the back laces, you will need help getting dressed AND undressed but that’s none of my business!
For the dress I used drapery fabric, a little heavier than I would have liked and which may have have played a little part in the eyelet disaster, but I loved the look of it and couldn’t resist!

The instructions are pretty easy to follow though I did get tripped up a little when it came time to make the bands that the eyelets are inserted in. The instructions talk about “the band” and it’s not until step 21 when the instructions say to apply eyelets to each band! Maybe I was just having a dork moment but there it is just in case it’s confusing to any of you.
The finished dress has princess seams with a small chapel train built into the length of the back. As I mentioned earlier, the zipper is replaced by lacing down the back.
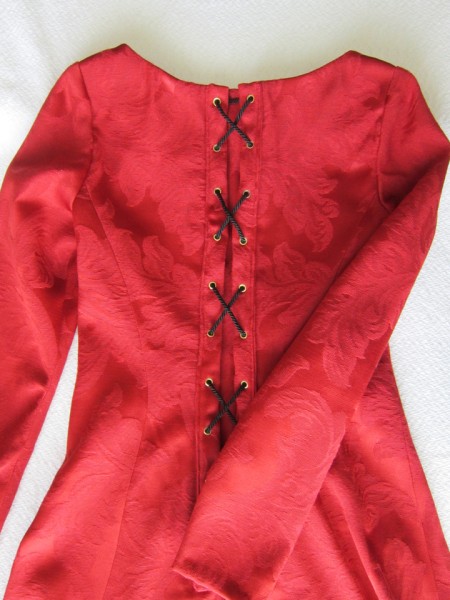
I made this dress several years ago for an SCA event and at the time did not make a skirt so to give this pattern a fair review, I decided to go ahead and make the skirt. I envisioned some sort of gold taffeta fabric with embroidered somethings on it but the fabric gods were not interested in helping me out! I had to keep reminding myself that it was just a costume so I found myself settling for some gold metallic fabric. I had many reservations, clear up until it was time to cut out my pieces. Following a glass of wine, I decided “who cares!” and started cutting. It was actually really fun sewing with it and I am quite happy with how it turned out. No zipper here either… just a button and buttonhole though you can finish it with hooks or whatever type of fasteners please you.
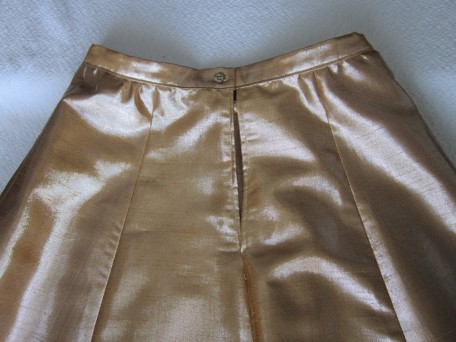
I loved the look of the belt that the model is wearing on the pattern envelope and assume it is made using the belt pattern pieces included. However… where do you find that kind of fabric?!!! Once again, I detoured and decided to go with something that I had stuffed away in a costume basket. I don’t know where it came from but I think it use to belong to my daughter.
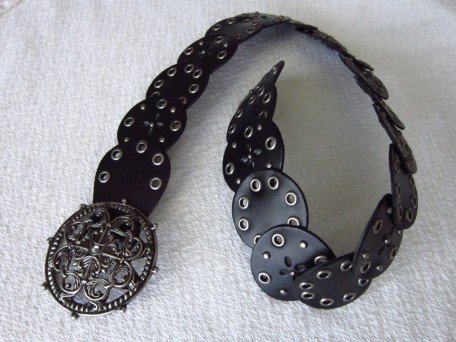
Of course there is footwear that must be considered! I purchased these medieval boots on-line at Costumes of Nashua. You have to scroll down a ways before you see these.
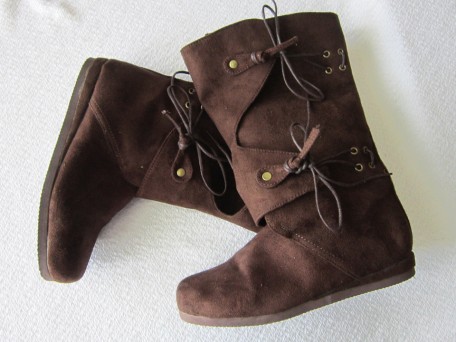
Okay! So there’s the necessary garb for a medieval female. And here she is doing her best to not look too tired! LOL

The fabric of my dress was too heavy to really look good hanging over the gold skirt. Fortunately it is being held up with safety pins that I can easily remove!
No skirt, but now you can see the dress and train.

Of course there is the interesting back…
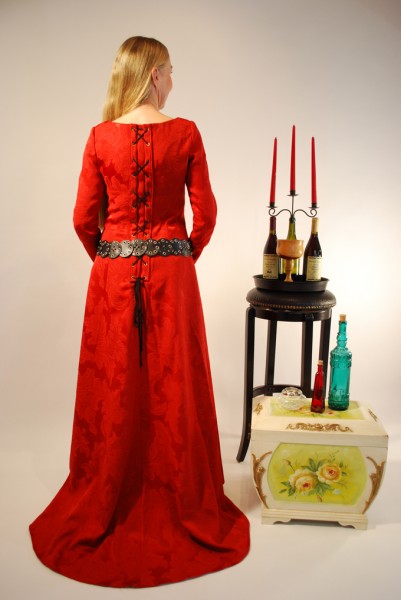
And one with my hair. Hey… it’s about the only thing that I was born with that I half like! I keep toying with cutting it off though…
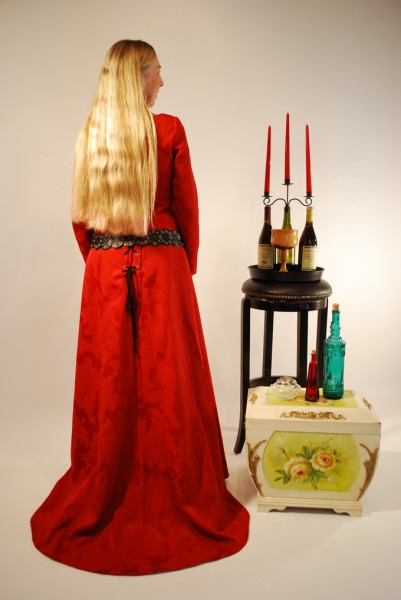
And you always have to have a fun one! I was trying to show some boot!

Okay then. That’s it for this week… I hope this is helping give you some ideas for your Halloween debut if you haven’t already set to work creating something fabulous! Next week’s costume line up involves lots of feathers! Will see you then. Now I have to go check on my wine… and have a glass to celebrate finally getting this posted!
Salute! Jessica
Read MorePairing McCalls 6028 Dress with Simplicity 1797 Jacket
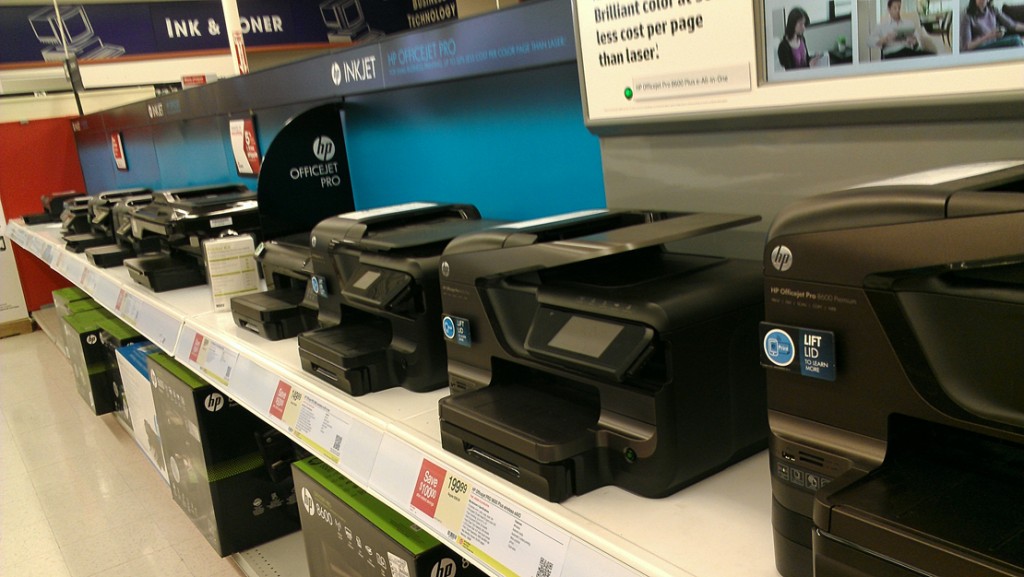
Living a glamorous life as a jet setter fashionista who also happens to be an Executive CEO is running rampant in my imagination while I walk through Staples, wearing my well worn flip flops from Trinidad, five-year-old faded yoga pants and a Converse T-shirt I got from Christmas last year. Definitely not a fashionista but hey, there’s nothing wrong with dreaming, right?! As for the Executive CEO… m-a-a-y-be she or he would be wandering around in Staples. So why am I at Staples in my gym clothes? Well, to either buy 2 tanks of ink OR a new printer. My ink guzzling printer has decided to not print in black, only color and is refusing to go into maintenance mode so I can do diagnostics until I feed it more ink! Yeah… there’s a rant brewing. You know the whole ink scenario. You can buy a printer for the cost of all the packages of ink that it needs to print! Well, I will resist the rant and say that I decided to toss my fate to the wind and sink $30.00 into ink with the hope that a nozzle cleaning after I fed the stupid thing would fix the black ink problem.
So let’s go back to my day-dream, the part about being an executive CEO. When I first saw the McCall’s 6028 pattern, I saw me, miss wishful fancy pants, wearing the sheath dress in royal blue with black trim shown on the envelope, in my fancy office with a fancy desk and lots of windows overlooking a city! I know…I’ve got a really big imagination 😛

That happened close to 2 years ago and I did buy the pattern, the fabric and made the dress. AND, it has hung in my closet since, unworn, because I made it too big and couldn’t convince myself to re-do it or toss it!
Then about three months ago I decided it was time to make a decision. Hmmm… it was tough but yep, I took it out of the closet and proceeded to remove all the trim, took out every seam and then.. then.. folded it up and put it in my future projects basket. Okay, so I was still stalling BUT… I had made a decision. Then last week, I am happy to say, I took all the pieces out of the future project basket and f-i-n-a-l-l-y went to work! I made a few discoveries in the process. 1) My fitting skills have improved immensely since I made that dress… obviously since it didn’t fit! 2) Some of my sewing skills have improved. 3) I have developed a lot more patience!
Okay… so the fabric is not quite royal blue but close. It’s a medium weight loose weave, sort of like a linen, but not! And the trim is a 1/2 inch twill that I learned you have to be careful of ironing because it’s very sensitive to heat! As you can see in the picture, I chose to not apply trim to the armholes because they fit so comfortably the way they are and I wanted no more boo boos!
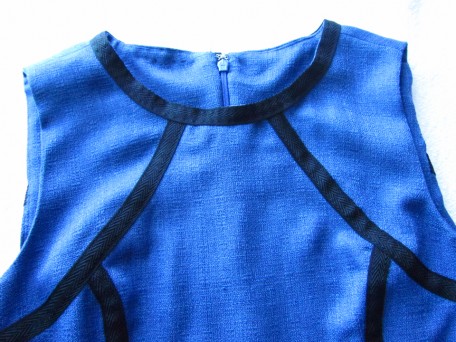
A lining is not called for in the pattern however, you know me, the queen of lining, decided otherwise so I chose a soft blue china silk.
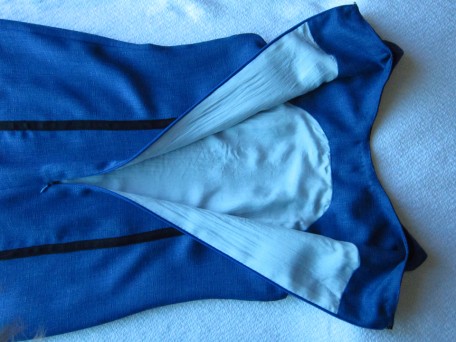
If you want to make this dress, no worries, the pattern instructions are fairly easy. I might offer a tip: Baste all the trim before you edge stitch it with your sewing machine. Its extra work but worth it since you have more control with the placement of the trim being centered over the seams. Learned this because I tried to short-cut it the first time!
I installed an invisible zipper, my fav.
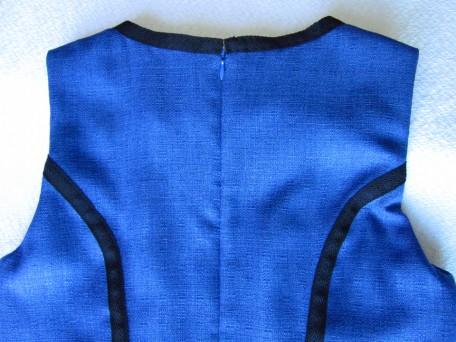
I think the dress was designed for Amazons. I had to take 3 inches of fabric off the bottom before hemming it. This is where my height of 5 foot 3 inches shows itself! I had to get a little creative with the back vent because of the lining I put in.
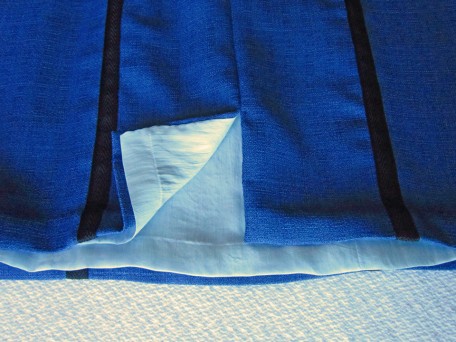
Now, to go with this dress, I got this crazy idea to pair it with the jacket from the Simplicity 1797 dress that I did the pattern review Simplicity 1797 on.

The really cool part was that I still had some of the blue fabric left that I made the dress from, so last week I dug it out from one of my stash piles. I laid it out and placed the pattern pieces on it to see if I had enough and indeed I did!
The instructions were easy and I thought the jacket was fun to make. It has some interesting features. There are two pleats on each front, on the outside. When you sew the darts, you have to be careful when coming to the point of the dart. You have to be able to pull the threads to the inside and tie them in knots.
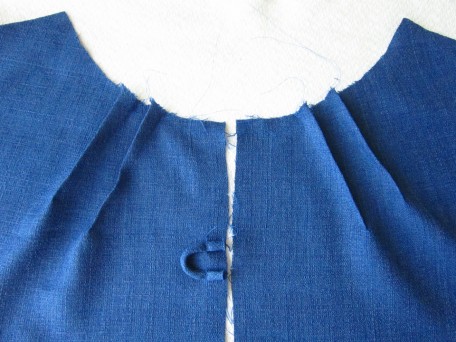
Basting the fasteners on is easy, it’s making them that can be a bit tricky. The easiest way I have found is to tie the thread from one end of the 3/8 inch stitching to a BIG hand sewing upholstery needle and then feed it into the casing eye first.
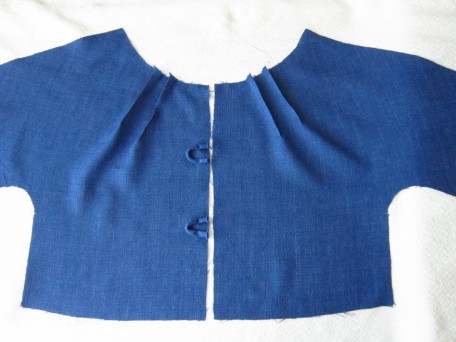
You next sew on the front bands by first finishing the edge which I did by pressing under 1/4 inch and then edge stitching.
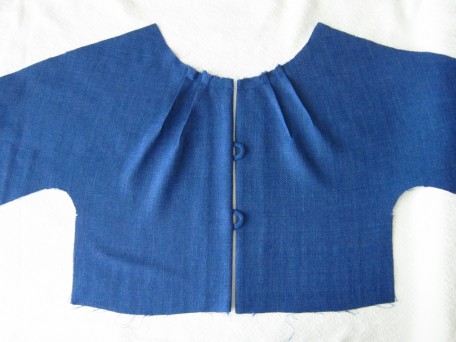
Here is a close up…
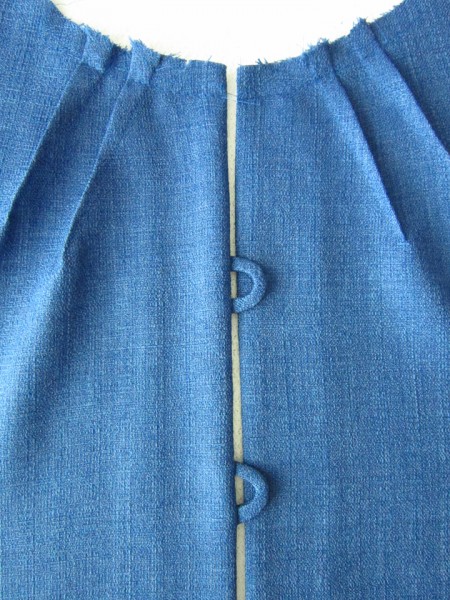
This is how it looks after you turn it to the inside. I went ahead and carefully tacked it down after hemming the jacket.

Putting the pleat in the back confused me a bit at first, but once I figured it out, I felt like a dummy. On the inside, you simply create a pleat like a box pleat on a mens shirt.
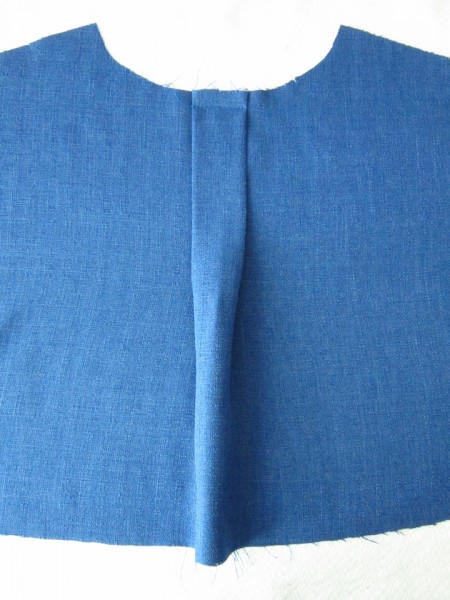
On the outside it looks like this…
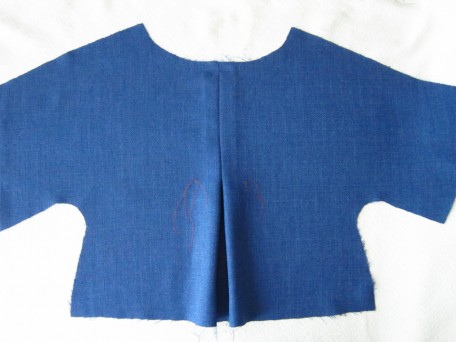
and close up…
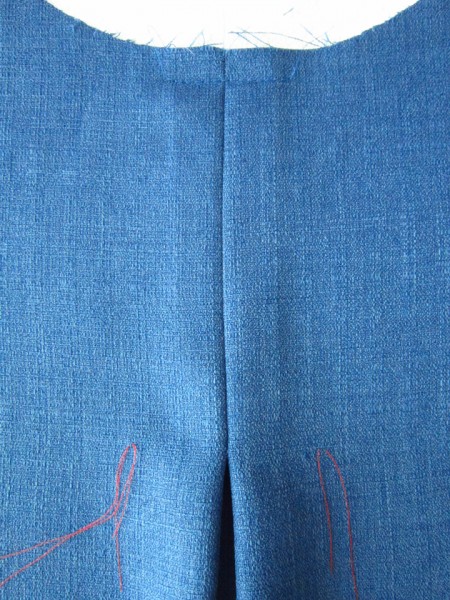
The red thread is marking the placement for the tab that goes across the back and holds 2 buttons. Of course somewhere along the way the red thread came out!
Shoulder seams were the next part of the construction. I decided to finish the edges in a flat-felled seam because the fabric is real unstable and frays easily not to mention that I just wanted it to look pretty inside. This is the outside seam.
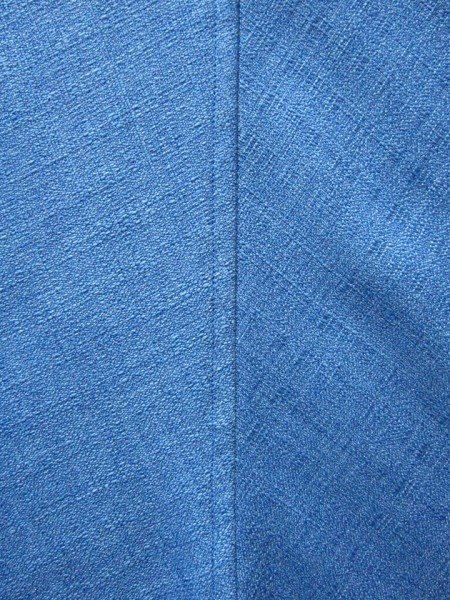
And my not so attractive inside seam. I do have a flat fell seam foot but this fabric is so loosely woven that it’s hard to take out a seam if I make a mistake and given that my flat fell seaming skills stink using the said foot (but not forever!), I decided to flat-fell by hand.
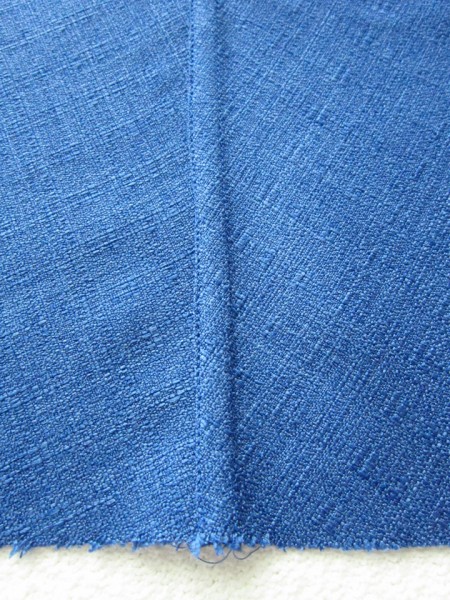
Applying the neck band I found a little tricky, partly it was just due to me but also I think because of the fabric. It easily stretched in all directions. I guess it’s that loose weave issue again! Or else I’m a DERP! Ehhh, I think I’ll blame it on the fabric!
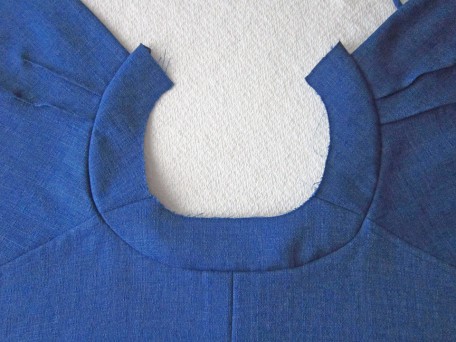
Be careful when applying the facing band over the front edges…specifically the one with the fastener! I made sure the lengths were equal on both the left and right but then I got fussy with how bulky the fabric was looking on the side with the fastener so started messing around with it. When I was done, I should have checked the length of each neck band front one more time before top-stitching all the seams around the band but didn’t! I just hate it when that happens!
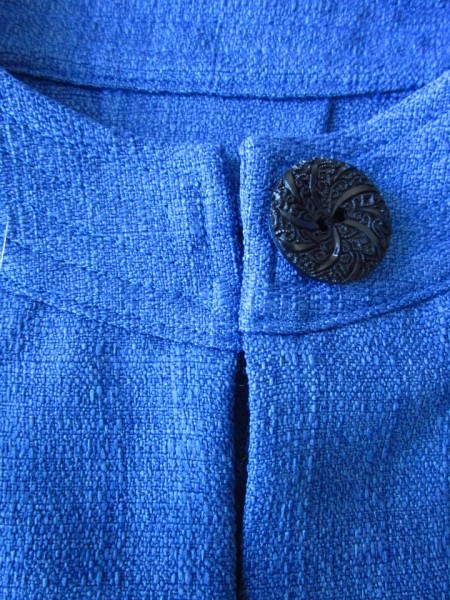
Underarm seams are a bit unnerving when flat felling seams. I maintained as much composure as I could and patiently worked on them for what seemed like hours. I first basted them down, and then edge stitched them just like with the shoulder seams.
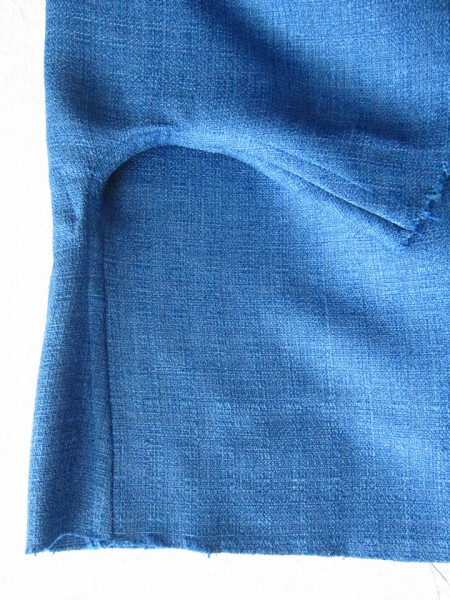
And the inside…

The sleeves were easy enough. You machine hem and then top-stitch 4 additional rows. I forgot to take a picture of the sleeves to show you. They turned out fine though I noticed sort of a bell shape thing happening along the end of the sleeves. I could have pulled to much but I think I’ll stay with the fabric being stretchy excuse! Maybe with the next washing I can press this out.
I have some advice on making the tab. Don’t cut off the corners like you are instructed to do in the pattern directions. And stitch from edge to edge rather than pivot on the corners.

I learned this valuable tip from Peggy Sagers of Silhouette Patterns and forgot it when I made the first tab! Fortunately I had enough scrap fabric and so made another one. Also, if you can do what I will attempt to explain next, you should be able to get nice looking outer corners on your tab. For starters, don’t try to turn the whole tab right side out through the opening at once but rather work with one corner at a time. I found it easiest to start with an end corner that is not on the side of the opening. Fold down the top seam allowance of the corner at the stitch line towards the underside of the tab and while holding it in place, fold the side seam allowance of that corner at the stitch line over the top of what you are holding. Then while holding the two edges pinched together begin turning them right side out, leaving the inside of the other corner of that same end of the tab visible. If you have the look you want, then do the same thing to the remaining corner of that end. You will do the same for the other end of the tab. It’s not rocket science but it requires patience. I hope my explanation makes sense and is not confusing.
The finished tab…
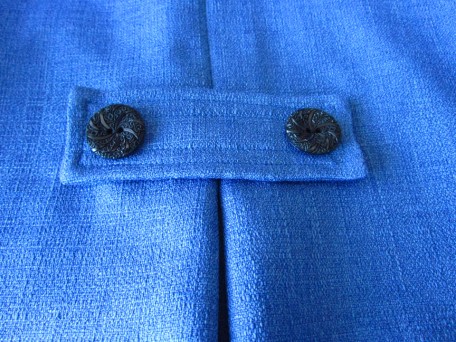
The rest of the construction of the jacket is pretty uneventful. Some hemming and a little tacking of the front bands if you choose to though the instructions don’t call for this.
So here is me in the dress with all the “executiveness” I can muster after a visit to the doctor and some skin wounds!

The back of course…

AND with the jacket…

The back of the jacket…
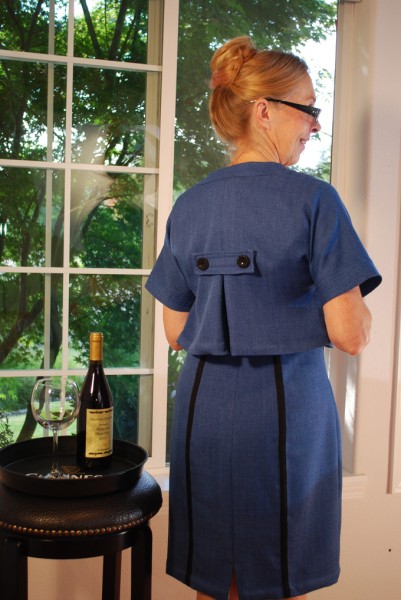
And a tadaaaa!!!!!

I’m still not sure about the combination, but I love the jacket and will undoubtedly make other things I can pair it with! Oh… and by the way, almost forgot, my fiendish printer works again!
Salute! Jessica
Read MorePattern Review Simplicity 2703

Hope you all are enjoying your summer. Likely taking a holiday to some special place…the beach, the mountains, going home to another state or country, or visiting family and friends you haven’t seen for a while. If so, tell them I said hi! 🙂 As for me, well – not seeing a holiday in the near future… there just seems to be more work that needs to be done! My herbs, flowers, bushes and grass are in constant need of watering, especially in the 90 degree days we seem to be having quite a bit of. Who said we were approaching an ice age? Honestly though, I’m not really complaining because I love doing these seasonal things. It means that I get to spend more time outdoors, I get to appreciate the smell of flowers (though there is something with hot days and dog poop that I don’t especially appreciate) and I also get to do my yearly canning. Canning, you ask? What’s that! You know, I think it’s becoming a lost art. I was fortunate enough to learn it from my grandmother. I remember my visits to her house so clearly. The first thing I always did was hit the pantry, strategically planning my meals based on what grandma had canned since my last visit. My favorite was peaches! Naturally my children have been indoctrinated into canning and will help me (most of the time) when the fruits and vegetables start rolling in. Every year the pantry gets filled with the usual items for the winter months; peaches of course, raspberry, strawberry and boysenberry jam, apple butter, spaghetti sauce, spicy tomato and mango chutney, and of course pickled dill green beans which explains the picture above.
Somewhere though in all of this chaos, I still manage to find time to do my sewing which brings me to my latest project, a dress I made using the Simplicity 2703 pattern.
I bought the pattern back in February or March, I think, and then added it to my “collection” and forgot about it. I hope I’m not the only one that does that! Anyways, then in the beginning of June, when I was buying fabric for the McCall’s 6745 dress that I made, I stumbled across another fabric that I had no idea what I would do with but had to have. Now I know I’m not the only one that does that! There was only 2 1/6 yards left and I made it mine. So last week when it was time to start a new project, I pulled out this fabric and pondered again on what I should do with it. I contemplated designing something of my own, but it was hot, I was tired and so I decided to take the easy road and rummage through my pattern “collection” (notice how I’m avoiding the word stash – collection sounds more artsy fartsy!). Lo and behold, I found the Simplicity 2703 pattern and wow…my fabric looked almost the same! The point here is to say that I didn’t mean to do that! But… since it happened, I decided to go all the way and I even added the two rows of twill tape. So here’s the fabric which turned out to NOT be fine cotton which I had originally thought but instead sateen. The white fabric is a pongee.
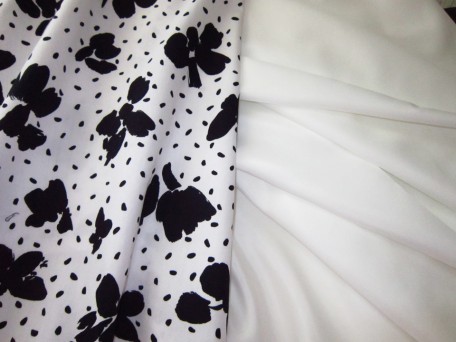
The pongee is for the lining. Yes… I am a liner! I don’t line my garments to hide ugly seams since I am pretty particular with how I finish seams. I like to consider myself sort of an “haute couture” kind of girl. I should be clear though that I don’t always use haute couture techniques for finishing seams, but I am fussy. There is something about a lined garment that gives me the feeling of quality – maybe it’s what the RTW (ready-to-wear industry) has done to me! But it’s also that it just feels nicer to wear. I like to use china silk, but when I”m not sure I’m going to like a garment I’m making, I hesitate to splurge and spend the extra money so pongee is always my fall back. At $3 to $4.99 a yard, it’s a no brainer! Pongee does sort of feel like silk to me, is nice to sew and since this makes me happy I’m good with it!
It is such a pain in the derriere every time I start a new sewing project because there is a whole fitting process that I have to go through. My shoulder width across the front is about 1/2 narrower than most standard patterns, my bust cup size is somewhere between an A and a B and my torso length is about an inch shorter, especially noticeable in the back if I don’t shorten the pattern pieces in length. I have learned this through trial and ERROR! Depending on the style line, all of these details can be easy to remedy or become challenging. This dress did create a bit of a challenge for me because the darting happens in the neck line. I started off thinking I might not like this dress but after three muslins, I finally nailed it down and thought otherwise.
The pattern instructions are easy to follow. I did make one change – I added a skirt lining made from my white pongee by sewing it to the bodice facings that I cut out of the dress fabric.
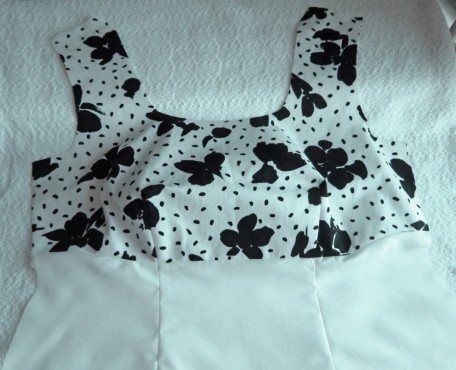
The back tripped me up a bit. I initially sewed darts in the skirt back lining and then when I went to attach it to the bodice back facing, the skirt part was too narrow. It was a total DERP moment! I removed the darts, though now have dart markings that hopefully will wash out but hey… now they fit together perfectly!
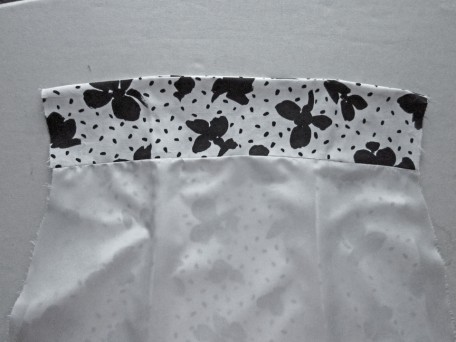
Whether it was the fabric or the pattern, or both, sewing this dress went very smoothly other than the lining foo-bar. I wish all my sewing creations went this way. (I’ve still not gotten over the experience of sewing the Simplicity 1797 dress) As to some of the details – here is the bodice showing the neck line pleats and the two rows of 1 inch twill tape. The pattern calls for 1/2 inch but I wanted the trim to be more bold! What’s new huh!
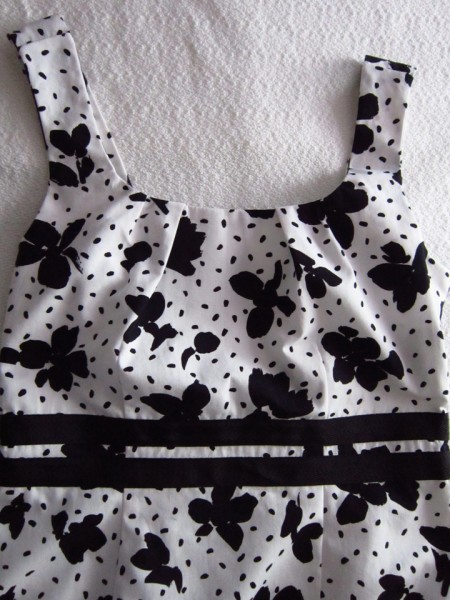
Here is a close up of the neck line pleats.
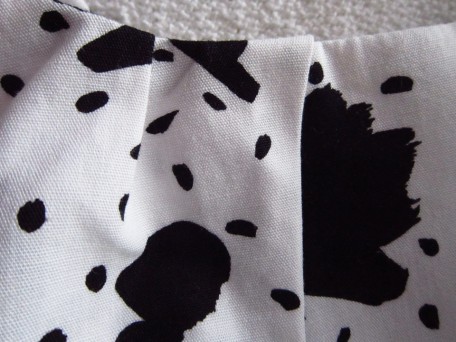
The dress closes on the left side with a zipper. I used my favorite, an invisible zipper and so I did not sew the fabric and lining seams below it until after it was installed.
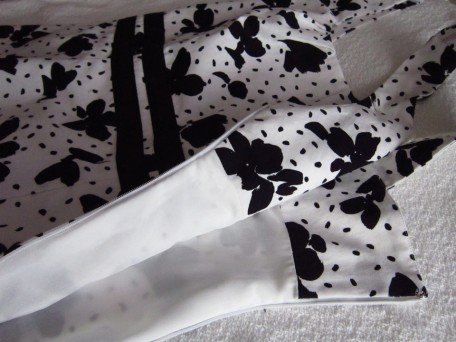
Well there you have it – a dress made from the the Simplicity 2703 pattern.
Now the moment of truth, a picture of moi wearing it.

The back of course!
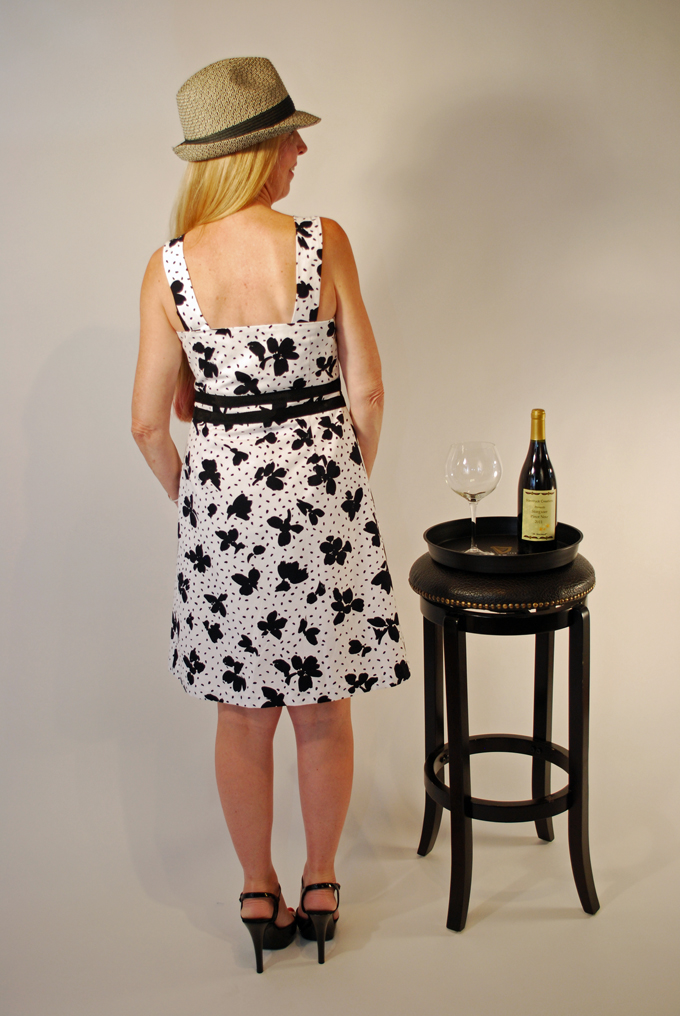
And one for fun!

So there it is, another new dress! A special event is coming up this next month that I might wear it to unless I think of something else before then… it’s called “Dragging the Gut”. My youngest son and daughter are going to drive their cars and I’ll drive mine of course. Probably have some friends join our herd and we’ll all drag the gut for part of the evening, along with hundreds of others on a route that will take us down a main street of a town we live near. After a bit of dragging we will cruise on back home, have dinner and I will indulge myself with a glass of wine! Or maybe two! A hot August night adventure … can’t wait!
Salute! Jessica
Read More
Dressmaking or Shirtmaking
So I have traversed back and forth across a bridge that connects two arts in the sewing world, dressmaking and shirtmaking and the question is… which do I prefer to make? I’ll have to say it’s a hands down… BOTH! Each satisfies my creative passion and both help me to develop more skills to stuff in my “tool box”. Not to mention that it’s just awesomely cool to also know how to make mens clothes!
In the last several weeks, I have been hard at work (when I’m not elsewhere like Blues Festivals, smacking pucks around at the rink or working in my yard trying to keep my herbs, vegetables and flowers alive through this ongoing hot spell) designing a shirt pattern for my loveable beer connoisseur and sewing a glamor dress for my adorable pencil. Today I am going to share these tales with you! Sorry about the length. I know blog articles should be short, sweet, to-the-point, and not novels! However, if you meet me in person, the first thing you will learn is that I love to talk to people. Yes, I am a social butterfly 🙂
I’ll start my tale with the glamor dress. The pattern is McCall’s 6561.

McCall’s 6561
I’ve made this dress before in white embroidered cotton and lined it with cotton silk. It has a 10 piece bodice that I had to totally re-design for my daughter because she was smaller than a 4 but a bit bustier. There is a post here at Sewlikeinparis, Pattern Review McCalls 6561 with more details and pictures but in short, while it’s not horribly difficult, it is a bit time consuming to make.
The fabric I used this time is shimmer satin in black and royal blue.
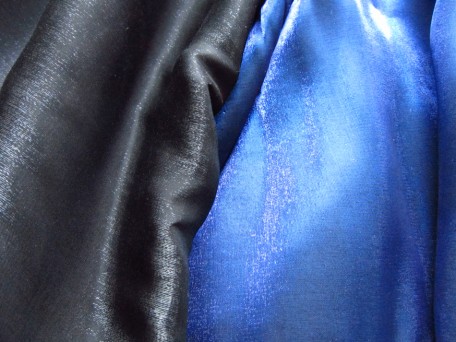
The pattern provides instructions for which pieces of the bodice should be cut from the fabric or the contrast fabric but we ditched those and my daughter marked the muslin bodice with her desired color scheme. This is the bodice front finished.
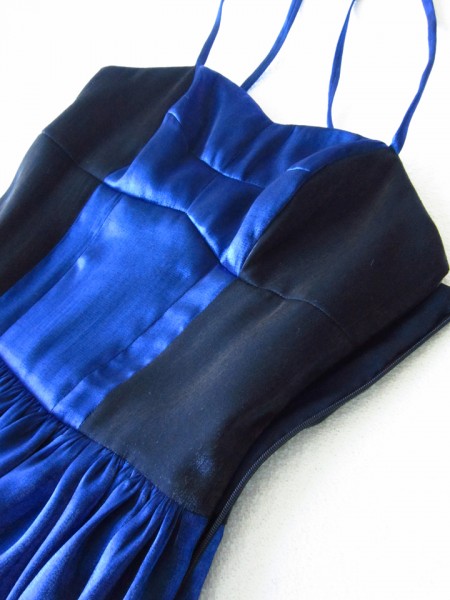
And the view of the back…
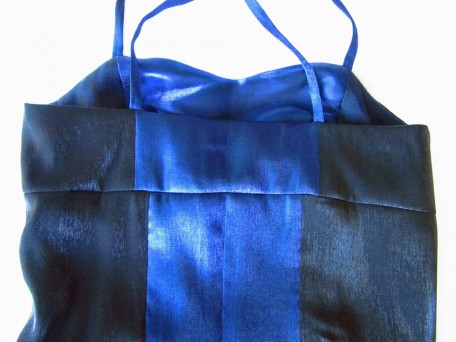
The dress has two gathered skirts, the instructions tell you to attach one to the bodice and one to the bodice lining. My daughter didn’t like the feel of the two separate skirts so I attached both to the main bodice this time. I didn’t sew the side seam and put in the zipper until after I had sewn both skirts to the bodice. There was a lot of basting going on.

Next, I installed the zipper first, then sewed the side seams. To be on the safe side, I decided that before going any further, I would make the straps and attach them so my daughter could try it on. OOOOh, it seemed a bit too snug for my liking but she felt it would be just fine. With hesitation, I went ahead and applied the lining and did the finish work.
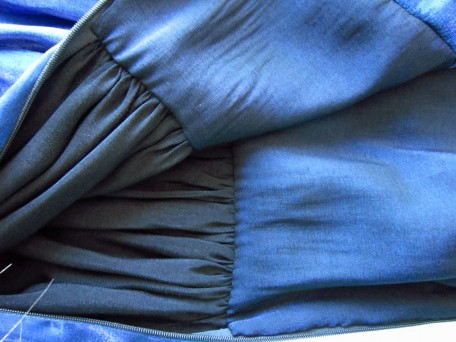
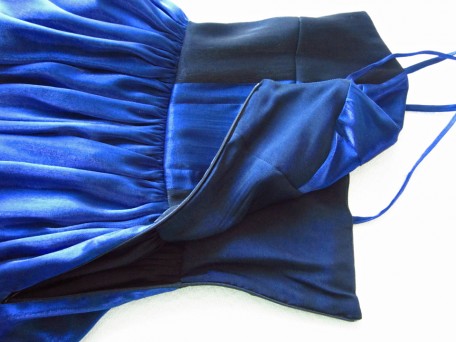
This is the bottom of the dress with the layered skirts, one being a little longer than the other.
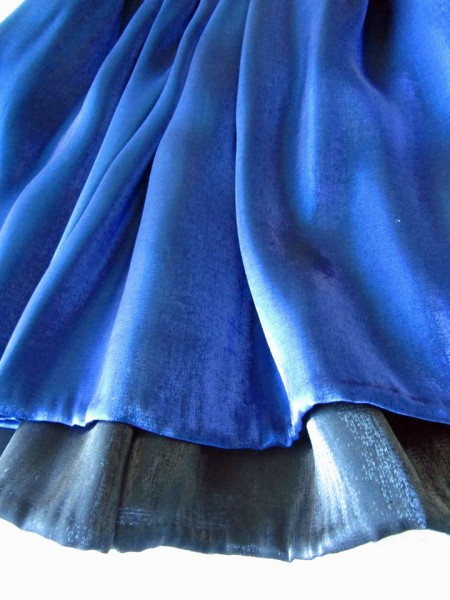
So yesterday was the official photoshoot for the McCall’s 6561 glamor dress but guess what? My pretty little pencil…

had at some point very recently, turned into a fine point Sharpie!
Yep, you got it… the glamor dress did not fit! Not even close! Because of this, there are no pictures to share this gorgeous little number with you because there is NO body that can fit into it. I had to go downstairs for a drink… of water, and when I went back to my room I found the dress hanging on my closet door frame. This is a nonverbal form of communication that as a mother I have learned to understand. My daughter is saying, “if you want me to wear this dress, you can fix it if you want, but I don’t want it in my closet taking up space if I can’t wear it.” I love my lovely fine point Sharpie very much and so believe it or not, there will be no more words and I will return to the fabric store in search of more matching fabric for a new bodice. I will see this experience as an opportunity for me to get better at alterations! (even though I really HATE altering anything!)
So, I bet you are wondering how the shirtmaking went huh? It too was quite an adventure. I have designed a final pattern which is a melting pot of three patterns, a draping, and a number of additional features that I discovered after studying one of my son’s better well-made RTW (ready-to-wear) shirts. It was after 3 muslins, an official attempt at shirt #1 which was an epic fail and my son’s fading hope that he would ever get a shirt when my bull headed determination saved the day and I finally figured it out! The next day after the celebration 🙂 , my son and I went to the fabric store and he chose this fabric.
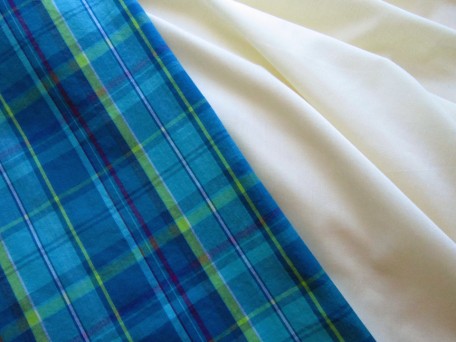
It is 100% cotton plaid and the pale yellow is broadcloth which will be the contrasting neck stand (band). I think my son has figured out the magnitude of his good fortune because he picked out some additional fabric as well for his next shirt!
Cutting shirt pieces out in plaid fabric, I think, is an art of its own! The 1st shirt that was a bomb took me all day to cut out because of the matching game I was trying to play with all the horizontal and vertical lines. It wasn’t too long before I figured out that the more pieces you had, the harder it was to match things up! Therefore, I devised a method through my pattern design that made things much easier. I drafted two separate pattern pieces, one for the right front and one for the left front. Each piece includes enough yardage at center front that will fold over itself several layers, creating an interfaced placket for the buttons and buttonholes. Mind you, folding over the right side that holds the buttons is pretty easy, but it was the left side that holds the buttonholes where I got a bit creative. Ultimately you fold the center fabric edge backwards, right side to right side, then forwards and then under 3/8 inch, allowing for a 1/8 inch overhang of the left side over the right side when lapped and wide enough for 1/4 inch top-stitching along both edges. And on another note, if sewing on only one pocket, that goes on the left and good luck with that matching! Argh!!!!!
So many details… and this is only the beginning. I find myself feeling a little overwhelmed right now explaining since it was just yesterday when I finished the shirt. Maybe we’ll just look at some more pictures for now. Pictures that I could take!
This is the collar and neck stand.
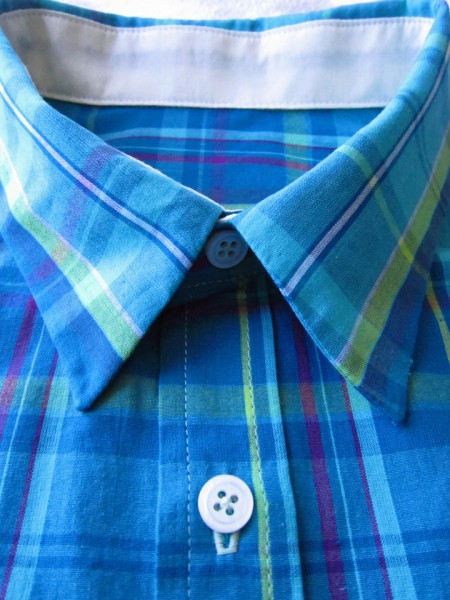
I don’t have any specialized shirtmaking tools yet… like a point presser clapper for collar edges but I was satisfied with what I did. Holy crap! Just realized when looking at this picture that I didn’t top-stitch the collar yet! I am going to have to sneak it out of my son’s room and do that ASAP!
Pockets are not really traditional in high quality mens shirts but… with sportier shirts they are considered okay. I found it a bit challenging to match up all the lines so I decided to try first with one pocket. And… with an attempt to show off, I decided to go with a rounded bottom and while I didn’t do half bad, I think I am in need of some more practice!

Closer view of pocket…
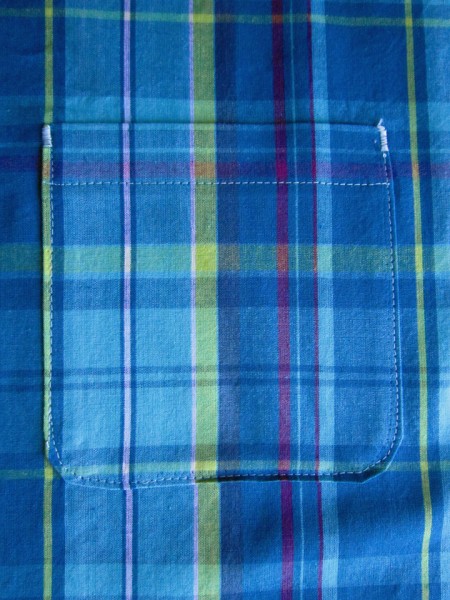
I like the knife pleats I used in this one but with the next shirt, I am going to do box pleats instead which are done exactly at center point below the yoke and see which my son likes better. I also felled the seams on the inside around the armscyes. That was a dangerous time during the sewing of this shirt! That’s all I am going to say about that.
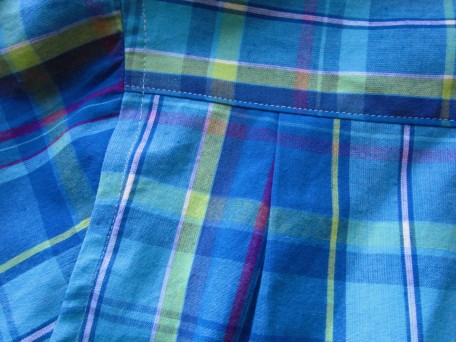
Speaking of felling seams… because the author of “Shirtmaking”, David Page Coffin recommended doing them using a foot rather than by hand, I heeded his advice and went and purchased one for my sewing machine.
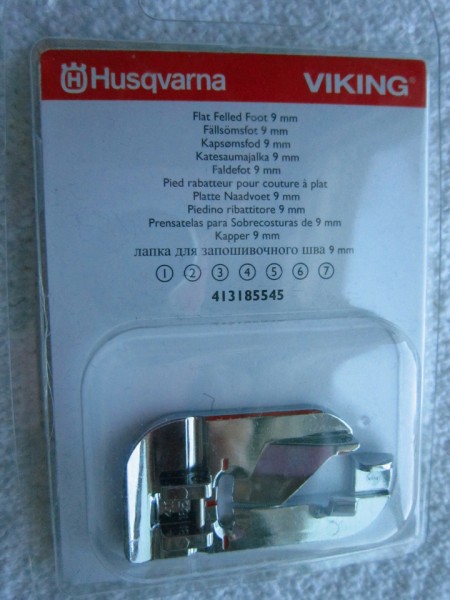
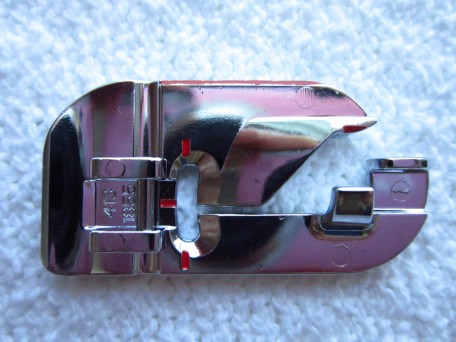
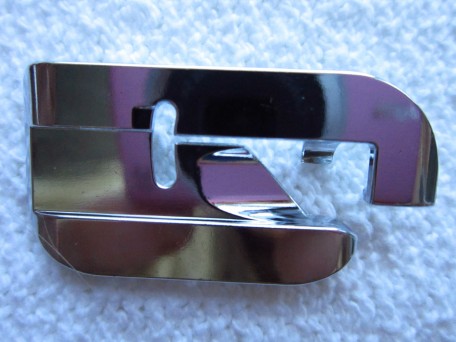
I’ve concluded that if I did nothing but flat-fell seams every time I sewed, then I might eventually become a master flat felled seam sewer when using my felling foot! However, because I am really hating that damn foot right now, I don’t have much hope!
Ahem…. I did eventually succeed at flat-felling the side seams using the felling foot (It’s almost time to raid the wine rack!) I sewed the wrong sides of the shirt together and then flat felled the seam allowance. I will re-visit flat-felling for you in another post and explain it more in detail when I am over it!
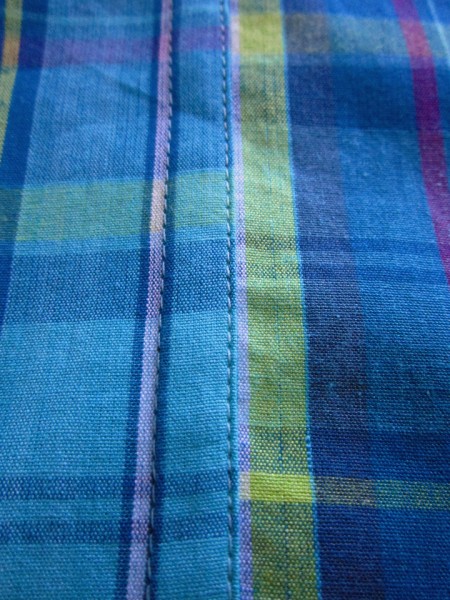
Finally, you have to hem the shirt using a rolled hem. I did NOT use a foot for this (even though I have one). I have a technique that works well for me and so I stayed with it.
Step 1:
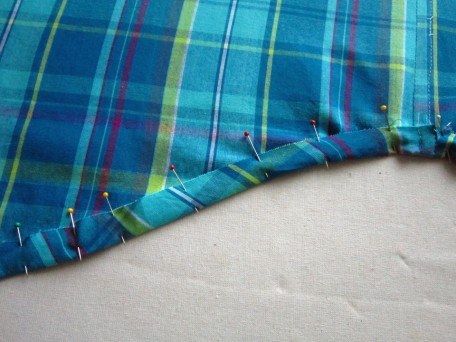
First – I fold up the hem 5/8″ and pin.
Step 2:
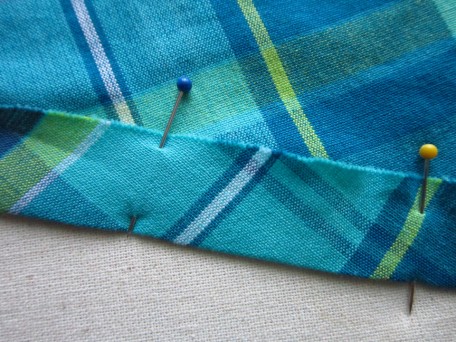
Next, I press, just setting the iron flat against the edge of the folded hem, going slowly and doing it section by section.
Step 3:
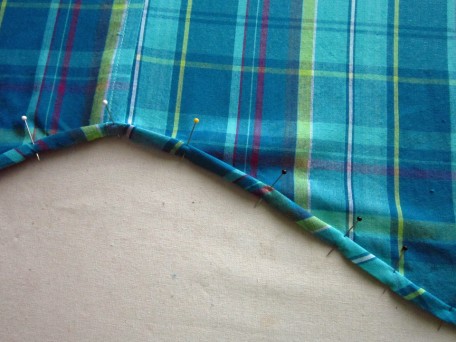
I fold the fabric over and under with the edge touching the inside bottom of the fold and pin again.
After step 3, I sew a 1/4″ seam along the bottom, then press again and this is the final look.
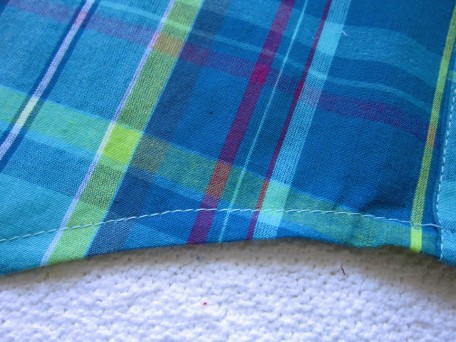
Of course, as a thoughtful addition I sewed on an extra button!
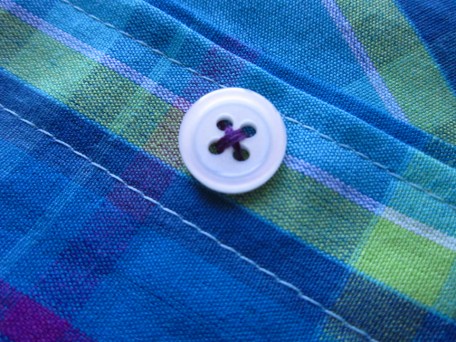
So the grand finale, my son with a hind sight view!

Being that he is sort of bashful, after some coercion and a bit of bribery, I got him to sit on a stool and smile!

To get this cheezy grin, he was thinking of his older brother who in a few hours will be off to a rally race competition in California. My son, Dylan, is a rally race driver with a passion for rally racing like I do for sewing… and obviously a personality that makes Jared smile!
Salute! Jessica
Read MorePattern Review McCall’s 6745
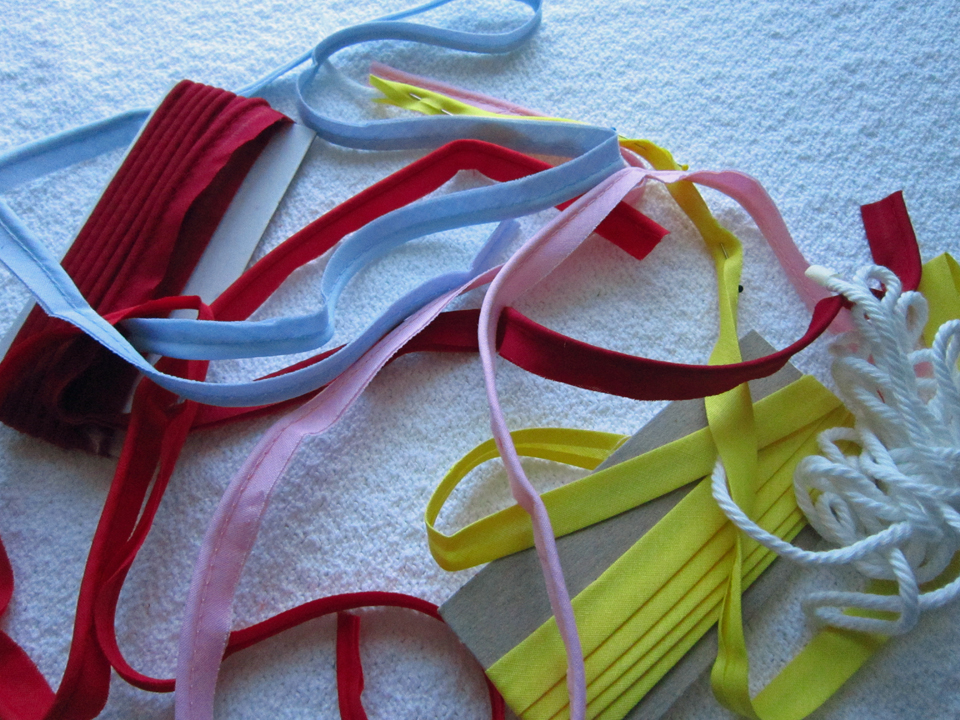
We are having a heat wave here in Oregon, first one for the summer and given that this is Oregon, it could be the only one. Some dismiss us Oregonians as whiny because our warmest days don’t usually get much higher than 99 to 103, but keep in mind that we have few of them, so how can we get use to them. AND there are many of us who do not have air conditioning! Why? Well, most of the time we are wearing fleece so why do we need air conditioners?!! This is heat wave day 4 (89 , 91, and 95 for the last 3 days) and my house is barely cooling down enough to be able to sleep at night. I have looked so forward to the summer because I was tired of cold and rain… I am determined not to get grouchy, to stay positive, to stay cooooool. Speaking of cool, this weekend is the Blues Fest in downtown Portland and since the temperature prediction is the high 80’s, I plan on wearing a dress that I recently finished, one that I really love, made with the McCall’s 6745 pattern.

I think what fascinated me most about this dress pattern was that piping was used to trim the bodice. Piping creates a look that has always caught my eye when it is sewn into a garment. I have used it enough times that I eventually purchased a piping foot for my sewing machine and it makes the job much easier. The pattern instructions say to use a zipper foot…I don’t know about that. I would love to hear from anyone that has tried sewing piping with one.
This is what my piping foot looks like. I have a Husqvarna 750 Platinum.
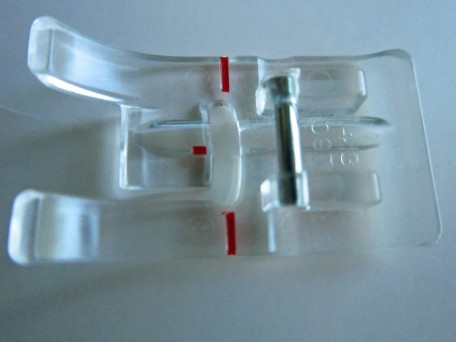
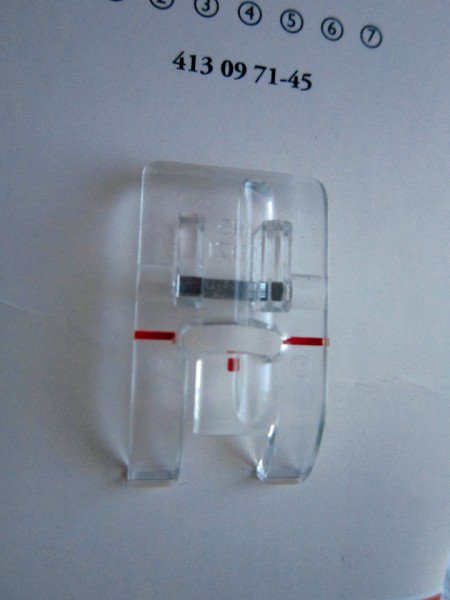
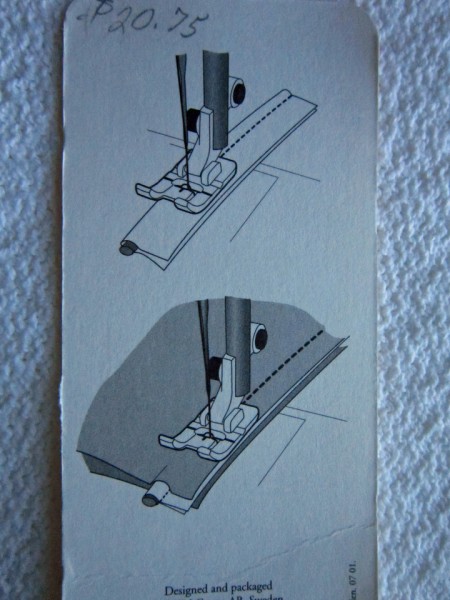
It took me over a month to find fabric that I could see this dress in. I loved the colors in the fabric of the dress shown on the pattern envelope but I’m not big on the southwest look. I do love teals as well as the deep cobalt blue that I’ve been seeing in lots of RTW (ready to wear) garments shown in magazines but alas, no printed fabrics with these colors in either fabric stores or on-line fabric stores. What’s with that! I probably know why but I won’t go there because it could cause me to rant.
I eventually decided on this, far from blue, but I really love this color too. (wow-I just rhymed) The fabric is fine cotton and for the lining I chose a salmon colored voile.
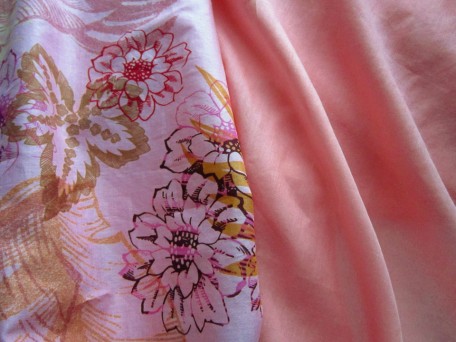
Before cutting into my beautiful fabric, I did what has become habit, made a muslin. With experience I have learned how much circumference I need for my hips and waist so I chose not to make the skirt part of the dress, just the bodice. Thank goodness because there was naturally a fitting issue. It seems to always be the same for me, the area just above the bust and next to the armhole. I need a size 8 everywhere but this spot. I decided to try something different since up until now I have remedied this problem by making adjustments to either the shoulder and/or center front neck, though neither really fix the problem that well. I have to share this even though this is suppose to be a pattern review because it was a major revelation for me!
I first traced the front pattern bodice piece on tracing paper. Next, I marked a spot 2 inches up from where the armhole starts. From here, I made a second mark 1/4 inch further up from this mark. Using these two marks, I created a dart drawing a line from each all the way to the top point of the waist dart. After briefly admiring my lovely new dart, I cut it out! I then drew a line from the bottom of the waist dart at the center between the two dart legs, all the way up to almost the tip of the lovely new dart I cut out, leaving a smidgen of tissue paper to act as a hinge. (the standard method is to cut the waist dart leg closest to the side seam but I was was in experimental mode, and being a rule breaker, as usual!) Using the hinge, I then swung the section of bodice nearest center outwards closing my lovely dart! Essentially what I did here was to remove the extra fullness at the armhole I didn’t want by first drawing in a dart that would remove it but then moving that dart and it’s fullness to the waist dart. It was then the final test. I made a 2nd muslin and when I tried it on, I tasted sweet success (like eating chocolate if you are chocoholic like me). It worked!

I love chocolate!
Now back to our review. The pattern instructions are clear enough to understand, but I would consider this pattern to be an intermediate skill level, partly due to the piping, but also because of the pivoting that happens in the center front of the bodice and all the pleating in the skirt. I am not sure if I pivoted properly, but did achieve a look I could live with. It might have been easier if piping had not been involved! (Sounds like I’m dancing)
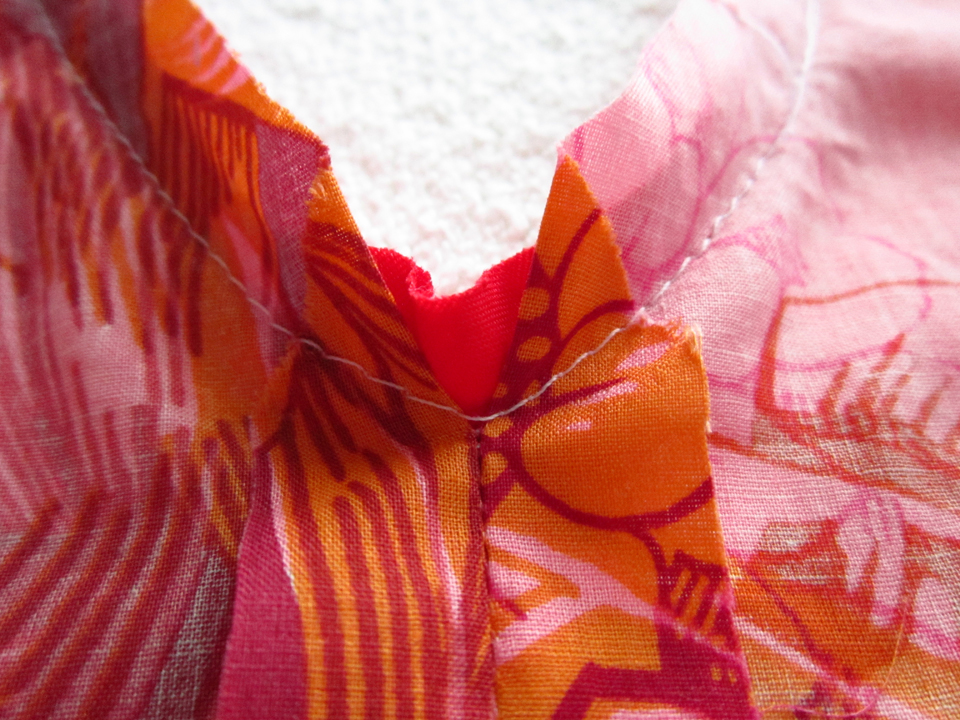
The darts are to be cut open and ironed flat. By doing this, you distribute the extra fabric of the dart evenly creating balance. This is an haute couture technique which I love, but you certainly need to be sure that you have done your fitting because once it’s cut, there’s no changing anything!
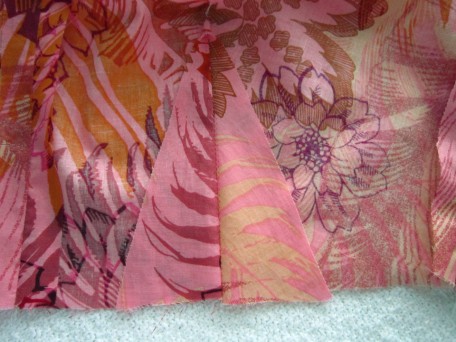
I basted the piping to the bodice but had a difficult time removing the thread after sewing the bodice and bodice lining together. I used the loosest stitch my machine sews. I try to always remove any temporary basting after the final seam is sewn because the fabric seems to lay smoother, especially when there are a number of layers.
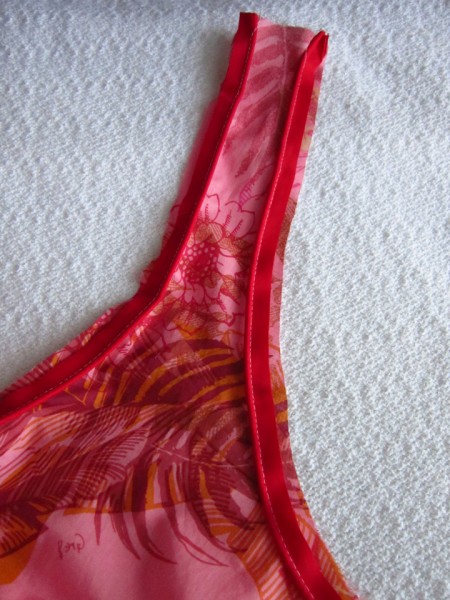
With the bodice finished, I was ready to move on to the skirt. Be warned, you will need some patience for this. I made all my markings for the pleats on the wrong side of the fabric but the picture instructions show you how to do the pleats on the right side of the fabric. Maybe the best way to do this would be to make tailor tacks (marking all the large and small dots with thread) on the right side but because I was not paying a lot of attention to the pictures when I first read the instructions, I missed this kind of important detail. There was a whole lot of pinning and I think a whole lot of swearing going on and fortunately the fabric I was using was forgiving of the pins and me!
The two back pieces each have four pleats.
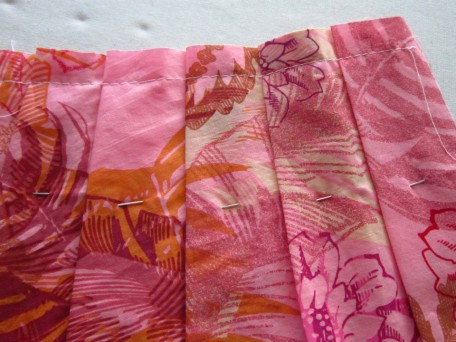
The front has two double (yes double) pleats on each side of center.

Here is a close up so you can see what I mean when I say double. It may be a bit confusing looking at the picture, but the main point here is that I want you to know that two pleats are stacked on one another which I found sort of confusing at first when following the instructions. I need to find out the techy way of putting pointers on my pictures so your eyes are directed to what I’m talking about. I’ll get there, soon, promise 🙂
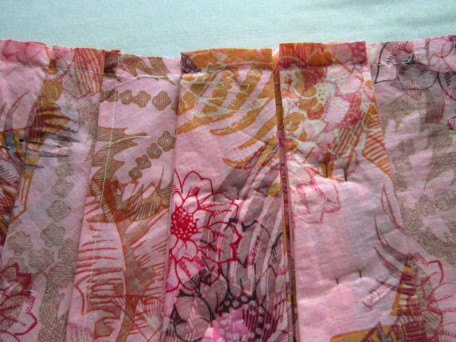
I was a little worried about the thinness of my fabric and the skirt without a lining since it was not called for but when I finally finished my skirt, I knew exactly why there was no lining. And I certainly didn’t need to worry about see through. There’s a lot of fabric in that skirt, especially when it came to having to hem it. I made a 1 inch hem instead of a 5/8 inch like the pattern recommends since dresses are usually too long for me. Now I wish I would have made it a 2 inch hem but it took me an hour to sew by hand so I think I’m good with how it is!
So here’s my dress!

And the back.

Notice the interesting color line on my back. Got this after 20 minutes in the sun watering my plants on Saturday. Lots of Aloe Vera Gel for the first 24 hours!

So there it is – McCall’s 6745. I’m not sure if it’s the fabric or the style of dress but I feel girly when I wear it. Several weeks ago I wore it to an American Sewing Guild Garment Lunch and when I left the restaurant, the wind caught my skirt and blew it up. I mean UP! It was sort of a Marilyn Monroe moment but I wasn’t feeling very Marilyn. I was worried more that someone saw my butt! Oh well – it made for an interesting moment. Wonder what I should expect this next weekend at the Blues Festival. Part of the day I will be on a boat cruise floating up the Willamette River listening to Blues singing women and drinking wine and the remainder of the day sitting in my beach chair, listening to more blues singers and socializing. Hmm…I’ll have to get back to you on that!
Salute! Jessica
Read MorePattern Review McCall’s 6754

When I first saw the Eiffel Tower, I was awestruck. It was gargantuous! No doubt I looked like the typical tourist at the time, snapping away on my camera, picture after picture. It was a magical moment for me that is hard to describe and one that I will never forget. So when I saw the McCall’s 6754 pattern with the model standing in front of a back drop picture of the Eiffel Tower, there was no question… I had to get that pattern. Yeah for me that it happened to be a dress – I love dresses because they are so feminine and to me, this dress had a look of french-ness, especially with the Eiffel Tower in the background.

The pattern is designed for knits and instructions suggest a stretch lace specifically for dress B, the adorable one shown on the envelope. It’ rated as an “easy” pattern and I would agree, however, if you plan on making dress B with stretch lace, get ready for a LOT of hand sewing. Both the dresses and tops require 1/4 inch wide elastic in the waist. I personally do not like using elastic because it feels to me like I am cheapening the quality of a garment that I have poured my heart and a lot of time into. But… the design utilizes the waistband seam allowance as the casing to hold the elastic so it is a lot less intrusive to the outside appearance which eased my mind quite a bit.
For a test, I decided to first make the sleeveless top that’s like dress B from some left over knit fabric that I had when I made McCall’s 6708 sweater.
It fit quite nice aside from the neckline in both the front and back which hung so low that my bra was sticking out majorly, a demi-bra that shows some cleavage! I wasn’t sure what to attribute this to. It could have been a combination of things: the knit fabric I was using, my shoulders may be more sloped downward than I thought, or just maybe the pattern size I was using was to big. Whatever it was, I managed to repair this problem somewhat in this top through shortening the shoulder straps but decided that when I made the dress, I would add 3/4″ to the neckline on both the front and the back and definitely do a fitting right after assembling the bodice to the skirt before I started finishing the neck and armhole edges.

After looking at myself wearing this, I think I will take the elastic out of the waist.
Now that I was armed and dangerous, I went to what I thought would be a decently stocked fabric store to get some gorgeous stretch lace and 60 inch wide tricot for my french-ness dress. Mind you I was really hoping to find fabric just like what was used for the dress shown on the pattern envelope. I bombed! There was only one lace that was stretchy, 60 inches wide and red…too red and I would later discover, really snaggy!
Then there was the 60″ wide tricot that I needed… well forget that! There was nothing, nada, zilch, zip, zero in white. It was suggested by one of the ladies at the fabric store that I try using swimsuit fabric which I did. DON’T DO IT! I think it is too heavy and the skirt of the dress will not have that billowy or light flouncy look you see on the envelope.
So… moving right along, remember all that hand sewing I was talking about? It starts when you are done cutting out the lace pieces AND the underlining pieces. ALL the lace pieces have to be basted to their matching underlining pieces (in stitches that can easily be removed) and then handled as single pieces. I did not take pictures to share because I was too busy basting and forgot! I used green thread that looked obnoxious which was my intention because then I could easily see it to remove it! When I finished, I begin the assembling.
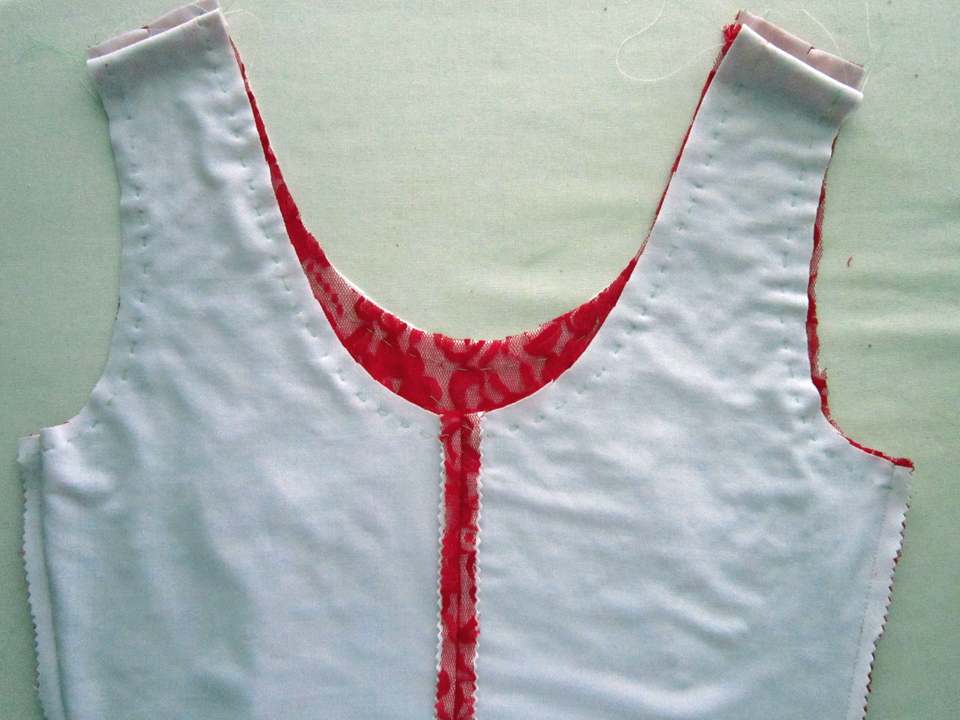
For finishing the seams, I decided to pink the seam allowances so there would be less bulk. I think I need new pinking shears because they kept catching on the two fabrics.

After attaching the bodice to the skirt, I was ready for the moment of truth…would the front and back neckline adjustments be positioned properly and would the shoulder straps be where they were suppose to be? YES!!!!! All was right in the world EXCEPT… I did not like the red over-lay look nor did I like the way the skirt hung. Remember what I said earlier about the fabrics I used? The way too red snaggy lace and the heavy swimsuit fabric… Well there was nothing I could do. The dress was almost done. I would not blame myself I decided. These were the only fabrics available to me at the time and being the determined person that I am, I gave them a whirl. Now I felt like whirling the damn dress into the garbage! But… I decided I would be better than that. I would think positive… see the glass still half full! I had successfully made a dress hadn’t I? It fit perfectly, and as my daughter timidly added, “it would be real nice to wear for a day on the beach”. Okay – so there it was. It’s not a french-ness dress, it’s a “beach-ness” dress and I can live with that, I think? So all that was left now was to sew in the hem.
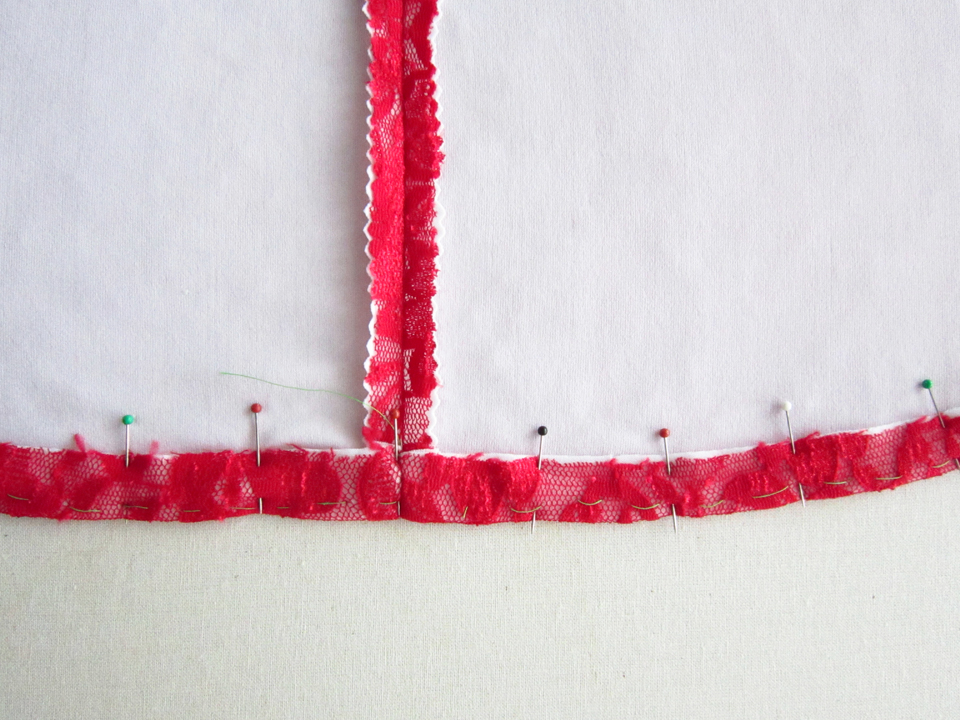
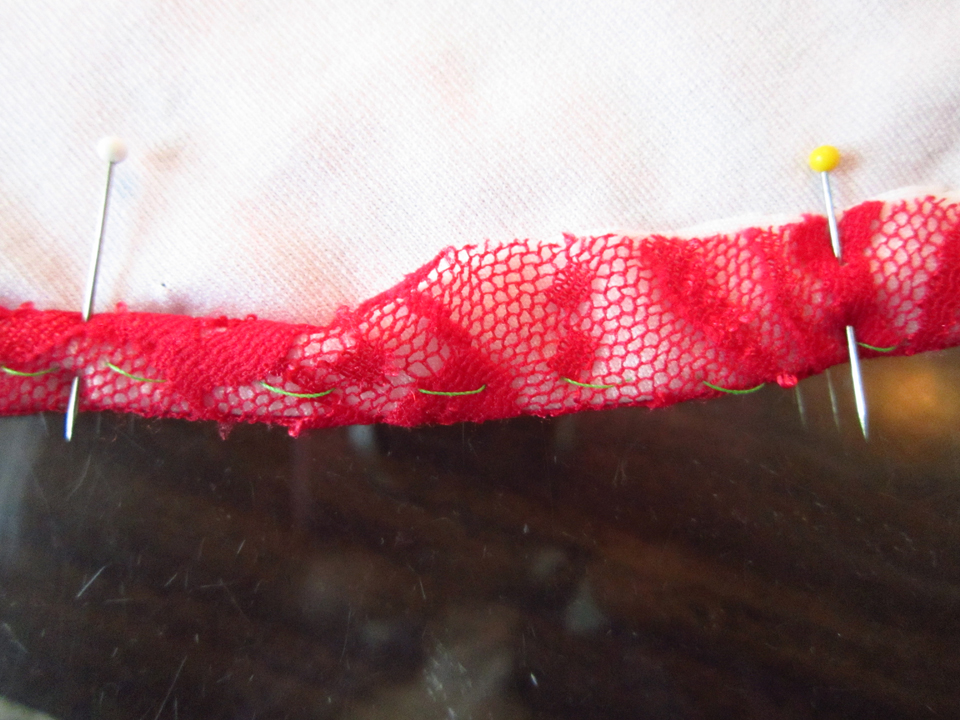
Oh yes, more hand sewing, lots more hand sewing! Why not use the machine? Well… early on I had decided that the lace overlay would have a richer look if it didn’t have machine stitches in it which proved true when I hand sewed the neckline and armholes. Therefore, I decided to hand sew the hem as well. It took a while but eventually I finished. I then hung the dress in my closet for a few days before looking at it again to decide how I felt about it. With a little reluctance, I decided to have the official photo shoot so you could decide for yourself. Is it a “french-ness” dress or a “beach-ness” dress?

Personally, I have concluded that it is definitely a red wine drinking dress so with that… it’s time for a glass of Pinot Noir!
Salute! Jessica
Read MoreDraping Fashion Designs
Some fabulous ladies to drape with!
Well…I have finished all my draping classes and learned right from the get-go that my biggest challenge was overcoming the feeling that I was wasting fabric. I am not a hard core recycle queen, not even remotely close, but as we cut, tore and marked our muslin and rayon for all the different projects we did, I had a struggle going on in my mind. Kinda weird, I know. Maybe this was in part due to the fact that at times it’s hard for me to find the extra funds to purchase fabric for my own sewing projects so to use up almost 14 yards of muslin and rayon for these classes gnawed on me. I had to keep reminding myself of what I was gaining in this process and believe me, I truly gained a lot!
To start off, let me first officially introduce you to “Wolfee”. Her and I worked quite well together. Since she is almost exactly my size, this means that everything I draped, with a few small adjustments, I will be able to use to make garments for myself. Pretty cool eh!
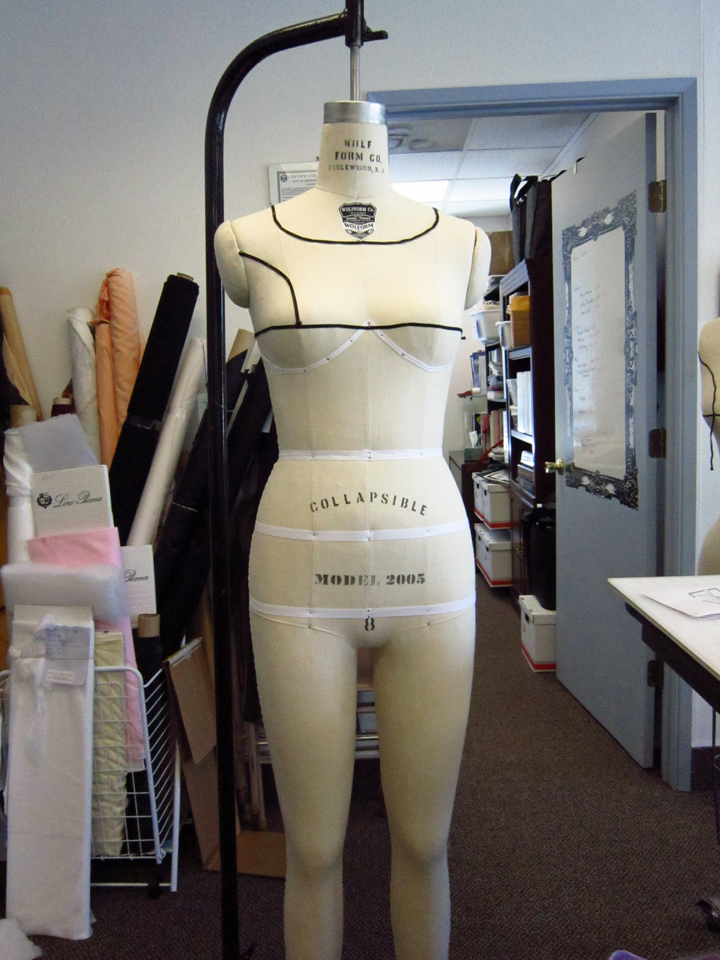
She is wearing black soutache braid for style lines.
Our instructor, Catherine Stephenson, Custom Couture Clothing, was awesome. She shared a wealth of information as she walked us through our draping projects, providing both group and individual guidance.
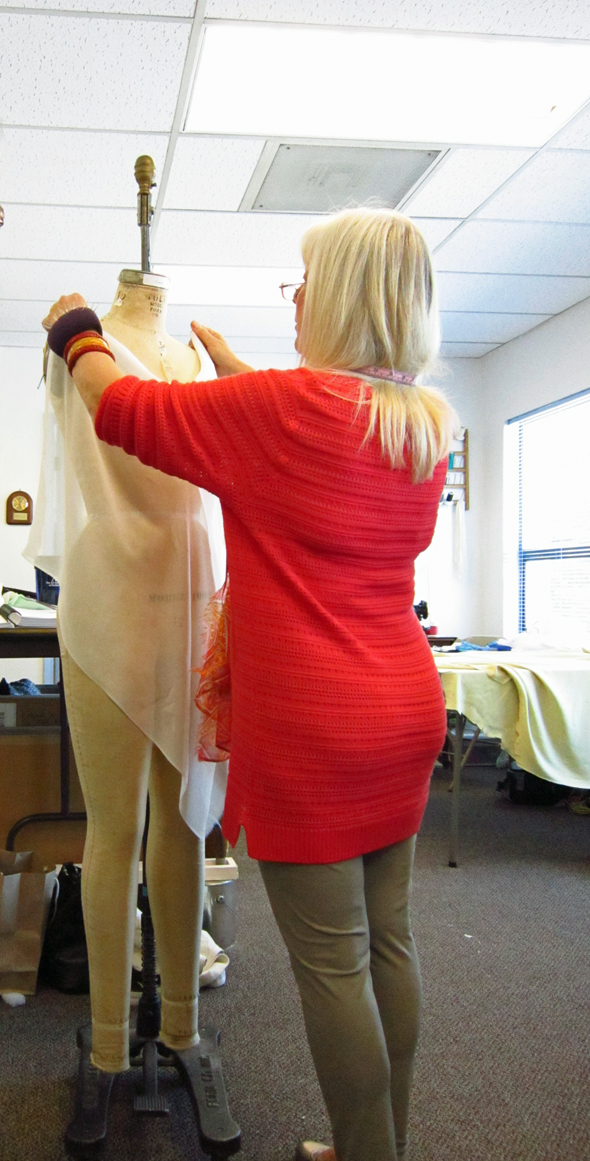
Catherine showing us how to drape a cowl neck.
Some of the draping techniques Catherine used were from the book, “The Art of Fashion Draping” by Connie Amaden-Crawford, a designer for The McCall Pattern Company under the Butterick label. It’s a bit spendy but will certainly be part of my sewing library one day soon.
In the first session of classes, we learned the importance of grain lines and cross-grain lines since these play a major role in the draping process. Another crucial part of draping is being precise and consistent when marking the draped and pinned muslin pieces since these markings are the lines, notches and bust, waist and hip levels that we rely on to construct the garment. The learning curve started flattening real fast for most of us with this part of the draping process. It’s kind of difficult to take pieces of fabric off of a dress form and then pin them together to form a garment if you can’t figure out what your markings mean!
I think our Christian Dior jacket was one of our high points in our draping projects. After finishing, I knew where I should have been a bit more careful in my draping, but nonetheless, I think that if I can fix a few discrepancies, it could serve as a functional pattern to make a jacket for myself…aside from the crappy collar. I was not happy with it at all. It was a project we did earlier and I didn’t know that it was going to be what we would use for the collar of this jacket.
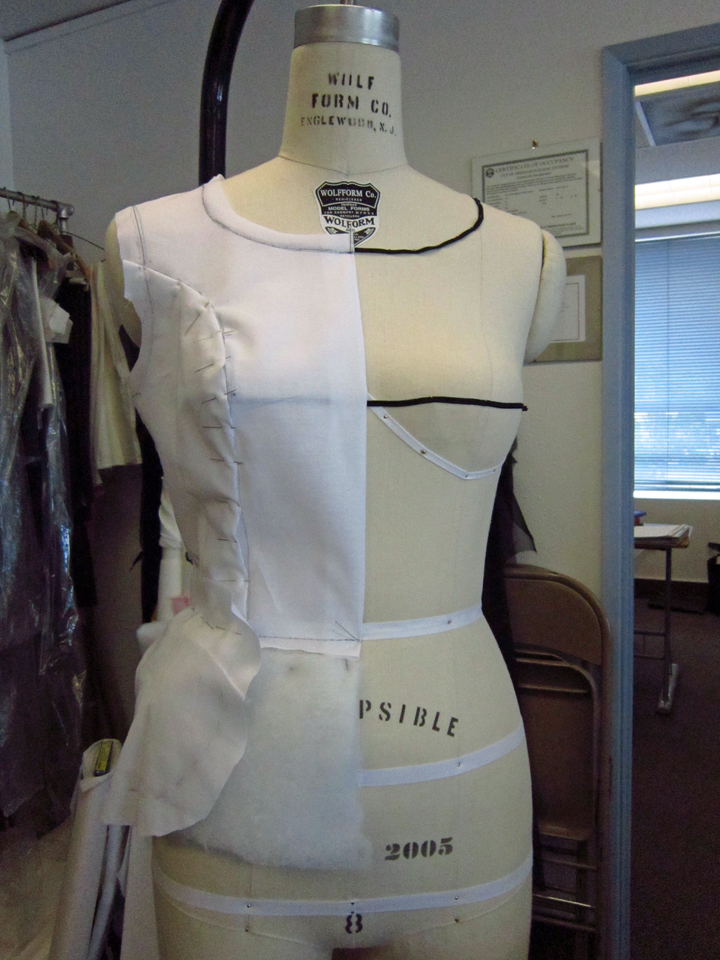
Princess bodice done and now making peplum.
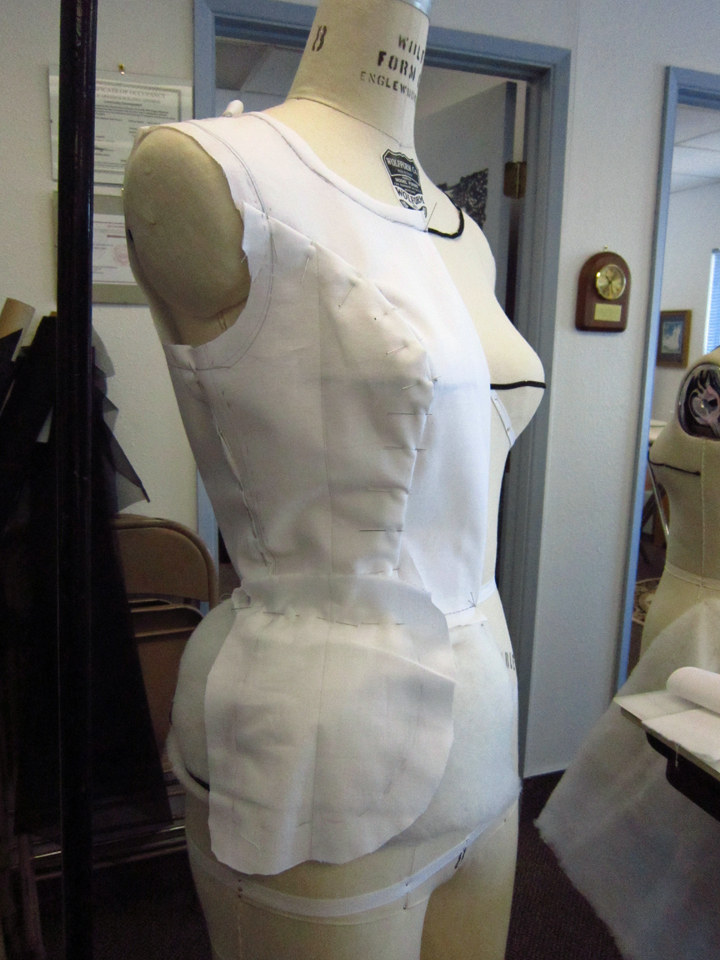
Notice the batting around hp area. It was to ensure more fullness in the peplum.
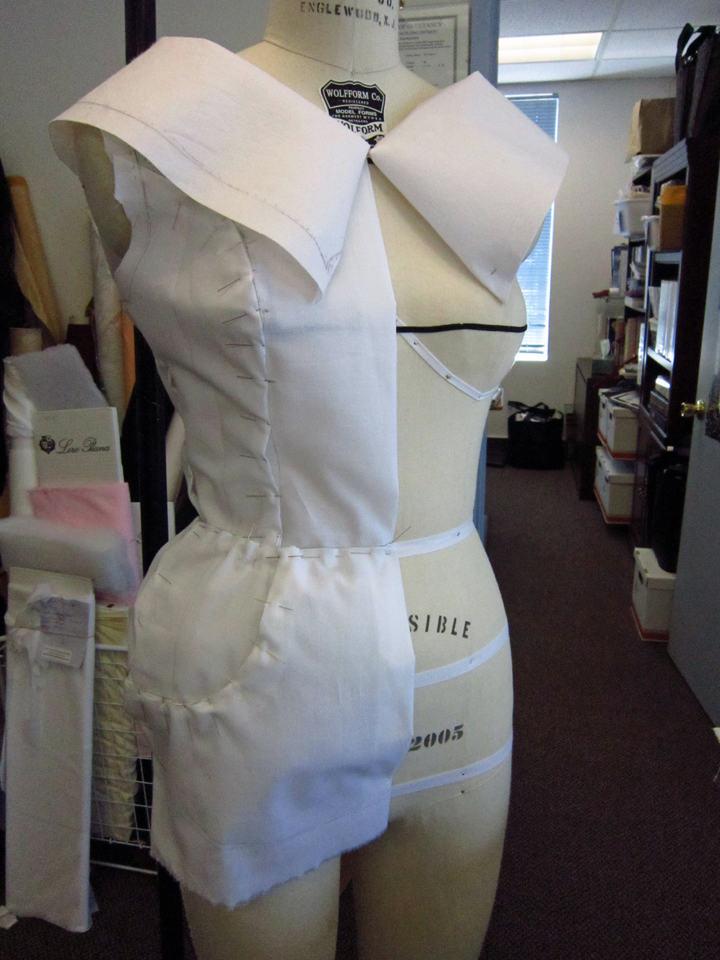
Finished front of Christian Dior jacket with my crappy collar!
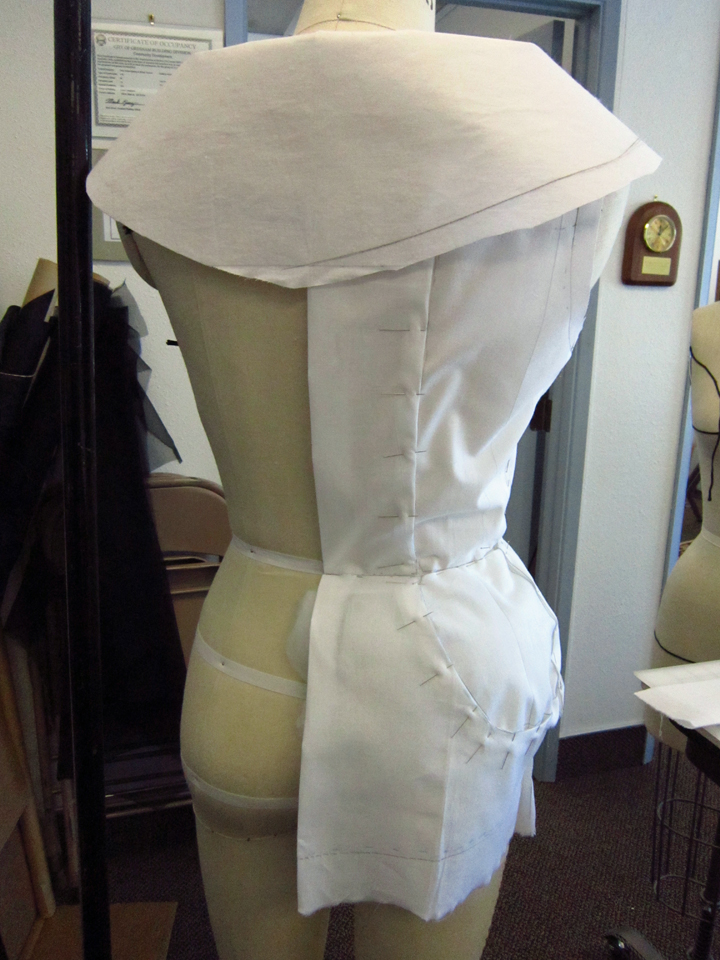
Back of Christian Dior jacket.
The final garment we draped was done on the bias! I have not worked much with bias though have been wanting to. I didn’t realize the complexity of just what happens when you cut fabric diagonally. Sheesh! One thing for sure, I will definitely have plenty of stay tape of some sort on hand when I create a bias garment
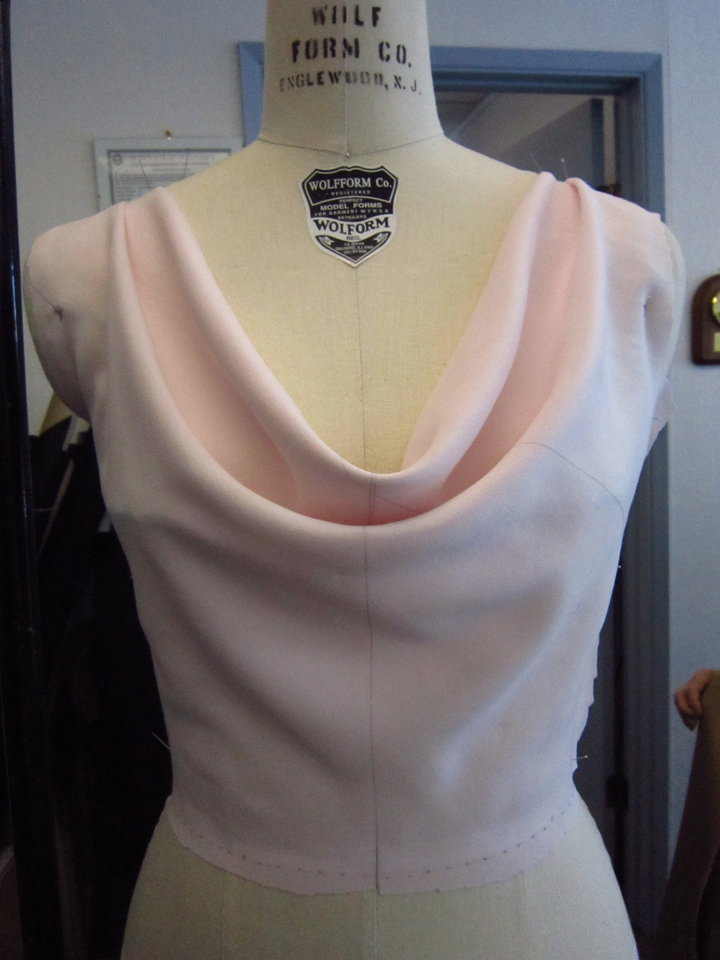
A cowl Neck
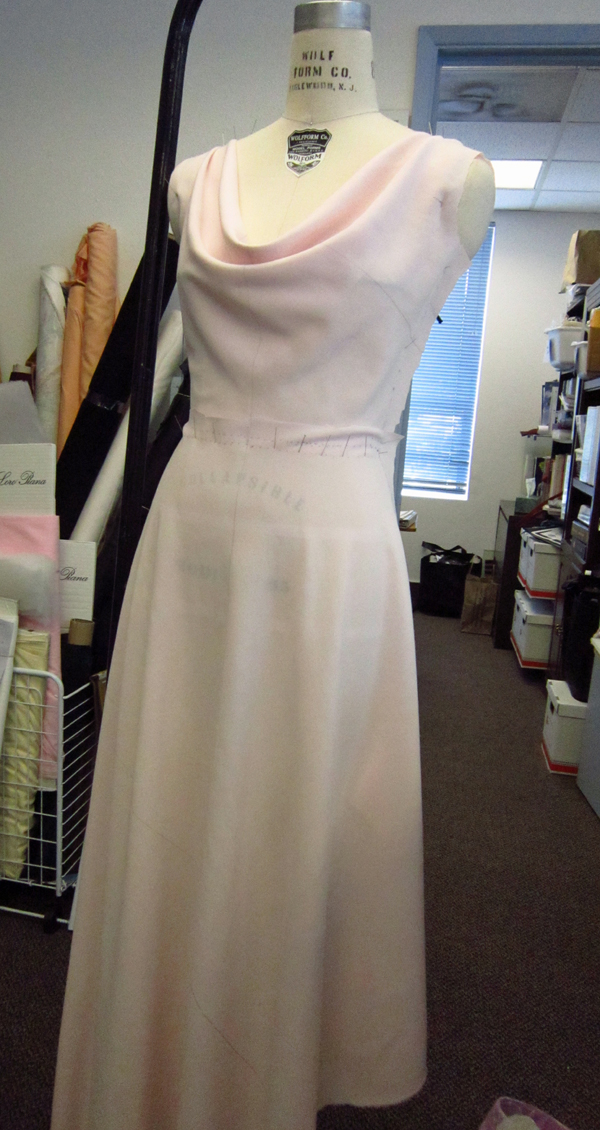
And the potential dress with a cowl neck
So guess what? Draping is a dying art. Many accredited fashion schools have removed draping from their fashion design programs because they feels it’s an obsolete technique. Since much of the design work these days is taken from drawings to computer pattern design programs, I guess technology is draping’s downfall. And get this…the ability to sew is not considered a requirement of a fashion designer. If you are talented enough to be able to design, you leave the sewing to someone else. Hmm… It sounds to me like being able to construct a garment through sewing is not considered very honorable let alone glamorous. Right about now I bet you can feel a rant coming on cuz I sure do!
Well I suppose I better show you that my draping classes were successful in showing me how to drape. If you are a returning visitor, you have seen a picture of some pastel green fabric with embroidered pink polka-dots. If this is your first visit, well…I used this fabric to make the princess-seam line dress that we draped in one of our classes and here it is.

I wore this to one of our last draping classes since Catherine had challenged me to make it and I knew I couldn’t chicken out. I felt a lot of sweating going on when she said take your sweater off and let me see. Fortunately this was not a full fledged test, but if it had been, from the smile on her face, I think I might have got an “A”.
Salute! Jessica
Read More
Wolf Dress Form Draping
This is Elizabeth. Yes, I am referring to my dress form in the picture above. She is not vintage, but she is a bit aged, about 17 years to be exact. We have collaborated together for many many projects over the years, never fighting or arguing… and she has patiently stood for hours while I repeatedly shove pins in her, never complaining. I know she would be crushed if she knew I have been working with another dress form! The dress form is a size 8, has long slender legs and her name is “Wolfee” (my pet name for her).
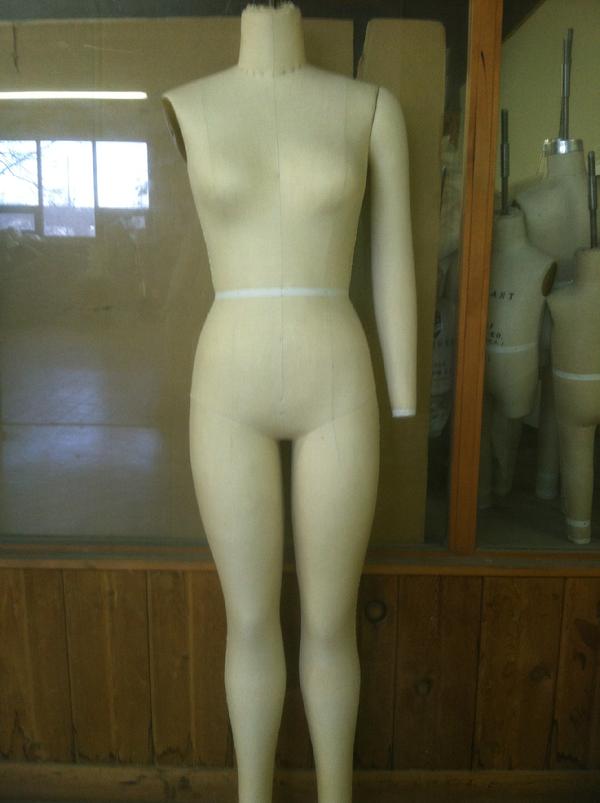 This photo is from Wolf Form Company, Inc. web site.
“Wolfee” and I have been working together in my draping classes. She was assigned to me the beginning of the first class and we will be working together till the end. I have learned that Wolfee’s kind is considered the industry standard for dress forms, meaning of course that they are considered the best. I can buy a sister of Wolfee for $1600 from the Wolf Form Company, Inc. , or the traditional straight skirt dress form for $825 (below).
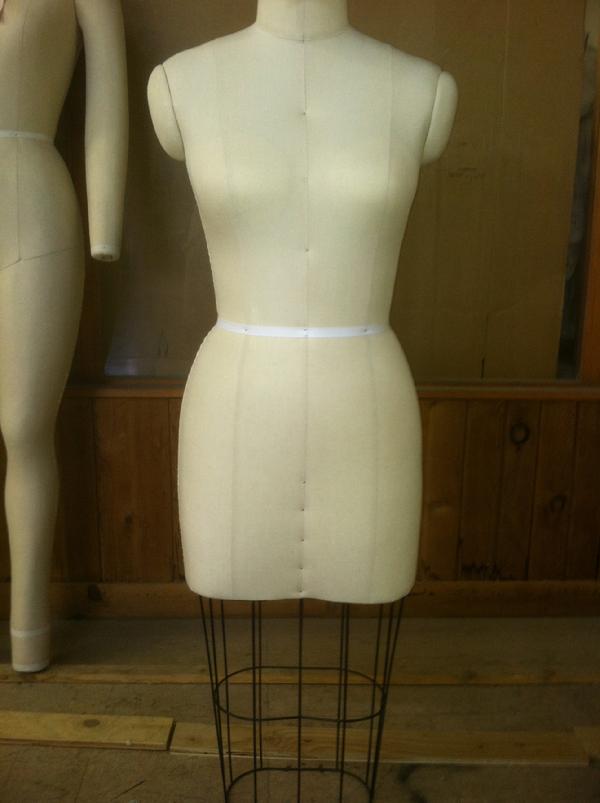 This photo is from Wolf Form Company, Inc. web site.
Yes, they are expensive and so unfortunately I may never have the luxury to own one but you just never know! See…I told you Elizabeth would be really upset if she knew.
So how are my draping classes going? Well, up to this point they have been incredible! We have draped a bodice, skirt, circle skirt and a princess seam dress. And… as usual, I have managed to get myself into a challenge project. I am not sure how this exactly happens. My best explanation is that I am sort of a visionary that can’t keep my imaginative ideas quietly to myself! I certainly can’t turn down a challenge; sometimes I think they are the reason for my existence. The challenge… making a dress for myself out of the princess seam dress that I draped and wearing it to my next draping class. Mind you the draping classes were split into two sessions of classes, Draping 101 and Draping 401 with a 3 week interval between…thank goodness for the 3 week interval! The 401 starts in four days from now so yes, I have been working hard on making the dress!
Okay, so last Tuesday my daughter and I hit one of my favorite fabric stores in search of challenge dress fabric and guess what? Oh yes, we found fabric for my dress but Calley found fabric for hers too, specifically the McCall’s 6561 pattern with the 10 piece bodice and the tons of gathering.! Yep – I am going to be doing more sewing for my beloved pencil!
This is the fabric and trim for my princess seamed summer dress.
It is a fine cotton in a pastel green with embroidered soft pink polka-dots. The trim is little pink daisies in glossy thread. I am trying to steer clear of the dots but the colors were exactly what I was looking for so I just had to!
And this is the fabric for Calley’s dress. It is called shimmer satin and I am truly excited to sew it, the fabric feels luxurious!

So I guess I have a lot of sewing to do. What’s really crazy is that I am already thinking about other projects that I can’t wait to dive into! My son, Jared, really wants shirts! Shirts made by me! You will definitely hear all about it when I get there but for now, I guess I better sign off. It’s Monday, Memorial Day, and time to reflect with a glass of Chardonnay!
Salute! Jessica
Read MoreDress Designing
Pattern Design Tools
Well…here I am, back to share another story with you. Hope you had a wonderful week. I would like to start off with a sharing moment…I have learned from a sister sewing artist in the American Sewing Guild Chapter that I belong to, that she has brought aboard followers who live in Florida. Hello to you “Floridians” and I hope you are enjoying your wonderful sunny weather while I am here in Oregon still freezing my… butt off and trying to enjoy our rain! Just teasing 😛 Truly, thank you for reading my posts and by all means enjoy that sunny weather, someone has to right!
So…Last Sunday, Mother’s day, was a pretty awesome day for me. There were some unexpected surprises including brunch and lots of yellow roses. I always get yellow roses on each of my children’s birthdays but generally not on Mother’s Day. How does that work you may ask? Well, I was smart and taught my children at an early age that giving flowers to your mother on your birthday is an honor (well it is!). Pretty brilliant huh! Why yellow…well I just happen to love yellow. Maybe it’s because it reminds me of the beautiful daffodils that grew in our front yard when I was a little girl. I don’t know but for whatever reason, the color yellow is calming to me. That is why I decided to make a yellow and white dress; a certain yellow and white dress that I designed myself.
SEWLIKEINPARIS
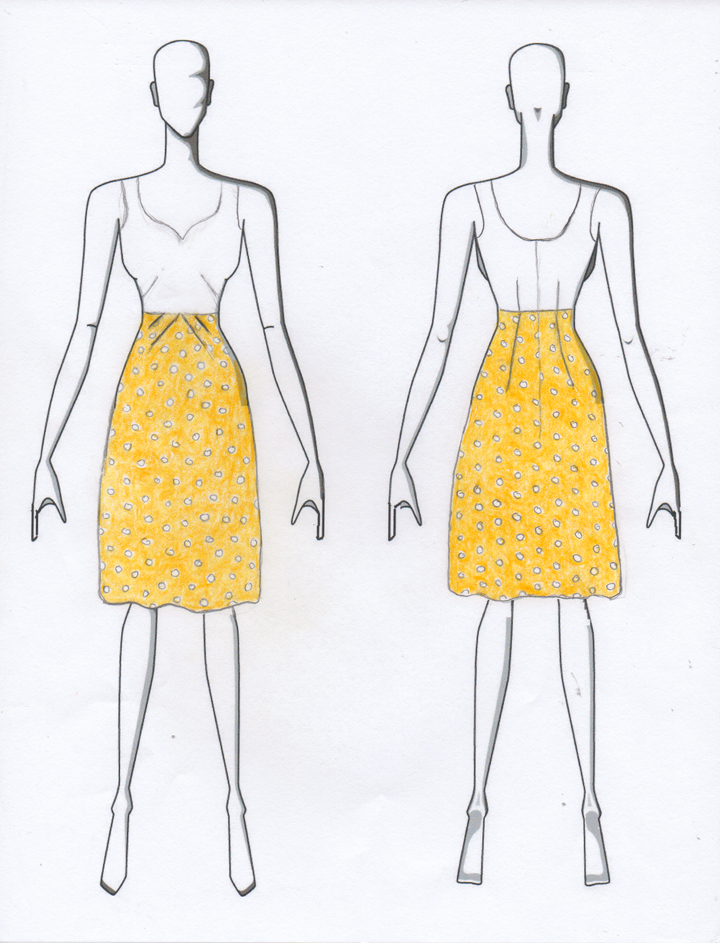
I went with inexpensive cotton, given that this was my first try at completely drafting a dress by myself. It has been my experience that if there is potential for something to go wrong, then it probably will! So here’s the fabric for the skirt of my dress.
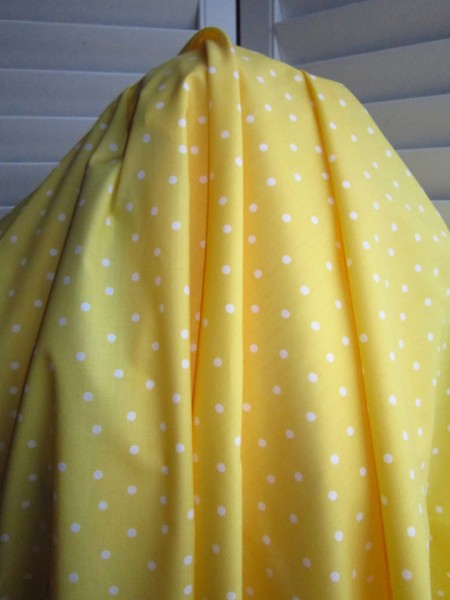
Yep…polka dots again! I think I loved the colors more than I did the fabric. It is 100% cotton but doesn’t have quite the textured feel I would have liked.
This is what I used for the bodice.
It is also 100% cotton, a slightly heavier hand than the polka-dot yellow, with chevrons on it. I had hoped to find the yellow in a fabric of this grade, but it was just not happening.
I think I spent several days drafting the different pattern pieces before I figured it all out, but when I did, I was feeling like the world was oh-so-right! I chose to use 3/8 inch seams which is just too cool! There was no trimming involved, no wasting of fabric and a nice even finish.
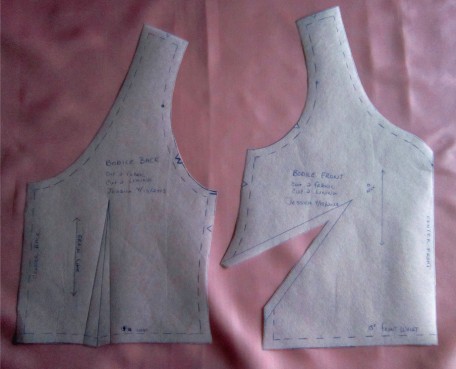
Bodice Back and Front Pattern Pieces
French darts fascinate me. I think they look more subtle than traditional darts and seem to flow more gracefully along the contours of the body. That being said, I chose to use them for my design.
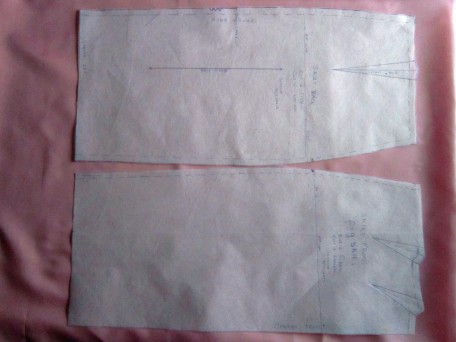
Skirt Back and Peg-Top Skirt Front
I love the look of diagonal darts on a skirt and so included them in the design of my dress skirt. Fortunately I have a book that shows you how to do this. It is titled “How to Design Your Own Dress Patterns” and written by Adele P. Margolis. My edition was printed in 1959! It’s a treasure to add to your library so by-all-means try to find a copy. A few weeks ago I posted instructions on how to do these diagonal darts in an article called “Drafting a Peg-Top Waist Skirt” which will explain it in more detail.
After having all my pieces drafted, seam allowances added and fabric pre-shrunk, I was ready to sew my first dress muslin. The bodice fit well though the sweetheart neck-line felt a little loose making me feel somewhat uneasy. I decided to be sure and stay-stitch the neck first thing when I begin my actual dress construction. I didn’t care for the large darts that I ended up with in the skirt front. It turns out they were large because of the 2 inches of space that the instructions say to use between the skirt sections at the top of the slash as shown below. (Please read Drafting a Peg-Top Waist Skirt to get the full skinny!)
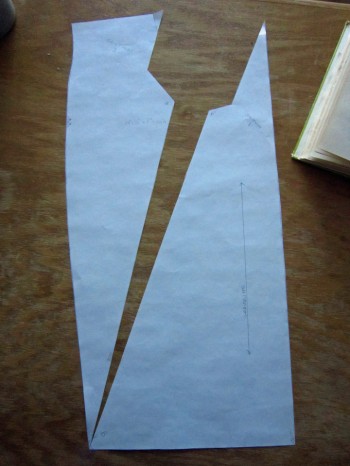
To eliminate these large darts, I tried using a 1 inch space instead of the 2 inches. Also, I didn’t draw my darts the same way they were illustrated in the book. Instead I made both the darts 3 1/2 inches long and angled them parallel to one another with 2 inches between them and 1 inch away from center. The results were exactly what I was looking for.
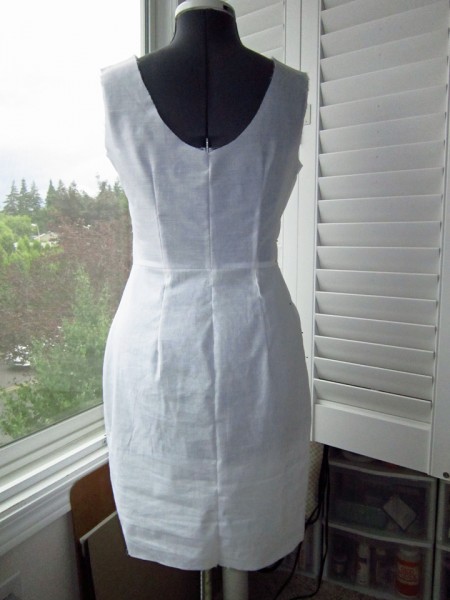
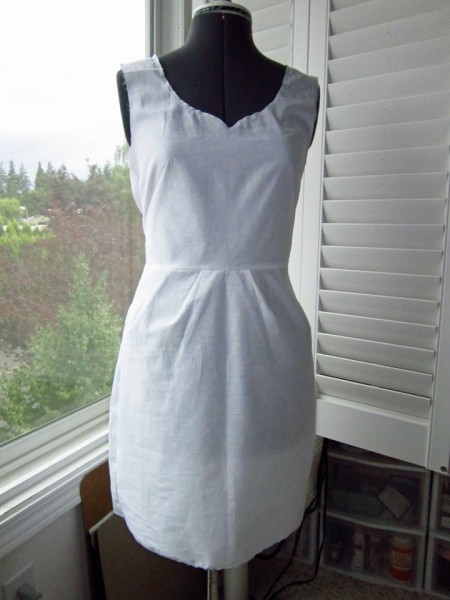
The front and back of my muslin with the peg-top waist.
The back is a normal one-dart block fitted for moi!
Okay…so now I’m reaching the point in my story where I talk about the “if it can go wrong, it will” part. Yes it happened… it went wrong…it was of course the sweetheart neck-line. I had tried the dress on several times through the sewing process. My thinking was that once the seams were finished by means of the lining, the looseness I was having would be tightened up. WRONG! The bodice really does fit me quite well. It was awesome sewing it to the skirt…all the darts matched up perfectly, the seams were true, but… it was that gaping neck-line that set me ablaze! To say it honestly, I was p-i-s-s-e-d! I wanted it to fit perfect the first time so I could relish in my success. Alas – there would be no relishing. I took a few deep breaths, went to the kitchen still wearing my dress, got myself a glass of wine and then went and stood before the mirror, glass in hand and pondered it all. I had three options:
1) Bail completely.
2) Redo the bodice on the dress after I re-designed the pattern.
3) Rather than tear it apart, sew an encased 2 inch section of elastic on the seam allowance on each side of the center of the neck-line to fix the gap, close up the lining, wear it and be proud… then re-draft the pattern and make another dress.
Yeah, you guessed it…I thought it best to go with option 3. So do you want to see?
Well here it is!
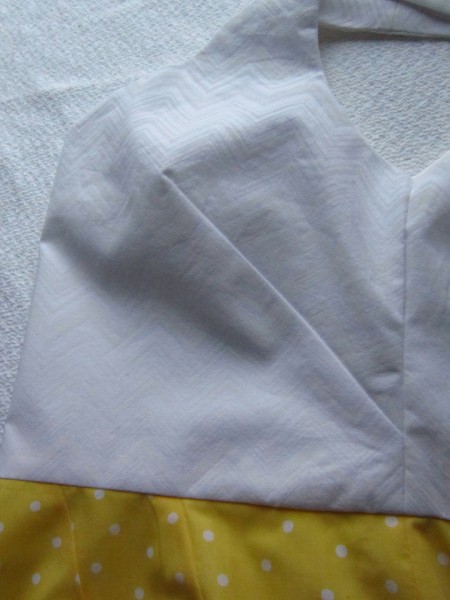
French Dart
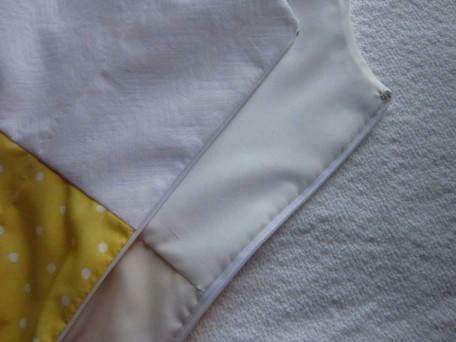
Invisible Zipper ( I love these )
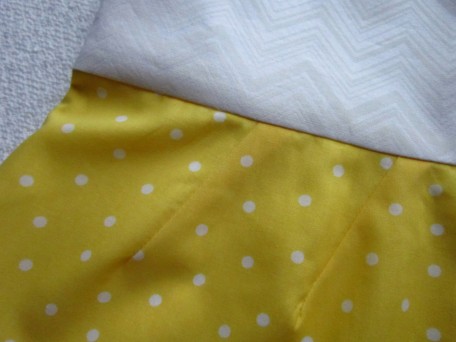
- Peg Top Darts
Then there is me. I sure hope you don’ get tired of the me shots, but it’s the only way I know how to show you that I can actually sew clothes that fit!

The back of course…


You know – I knew it was risky business trying to draft a sweetheart neck line. It seems that they are notorious for doing the gap thing. I still think I can beat it…maybe. If all else, my skirt draft was a success and I can always come up with a new design for my bodice front and still use my beloved french darts. So… I think it’s fair enough to say, “I have officially “designed a dress ” AND this is only the beginning! Au-revoir!
On yeah, by-the-way…have you ever sat on a straight pin?
Salute! Jessica
Read MorePattern Review McCalls 6561

A table fit for Mother’s Day
When we went into Joann’s fabric store to look at patterns I had this funny feeling. As we sat and perused the pages of the McCall’s pattern catalog, I watched her scanning, looking for that perfect…unique dress and when I saw her zero in on it, I knew right then that I had my work cut out for me. My daughter chose McCall’s 6561. Don’t misunderstand me. I have nothing against the pattern, they definitely had a cool idea in mind but… 10 pieces just to make the bodice? Just saying.
McCall’s 6561

Needless to say, she had her heart set on it and so I said yes! So the first thing I did was make a muslin. Remember those 10 pieces! We tried it on her and I had an “Oh Crap” moment. I made the muslin up in a size 4 but my daughter is like trying to dress a pencil!
She is lovely, healthy and the eating machine in my household. How she gets away with it I have no idea. Her brothers harbor a little resentment since they have to count their calories, as do I. Somehow she manages to maintain a 24″ waist! We’ll see just how many years this lasts. (that sounds evil huh)
Well… anyways, besides the fact that my daughter is a pencil and size 4 was too large, she was still fuller busted than the pattern allowed for so I had to do some major pattern changes to all 10 pieces! It took me two muslins before I got it right!
While it doesn’t say it on the envelope, if you look at it on McCall’s website, it is considered “easy”! Well yeah…it’s easy to understand how to sew it; the instructions are pretty clear. But it’s a “sewer beware” pattern. I think most of the difficulty lies in the fitting but for new sewers, I think constructing the bodice is not a cake walk. If any of you readers are new to sewing and have already taken on this challenge and did it, I have two words to say to you.. You ROCK!!
Anyways, with the fitting out of the way, we were ready to choose fabric. It was a unanimous vote, white with a splash of red. The fabric is white embroidered cotton and the lining which Calley chose is a white silk cotton. We found some beautiful red satin trim but my concern here was whether it would bleed onto the white fabric when it’s laundered so several pieces had to undergo testing. Cold water brought out red making the water pink, but hot water was worse. I decided to wash the trim in my washing machine on gentle cycle, hang to dry and press it before applying to the dress. (Heavy sigh; more work)
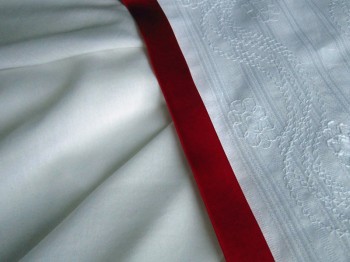
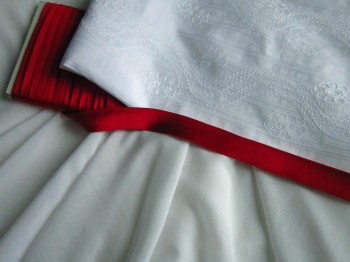
After pre-shrinking all the fabric, I was ready to start construction. Assembling the bodice wasn’t too bad though like I mentioned earlier, there were several pivots in the top and bottom of the front pieces that took me a bit but eventually I got them.
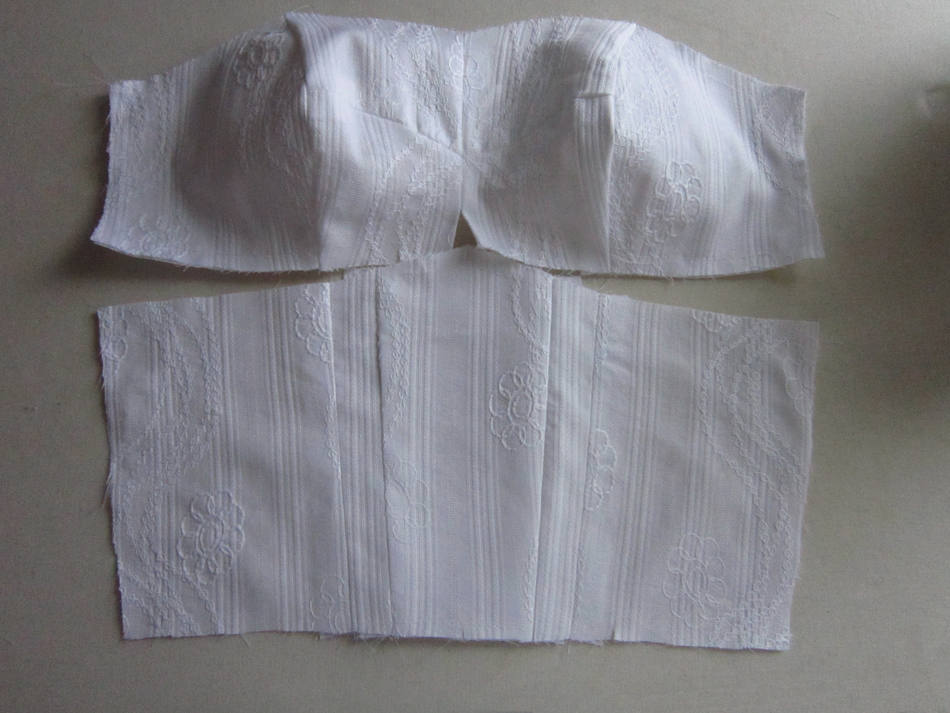
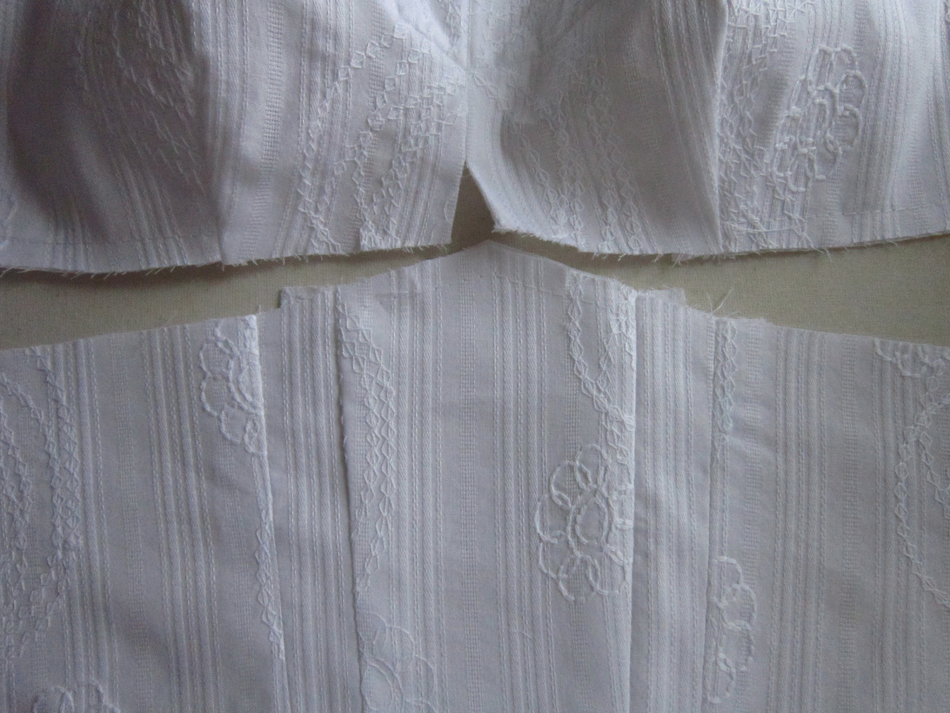
I took this close-up picture so you could get a good look at the bottom pivot on the center front. I fussed with this one the most.
The main bodice is sewn to a gathered skirt and then there is a bodice lining that is sewn to a second or contrast gathered skirt. Suffice it to say, there was a whole lot of gathering going on! It wasn’t hard, just time consuming.
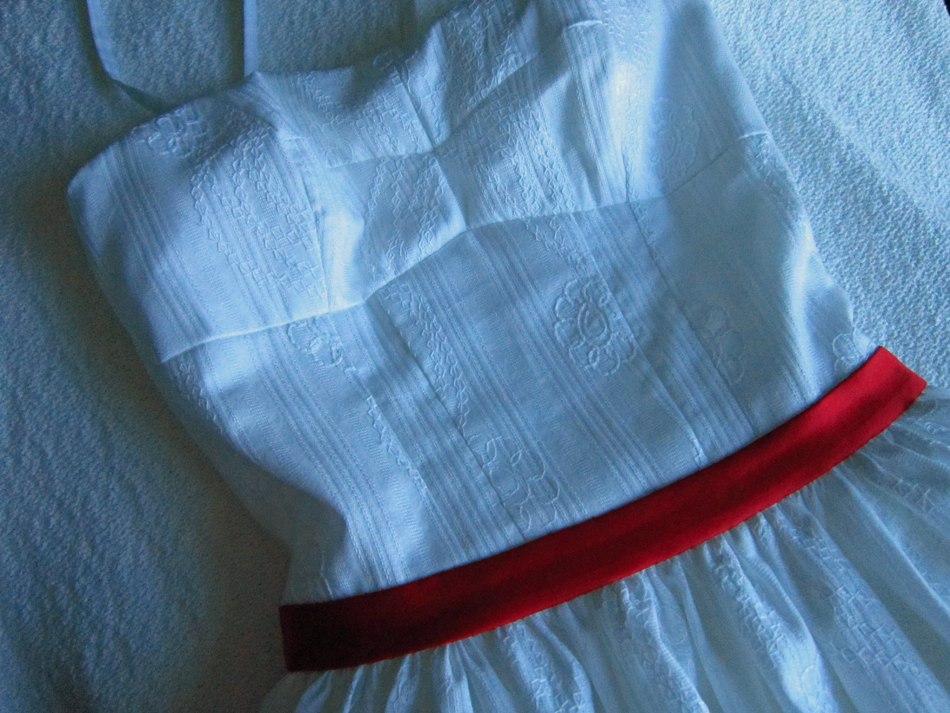
I decided to hand sew the red trim around the waist after the dress was constructed. I did try top-stitching it on first but I didn’t like the look.
To break up the layers, I sewed red satin trim on the top skirt.
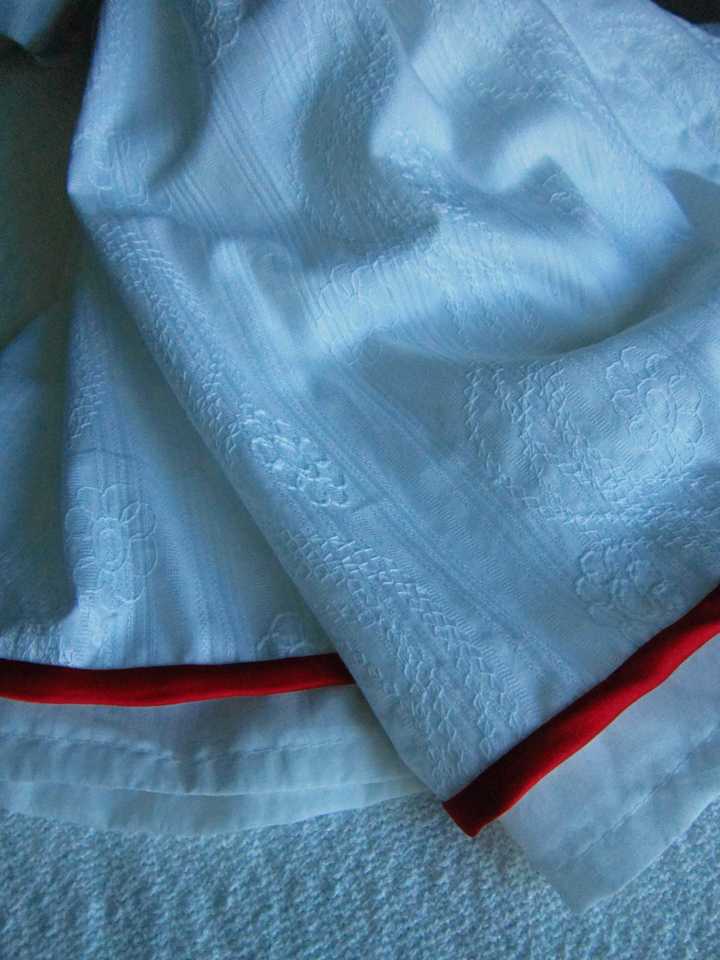
And here it is being worn by my daughter.

The back of the dress…

And a just because picture!

The dress was a success, especially because it’s what Calley wanted but I am not real keen on making a 2nd or 3rd one. Unfortunately I think she wants more of them and since she let me make her something versus buying it, how can I say no? I’ll make 10 if I have to. 🙂 I truly love being her and her two brothers mom, and sewing for them is such an honor to me. You can expect to see more of my family creations in the future.
With that, I think I will now go and enjoy Mother’s Day with my children. If you are a mother, a child who has a mother, or know someone who is like a mother to you, take advantage of the opportunity today to give your love. We don’t know what tomorrow will bring, but today is here, so live it to it’s fullest. That being said, I’m now signing off to go and enjoy a glass, or two, of champagne!
Salute! Jessica
Read MoreBetsey Johnson Polka Dots
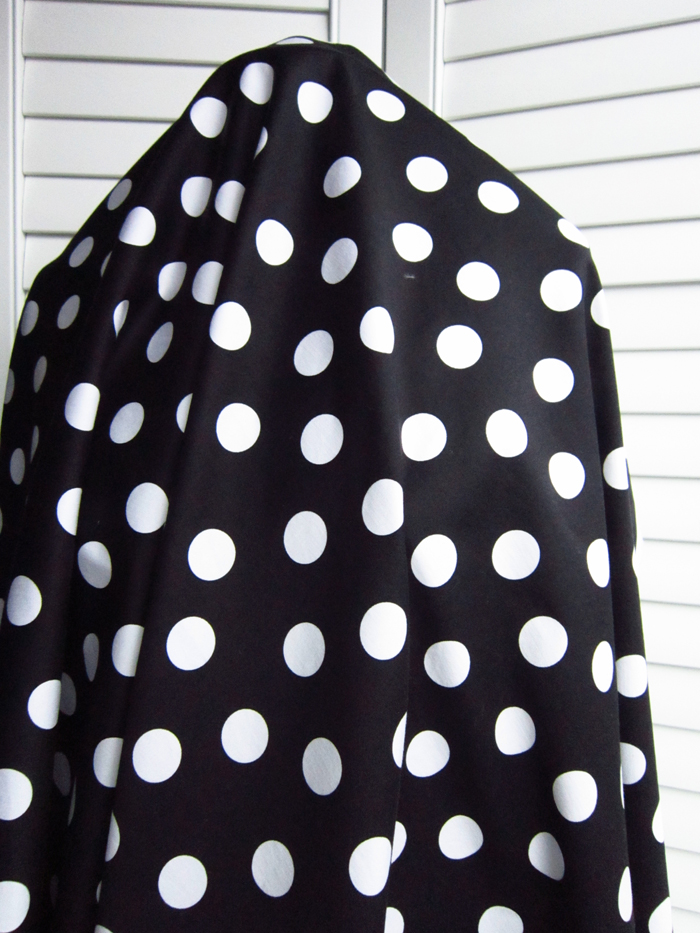
Yes, this is Betsey Johnson polka dot fabric! Lady Luck was on my side when I saw it available at Gorgeous Fabrics. I snagged 2 yards, then later thought about getting some more, but alas…it was all gone! It is Sateen and has a slight stretch to it; definitely has the feel of bottom weight fabric but perfect for what I had in mind. I washed it on the gentle cycle in my washing machine, bypassed the dryer and hung it to dry instead.
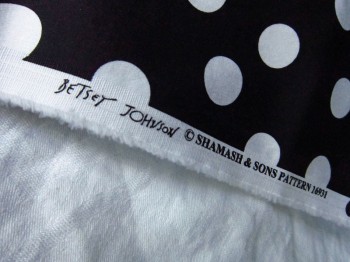
Some of you might say, “who the heck is Betsey Johnson?” Well, she is an American clothing designer who loves color, adores costumes and likes to design fashions that are playful, whimsical and edgy. I bet she would be a lot of fun and I would so love to meet her! So when I saw this fabric with the big polka-dots, I caved!
My original plan for this fabric was to make a dress from the Simplicity 1797 pattern. However… crap happened! There is really no other way to say it and that was the nice way. If you are one of my regular readers, then you know the story. If you are new here, it had nothing to do with the Simplicity pattern but the fabric I was practicing with before I started cutting pattern pieces out of my polka dot fabric. The pattern review for Simplicity 1797 tells all!
My new game plan was to draft my own dress. I wanted to make a skirt with an empire waist and it would have a whole lot of flare! I envisioned the bodice as sleeveless with a criss-cross front. Oh yeah – I thought I was brilliant until it was time to start drafting. I begin to lose my courage and started the transformation into a big chicken!
I deduced that maybe I needed to stimulate my imagination so for ideas I went rummaging through my patterns. It was sort of like panning for gold; a lot of “not what I wanted”. Then all of a sudden, there it was, the gold nugget, Simplicity 3783. What I saw sparkling was the bodice…it was exactly what I saw in my mind. The skirt I was not sure about though I loved the bubble hem idea. I had time before I had to make up my mind so I swept the skirt business aside, eager to check out the bodice scene.
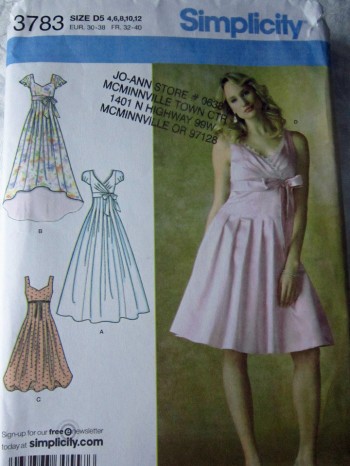
I can’t remember when I bought it but it is old enough that if you search Simplicity’s website, you can’t find it, not even in the out-of-print section.
I selected the bodice pieces of tissue from the pattern envelope and began. Here it is… my muslin. I loved the fit…it was perfect!
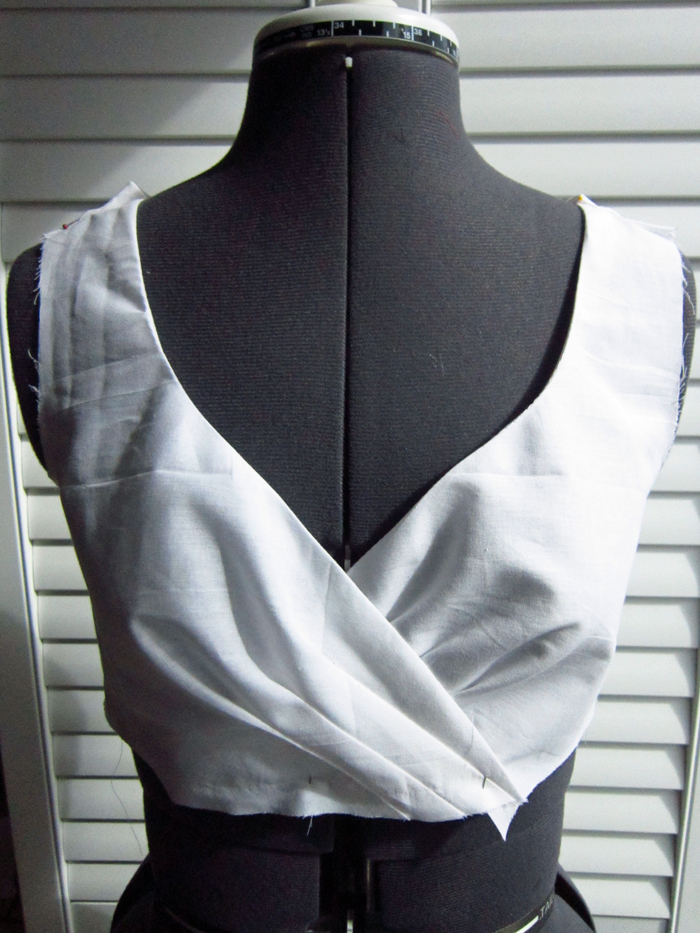
Elizabeth, my dressform, is probably a little embarrassed by the wrinkles that you can see on the muslin so I should apologize. Not sure when it happened, but I did iron it at some point! 🙂
Now it was time to figure out what to do about a skirt. The bottom of the skirt pattern seemed wide enough to do a subtle bubble hem (though I wanted more than subtle) but it was the darts that ran from the top of the skirt to down below the waistline that were troubling me. Not to mention I wasn’t sure I wanted all that fabric folded around me and wasting those beautiful polka dots! That was when Simplicity 3783 was no more but my courage had grown and drafting a skirt didn’t seem to be as scary a business. I had a skirt pattern I drafted last year that I used to make several other dresses and it had an empire waist so I dug it out. I know it’s a crummy picture, but it’s hard photographing tracing cloth.
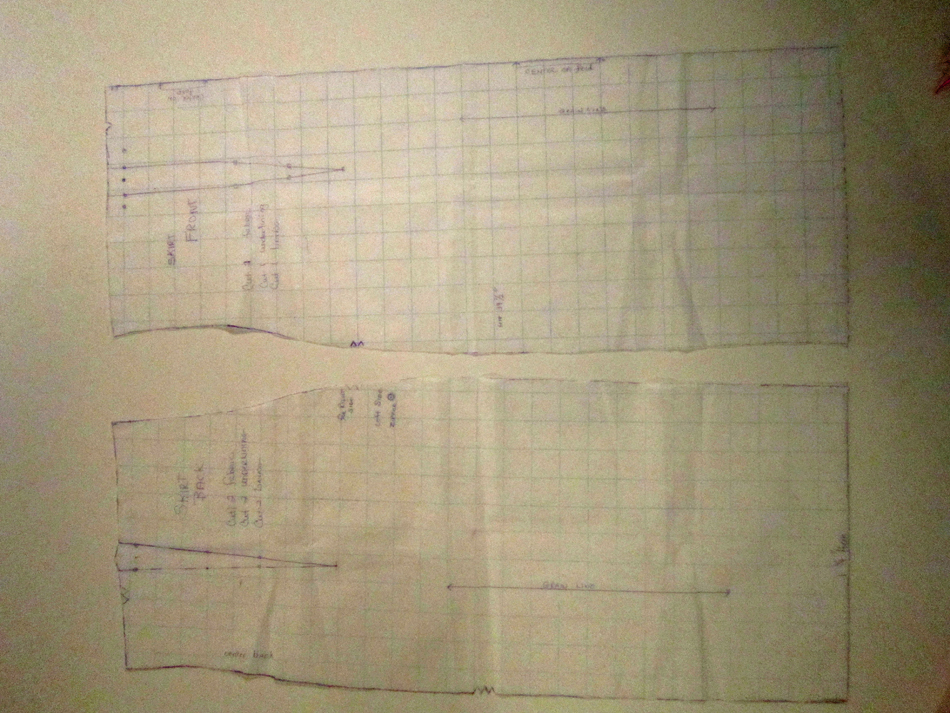
I fit me perfectly, a front and a back, each side with two darts. I wanted fullness, not as much as a circle skirt, but just lots of flare at the bottom. I knew that I couldn’t get the flare I wanted with only a front and back piece; I was going to have to split them into a center front and side front, and center back and side back. After having a mental struggle with whether I was on the right track or not, I gave in to my creative side and dug out my pattern tracing paper, my mechanical pencil and my Dritz cardboard cutting board with the quarter circle lines on it.
The drafting commenced for what seemed like hours and then it was time to cut my new skirt pieces out. Once again the wave of uncertainty hit me! I hate it when that happens! Everything looked good; all the sides that were to be seams were of equal length. The waist matched the bodice…but I needed some support so back to my pattern stash I went. It was the Butterick 5603 pattern that slapped me in the face! The skirt was exactly what I wanted.

I pulled out the tissue pieces and compared them to my drafted pieces. I was close! Several of my curves needed a little correction, but outside of this, I was good to go!
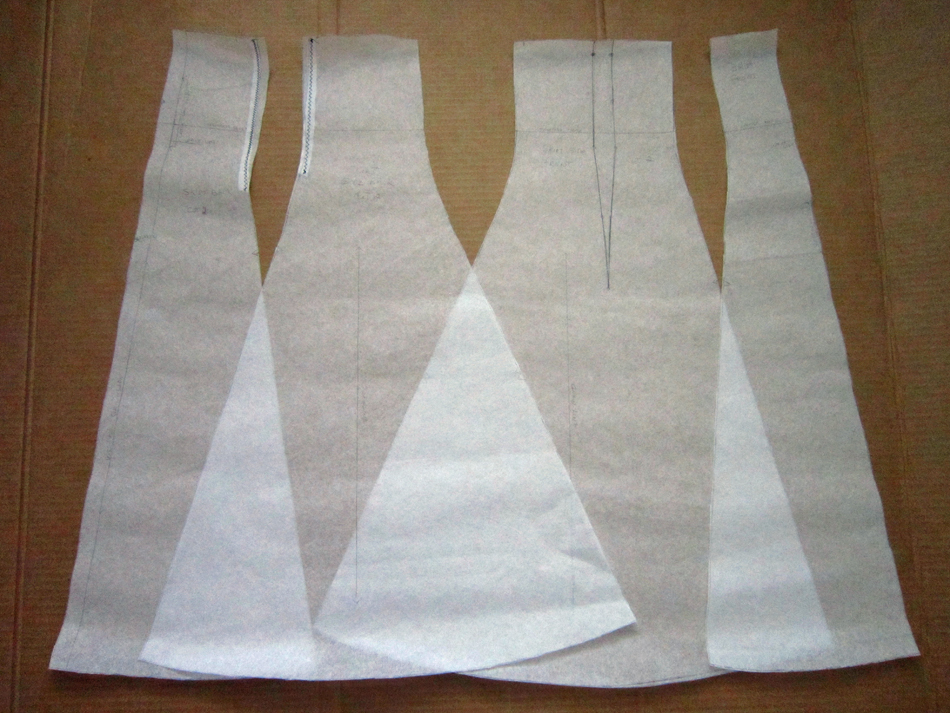
With the pattern/designing war over, I went to work cutting out the pieces from my beloved polka dot fabric. Sewing the dress together was like a fantastic dream! I loved the way the fabric handled and it all went so smoothly. I made the bodice first.
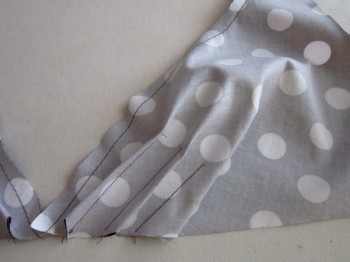
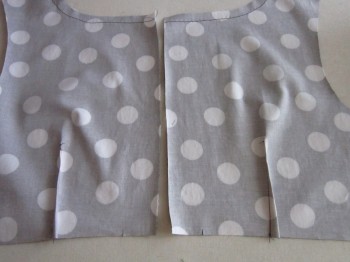
As you may note, the bodice is already attached to the skirt in the following pictures. I forgot to take pictures during the process. I also forgot to eat that day –I’m sorry but I get so involved!
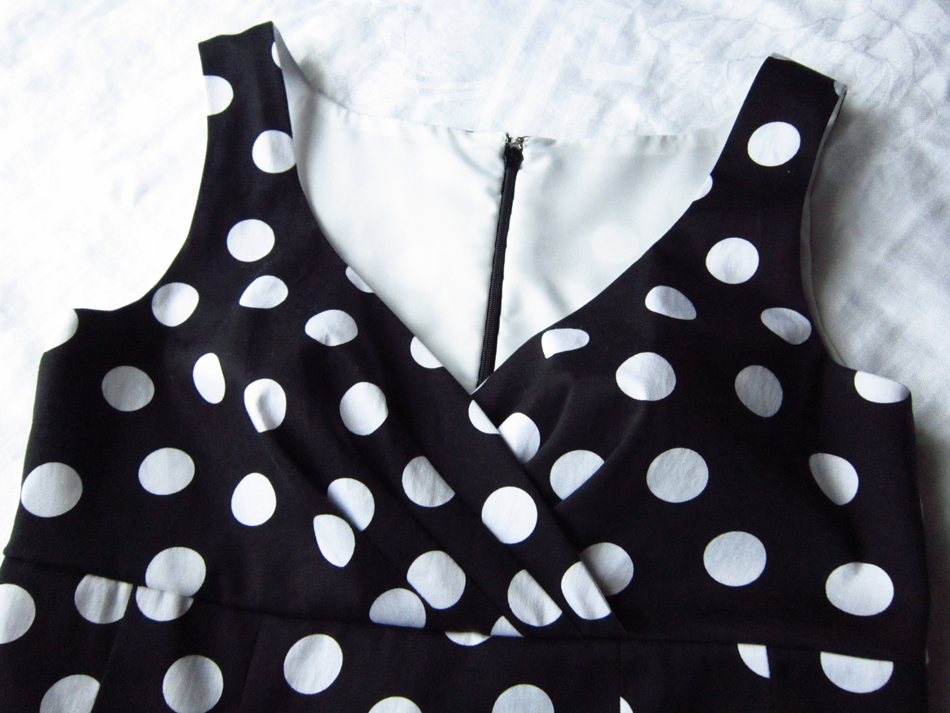
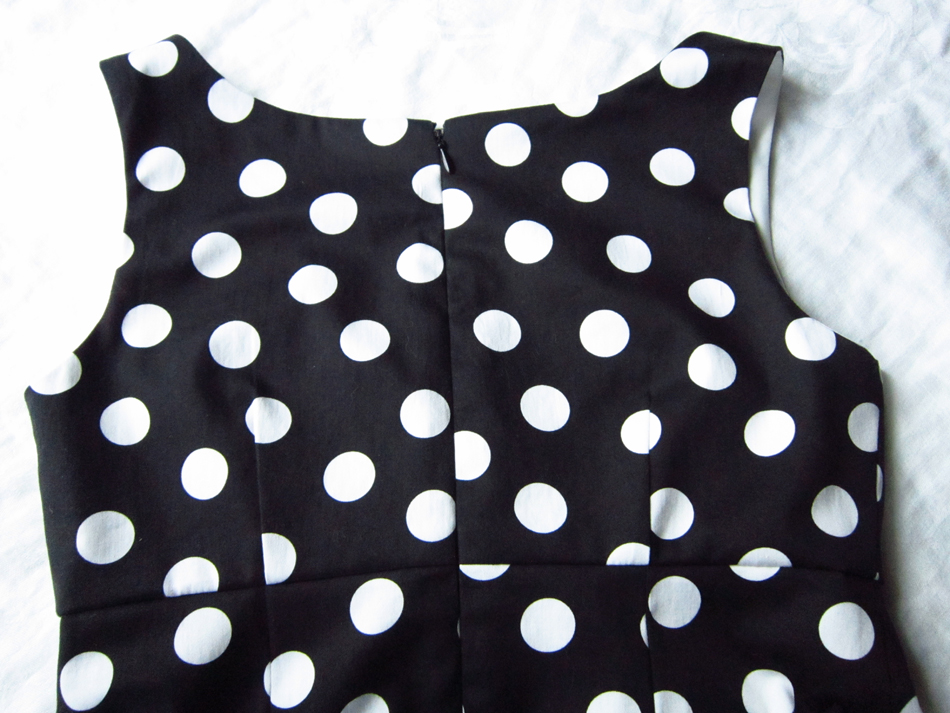
Then it was on to the skirt. I serged all the edges before I sewed the seams.
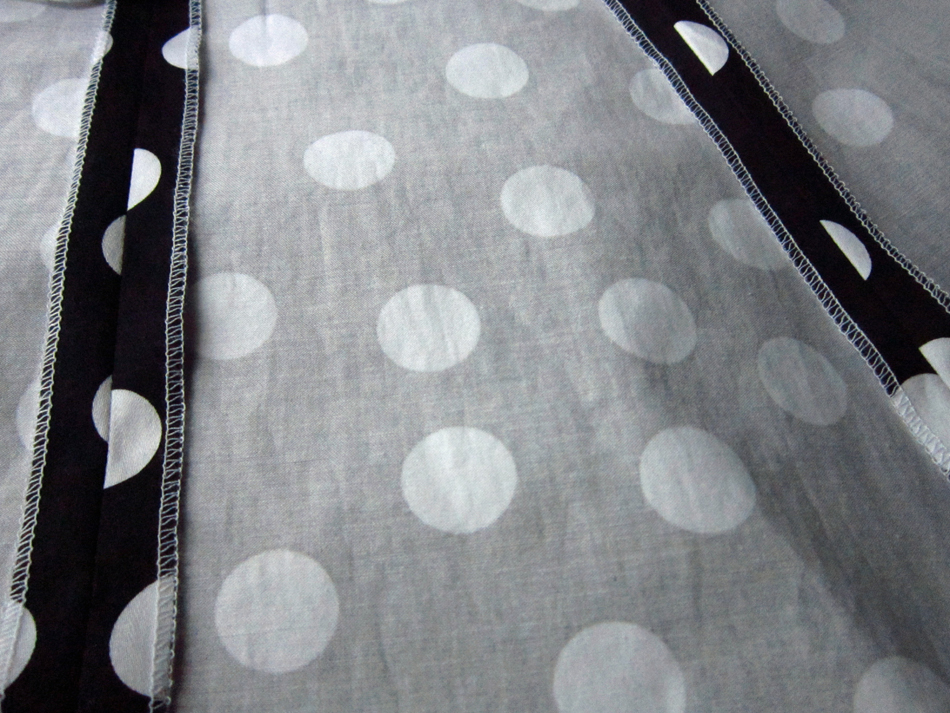
I made a lining. I used the one from Simplicity 3783, It was nothing more than a front with 4 darts and 2 pieces for the back, each with 2 darts. I serged all the edges on these too before sewing it together, then I machine sewed a 5/8 inch hem in it. Next, I basted it to the skirt, wrong sides together. I didn’t sew the back seam of the skirt so basting in the lining was easy. I usually do it this way anyway because I find it easier to put the zipper in first, THEN sew in the back seam.
Now with the skirt lining installed, I was ready to attach it and it’s mate the skirt to the bodice. It went very smoothly. I was definitely needing a confidence boost and this was it! Now, all that was left was to set in the invisible zipper, sew the back seam and turn under and hand sew the edges of the lining. This was a little tricky on the front of the bodice where the two sides crossed. I had to get a little creative but still managed a nice finish.


All that was left was to hem it and Shabam!


Check out the earrings if you can see them. They are my daughter’s…red guitars! How awesome is that!

So there you have it. My creation with a little help from B & S! (That doesn’t sound right does it?) I call it my Jessica Betsey dress. I love this style so much, especially because while being somewhat form fitting, it is oh so comfortable. So comfortable that I made a second one, a “little white dress”. The fabric has pretty embroidered flowers and I used a bit of pink chiffon I had on hand.
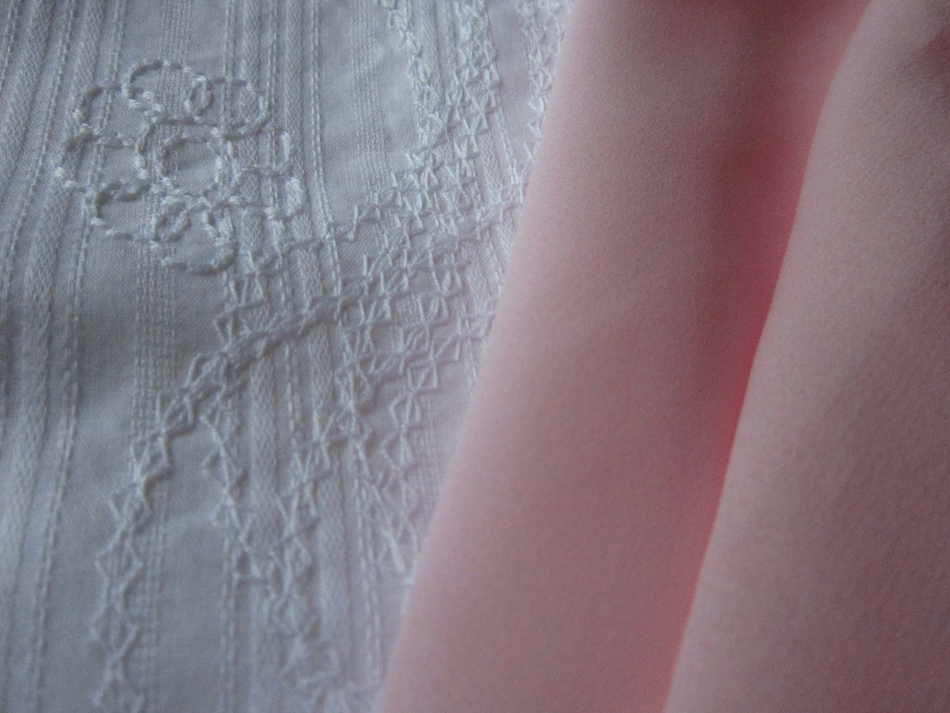
I did change it up a bit though. A pink band of chiffon sewn between the bodice and skirt.
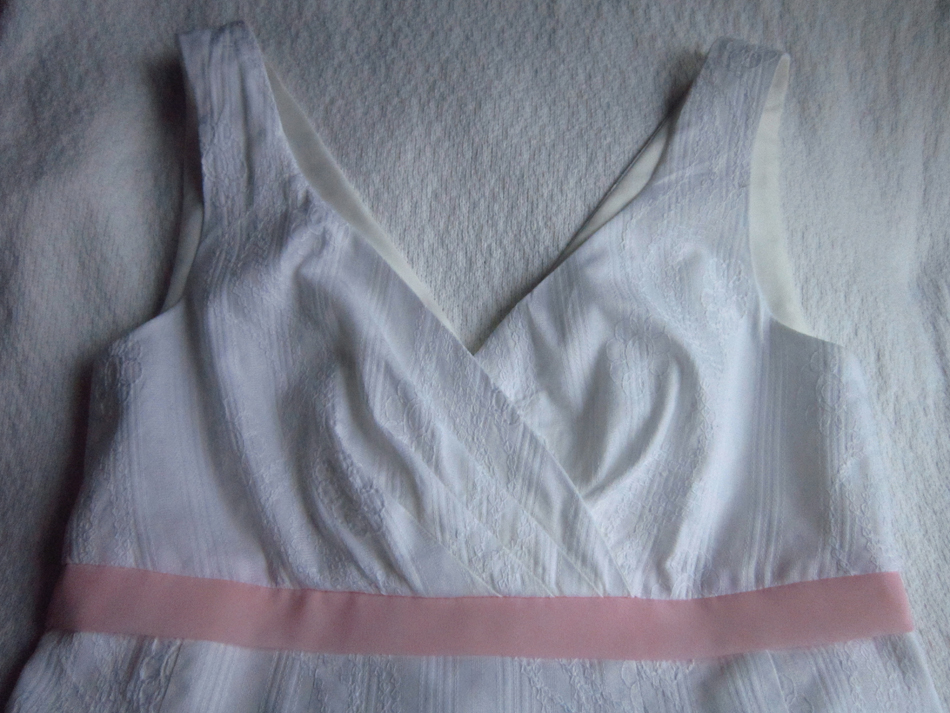
And a v-neck in the back.
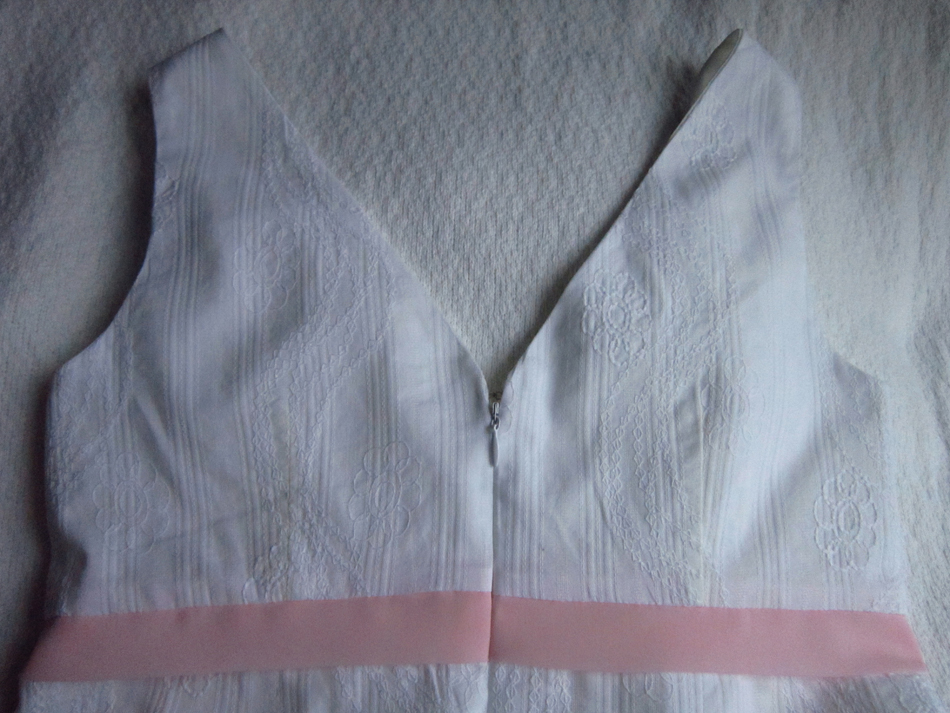
and the full deal…

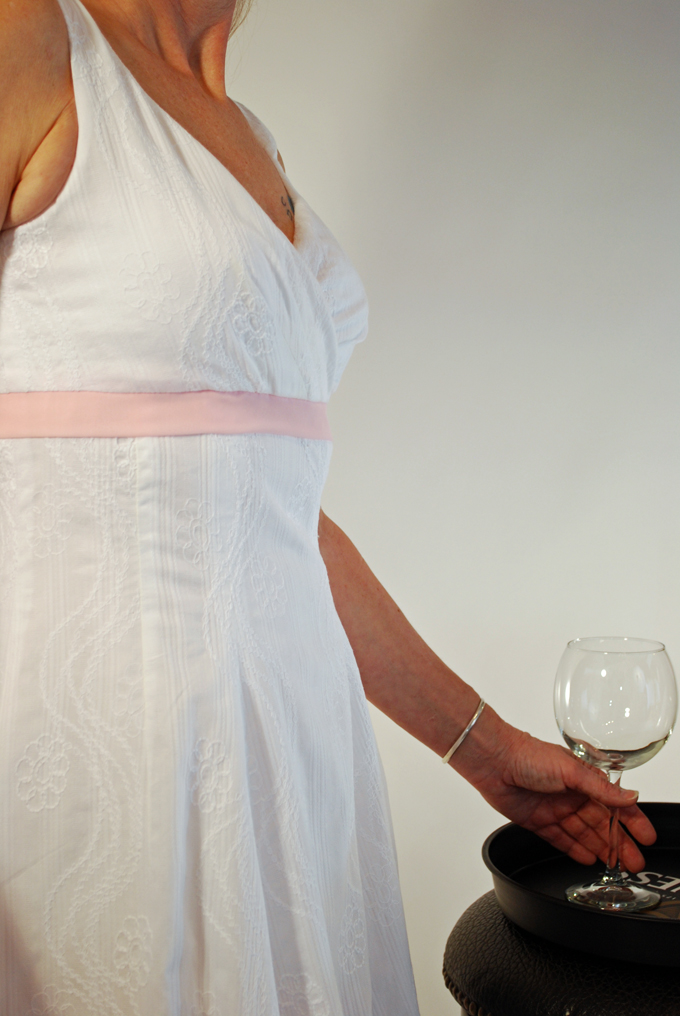


I have several occasions in mind for wearing my dresses and I can’t wait. Coco Chanel once said, “Dress women in black or white at a ball. They will catch the eye”. I don’t know about catching the eye, but I certainly will feel like I’m going to a ball. I can’t wait!
Salut! Jessica
Read MorePattern Review Simplicity 1797

SPRING IS HERE! But…I live in Oregon and — well let’s just say that we Oregonians are still planning our wardrobes for that mildly warm sunny spring weather that will actually be here when it’s almost summer. However, I am not complaining…much. This is actually a good thing because it means that I have a little more time for sewing projects that include those pretty summer dresses that I envision myself wearing to parties, the Blues Festival, wine tasting, birthday parties, or just because!
Since we are on the subject of dresses, I believe it’s time to talk about Simplicity 1797. I decided to make this dress for several reasons. The obvious one of course is that it’s cute! I really liked the sample displayed on the pattern envelope and so I purchased it when it came out last year. Somehow it ended up in my future project stack of patterns and…I sort of forgot about it. Then last month when I was reading the American Sewing Guild Newsletter I made a discovery. A national sewing contest is just getting underway and to participate, you can sew one or all of the patterns from a a selected list and the Simplicity 1797 is on that list! The grand prize and 2nd reason to make this dress…a Babylock! I was so excited that I think I drooled on the newsletter.

My plan was to make this dress from a special designer fabric that I purchased, but I wanted to do a test run first so I chose a floral eyelet that I found in the local fabric store’s linen section along with a pretty rose-red cotton for the piping. The eyelet was regularly $12.99 a yard but with the 30% discount that I noted, I figured what the hey, I can handle this. Keep in mind that during this time my phone was ring-a-ding-dinging text messages from two of my kids. When I left the cutting counter it turns out the fabric was not on sale! I was already late for meeting my son at a local pub for lunch so with as much calm collective-ness I could muster, I purchased my NOT-ON-SALE fabric and left in a dash!
Later, when I got home and started looking at my eyelet, I realized that it was not embroidered threads in pretty flower patterns but rather glued on rubber stuff that looked like eyelet. Sort of flocked, but not! All I could do at this point was hope that this wasn’t a tell-tale sign of what was to come!
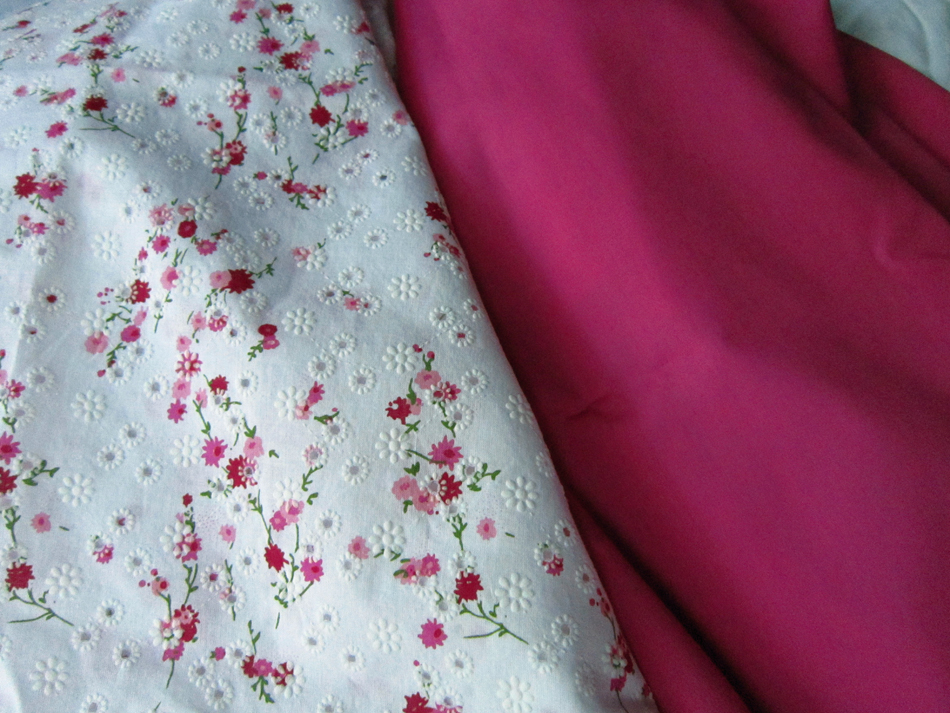
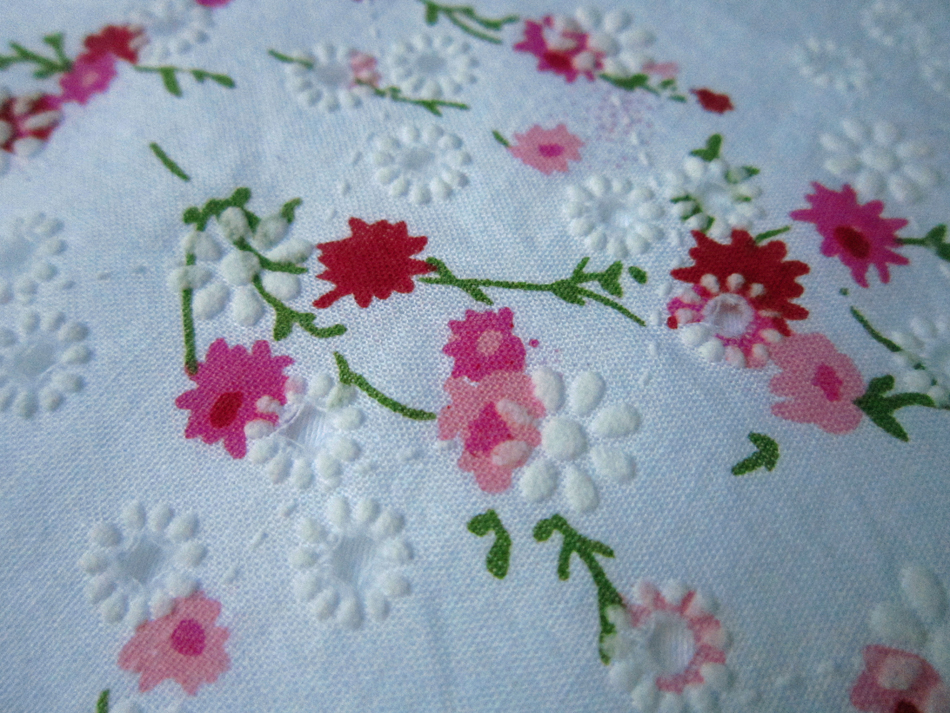
I went ahead and pre-shrunk the fabric (if rubber can shrink) reminding myself that it was suppose to be a test-run. By this point I was a little irritated and so I just threw the fabric in the washing machine and then the dryer. Turned out fine so off I went to iron it. That was when I hit the next speed bump! I couldn’t iron it on the right side. Okay I said to myself, “self, don’t let this fabric beat you!” And I didn’t. I ironed it on the wrong side which worked out fine… until it was time to press seams. But I would not lose this battle either so I broke out the press-cloth ammo! During all the frenzy in a room full of colorful expletives, my daughter came in to see what was going on and her only comment…”that’s pretty fabric”. At that moment I swear I saw the eyelet blowing a raspberry at me!
Moving along…I had already made a muslin before I purchased my rubber fabric. With only a few adjustments I was able to find my desired fit; the usual size 8 grading to a size 12 at the waist (yes, I am the shape of a triangle) so I was ready to go. I made style B. I love the look of the little jacket that goes with it and plan on making it with some beautiful white boucle I purchased recently.
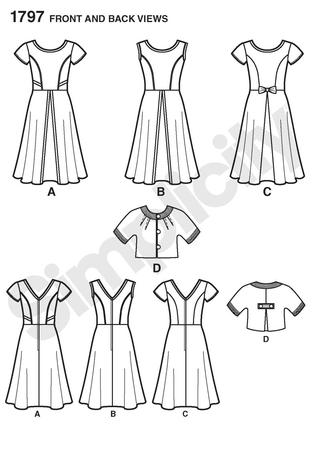
The instructions were pretty easy to follow. I left out the pockets because of my previous side-seam pocket ordeal with the floral silk fabric dress that I had to re-do because of the big butt scenario but we won’t go there! I’m sure it would be fine in this dress, but my trauma has not quite passed yet.
I chose to do the piping which was 2 inch strips of fabric folded in half length-wise. The instructions asked you to baste the strips to the bodice and skirt with raw ends together before actually sewing the bodice and skirt sections to one another permanently. The width allowed for a 5/8 seam and 3/8 for trim. I thought it was fun to apply so no problems here.
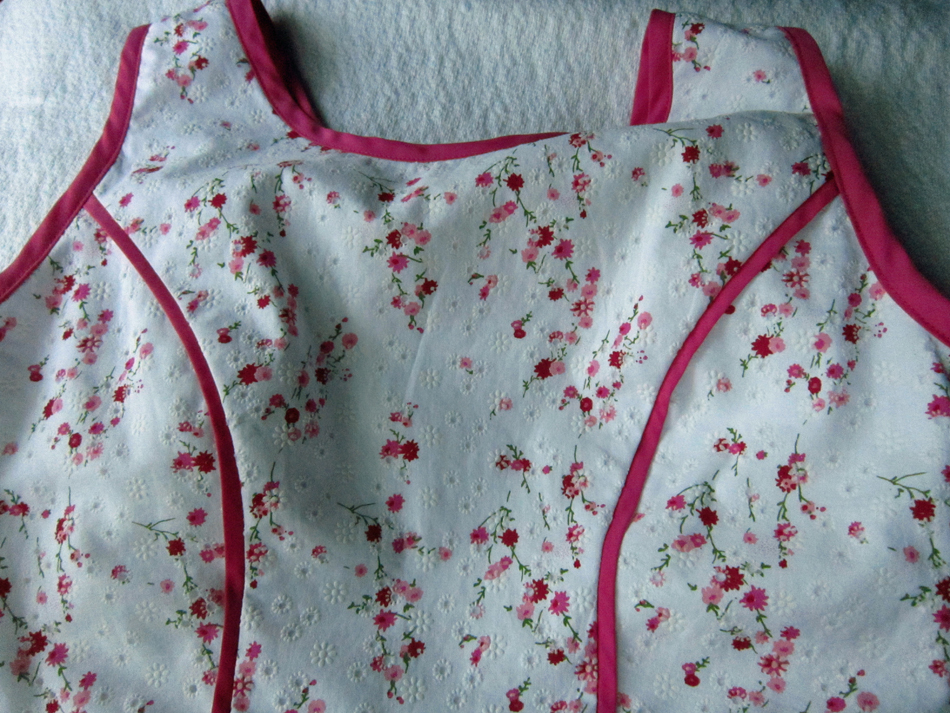
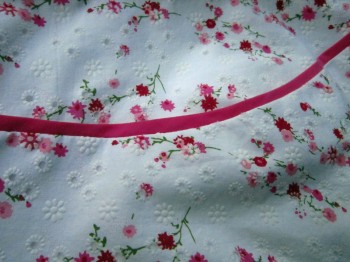
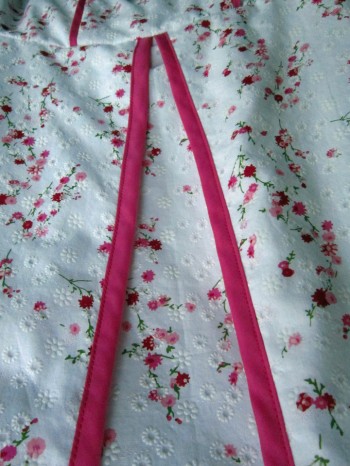
The only thing that I found difficult was when I was applying the fabric bands around the neck and arm holes. The first part was easy. You simply pinned the binding to the neck and sleeve edges and then stitched a 3/8 inch seam. It was the next step that got me. You were to fold the edge of the binding to the inside, pin and then stitch on the outside in the the groove of the seams. The fabric was not cooperating at all. And…being to fussy, I finally ended up sewing along the top along the inner finished edge catching the underside of the band with it. I don’t know if this is when it happened but the shoulders and bust area seemed to grow a bit larger. My muslin fit so well, so I am not sure what happened, but hey…with that extra space, there is always room for the Wonder Bra!
Well…this is it!


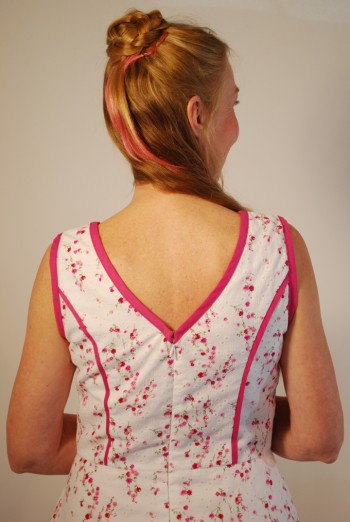

I don’t know if I will make the dress again though I still plan on making the jacket. I think the dress pattern is great but due to the fabric issues, I kind of lost some of the wind in my sails on this project. I will definitely submit a picture to the American Sewing Guild contest. It is totally a long shot but… winning a new Babylock to replace my dinosaur serger would be stupendous!
Well, time to go and enjoy a beautiful overcast day in this pretty springtime dress. Where am I going? My daughter and I are going shopping for shoes! Then go have lunch and with a glass of wine for me at the Cheesecake Factory!
Salut! Jessica
Read MorePattern Review Butterick 5646
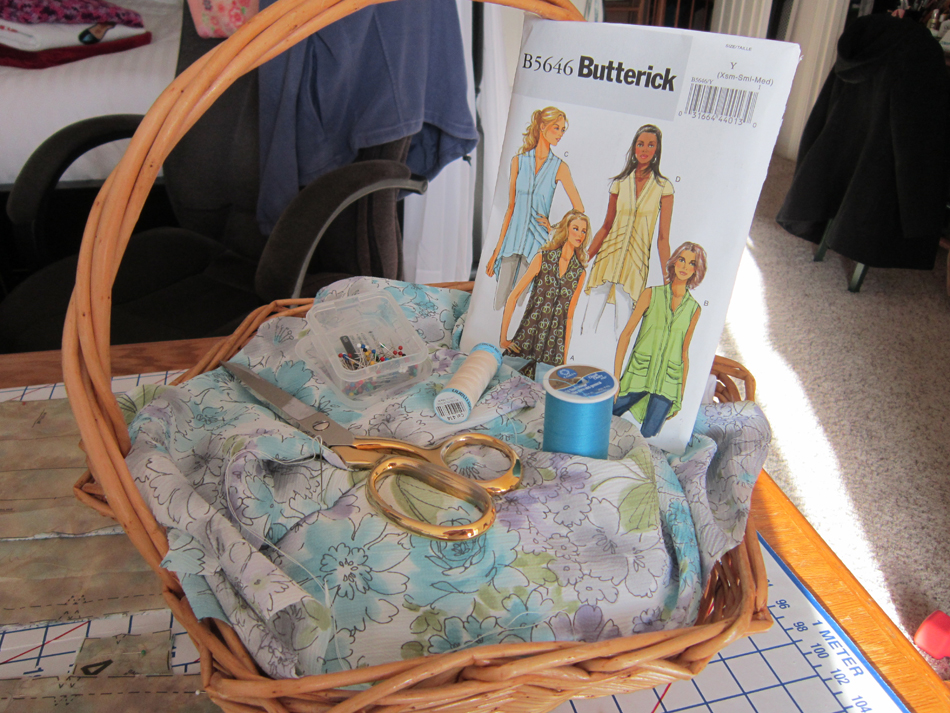
Believe it or not, I have been sewing while I have been chit chatting on this blog for the last few weeks! And… outdoors soaking up the sun and working in the yard cuz spring is here and it’s time to plant! Even mucked out the small pond and waterfall in my backyard leaving it sparkly and pretty…until next year when I have to do it again! Here I am though, faithfully sitting here at my desk on this beautiful sunny April 1st Monday morning, writing because this is important too. No fooling!
So what have I been sewing? Well, actually a few things, with three more projects in the makings. Sometimes I make myself crazy! Today I am going to start by reviewing Butterick 5646 and with the next several posts McCalls 6708 and Simplicity 1797. I am splitting them up because I think I talk to much and end up making monster posts that you may not want to sit and read! See, here I am, yaking!


Butterick 5646 McCalls 6708 Simplicity 1797
Before diving in, let me first say that each of my projects gets to go through muslin consideration. There’s nothing worse than finding out that something doesn’t fit properly that you were dreaming of wearing when you finished sewing it. Been there, done that!
Also, sewing for myself is sort of like dressing a triangle! I find it a constant challenge with any pattern I choose to make, because my shoulders are a little more narrow than standard shoulders. My bust… well I won’t complain; I am far from gifted in this area, but it could be a lot worse. Then there’s my waist, it’s two sizes up as compared to my bust measurement; what’s with that! Hips are hips; they are always the fullest area but the numbers just keep getting bigger. See… a triangle! What has worked best for me is to cut a size 8 at the top with still a bit more adjusting, then ease this size into a 12 at the waist. Most of the time size 12 is good for the circumference at the hip line, but sometimes I will cut out a 14 just to be sure! I try not to pay a lot of attention to size though, just actual circumference; notice I said try. And go figure, my store bought clothes are entirely different sizes! We are all in this mess together so I’ll just leave it at that 🙂
Okay…so here goes: The Butterick 5646 top

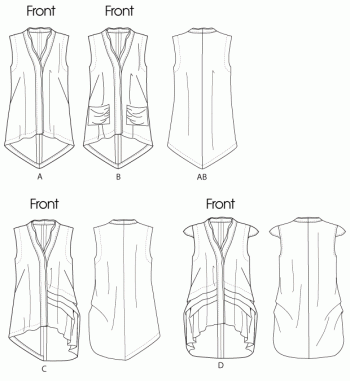
Butterick – 5646 Options
Let me start by saying that I picked this top because I like the long v-shaped back business that’s going on. Besides looking very feminine, it’s a butt cover when I don’t want my butt seen. (have no idea why I sometimes feel this way) 😉
The pattern is sized by XS, S, M, L, XL, and XXL
I chose size Small for several reasons. First, the bust circumference was closest to mine. Second, the waist and hip measurement with ease was printed on the pattern pieces, a number of inches more than I needed. And third, I pinned all the tissue pieces together to see what I was working with and could easily tell that it was going to be loose fitting all the way down; so…with much contemplation, I decided there would be no muslin done and size Small it would be. After the fact, I could have made an XS, since I almost feel like I am wearing a painting smock, but…I am not gonna fret!
I made style B because it has pockets which I thought would make the front more interesting. Chiffon and georgette were two of the recommended fabrics which was why I chose to make it in the first place. I love to wear things made of these light flowy fabrics, but… I thought I would do a test drive with some fabric I discovered in my stash that I bought a year or two ago to make a skirt out of, don’t know what I was thinking, anyways, decided to use it for this top.
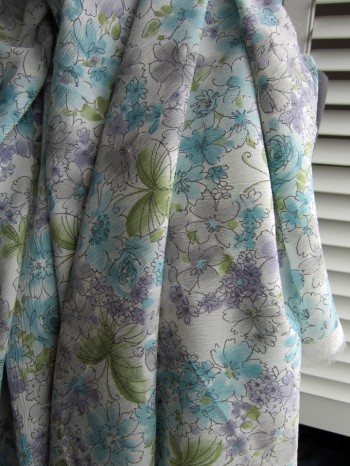
The instructions for the most part were straight forward. The band around the neck tripped me up at first, likely because I have not sewn a lot of tops. You had to sew 2 bands allowing for a hidden band where the buttons and buttonholes are to be placed. As usual, I went off the beaten path because I wanted blingy buttons and didn’t want to hide them! The 2 bands got to become one band for my whim. All I did was slip stitch them together along the center edge and then top-stitched 1/4 inch from the edge all around the entire band.
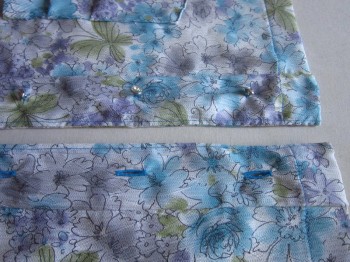
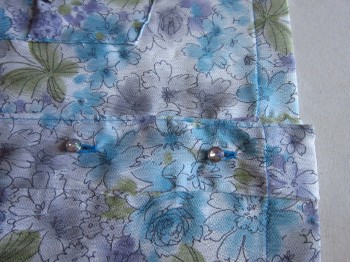
I loved sewing the french darts. I have read that they can be a bit tricky at times. I can see how this might be, especially with certain kinds of fabric but the finish line is so complimenting that I can’t wait to sew them in future garments.
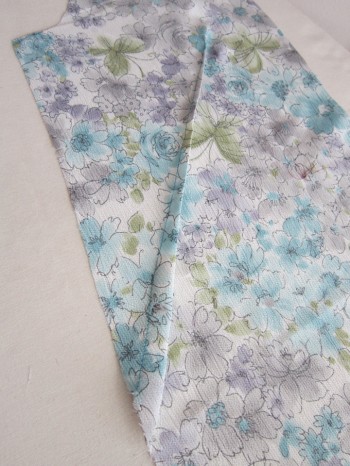
Also, french seams were a suggestion for finished edges which is one of my favs so I did this too. Maybe I will make this again in an XS if I can find some pretty georgette fabric.
The back…

And the front!

Salut, Jessica
Read MoreThe Do-Over Liberation Dress
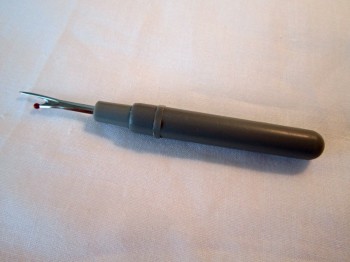 The “Save-your-Derriere Tool”
Have you ever decided to sew yourself something, lets say… a new spring-time looking cocktail dress that you can just imagine yourself wearing. You then decide it would look spectacular made of this fantastic silk that just happens to cost almost $30 dollars a yard, but it’s not very often that you buy fabric this expensive and so…you tell yourself you deserve it and BUY it! You then hurry home and dive into the project like the world is going to end tomorrow. As you are nearing the finish line, having sewn all the pieces together, you try it on before doing the final touches and discover that… IT DOESN’T FIT! It turns out your butt is bigger than you thought. You become concerned that maybe you are shaped weird in the shoulders because the neck of the bodice back looks more like a vampire collar. AND…you discover that your boobs are actually bigger than you thought because the bodice fits more like a corset!
Okay…yes, I am talking about something I did! I know; you are asking…why didn’t you make a muslin first. Well…does previously making another style of dress from the same pattern count as a muslin? I thought it did but I was WRONG. After a number of different tactics, I finally admitted defeat, lovingly folded the partly dismantled dress into a small square and put it away because I couldn’t bring myself to throwing away the almost $30 dollar fabric it was made out of.
That was over a year ago…my life has changed a lot since then, more than just the usual changes that life brings. There were broken friendships, the death of a friend, end of a marriage, that feeling of ickiness that comes when we think we may have failed. But time has passed, healing has occurred and it now feels like it’s time to take on new challenges. This includes that little folded up square of partly dismantled dress that is in bad need of a re-do.
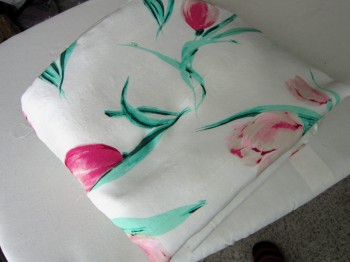
My sewing courage has certainly been re-vitalized through the learning of pattern drafting that I have undertaken the last few months. With the seam ripper in hand, and a deep breath, I set to work.
The pattern that I used was S2588, the multicolored dress on the right except with a slim fitting skirt rather than the fuller one shown. The slim skirt is also included in the pattern and drawings of it can be seen on the lower part of the pattern envelope.

The original dress I made had side-seam pockets but they are now gone for good! The approximate 3 inches of pleats that were suppose to be in the top front of the skirt found a new home. The side seam also moved away from the bodice side seam. This all was done to make room for my big butt!
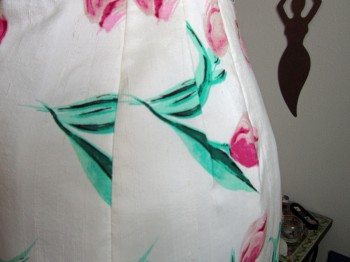
After making the Silhouette top with the 3/8″ seams, doing the same with this dress was a no-brainer. I managed to get plenty of circumference!
As for the vampire collar, I cut 5/8″ from the top of the bodice-back which brought the neck band more in-line with my neck.
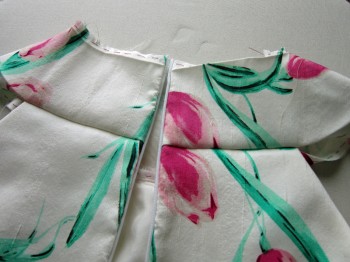
There are lots of angles and curves in the pieces that make up this dress, which makes it a bit tricky when it comes to fitting, but I took my time, did lots of hand basting with lots of FITTINGS and I did what I set out to do. It felt liberating to move seams, create darts and tear out unnecessary interfacing. Here it is from the back…
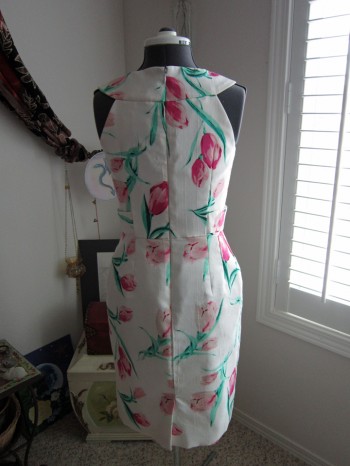
Still doing some finish work, but almost done.
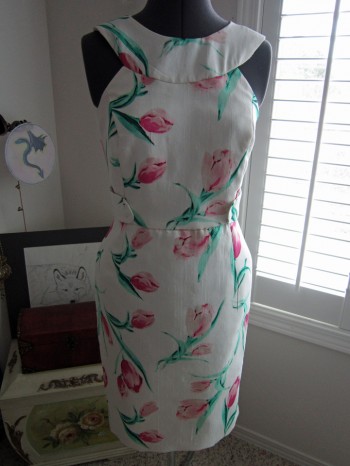
Buttons still need to be sewn on the tabs at the waist.
And here it is all finished!

The back…
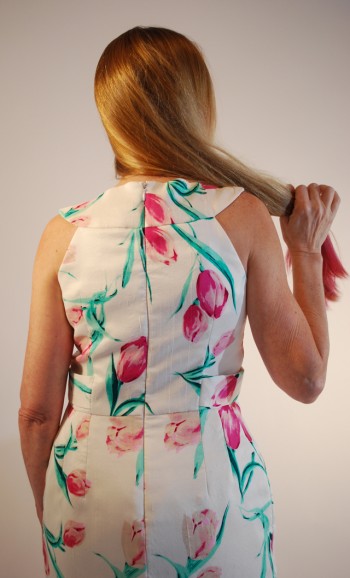
Close-up of the side
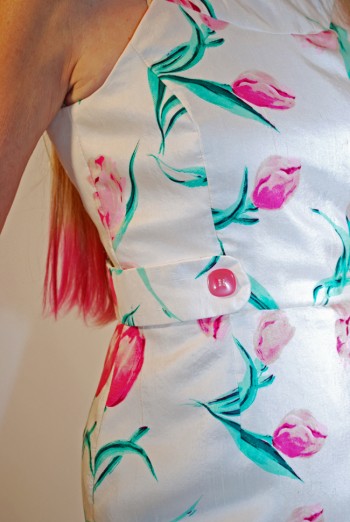
I have named it my “Liberation” dress. Why? Because I felt both a sense of relief and a sense of freedom when I was making it conform to what I wanted, rather than the other way around. No pattern instructions, just me, my creative nature and a handy-dandy seam ripper! The side-seams are not where they usually are, but why should that matter. Maybe the darts are not located in the correct places, but my butt has enough room so who cares! And thank you thank you Peggy Sagers for 3/8″ seams; without them, this might not have been possible! Yes…if we set our minds to it, there is almost always a chance for a successful red-do!

I forgot to tell you – when I saw myself wearing this dress, it was while drinking some of my favorite wine so with that, catch later, gotta go enjoy the rest of my glass of Chardonnay!
Salut! Jessica
Read MoreAbout Me
 Portland, Oregon,
 United States
Hi there! I’m Jessica Brandon and I am a clothes-loving sewing artist. When I am not sewing, blogging or shopping for shoes for my creations, I fill in the remainder of my days spending time with my children, playing ice hockey, gardening and making and drinking wine!


Up Coming Projects:
Vogue 1426

Vogue 7881

McCall's 7089

Vogue 8997

Vogue 1431

Vogue 9006

Vogue 8991
