

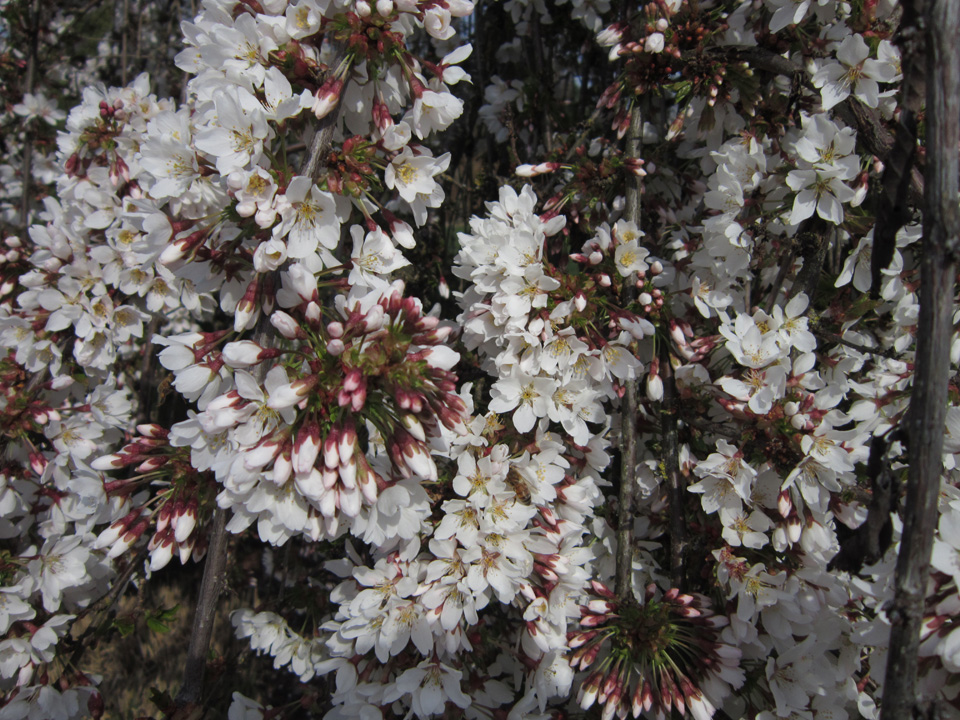
My “Weeping Cherry” is full of honey bees right now! There is one just below the center.
This is definitely a sign of Spring!
At last it’s officially spring! This means warm weather is coming… hopefully sooner than later. We have had several nice days now with the temps being in the upper 60 ‘s but the rain is back today and the temperature has dropped down to 50°! Oregon is such a tease! This means that for some time yet, many of us Oregonians will continue to wear sweatshirts, hoodies, and sweaters to stay warm. And some of us are still happy with long sleeves and so that is why I decided to sew up a new tunic type top. My daughter thought it was a sweater! She did say it was really cute though and coming from a 19-year-old, I decided to roll with it!
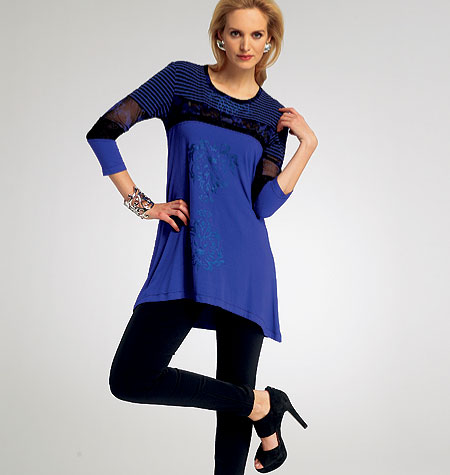
So what is this sweater tunic thing I am talking about? Well, I made it using the Vogue 8817 pattern and it looks like this… only different!
I have to say it right away… sewing this top was a dream of a project. I had a lot of fun making it and was even able to sip my wine during the process without any major casualties! I had so much fun in fact that I forgot to take any pictures while I was assembling it. I’ll blame THAT on the wine! The pattern instructions are very easy to follow. There are no zippers, buttons and button holes, facings, etc., so you can just fly like a breeze right through the making of it. I am not saying that sewing knits is easy though. There are a few challenges… like using the right sewing machine needle, getting the tension right so the fabric feeds through smoothly and lots of double row stitching if you aren’t fortunate enough (like moi!) to have a machine that sews an excellent stretch seam.
The total instructions are less than a page. I was a little uncertain about how heavy a fabric I should use so I leaned towards more of a medium weight than a light, and while I really like what I chose, my next one, maybe two, (yes I am going to sew several more because they are so quick and easy) I think I will choose more springy bright colored lighter weight knit fabric. You know how it is though… the prototype is always the test run and you never know how you will feel about making another until you’ve finished. The pattern instructions call for 3 different fabrics, the main fabric with 2 contrast colors. For contrast one & two I decided on black and a beige-y brown…
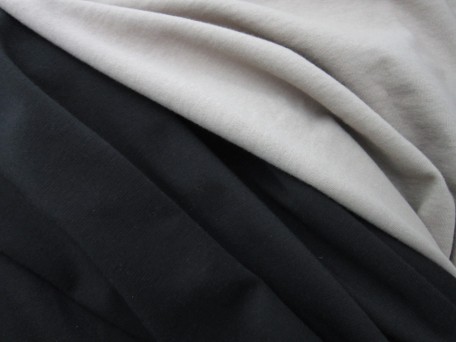
The beige-y fabric was a little heavier than than the other two and I was kind of concerned about this but it was the perfect color for the ensemble so I decided to give it a go!
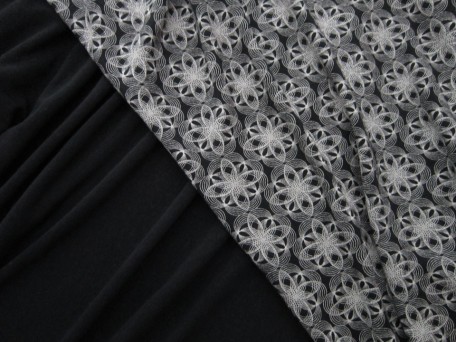
And for my main fabric, I chose this. The back side is a solid black. I loved sewing it.
All of my fabrics I purchased at Mill Ends in Beaverton, Oregon. Unfortunately they do not have an on-line catalog so it would be difficult to order from them if you are out of state but if you are ever in Oregon, they have two stores you can visit, one in Beaverton and the other in Portland, both with a very nice selection of some very beautiful fabrics.
Since I didn’t take any pictures while sewing this top/tunic together, I thought I would share with you some close-ups so you can get an idea of how it goes together.
The front bodice is in two parts while the back is one. Here is the back.
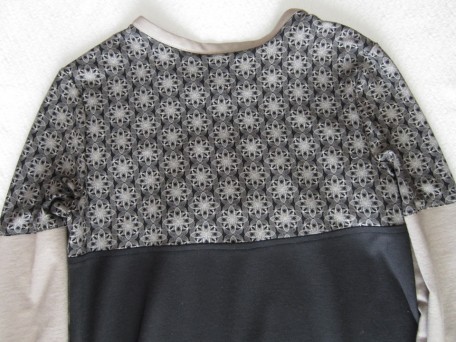
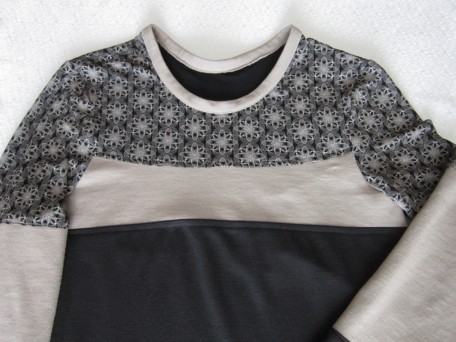
This is the front. Each section is top-stitched.
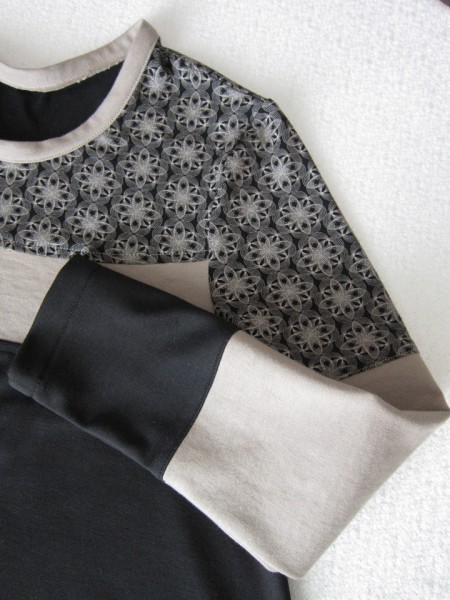
The neck band goes together like this:
1) You stitch it’s ends together so that it is a circle.
2) You next pin it to the neckline, right side to right side, stretching it slightly to match markings. I just marked centers and one shoulder since the seam goes on one of the shoulders.
3) Lastly, the band is then folded over the seam allowance to the inside with the edge turned under 1/4 inch and sewn in place. You end up with a 1 inch wide neck band. I thought this a bit bulky but the beige-y fabric which I already thought was a bit too heavy may have been a big part of the problem. I ended up cheating and didn’t turn the edge under 1/4 inch. This fabric doesn’t ravel so after sewing the band in place I just trimmed off the excess.
The skirt for the front and back is made from one of the contrast fabrics and I didn’t do any close-ups because it’s hard to do with a camera. If you look on the pattern, it is easy to see that the front is cut on the bias and has a upside down U shape while the back is cut an even length
I did lengthen the sleeves a bit since I wanted LONG sleeves. Remember… I’m still cold! My arm from shoulder to wrist is 21 inches long but the pattern pieces for the sleeve in a size 8 which I usually use, are only 19 1/4 inches. It looks to me from the picture on the pattern envelope that they are probably suppose to be 3/4 inch sleeves.. I think! Anyways, I needed to add 1 and 3/4 inches so I divided that number by 4 and then added 3/8 inches plus a smidge to each end of the 3 pieces for the sleeve (bottom of top – top and bottom of middle- and top of bottom). Here is a picture of a sleeve. Oh yes, and they too are top-stitched.
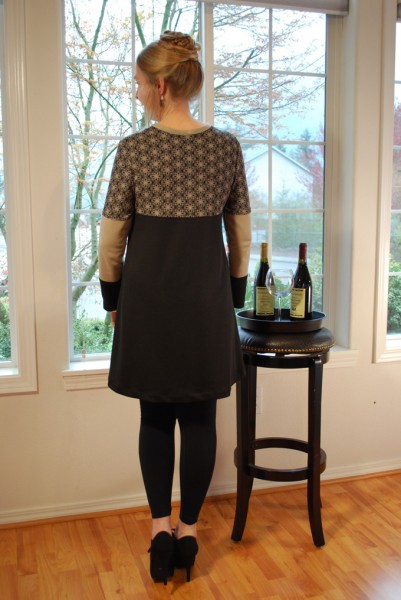
I decided before I even made this that I would wear it with black tights or leggings. Warm and comfortable! So this is the front.
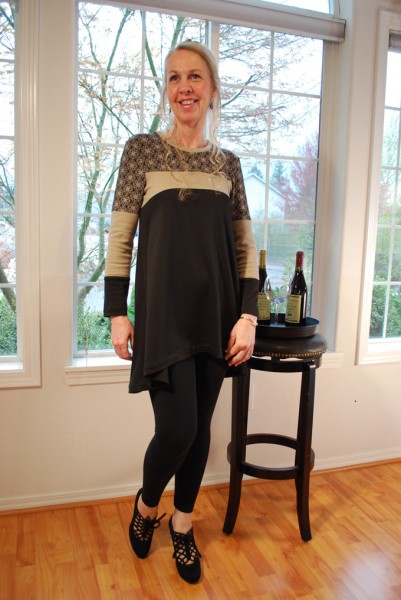
The back of course.
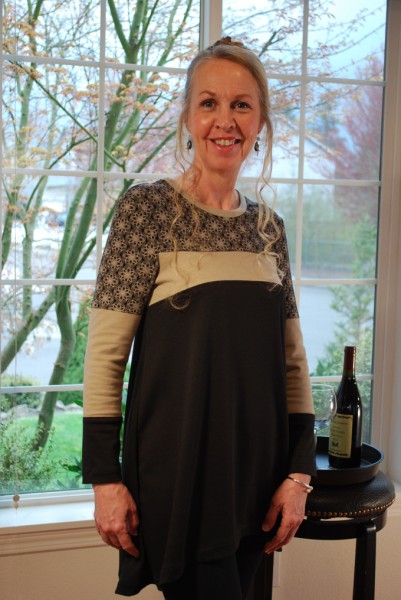
A close-up so you can see the color blocking a little better.
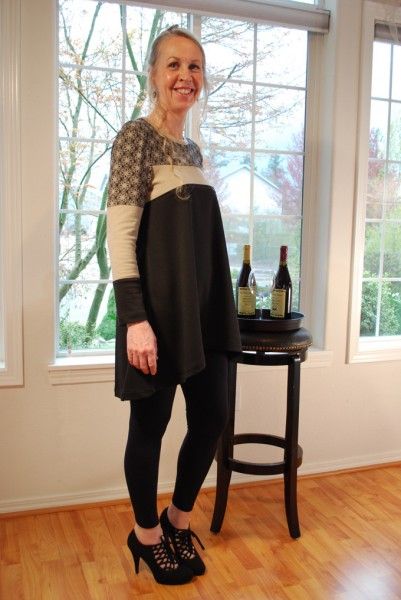
And another because, because… oh just because!
I have already started looking for more fabric to make several more of these. I am thinking one in coral and one in robin egg blue, oh and maybe one in lace… with contrasts that really complement! But of course, that’s if I can find just the right fabric I see in my mind! My next up and coming project I think you will really like. May even wear it to my next Curtis Salgado show! He is such an awesome rhythm & blues man! Sheesh… that means I better get sewing because I only have 2 weeks! Until then, enjoy the beginning of spring!
Salute! Jessica
About Me
 Portland, Oregon,
 United States
Hi there! I’m Jessica Brandon and I am a clothes-loving sewing artist. When I am not sewing, blogging or shopping for shoes for my creations, I fill in the remainder of my days spending time with my children, playing ice hockey, gardening and making and drinking wine!


Up Coming Projects:
Vogue 1426

Vogue 7881

McCall's 7089

Vogue 8997

Vogue 1431

Vogue 9006

Vogue 8991
