


The photo above is me during a hockey game I was playing in last week. Mind you, at the moment it was taken, I wasn’t sure if I was going to skate off the ice when the game was over, or have to be carried off on a stretcher from total exhaustion. I took a break from hockey for a few months so being in game shape I am not! My options are to either adjust or bail and since I’m not a quitter, somehow I will endure!
So what’s the point of this image? Please note the orange jersey over the 10 lbs. of gear. First of all, the orange is a horrid shade, is not my color and I did not choose it! My apologies to whom it may concern. And good-by to any idea that I might be a female! Feeling like I look pretty? NOT! After an hour and half on the ice sweating profusely with a bunch of guys also doing the same, when I leave the smelly locker room, I mentally return to my pink fluffy unicorns and glitter mind palace, envisioning myself wearing a dress! Truly, I do love to play hockey but this is one reason why I like to sew dresses for myself. So that being said, now I want to share with you a really cute one that I’ve finally finished.
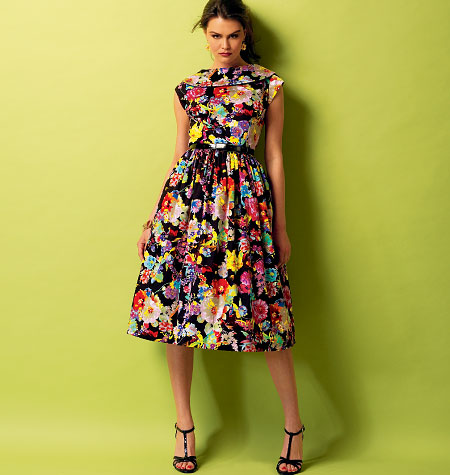
I first saw it last year on a Burda Style web page and no where could I find who the pattern maker was. Then on a pattern shopping day this last spring, you know, when you can buy 5 for $5.00, there it was, Butterick 5919 in their book and I knew I had to make it. It looks a little retro with the boat-neck and large peter pan type collar with a poofy skirt. Being short like I am, it’s maybe not the best style for me to wear but… I really liked it, it was pretty and so I was making it!
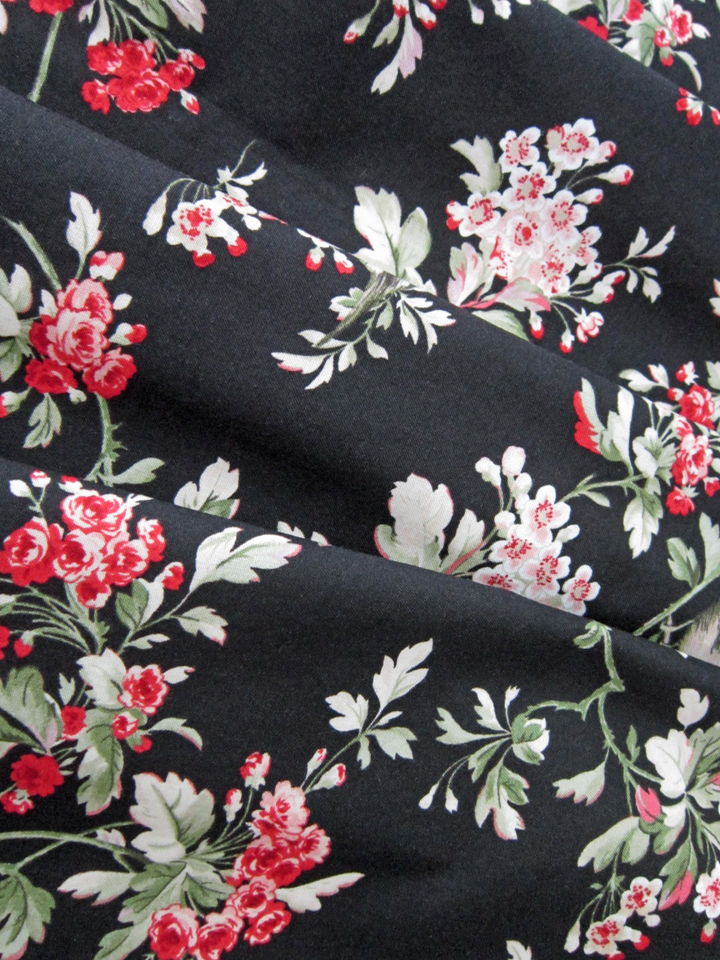
This was a design that definitely required a muslin. There was no way I was going to start chopping on the very beautiful fine cotton that I discovered at Mill Ends nor the silk that I chose to line it with until I did a practice run. Below is a picture of the fabric. I choose it from a selection the fabric store called the Downton Abbey collection. Get this… my choice of print was one of those thought characteristic of “granny” played by Maggie Smith. Hmm… I’m not talking anymore about this!
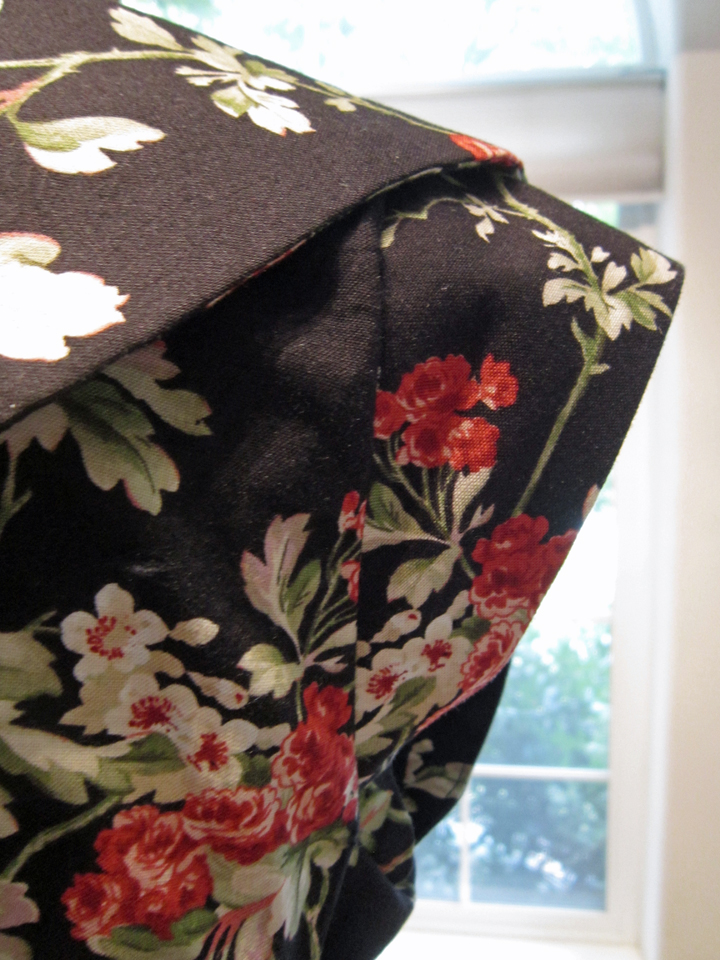
I ended up making 3 muslins of just the bodice before I was ready to make the dress. Why three? Well, it started off the way it should. I made the usual fitting adjustments and discovered when putting it on that the gathered bustline (see in picture below) didn’t feel right nor look right on me. It felt way too high! At least that was my opinion and that’s my story and I’m sticking to it!

Just to clarify, I have made so many dresses for myself that much of the time I don’t make a complete muslin because I have the feel for knowing what I need in circumference for my waist and hips and find it easy to adjust the bodice to those measurements. Plus, it’s less work! However, if I was sewing something really special, I would make a full muslin.
So Anyhoos, I’m pretty sure I was having a “derp” moment when I started making my 2nd muslin. I tweaked and adjusted the pattern pieces in order to drop the bustline and that’s when it happened! Thank goodness it was a muslin. I got to looking at my 2nd set of pattern pieces that I traced from the originals which included my new pattern changes and that’s when I saw the boo boos! Feeling totally frustrated, I quit working on the dress for several weeks… or more! When I once again felt the wind back in my sails, I broke out the tracing paper and then created muslin number three. Yeah! this time it worked and feeling happy and pleased, I was ready to make my dress!
Since I’ve already shared with you the “Happy” song by Pharrell Williams to express my happiness, I decided this time I would share this lovely postcard.

https://www.flickr.com/photos/jok22
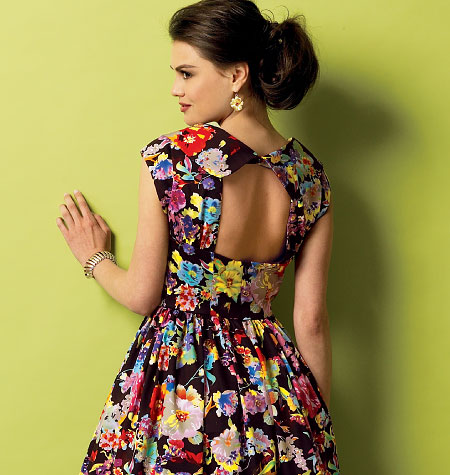
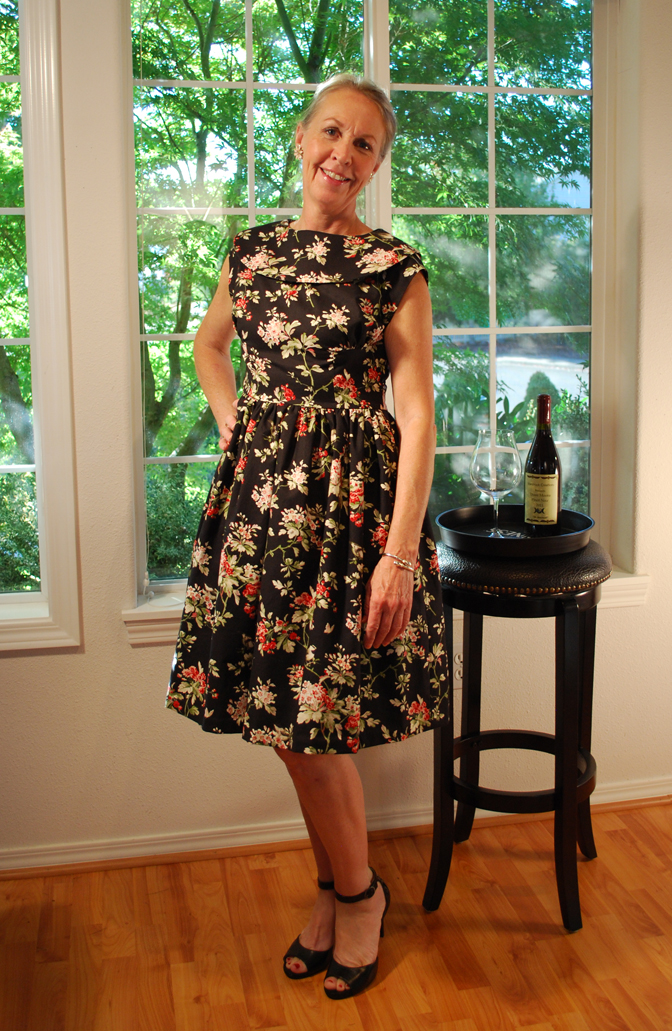
It was fun sewing this dress because it had such a neat design. I did discover however that when sewing the bodice to the bodice lining, sewing the armholes first before the neck, opposite of the pattern instructions, made it easier to check that the sleeves didn’t need any fixing! For me, one sleeve was error free and the other I needed to fix a tiny imperfection that I didn’t like. This would have been harder to do if the neck had already been sewn. If you make this dress, you will totally understand what I’m talking about! Here is a view of the collar and one sleeve on the finished bodice.
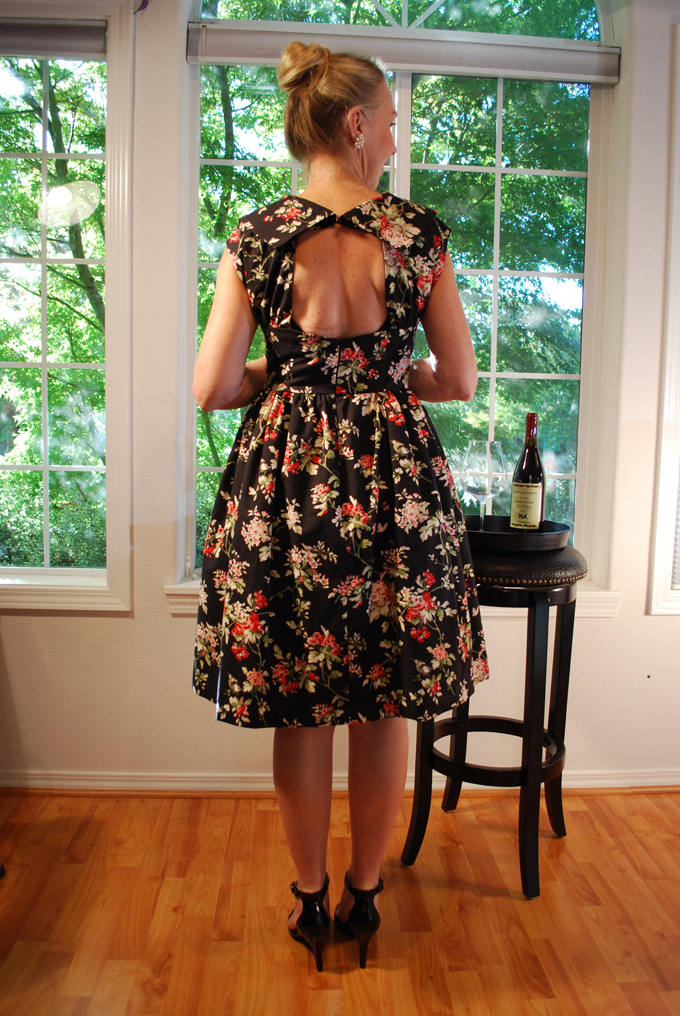
The upper back opening at the neckline closes with a single button and thread loop. An afterthought… maybe an elastic loop?
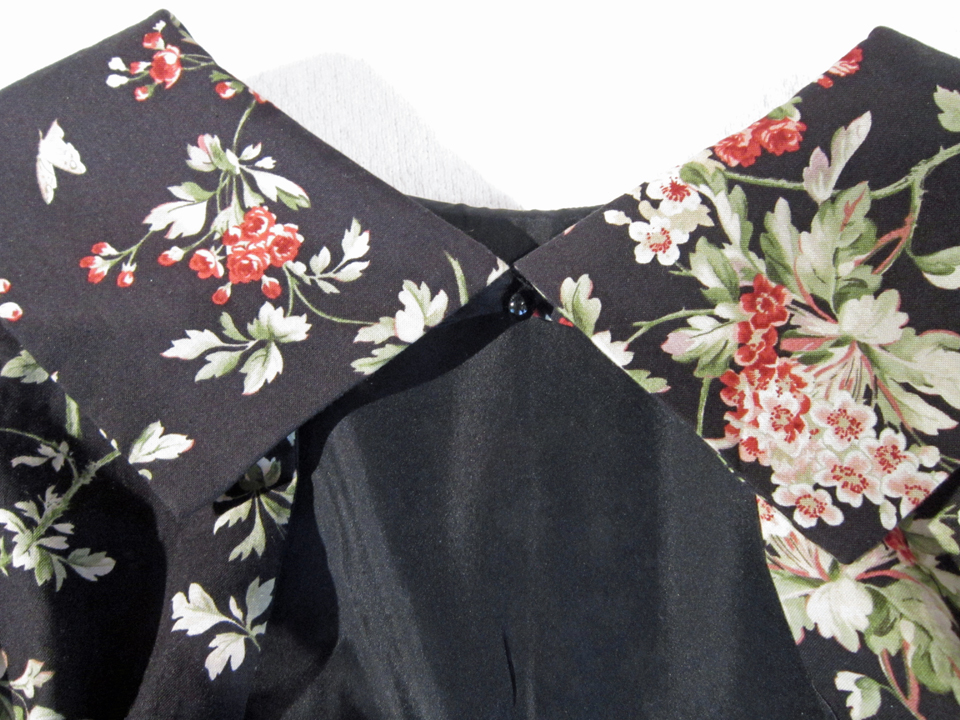
Of course, the back has the center cut-out which is why I thought this design was so cool!
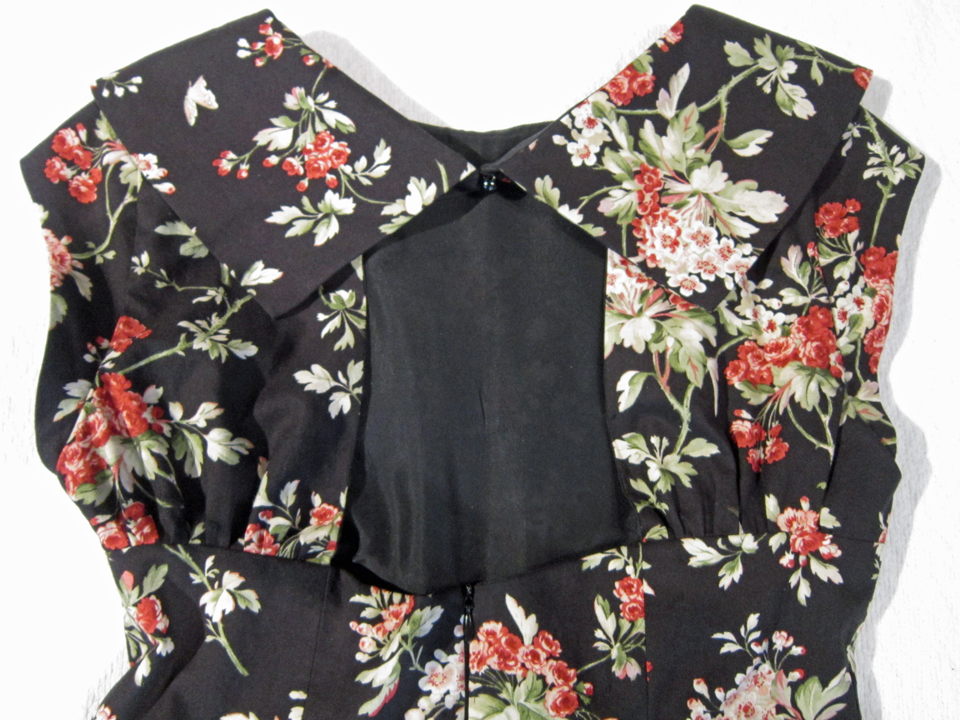
This is the front of the bodice. You can see the collar but unfortunately the gathers at the bustline are not easily seen due to the type of print on the fabric.

It is printed on the Butterick 5919 pattern envelope that the model in the picture is wearing a petticoat with the dress. This got me to thinking. I had just bought a McCall’s skirt pattern recently that included a petticoat, option F.

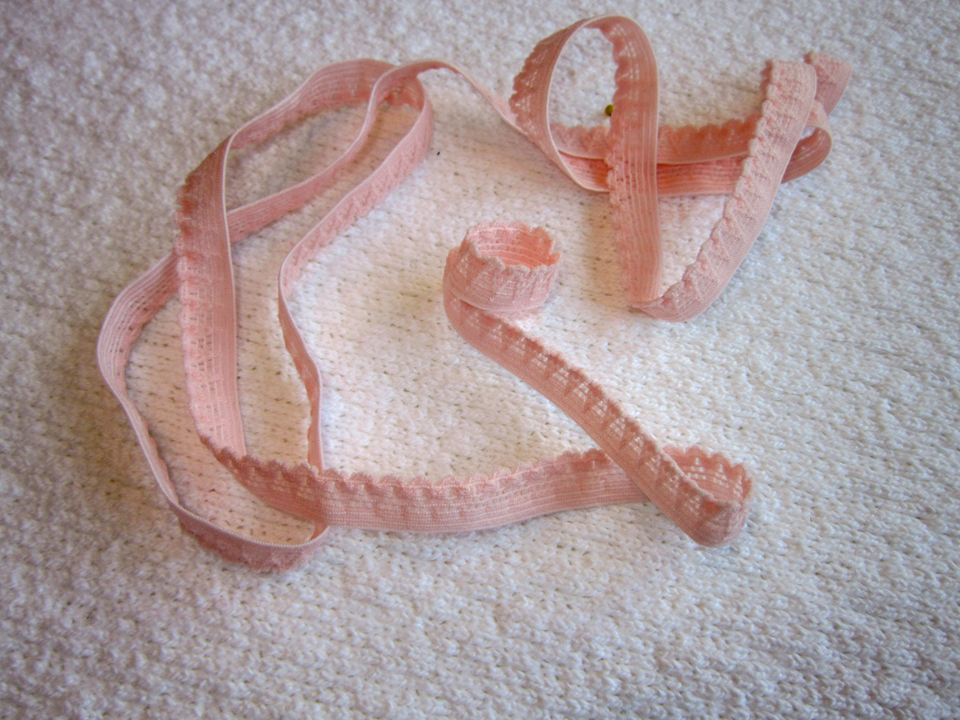
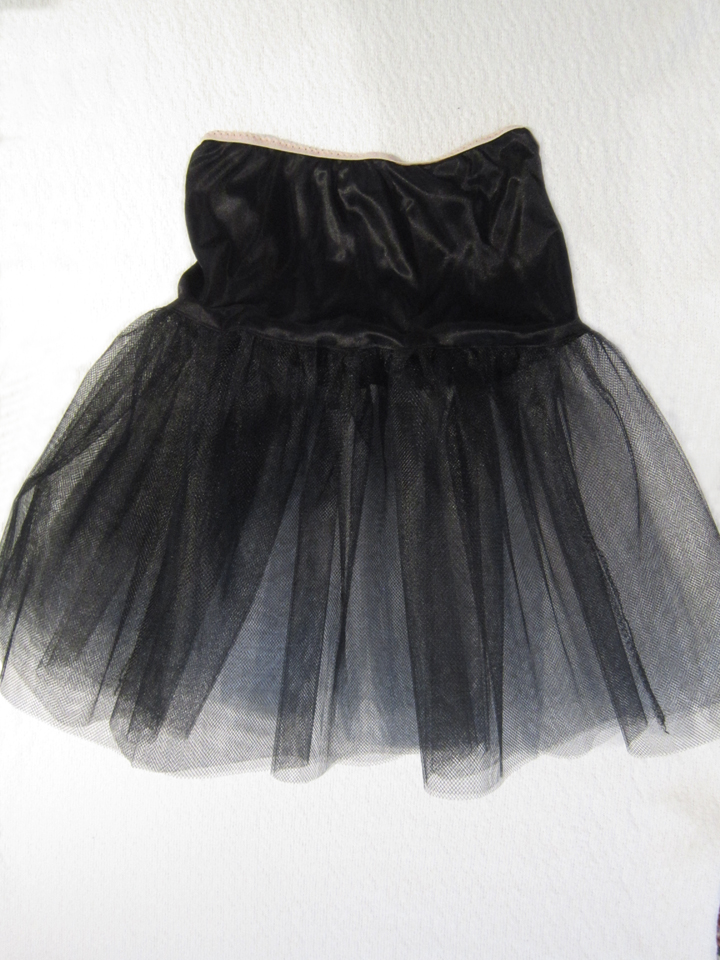
Before making it up, I wasn’t so certain that it was worth the trouble. Gathering petticoat netting! Yuck! It was actually not too bad though. I used black tricot and black petticoat netting and for some pretty, I chose this pink lingerie elastic.
I did discover a minor problem with the construction. The instructions have you sew the seam that connects the gathered netting to the upper section on the inside. I think it should have been on the outside. Why do I know this? Because when I wear it inside out… it doesn’t scratch!
Well, here’s my black petticoat, right-side out for the moment. It’s really not much to look at…
But when I wear it under my dress… it makes a difference!

The back is a lot of why I wanted to make this dress.
This is without the petticoat and there is a difference in how the skirt hangs!
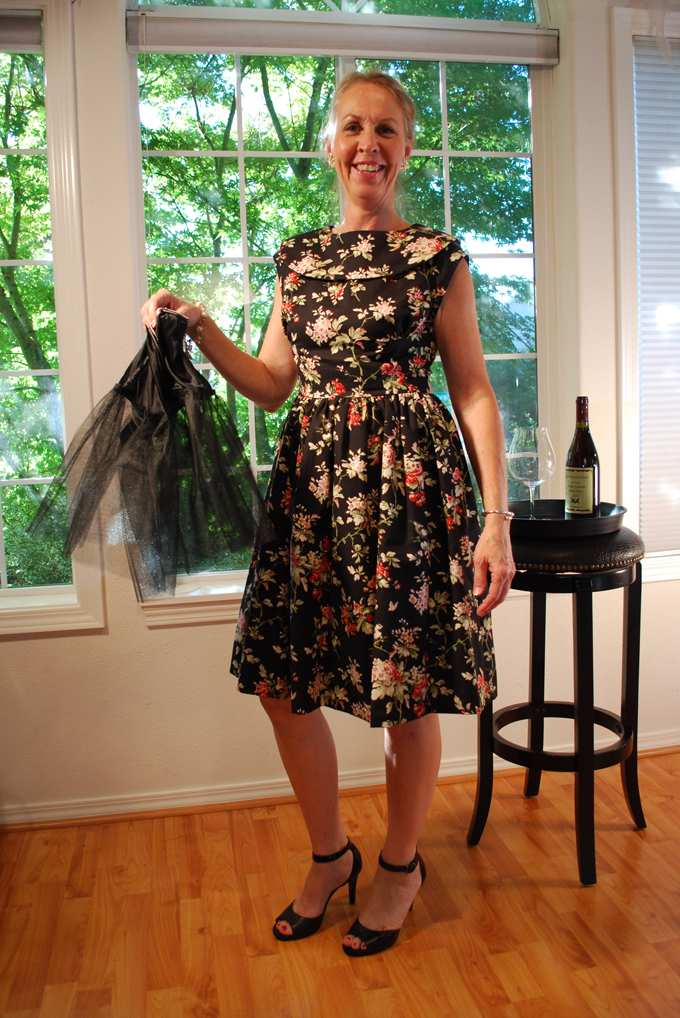
Go Petticoat!
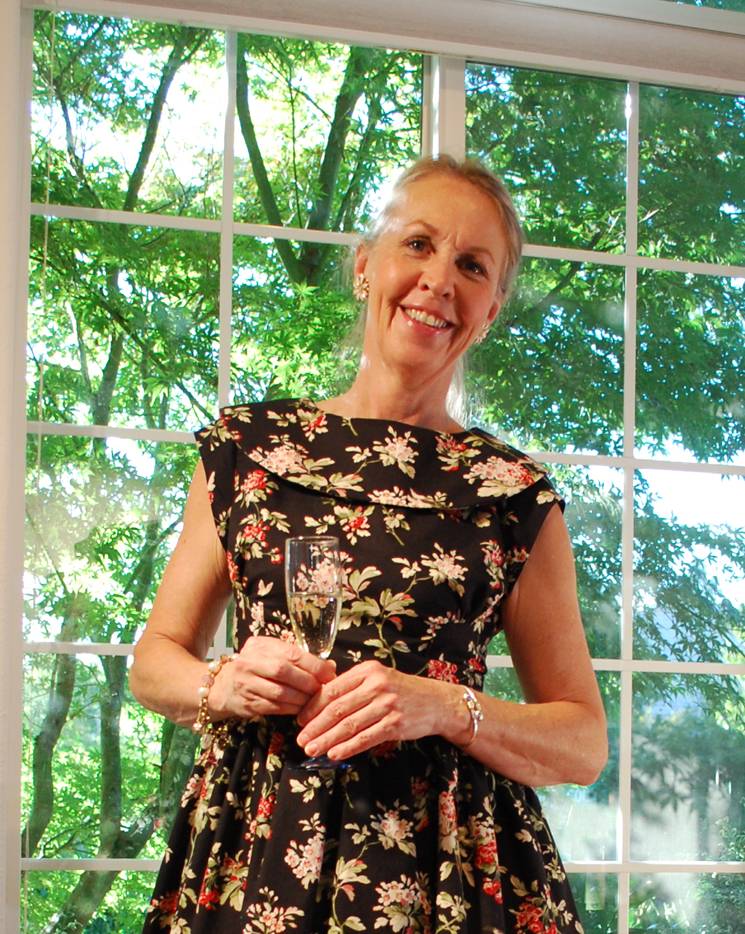
Yes… it’s champagne, not wine! What am I celebrating? Well… I think being alive, feeling pretty, and happy that I get to write about my wacky sewing adventures with you!
Salut! Jessica
2 Comments
Leave a Reply to Andrea Cancel reply
About Me
 Portland, Oregon,
 United States
Hi there! I’m Jessica Brandon and I am a clothes-loving sewing artist. When I am not sewing, blogging or shopping for shoes for my creations, I fill in the remainder of my days spending time with my children, playing ice hockey, gardening and making and drinking wine!


Up Coming Projects:
Vogue 1426

Vogue 7881

McCall's 7089

Vogue 8997

Vogue 1431

Vogue 9006

Vogue 8991

I am so grateful to you! I’ve just completely undone the lining on the because it went horribly at the sleeves. I’ll recut and research, doing the sleeves first 🙂
Hi Andrea! It’s hard to explain in words, the neck and sleeve scenario but you have discovered it! Just take a breath, relax and be at one with the fabric. I’m not an Obi-Wan Kenobi but I’ve learned that fabric has a mind of it’s own and one must work to get along with it! I bet on your second go, you’ll do just fine! Would love to see a picture when you get it finished!
Wish you the best – Jessica