

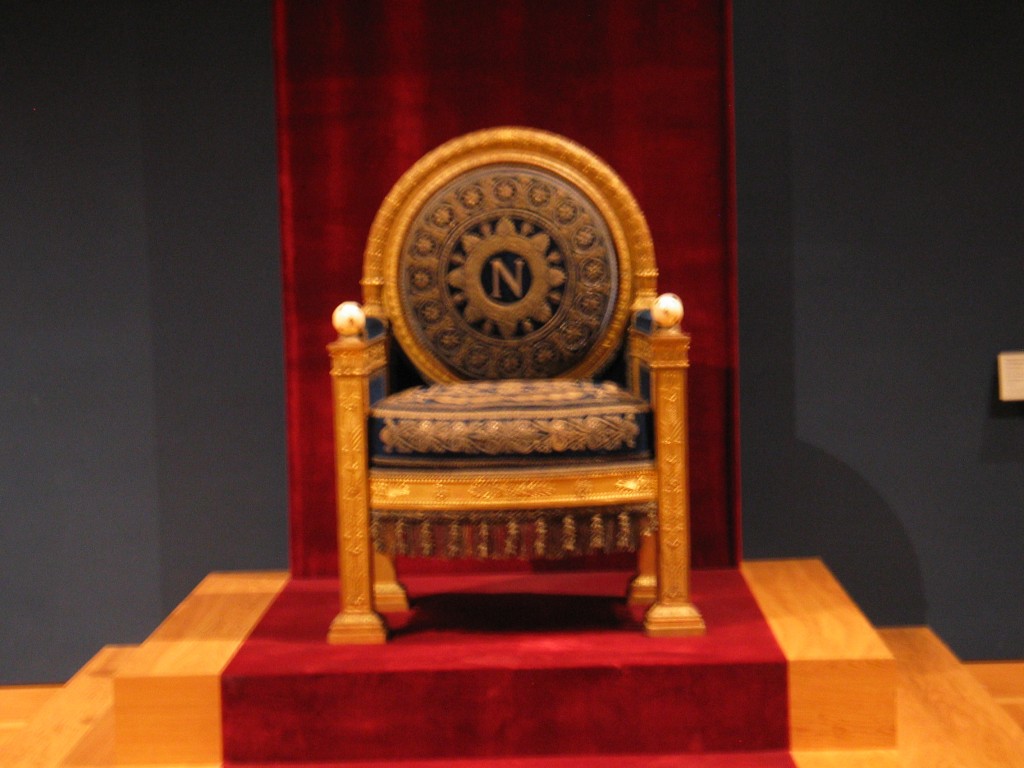
Napoleon Bonaparte’s throne
I think most everyone knows who Napoleon Bonaparte is and what you see in the picture above is his throne displayed in the Louve in Paris, France. There is an entire apartment within the Louve dedicated to all things Napoleon and it is breathtaking to see. My son, Jared, loves history and so it was a given that during our last visit to France that we had to visit the Louve and most definitely not miss this!
There is lots to read about Napoleon, lots of history, lots of tidbits which makes him interesting enough to style a costume after… such as the Butterick 4891 pattern.
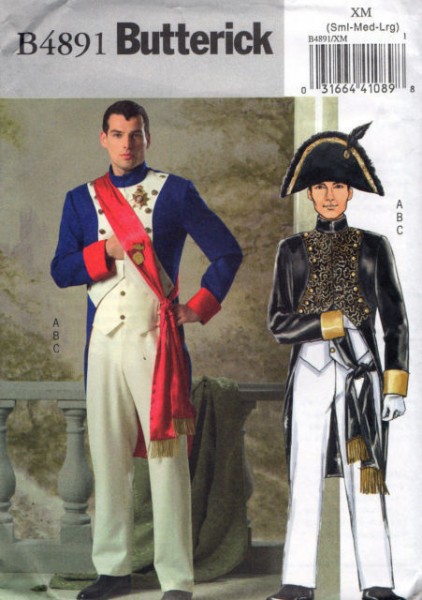
I thought this would be a fun pattern and costume to share with you and so included it in my scheduled line-up of costume posts. Then when it was time to dig it out of the costume closet and begin writing this article, I experienced several shockers! First, I have discovered that the Butterick website no longer has this pattern. It is not even listed in the out of print section and is spoke of on the internets as a vintage pattern. It’s selling anywhere from $26 to $38 dollars… Qu’est-ce que c’est? (English…What is this!) And secondly, I made this costume for Jared a few years back and… well… his sizing has changed… A LOT! Once again, what I thought would be quick and easy has turned into a laborious job but hey – since I have been making shirts for Jared, I have learned some things about fitting him which has saved my butt!
The jacket was my biggest obstacle to change up. Fortunate for me, while this pattern is considered a historical costume of a Napoleon French Revolution Uniform, it is not exact nor does it use period garment making techniques so I had free range on how I managed the changes. The pattern instructions are easy to follow and the design of it is well put together and an enjoyable sew. For the main part of the jacket, I used a royal blue denim and as per the pattern added a white garbardine overlay to the front. It is a lined jacket and so I chose the only obvious color to line it with… red! I loved working with the contrasting colors and for the first time, sewing on buttons was a treat because that’s when I began to see the jacket really become officially a uniform!
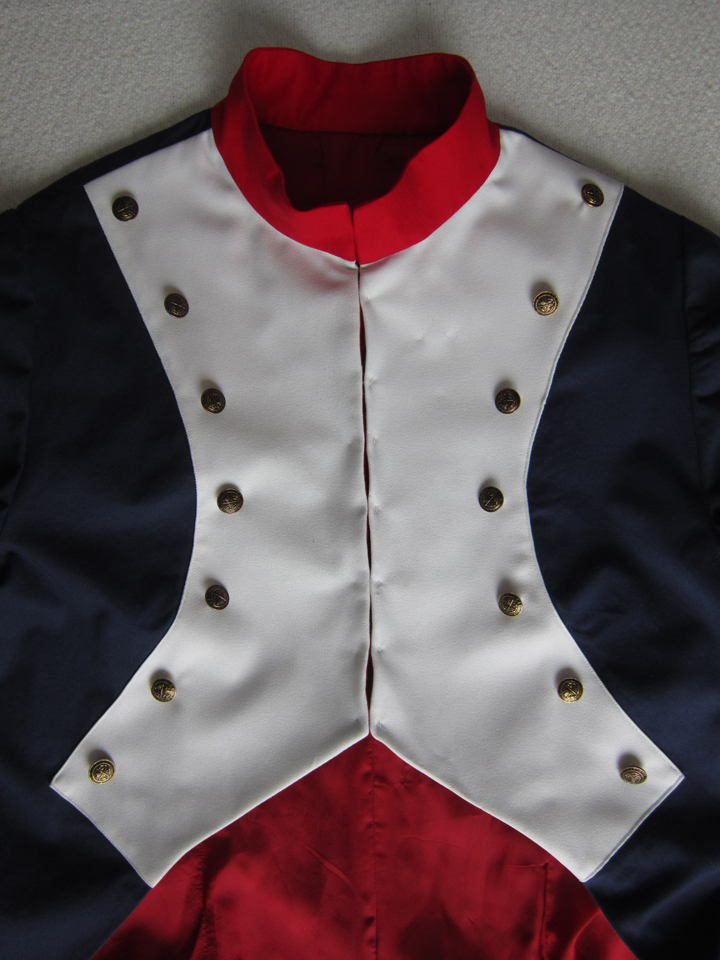
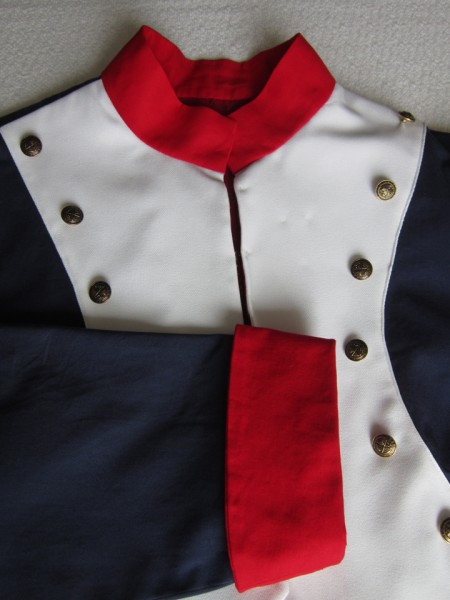
As you can see in the picture above and below, I chose to make the collar in red since that is what all the Napoleon images on the internets show it to be. I think the mandarin style makes it quite attractive. I do wonder though when the mandarin collar was introduced into military fashion. I guess I have a homework assignment!
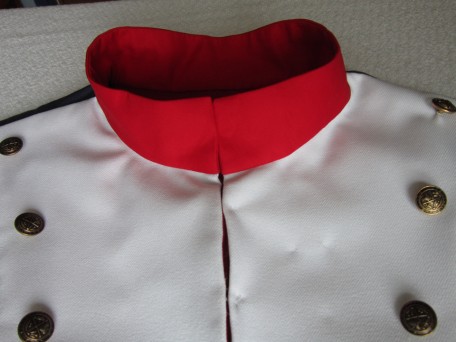
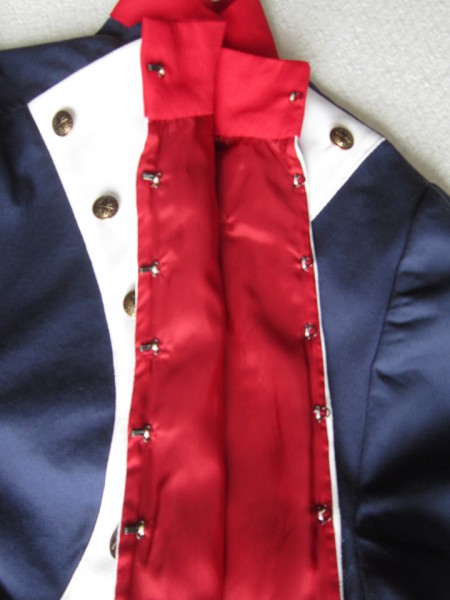
Given that this is a mens garment, I chose to use big jumbo hooks for closures.
Of course the red cuffs brought it all together.
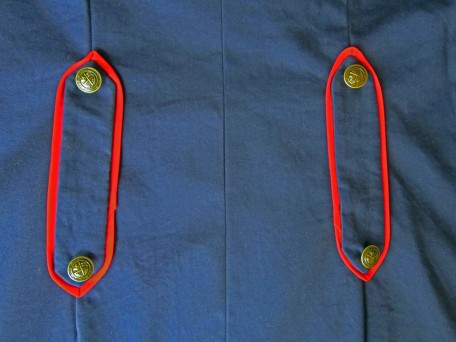
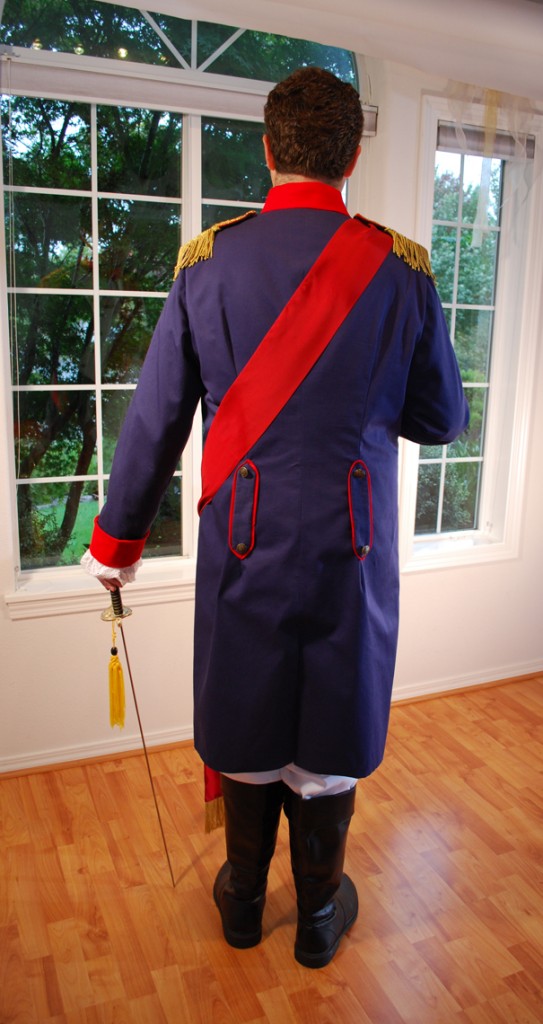
When I first made this costume, I didn’t do any research to see how close to the real deal it was, I just followed the instructions and made it! Now that I’m back re-doing it, and at the same time searching on-line, I’ve discovered that the shape of the tails, the cuffs, as well as the kind of buttons, etc, may not be correct so you can’t very well call this a true historical period costume but it certainly is easy to adapt it to what you need. For instance, the back of the jacket seemed so plain that I decided to borrow a detail from some of the images I viewed and with some scrap fabric I had left, did this.
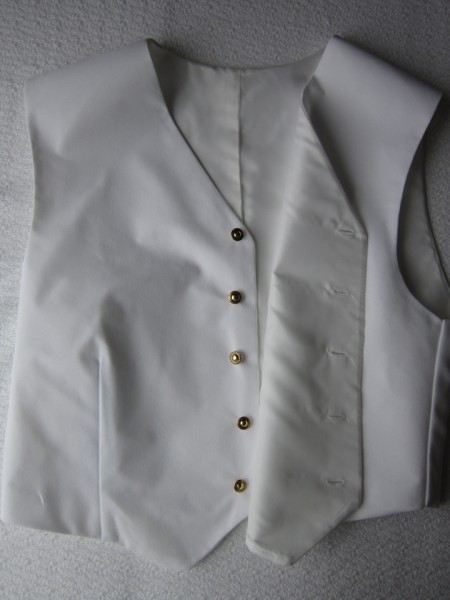
Next is the vest. It is simple and quite traditional. As you can see, I did it all in white using the same gaberdine fabric as in the pants and jacket.
The pants are nothing more than two legs with an elastic waist. I hate elastic but when I made these pants, I was following pattern instructions so I just went with it. And… the costume was for my son and I knew he didn’t care one way or the other as long as he had a costume! I thought the Gaberdine fabric I used was too thin so I lined the pants with Bemberg (Ambiance) and this made a big difference. I didn’t take a picture though because… because… I’m a nerd and forgot!
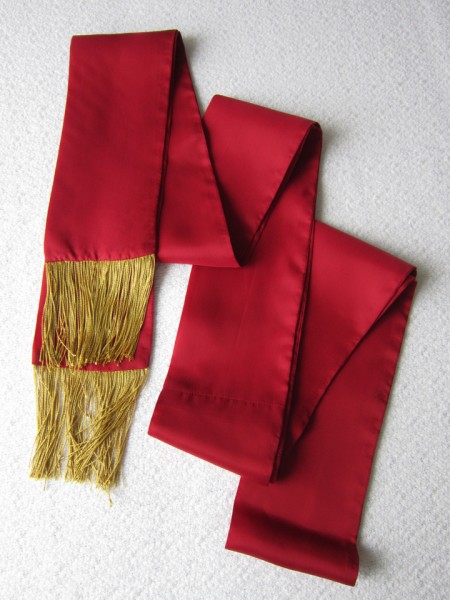
The sash definitely gives this uniform some panache! I used a lining fabric from the JoAnn store that cost me $12.99 a yard and it was not silk! The gold fringe is oh so uniform.
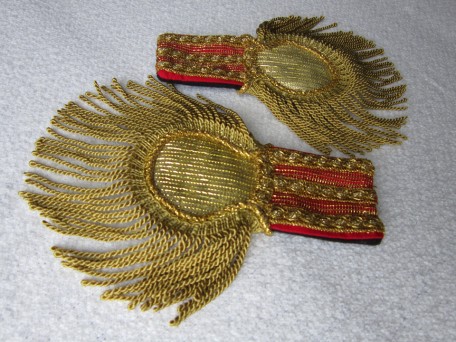
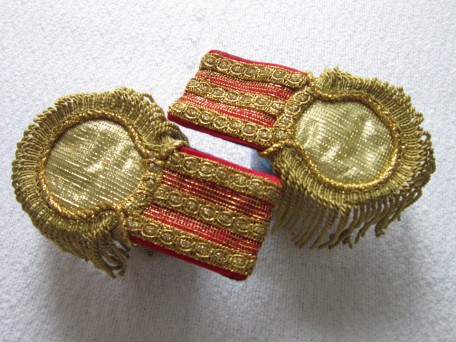
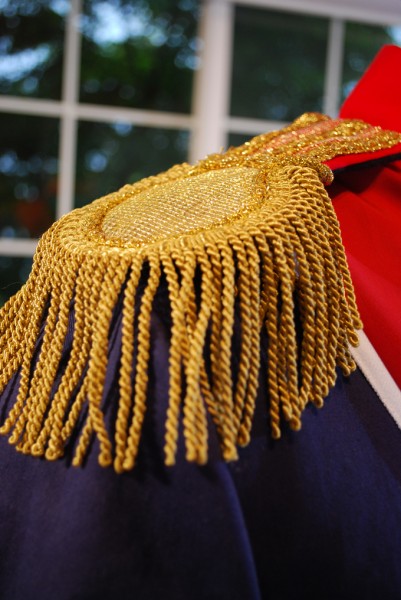
Shoulder boards seemed to be in order as I was re-working this costume. I found a gorgeous pair on a historical costume site for 400.00 euros but… I decided that it might be better to eat and have electricity so decided to try making them myself. This is what I ended up with.
Now – there is the matter of a bicorne hat. Long story short… after spending most of the week rebuilding the costume and another day making the shoulder boards, I decided to bypass the bicorne and get this posted! The hat sure would have made the costume complete but I am choosing not to stress! I think you all would agree with me! 🙂
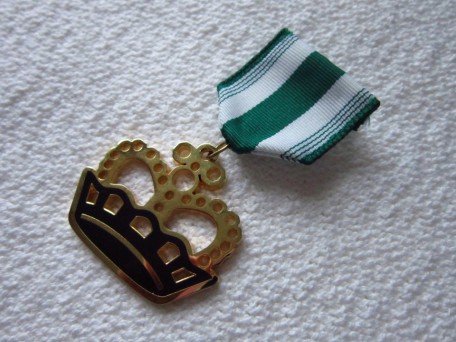
We dug up a shirt and a pair of boots from our costume collection but for the life of me, I can’t remember where I purchased them from. I do know that I found both on-line. The shirt, my son Dylan calls a “doilie shirt”. You know… like doilies that you put on tables and set nicknacks on! He has an attitude huh! We tried to find medals that looked like what Napoleon wore that wouldn’t cost a fortune… it didn’t happen. It was compromise. I created something from what Jared decided he could accept.
Now it is the time for the man of the hour in all his regalia that his mom made!
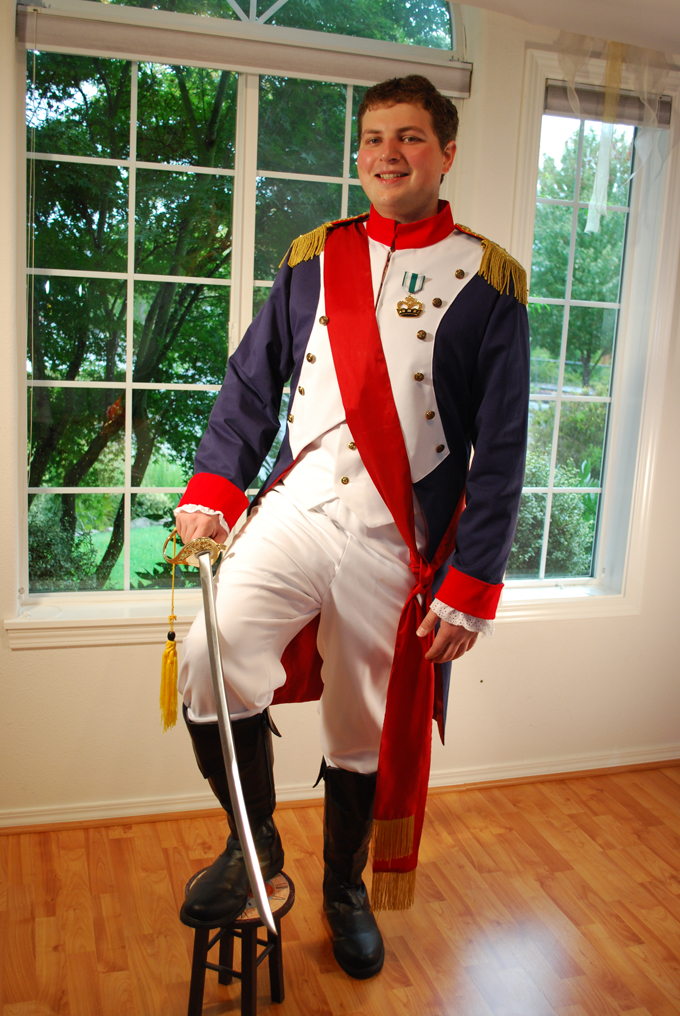
On the back are the bands that I added. They are really suppose to be a little longer based off the historical images that I’ve seen but I was working with scraps!
I think the shoulder boards or epaulettes really stand out on the costume.
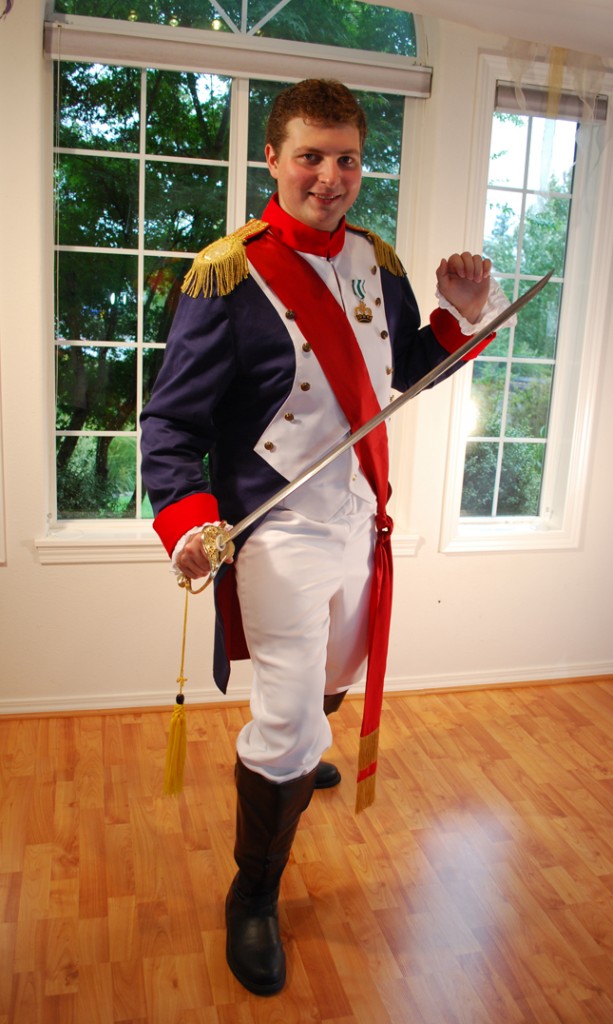
Probably need to include this one…

Jared is a fencer and so is having a bit of fun here!
Well…it is 4 1/2 weeks until All Hallow’s Eve and I’ve already started counting down! I hope you are enjoying the costumes so far. Next week’s show-and-tell will be a bit of a mix-up… a little bit of pirate, a little bit of Victorian and a whole lot of fun!
Salute! Jessica
7 Comments
Leave a Reply to MariaDenmark Cancel reply
About Me
 Portland, Oregon,
 United States
Hi there! I’m Jessica Brandon and I am a clothes-loving sewing artist. When I am not sewing, blogging or shopping for shoes for my creations, I fill in the remainder of my days spending time with my children, playing ice hockey, gardening and making and drinking wine!


Up Coming Projects:
Vogue 1426

Vogue 7881

McCall's 7089

Vogue 8997

Vogue 1431

Vogue 9006

Vogue 8991

Hi, Beautiful job. I am currently making this costume for myself for Halloween. You mentioned that you lined the pants. Is that something you recommend? Did you just use the patterns for the pants to cis out similar pieces of lining and sew them in? Or did you use any fusible interface? Any other tips appreciated! Thanks so much! Merci!
Hi Doug! Thank you. I think it’s brilliant that you are making this costume, happy to hear it.
I lined the pants because to me, there’s nothing worse than seeing someone’s underwear under the white pants they are wearing. I certainly didn’t want my son to have to deal with this faux pas so that’s why I lined them! LOL It also feels nice to have a smooth fabric against the skin and pants are no exception. Bemberg, also known as Ambiance is what I used. It breaths like silk but not as spendy, especially if you can purchase it with a coupon at Joann Fabric.
Yes, I did use the pant pattern pieces for cutting out the lining pieces. A tip: Before folding the top edge of the waist down to create the casing, baste the lining to the fashion fabric, then serge or finish the edges. By doing it this way, when folding the layers down to create the casing, you will have a nice finished edge and won’t have to fold all the layers under which may be quite bulky depending on the fabric you are using. Lastly, when folding the fabric/lining layers down for the casing, make sure to allow for the width of the elastic plus a smidge extra so the elastic can pass through easily.
I hate to say it Doug, but honestly, I don’t remember whether I used interfacing or not. The denim I used was fairly heavy, but I’m thinking I may have used it in the collar and cuffs.
Overall, this is a pretty easy costume to make and no doubt, you will rock it when you wear it! Would love to see pictures so please share!
À la vôtre! Jessica
Thanks for the tips…it came out great!
If this works…it’s on my Facebook page:
https://scontent.xx.fbcdn.net/hphotos-xtf1/t31.0-8/12188129_10153647187267456_5339523217001966860_o.jpg
The link worked and you look fabulous Doug! Job well done. So what is your next project going to be? Can’t wait to hear!
À la vôtre! Jessica
Oh my goodness-that is brilliant! Grelt job! I’m curious: How did you make the shoulder thingies?
Hi there Maria! The shoulder thingies were a bit of a challenge at first. I had no idea how I was going to do it when I started… the mind works in mysterious ways! LOL
I had some sinamay on hand that I use for fascinators and decided that it would work well for the base of the shoulder boards. I cut two rectangles from the sinamay, then made a casing out of wool felt that the rectangles would fit into. I slipped stitched the openings of each closed. You can’t really see the black felt because I then hand sewed red trim around one end and along the two extending sides of each, that I made from bias I cut from the fabric I used for the collar and cuffs. Red is hot when it comes to anything military! Next I cut two circles out of the felt and then made cases to fit them out of unbleached muslin because I wanted that color. I then sewed the circles, each on one end of the two rectangles. After that, it was another trip to JoAnn fabric store to search through the trimmings section looking for ideas of what to do next! After spending $16.00 I went home and finished them! The unfortunate thing was that I ended up not using most of what I just bought but rather more of what I had on hand! You know how that works I’m sure! Anyways, I played with trims, sewed and removed things a few times, until I finally achieved what I could live with!
My son is a fencer, and this costume was so up his alley! And those shoulder boards were worth the headache!