

My Wisteria is blossoming!
There is so much I want to share and I’m not sure just where to start. I try so hard to not write monster blogs. I’ll do my best to try and keep it minimal. But I’m drinking wine while I do this so I really can’t make any promises! With the absolutely beautiful weather we are having, it seemed such a nice idea to sit on the patio, sip Chardonnay and write to you.
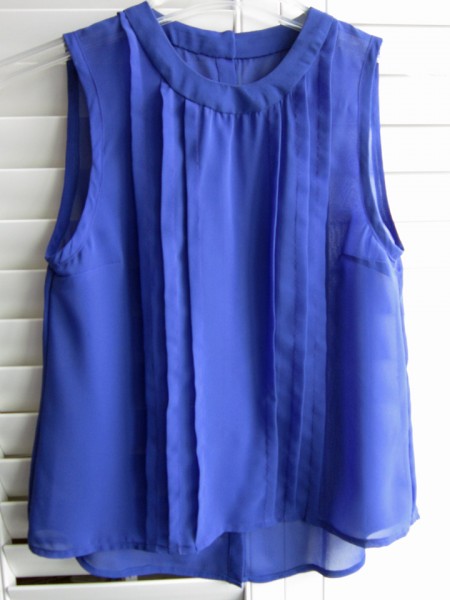
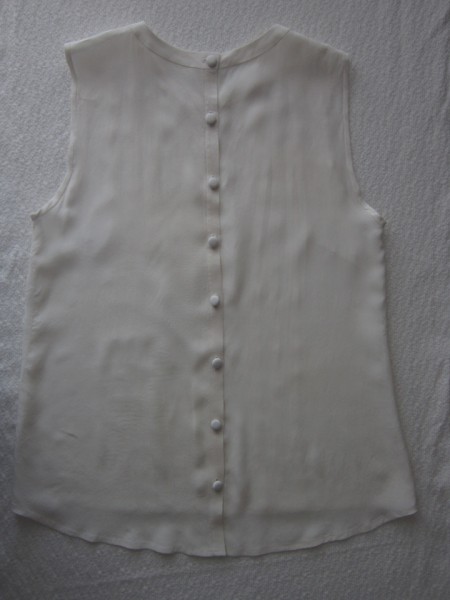
OKay… so… let’s start with the blouse that I designed, drafted and made in some inexpensive fabric that I posted about a while back. I was inspired by a blouse that Emily VanCamp wore on the TV show, Revenge. I can’t believe I’m still watching it… I hate TV because of all the commercials! It’s Netflix’s fault because that’s where I got hooked on it! No rant, promise! Anyways, there were a few discrepancies when it was finished, but overall I was happy with it. After putting it on the back burner for a bit to work on Vogue 8972 dress project, I decided to go back at it so that’s where I’ll dive in.
Here is a picture of it and if you want, you can go here to read more about it..
 There were a few things that I needed to change.
1) The front was a little shorter than I wanted. When I extended it in length on my pattern, I also had to redraw the back at the side seams to match the front side seams but that was pretty simple.
2) The pleats were in sort of weird positions when I had to apply the neck yoke so I moved them more towards the side and away from center.
3) Instead of a 1 inch neck yoke, I reduced it to 3/4 inch. Not sure if I like it the way it is now or better when it was an inch wide, but…it’s just a minor detail, nothing to get excited about. (still not super happy with how the yoke lays around the neck but that just may be the way I am sewing it on)
4) The last two changes were lowering the front and back neck lines, 1/4 inch for the front and 1/2 inch for the back.
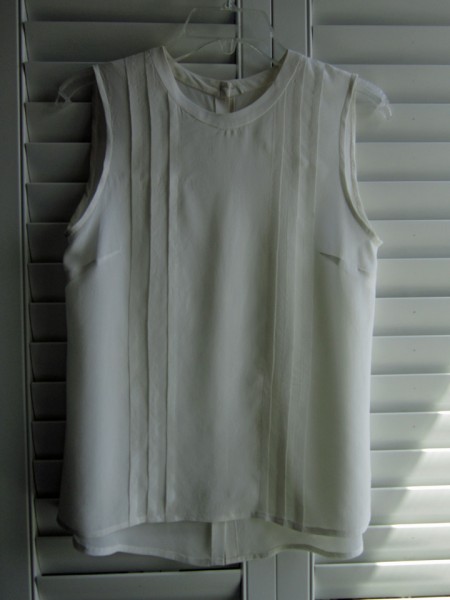
So this time when I made it up, I used some cream silk Crepe De Chine that I had. I love sewing with silk because it feels so luscious! And it feels so nice to wear, though I did discover that it’s still pretty shear. Will wear a cami under it unless I feel really bold on a night out with the girls! Woo hoo!
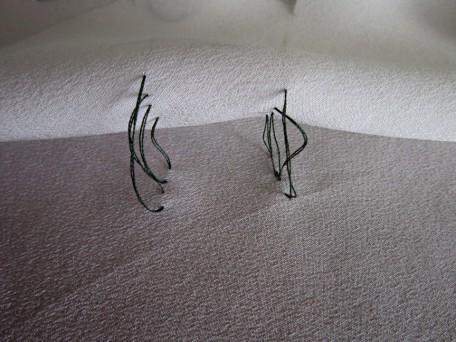
Haute Couture fascinates me, so while I was making this top, I decided to pretend I was a famous fashion designer, sewer kind of person (I think the wine is starting to kick in! :P) and have some fun. I used tailor tacking to mark my pleats. It was still a bit of a challenge to get all the folds equal, and running evenly straight from top to bottom but I managed.
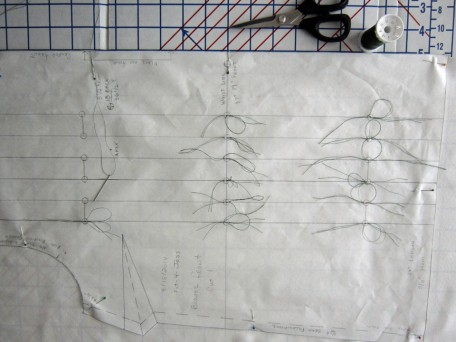
I took these pictures to show you what they look like. If you look at the picture on the right, it’s a closer view. For those that aren’t sure how to do this I’ll try to briefly explain.
I insert my sewing needle downward (like I am sewing) about 1/8 alongside the center point (this can be whatever side you want to start at) and then push the needle back up through the center point, then I push the needle back down through the center point again, and bring it back up about 1/8 inch away from the center opposite from where you started. Through this process, from the start when I first pull my thread through, I leave several inches at the end where I started, a big loop at the center and leave several inches at the end where I finished. (see the picture above on the right)
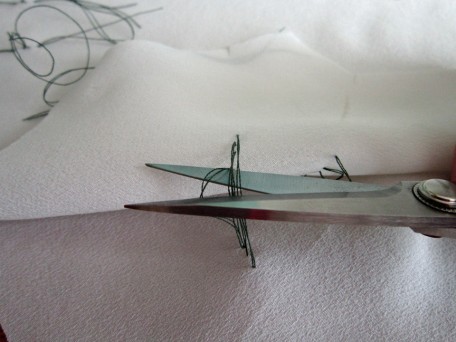
When you have finished, you pull the pattern tissue/paper away. Most of the time the tissue just slips off unless it hangs up at the center point where you stitched in and out. When this is done, you then have to clip the thread that lies between the two sides of cut fabric pieces, leaving equal parts of thread for each side.
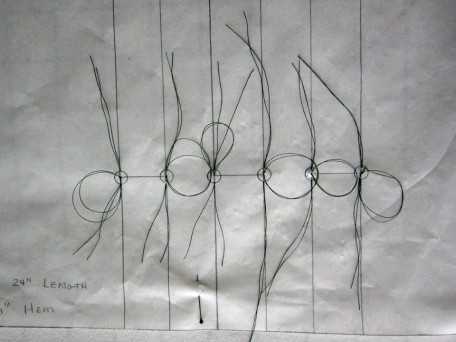
So when it was time for me to make my pleats (on the outside), I used these tailor tacks for my guides.
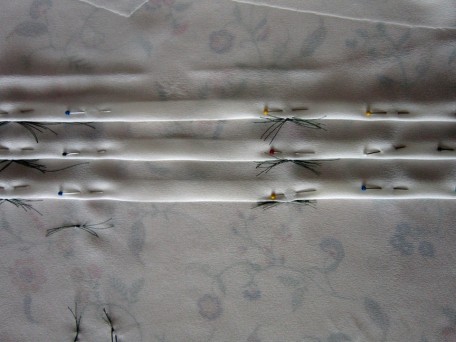 The tacks under the pleats are for the dart.
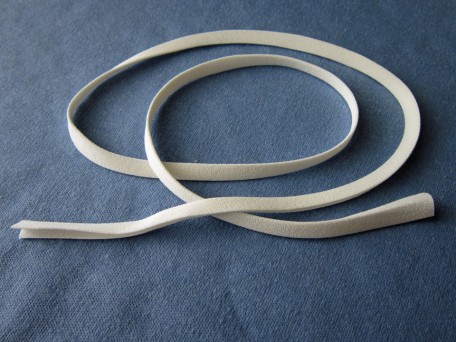
A Hong Kong finish on the seams was my first plan but I didn’t have any silk organza on-hand so I ended up using my pinking shears on the seam allowances. I did finish my armholes with bias I cut from my Crepe De Chine and then used my 1/2 inch Daisy Bias Tape maker. Silk looks so smooth so I didn’t want to use any top-stitching in my construction. This meant a lot of hand sewing but hey, I’m a famous designer sewer person and I do like to hand sew so this worked out just fine.
My silk bias tape turned out very nice… thank goodness!
Covered buttons look so elegant so this was also a feature that I wanted to include in my silk blouse. They are not hard to do. You can buy the metal buttons and the tool to make them. Here’s how it works.
1) First, you have to cut out circles of fabric. The package that the buttons come in has a template. They don’t have to be perfect, just large enough to cover the round metal cap. I did a double layer because the Crepe De Chine was too sheer.
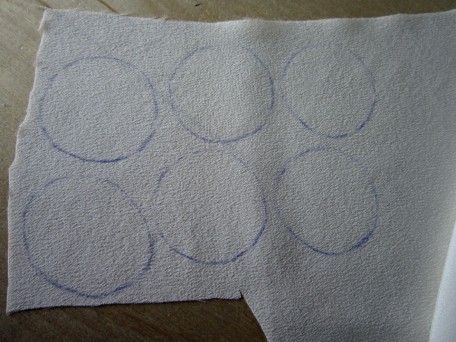 One of my circles looks a little oval. I was not drinking wine at the time!
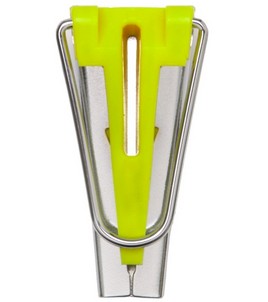
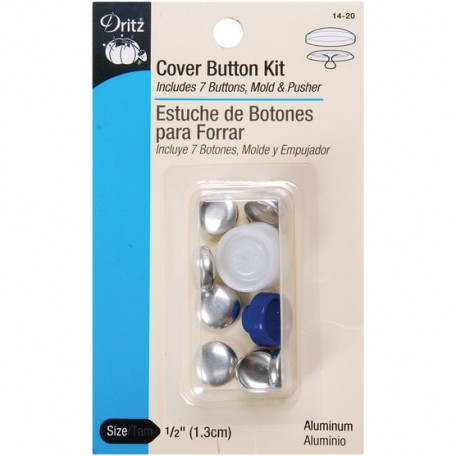
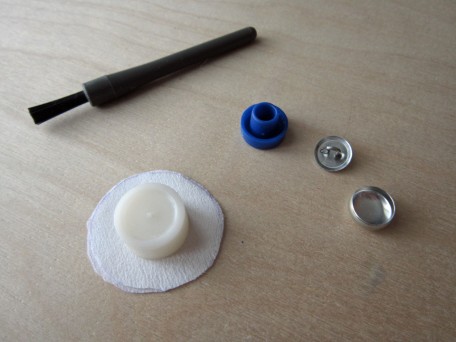
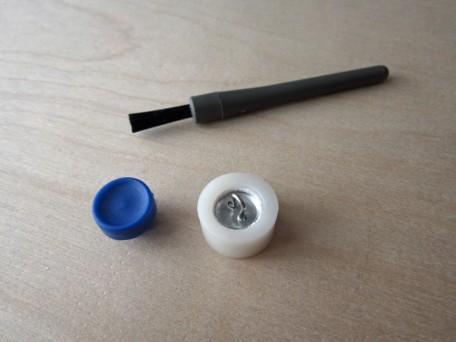
2) You gather up all your widgets. The metal button dome and matching back, the blue pusher and white mold tools that you can purchase in a package from most sewing stores including JoAnn Fabric. My sewing machine fuzz remover is my tucking weapon! You’ll see in a minute.
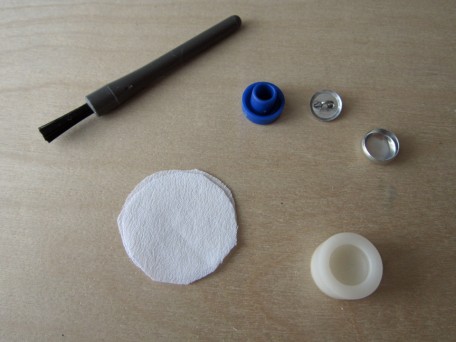
I used the #20 which is 1/2 inch.
3) Next – Center the white mold over your fabric. You’ll probably figure out your own technique for doing this. I’m just trying to explain this in steps so bear with me.
4) Now flip it over and place the dome part of the button, top down over the top of the fabric.
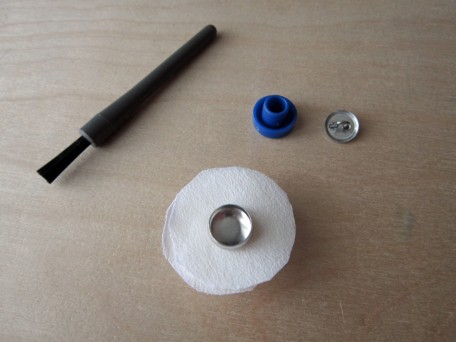
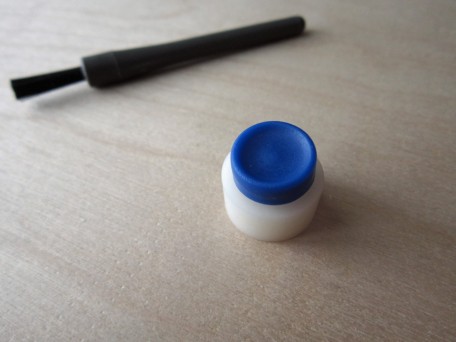
5) With the fabric sandwiched between the mold and the button top, now push the metal button top down into the mold.
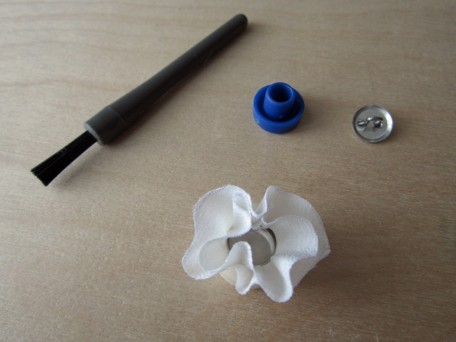
6) Here is where my fancy fuzz tool comes in. Oh… and my circles of fabric are larger than they need to be. Yes, there is a template and I could have cut out the exact size from my fabric but this is where things can go bad. The exact template size j-u-s-t fits and if the circles aren’t perfect and if everything is not centered, then it’s a bomb! I purposefully cut the circles larger to see what I could get a way with. With the non-fuzz removing end, I tuck in all the fabric as neatly and smoothly as I can.
7) The button bottom is now placed with the flat end down over the folded fabric.
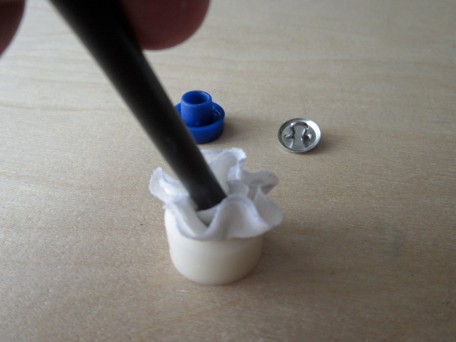
8) While holding everything in place, you take the blue pusher and place it with the opening over the top of the hook part of the button bottom and then squeeze it and the white mold together.
9) When you are done squeezing, then comes the moment of truth… did it work. This is how it feels to me almost every time!
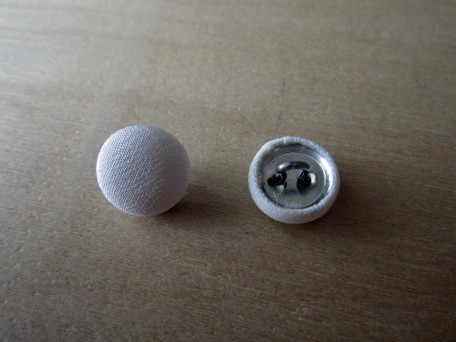
Voila! Silk covered buttons. If I was really going all out Haute couture,
I would have also covered the button bottoms.
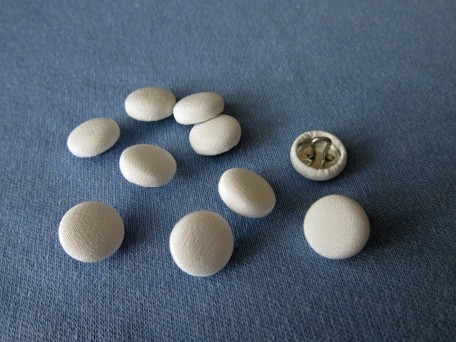
Here are all my finished buttons with several extra if one comes apart or I lose one!
Here they are sewn onto my blouse.
Oh yes, and I also hand bound all my button holes. They are not too bad, but with practice I know I can get better!

The front of the blouse with all the pleats…
Well I think I’ve written a monster, but… it’s all for you! With that I’m going to just keep on going because the next part is the cool part! At least I think it is!
Remember the title of this post that included Vigoss Skinny Jeans Renewed. Well… I purchased a pair last year, several pair in fact. Getting skinny jeans that fit me is tricky business. In order to get them over my thighs, I have to get a slightly larger waist. On one particular occasion, I decided to buy a pair in a waist size that fit so I wouldn’t have to wear a belt. I proudly wore them shopping for the first time a few weeks later and the legs were so too tight that as I walked, they would pull down. It was awful! My coolness that day melted into a day of hell! My first thought when I got home was to hurk them in the garbage. Then I thought, maybe I can fix them to somehow fit me so I tossed them in the “later days” project pile and forgot about them! Then, last month at the American Sewing Guild garment lunch bunch group meeting, one lady who I so adore, Lottie, suggested we do a sewing challenge. Different ideas were tossed around but I think what was most important was that we try to remake, or renew something showing our creative side. I went home and pondered this while digging through the “later days” pile and there they were, those evil skinny jeans! I knew what I was going to do… I was going to make a skirt out of them.
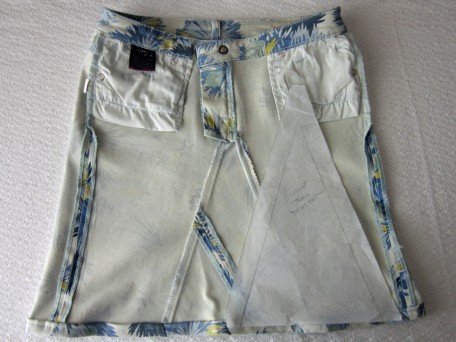
I took out the inseams first. Then I calculated how long I wanted the skirt to be including the hem, then cut off the legs! Served them right! There was now missing fabric in the center of the front and back shaped like triangles. Using pieces of tracing paper that I laid under the edges, I drew these shapes. Then I added an inch on the two sides for my seam allowances. and used them as pattern pieces. After removing the inseams from those evil skinny legs, I played with my pattern pieces until I figured out how I wanted them to look. I decided to stay on the side of caution and only cut out the back side first because it was the larger section and I wanted room for error. It took several tries on both sides until I got the fit I wanted but it wasn’t much trouble. I think the hardest part was sewing in the tip of the triangle on the top because I was sewing through the felled seam on the jeans. It’s all experimental so you just have to go with the flow.
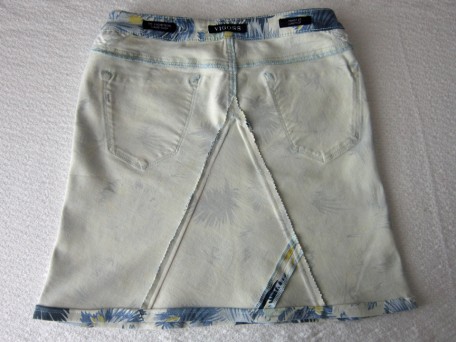
Here is my new skirt on the inside and the template.
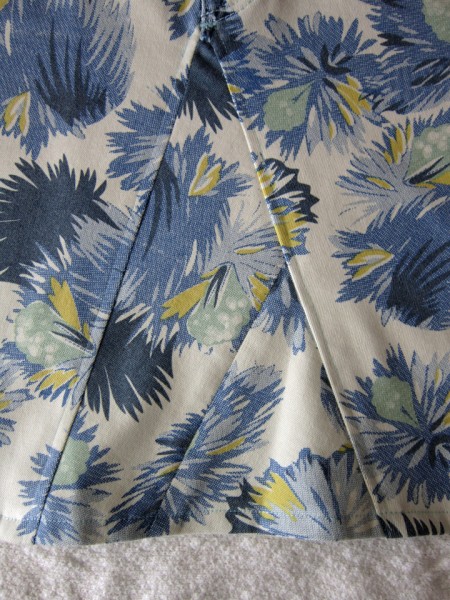
On the outside. I top-stitched along the two sides of the triangle at 1/4 inch.
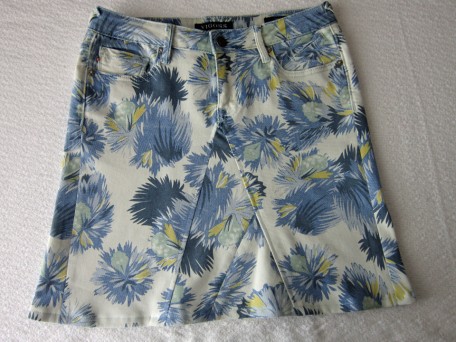
Close-up of the V
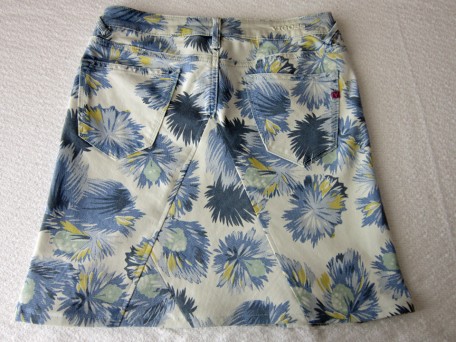
And the back on the inside…
And on the outside…
Well, there it is! My very own silk blouse and newly invented Vigoss skirt! It took me a trip around Africa to explain it all but there are so many things that I wanted to share with you and by golly I did it! Take care and will be back soon!
Salute! Jessica
2 Comments
Leave a Reply to Kyleigh Cancel reply
About Me
 Portland, Oregon,
 United States
Hi there! I’m Jessica Brandon and I am a clothes-loving sewing artist. When I am not sewing, blogging or shopping for shoes for my creations, I fill in the remainder of my days spending time with my children, playing ice hockey, gardening and making and drinking wine!


Up Coming Projects:
Vogue 1426

Vogue 7881

McCall's 7089

Vogue 8997

Vogue 1431

Vogue 9006

Vogue 8991

The cream shirt is sublime! Really fantastic work!
Thank you Kyleigh. There are a few other styles I plan to create using the base pattern, and then it is my hope to make it available for purchase. Ultimately, I would prefer it to not be a printable pattern, rather one made from tissue that comes in an envelope. I figure if I’m gonna dream, it might as well be big!
I apologize for not getting back to you in a timely manner, but the short of it… my household has been cursed with mono and the doctor thinks I was the guilty party that started it! It’s been a crazy year so far for me. I sure hope you are having a great one!
Take care Kyleigh!
Jessica