

Blouse in Silk plus Vigoss Skinny Jeans Renewed
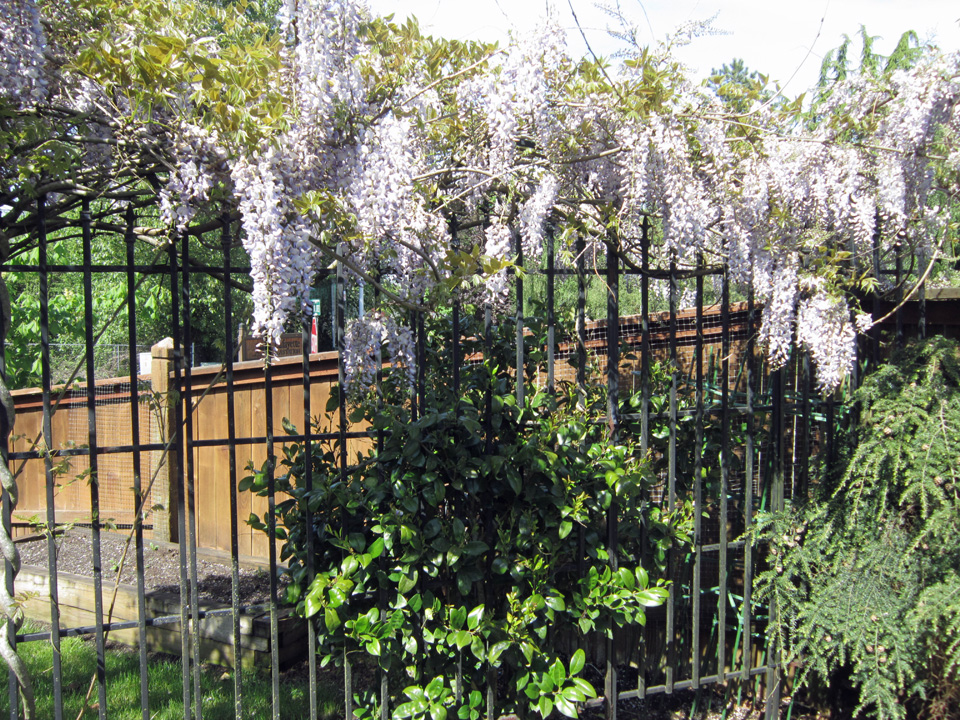
My Wisteria is blossoming!
There is so much I want to share and I’m not sure just where to start. I try so hard to not write monster blogs. I’ll do my best to try and keep it minimal. But I’m drinking wine while I do this so I really can’t make any promises! With the absolutely beautiful weather we are having, it seemed such a nice idea to sit on the patio, sip Chardonnay and write to you.
OKay… so… let’s start with the blouse that I designed, drafted and made in some inexpensive fabric that I posted about a while back. I was inspired by a blouse that Emily VanCamp wore on the TV show, Revenge. I can’t believe I’m still watching it… I hate TV because of all the commercials! It’s Netflix’s fault because that’s where I got hooked on it! No rant, promise! Anyways, there were a few discrepancies when it was finished, but overall I was happy with it. After putting it on the back burner for a bit to work on Vogue 8972 dress project, I decided to go back at it so that’s where I’ll dive in.
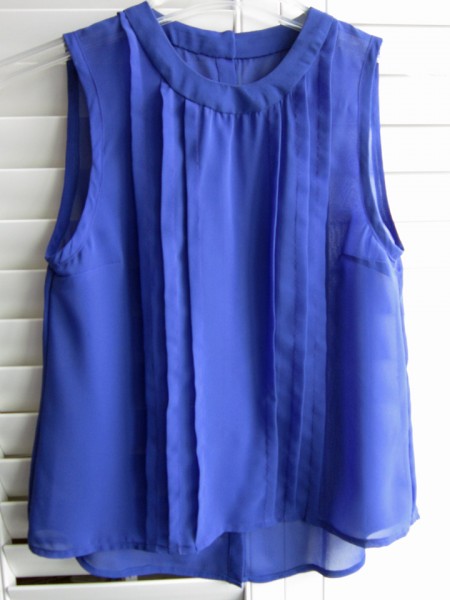
Here is a picture of it and if you want, you can go here to read more about it..
 There were a few things that I needed to change.
1) The front was a little shorter than I wanted. When I extended it in length on my pattern, I also had to redraw the back at the side seams to match the front side seams but that was pretty simple.
2) The pleats were in sort of weird positions when I had to apply the neck yoke so I moved them more towards the side and away from center.
3) Instead of a 1 inch neck yoke, I reduced it to 3/4 inch. Not sure if I like it the way it is now or better when it was an inch wide, but…it’s just a minor detail, nothing to get excited about. (still not super happy with how the yoke lays around the neck but that just may be the way I am sewing it on)
4) The last two changes were lowering the front and back neck lines, 1/4 inch for the front and 1/2 inch for the back.
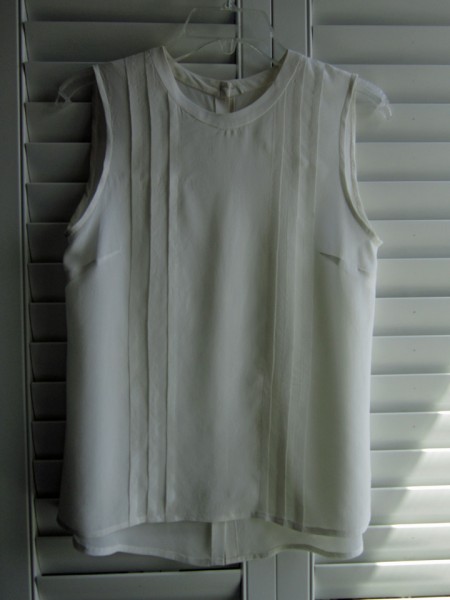
So this time when I made it up, I used some cream silk Crepe De Chine that I had. I love sewing with silk because it feels so luscious! And it feels so nice to wear, though I did discover that it’s still pretty shear. Will wear a cami under it unless I feel really bold on a night out with the girls! Woo hoo!
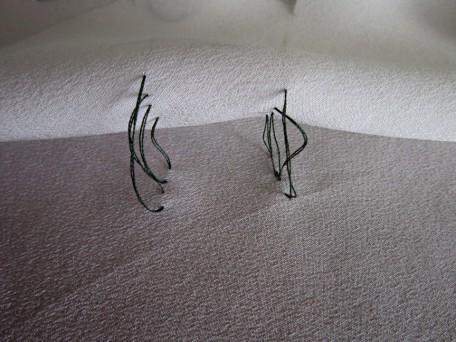
Haute Couture fascinates me, so while I was making this top, I decided to pretend I was a famous fashion designer, sewer kind of person (I think the wine is starting to kick in! :P) and have some fun. I used tailor tacking to mark my pleats. It was still a bit of a challenge to get all the folds equal, and running evenly straight from top to bottom but I managed.
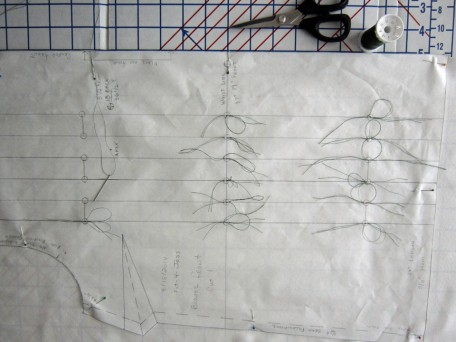
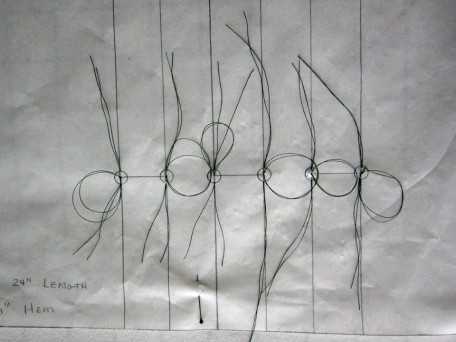
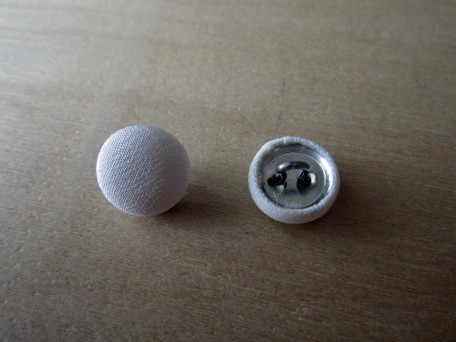
I took these pictures to show you what they look like. If you look at the picture on the right, it’s a closer view. For those that aren’t sure how to do this I’ll try to briefly explain.
I insert my sewing needle downward (like I am sewing) about 1/8 alongside the center point (this can be whatever side you want to start at) and then push the needle back up through the center point, then I push the needle back down through the center point again, and bring it back up about 1/8 inch away from the center opposite from where you started. Through this process, from the start when I first pull my thread through, I leave several inches at the end where I started, a big loop at the center and leave several inches at the end where I finished. (see the picture above on the right)
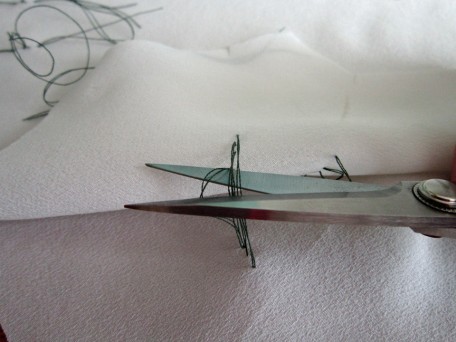
When you have finished, you pull the pattern tissue/paper away. Most of the time the tissue just slips off unless it hangs up at the center point where you stitched in and out. When this is done, you then have to clip the thread that lies between the two sides of cut fabric pieces, leaving equal parts of thread for each side.
So when it was time for me to make my pleats (on the outside), I used these tailor tacks for my guides.
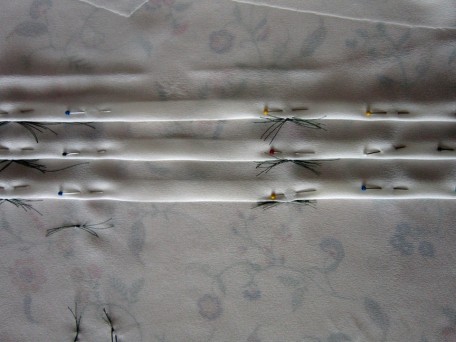 The tacks under the pleats are for the dart.
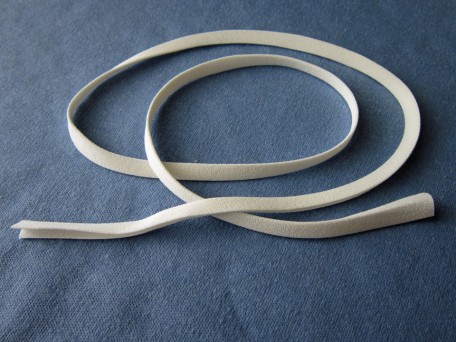
A Hong Kong finish on the seams was my first plan but I didn’t have any silk organza on-hand so I ended up using my pinking shears on the seam allowances. I did finish my armholes with bias I cut from my Crepe De Chine and then used my 1/2 inch Daisy Bias Tape maker. Silk looks so smooth so I didn’t want to use any top-stitching in my construction. This meant a lot of hand sewing but hey, I’m a famous designer sewer person and I do like to hand sew so this worked out just fine.

My silk bias tape turned out very nice… thank goodness!
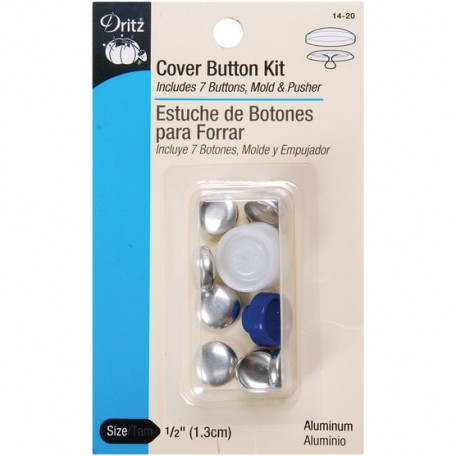
Covered buttons look so elegant so this was also a feature that I wanted to include in my silk blouse. They are not hard to do. You can buy the metal buttons and the tool to make them. Here’s how it works.
1) First, you have to cut out circles of fabric. The package that the buttons come in has a template. They don’t have to be perfect, just large enough to cover the round metal cap. I did a double layer because the Crepe De Chine was too sheer.
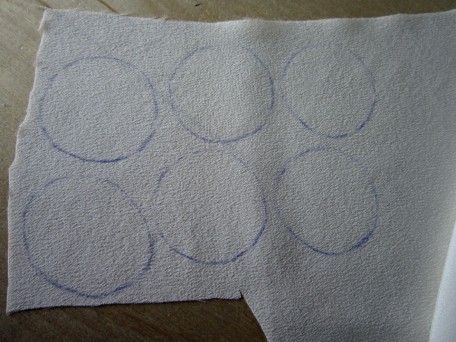 One of my circles looks a little oval. I was not drinking wine at the time!
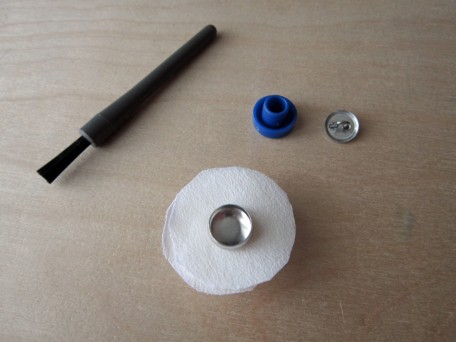
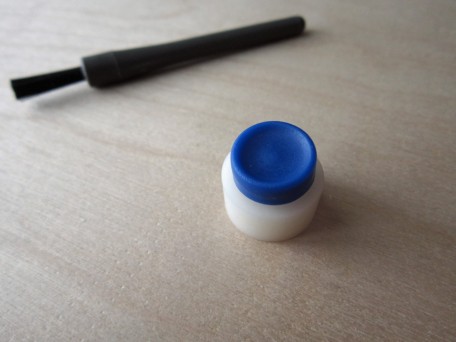
2) You gather up all your widgets. The metal button dome and matching back, the blue pusher and white mold tools that you can purchase in a package from most sewing stores including JoAnn Fabric. My sewing machine fuzz remover is my tucking weapon! You’ll see in a minute.
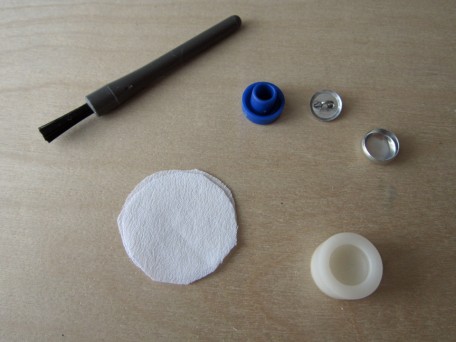
I used the #20 which is 1/2 inch.
3) Next – Center the white mold over your fabric. You’ll probably figure out your own technique for doing this. I’m just trying to explain this in steps so bear with me.
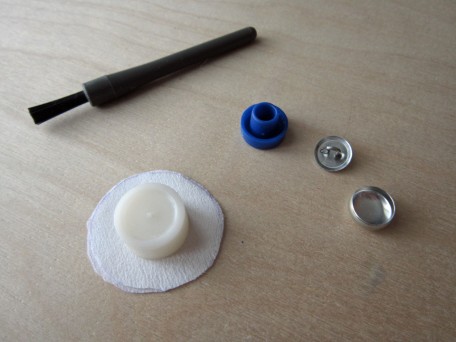
4) Now flip it over and place the dome part of the button, top down over the top of the fabric.
5) With the fabric sandwiched between the mold and the button top, now push the metal button top down into the mold.
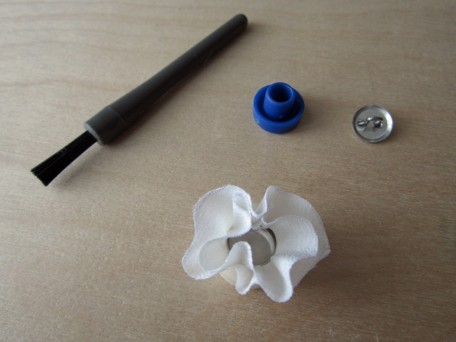
6) Here is where my fancy fuzz tool comes in. Oh… and my circles of fabric are larger than they need to be. Yes, there is a template and I could have cut out the exact size from my fabric but this is where things can go bad. The exact template size j-u-s-t fits and if the circles aren’t perfect and if everything is not centered, then it’s a bomb! I purposefully cut the circles larger to see what I could get a way with. With the non-fuzz removing end, I tuck in all the fabric as neatly and smoothly as I can.
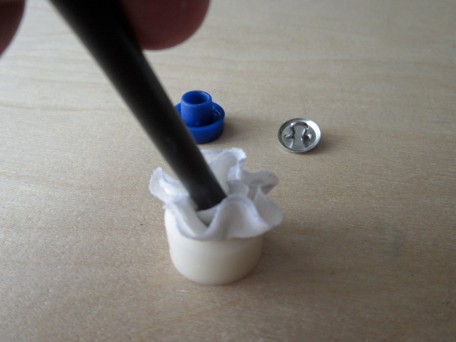
7) The button bottom is now placed with the flat end down over the folded fabric.
8) While holding everything in place, you take the blue pusher and place it with the opening over the top of the hook part of the button bottom and then squeeze it and the white mold together.
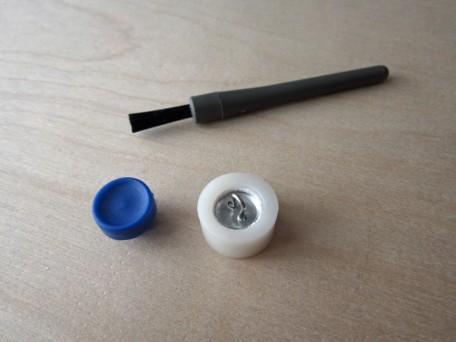
9) When you are done squeezing, then comes the moment of truth… did it work. This is how it feels to me almost every time!
Voila! Silk covered buttons. If I was really going all out Haute couture,
I would have also covered the button bottoms.
Here are all my finished buttons with several extra if one comes apart or I lose one!
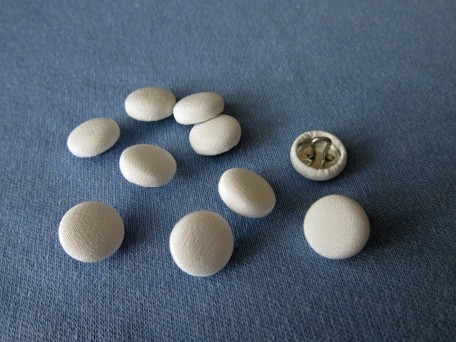
Here they are sewn onto my blouse.
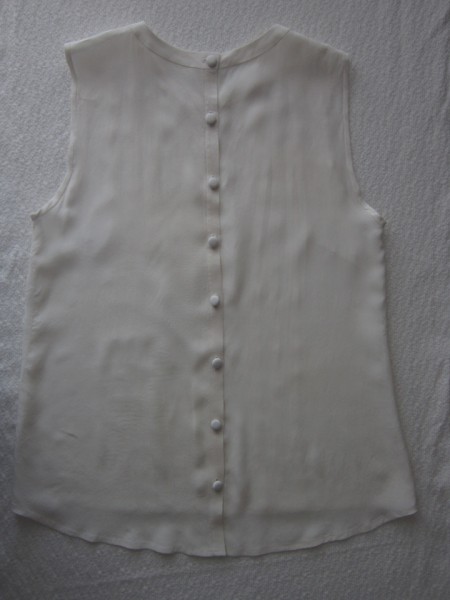
Oh yes, and I also hand bound all my button holes. They are not too bad, but with practice I know I can get better!

The front of the blouse with all the pleats…
Well I think I’ve written a monster, but… it’s all for you! With that I’m going to just keep on going because the next part is the cool part! At least I think it is!
Remember the title of this post that included Vigoss Skinny Jeans Renewed. Well… I purchased a pair last year, several pair in fact. Getting skinny jeans that fit me is tricky business. In order to get them over my thighs, I have to get a slightly larger waist. On one particular occasion, I decided to buy a pair in a waist size that fit so I wouldn’t have to wear a belt. I proudly wore them shopping for the first time a few weeks later and the legs were so too tight that as I walked, they would pull down. It was awful! My coolness that day melted into a day of hell! My first thought when I got home was to hurk them in the garbage. Then I thought, maybe I can fix them to somehow fit me so I tossed them in the “later days” project pile and forgot about them! Then, last month at the American Sewing Guild garment lunch bunch group meeting, one lady who I so adore, Lottie, suggested we do a sewing challenge. Different ideas were tossed around but I think what was most important was that we try to remake, or renew something showing our creative side. I went home and pondered this while digging through the “later days” pile and there they were, those evil skinny jeans! I knew what I was going to do… I was going to make a skirt out of them.
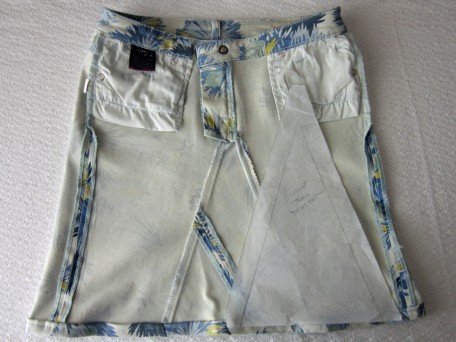
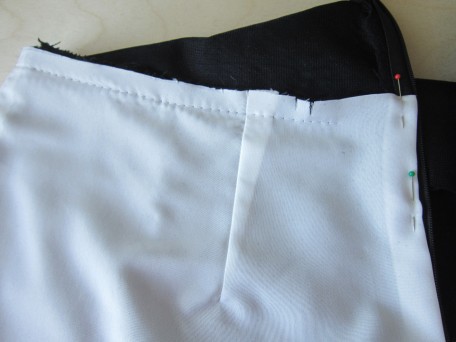
I took out the inseams first. Then I calculated how long I wanted the skirt to be including the hem, then cut off the legs! Served them right! There was now missing fabric in the center of the front and back shaped like triangles. Using pieces of tracing paper that I laid under the edges, I drew these shapes. Then I added an inch on the two sides for my seam allowances. and used them as pattern pieces. After removing the inseams from those evil skinny legs, I played with my pattern pieces until I figured out how I wanted them to look. I decided to stay on the side of caution and only cut out the back side first because it was the larger section and I wanted room for error. It took several tries on both sides until I got the fit I wanted but it wasn’t much trouble. I think the hardest part was sewing in the tip of the triangle on the top because I was sewing through the felled seam on the jeans. It’s all experimental so you just have to go with the flow.
Here is my new skirt on the inside and the template.
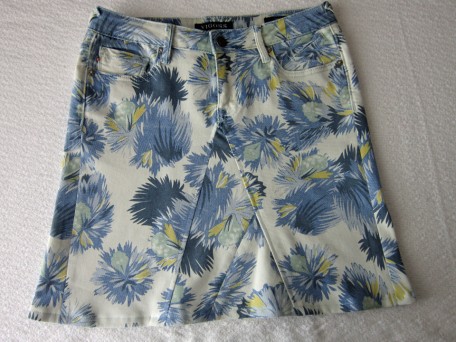
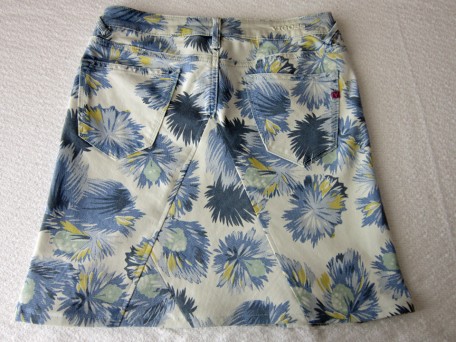
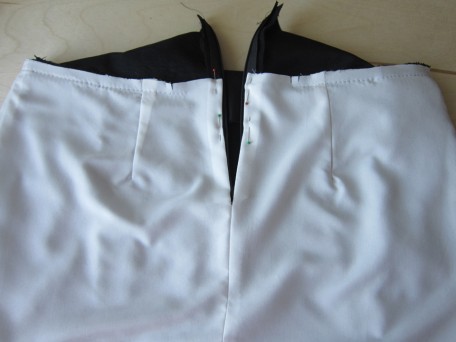
On the outside. I top-stitched along the two sides of the triangle at 1/4 inch.
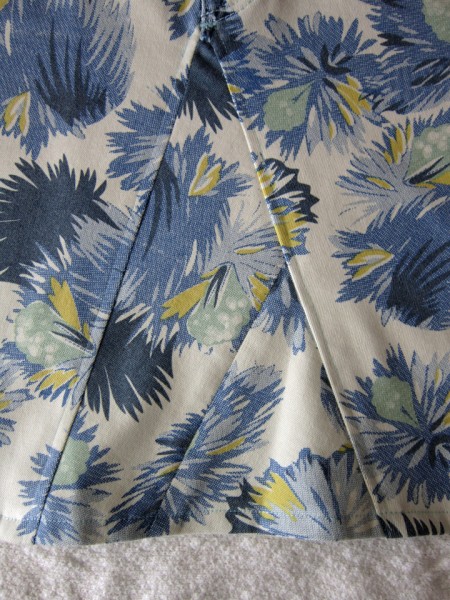
Close-up of the V
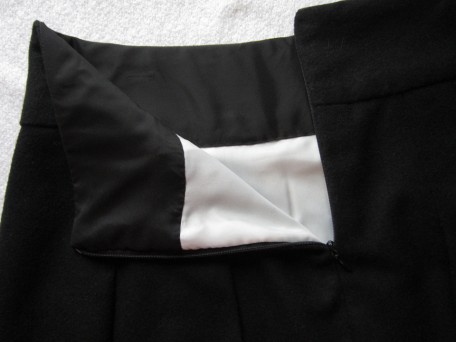
And the back on the inside…
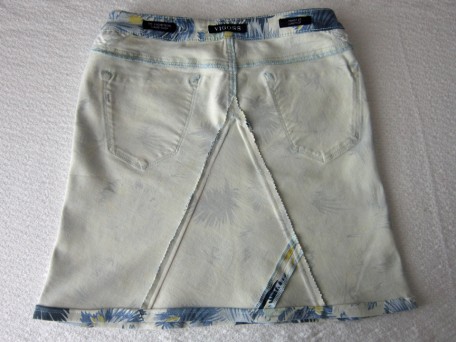
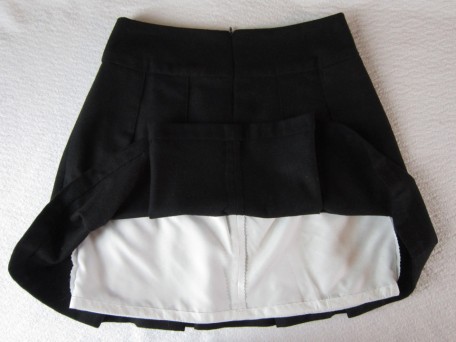
And on the outside…
Well, there it is! My very own silk blouse and newly invented Vigoss skirt! It took me a trip around Africa to explain it all but there are so many things that I wanted to share with you and by golly I did it! Take care and will be back soon!
Salute! Jessica
Read More
Designing a New Top
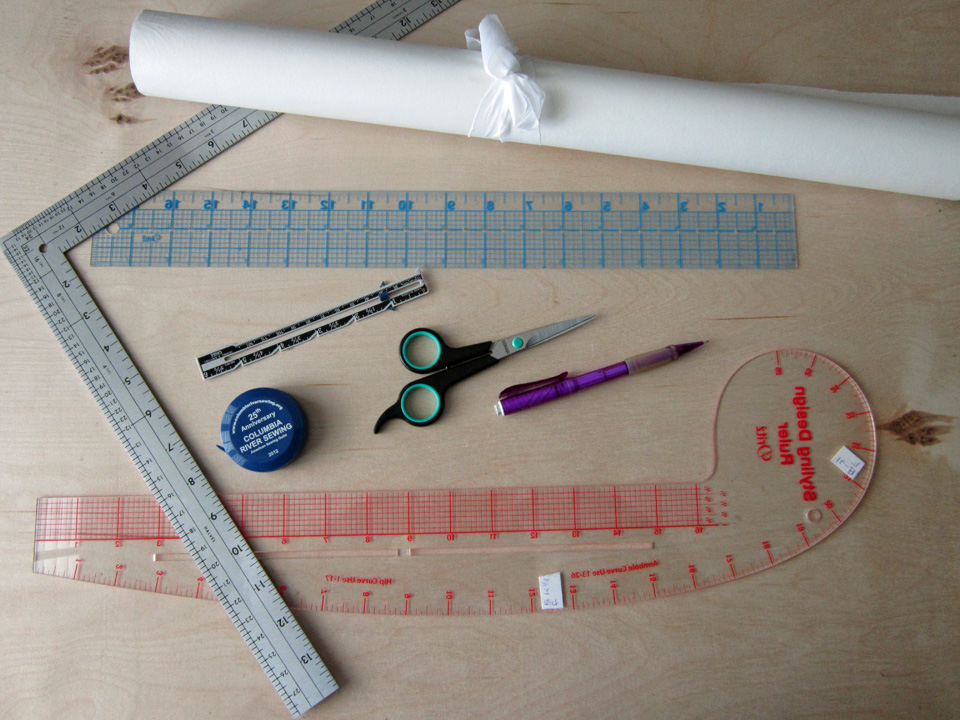
Useful Tools for Flat Pattern Design… Except one item missing… TAPE!
For several years before the last several years, before our economy blew up, clothes in stores, blouses in particular, had style! They were made from fairly good quality fabrics in stunning patterns and beautiful colors and were just plain fun! AND… during that time, it was more tempting to buy than sew, especially when you fell in love with something and wanted to take it home and wear it immediately! Okay… so the cat is out of the bag… Yes, I think I bought more than I sewed! There! I said it! I was sew lazy! Now days though, when I get that wee little urge to go out for a little sneak peek, all I see on the racks is, for lack of a better word, garbage! It seems there are more cheap ugly clothes than ever! You know what this means don’t you?!! Yep… it’s time to do some serious blouse sewing!
I have an assortment of top/blouse patterns in different styles, a few I have attempted to make but…so far, none that really fit me properly. I can’t hold the pattern makers responsible because it is the same problem when I buy Ready-to-Wear blouses. In either case, blouses are a little too roomy in the shoulders and if they do fit in the shoulders, they are not quite roomy enough at the waist. My only explanation… I am shaped like a triangle! I long ago accepted this fate in life but am growing tired of the fitting battle so I decided to strap on the big guns and take on the challenge of making my own blouse pattern(s).
Okay… so for my first blouse design, my inspiration came from something I saw Emily VanCamp wear on Revenge about a month ago. Yes… I’m still watching that stupid show! She wore a cream colored blouse that looked to me to be made of Crepe de Chine but of course that’s just a guess. Anyways, after stewing on it a bit, I grabbed my clip board with pages of ready to use croquis and started sketching. Eventually this is what I ended up.
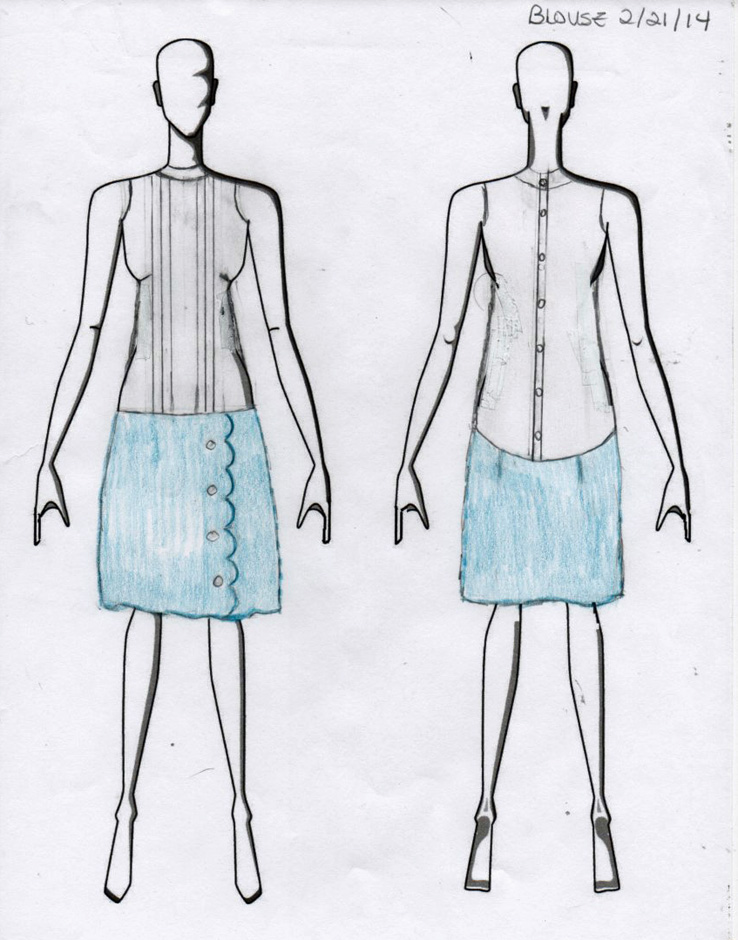 Yes, there was a bit of skirt thinking going on too!
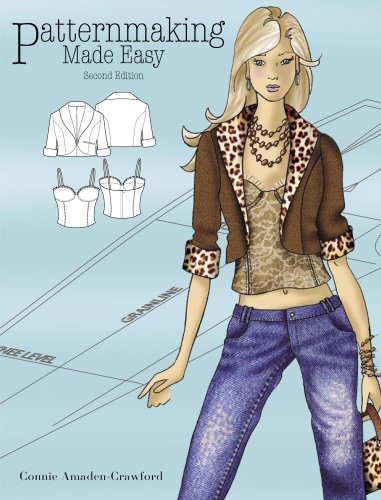
Obviously I am not the greatest at fashion drawing on croquis but it works for me and that’s what matters! After dwelling on this drawing for a bit, I went to work. I started off with a basic bodice block that I drafted last year using Connie Amaden-Crawford’s book, “Patternmaking Made Easy” (The book on Connie’s site is the 3rd edition whereas mine is the 2nd so the front cover picture is different).
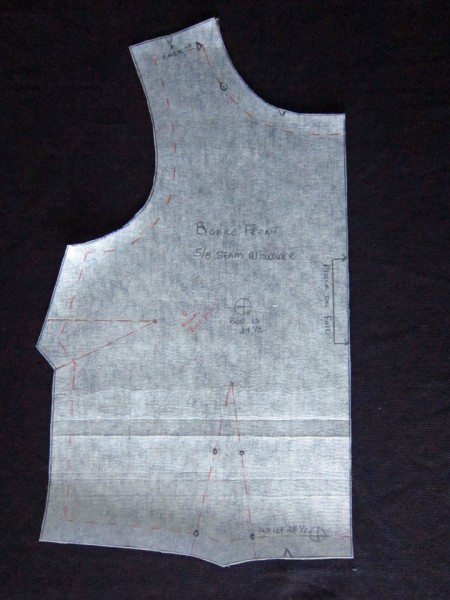
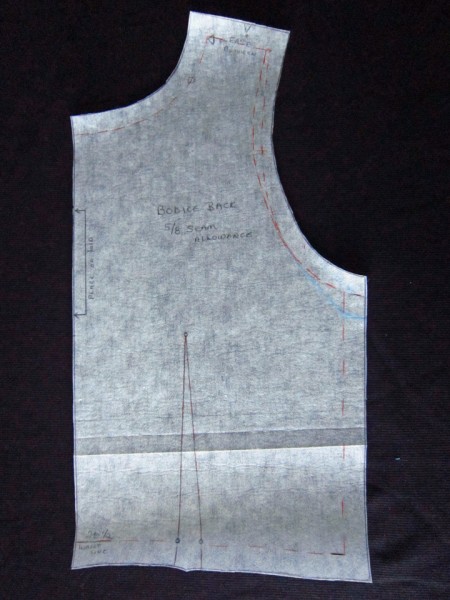
My bodice block has waist darts on both the front and back and a side dart on the front. They come in handy time and time again when I am fitting patterns that have similar bodices. Not sure why I added the 5/8 inch seam allowances to them when I originally drafted them. It was a learning curve at the time! Sheesh… it’s still a learning curve! I should say it now… my pictures for this post are a bit lacking and I’m sorry about that. It’s hard taking pictures of paper! Next time maybe I should do mini’s.
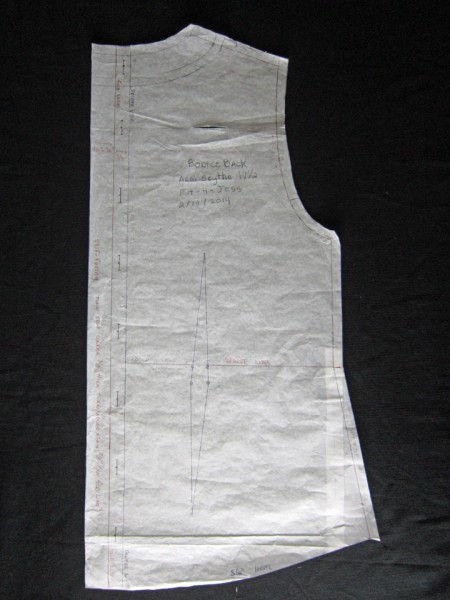
Anyhoos, the next two pictures are my basic bodice block, front and back (oops! I’ve got fold wrinkles – sorry about that!)
My initial idea was to use this basic bodice block to create a dart-less blouse block, aided by my book “Patternmaking Made Easy”. I spent two days drawing, measuring, ERASING, drawing more, cutting, wadding paper into balls, then taping and drawing again… and when I thought I had it, made a muslin. It was after trying it on at least five times after at least five different MAJOR adjustments, I contemplated taking it down to the fire pit in the back yard and setting it ablaze, then filling my wine glass extra full and playing games on my computer! “Defeat” is hard for me to accept though so instead of resorting to fire, I dumped the dart-less idea and started over.
Here’s how I created my Darted Blouse Block
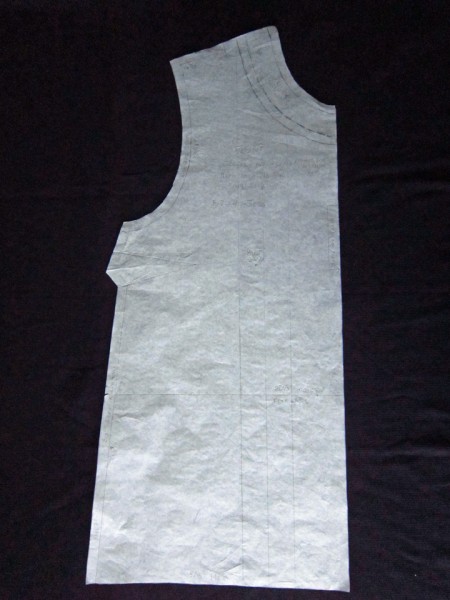
1 ) Using tracing paper and my basic bodice blocks, I begin again to trace, only this time the front side dart at the bust line got to stay. The waist darts in front and back became non-existent.
2) For the front, I continued drawing the center front line downward from the waist line adding another 7 inches of length. I wanted the back longer than the front so I extended the center back line down from the waist an additional 11 inches. However, before I could draw in side seams, I had to determine just how wide my hem line would be.
3) I calculated the width I needed for the front and back hem-line. (hip measurement + ease ÷ by 2, then ÷ by 2 again because the flat pattern is 1/4 of the measurement amount. After doing these calculations, I subtracted 1/2″ from the second calculation, and used this final figure for the front but added 1/2″ to the same second calculation, using this final figure for the back which is “butt” a little fuller than the front. 🙂
Example: Hip 37 inches. I added enough ease for a drapey look which I guesstimated to be of about 5 inches: 37 “+ 5″ = 42”
42″ ÷ 2 = 21″ (width for front and back)
21″ ÷ 2 = 10 1/2″ (width for flat pattern front and back pieces)
Now, move 1/2 inch to the back: 10 1/2″ + 1/2″ = 11″
The front: 10 1/2″ – 1/2″ = 10″
** Note that 11″ + 10″ = 21″ x 2 equals the 42″ we started with.
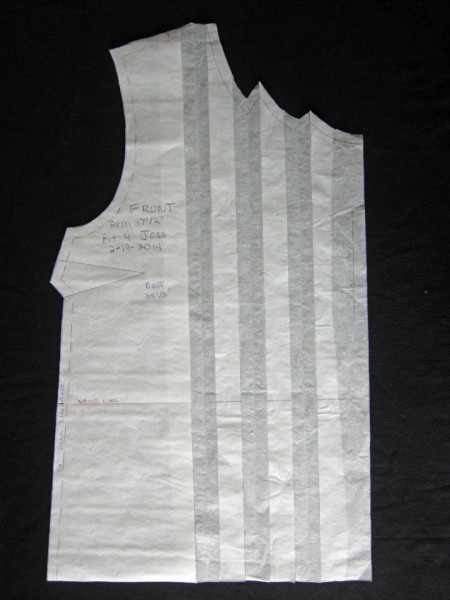
4) Using the above calculations, I then drew in the hem lines for the front and back. An L-square metal ruler (shown in the picture at the beginning of this post) is really helpful for doing this. You place the ruler with an edge on the center front or center back with the other end extending along where you need to draw the hem line.
5) To create side seam lines for the front and back, I drew lines that angled out from the waist to the hem line. We are not really boxy or straight edged so I then did a little curving and blending so that the side seam lines looked more like a body shape! When done, I double checked to make sure that the front and back side seam lengths were equal to one another.
Well here is my new drafted blouse blocks. I went ahead and added seam allowances since I’m almost ready for production. I decided to go with 3/8″ so I wouldn’t have to do trimming.
It’s hard to see in the 2 pictures above, but there are a number of features that I included on my front and back blocks because of some styling features I wanted to achieve.
1) Yokes: There are yokes drawn in, on both the front and back blouse blocks. I made them 1 inch in width and drew them in before I added seam allowances. I did this by drawing a line 1 inch down and along each of the the block necklines. In order to create yoke pattern pieces, I then traced the yokes I drew in and added 3/8″ seam allowances. Word of warning. Make sure they are equal widths all the way around! My first pieces I cut from my fashion fabric were off and after I sewed them on and thought I was finished, I noticed some major discrepancies! Yuck! I had to take them off and make new ones.

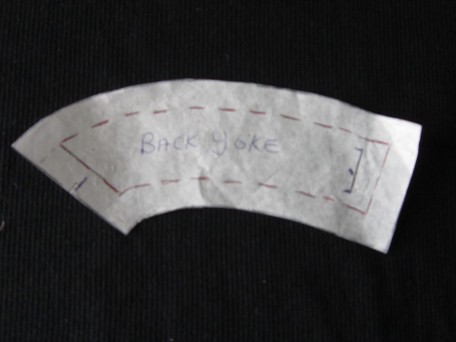
** Note 2: The yokes are just the upper part or neckline section of my blouse blocks so in order for me to create the style I wanted, I needed to trace the blocks again and exclude the yoke sections but remembering to include a seam allowance.
2) Center back button/buttonhole extension: At the center back, I added 1 and 5/8 inches that is a combined facing unit and button/buttonhole extension.
To break it down: I drew a new line 5/8″ further out from the center back line that runs parallel from neck to hem line. This added amount will accommodate the buttons and buttonholes. Then parallel to this line I drew an additional line 1 ” away from it. This 1 inch section is the facing unit. It contains a 5/8″ facing and 3/8″ for a clean finish.
How it works: In order to keep all things equal, I first basted a 3/8 and 5/8″ seam on each back side. (the picture below is the left side – the pin in the shoulder tells me that this is the right side of the fabric)
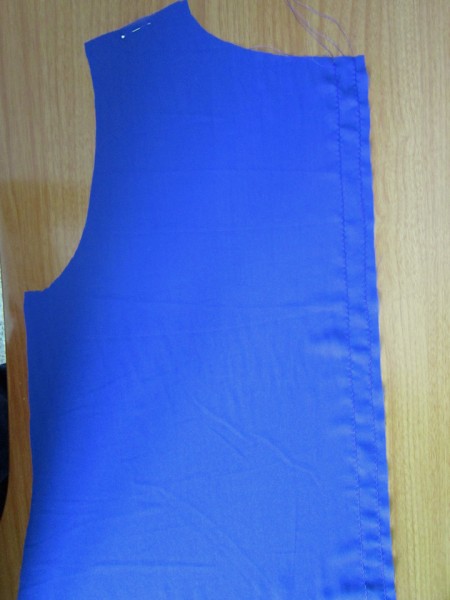
I next turned under the 3/8″ section and pressed it. Then I did the same for the 5/8″ section. Now I was ready to sew the final seams. I laid each back side right-side up, and stitched a 5/8″ seam using the guide on my sewing machine. Fortunately I caught the folded-under edge all the way down! You could also edge stitch on the underneath which I often do so I don’t have to worry about not catch the folded edge, but because the fabric I was using for my prototype was so slippery and showed every uneven thing I did, I decided to do what I did. Below is a picture of the underside but unfortunately it’s not the match to the left side shown above. This is the inside of the right side instead of the left. Damn it I hate it when I do that!

3) Creating my pleats (tucks): There are 3 straight lines drawn in on my front blouse block that run from the neckline to the hem line and are parallel to center front. They are for the creating of tucks (Page 173 of “Patternmaking Made Easy”) or what I call pleats. The bust level line is on perfect crossgrain so once again, with the aid of a metal L-square ruler, I used this point and the center front to make my markings for my pleat lines. Since cutting up the block is the next step, I decided to first trace an additional front blouse block that included the 3 lines for pleats and then let the cutting commence! Mind you I have now done this twice! Once for the actual creation of my pattern and the other to be able to show you how I did it! On the positive side… I’m getting faster at it!
So when I was done tracing, I next had to cut along each of the 3 lines, separating the sections completely from one another. Here’s what it looks like.
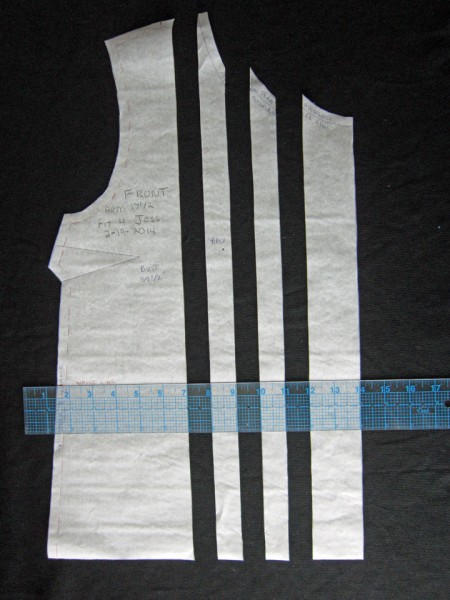
Now I have 4 sections but there are only going to be 3 pleats. You can choose whatever width you want… it could have been 1/8, or 1/4, 3/8 or 1/2″ but I decided I wanted 1 inch. The ruler in the picture is there to show you how it looks when I place my sections 1″ apart for my pleats. (my picture is not square so my strips don’t look square!)
The above picture is for explaining… you actually take the strips and position them the width you want, onto a piece of paper that fills in the gaps and enough room at the top so that you can fold, and draw in the finished look of the pleats. Here is a picture though once again, it may look uneven but after the many times I folded the paper in order to draw in the top of the pleats and all the tape that was involved, I couldn’t get it to lie very flat!
For the real deal, here’s what it looked like during construction! By the way, I messed up several times when trying to decide how I wanted to fold my pleats (tucks) and so had to pull all the threads out. With no instructions you are free to do what you want, but this is when the accidents occur! It’s a wonder that my blouse went together at all by the end.
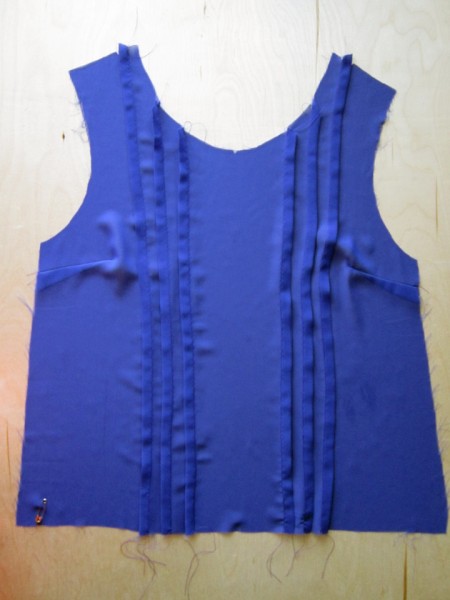
Now is the moment of truth… here is the front
And here is the back…
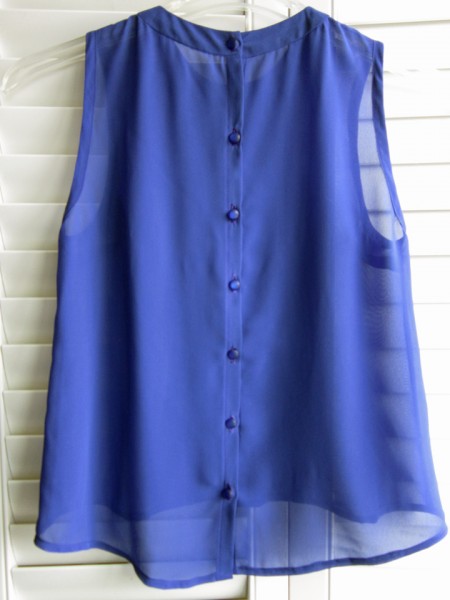
My handy camera crew are both sick and tired so not able to help me with a photoshoot so I couldn’t model it for you! Yes, it turned out and I will wear it but it does have flaws. My front and back yokes were even but they don’t lie as nicely as I had hoped. It probably didn’t help that I pretty much mangulated the neck line while trying to figure out how to do my pleats and resewed the yoke on about 3 times! I also ended up with the front being shorter than I thought it was going to be. It’s just long enough but I like it longer than just enough. I will probably layer with a red cami which will make things interesting. As I look at these last 2 pictures, I realize that I didn’t say anything about the armholes and how I finished them. It was pretty easy… 3/8″ seams and bias tape that I made from the same fabric using my Clover Bias Tape Maker, only I folded it to the outside.
This is a monster of a post which I know is a pain to read and I am sorry about that. But hey… it was a pain to write! Whew! Right now it’s totally Wine:30! And time for a piece of cake too! I am truly happy though, that I could share this with you and hope it helps someone! Sew until next post…
Salute! Jessica
Read MoreEdith Blouse Paired with Wool Butterick 5613
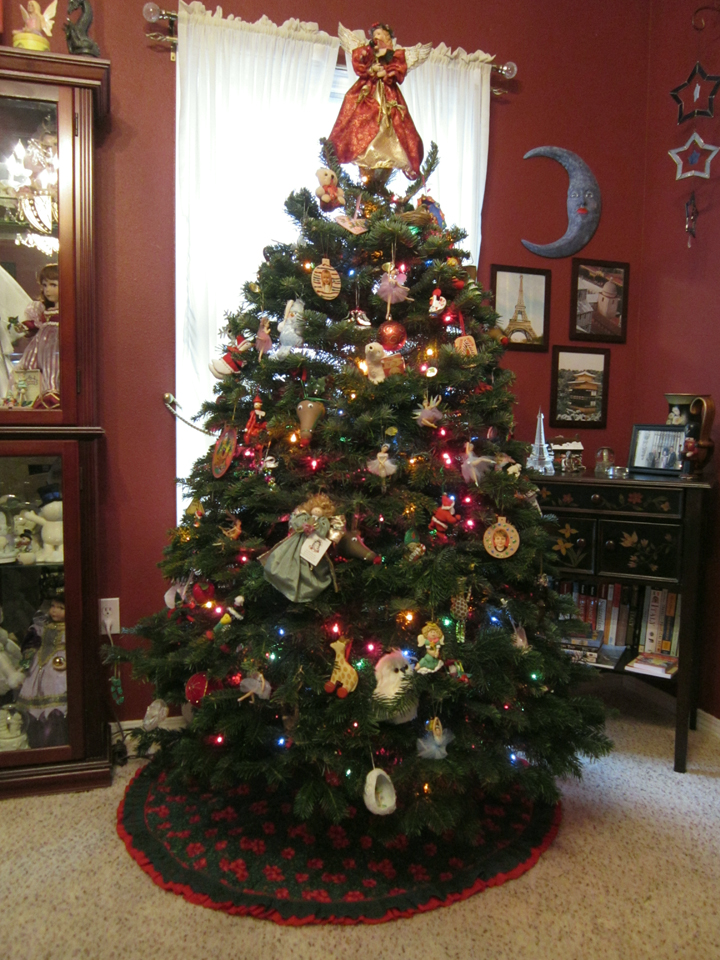
Yes.. I am one of those who drags the yule log in the house and decorates it… with the help of my kids of course! There were absolutely no squirrels in the branches this year but… there was another problem. Monday morning at about… say 6:30 am, there was a tinkling, ringing, clanking sound that came from the downstairs room where this pretty little tree WAS (I’m emphasizing the “was”) standing. The ornamental carnage that came with the falling of our tree drove me to drink!… Tea! HA… you thought I was gonna say wine! I am unwilling to take the responsibility for this fate so I am blaming this incident on either the South Pole Elves or the crappy tree stand that we used. Since there was no evidence of elves, I determined that the blame would be placed on the tree stand! After a trip to Lowe’s and the purchase of a new improved tree stand, we were able fix the disaster. I did have to wait until today for the carpet to dry so I could put the skirt underneath but now it is finished and ready for Christmas.
Interestingly, this holiday season here in Oregon has started off with truly cold cold weather that has caused a lot of us to actually freeze our butts off!

For the last three weeks it has been in the teens and low 20’s during the day, getting even colder at night. My understanding is that this hasn’t happened since the 70’s! Believe it or not, during all of this coldness, I have managed to continue sewing, albeit a bit slower of a speed than my usual. I haven’t left my skirt making mode and while making them, I got to thinking that I need tops to go with my skirts.
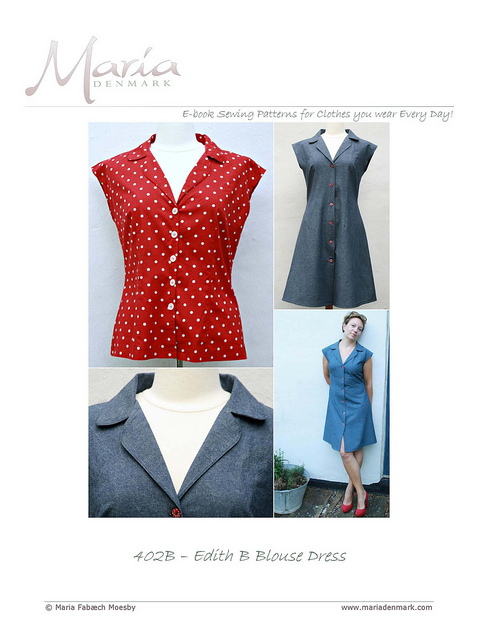
MariaDenmark, a fellow blogger has designed and created a blouse pattern, the “Edith Blouse”, that you can purchase on Craftsy . She shares a little story on both Craftsy and her “Wool and Weeds” Blog about how this cute blouse came to be. Last summer I purchased it with the intention of making it then but alas… so much was going on that it didn’t happen. However… now, in my skirt-making-madness-mood, it seems the perfect time to make it.
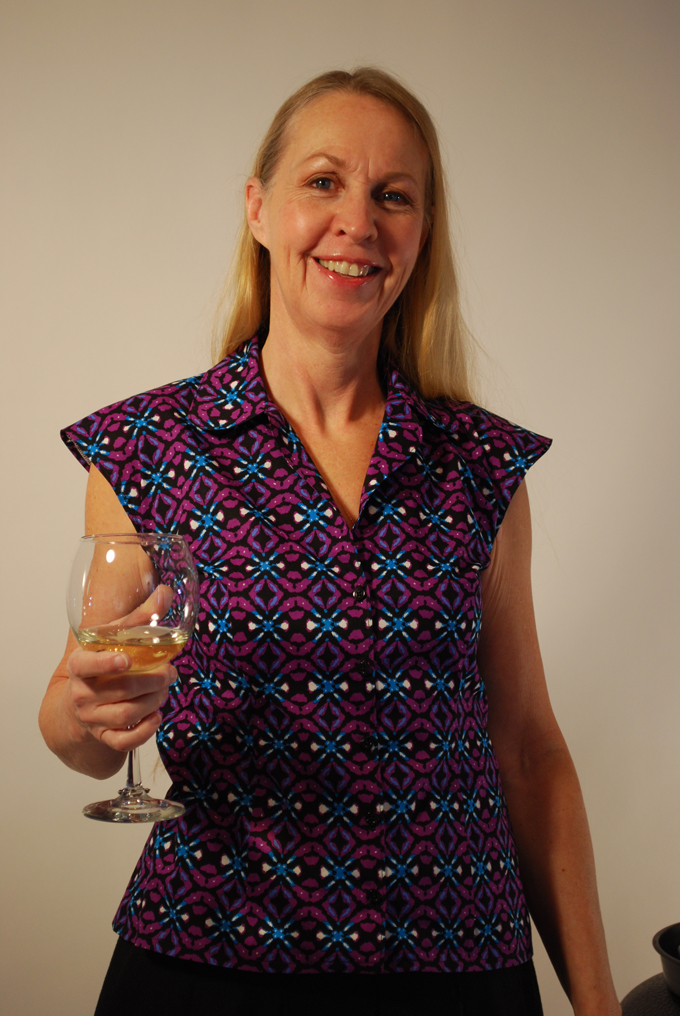
This is a picture of the blouse. The pattern also includes a dress, which actually is just added length below the level of the blouse. It has that Retro look yet still looks modern and given that the blouse fits me so well, I think the dress will be a fabulous spring project!
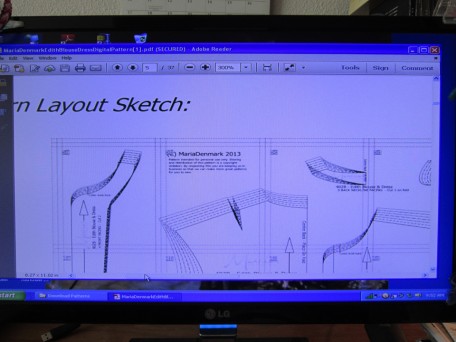
This is a download pattern which arrived to me via PDF file. I have never downloaded a pattern before so admittedly, I was a little nervous at first. However, it truly went very smooth. I opened the PDF file and after reading all the instructions, printed off only the pages for the blouse. While piecing all the printed sheets together, I kept the full pattern layout sketch picture that’s included, on my computer screen while I was cutting and matching and taping.
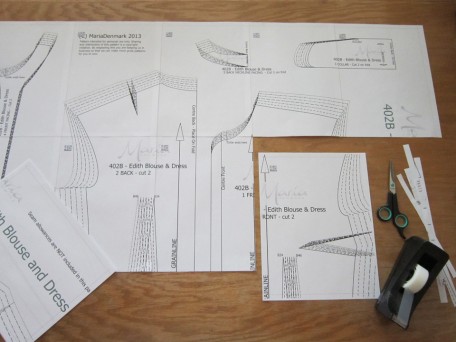
Before I started, I considered to first cut off all the right sides and bottom edges of the printed pages along the red dotted lines but… since I am really getting tired of re-doing ANYTHING.. I decided against this and instead, went one page at a time. Here is a picture of my system.
Now that the printed pages were all taped together…
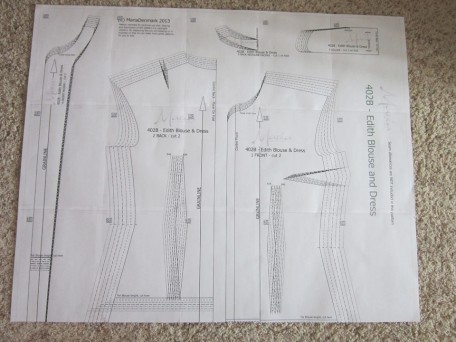
I was ready for step two. Using tracing paper that I purchase by the roll from Nancy’s Notion’s, I traced the pieces that I needed for the blouse, adjusting sizes between bust, waist and hip. I next made a muslin to see where I was at in the fitting. Too much shoulder length, perfect bust, waist to narrow and hips WAY to wide. It was back to the drawing board so-to-speak. I rolled back out my taped together Edith Blouse pattern and re-traced my pieces making adjustments for all my fitting issues. Now it was time to make muslin number 2! It was a success! The happy dance commenced!
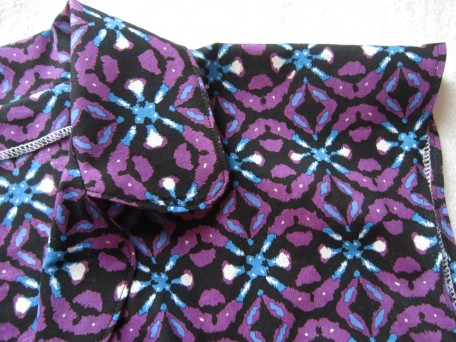
I had found some fabric at Mill End’s in Beaverton, Oregon that I felt so drawn to. Not sure why… it was a very nice fine cotton, but I knew that matching cut fabric pieces with a pattern like this fabric had would be tricky! Nonetheless, I was determined to make this fabric into the E. blouse.
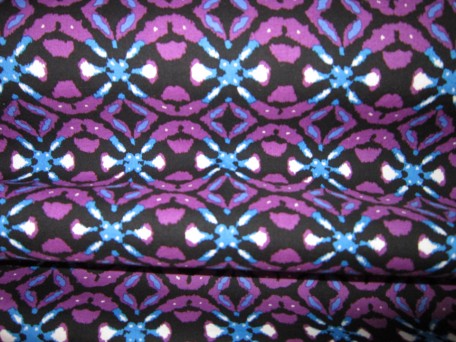
I spent a little time pondering my tactics before I started cutting. I pre-washed, dried and pressed the fabric and when I laid it out to cut out my pieces, I discovered that it was not on grain! Yuk! I paid $9.99 a yard for this fabric which was only about 42 or 43 inches wide resulting in having to buy additional yardage to cut out all my pieces. I decided to do what seems to be my usual these days… I tossed my fate to the rain and cut my blouse pieces the way that I thought the printed pattern would look best. I haven’t washed it since I’ve made it so I don’t know if I will get twisting or what, but…I will worry about that then!
The blouse sleeves finish in such a way that I was concerned about them raveling even if I used my pinking shears so I decided to dig out my old dinosaur serger. I hate that machine! If I was a better operator maybe I wouldn’t get so frustrated with it but it’s so rarely that I use it. That is why I’ve not considered taking classes or joining a serger group but maybe I should reconsider. At least I would know how to fix most of my problems! It must have taken me an hour to finally get it to sew a decent seam and so now I was ready to actually sew together the blouse .
I had fun sewing it. It was a little time consuming making all the darts but they are what makes the blouse fit so nicely. There are two long ones that go to the hem in the back piece and one on each of the front pieces that are almost as equally long as the back ones. The front center edges fold over to the outside towards the top like a lapel and blend nicely into the collar.
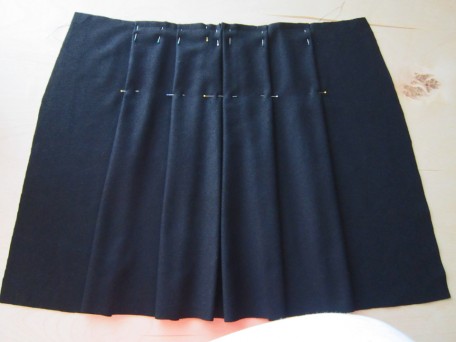
Next up was my skirt. I found some beautiful wool flannel in black that I couldn’t wait to sew so I could wear it! I am thinking really warm here! I tried to take a picture of the wool but because it was black, the camera had a horrible time with it. I was getting grays which were not at all true to it’s color so I bailed on the picture. The skirt that I decided to make was a style from the Butterick 5613 that I made my previous skirt from. My lining skirt that is!
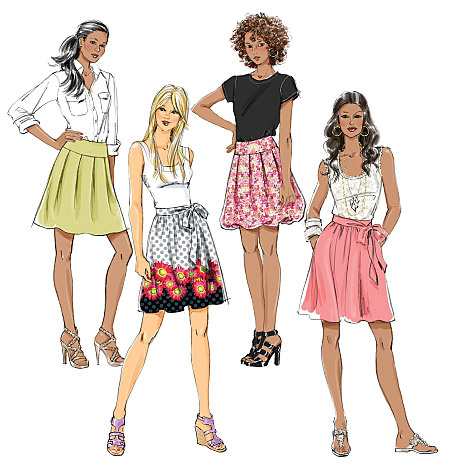
This time I chose the option C style with pleats. I made a few changes however. There are five pleats in the front section and per the pattern instructions, all are folded in the same direction. You are told to make the pleats on the outside, creasing along the lines of the small circles and then bringing those creases to the lines of the large circles. I did this for the 2 outer pleats on the right side but did the opposite for the 2 outer pleats on the left side. I still had the center pleat to contend with. I decided to divide the width of this pleat in half and marked this as the center. Then I folded one side of the pleat towards that center and then folded the other side of the pleat the same. I pinned them in place and then basted them. I wanted the pleats to hold their shape so I then top-stitched each fold, 6 in total, down 4 1/2 inches from the top edge of the waist. The back pleats I folded per the pattern instructions though I did top-stitch them like I did the front ones.
The pattern doesn’t give instructions for lining the pleated skirt but because I made mine from wool flannel, I considered the itch factor so decided to line it. An added plus would be that the pleats would drape better, especially if I used the straight lining that comes with the pattern. This straight skirt lining is intended for the pleated skirt if you make a bubble hem so that’s why it’s included. My method was my own for attaching the lining. I followed the pattern instructions through until after inserting the zipper (excepting the change I did in the front pleats). Then I made my lining and basted it to the skirt selvage, raw edges even, in a 3/8 inch basting seam with my sewing machine.
It was a toss up on what to do next, either sew the waistband yoke facing to the waistband yoke, or slip stitching the lining to the zipper. I decided to sew on the waistband facing first. I followed the pattern instructions for this… it’s pretty easy. Just matching up seams and markings. Next was slip stitching the lining to the zipper.
Almost there… now it was time to slip stitch the folded under waistband yoke facing over the skirt seam.
Then finally, the last thing to do… hem the lining. Mind you I did do this before I attached the lining to the skirt but I had an oh crap moment! I didn’t hem it short enough so it hung down below the hem of the skirt after I basted it in place. I just hate it when that happens!
I contemplated top-stitching the waistband yoke on the top and bottom, but for some reason my mind doesn’t want to let me. I kinda like the plain wool look, it is so beautiful. I absolutely love sewing wool flannel. I don’t know what other colors it comes in but I plan on making more skirts from it. It will be so warm and cozy to wear.
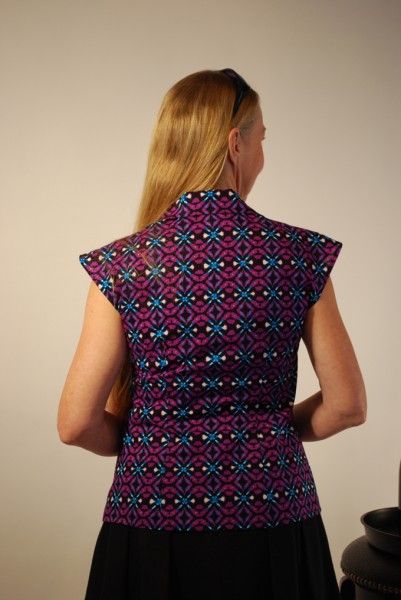
I am not sure if my cotton Edith Blouse is the best match for my wool flannel pleated skirt but their colors compliment one another so I decided to pair them up for pictures. Here they are!

The back actually hangs quite smoothly but because I was turned a little, I think this feature was lost!
My daughter told me to tip my head a little, and then shortly later said left giving me a direction but I thought she said laugh!

That’s a take then! We are finished. I hope to next start on something blue. I have never made myself anything in blue before but the ladies at one of my favorite fabric stores did a poll with some customers while holding the fabric up alongside my face and it was unanimous that I could pull off wearing blue! So please note that if I look like crap, I am not responsible! 🙂
Salute! Jessica
Read MoreAbout Me
 Portland, Oregon,
 United States
Hi there! I’m Jessica Brandon and I am a clothes-loving sewing artist. When I am not sewing, blogging or shopping for shoes for my creations, I fill in the remainder of my days spending time with my children, playing ice hockey, gardening and making and drinking wine!


Up Coming Projects:
Vogue 1426

Vogue 7881

McCall's 7089

Vogue 8997

Vogue 1431

Vogue 9006

Vogue 8991
