

I’ll start by saying… I love sweaters! The weird thing though is that I don’t have very many, however that’s going to change because I just figured out that I can sew them! Up until now, I never dared to consider making these wonderful little wardrobe necessities. I figured sewing knits would be an experience from hell and happily chose to never go there. Then after spending some time with some wonderful women in ASG (American Sewing Guild), a door has opened and knit fabric has hit the fan so to speak! I won’t say that I am totally comfortable sewing knits now but my confidence is growing, especially after making the McCalls 6708 sweater.

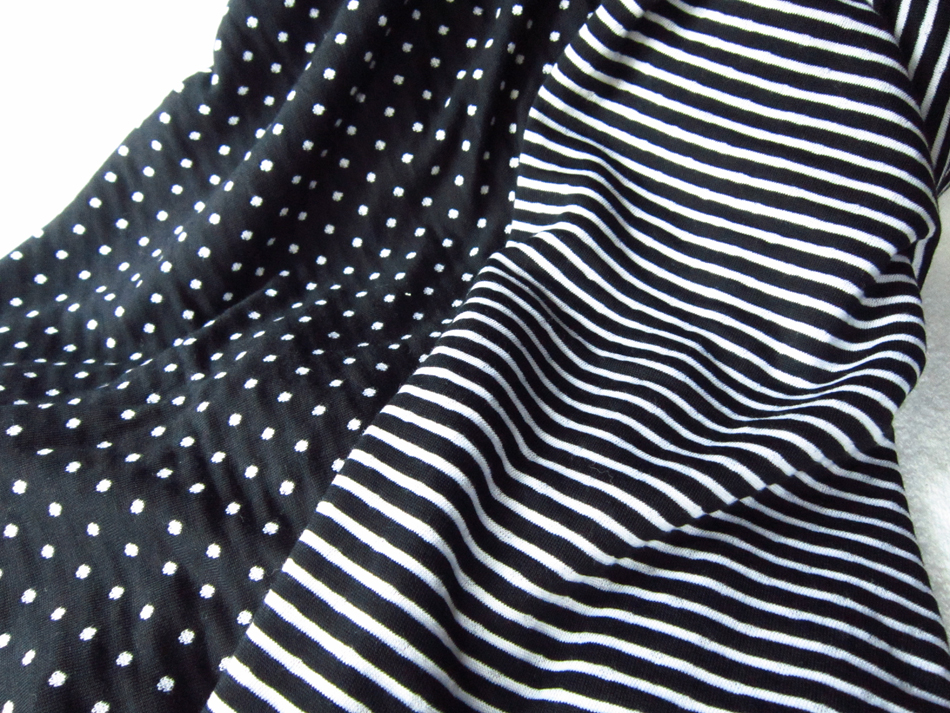
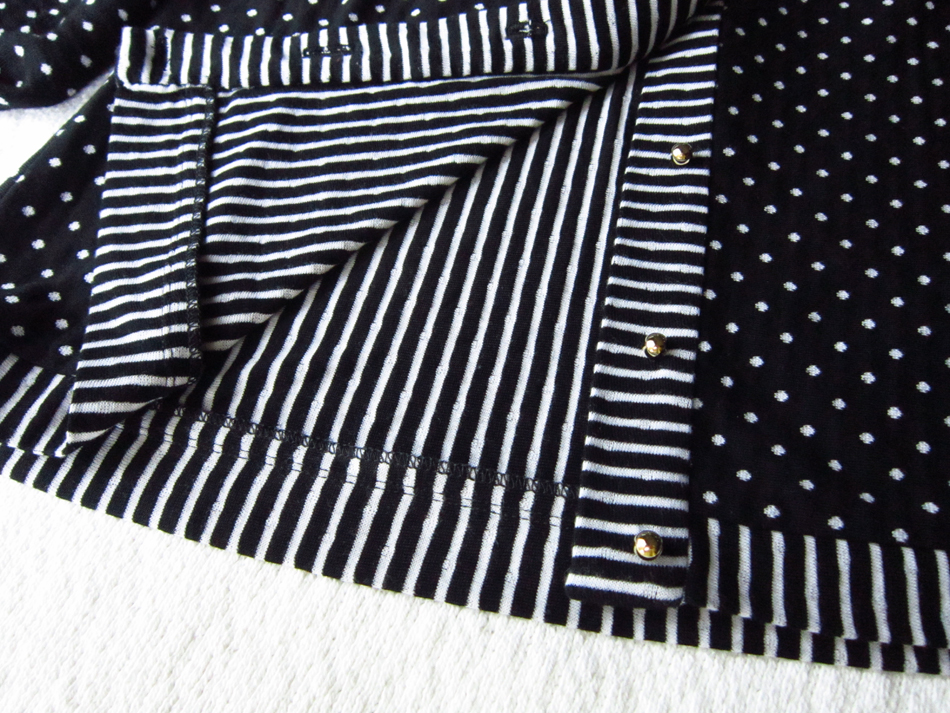
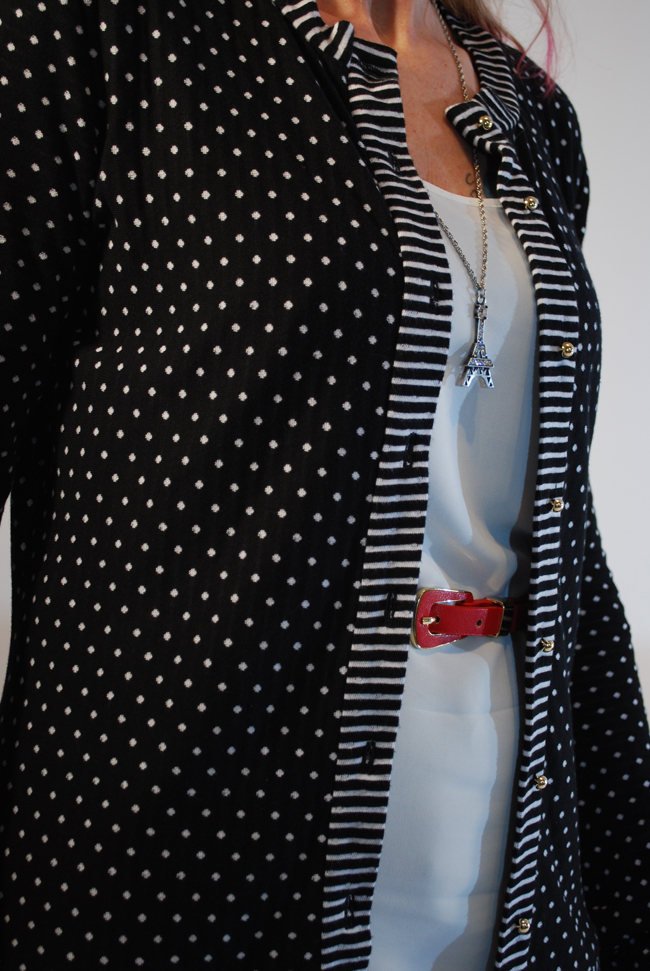
For the fabric I chose a double-ply knit, black and white stripes on one side with small polka-dot like markings on the other.
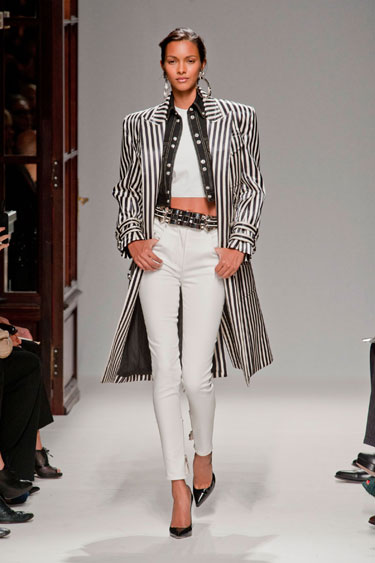
My inspiration for this fabric came from the Spring 2013 Ready-to-Wear Fashion Show number by Balmain which drew me in and renewed my interest in the black and white theme, and especially stripes.
The sweater I made was a mash-up. I wanted the neckline of A and the length of the bodice and sleeves of E. It wasn’t difficult at all. By overlapping the front A tissue piece over front E tissue worked perfectly. I used the back pattern piece for E. Long sleeves were not a problem either since both sleeves come as one tissue.
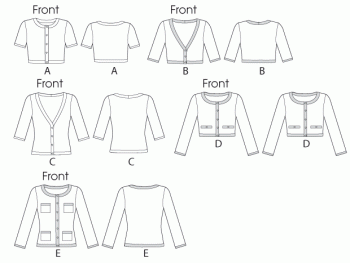
McCalls 6708 Options
For size, here again I chose small based upon the circumference of the bust provided on the pattern for that size. I didn’t make a “knit” muslin. I do like adventure and given that there would be some stretchy going on, I decided to throw caution out the window and just sew!
The instructions were very clear and quite easy to follow. Double-stitched seams were suggested for most of the construction. For this I used a twin-needle, a 3.5 mm. stitch and my standard sewing foot. It wasn’t called for but I decided to serge all the edges that would be exposed to make a nice finish.
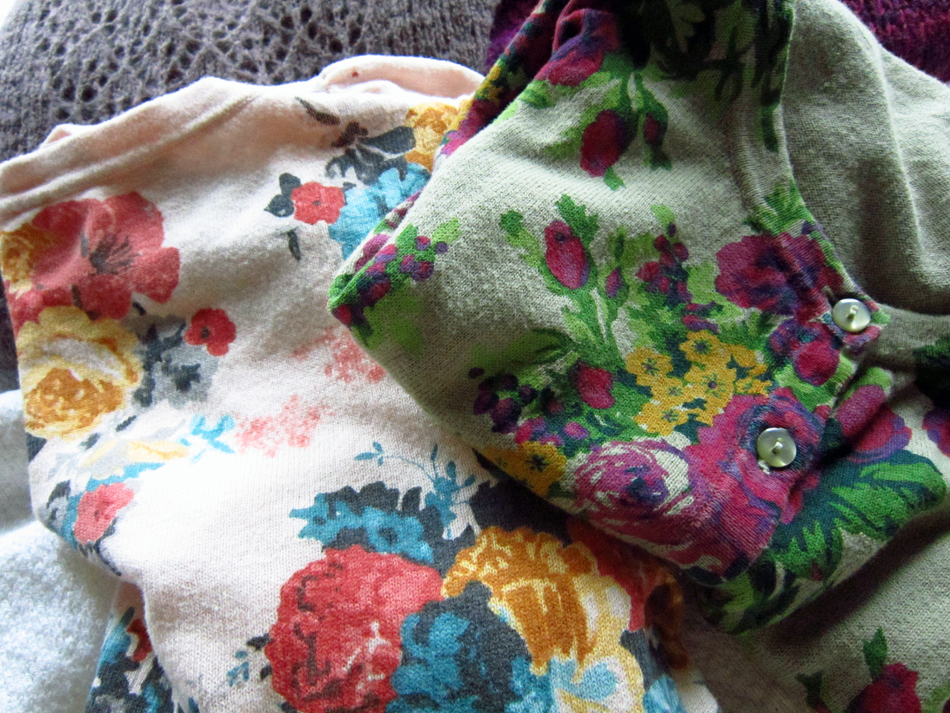
I was fascinated with the knit that I used because it was double-sided and not too thin. It seems that thin fabric is the norm in store bought garments these days and doesn’t last long but I will save that for another rant! Due to my stripe inspiration, for some fun and to make it interesting, I decided to use the opposite side of the fabric for the neck, front and bottom bands.

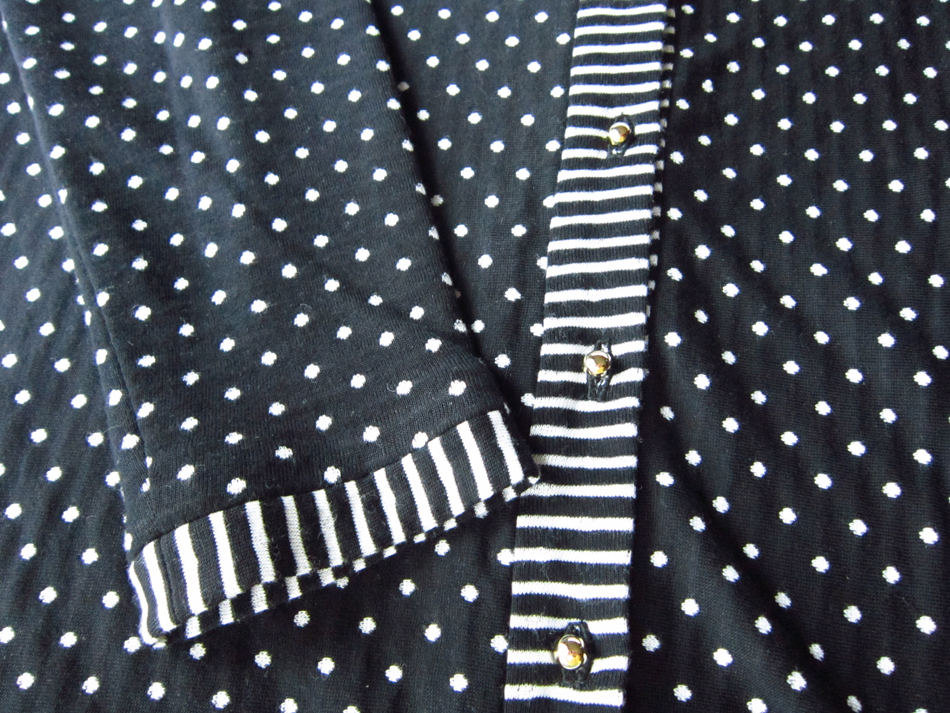
All the bands fortunately turned out pretty good, but because of the method of construction with the neck band and my double-ply not-too-thin fabric, it was a real pain in the… derriere to get the finish I wanted. The thickest area was where the top and bottom buttons go. It doesn’t help that I tend to be a perfectionist, sometimes very problematic for me!
As a side note, always up for a challenge, I decided to cut out the sleeves and bands cross-grain so I could have the stripes in the direction that they are as well as to utilize the fabric and eliminate waste. There were no problems with doing this and I have a chunk of fabric left, for what I don’t know, yet…
So…here it is


I have to say, I really like the way knit responds when a seam is sewn in it and I love how it feels to the touch – oh so soft. It is pleasurable to sew! I’m still a bit skittish when it comes to doing buttonholes. It’s a real pain to remove all the threads when the buttonhole is a total bomb and requires a do-over! Moving right along… yes I’m discovering that sewing knits can be a pretty fun thing to do, and that’s why I plan on sewing this sweater again. However, I would like to try and figure out another method for applying the neck band…I need to put on my thinking cap. If you have any suggestions, I would love to hear them. Until then…it’s off to go wine tasting!
Salut! Jessica
2 Comments
Leave a Reply to Catherine Cancel reply
About Me
 Portland, Oregon,
 United States
Hi there! I’m Jessica Brandon and I am a clothes-loving sewing artist. When I am not sewing, blogging or shopping for shoes for my creations, I fill in the remainder of my days spending time with my children, playing ice hockey, gardening and making and drinking wine!


Up Coming Projects:
Vogue 1426

Vogue 7881

McCall's 7089

Vogue 8997

Vogue 1431

Vogue 9006

Vogue 8991

Beautiful job! I have this pattern and am ready to embark on my first sweater project. Any advise on attaching the front band? The directions have me baffled. Any advise is appreciated!
Thank you Catherine! Attaching the front band is not really hard – it’s just that it gets rather bulky at the ends once you sew it on.
Let’s start with the neck band first. It’s a double fold of fabric that you will apply to the edge of the sweater neck as per the pattern instructions. After you have done this, you will apply the lower band in the same fashion. Once you have finished applying these two bands, THEN you apply the front bands. You have to first prepare them by pressing under the un-notched edges and then trimming. When you pin each band, right sides together, to the center fronts (right and left), the ends of the bands will extend 5/8 of an inch beyond the neck and bottom band you sewed on previously. After you sew these front bands in place, the extra 5/8″ on each end you will sew across, perpendicular to the band along the neck and bottom, being careful to not catch the edge of the neck and bottom bands. You are creating a facing for the corners and enclosing the seams. I usually don’t trim the seam allowance when I do this until I turn these corners as best I can, to the inside to see how they look. If I messed up, I can re-do it! (I’m a re-do Queen because I am fussy, quit fighting it a long time ago). So this is where the bulkiness that I mentioned happens. There is the double layered neck band and the double layered front band, 4 layers of fabric and as a sewing artist, you are going to want it to look nice. Especially given that you then have to sew a buttonhole in this same area. Depending on the fabric you are using, this will not be a problem or a little bit challenging. I am certainly not trying to scare you, just preparing you 🙂 Take your time, be patient and you can do it! This is a wonderful cardigan once you finish it.
I hope I haven’t confused you. When you start sewing your sweater, by all means ask me if you get stuck or have anymore questions. Salute! Jessica