


Here I am, back with Part 2 of the pants saga… Making Pants is Rocket Science. All the alphas and zooloos lined up and finally my friend and I were able to get together and do a pants fitting. Guess what?!! I was so close! I would have taken pictures but I forgot and wore hot pink undies that proudly glowed through the muslin and so I really didn’t want to post pictures of this on-line! I don’t even want to think about what kind of spam I would get! The good news — I have taken pictures of the pants muslin with all the thread tracings and adjustments so that I can share and explain.
Just to briefly up-date, the pants pattern I have been using is Vogue 7881.

It is from the Claire Shaeffer’s Custom Couture Collection. These pants are straight-legged with a contour yoke waistband. They can be made as dart-less (option A) or with darts (option B). I followed the couture techniques and construction given for the dart-less option A pants.
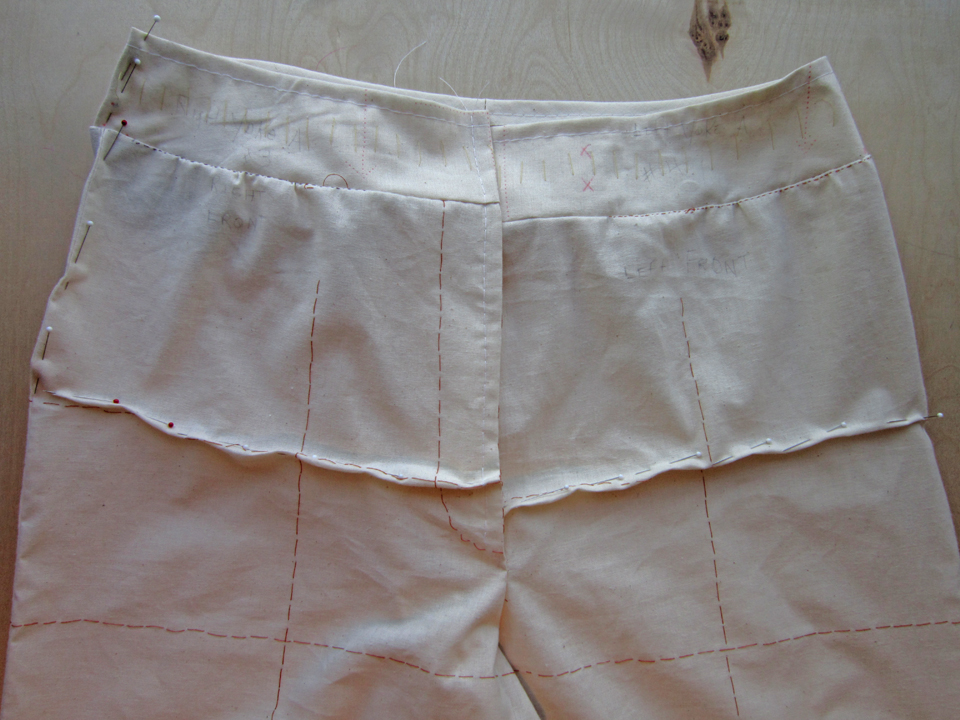
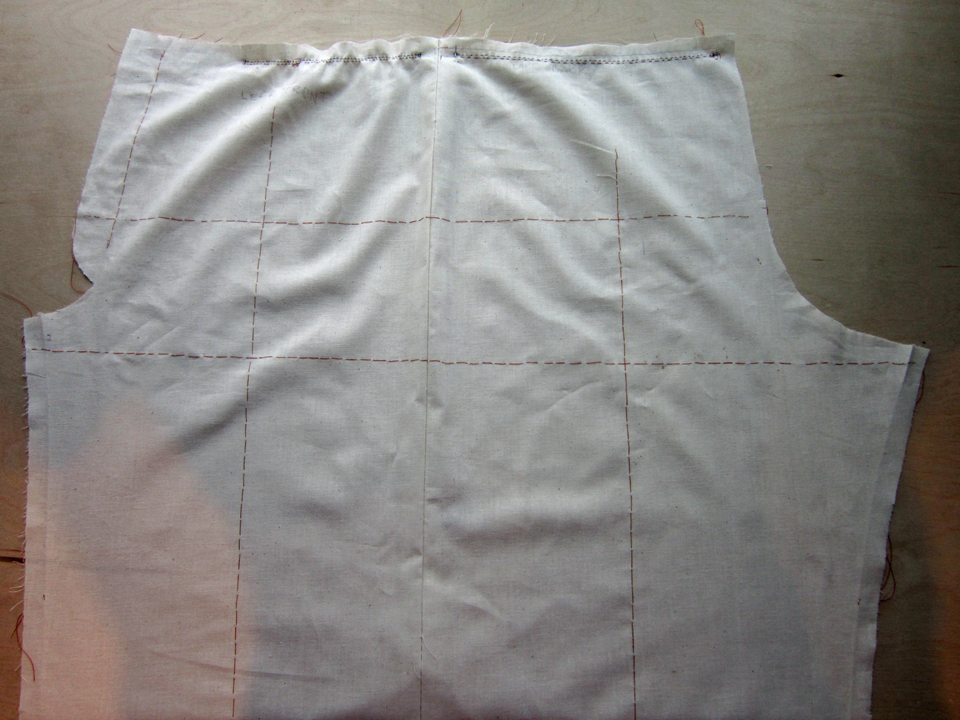
As you can see from the picture below, my muslin still requires some adjustment on the front. The front crotch length is about 3/4″ of an inch too long (this was easy to see when doing my fitting). We pinned darts of 3/8″ inches, starting from the edges of where the zipper will be placed and easing to nothing at the side seams. The same measurement of these darts I will transfer to the front pattern piece and so the fact that the pinned in darts on my pants muslin are not meeting equally at the center is nothing worrisome. I also need to remove 1″ inch from the waist because we pinned 1/2″ out on each side through 1/4″ inch pinches.
The back of the pants fit almost perfectly and this is why. In all my failed attempts I had always thought that the reason for the bagginess or pooling of fabric under my butt cheeks was from too much back crotch length (the measurement from the top of the waist to where the back crotch seam meets with the front crotch seam). Well, I was wrong. My problem was not back crotch length, rather the “pitch” of the seat.
The question now arises… pitch? what’s a pitch? Yep, I asked the same question. I had never heard that term before either and whether it was a creation of my friend’s that she used in her explanation to me, or an actual pattern drafting term, it didn’t matter because it was that magic word that helped me to make sense of what was happening to the back of pants when a dart is added into the back center seam curve of a pattern tissue for the fitting adjustment that fixes under the cheek fabric bagginess!
I was so excited about this new discovery that I ran home, re-worked my pants pattern back piece and then wrote my Making Pants is Rocket Science – Part 1. After the fact, I learned in my next couple of get-togethers with my sewing friend that while my method for creating a dart to alter the pitch was correct, there is a cleaner and more efficient way of carrying it out which I will once again be eager to share, only this time I ‘m applying the method to the front pattern piece.
Oh, and though not something to climb a mountain and shout about… well maybe I would because goofing off is in my nature, I also learned that the back center seam curve is usually shaped like a J but mine looks more like an L!

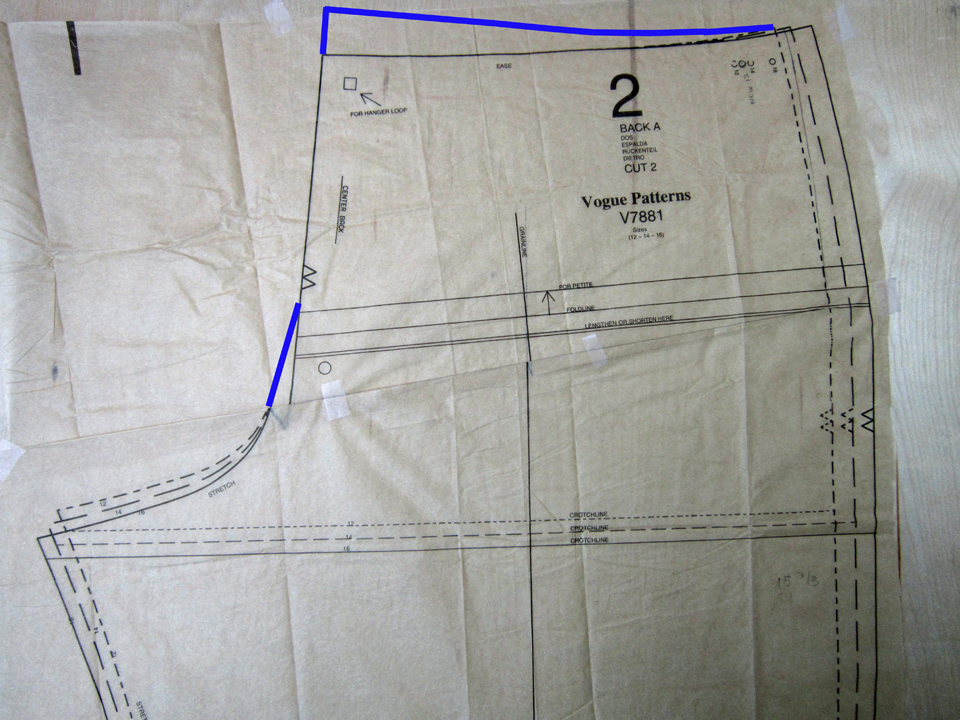
For a quick review, below is the picture from my Making Pants is Rocket Science Post. I made an upwards fold in the pattern piece which in essence is a dart, then trued up the curve and added the lost 1 inch length to the top of the waist.
Now, for the more efficient way to shorten the crotch length in the front or back of a pants pattern piece.
I should first explain that when reducing crotch length, whether in front or back, this adjustment is done thru a dart made in the pattern tissue or muslin, in which the larger side of the dart starts at the center since this is where the fabric that shapes around the roundness of our bodies is too excessive. The dart will then ease to nothing at the side seams. When I adjusted my back pattern piece, I used a dart but I didn’t want to change the crotch length, rather the “pitch” of the curve so the amount I removed in that dart I added back to the top of the waist. My front pattern piece however, has too long of a crotch length so in my steps below, I will create a dart to shorten it and not add anything back to the top of the waist.
1. Determine where the fitting dart should be located. In a fitting of a muslin, where the pinching and pinning out of the excess fabric happens, somewhere between the waist but above the crotch, this amount and location is where the dart should be drawn on the pattern piece.
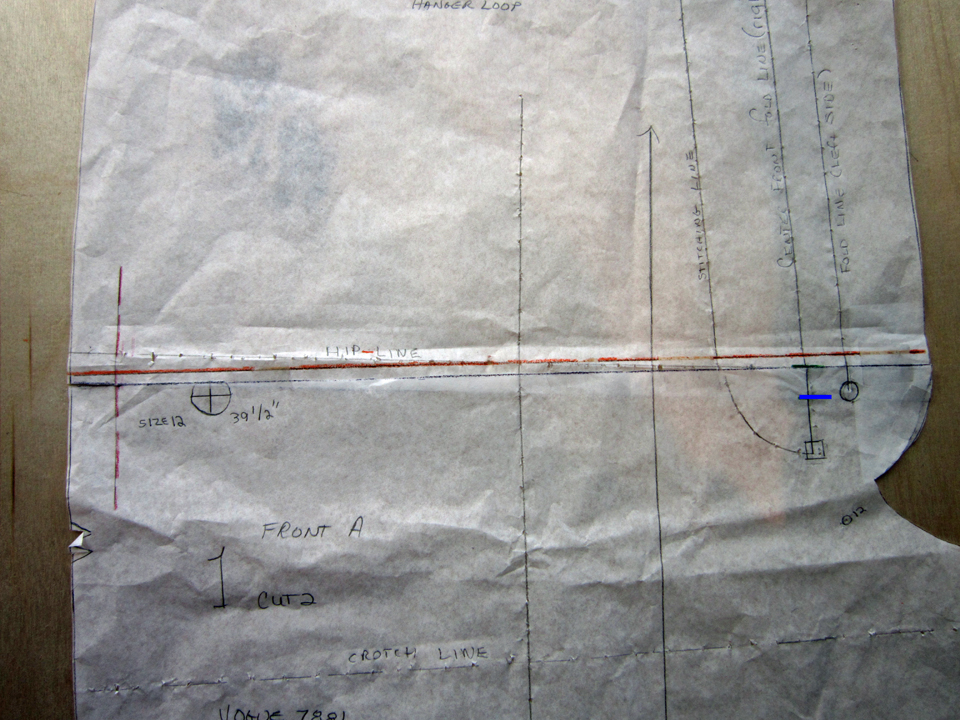
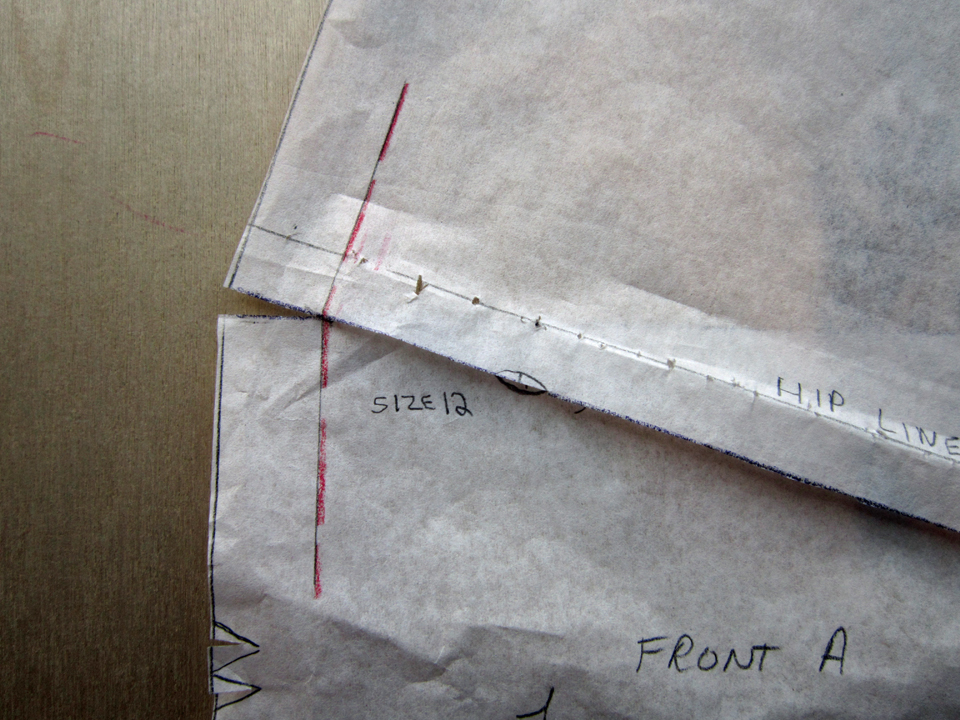
2. On the pattern piece (my front is shown in the picture) draw a line from edge to edge where the dart is needed. I drew mine just below the red colored hip line in the picture below.
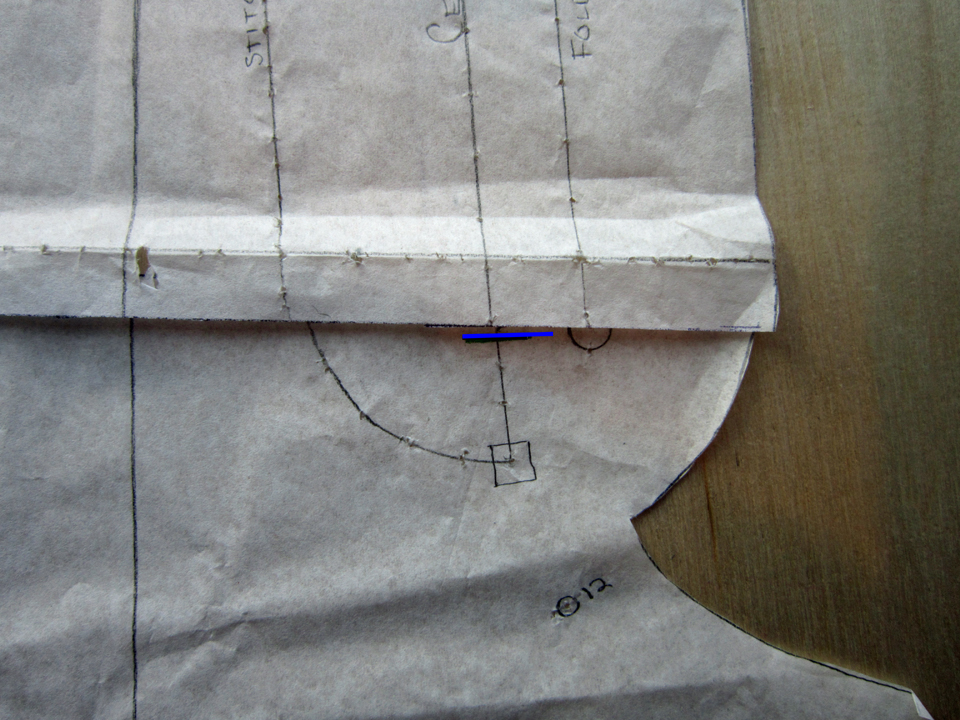
3. Make a mark below the line just drawn, at the center front, the measured amount that needs to be removed. (I needed to remove 3/4″ of an inch in the crotch length so the blue mark in the picture is 3/4″ of an inch down from the center line)
4. Begin cutting from the edge of the front center seam of the pattern tissue, continuing along the drawn line towards the side seam, but stop just a smidge from the seam allowance. (In the picture below, the seam allowance is the dashed line in red on the left side)
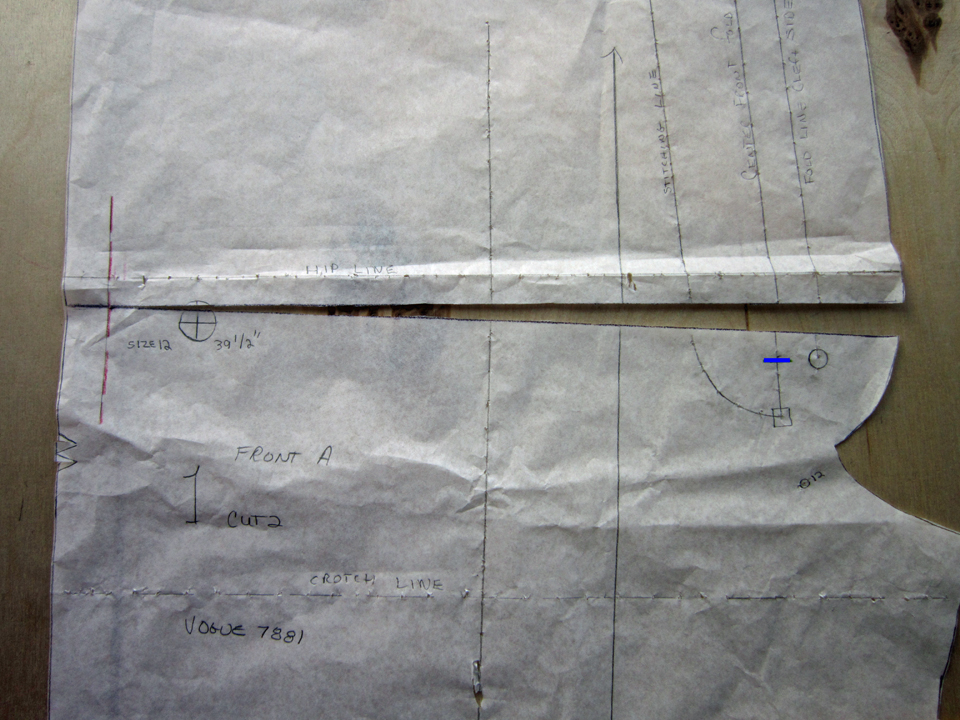
5. Next clip on this same line from the edge of the side seam of the tissue towards the seam allowance but not cutting through. There should be just a snag of tissue between these two cuts that are going to be a hinge for pivoting.
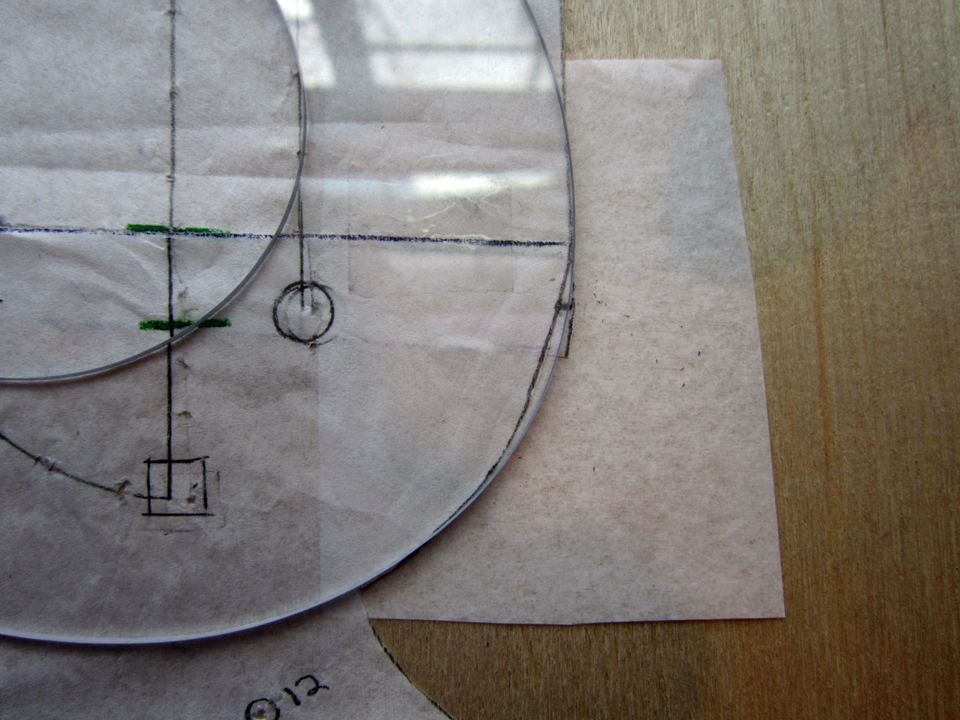
6. Now pivot the cut line section downward to match the line that is not cut. There will be a small gap at the side seam (slightly less than what you see in the picture for step 5) but don’t worry, it’s okay.
7. The center front now needs to be trued up along the edge so tape a piece of paper to the underneath near the area and re-draw the front curve. (The edge is just on the inside of the plastic curve ruler. I am merely adding back in a little section.
*Note: My above instructions are if the crotch length is too long, but if the crotch length is too short, this same method can still be applied, only rather than layering the top and bottom parts of the pattern using the hinge, the two sides will be separated or spread apart to the amount that needs to be added and additional paper is used to fill in the space.
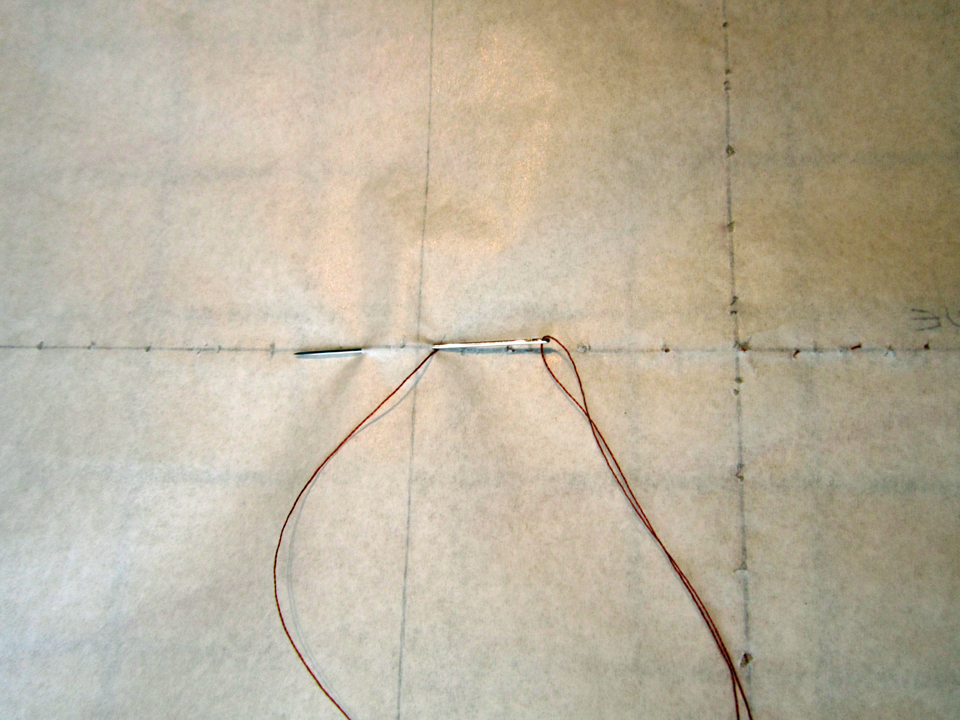
Okay… so maybe I should next talk about making my muslin. Yes, I thread traced all the lines Ms. Shaeffer recommended… EXCEPT the seam lines. I was eager to do things right but not quite that eager! Each fabric piece has to be thread traced separately so first cut the pieces out of the fabric and then lay the tissue on each piece, and sew running stitches by inserting the needle in and out from the same point along the markings. By using the same point for access and exit, the pattern paper will lift up easily from the fabric with maybe a little snag here and there. I traced the crotch line, hip line, knee line, the crease in front and the grain line in back, all the zipper markings and start and stop points for the gathered darts. See picture below.
This is how one leg (front and back) of my pants muslin pieces looked when I finished. There is baggy bumpiness at the waist area of each because this is where I stitched gathering threads in the fabric between markings. Remember… dart-less pants! Already a little nervous about this part of the construction.
My dart gatherings before the gathering!
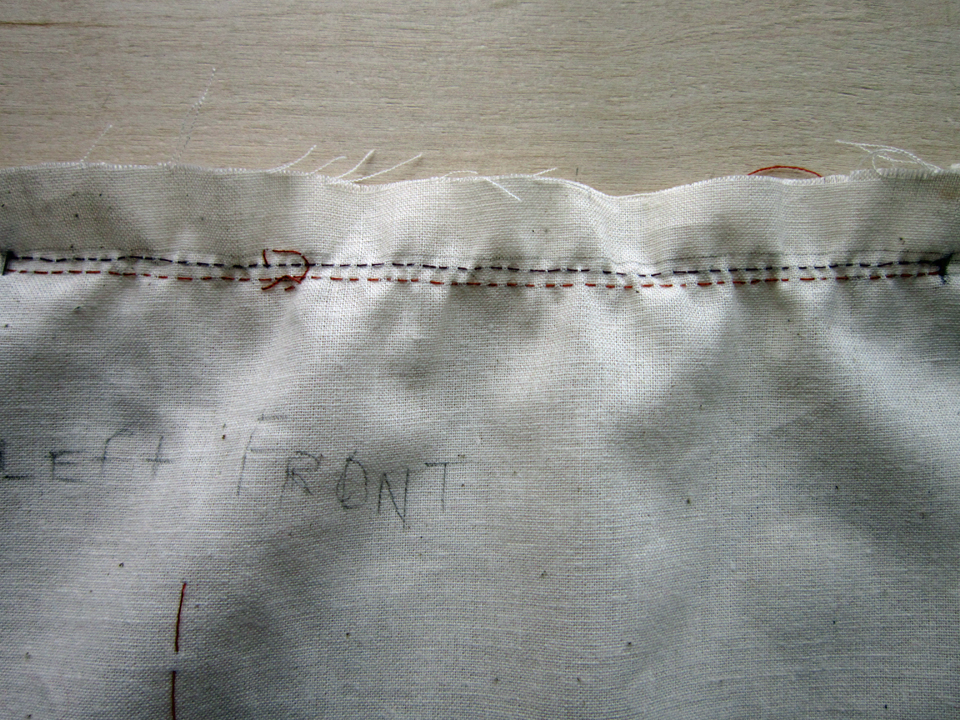
And after.

Okay… phase 2 of the engineering of my pants is complete. Now I’m ready for phase 3, the construction of my actual pants! It was my hope to refute the thought that Making Pants was Rocket Science and that is still my goal. But I’ll have to get back to you on that when I write Part 3. For now, enjoy the rest of your Spring break, vacation, or week and I’ll be back soon!
Salute! Jessica
2 Comments
Leave a Reply to jessebrandon Cancel reply
About Me
 Portland, Oregon,
 United States
Hi there! I’m Jessica Brandon and I am a clothes-loving sewing artist. When I am not sewing, blogging or shopping for shoes for my creations, I fill in the remainder of my days spending time with my children, playing ice hockey, gardening and making and drinking wine!


Up Coming Projects:
Vogue 1426

Vogue 7881
McCall's 7089

Vogue 8997

Vogue 1431

Vogue 9006

Vogue 8991

Love the little black dress and I hope I read the letters right so I can post this to you
Thank you Mom! With my life style, black dresses are really the best. Like when visiting wineries! I have plans for several more but with spring here and summer around the corner, I’m really needing color. I’m just finishing up a pretty floral one which I’ll be posting about soon!
Love – Jess