

"Fashion is not something that exists in dresses only. Fashion is in the sky, in the street;
Fashion has to do with ideas, the way we live, what is happening." - Coco Chanel"
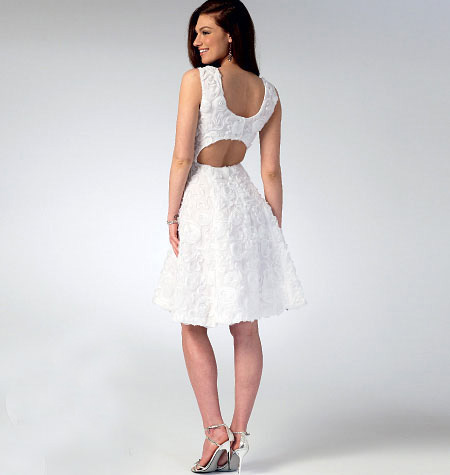
McCalls 6887 Impressionist Dress
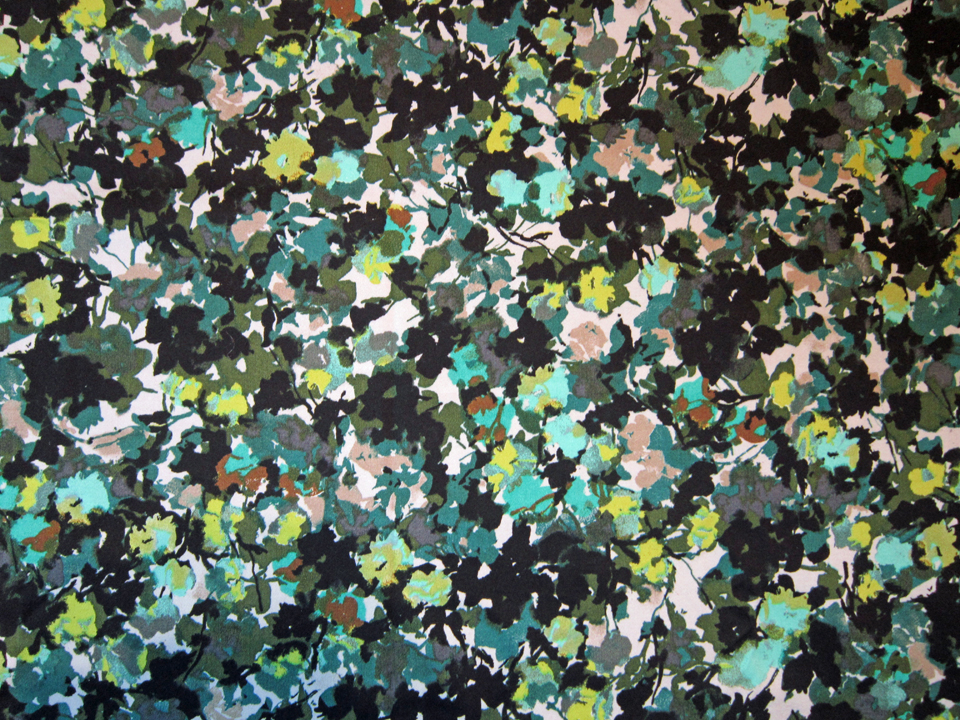
Impressionist Fabric
When I stumbled across some fabric at Joann’s (no I was not drinking!), for whatever reason, I saw it as perfect for making this McCall’s 6887 dress.
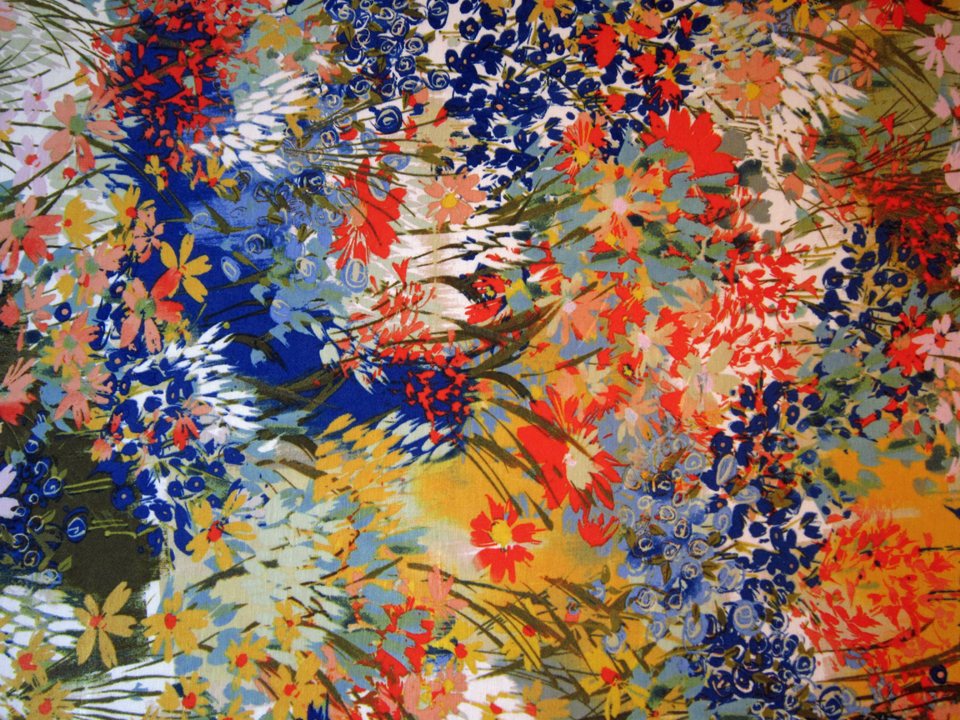
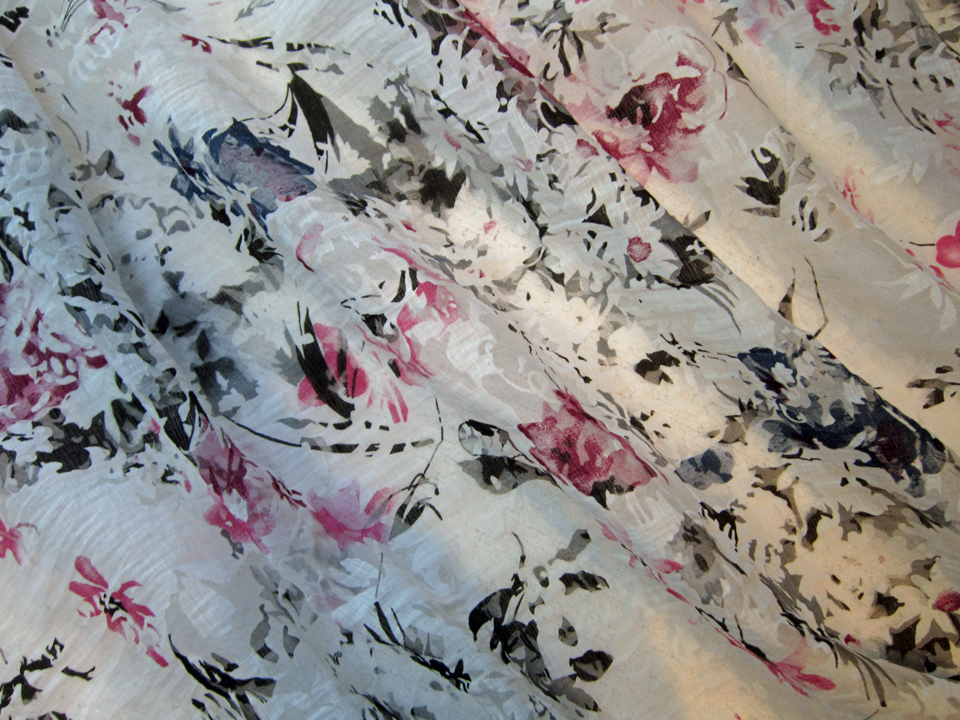
So what does the fabric look like? Well, the picture below is it.
When my son, Jared, saw it, he said it looked like impressionist fabric! My mind was whirling away as I heard him say this… the word was familiar, it had to do with art, but who was I kidding. I never paid attention to the art part of any lecture in my college classes. Nothing is worse than when one of your children seems to have one up on you; so I decided I better investigate and educate myself quickly! Because I like to share, I’m going to present a cliff notes version of what I learned. A glass of wine to sip while perusing my ramblings would fit in nicely about now! Hint Hint!
QUICK BIT OF HISTORY:
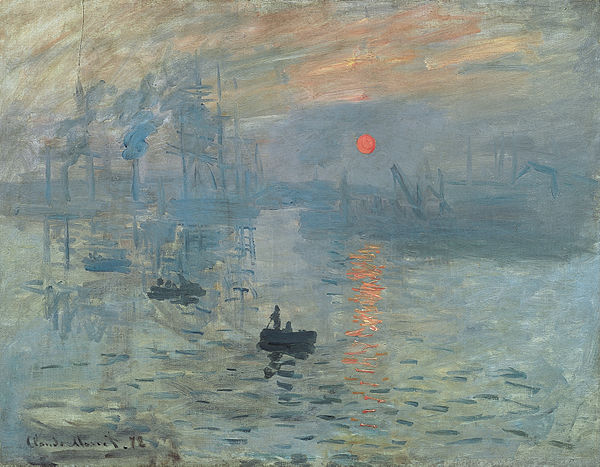
In the early 1860’s four young painters met while studying under a Swiss artist, Charles Gleyre. They were Claude Monet, Pierre-Auguste Renoir, Alfred Sisley and Frédéric Bazille. They were all interested in painting landscape scenes but wanted to accomplish this by paying less attention to details, instead using lighter brush strokes and brighter colors. It is said that at an exhibit, a reviewer-humorist Louis Leroy, who wrote his criticism in the Le Charivari newspaper, coined the word “Impressionist” from Monet’s painting entitled Impression Sunrise. He said that he considered Monet’s work to be nothing more than unfinished sketches.
He sarcastically wrote:
Impression- I was certain of it. I was just telling myself that since I was impressed, there had to be some impression in it… and what freedom, what ease of workmanship! Wallpaper in its embryonic state is more finished than that seascape.
What an A-hole right! Below is that picture, Impression Sunrise, Louis Leroy was speaking of.
Anyways, Impressionist art depicts scenes where there is less definition and specificity, with the intention of portraying an image that leaves some of the perception to the viewer.
Please keep in mind that my son is not an “art nerd”… he’s a “history nerd“! He’ll probably have some interesting words to describe me if he happens to read this particular blog article!
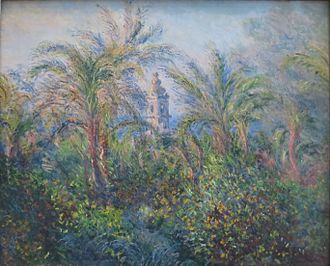
Since I’ve now talked a wee bit about Monet, I think I’ll go one step further and share one of his pictures that I think resembles my fabric. It is entitled “Garden at Bordighera, Impression of Morning” by Claude Monet, 1884.
One thing for sure, I’ve concluded that I most definitely made an Impressionist dress but not because of the fabric, but rather because I was less focused on detail, and instead paying more attention to the bright colors of the fabric! I was so mesmerized by it during the construction process, I don’t think my brain was functioning properly. There were tell-tale signs when I made my bodice muslin but I guess I was too eager to sew my Impressionist fabric!
The afterthought… should have made the whole damn dress out of muslin first and then I probably would have made something different out of my precious fabric! There were a number of problems. Here is the list:
1) The band across the back seemed a smidge too high when I put on my muslin, showing my bra strap but my thinking was that after I sewed the skirt to the actual bodice, its weight would pull it down. WRONG!
2) After finishing the bodice, I discovered that the shoulders had a weird curve that caused them to not lay right over my shoulders. So I would do what any creative soul would, I cut off the outer curve portion of the straps, AFTER I removed under-stitching seams and stitching seams. All that time and work and I was redoing it! This did not set well for me! In the end, the shoulders still aren’t right! In the picture, they do extend wider in the back and that’s what I slimmed down! I think I’m starting to hate this dress!
3) Attached the skirt and discovered that the back waist was 2 inches to much and sagged down my back. Lots of cussing commenced at this point! Since I had already put in the zipper this meant tearing it back out for my adjustments! More work!
4) When I was done hemming the skirt and skirt lining, I held my breath as I tried it on…the stinking back waist was still to big! I took 2 INCHES out of the center back! To top it off, the left shoulder was still doing something weird (probably because I have a weird left shoulder!) and the cross strap in the back did not cover my bra strap!
I left my sewing room, gulped down a glass of wine, and decided that I would sew elastic on the seam allowance in the back waist and call it good. Maybe when it’s 90 degrees I’ll wear it because it will feel cool on my back and everyone else will be so hot that they won’t pay attention to my wardrobe malfunctions!
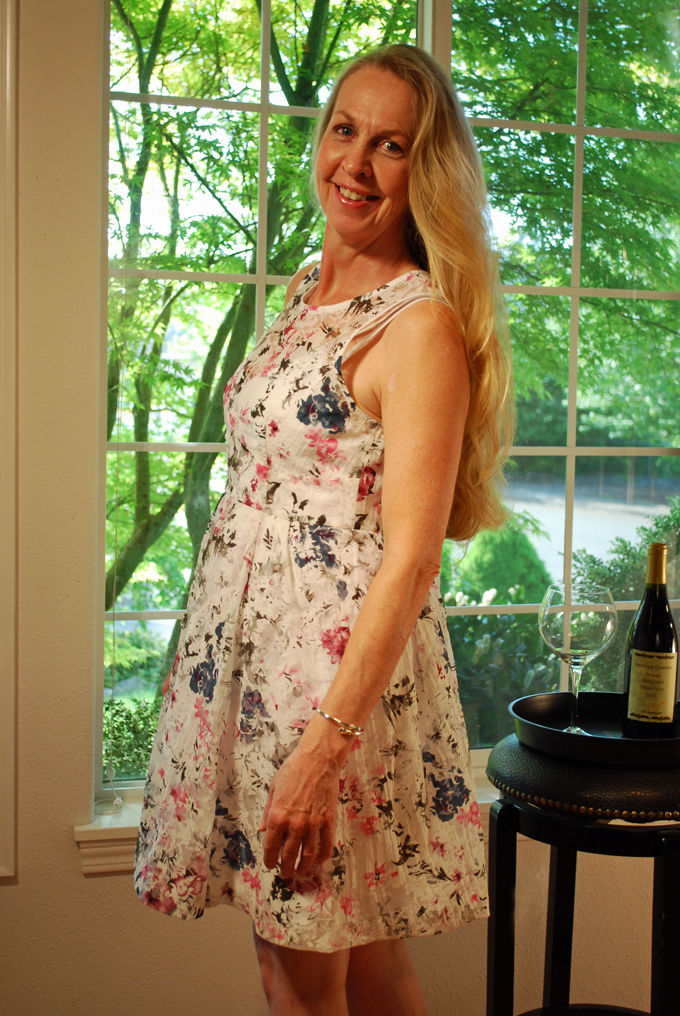
Well I guess I better get this over with. I decided to do a photoshoot in my backyard. It’s beautiful outside and after a long winter indoors, I plan on spending as much time as I can outside!
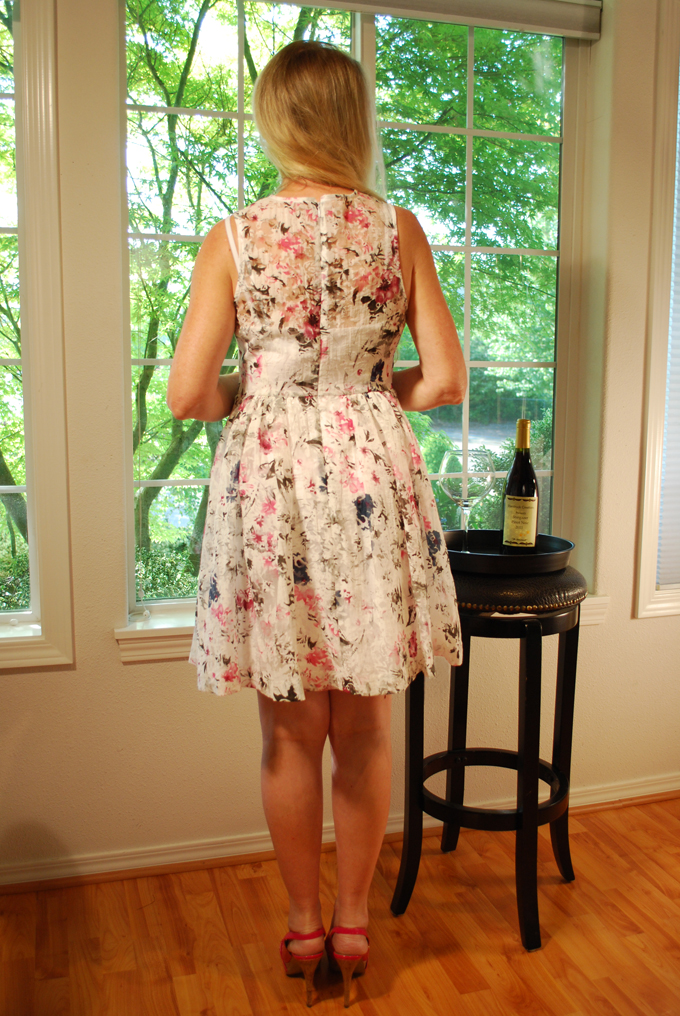
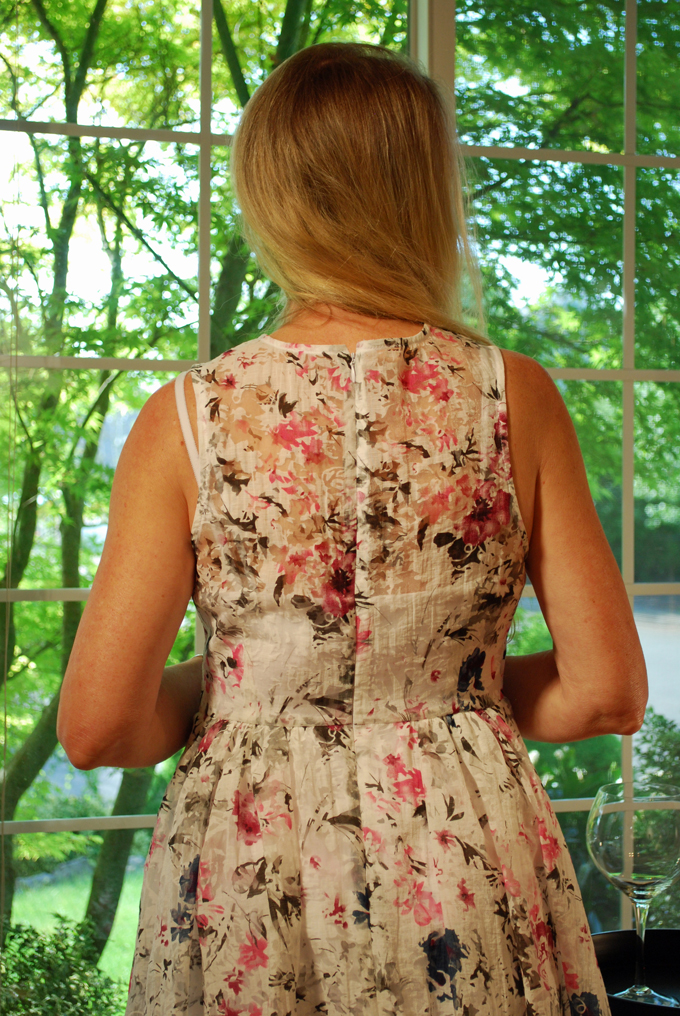
Here it is!

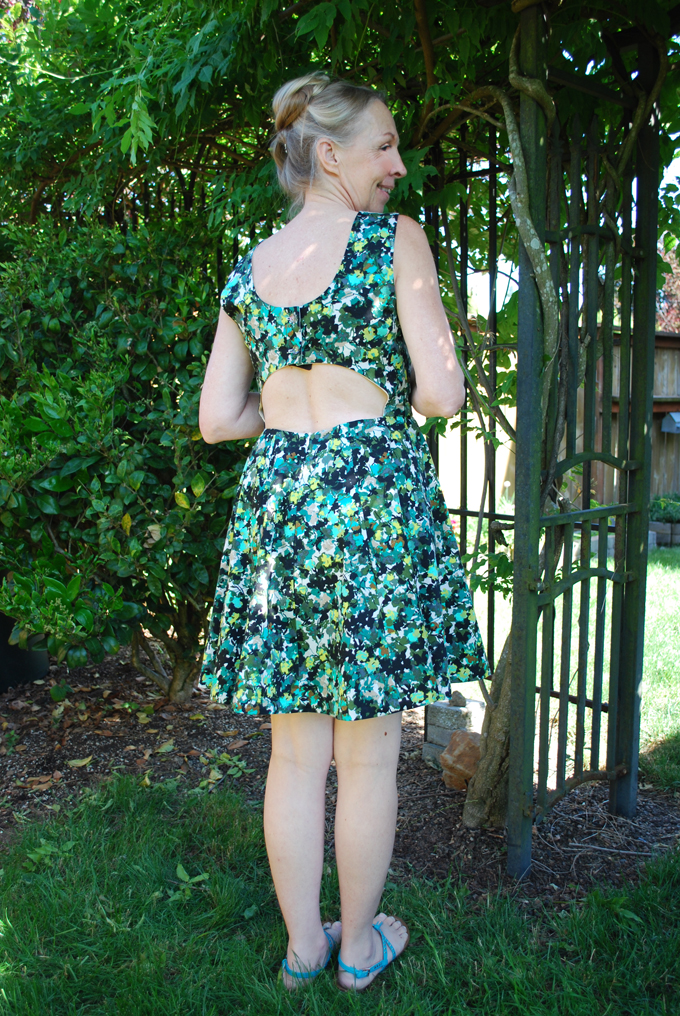
Here is a view of the back which I am going to do some more work on but decided to share it and then tear apart later so I could get this posted! (Part of my bra strap in the back popped out – I didn’t Photoshop it out. This is one of the problems!
And just because…
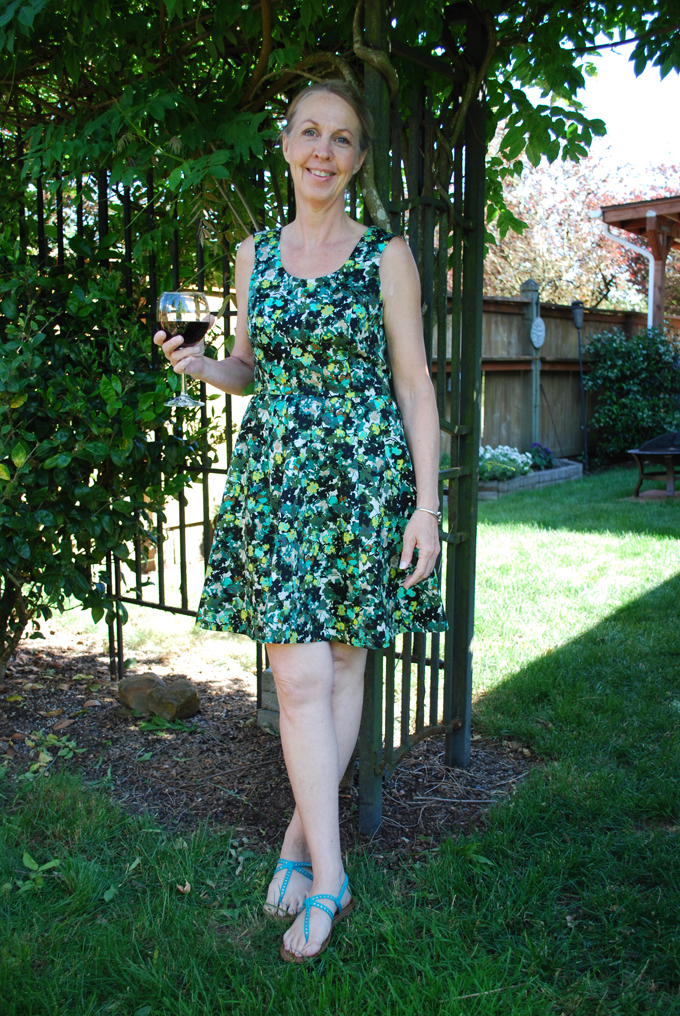
Honestly, I did like the pattern and the instructions were easy to follow but because of the styling in the back of the dress, I sort of failed at getting it to fit properly so a word to the wise, be careful with this one!
Almost forgot… remember the picture at the very beginning of this post? Well that’s fabric for my next dress! Wish me luck!
Salut, Jessica
Read MoreMcCalls 7088 In Spring
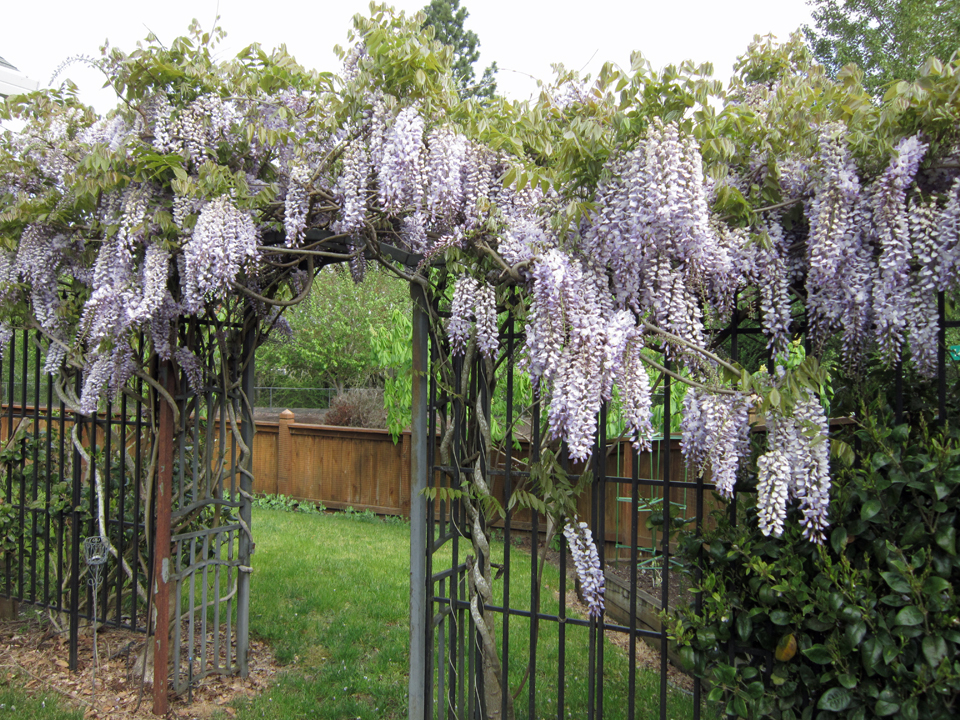
My Wisteria in full bloom!
Finally…the rain has slowed down and April is turning out to be a very beautiful month! The setting at the winery I visited last weekend was fabulous. It was a beautiful 76 degree day and I got to enjoy time with friends while listening to Ty Curtis play the blues and of course, sipped a glass of lovely rose wine… or two…or –uh…we’ll stay at two! Needless to say, I had the feeling that life just couldn’t get much better!
Spring days like those at the winery always inspire and motivate me to push ahead through the winter drudgery mood that I develop, slap me in the face with new ideas and prod me on to the sewing machine to get back to creating clothes! I posted a picture of my Wisteria above because it kind of reminds me of my fabric for the McCall’s 7088 dress I just finished. Well sort of! I bought it from Mill Ends in Beaverton Oregon.
Now you’re thinking…What? What McCall’s7088 dress are you talking about? Well, here’s the pattern:

I really enjoyed making this dress. I got caught off guard with a surprise, but nothing disastrous. If I made this dress over and over, there would be no surprises, only perfection! But that’s how it is for us “home sewers”. The beauty of this though is that with all the surprises and mistakes, we get very good at problem solving which is where that lovely creative part of us really kicks in!
Instructions for the dress construction are pretty straight forward. I’m still working on improving SHARP pivots like that in the bodice so do whatcha gotta do! My fabric was sheer so I tread traced all the darts and used the pinking shears on all my seams. I would have done french seams but the fabric has a slight stiffness to it and I was concerned how the seams would hang so decided to avoid them.
The bodice lining was easy. I used a very fine white cotton that feels almost like silk. For the price it should have been!
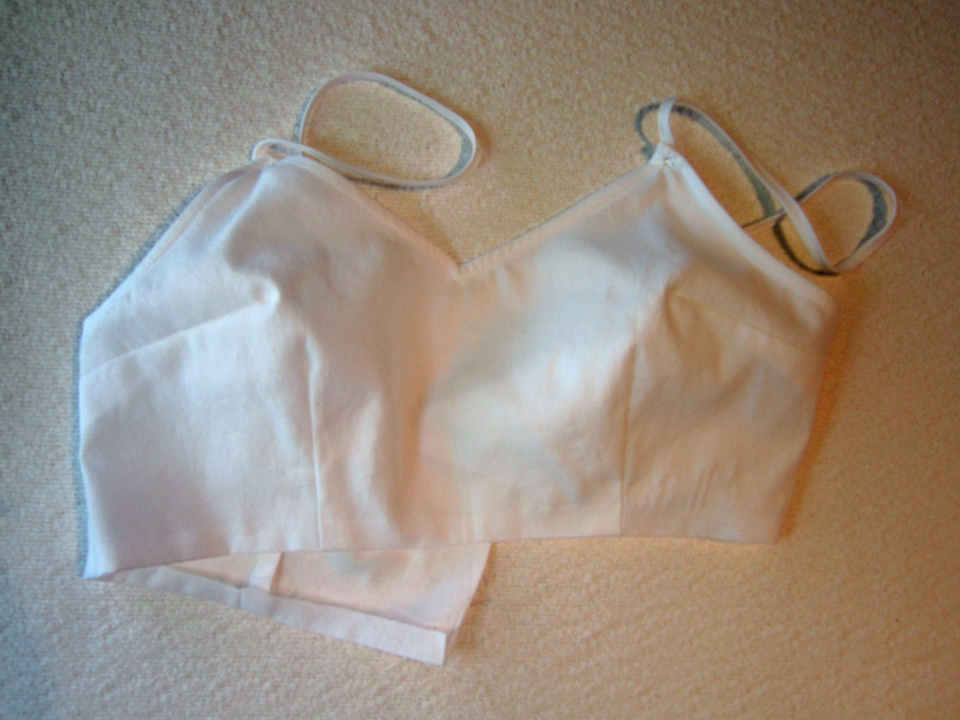
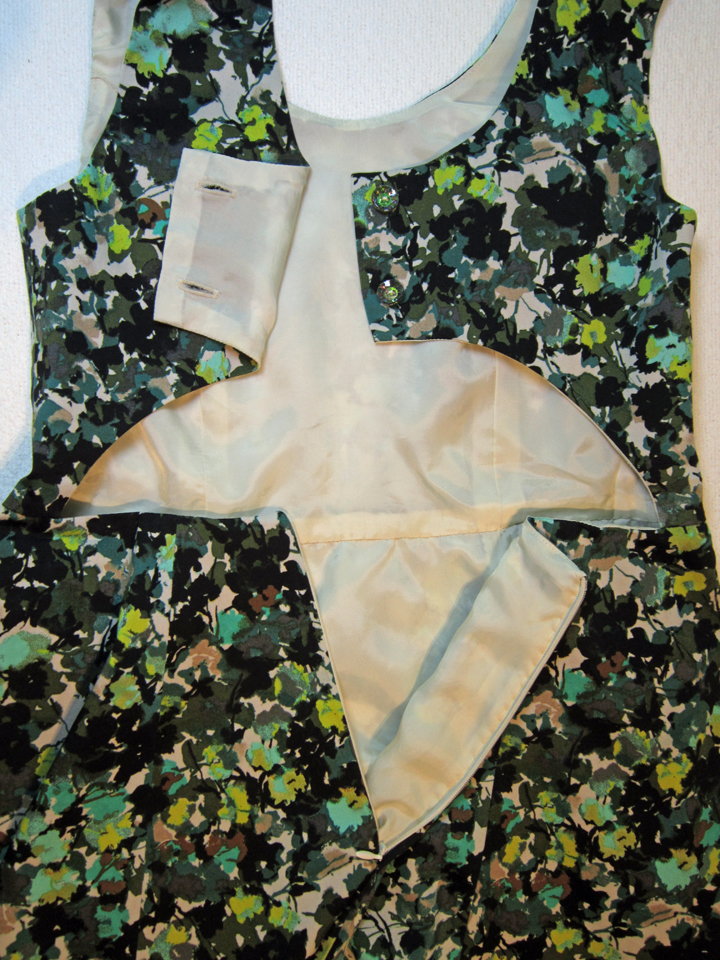
You might notice in the picture above that the waist seam allowance is pressed under 5/8″ inches. I decided to not sew it into the waist with the skirt but rather sew it over the seam allowance of the skirt and skirt lining for a nicer finish. This is when I realized that the right side of the lining would not be facing my body, the wrong side would. Why? Because that’s what the pattern instructions tell you to do! I was okay with this here because my fabric was shear enough that I didn’t want the seams to show. I had to iron out the fold and press the fold to the outside. No problem though because I always baste a line of thread to follow when I press, which I remove later.
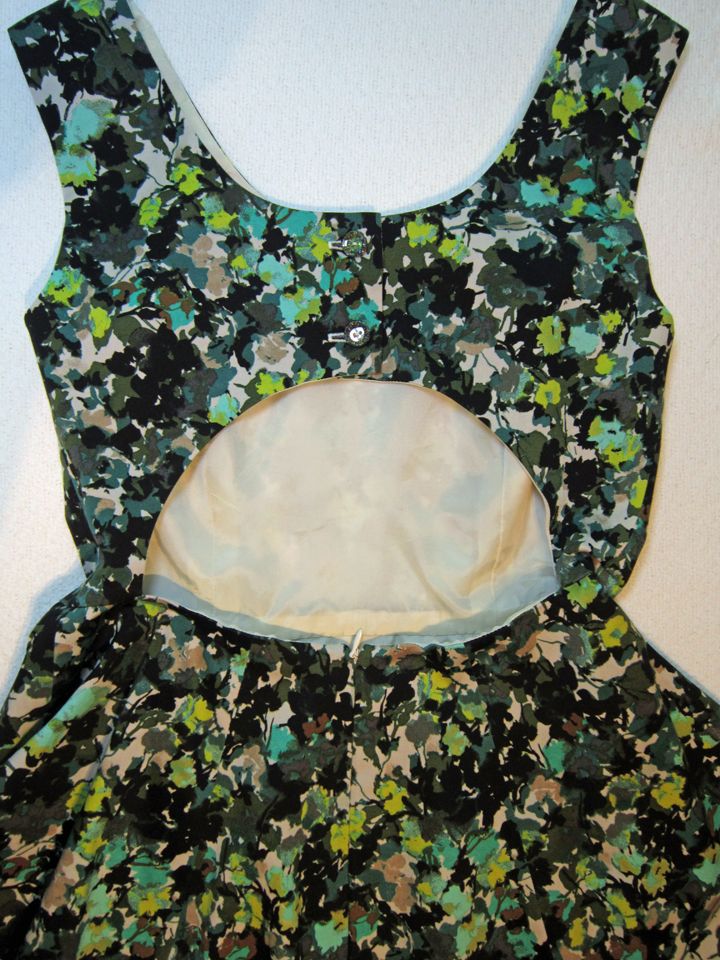
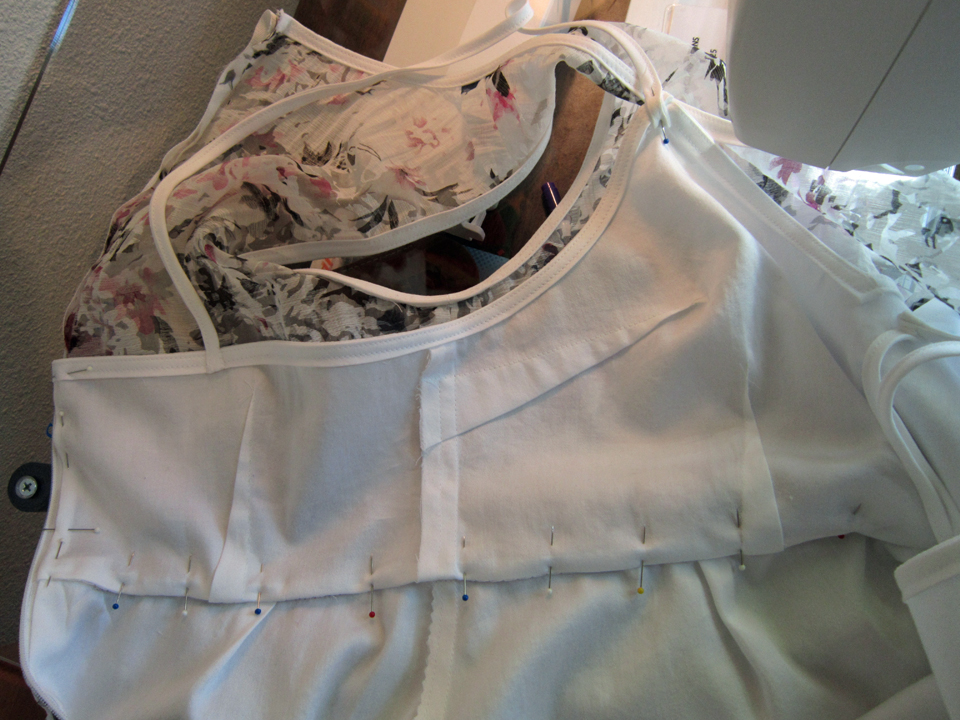
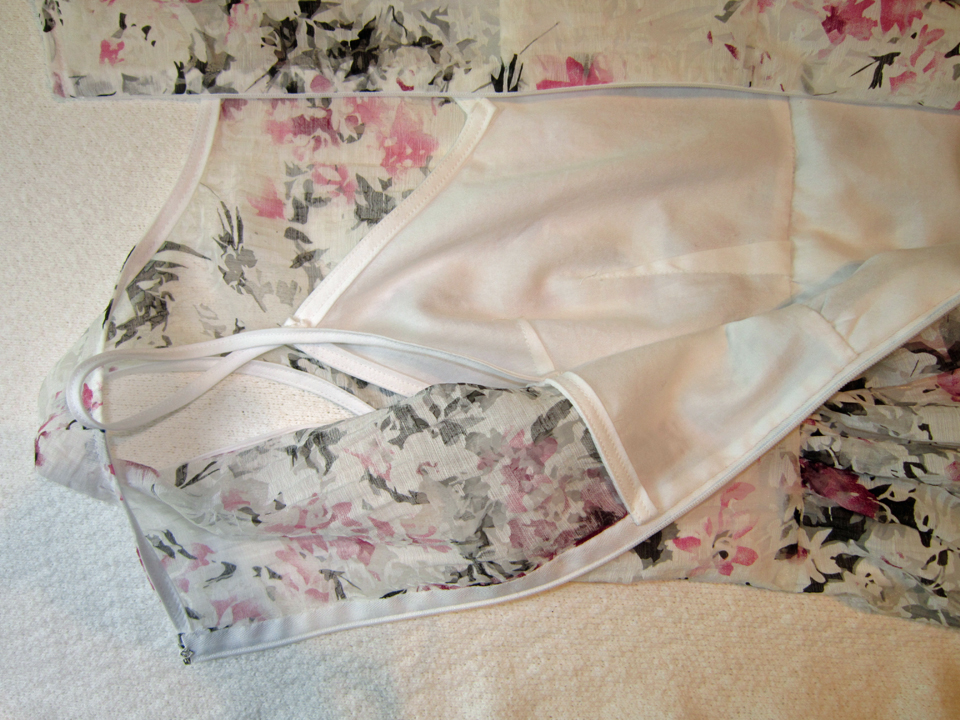
In the picture below, the dress bodice, skirt, and skirt lining have already been sewn together and the zipper installed. I went ahead and did the finish sewing that secured the skirt lining over the zipper tape. Now I was able to hand sew the bodice lining to the waist seam allowance and finish the sides along the zipper.
Here it is finished, laying on my working table with the sunlight shining in! Not a very good picture for displaying work but it just seemed right because it’s sunshine!
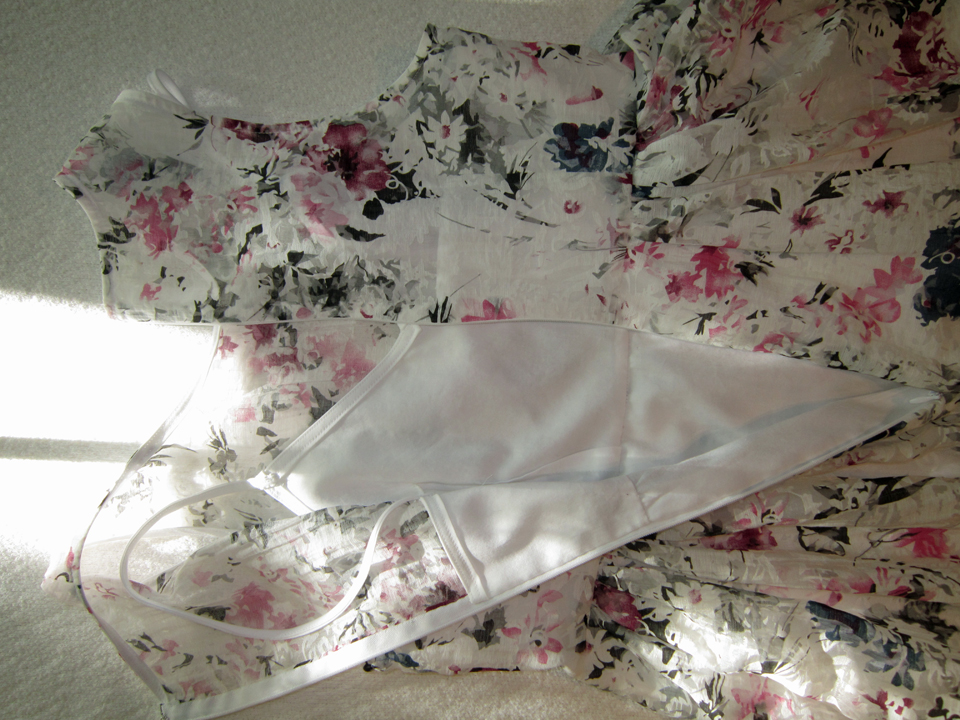
I decided not to sew the lining straps to the dress shoulder. If it becomes a problem, then I can easily do that at any time.
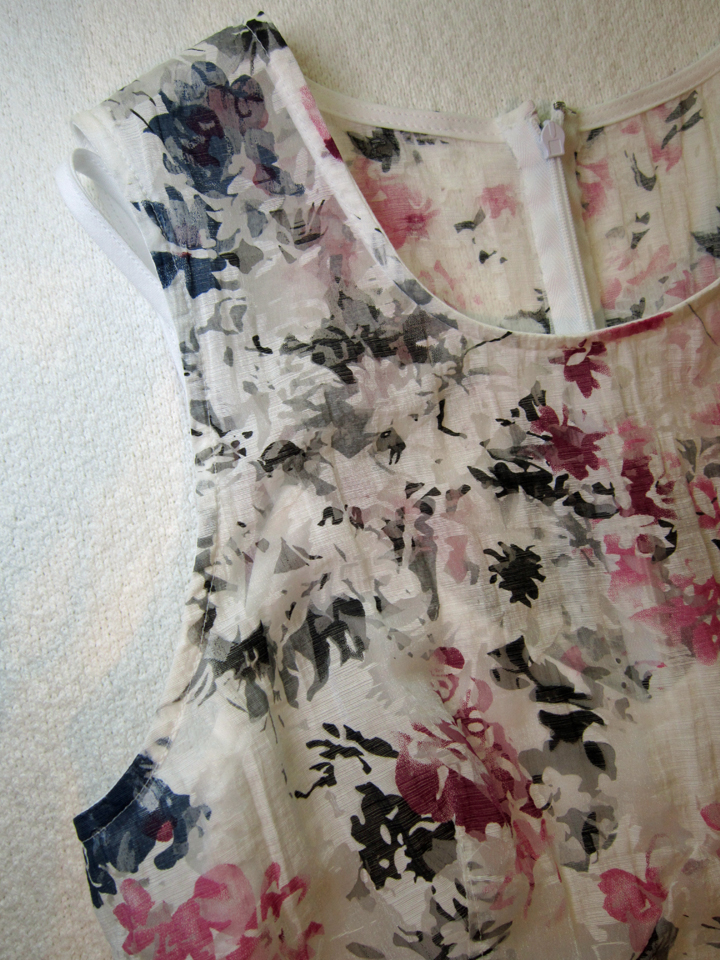
Here is the back with the zipper open.
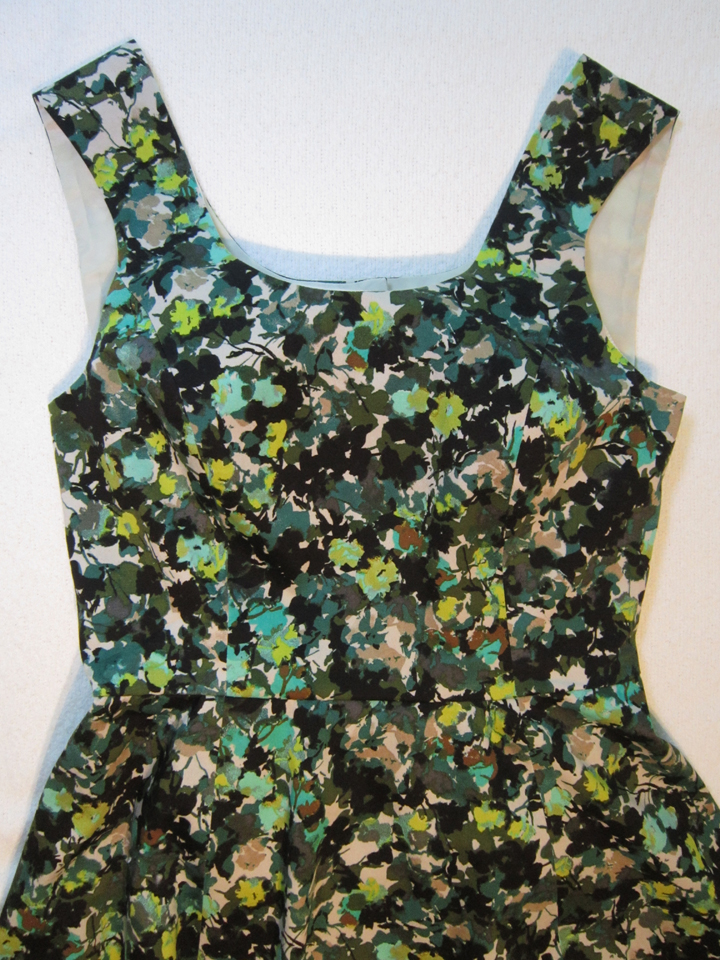
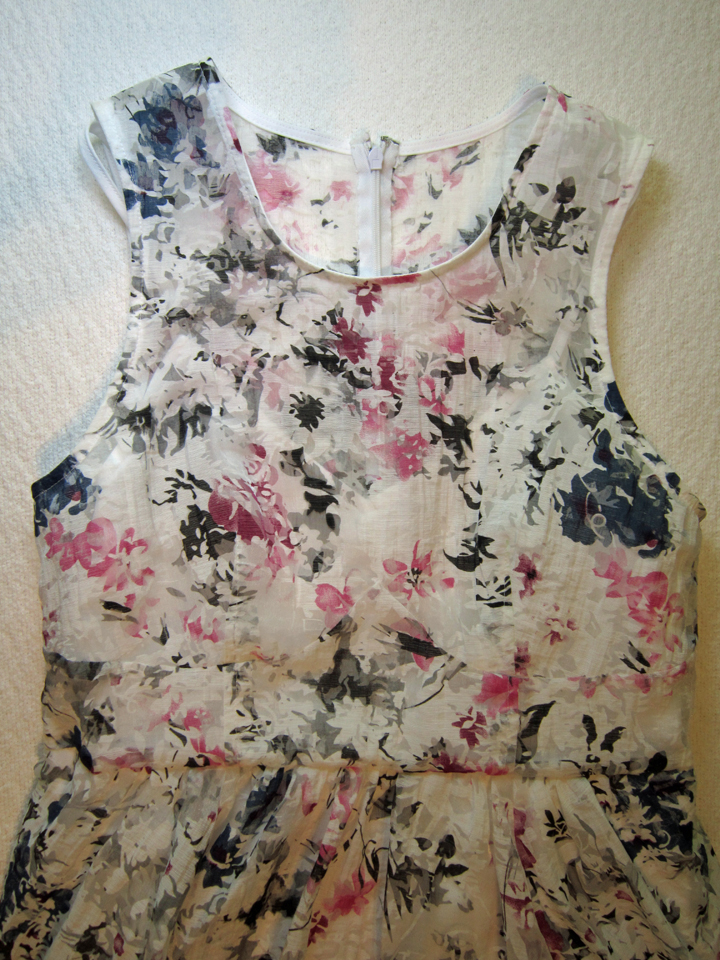
This is the back with the zipper closed.

The front. In both this picture and the last one of the back, it is easy to see the lining.
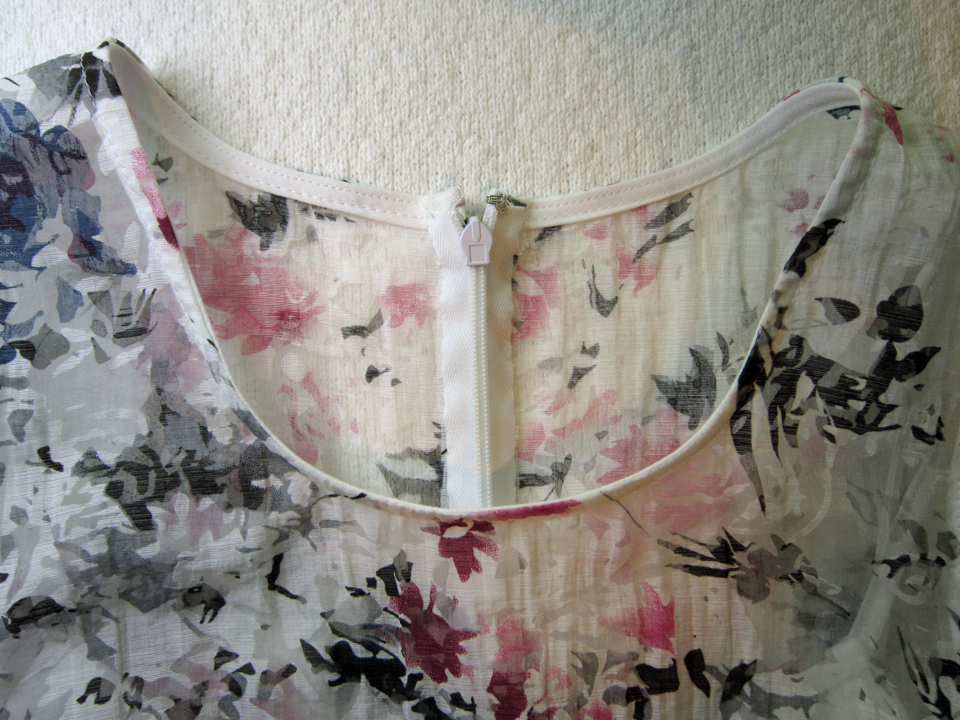
A close-up of the neck. Notice how the zipper rolls ever so slightly. And I tacked it down!
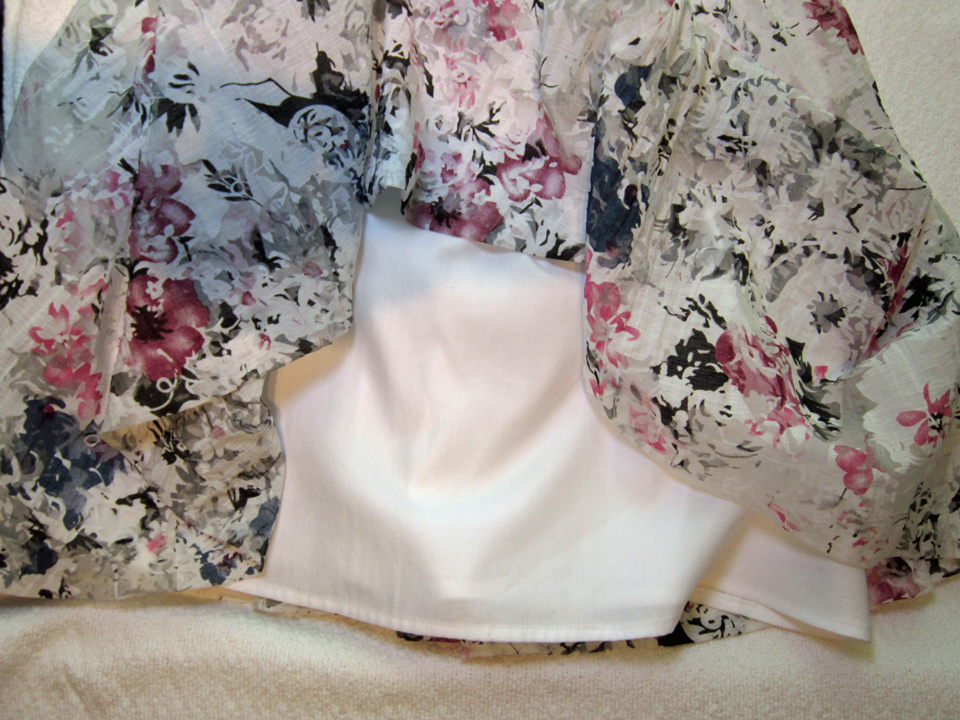
This is the skirt and skirt lining. Really no purpose but I took the picture and figured, why not!
I simply loved how this dress went together. Probably the beauty of the fabric played an enormous role too. The colors and brightness of the white lining lifted my mood. I’m going to have to get back to a fabric store soon and buy some more cheery fabric and make another summer dress!
I suppose I better show you how it looks on me. I keep worrying that it may be the boring part of my post but from some feedback I’ve gotten, it seems that’s sort of like the drum roll! The question of what shoes I’ll be wearing is sometimes the grabber! I’ll probably never know for sure, but as the old adage goes, if it’s not broke, don’t fix it! So, until then, I bring you me!

Yes… hot pink shoes! Below is the back.
A close-up so you can see that the fabric is shear above the bodice back lining and of course, the strap that I chose not to sew to the inside of the shoulder is peaking out!
Back to the front…

And because I’m a ham!!!!
So there you have it… McCalls 7088 in Spring! Speaking of spring… the sun is suppose to grace us with it’s company for the next four days, as you can see behind me through the window but for the moment, it’s time for me to sit, relax and enjoy a glass of Nebbiolo Wine and decide where to wear my new dress!
A Votre Santé! Jessica
Read More
About Me
 Portland, Oregon,
 United States
Hi there! I’m Jessica Brandon and I am a clothes-loving sewing artist. When I am not sewing, blogging or shopping for shoes for my creations, I fill in the remainder of my days spending time with my children, playing ice hockey, gardening and making and drinking wine!


Up Coming Projects:
Vogue 1426

Vogue 7881

McCall's 7089

Vogue 8997

Vogue 1431

Vogue 9006

Vogue 8991

![]()
Starstruck Creations LLC