

Spring into Vogue 8817 Top
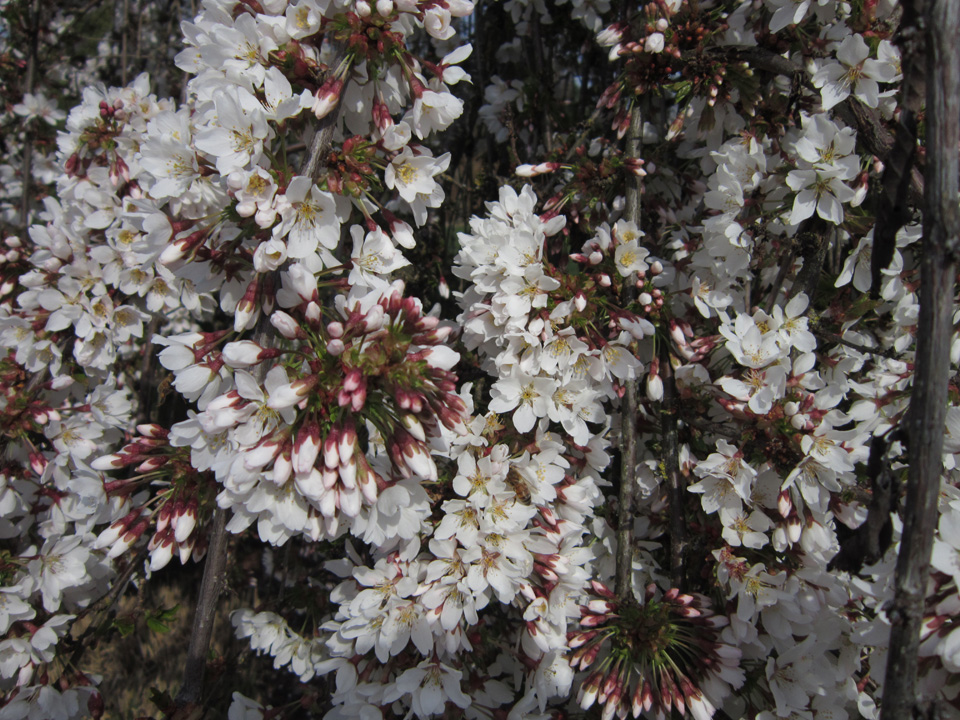
My “Weeping Cherry” is full of honey bees right now! There is one just below the center.
This is definitely a sign of Spring!
At last it’s officially spring! This means warm weather is coming… hopefully sooner than later. We have had several nice days now with the temps being in the upper 60 ‘s but the rain is back today and the temperature has dropped down to 50°! Oregon is such a tease! This means that for some time yet, many of us Oregonians will continue to wear sweatshirts, hoodies, and sweaters to stay warm. And some of us are still happy with long sleeves and so that is why I decided to sew up a new tunic type top. My daughter thought it was a sweater! She did say it was really cute though and coming from a 19-year-old, I decided to roll with it!
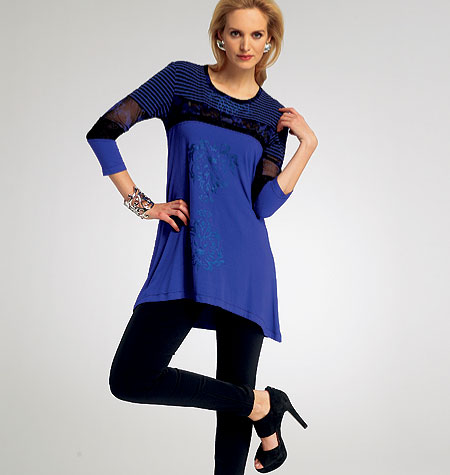
So what is this sweater tunic thing I am talking about? Well, I made it using the Vogue 8817 pattern and it looks like this… only different!
I have to say it right away… sewing this top was a dream of a project. I had a lot of fun making it and was even able to sip my wine during the process without any major casualties! I had so much fun in fact that I forgot to take any pictures while I was assembling it. I’ll blame THAT on the wine! The pattern instructions are very easy to follow. There are no zippers, buttons and button holes, facings, etc., so you can just fly like a breeze right through the making of it. I am not saying that sewing knits is easy though. There are a few challenges… like using the right sewing machine needle, getting the tension right so the fabric feeds through smoothly and lots of double row stitching if you aren’t fortunate enough (like moi!) to have a machine that sews an excellent stretch seam.
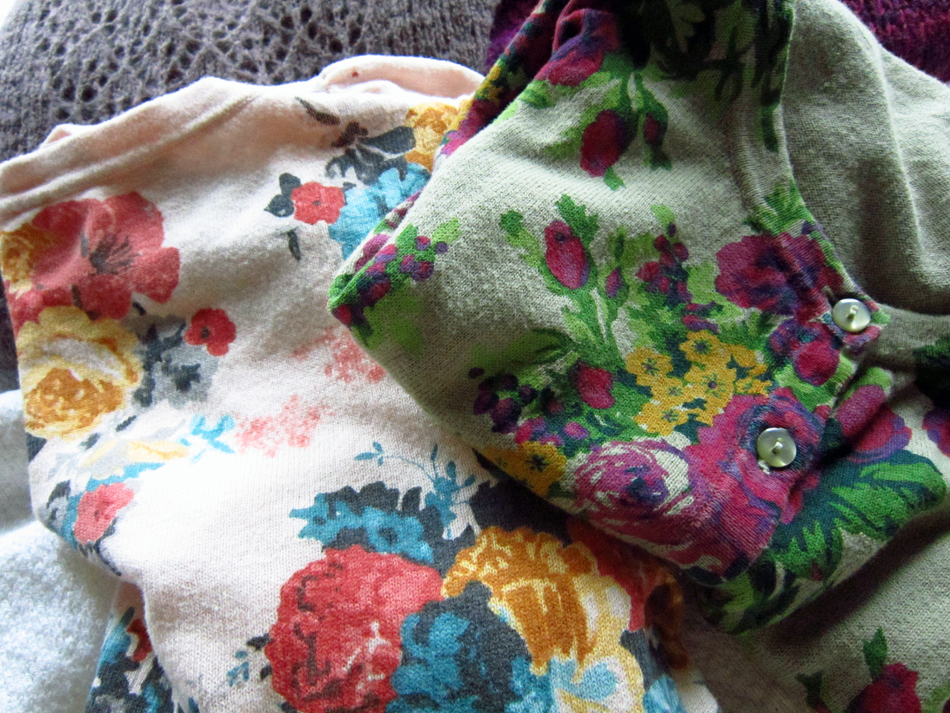
The total instructions are less than a page. I was a little uncertain about how heavy a fabric I should use so I leaned towards more of a medium weight than a light, and while I really like what I chose, my next one, maybe two, (yes I am going to sew several more because they are so quick and easy) I think I will choose more springy bright colored lighter weight knit fabric. You know how it is though… the prototype is always the test run and you never know how you will feel about making another until you’ve finished. The pattern instructions call for 3 different fabrics, the main fabric with 2 contrast colors. For contrast one & two I decided on black and a beige-y brown…
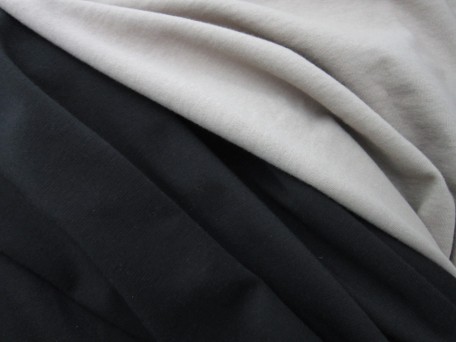
The beige-y fabric was a little heavier than than the other two and I was kind of concerned about this but it was the perfect color for the ensemble so I decided to give it a go!
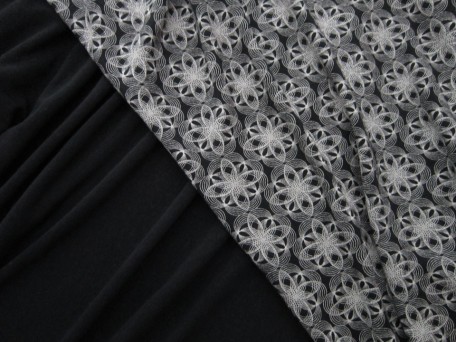
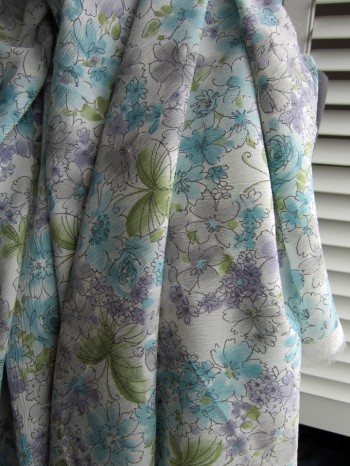
And for my main fabric, I chose this. The back side is a solid black. I loved sewing it.
All of my fabrics I purchased at Mill Ends in Beaverton, Oregon. Unfortunately they do not have an on-line catalog so it would be difficult to order from them if you are out of state but if you are ever in Oregon, they have two stores you can visit, one in Beaverton and the other in Portland, both with a very nice selection of some very beautiful fabrics.
Since I didn’t take any pictures while sewing this top/tunic together, I thought I would share with you some close-ups so you can get an idea of how it goes together.
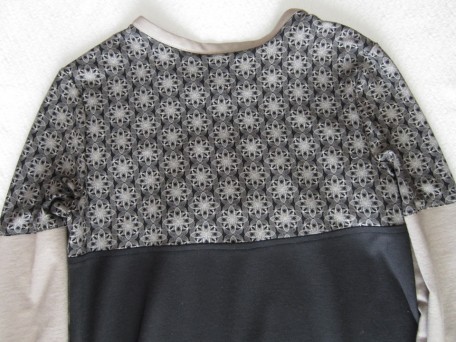
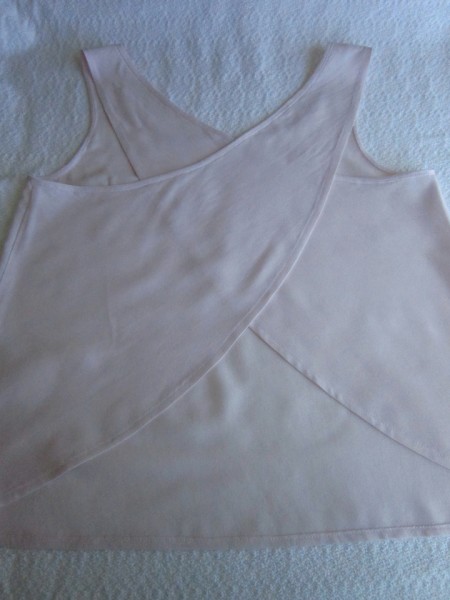
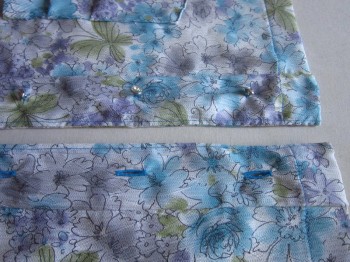
The front bodice is in two parts while the back is one. Here is the back.
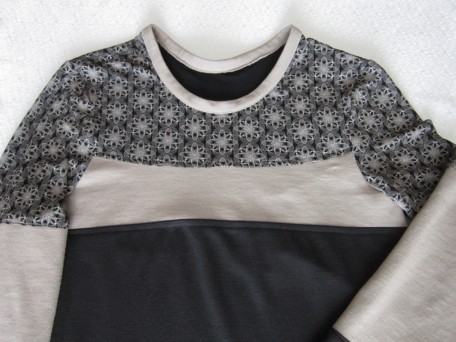
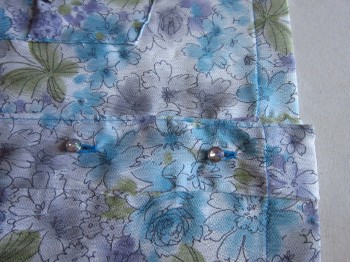
This is the front. Each section is top-stitched.
The neck band goes together like this:
1) You stitch it’s ends together so that it is a circle.
2) You next pin it to the neckline, right side to right side, stretching it slightly to match markings. I just marked centers and one shoulder since the seam goes on one of the shoulders.
3) Lastly, the band is then folded over the seam allowance to the inside with the edge turned under 1/4 inch and sewn in place. You end up with a 1 inch wide neck band. I thought this a bit bulky but the beige-y fabric which I already thought was a bit too heavy may have been a big part of the problem. I ended up cheating and didn’t turn the edge under 1/4 inch. This fabric doesn’t ravel so after sewing the band in place I just trimmed off the excess.
The skirt for the front and back is made from one of the contrast fabrics and I didn’t do any close-ups because it’s hard to do with a camera. If you look on the pattern, it is easy to see that the front is cut on the bias and has a upside down U shape while the back is cut an even length
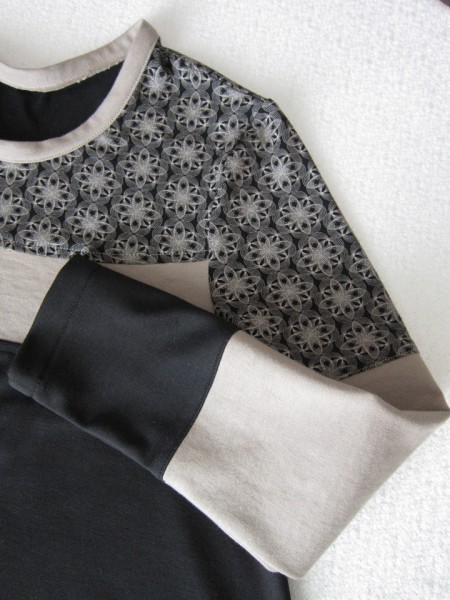
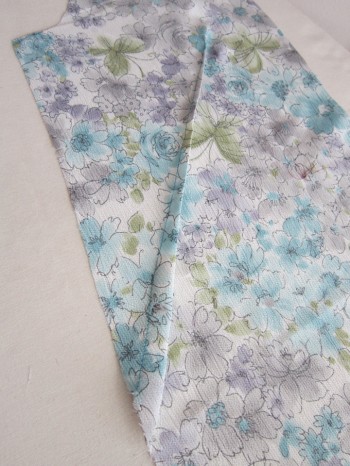
I did lengthen the sleeves a bit since I wanted LONG sleeves. Remember… I’m still cold! My arm from shoulder to wrist is 21 inches long but the pattern pieces for the sleeve in a size 8 which I usually use, are only 19 1/4 inches. It looks to me from the picture on the pattern envelope that they are probably suppose to be 3/4 inch sleeves.. I think! Anyways, I needed to add 1 and 3/4 inches so I divided that number by 4 and then added 3/8 inches plus a smidge to each end of the 3 pieces for the sleeve (bottom of top – top and bottom of middle- and top of bottom). Here is a picture of a sleeve. Oh yes, and they too are top-stitched.
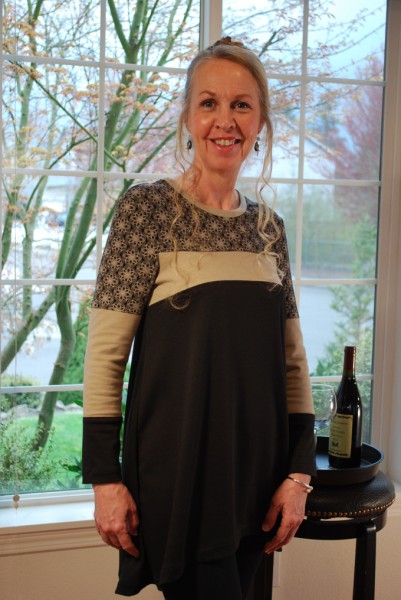
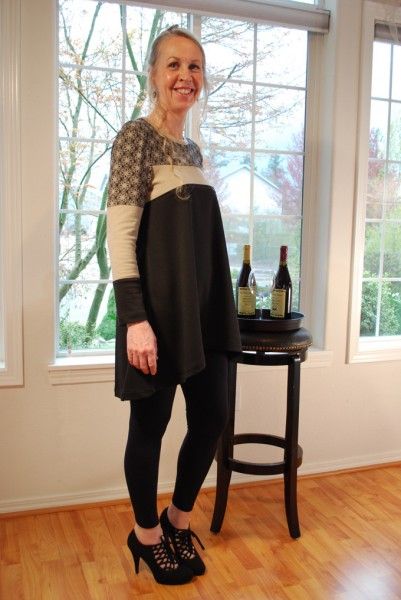
I decided before I even made this that I would wear it with black tights or leggings. Warm and comfortable! So this is the front.
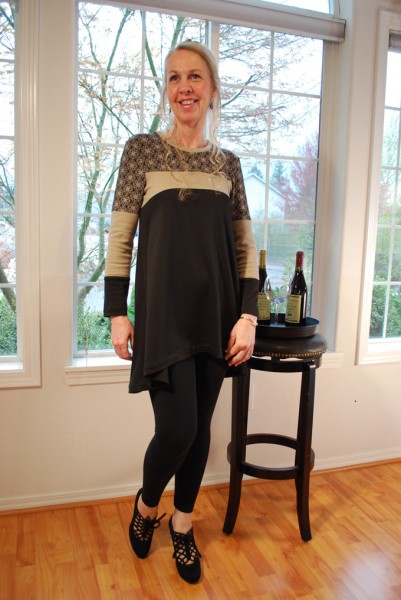
The back of course.
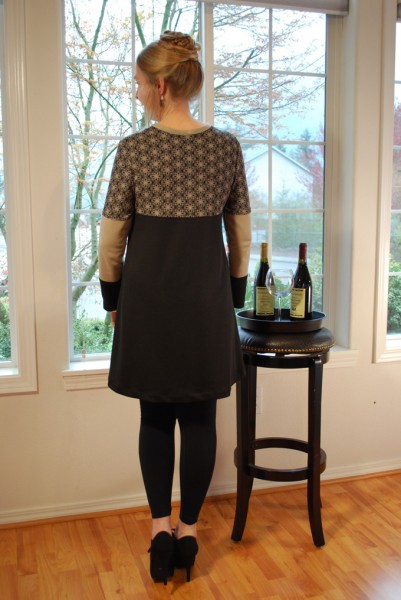
A close-up so you can see the color blocking a little better.
And another because, because… oh just because!
I have already started looking for more fabric to make several more of these. I am thinking one in coral and one in robin egg blue, oh and maybe one in lace… with contrasts that really complement! But of course, that’s if I can find just the right fabric I see in my mind! My next up and coming project I think you will really like. May even wear it to my next Curtis Salgado show! He is such an awesome rhythm & blues man! Sheesh… that means I better get sewing because I only have 2 weeks! Until then, enjoy the beginning of spring!
Salute! Jessica
Read MoreDesigning a New Top
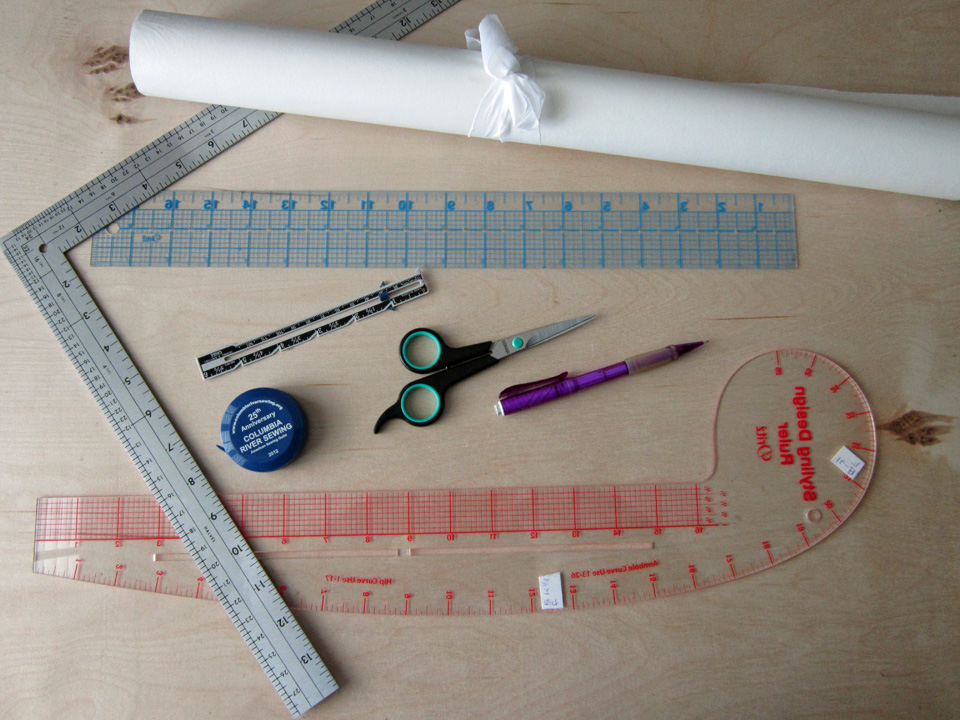
Useful Tools for Flat Pattern Design… Except one item missing… TAPE!
For several years before the last several years, before our economy blew up, clothes in stores, blouses in particular, had style! They were made from fairly good quality fabrics in stunning patterns and beautiful colors and were just plain fun! AND… during that time, it was more tempting to buy than sew, especially when you fell in love with something and wanted to take it home and wear it immediately! Okay… so the cat is out of the bag… Yes, I think I bought more than I sewed! There! I said it! I was sew lazy! Now days though, when I get that wee little urge to go out for a little sneak peek, all I see on the racks is, for lack of a better word, garbage! It seems there are more cheap ugly clothes than ever! You know what this means don’t you?!! Yep… it’s time to do some serious blouse sewing!
I have an assortment of top/blouse patterns in different styles, a few I have attempted to make but…so far, none that really fit me properly. I can’t hold the pattern makers responsible because it is the same problem when I buy Ready-to-Wear blouses. In either case, blouses are a little too roomy in the shoulders and if they do fit in the shoulders, they are not quite roomy enough at the waist. My only explanation… I am shaped like a triangle! I long ago accepted this fate in life but am growing tired of the fitting battle so I decided to strap on the big guns and take on the challenge of making my own blouse pattern(s).
Okay… so for my first blouse design, my inspiration came from something I saw Emily VanCamp wear on Revenge about a month ago. Yes… I’m still watching that stupid show! She wore a cream colored blouse that looked to me to be made of Crepe de Chine but of course that’s just a guess. Anyways, after stewing on it a bit, I grabbed my clip board with pages of ready to use croquis and started sketching. Eventually this is what I ended up.
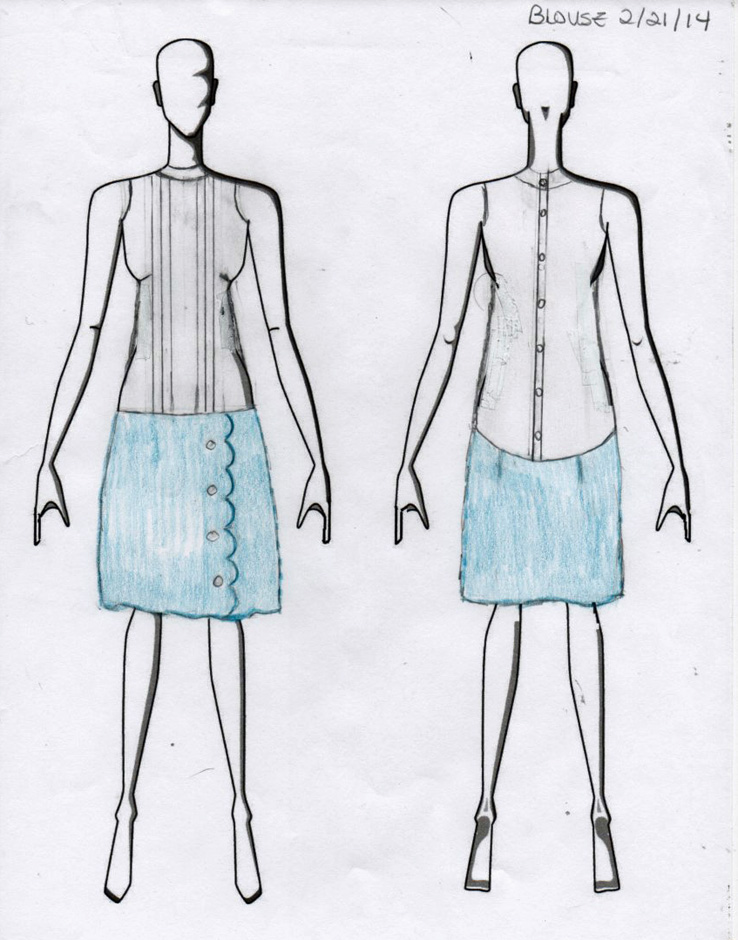 Yes, there was a bit of skirt thinking going on too!
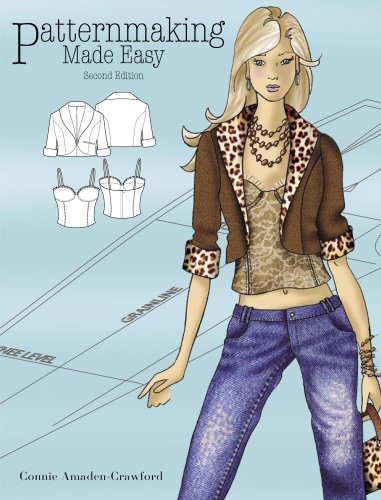
Obviously I am not the greatest at fashion drawing on croquis but it works for me and that’s what matters! After dwelling on this drawing for a bit, I went to work. I started off with a basic bodice block that I drafted last year using Connie Amaden-Crawford’s book, “Patternmaking Made Easy” (The book on Connie’s site is the 3rd edition whereas mine is the 2nd so the front cover picture is different).
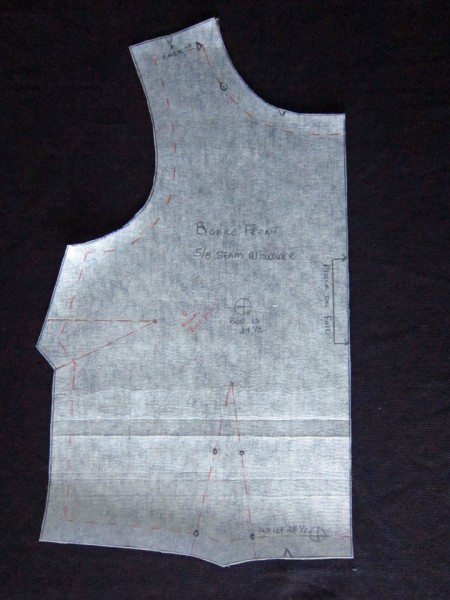
My bodice block has waist darts on both the front and back and a side dart on the front. They come in handy time and time again when I am fitting patterns that have similar bodices. Not sure why I added the 5/8 inch seam allowances to them when I originally drafted them. It was a learning curve at the time! Sheesh… it’s still a learning curve! I should say it now… my pictures for this post are a bit lacking and I’m sorry about that. It’s hard taking pictures of paper! Next time maybe I should do mini’s.
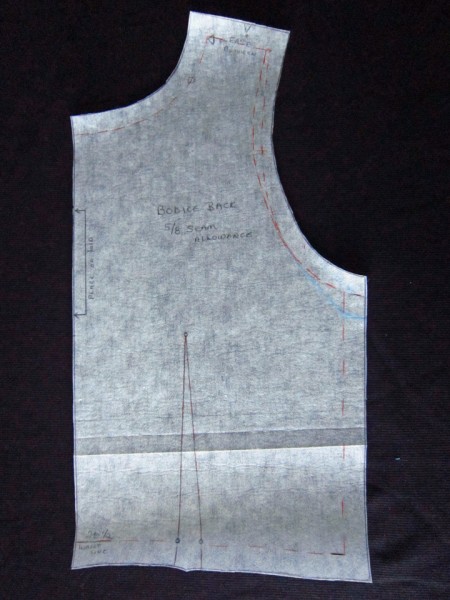
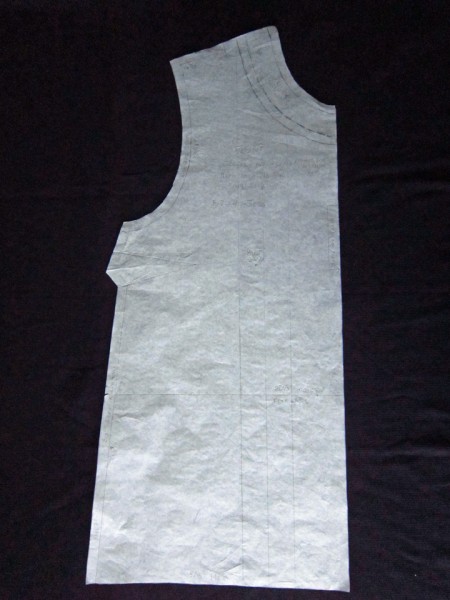
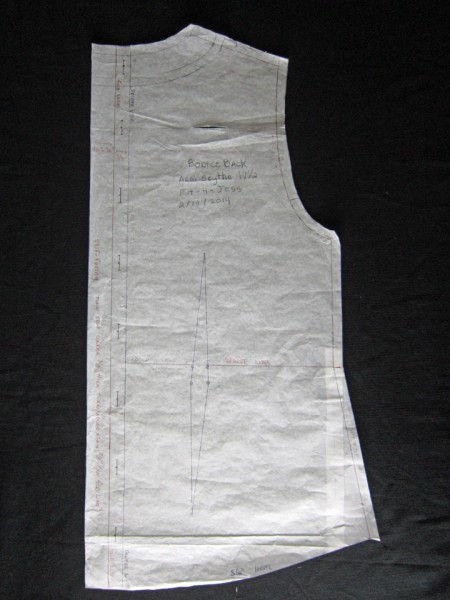
Anyhoos, the next two pictures are my basic bodice block, front and back (oops! I’ve got fold wrinkles – sorry about that!)
My initial idea was to use this basic bodice block to create a dart-less blouse block, aided by my book “Patternmaking Made Easy”. I spent two days drawing, measuring, ERASING, drawing more, cutting, wadding paper into balls, then taping and drawing again… and when I thought I had it, made a muslin. It was after trying it on at least five times after at least five different MAJOR adjustments, I contemplated taking it down to the fire pit in the back yard and setting it ablaze, then filling my wine glass extra full and playing games on my computer! “Defeat” is hard for me to accept though so instead of resorting to fire, I dumped the dart-less idea and started over.
Here’s how I created my Darted Blouse Block
1 ) Using tracing paper and my basic bodice blocks, I begin again to trace, only this time the front side dart at the bust line got to stay. The waist darts in front and back became non-existent.
2) For the front, I continued drawing the center front line downward from the waist line adding another 7 inches of length. I wanted the back longer than the front so I extended the center back line down from the waist an additional 11 inches. However, before I could draw in side seams, I had to determine just how wide my hem line would be.
3) I calculated the width I needed for the front and back hem-line. (hip measurement + ease ÷ by 2, then ÷ by 2 again because the flat pattern is 1/4 of the measurement amount. After doing these calculations, I subtracted 1/2″ from the second calculation, and used this final figure for the front but added 1/2″ to the same second calculation, using this final figure for the back which is “butt” a little fuller than the front. 🙂
Example: Hip 37 inches. I added enough ease for a drapey look which I guesstimated to be of about 5 inches: 37 “+ 5″ = 42”
42″ ÷ 2 = 21″ (width for front and back)
21″ ÷ 2 = 10 1/2″ (width for flat pattern front and back pieces)
Now, move 1/2 inch to the back: 10 1/2″ + 1/2″ = 11″
The front: 10 1/2″ – 1/2″ = 10″
** Note that 11″ + 10″ = 21″ x 2 equals the 42″ we started with.
4) Using the above calculations, I then drew in the hem lines for the front and back. An L-square metal ruler (shown in the picture at the beginning of this post) is really helpful for doing this. You place the ruler with an edge on the center front or center back with the other end extending along where you need to draw the hem line.
5) To create side seam lines for the front and back, I drew lines that angled out from the waist to the hem line. We are not really boxy or straight edged so I then did a little curving and blending so that the side seam lines looked more like a body shape! When done, I double checked to make sure that the front and back side seam lengths were equal to one another.
Well here is my new drafted blouse blocks. I went ahead and added seam allowances since I’m almost ready for production. I decided to go with 3/8″ so I wouldn’t have to do trimming.
It’s hard to see in the 2 pictures above, but there are a number of features that I included on my front and back blocks because of some styling features I wanted to achieve.
1) Yokes: There are yokes drawn in, on both the front and back blouse blocks. I made them 1 inch in width and drew them in before I added seam allowances. I did this by drawing a line 1 inch down and along each of the the block necklines. In order to create yoke pattern pieces, I then traced the yokes I drew in and added 3/8″ seam allowances. Word of warning. Make sure they are equal widths all the way around! My first pieces I cut from my fashion fabric were off and after I sewed them on and thought I was finished, I noticed some major discrepancies! Yuck! I had to take them off and make new ones.

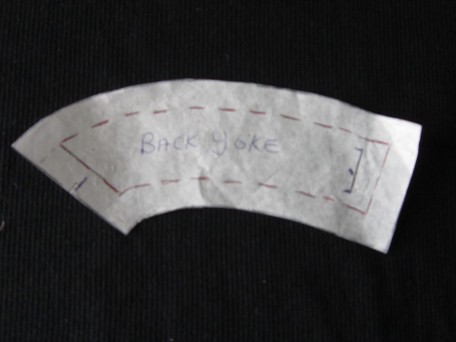
** Note 2: The yokes are just the upper part or neckline section of my blouse blocks so in order for me to create the style I wanted, I needed to trace the blocks again and exclude the yoke sections but remembering to include a seam allowance.
2) Center back button/buttonhole extension: At the center back, I added 1 and 5/8 inches that is a combined facing unit and button/buttonhole extension.
To break it down: I drew a new line 5/8″ further out from the center back line that runs parallel from neck to hem line. This added amount will accommodate the buttons and buttonholes. Then parallel to this line I drew an additional line 1 ” away from it. This 1 inch section is the facing unit. It contains a 5/8″ facing and 3/8″ for a clean finish.
How it works: In order to keep all things equal, I first basted a 3/8 and 5/8″ seam on each back side. (the picture below is the left side – the pin in the shoulder tells me that this is the right side of the fabric)
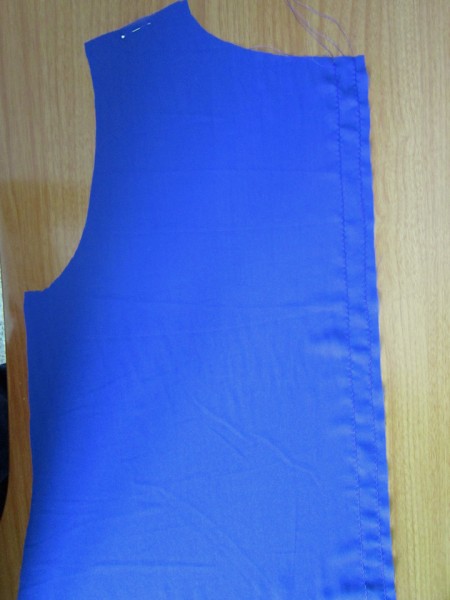
I next turned under the 3/8″ section and pressed it. Then I did the same for the 5/8″ section. Now I was ready to sew the final seams. I laid each back side right-side up, and stitched a 5/8″ seam using the guide on my sewing machine. Fortunately I caught the folded-under edge all the way down! You could also edge stitch on the underneath which I often do so I don’t have to worry about not catch the folded edge, but because the fabric I was using for my prototype was so slippery and showed every uneven thing I did, I decided to do what I did. Below is a picture of the underside but unfortunately it’s not the match to the left side shown above. This is the inside of the right side instead of the left. Damn it I hate it when I do that!

3) Creating my pleats (tucks): There are 3 straight lines drawn in on my front blouse block that run from the neckline to the hem line and are parallel to center front. They are for the creating of tucks (Page 173 of “Patternmaking Made Easy”) or what I call pleats. The bust level line is on perfect crossgrain so once again, with the aid of a metal L-square ruler, I used this point and the center front to make my markings for my pleat lines. Since cutting up the block is the next step, I decided to first trace an additional front blouse block that included the 3 lines for pleats and then let the cutting commence! Mind you I have now done this twice! Once for the actual creation of my pattern and the other to be able to show you how I did it! On the positive side… I’m getting faster at it!
So when I was done tracing, I next had to cut along each of the 3 lines, separating the sections completely from one another. Here’s what it looks like.
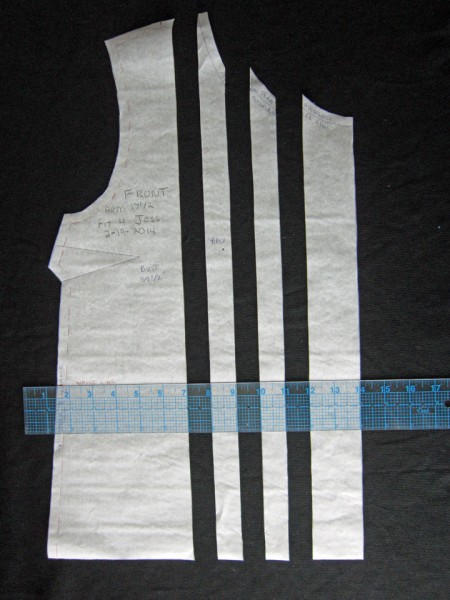
Now I have 4 sections but there are only going to be 3 pleats. You can choose whatever width you want… it could have been 1/8, or 1/4, 3/8 or 1/2″ but I decided I wanted 1 inch. The ruler in the picture is there to show you how it looks when I place my sections 1″ apart for my pleats. (my picture is not square so my strips don’t look square!)
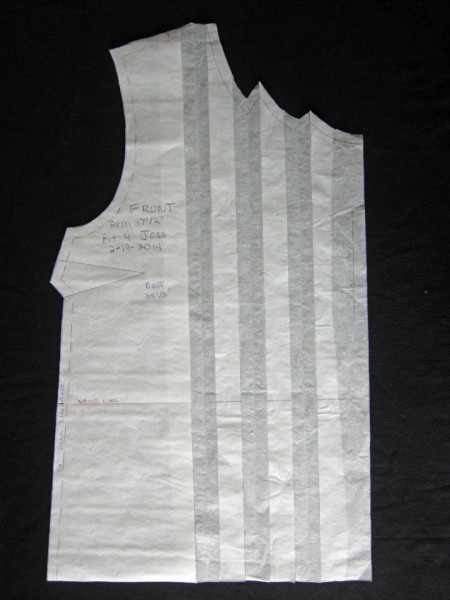
The above picture is for explaining… you actually take the strips and position them the width you want, onto a piece of paper that fills in the gaps and enough room at the top so that you can fold, and draw in the finished look of the pleats. Here is a picture though once again, it may look uneven but after the many times I folded the paper in order to draw in the top of the pleats and all the tape that was involved, I couldn’t get it to lie very flat!
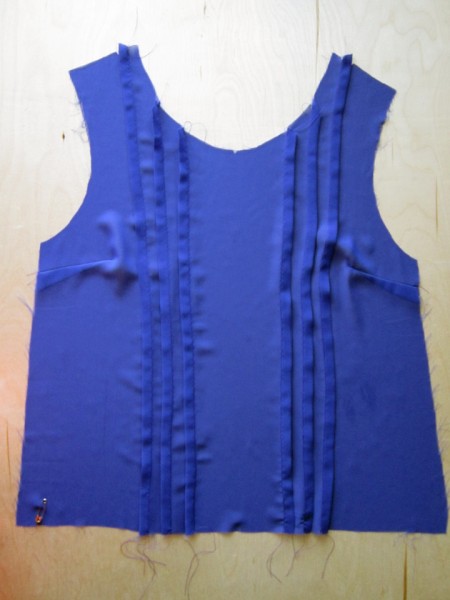
For the real deal, here’s what it looked like during construction! By the way, I messed up several times when trying to decide how I wanted to fold my pleats (tucks) and so had to pull all the threads out. With no instructions you are free to do what you want, but this is when the accidents occur! It’s a wonder that my blouse went together at all by the end.
Now is the moment of truth… here is the front
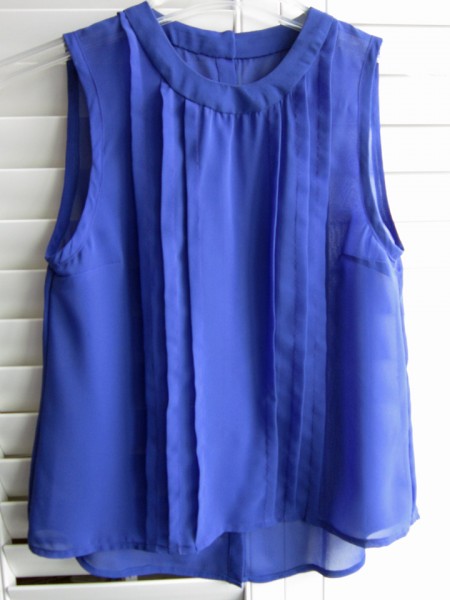
And here is the back…
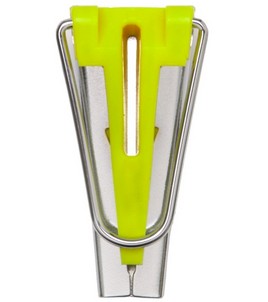
My handy camera crew are both sick and tired so not able to help me with a photoshoot so I couldn’t model it for you! Yes, it turned out and I will wear it but it does have flaws. My front and back yokes were even but they don’t lie as nicely as I had hoped. It probably didn’t help that I pretty much mangulated the neck line while trying to figure out how to do my pleats and resewed the yoke on about 3 times! I also ended up with the front being shorter than I thought it was going to be. It’s just long enough but I like it longer than just enough. I will probably layer with a red cami which will make things interesting. As I look at these last 2 pictures, I realize that I didn’t say anything about the armholes and how I finished them. It was pretty easy… 3/8″ seams and bias tape that I made from the same fabric using my Clover Bias Tape Maker, only I folded it to the outside.
This is a monster of a post which I know is a pain to read and I am sorry about that. But hey… it was a pain to write! Whew! Right now it’s totally Wine:30! And time for a piece of cake too! I am truly happy though, that I could share this with you and hope it helps someone! Sew until next post…
Salute! Jessica
Read MoreEdith Blouse Paired with Wool Butterick 5613
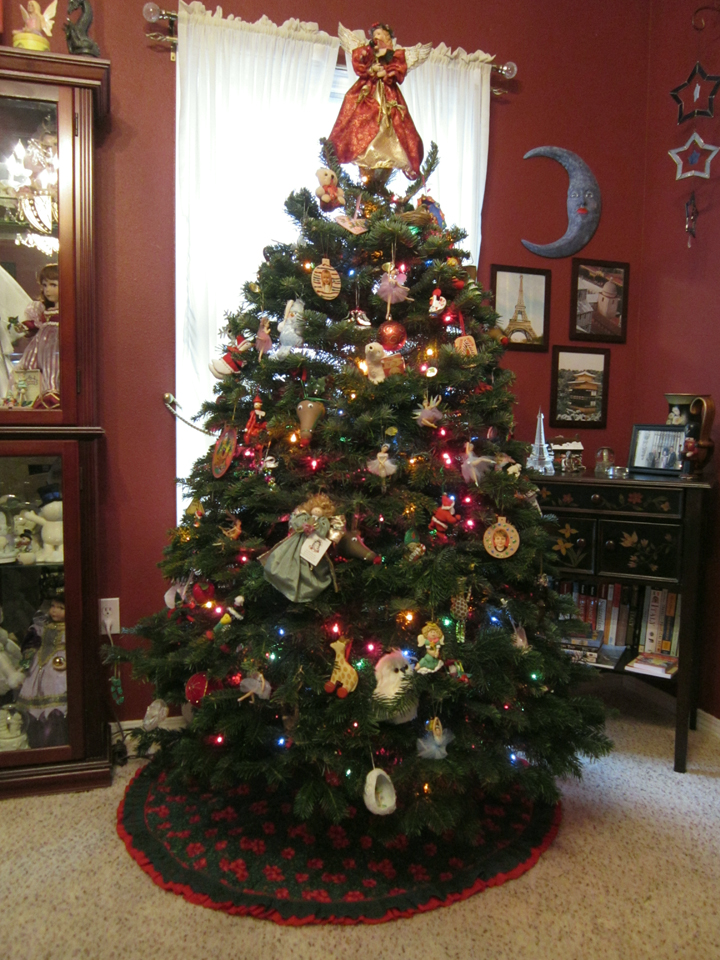
Yes.. I am one of those who drags the yule log in the house and decorates it… with the help of my kids of course! There were absolutely no squirrels in the branches this year but… there was another problem. Monday morning at about… say 6:30 am, there was a tinkling, ringing, clanking sound that came from the downstairs room where this pretty little tree WAS (I’m emphasizing the “was”) standing. The ornamental carnage that came with the falling of our tree drove me to drink!… Tea! HA… you thought I was gonna say wine! I am unwilling to take the responsibility for this fate so I am blaming this incident on either the South Pole Elves or the crappy tree stand that we used. Since there was no evidence of elves, I determined that the blame would be placed on the tree stand! After a trip to Lowe’s and the purchase of a new improved tree stand, we were able fix the disaster. I did have to wait until today for the carpet to dry so I could put the skirt underneath but now it is finished and ready for Christmas.
Interestingly, this holiday season here in Oregon has started off with truly cold cold weather that has caused a lot of us to actually freeze our butts off!

For the last three weeks it has been in the teens and low 20’s during the day, getting even colder at night. My understanding is that this hasn’t happened since the 70’s! Believe it or not, during all of this coldness, I have managed to continue sewing, albeit a bit slower of a speed than my usual. I haven’t left my skirt making mode and while making them, I got to thinking that I need tops to go with my skirts.
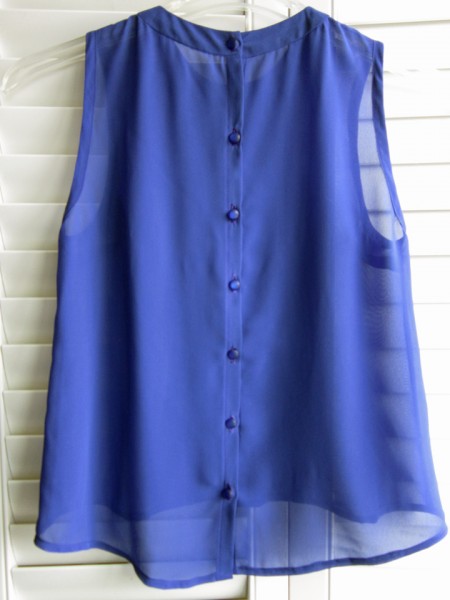
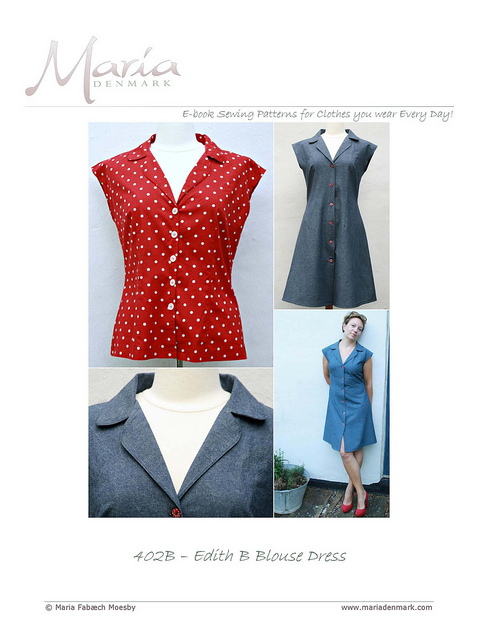
MariaDenmark, a fellow blogger has designed and created a blouse pattern, the “Edith Blouse”, that you can purchase on Craftsy . She shares a little story on both Craftsy and her “Wool and Weeds” Blog about how this cute blouse came to be. Last summer I purchased it with the intention of making it then but alas… so much was going on that it didn’t happen. However… now, in my skirt-making-madness-mood, it seems the perfect time to make it.
This is a picture of the blouse. The pattern also includes a dress, which actually is just added length below the level of the blouse. It has that Retro look yet still looks modern and given that the blouse fits me so well, I think the dress will be a fabulous spring project!
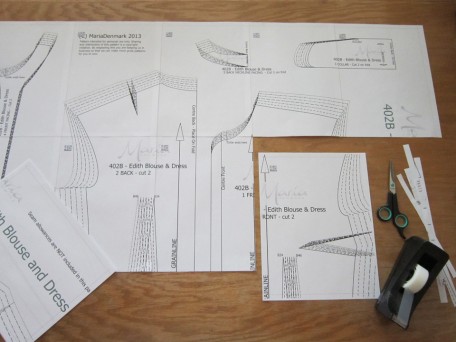
This is a download pattern which arrived to me via PDF file. I have never downloaded a pattern before so admittedly, I was a little nervous at first. However, it truly went very smooth. I opened the PDF file and after reading all the instructions, printed off only the pages for the blouse. While piecing all the printed sheets together, I kept the full pattern layout sketch picture that’s included, on my computer screen while I was cutting and matching and taping.
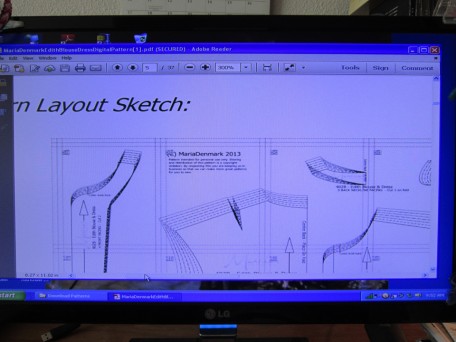
Before I started, I considered to first cut off all the right sides and bottom edges of the printed pages along the red dotted lines but… since I am really getting tired of re-doing ANYTHING.. I decided against this and instead, went one page at a time. Here is a picture of my system.
Now that the printed pages were all taped together…
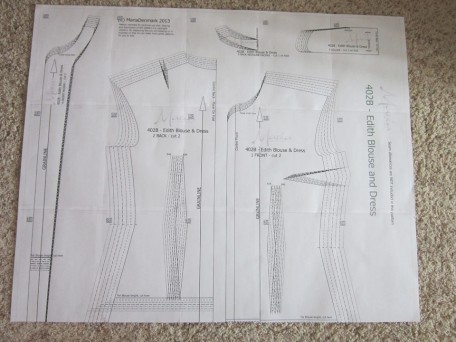
I was ready for step two. Using tracing paper that I purchase by the roll from Nancy’s Notion’s, I traced the pieces that I needed for the blouse, adjusting sizes between bust, waist and hip. I next made a muslin to see where I was at in the fitting. Too much shoulder length, perfect bust, waist to narrow and hips WAY to wide. It was back to the drawing board so-to-speak. I rolled back out my taped together Edith Blouse pattern and re-traced my pieces making adjustments for all my fitting issues. Now it was time to make muslin number 2! It was a success! The happy dance commenced!
I had found some fabric at Mill End’s in Beaverton, Oregon that I felt so drawn to. Not sure why… it was a very nice fine cotton, but I knew that matching cut fabric pieces with a pattern like this fabric had would be tricky! Nonetheless, I was determined to make this fabric into the E. blouse.
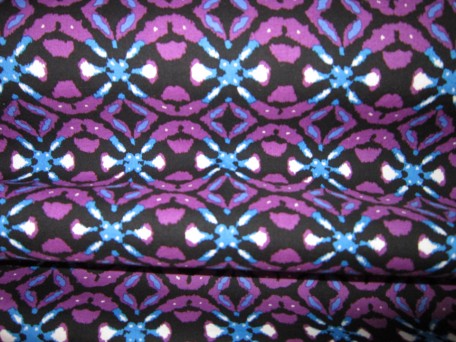
I spent a little time pondering my tactics before I started cutting. I pre-washed, dried and pressed the fabric and when I laid it out to cut out my pieces, I discovered that it was not on grain! Yuk! I paid $9.99 a yard for this fabric which was only about 42 or 43 inches wide resulting in having to buy additional yardage to cut out all my pieces. I decided to do what seems to be my usual these days… I tossed my fate to the rain and cut my blouse pieces the way that I thought the printed pattern would look best. I haven’t washed it since I’ve made it so I don’t know if I will get twisting or what, but…I will worry about that then!
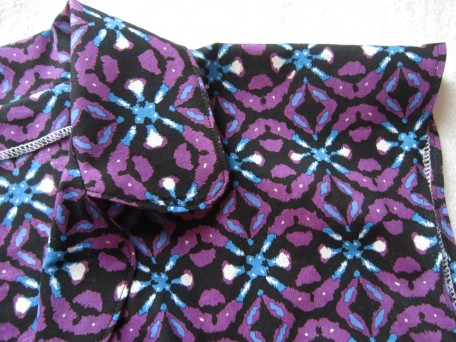
The blouse sleeves finish in such a way that I was concerned about them raveling even if I used my pinking shears so I decided to dig out my old dinosaur serger. I hate that machine! If I was a better operator maybe I wouldn’t get so frustrated with it but it’s so rarely that I use it. That is why I’ve not considered taking classes or joining a serger group but maybe I should reconsider. At least I would know how to fix most of my problems! It must have taken me an hour to finally get it to sew a decent seam and so now I was ready to actually sew together the blouse .
I had fun sewing it. It was a little time consuming making all the darts but they are what makes the blouse fit so nicely. There are two long ones that go to the hem in the back piece and one on each of the front pieces that are almost as equally long as the back ones. The front center edges fold over to the outside towards the top like a lapel and blend nicely into the collar.
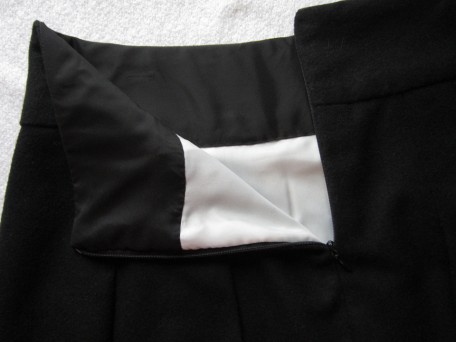
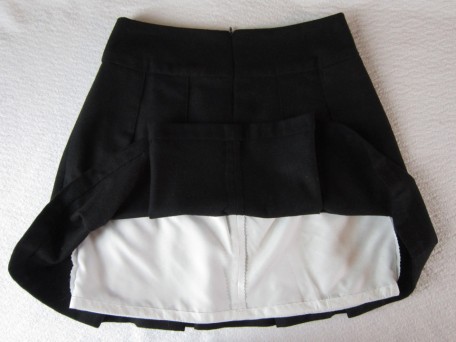
Next up was my skirt. I found some beautiful wool flannel in black that I couldn’t wait to sew so I could wear it! I am thinking really warm here! I tried to take a picture of the wool but because it was black, the camera had a horrible time with it. I was getting grays which were not at all true to it’s color so I bailed on the picture. The skirt that I decided to make was a style from the Butterick 5613 that I made my previous skirt from. My lining skirt that is!
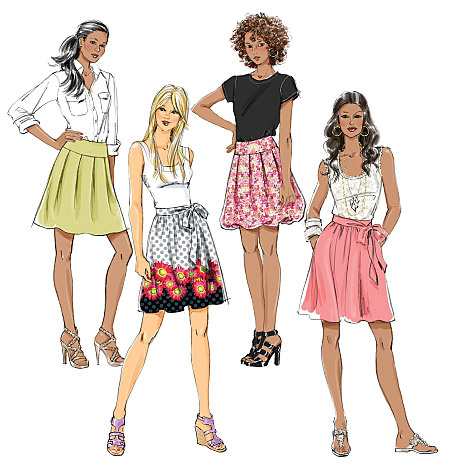
This time I chose the option C style with pleats. I made a few changes however. There are five pleats in the front section and per the pattern instructions, all are folded in the same direction. You are told to make the pleats on the outside, creasing along the lines of the small circles and then bringing those creases to the lines of the large circles. I did this for the 2 outer pleats on the right side but did the opposite for the 2 outer pleats on the left side. I still had the center pleat to contend with. I decided to divide the width of this pleat in half and marked this as the center. Then I folded one side of the pleat towards that center and then folded the other side of the pleat the same. I pinned them in place and then basted them. I wanted the pleats to hold their shape so I then top-stitched each fold, 6 in total, down 4 1/2 inches from the top edge of the waist. The back pleats I folded per the pattern instructions though I did top-stitch them like I did the front ones.
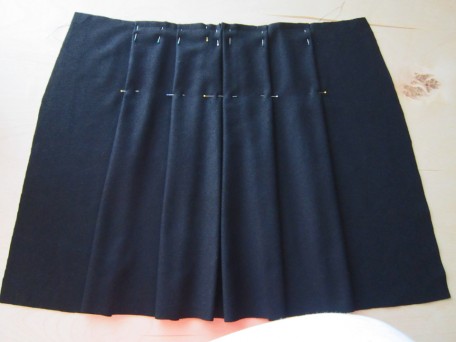
The pattern doesn’t give instructions for lining the pleated skirt but because I made mine from wool flannel, I considered the itch factor so decided to line it. An added plus would be that the pleats would drape better, especially if I used the straight lining that comes with the pattern. This straight skirt lining is intended for the pleated skirt if you make a bubble hem so that’s why it’s included. My method was my own for attaching the lining. I followed the pattern instructions through until after inserting the zipper (excepting the change I did in the front pleats). Then I made my lining and basted it to the skirt selvage, raw edges even, in a 3/8 inch basting seam with my sewing machine.
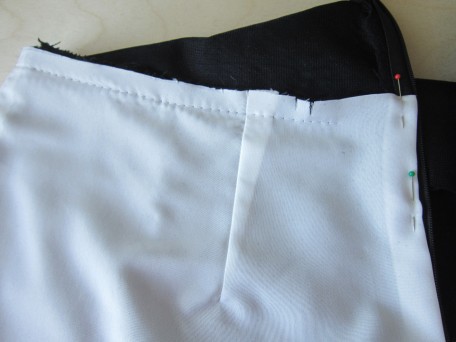
It was a toss up on what to do next, either sew the waistband yoke facing to the waistband yoke, or slip stitching the lining to the zipper. I decided to sew on the waistband facing first. I followed the pattern instructions for this… it’s pretty easy. Just matching up seams and markings. Next was slip stitching the lining to the zipper.
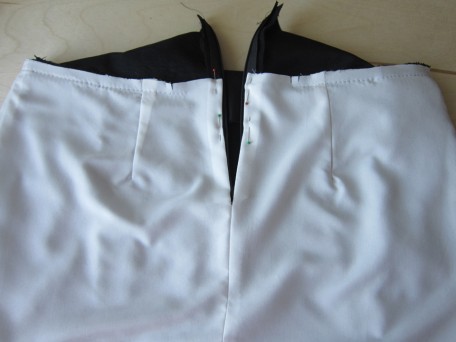
Almost there… now it was time to slip stitch the folded under waistband yoke facing over the skirt seam.
Then finally, the last thing to do… hem the lining. Mind you I did do this before I attached the lining to the skirt but I had an oh crap moment! I didn’t hem it short enough so it hung down below the hem of the skirt after I basted it in place. I just hate it when that happens!
I contemplated top-stitching the waistband yoke on the top and bottom, but for some reason my mind doesn’t want to let me. I kinda like the plain wool look, it is so beautiful. I absolutely love sewing wool flannel. I don’t know what other colors it comes in but I plan on making more skirts from it. It will be so warm and cozy to wear.
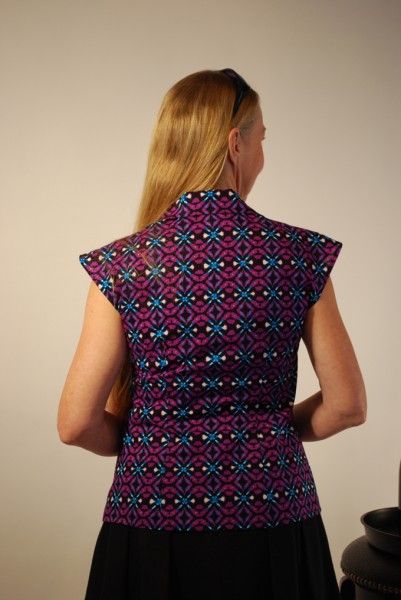
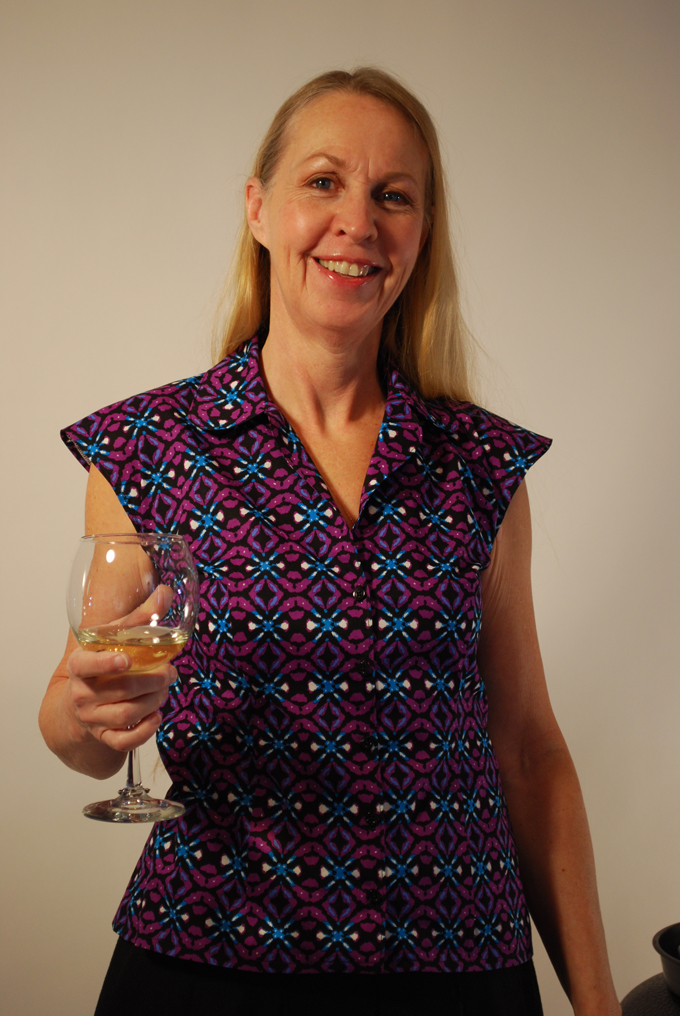
I am not sure if my cotton Edith Blouse is the best match for my wool flannel pleated skirt but their colors compliment one another so I decided to pair them up for pictures. Here they are!

The back actually hangs quite smoothly but because I was turned a little, I think this feature was lost!
My daughter told me to tip my head a little, and then shortly later said left giving me a direction but I thought she said laugh!

That’s a take then! We are finished. I hope to next start on something blue. I have never made myself anything in blue before but the ladies at one of my favorite fabric stores did a poll with some customers while holding the fabric up alongside my face and it was unanimous that I could pull off wearing blue! So please note that if I look like crap, I am not responsible! 🙂
Salute! Jessica
Read MorePattern Review McCalls 6705
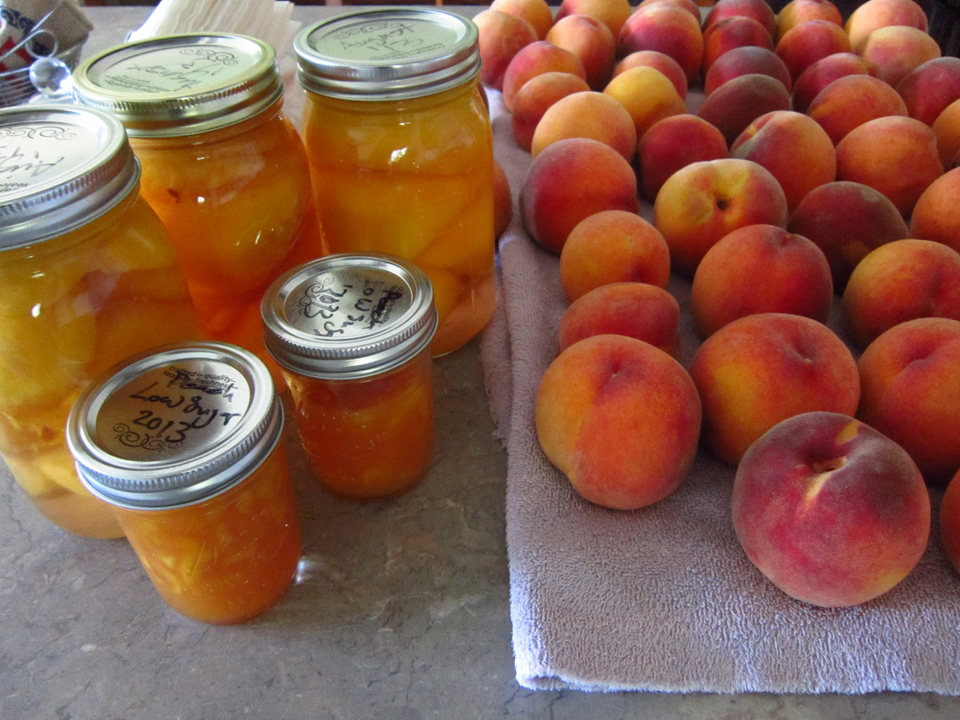
Well it’s September and you know what that means… yeah, summer is about over and school is starting but that’s not what I was thinking. The end of August and beginning of September means that the peaches have finally ripened on the trees and are ready for picking. An alternative band, The Presidents of the United States of America, rocked a song about peaches so I know I’m not the only one that’s got a thing for them! My children are also caught up in the peach frenzy so they most willingly helped me last Sunday, after our morning brunch, can 28 quarts of Canadian Harmony peaches and cook 16 jars of jam. The almost 80 pounds of peaches that we blanched, peeled, pitted and halved or chopped are now nestled in their jars and will rest in the pantry until their debut this winter. Yummy… can’t wait. Incidentally, peach jam is bodacious on scones!
So yeah, Summer is about over and for us Oregonians, the imminent rain will be arriving before long, but… I actually do look forward to the season change because this means having to spend more time indoors and getting back in full swing with my sewing. My projects have backed up on me, a basket full to be exact, and it’s going to take a bit to catch up. I’ve still managed to get a few things finished though, one being the McCall’s 6705 top which my daughter has been patiently waiting the whole summer for (I’m glad she loves me). Maybe I should rephrase my words a little and say that I made the top and THEN re-made it again! Stay with me and I will explain.
This is the McCall’s 6705 pattern.
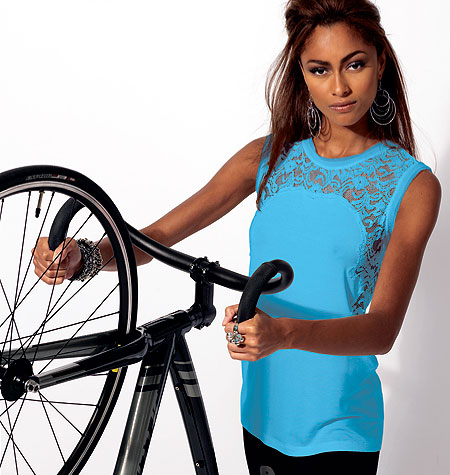
It is designed for knit fabrics and the word “easy” on the pattern I can agree with! The instructions are easy to follow, only 3/4 of a page!
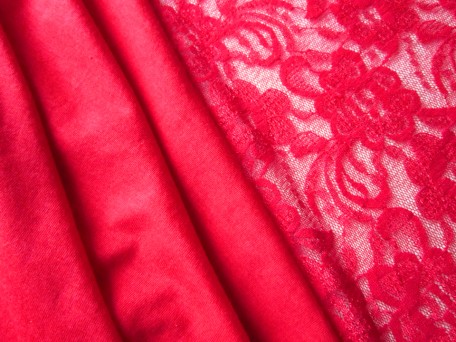
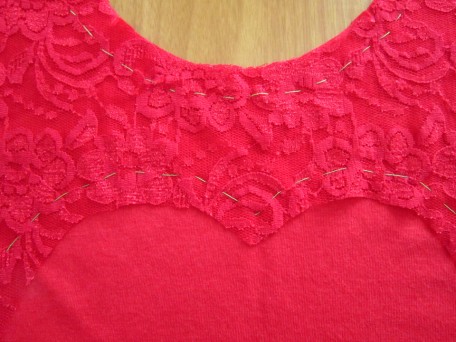
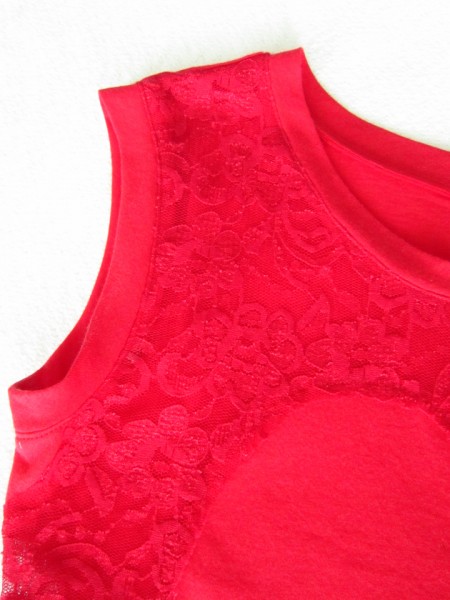
The fabric I used was a red t-shirt type of knit and for the lace overlay, a red stretch lace.
A useful tip: Baste the lace overlay onto the top, all around, and stitch the inner edges along the stitch line (1/4 inch) BEFORE sewing the front and back together. However, don’t baste and sew the lace clear to the edge of where the side seams will be; stop about 2 inches before reaching them. Remember, the lace overlay has to go over the side seams so you will have to fold it out of the way when you sew each of the side seams. With the first top I made, I did it per the pattern instructions, the 2nd time around I did it this way and it was a lot easier to stitch the majority of the inner edge of the lace before the front is sewn to the back. And when I had to finish stitching the overlay that goes over the side seams, there was a lot less sewing to contend with so it went pretty smoothly. (I still haven’t explained the top #1 and top #2 but it’s coming!)
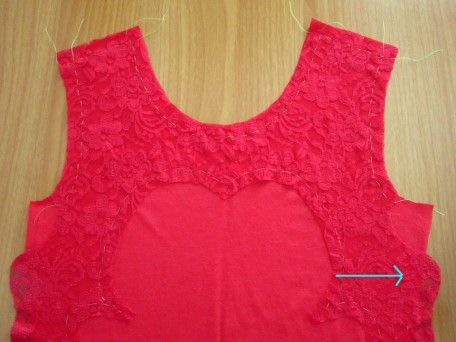
If you choose to apply the lace to the front first – remember not to baste and stitch edge of lace near the side seams. You can finish doing this after sewing the side seams.
A close-up of the basting in front.
After you sew the side seams, you can then baste the remaining lace overlay and then stitch it down permanently. The pattern directions aren’t just for directions! I inserted them between the front and back to make it easy to baste.

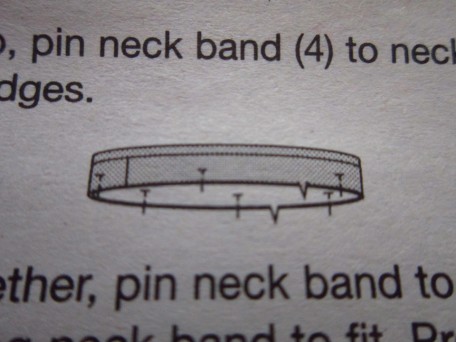
Okay… so this is where my dilemma started. I didn’t care for how the neck and arm bands were styled. There are 2 bands, one wider than the other, that are applied as one to the neck and each arm hole. They are a raw edge finish.
For the last several years, many RTW (ready-to-wear) tops have been made in this same fashion and quite frankly, I think its crappy looking! No doubt it’s probably part of the trendy shabby chic look that is great when all you want to do is put on some comfy kick around clothes when you are canning peaches or something else messy and work intense but… I don’t want that look on garments that “I” make! That’s just plain wrong! Against my better senses though I went ahead and made the neck and arm bands the way the pattern instructions were given so I could live to tell about it! In the end, I was not happy… not happy at all but it wasn’t the unfinished raw edges that were bugging me, it was trying to sew the 2 bands as one onto the neck and armholes and getting the finished edges equal widths from one another all the way around. If that sounds confusing, I’m sorry, but I think it’s one of those things where you have to do it to really understand.
Anyways, after I finally felt I had those damn things sewn on the best I could manage (cuz that’s how I felt about them), I was nearing the end. It was now time to cut the fabric off from underneath the lace and hem the top. It must have taken me a half hour or more to so very carefully cut that fabric off and when I was nearing the end… the last little section… those nasty evil scissors took control and snipped a substantial hole in the lace!
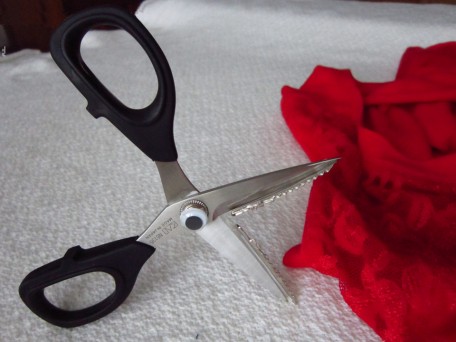
It was over! The four letter words came spilling out. I hated my Kai scissors even though I loved them before I started cutting the fabric from underneath the lace. I was more than pissed! I contemplated many things in that moment… chopping the damn thing to pieces with my evil scissors, burning it, or better yet, laying it out in the street and letting the cars have their way with it. Then… after a deep breath and a little dread for fear of her disappointment, I went to tell my daughter what I had done. All she said was “that’s a bummer.” Okay… wasn’t sure how to react to that! Did this mean she understood or did she just not care. It was a trap! It was then my turn to say something. So I did what I thought was the mature thing to do and said – I have enough fabric to make another one if you would like me to. She was thrilled that I was willing but wondered if we could do something different with the finished look of the neck and arms. Now that’s my girl! She has taste!
When I made the 2nd top, to change up the finished neck and armhole edges, I decided to just sew on bands like you see on a t-shirt. To do this, I took tracing paper and traced over the wider width neck and armhole bands but re-drew the pattern width of 1 1/4 inches to 2 1/2 inches. The original band is 5/8 inch wide with a 5/8 seam equaling 1 1/4 inches so by doubling this you end up with a width of 2 1/2 inches. After cutting them out, I just sewed the ends of each band together and then folded them in half lengthwise, wrong sides together so you have a circle and then applied them to the neck and armholes just like in the pattern instructions.
This is the neck band when finished…
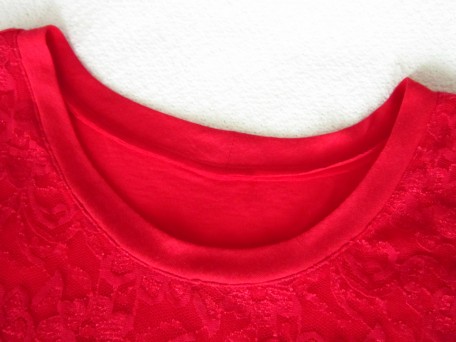
And the arm bands…
Then it was time… being ooooh so careful, I cut the fabric off from behind the lace and it was a success. Absolutely no holes!
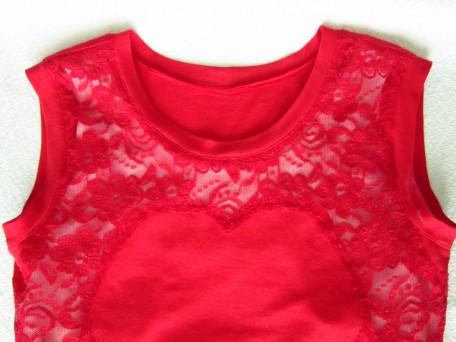
Well, there you have it. The photo shoot commenced this morning and I am happy to share with you the finished McCall’s 6705 top with my daughter wearing it!

The right side…

And the left side.

And one just because!

Calley really likes this top and wants one… or two… with long sleeves to wear this winter. Minus the lace overlay of course which is just fine by me!
I have mentioned it before, but as a news update – with October creeping up and Halloween in its grasp, costumes are going to be my focus in some of my up and coming articles! Hope you enjoy them. As for September events, the October fest at Mt. Angel here in Oregon is next weekend and yes… I am going, with my sons! They have a r-e-a-l-l-y big wine garden!
Salute! Jessica
Read MorePattern Review McCall’s 6751

Well I made it to the Blues Festival this last weekend and it was fabulous! There were so many different blues artists playing on stages all over the park in downtown Portland. At midday on Saturday, my chicadees and I left land and stepped on the Portland Spirit and took a blues cruise down the Willamette River. The Sister Cruise, it was called, with blues singing sisters that rocked that boat! For a short spell, we stepped out on the lower back deck to see some sights and that’s when I took the above picture. I wonder what it would be like to live in a houseboat? Lived on a sailboat once for about six months (that’s another story!) but I don’t think that’s the same.
Anyways, I wore my latest dress, the McCall’s 6745 halter dress for this day and guess what? It happened again. When I was standing on the deck taking my pictures, the wind whooshed in and blew up the hem of my dress, I mean UP! It took me a couple of seconds to realize, but by then it was too late! I quickly grabbed the skirt of my dress and pushed it down, turned around and there was an elderly woman and her husband sitting in chairs watching me. I asked her how much I flashed and she said “well, quite a bit, but don’t worry, it didn’t look bad.” Hmmm… I wasn’t sure what she was saying but with as much dignity as I could muster, while holding onto my skirt, I gave my best smile and headed back into the cabin.
Maybe I should have worn a top and shorts instead of “the flashing dress” to the Blues Festival… if I had, I think I might have worn my new McCall’s 6751 top.

Mind you, I haven’t made the top shown above – it is top B. I made top A which shares the same front, but has a different back. Below is the drawings that includes top A.
Since the pattern is drafted for x-small through XX-large, I decided to throw my fate to the wind, pass on sewing a muslin, and just cut and sew! I was using some fabric that I had in my stash so other than the time I would spend sewing it, I wouldn’t be out anything so why not. I usually wear a size small so I decided to stay with this size, but I did adjust the pattern pieces to be medium at the waist because sometimes RTW (ready-to-wear) tops tend to be a smidge tighter in this area than I like.
The fabric that I used is a pale pink rayon and has a slight stretch to it. I didn’t particularly like sewing it. It was kind of like sewing peach skin fabric which I will never be sewing again, don’t like to sew that stuff at all! This rayon was not quite that bad, nonetheless, the 2 yards I have left may never see my sewing machine.

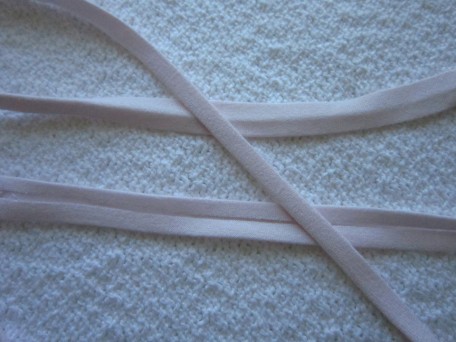
The pattern instructions are really easy to follow, however, I am not real fond of the finishing technique used for the neck and armholes. Maybe it’s me, but I cannot get a nice finish in these curved areas by simply folding the fabric into a narrow hem. The second technique they suggest is to use bias tape. I am not a big fan of packaged bias tape – yes, I have used it, but it feels and looks sort of cheezy to me. Instead of either of these, I opted to make my own bias tape, which I made from the pink rayon and used my Clover Bias Tape Maker.
It comes in two sizes, 1/2 and 1/4 inch. I have the 1/2 inch. Using this little gadget is the easy part of making your own bias tape. The work comes with cutting out your strips and sewing them together. An important point in your success is making sure you cut every strip a width of exactly 1 inch. Sewing it to the neck and arms can be a bit tricky too, especially with certain fabrics like pale pink rayon.
When it was time to apply the bias tape, I baled on the instructions and attempted to do my own thing. While writing this review and re-reading the pattern instructions, I now realize that I made it harder than it had to be so I will not even explain what I did but I’m such a dork! You can still follow theirs using your own bias tape and be just fine.
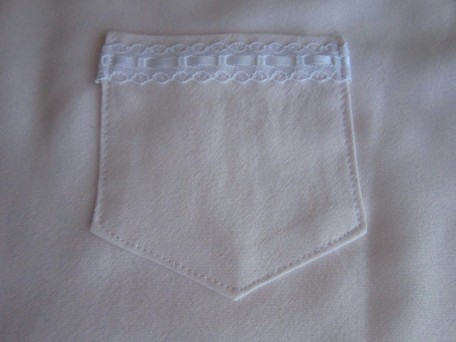
I wanted to add my own touch so I opted on making a pocket different than the one given with the pattern. This is what I ended up with.
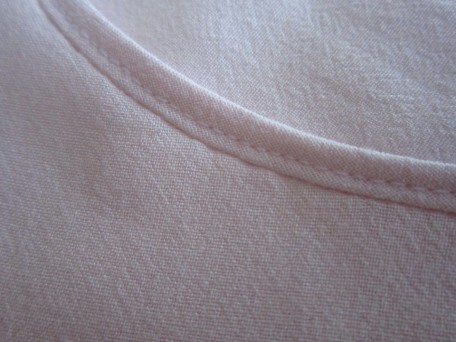
The back is interesting. I’ve seen lots of tops in clothing stores in this style and really like the look.
Wearing them is sort of different though. Still not sure what I think, but this is it.

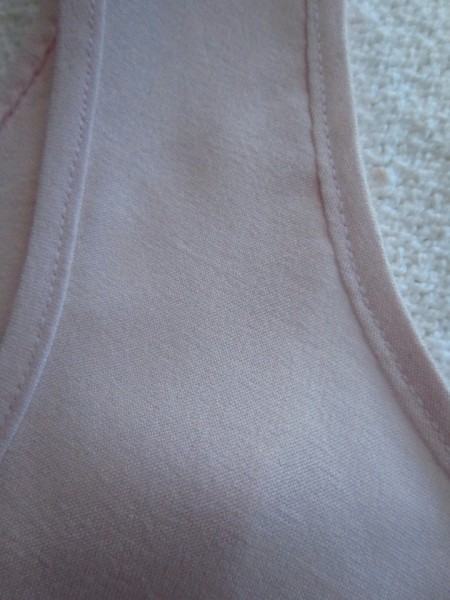
And then there is the front view of course!

I still haven’t decided whether I want to make top B or let it rest. If I did make it, I’d get more practice making bias tape and applying it… hmm… guess I will be making top B after all! When we started our photo-shoot, my daughter informed me that she wants one of these too. I guess you know what that means… it’s time to start drinking this glass of wine!
Salute! Jessica
Read MorePattern Review McCalls 6708
I’ll start by saying… I love sweaters! The weird thing though is that I don’t have very many, however that’s going to change because I just figured out that I can sew them! Up until now, I never dared to consider making these wonderful little wardrobe necessities. I figured sewing knits would be an experience from hell and happily chose to never go there. Then after spending some time with some wonderful women in ASG (American Sewing Guild), a door has opened and knit fabric has hit the fan so to speak! I won’t say that I am totally comfortable sewing knits now but my confidence is growing, especially after making the McCalls 6708 sweater.

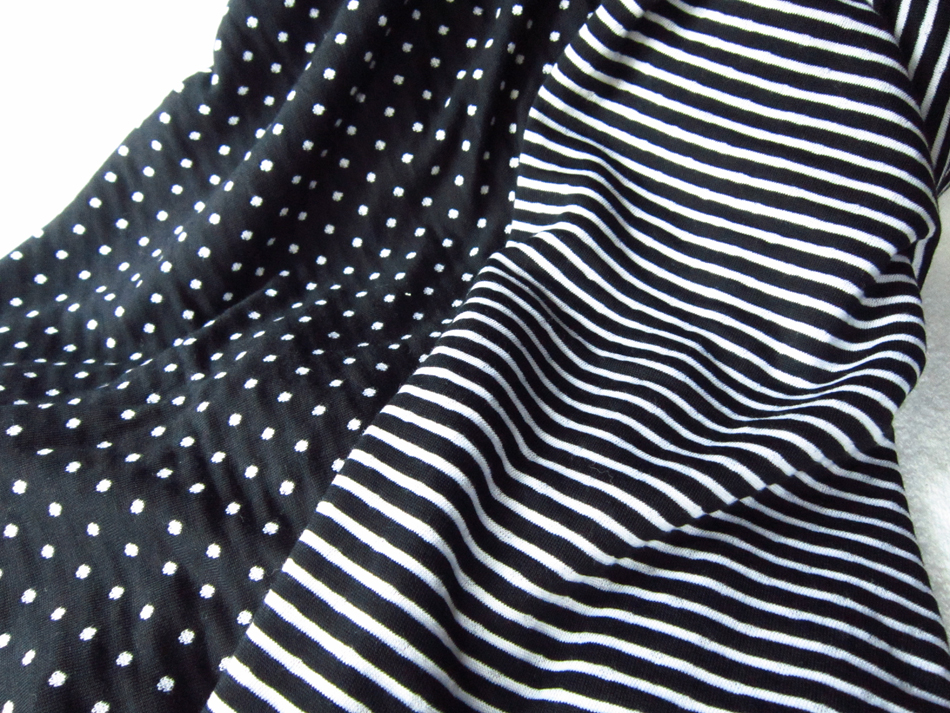
For the fabric I chose a double-ply knit, black and white stripes on one side with small polka-dot like markings on the other.
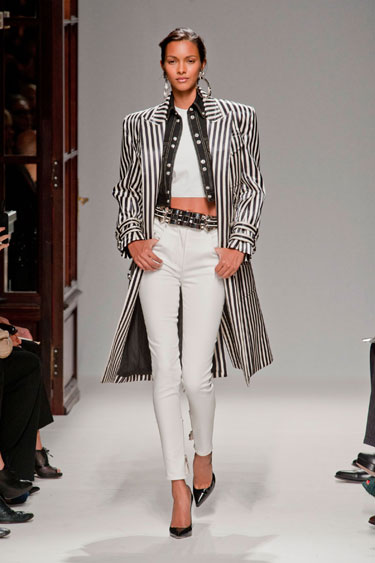
My inspiration for this fabric came from the Spring 2013 Ready-to-Wear Fashion Show number by Balmain which drew me in and renewed my interest in the black and white theme, and especially stripes.
The sweater I made was a mash-up. I wanted the neckline of A and the length of the bodice and sleeves of E. It wasn’t difficult at all. By overlapping the front A tissue piece over front E tissue worked perfectly. I used the back pattern piece for E. Long sleeves were not a problem either since both sleeves come as one tissue.
McCalls 6708 Options
For size, here again I chose small based upon the circumference of the bust provided on the pattern for that size. I didn’t make a “knit” muslin. I do like adventure and given that there would be some stretchy going on, I decided to throw caution out the window and just sew!
The instructions were very clear and quite easy to follow. Double-stitched seams were suggested for most of the construction. For this I used a twin-needle, a 3.5 mm. stitch and my standard sewing foot. It wasn’t called for but I decided to serge all the edges that would be exposed to make a nice finish.
I was fascinated with the knit that I used because it was double-sided and not too thin. It seems that thin fabric is the norm in store bought garments these days and doesn’t last long but I will save that for another rant! Due to my stripe inspiration, for some fun and to make it interesting, I decided to use the opposite side of the fabric for the neck, front and bottom bands.

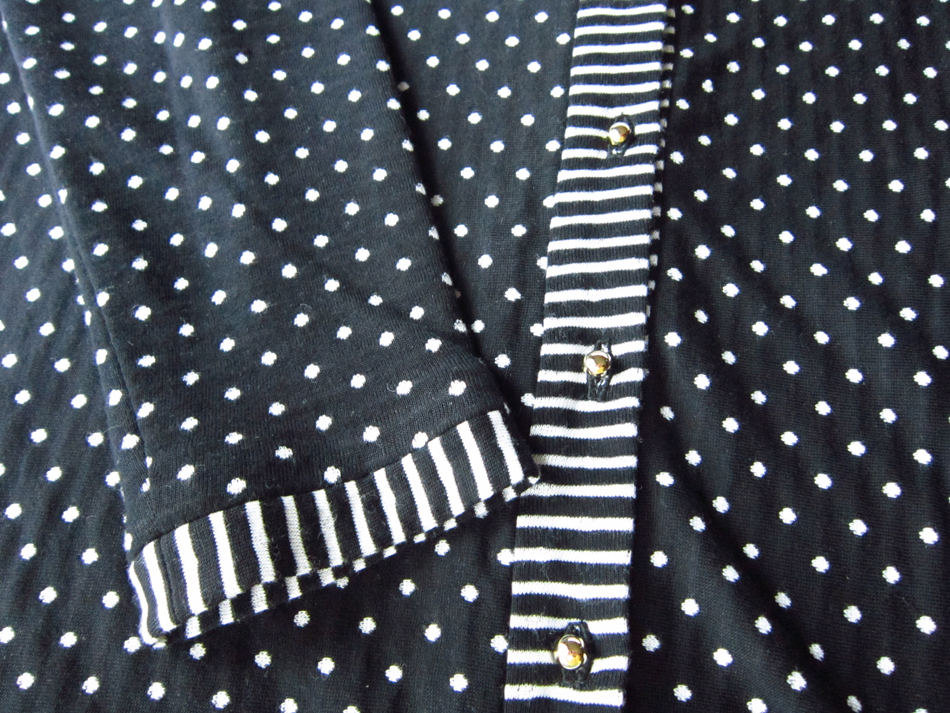
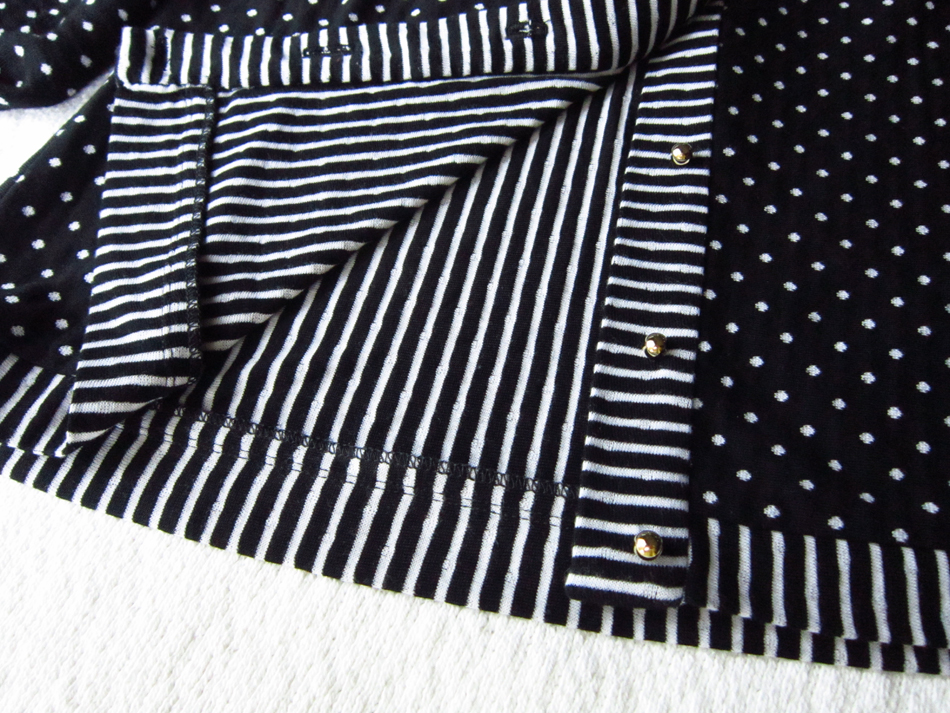
All the bands fortunately turned out pretty good, but because of the method of construction with the neck band and my double-ply not-too-thin fabric, it was a real pain in the… derriere to get the finish I wanted. The thickest area was where the top and bottom buttons go. It doesn’t help that I tend to be a perfectionist, sometimes very problematic for me!
As a side note, always up for a challenge, I decided to cut out the sleeves and bands cross-grain so I could have the stripes in the direction that they are as well as to utilize the fabric and eliminate waste. There were no problems with doing this and I have a chunk of fabric left, for what I don’t know, yet…
So…here it is


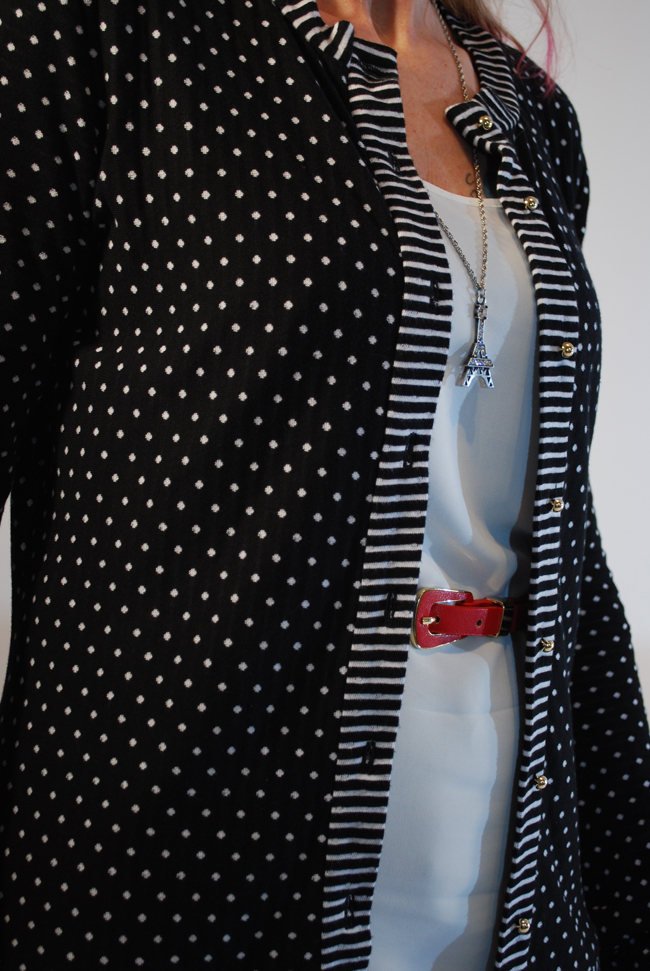

I have to say, I really like the way knit responds when a seam is sewn in it and I love how it feels to the touch – oh so soft. It is pleasurable to sew! I’m still a bit skittish when it comes to doing buttonholes. It’s a real pain to remove all the threads when the buttonhole is a total bomb and requires a do-over! Moving right along… yes I’m discovering that sewing knits can be a pretty fun thing to do, and that’s why I plan on sewing this sweater again. However, I would like to try and figure out another method for applying the neck band…I need to put on my thinking cap. If you have any suggestions, I would love to hear them. Until then…it’s off to go wine tasting!
Salut! Jessica
Read MorePattern Review Butterick 5646
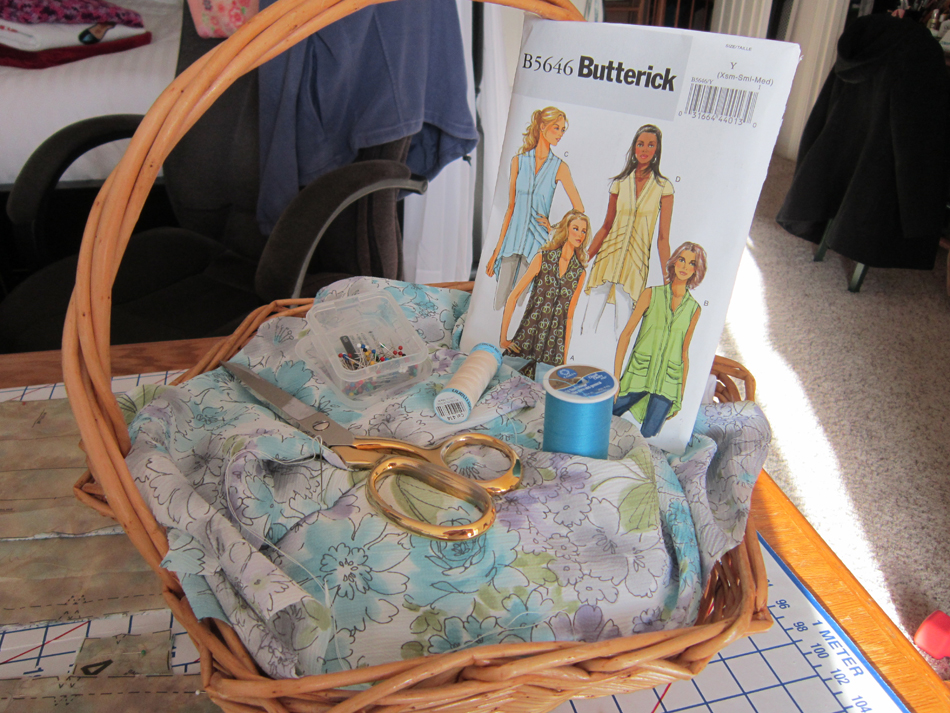
Believe it or not, I have been sewing while I have been chit chatting on this blog for the last few weeks! And… outdoors soaking up the sun and working in the yard cuz spring is here and it’s time to plant! Even mucked out the small pond and waterfall in my backyard leaving it sparkly and pretty…until next year when I have to do it again! Here I am though, faithfully sitting here at my desk on this beautiful sunny April 1st Monday morning, writing because this is important too. No fooling!
So what have I been sewing? Well, actually a few things, with three more projects in the makings. Sometimes I make myself crazy! Today I am going to start by reviewing Butterick 5646 and with the next several posts McCalls 6708 and Simplicity 1797. I am splitting them up because I think I talk to much and end up making monster posts that you may not want to sit and read! See, here I am, yaking!


Butterick 5646 McCalls 6708 Simplicity 1797
Before diving in, let me first say that each of my projects gets to go through muslin consideration. There’s nothing worse than finding out that something doesn’t fit properly that you were dreaming of wearing when you finished sewing it. Been there, done that!
Also, sewing for myself is sort of like dressing a triangle! I find it a constant challenge with any pattern I choose to make, because my shoulders are a little more narrow than standard shoulders. My bust… well I won’t complain; I am far from gifted in this area, but it could be a lot worse. Then there’s my waist, it’s two sizes up as compared to my bust measurement; what’s with that! Hips are hips; they are always the fullest area but the numbers just keep getting bigger. See… a triangle! What has worked best for me is to cut a size 8 at the top with still a bit more adjusting, then ease this size into a 12 at the waist. Most of the time size 12 is good for the circumference at the hip line, but sometimes I will cut out a 14 just to be sure! I try not to pay a lot of attention to size though, just actual circumference; notice I said try. And go figure, my store bought clothes are entirely different sizes! We are all in this mess together so I’ll just leave it at that 🙂
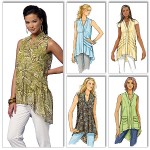
Okay…so here goes: The Butterick 5646 top
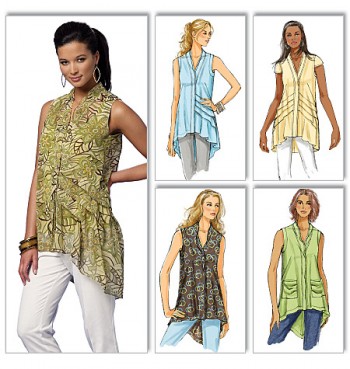
Butterick – 5646 Options
Let me start by saying that I picked this top because I like the long v-shaped back business that’s going on. Besides looking very feminine, it’s a butt cover when I don’t want my butt seen. (have no idea why I sometimes feel this way) 😉
The pattern is sized by XS, S, M, L, XL, and XXL
I chose size Small for several reasons. First, the bust circumference was closest to mine. Second, the waist and hip measurement with ease was printed on the pattern pieces, a number of inches more than I needed. And third, I pinned all the tissue pieces together to see what I was working with and could easily tell that it was going to be loose fitting all the way down; so…with much contemplation, I decided there would be no muslin done and size Small it would be. After the fact, I could have made an XS, since I almost feel like I am wearing a painting smock, but…I am not gonna fret!
I made style B because it has pockets which I thought would make the front more interesting. Chiffon and georgette were two of the recommended fabrics which was why I chose to make it in the first place. I love to wear things made of these light flowy fabrics, but… I thought I would do a test drive with some fabric I discovered in my stash that I bought a year or two ago to make a skirt out of, don’t know what I was thinking, anyways, decided to use it for this top.
The instructions for the most part were straight forward. The band around the neck tripped me up at first, likely because I have not sewn a lot of tops. You had to sew 2 bands allowing for a hidden band where the buttons and buttonholes are to be placed. As usual, I went off the beaten path because I wanted blingy buttons and didn’t want to hide them! The 2 bands got to become one band for my whim. All I did was slip stitch them together along the center edge and then top-stitched 1/4 inch from the edge all around the entire band.
I loved sewing the french darts. I have read that they can be a bit tricky at times. I can see how this might be, especially with certain kinds of fabric but the finish line is so complimenting that I can’t wait to sew them in future garments.
Also, french seams were a suggestion for finished edges which is one of my favs so I did this too. Maybe I will make this again in an XS if I can find some pretty georgette fabric.
The back…

And the front!

Salut, Jessica
Read MoreYes…I made it!
Wahoo!!! You can’t see me but if you were a fly on the wall right now, you would be watching me skip my way to the wine rack looking for the appropriate bottle of wine to celebrate my triumphant moment! You do get to see this though…
The wine…

and the moment…

Yeah, I am drinking wine, I am suppose to be, I am celebrating my latest project! The Silhouette 675 Top.

So what’s so exciting about the fact that I made this top? Well…the fabric is knit and this is the first knit anything I have ever attempted. So………….Yes, I made it and it actually turned out!
Admittedly I was a bit nervous before I dove into this project. I spent a good deal of time on the “internets”, surfing anything and everything that had to do with sewing knits. Finally, after feeling like I killed a bazillion brain cells fretting about how to tackle sewing them, I decided to go with the advice of the lady who designed the pattern, Peggy Sagers.
She said “use a ballpoint needle” and sew it like you do anything else. Also, I had heard her say in one of her pod casts that she uses a teflon foot for most everything so I opted to do the same. It did make sense to me since I have used this foot when sewing silk because it holds the slippery wonderful stuff quite nicely! I set my machine to a 3.0 stitch for all the major sewing like she suggests in the pattern instructions and used the recommended 3.5 setting when top stitching and both worked like a charm.
The needles and the teflon foot that fits my Husqvarna sewing machine.


Silhouette patterns have 3/8″ seam allowances and when I first started sewing the fabric, I wondered if this seam would allow for enough width, especially when sewing three layers of the knit where there was facing. I experienced the WOW factor. I was impressed. It was so cool to not have to spend time trimming the edges of seams. It also meant needing less fabric and of course less waste. I’m kind of diggin the idea!
There was a small speed bump that I hit…the buttonholes. I have done lots of buttonholes but never on knit since I’ve never sewn it, right! It was BACK to the “internets”! Once I found the magic info I needed, I headed for my interfacing stash basket and pulled out my handy dandy Tear-Away interfacing and started cutting out strips which I then cut into large enough sections to place underneath each area where I needed to sew a buttonhole. The interfacing tore away easily leaving the underside of the first buttonhole I made look exactly like it was suppose to. It really did work like a charm. I was so thrilled with my success that I went a little crazy and ended up with 7 buttonholes instead of 6 but hey, who’s counting and besides, 7 is one of my lucky numbers so – “all is right in the world!” Now – it’s back to my wine.
Salut! Jessica
Read MoreAbout Me
 Portland, Oregon,
 United States
Hi there! I’m Jessica Brandon and I am a clothes-loving sewing artist. When I am not sewing, blogging or shopping for shoes for my creations, I fill in the remainder of my days spending time with my children, playing ice hockey, gardening and making and drinking wine!


Up Coming Projects:
Vogue 1426

Vogue 7881

McCall's 7089

Vogue 8997

Vogue 1431

Vogue 9006

Vogue 8991
