Making Pants is Rocket Science Part 2
Here I am, back with Part 2 of the pants saga… Making Pants is Rocket Science. All the alphas and zooloos lined up and finally my friend and I were able to get together and do a pants fitting. Guess what?!! I was so close! I would have taken pictures but I forgot and wore hot pink undies that proudly glowed through the muslin and so I really didn’t want to post pictures of this on-line! I don’t even want to think about what kind of spam I would get! The good news — I have taken pictures of the pants muslin with all the thread tracings and adjustments so that I can share and explain.
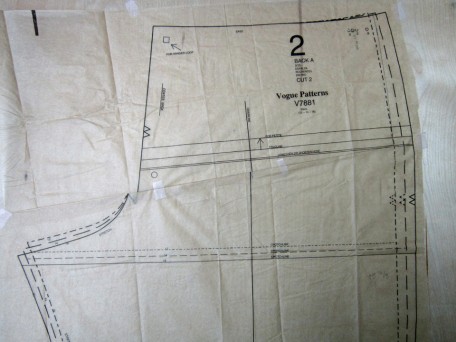
Just to briefly up-date, the pants pattern I have been using is Vogue 7881.
It is from the Claire Shaeffer’s Custom Couture Collection. These pants are straight-legged with a contour yoke waistband. They can be made as dart-less (option A) or with darts (option B). I followed the couture techniques and construction given for the dart-less option A pants.
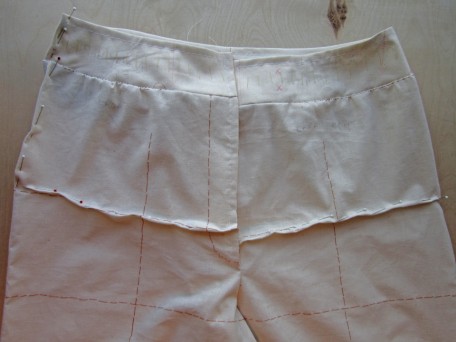
As you can see from the picture below, my muslin still requires some adjustment on the front. The front crotch length is about 3/4″ of an inch too long (this was easy to see when doing my fitting). We pinned darts of 3/8″ inches, starting from the edges of where the zipper will be placed and easing to nothing at the side seams. The same measurement of these darts I will transfer to the front pattern piece and so the fact that the pinned in darts on my pants muslin are not meeting equally at the center is nothing worrisome. I also need to remove 1″ inch from the waist because we pinned 1/2″ out on each side through 1/4″ inch pinches.
The back of the pants fit almost perfectly and this is why. In all my failed attempts I had always thought that the reason for the bagginess or pooling of fabric under my butt cheeks was from too much back crotch length (the measurement from the top of the waist to where the back crotch seam meets with the front crotch seam). Well, I was wrong. My problem was not back crotch length, rather the “pitch” of the seat.
The question now arises… pitch? what’s a pitch? Yep, I asked the same question. I had never heard that term before either and whether it was a creation of my friend’s that she used in her explanation to me, or an actual pattern drafting term, it didn’t matter because it was that magic word that helped me to make sense of what was happening to the back of pants when a dart is added into the back center seam curve of a pattern tissue for the fitting adjustment that fixes under the cheek fabric bagginess!
I was so excited about this new discovery that I ran home, re-worked my pants pattern back piece and then wrote my Making Pants is Rocket Science – Part 1. After the fact, I learned in my next couple of get-togethers with my sewing friend that while my method for creating a dart to alter the pitch was correct, there is a cleaner and more efficient way of carrying it out which I will once again be eager to share, only this time I ‘m applying the method to the front pattern piece.
Oh, and though not something to climb a mountain and shout about… well maybe I would because goofing off is in my nature, I also learned that the back center seam curve is usually shaped like a J but mine looks more like an L!
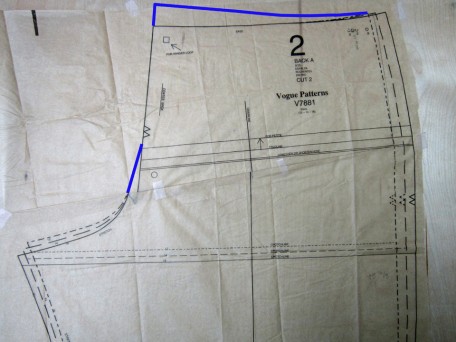
For a quick review, below is the picture from my Making Pants is Rocket Science Post. I made an upwards fold in the pattern piece which in essence is a dart, then trued up the curve and added the lost 1 inch length to the top of the waist.
Now, for the more efficient way to shorten the crotch length in the front or back of a pants pattern piece.
I should first explain that when reducing crotch length, whether in front or back, this adjustment is done thru a dart made in the pattern tissue or muslin, in which the larger side of the dart starts at the center since this is where the fabric that shapes around the roundness of our bodies is too excessive. The dart will then ease to nothing at the side seams. When I adjusted my back pattern piece, I used a dart but I didn’t want to change the crotch length, rather the “pitch” of the curve so the amount I removed in that dart I added back to the top of the waist. My front pattern piece however, has too long of a crotch length so in my steps below, I will create a dart to shorten it and not add anything back to the top of the waist.
1. Determine where the fitting dart should be located. In a fitting of a muslin, where the pinching and pinning out of the excess fabric happens, somewhere between the waist but above the crotch, this amount and location is where the dart should be drawn on the pattern piece.
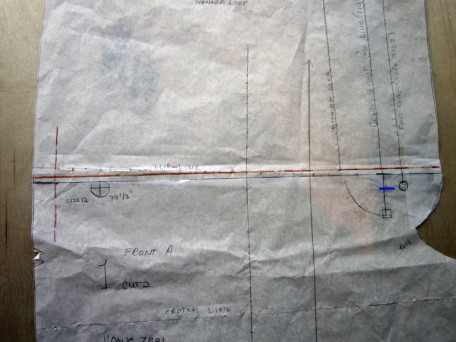
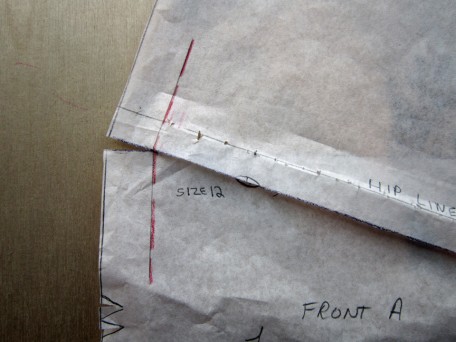
2. On the pattern piece (my front is shown in the picture) draw a line from edge to edge where the dart is needed. I drew mine just below the red colored hip line in the picture below.
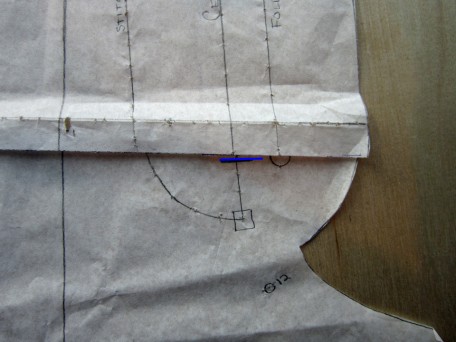
3. Make a mark below the line just drawn, at the center front, the measured amount that needs to be removed. (I needed to remove 3/4″ of an inch in the crotch length so the blue mark in the picture is 3/4″ of an inch down from the center line)
4. Begin cutting from the edge of the front center seam of the pattern tissue, continuing along the drawn line towards the side seam, but stop just a smidge from the seam allowance. (In the picture below, the seam allowance is the dashed line in red on the left side)
5. Next clip on this same line from the edge of the side seam of the tissue towards the seam allowance but not cutting through. There should be just a snag of tissue between these two cuts that are going to be a hinge for pivoting.
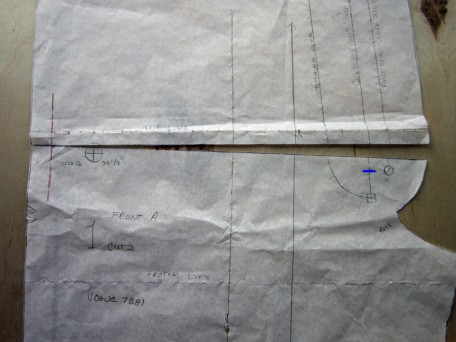
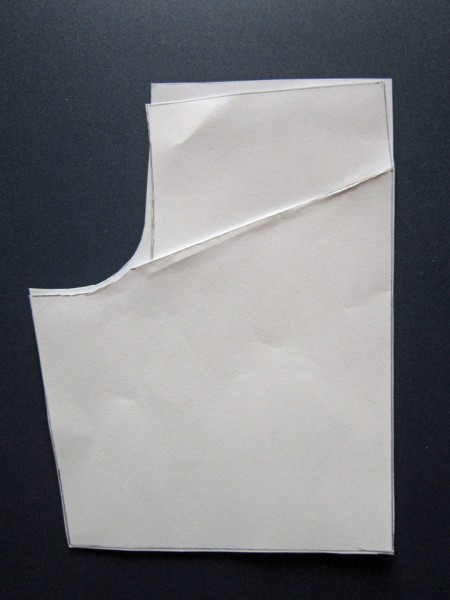
6. Now pivot the cut line section downward to match the line that is not cut. There will be a small gap at the side seam (slightly less than what you see in the picture for step 5) but don’t worry, it’s okay.
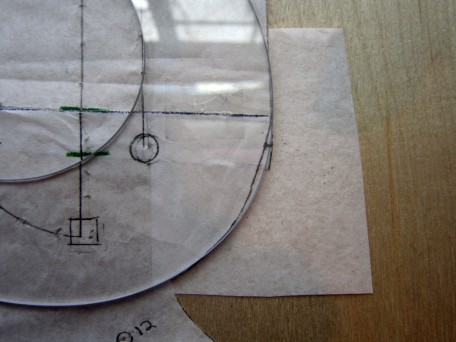
7. The center front now needs to be trued up along the edge so tape a piece of paper to the underneath near the area and re-draw the front curve. (The edge is just on the inside of the plastic curve ruler. I am merely adding back in a little section.
*Note: My above instructions are if the crotch length is too long, but if the crotch length is too short, this same method can still be applied, only rather than layering the top and bottom parts of the pattern using the hinge, the two sides will be separated or spread apart to the amount that needs to be added and additional paper is used to fill in the space.
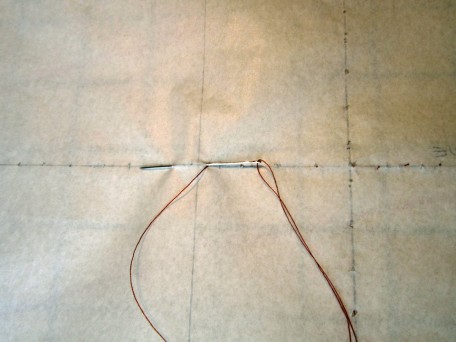
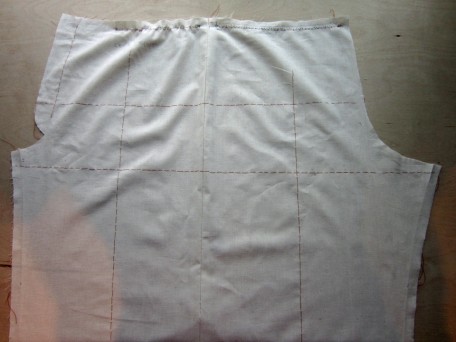
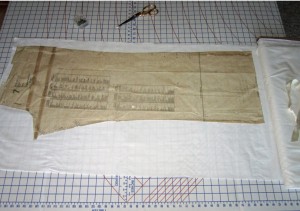
Okay… so maybe I should next talk about making my muslin. Yes, I thread traced all the lines Ms. Shaeffer recommended… EXCEPT the seam lines. I was eager to do things right but not quite that eager! Each fabric piece has to be thread traced separately so first cut the pieces out of the fabric and then lay the tissue on each piece, and sew running stitches by inserting the needle in and out from the same point along the markings. By using the same point for access and exit, the pattern paper will lift up easily from the fabric with maybe a little snag here and there. I traced the crotch line, hip line, knee line, the crease in front and the grain line in back, all the zipper markings and start and stop points for the gathered darts. See picture below.
This is how one leg (front and back) of my pants muslin pieces looked when I finished. There is baggy bumpiness at the waist area of each because this is where I stitched gathering threads in the fabric between markings. Remember… dart-less pants! Already a little nervous about this part of the construction.
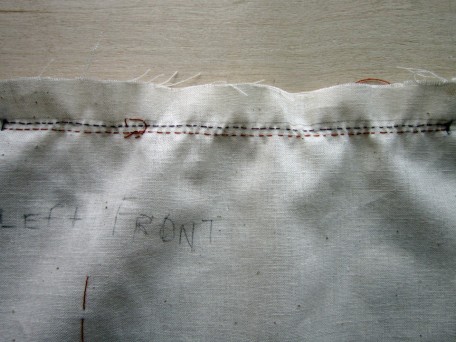
My dart gatherings before the gathering!
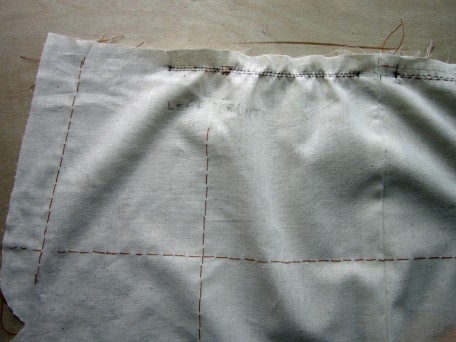
And after.
Okay… phase 2 of the engineering of my pants is complete. Now I’m ready for phase 3, the construction of my actual pants! It was my hope to refute the thought that Making Pants was Rocket Science and that is still my goal. But I’ll have to get back to you on that when I write Part 3. For now, enjoy the rest of your Spring break, vacation, or week and I’ll be back soon!
Salute! Jessica
Read MoreMaking Pants is Rocket Science Part 1
This picture illustrates clearly how I feel as I start my pants challenge!
Happy New Year! We’ve just pushed off from the starting line of 2015 and personally, I’ve got my fingers crossed that this year is gonna be the best ever yet!
With regards to years, while writing this, I’ve realized I just passed my 2nd anniversary of starting up Sewlikeinparis. It’s hard to believe that I’ve been banging away on my keyboard for that long! I remember when I started… I was so scared. It felt like I was jumping off a high dive into a pool with no clothes on in front of a grandstand of spectators, worrying I would belly flop! And I felt bombarded by all the warnings about the dangers of the internet! On occasion I found myself entertaining the thought, “what if there are internet boogie men who try to steal my personal information and expose me in Facebook, Twitter, Spokeo or some other sensitive information vacuum sucker up-er! Well I’m over that now! It’s been an awesome experience that I’ve truly enjoyed… and I’m certainly not done yet!
I’ve shared many things through my posts, feelings of success, frustrations accompanied by rants, a few disasters, songs, jokes and toasts, but I’m not sure if I’ve shared enough epic fails! Believe me, I’ve had my share, especially when it comes to making “PANTS”! I know there are those that get to enjoy the sweet taste of success from accomplishing this great feat, I’ve met some of them and they say it’s easy. I call BULL. I think making pants is rocket science. I’m sure of it! I’ve lost track of the number of muslins I’ve made, say…7, maybe 10, nah… more like 15! I’m actually not sure – I quit counting after 6. I’ve even sewn from good fabric 4 pair of trousers and 2 pair of jeans, and all ended up in the trash! Certainly sounds like an “epic fail” to me. But I’m tired of failures and ready for success so I’m challenging myself to learn how to make pants that fit!
In order to meet this new challenge, I decided to start from the basics; meaning, no fitted jeans, no low-rise waist, no skinny legs, but rather, plain classic women’s trousers. And I’m not going to draft my own… I’ll save that for later. I’m going to take baby steps on this project, meaning that I’m not going to be in a hurry and the perfect pattern for this, I think, is Vogue 7881.
These pants are straight-legged with a contour yoke waistband. They can be made as dart-less (option A) or with darts (option B). The pattern is part of the Claire Shaeffer Couture Collection so couture techniques and construction are given for option A and stream-lined instructions for option B for quality ready-to-wear. I know I said baby steps… but to me, this is baby steps. Yes, there is lots of hand sewing involved, specifically, thread tracing the major construction lines but I see this as really digging in, one baby step at a time. All the thread tracings will show me what is going on when I’m trying to fit the pants to my butt! Yes, the butt! This is where all the action is happening… all the unwanted wrinkles, or pooling bagginess, or uncomfortable tightness! Getting pants to fit my butt is the maker or breaker here!
I have a friend who studied pattern design at Parsons in New York and she sat with me this last week and explained how the “pitch” of the curve of the back center seam affects the fit of a pair of pants. Hopefully I’ve understood it well enough to explain. The curve of the back center seam of a (back) pattern piece for a pair of pants is at a “pitch” that matches the shape of the model’s derriere. Since no two butt shapes are alike, the pitch of the curve will vary. Darts, go figure… are what is used to adjust the curve and change the pitch. With every pair of pants I’ve made, it’s always the same; there’s a pooling of fabric to the right and left side of the center back seam under my butt cheeks! This I’ve learned, may be a pitch of the curve problem. I guess I’ll just fly by the pitch of my pants and see what happens!
Below is a picture of my pattern piece with a fold (dart) at the center back seam. It’s 1″ inch that decreases to nothing at the side seam. I don’t want to change the side seam because it has to match the front side seam. My friend warned me that this dart may cause some tightness a little up from it’s location and if so, I will need to add back in some of what I just took out! It’s all about the dart!
Because I’ve taken out 1″ inch on the back center seam length, I need to add that 1′ inch back to the top of the back center seam, and from that point re-draw the waist ending at the top of the original side seam. See picture below. I will also need to re-draw the crotch area seam line where the fold (dart) creates a discrepancy.
Below are some miniature pants back examples to provide visuals of what happens to the pitch of the curve on the back center seam when a dart is added.
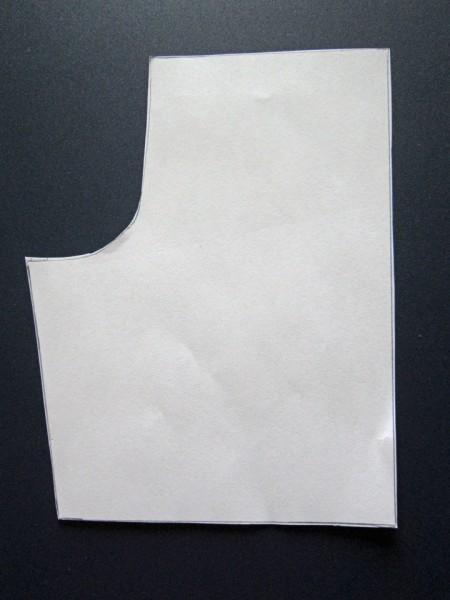
Picture #1: The pants back pattern piece before doing anything.
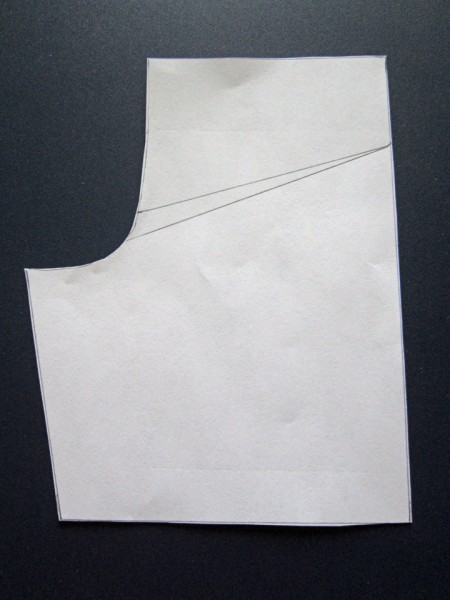
Picture 2: I have drawn lines on the example to show how the fold (dart) is created that will change the pitch of the curve.
**Note: The lines I drew on my actual pattern piece were not arbitrary. I’ll explain:
At the back center seam, I started the bottom line at the point where the bagging is most problematic and drew it diagonally upwards to the side seam at the point where I’ve found through fitting with muslins that it seems to start. The point is about 4 to 5 inches down from the top of the side seam, including the waistband.
The top line I started 1 ” above the bottom one at the back center seam, ending at the same side seam point of the bottom line.
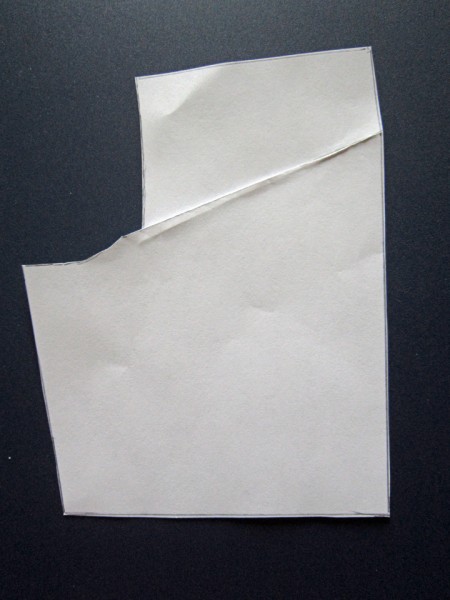
Picture #3: I’ve folded the bottom line up to the top line. Now the top of the back center seam has dropped lower and so the amount folded out will have to be added back to the top and a segment of the curve will need to be filled in to correct the discrepancy.
Picture #4: I have laid the folded pant back on the top of the original one that has not been changed which gives a visual of what is happening with the pitch of the back center curve. This change does not change the width or circumference of the back of the pants, just shifts the curve in the seat area. This adjustment will hopefully clear up the bagginess I get in the back. It will be with the fitting of my muslin when I will know for sure!
**Note that because my fold in the miniature example is roughly 1/4″ inch instead of 1″ inch, the change is not as drastic.
After I completed the adjustment I just discussed, I then traced my back pattern piece using tracing paper I purchased by the roll from Nancy’s Notions, and also drew in the corrections resulting from the adjustment. I went ahead and traced the front pattern and waistband pieces as well, preserving them in their original form in the event this fails and I have to start over!
I think I’ve reached a stopping point for this post but no worries… I’ll be back with Part 2 after I’ve met with my friend who is going to help me with my fitting! It will either be on to making my fabulous pants or back to the drawing board!
Salut! Jessica
Read MoreHockey Officiating Pants Made for Her
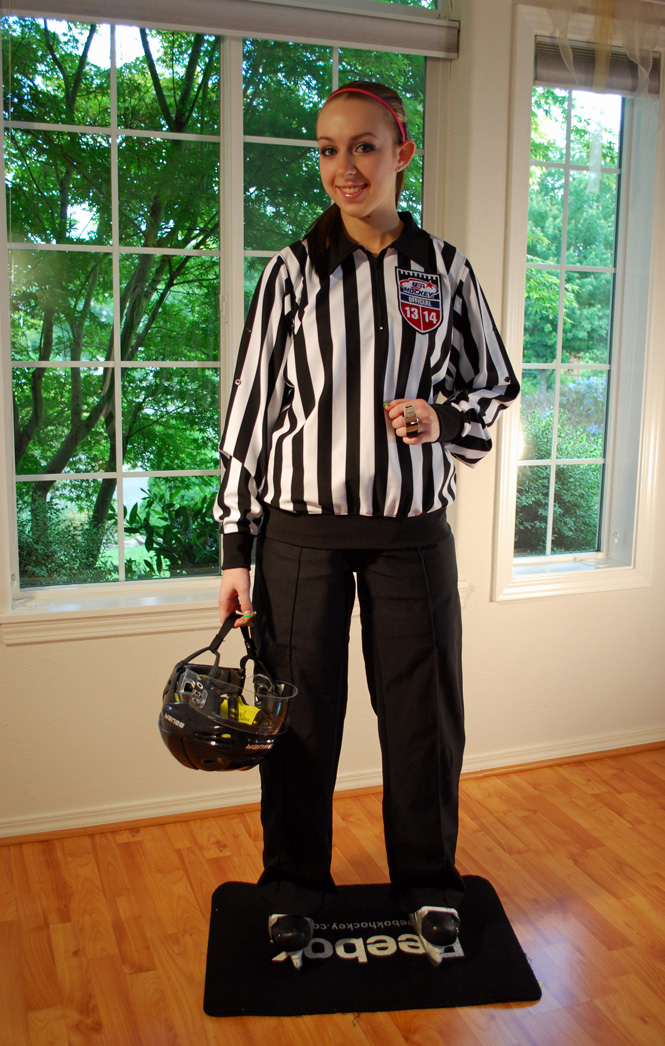
Hockey Officiating pants made for her! For my favorite hockey Referee that is!
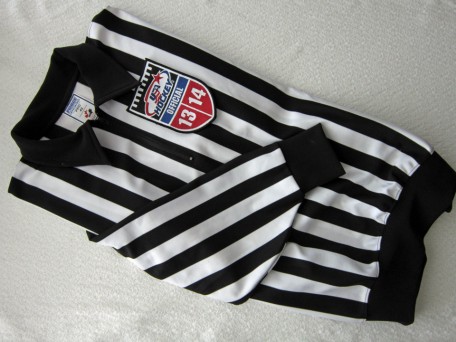
My daughter and I have been playing hockey for a number of years now. It has been a pretty awesome journey that we’ve shared, but several years ago she decided that just playing the game was not enough. As an official “rink rat” she had found her place in the hockey community and so it was no surprise when she landed herself a job score-keeping hockey games. There were some things to learn, but overall, she discovered that this new job made all kinds of sense if you know the game and she became pretty good at it. However, it wasn’t too long after spending time in her refrigerator box, that she figured out that along with doing this new job, she could also fit in another. So after seminars, tests, and lots of skating, she landed her additional 2nd job as a Referee, known in the hockey community, as a “Zebra”. Why a Zebra? Well, part of their uniform includes a “sweater” and the picture below tells the rest!
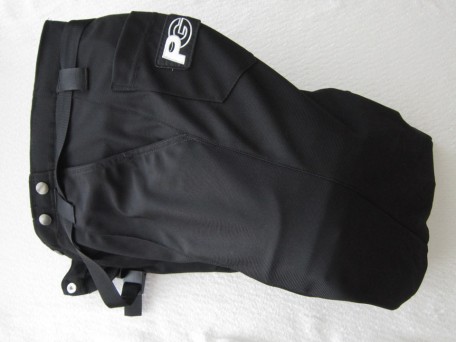
Along with this sweater, black pants are worn that are suppose to give the feeling of being suit pants but still accommodating for a physical work-out. They come in various styles based on the manufacturer and designed in different ways to allow for the padding worn underneath. Yes, even hockey referees wear padding. It can really really hurt to get hit by a puck and there are all kinds of other things that can happen too!
The first pair of pants my daughter purchased were an intro brand that served her well after a major re-build operation provided by moi! She wears a size 1 in juniors, and so mens size small hockey officiating pants are humongous on her. That first pair were not too expensive, about $50 dollars and so I tore into the project feeling confident. They turned out fine but after a year of reffing experience, it was time for a pants upgrade. This new pair she paid $170.00 for and of course the mens size small was way way too large! This meant only one thing… It was rebuild time… again! With a deep breath, I picked up my seam ripper and my work began. I should say that I have been working on a muslin for a dress that I’ve posted a picture of under Up and Coming Projects, but fixing these pants was also very important so the dress project got put on hold. I worried at first about what in the world I would share with you but then it occurred to me that fixing these pants to fit my daughter is sewing so why not! Oh, and get ready for some hockey lingo that you will see in italics!
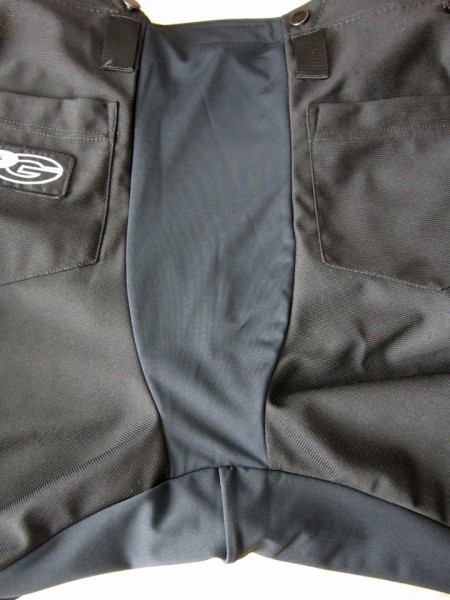
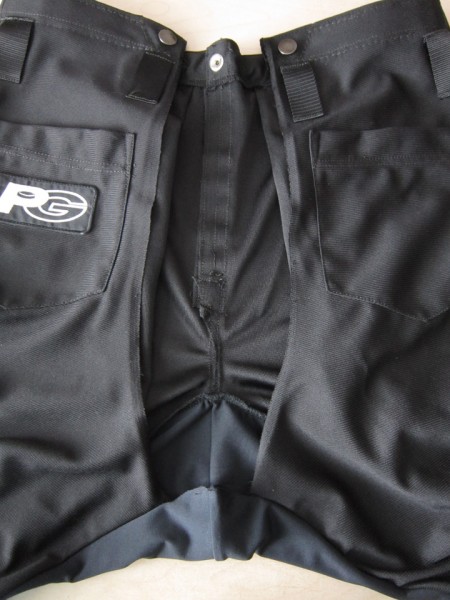
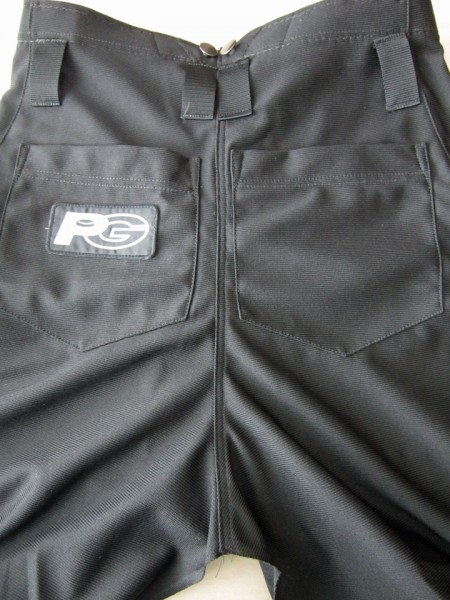
Okay… here are the back of the pants before my seam ripper started “hooking” and “slashing” the back seams out of them. We decided that the stretchy insert looked like a diaper!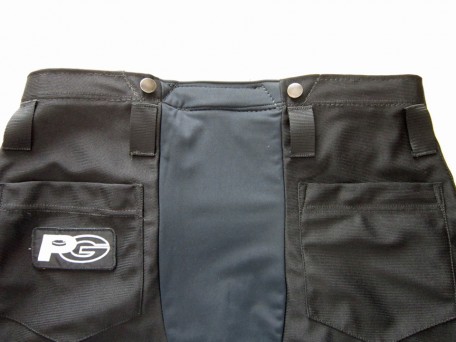
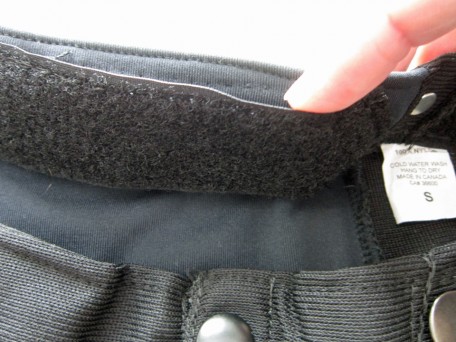
At the top of the pants on the outside, there is a seam that holds a strip of Velcro to the inside waist which padding fastens to. The padding on the back side is important for protecting the tailbone in the event of a fall sometimes caused by “tripping”. 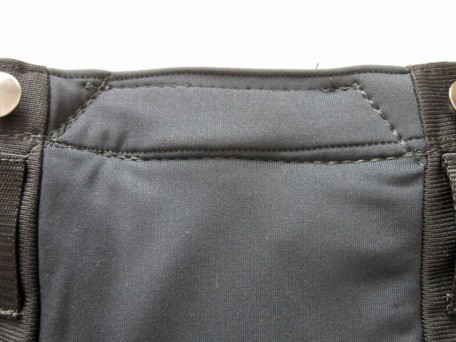
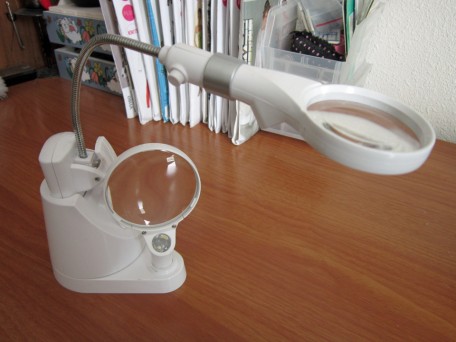
As I began trying to take out this seam, I realized that if I wasn’t careful, I could do a lot of damage and earn myself “major penalties” with my daughter for cosmetically messing up her pants! Fortunately I had my nifty Ottlite Led Magnifier Lamp that I purchased from JoAnn Fabric. It is portable and when I first purchased it, I wasn’t sure if I wasted my money, but given that it has saved MY butt so many times with it’s “assists“, I have now become quite fond of it!
It was a “give and go“, as I attacked this seam from the outside to the inside due to the thickness of the waistband, the Velcro, and the heavy-duty thread.
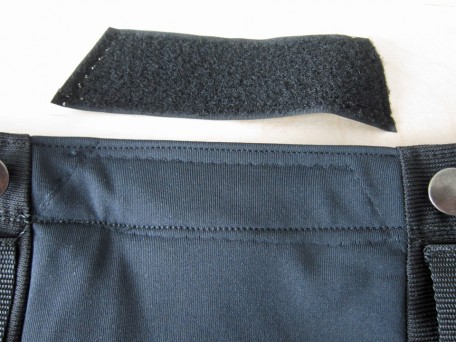
But eventually I got it removed.
The next step was removing the stretchy panel that was inserted between the two back sides of the pant.
Still a little nervous about tearing apart these expensive pants, I decided to start at the crotch seam first, and then work my way up the two sides.
I discovered that the front and back insert sections were double layers which sort of made me nervous at first, but as I worked through it, it turned out to be no problem at all.
Admittedly, the language I used in this part of the pants re-building process would have landed me in the “sin bin “. I think it took me about an hour to get all the seams out.
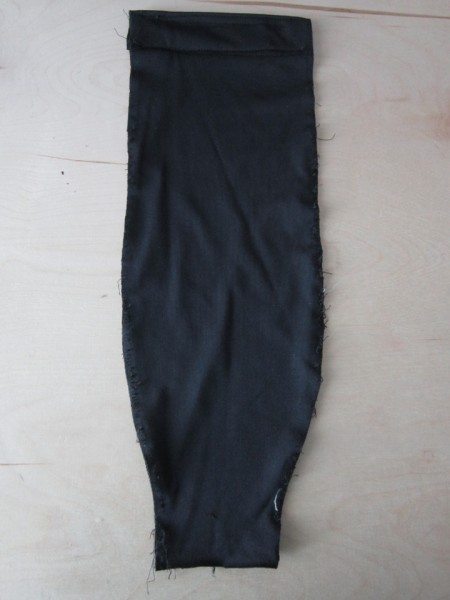
This is the insert that was sewn into the back.
At this point it felt like I was ready to do a “break away” and sew up the seat of the pants but as you can see from the picture before the insert picture, the front side of the pants and the inseams of both legs also had inserts. I decided it was the end of the “1st period” of hockey pants re-building and so poured myself a glass of chardonnay and watched Inspector Morse on Netflix with my son. These kind of projects sometimes can confound you temporarily and if you step away for a bit, afterwards, it sometimes just all makes sense!
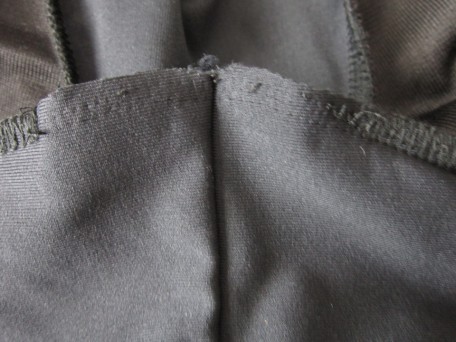
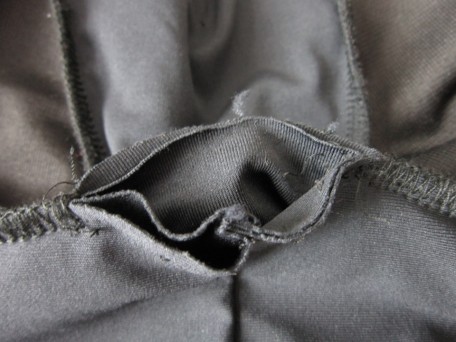
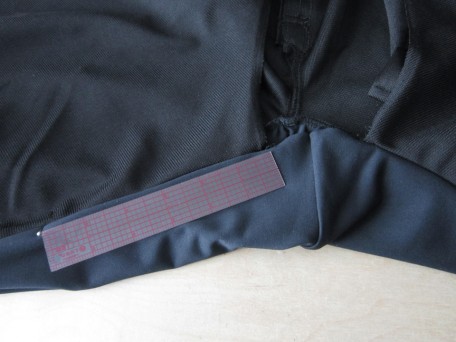
The next day… Back to the task at hand and fully charged, I knew what I needed to do. Before I could close up the back, I had to take out some of the inseam on each side of the crotch but along with this, I had to figure out how much of the front insert I wanted to remove because it made the crotch length way too long. If you look at the picture below, the open part is the back and the ruler is lying along the left inseam. The remaining inserts sewn into the inseam of each leg meet at the center and are also part of the front.
** A side bar-note for anyone that may be asking the question … **What’s a crotch length? There is a wonderful explanation along with pictures written by a fellow blogger that I would like to share. Her site is A Fashionable Stitch.
A quick definition: The measured distance from the front center waistline, down and through the crotch, continuing to the back center waistline.
These hockey pants had a crotch length of 33 1/2″ inches. The older hockey pants had a crotch length of 32″ and were a little too long. Obviously I was going to have to shorten the crotch length on the new ones but I wasn’t sure at this point exactly how this was going to work so I became the “winger” that I am and decided to take out 10″ inches of inseam on each leg and then sewed up the back of the pants. As you can see in the picture below, I also did a flat-fell seam like you would on jeans because I wanted it really durable. Working around the suspender hooks at the top was a bit of a challenge but with some hand sewing, and the use of a zipper foot, I think I’ve got it pretty good. Sewing back in the Velcro strip at the center top back was also reassuring because it extends several inches on both back sides and anchors the two sides together.
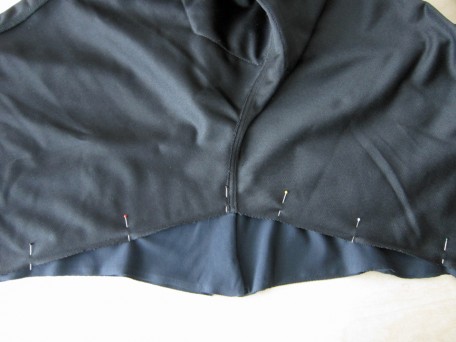
Being well into the “2nd period” and feeling strong, I pushed on to re-assess how to reduce the crotch length. I re-measured the old hockey pants, breaking down the measurements to front and back, the front being 15″ inches and the back 17″ inches. Then, starting at the front waistline on the new pants, I measured down 15″ inches plus an additional 1/4″ inch for the seam allowance. This distance landed a little ways into the insert. I marked this point with chalk and the marine blue arrow points to it. Notice how much of the insert still remains below my mark!
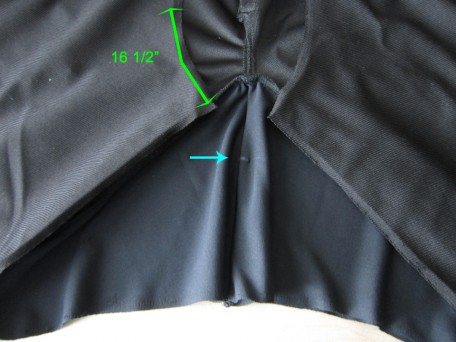
Oops! Took this picture before sewing up the back but it doesn’t change the situation I’m talking about.
Then I measured the back which was now 16 1/2″ inches in total without the insert (see above photo). Hmm… I thought… now what?!! I needed 32″ inches or a little less in total… the front of 15 1/4″ inches plus the back of 16 1/2″ inches equaled a total of 31 3/4″ inches… then if I sewed a 1/4″ inch seam, I would end up with 31 1/4″ inches which was less than 32″ inches… well, then there was only one thing to do… pin the back crotch seam to the marking I placed on the front, reposition and pin the inseams of each leg for the new crotch length, baste them together and have my daughter try them on!
Hot damn and a woo-hoo! They fit! I made a “goal”! I was singing the “Happy” song by Pharrell Williams! I really love that song. So much so that I decided to share it with you so you can feel some happiness too! At the end of this post is a start button and you can check it out! Anyhoos… the rest is history! I stitched a solid seam where the basting was, then serged the selvedges and hemmed the pant legs since they came un-hemmed for custom fitting.
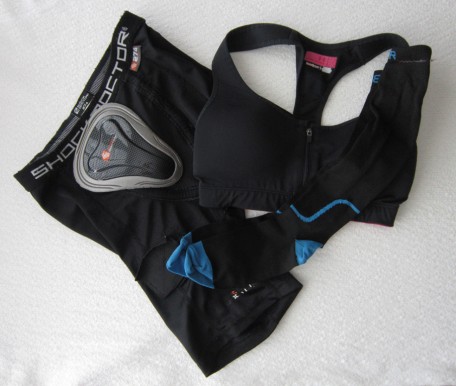
While I was writing this post, I thought it might be fun to share a few more pictures of all the gear that my daughter wears when she’s reffing a game. We’ll start with the under-undergarments. They of course include a sports bra if the ref is a female, some sort of undershorts that hold a cup for protection… yes, girls wear them too because they also need protection… and special wicking socks.
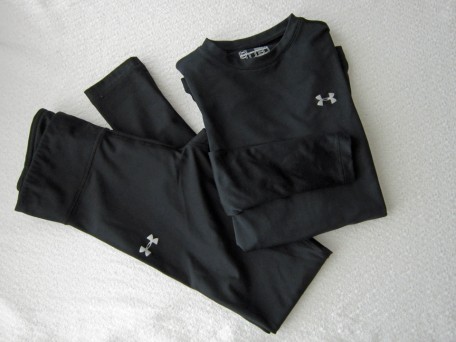
Then there are the “keep you warm” undergarments… our preferred choice is Under Armour frosty tights and long sleeve t-shirt.
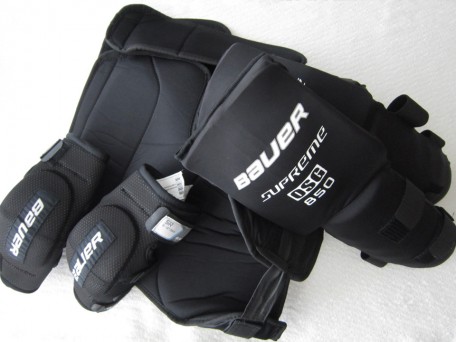
Next up is the padding. Besides the padding in the pants included in the picture below, she wears elbow and shin pads.
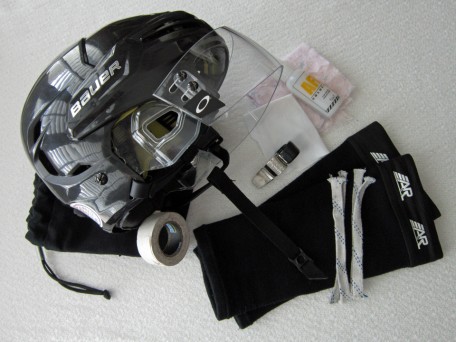
After donning the under-under garments, the warmth under garments and then all the padding, she’s then ready to put on her padded pants and sweater. But there is still a few necessary items: A certified helmet with visor and cleaning goodies to keep off fog; shin tights to keep her pants from hooking on the back of her skates, an official hockey whistle, ties to make emergency repairs on the nets and white tape for protecting fingers if she has to break up “dancing” hockey players!
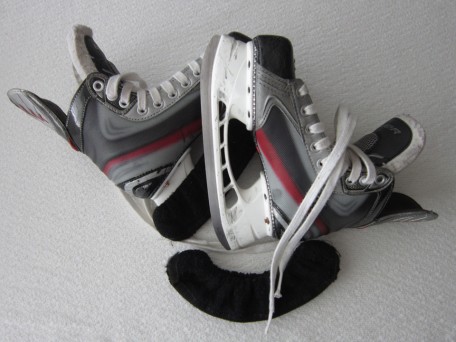
Oh! And one more very important item… the hockey skates!
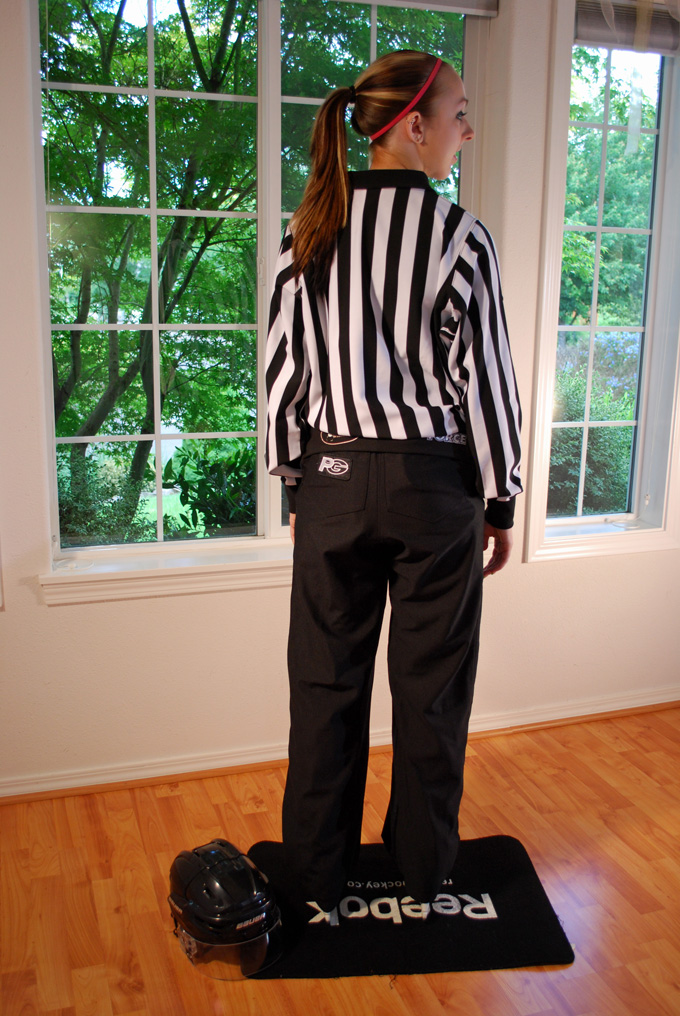
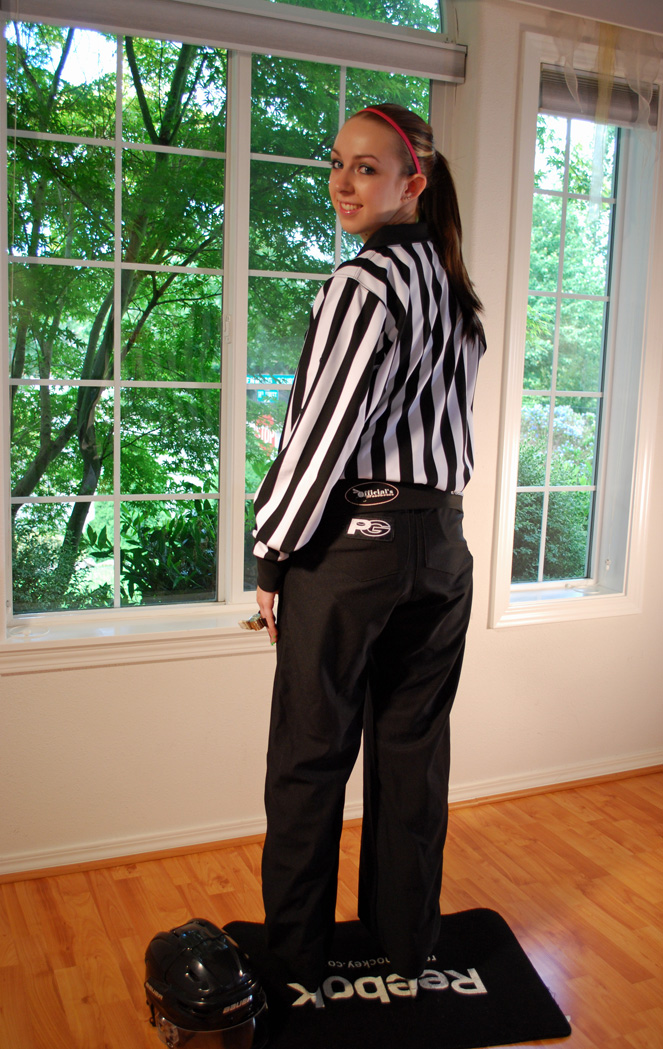
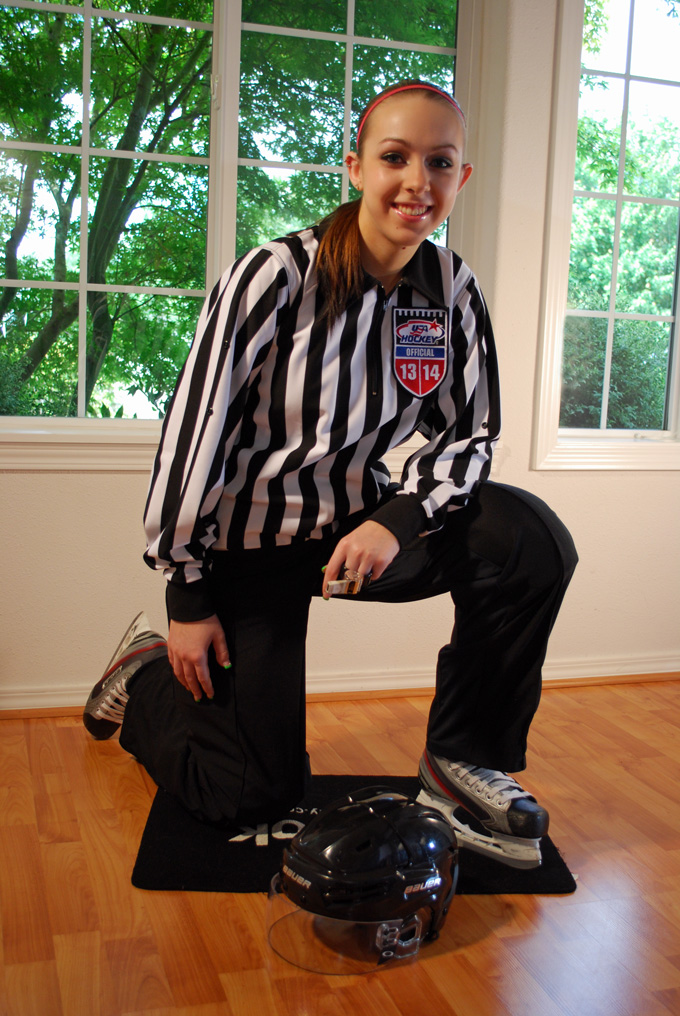
A photoshoot was in order to share with you how the pants look now that they have been custom fit for my daughter.
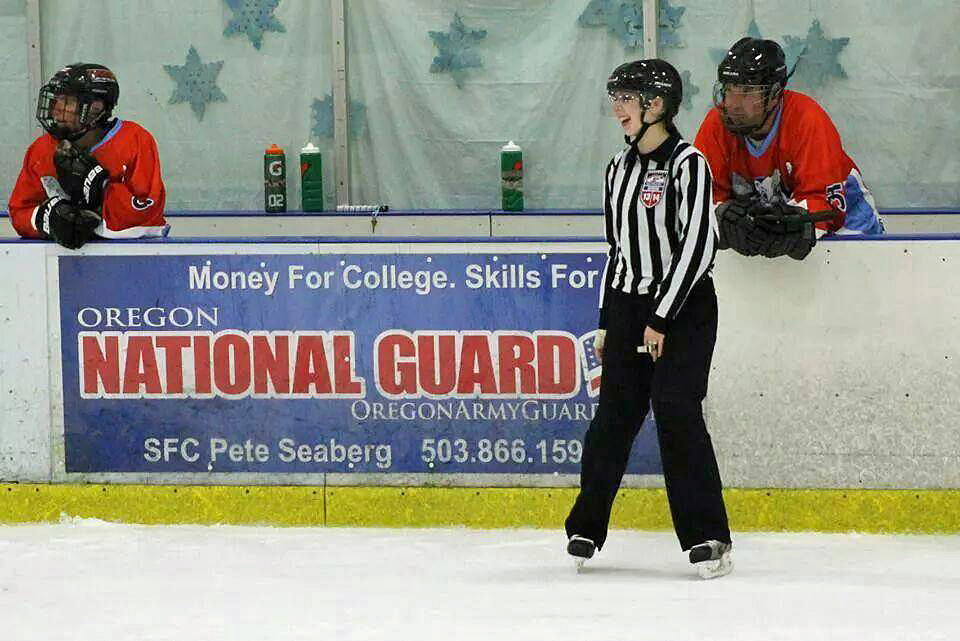
This is our family “Zebra”!
The pants fit her properly now.
And taking a knee because it’s time out!
For all of you, I also decided to include in this post an interview of my daughter that was done by one of her brothers (one of my sons!) which was a college class film making project filmed in November of 2013. Emjoy!
And here is that most cool song so you can clap along and be happy too!
Take care and hope you had a wonderful Memorial Day weekend. Will be back soon!
Salute! Jessica
Read MoreFitting and fitting and welts oh no!
Okay… so I have started working on the Vogue 1051 pants project and…and…was fortunate that I used some old stash fabric for my first pair! I discovered the error in my ways and will make future adjustments for fit in the proper location. There, I admitted it – I messed up!
moving right along…
Note to self: Since my goal is to make pants that truly fit me, are comfortable, look professional and make my butt look good, then the number of re-dos is immaterial! Ha! What a play on words.
Now on to cutting out muslin #2 for second pair of pants.
Yes, still using scissors and not a rotary cutter. (I admit that I am a coward that needs more courage!)
I folded the tissue above the crotch line (the fold nearest the waist) to raise the crotch line to the fitting point that I found comfortable with the first muslin. For me this was a 5/8 inch fold that adds up to 1 ¼ inches being removed when I cut the muslin fabric. Yes…I am sort of short, sort of!
The second fold in the tissue (the one at the crotch line) is now in the proper place, uhem… which is why muslin #2. It is also 5/8 inches for a total of 1 ¼ inches of fabric that I am removing because the top of the leg is where there is bagginess under my derrière.
Sometime later…
Well this is interesting…tried on the basted together muslin #2 and there is still some bagging happening at the base of my back side so I decided to take up a smidge more of the fabric. I made a 5/8 inch fold (okay, a little more than a smidge) just below the crotch line, basted it in place and then tried it on. The muslin fit so well that I decided to use it as my main front and back pattern pieces.
Read MoreWhen winter hits, the pants come out!
I love to wear dresses or skirts with tops because they are usually a lot less restrictive and easy to move in. However, when I get cold…out come the pants! To make sure we are on the same page, when I talk about pants, I am talking about dress slacks, maybe cargo or a straight leg slimming everyday pant, but not jeans. Hey I love jeans, but just not on me! I have a hard time feeling comfortable in them. Regardless of the brand or style, they never seem to fit me properly, which is why the up and coming Silhouettes # 3300 project…can’t wait!
Now…back to pants. Overall, I have had decent luck getting a good fit with pants that I have purchased, but I feel it is time to break free from the chains that have kept me prisoner to store bought pants, face my fear and learn to make my own…that fit! Then on to jeans!
For starters, I decided to try this Vogue 1051 Alice + Olivia pattern because I liked the overall style.

Vogue 1051
They have a wide waist band which I find comfortable, a slightly flared leg, and welt pockets in the front and back which are intimidating to me because I don’t do enough welts though that is about to change!
Read More






 Portland, Oregon,


