Butterick 4891 Bonaparte Style
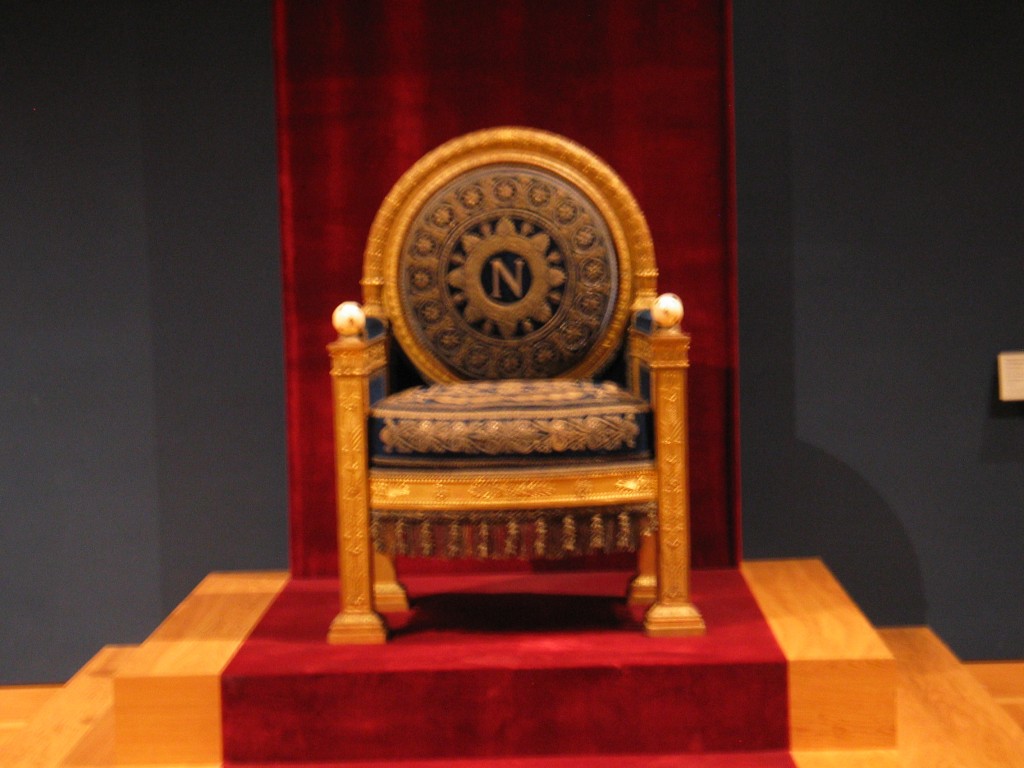
Napoleon Bonaparte’s throne
I think most everyone knows who Napoleon Bonaparte is and what you see in the picture above is his throne displayed in the Louve in Paris, France. There is an entire apartment within the Louve dedicated to all things Napoleon and it is breathtaking to see. My son, Jared, loves history and so it was a given that during our last visit to France that we had to visit the Louve and most definitely not miss this!
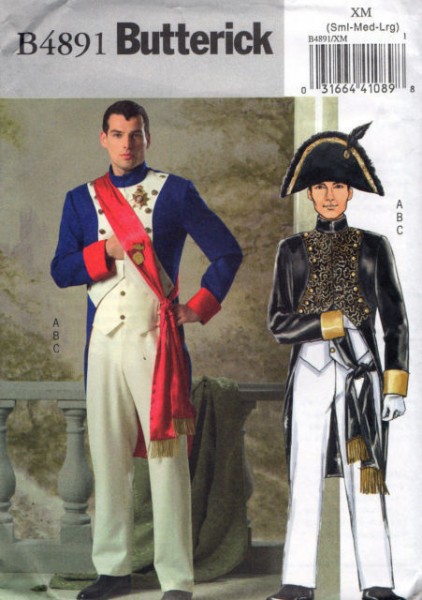
There is lots to read about Napoleon, lots of history, lots of tidbits which makes him interesting enough to style a costume after… such as the Butterick 4891 pattern.
I thought this would be a fun pattern and costume to share with you and so included it in my scheduled line-up of costume posts. Then when it was time to dig it out of the costume closet and begin writing this article, I experienced several shockers! First, I have discovered that the Butterick website no longer has this pattern. It is not even listed in the out of print section and is spoke of on the internets as a vintage pattern. It’s selling anywhere from $26 to $38 dollars… Qu’est-ce que c’est? (English…What is this!) And secondly, I made this costume for Jared a few years back and… well… his sizing has changed… A LOT! Once again, what I thought would be quick and easy has turned into a laborious job but hey – since I have been making shirts for Jared, I have learned some things about fitting him which has saved my butt!
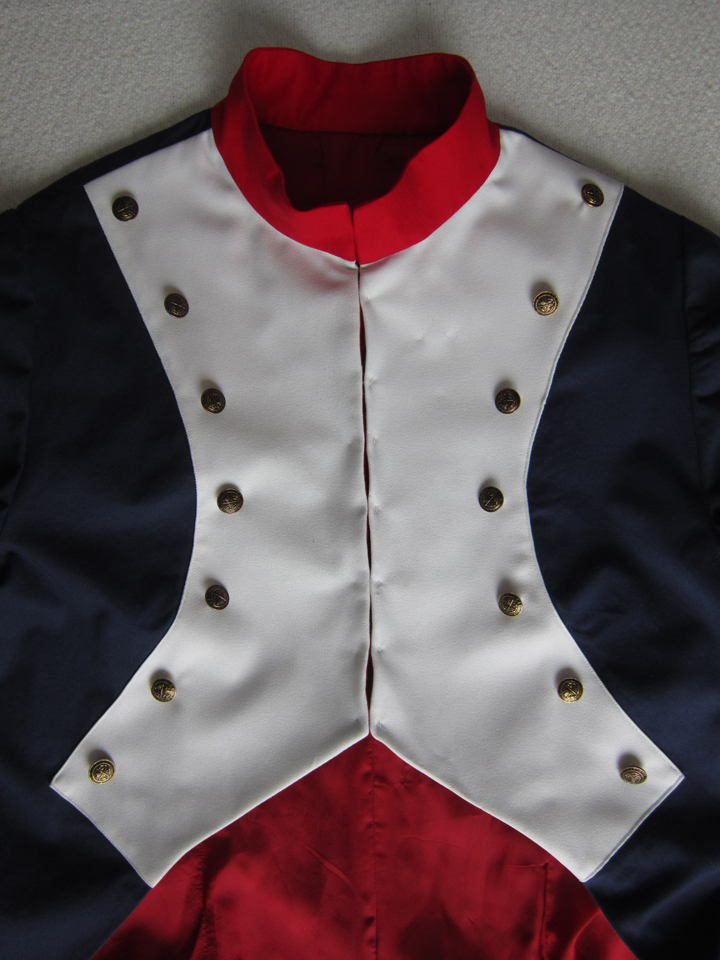
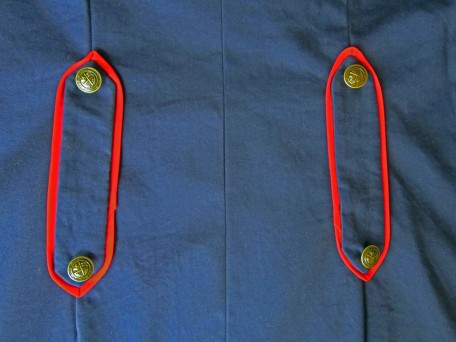
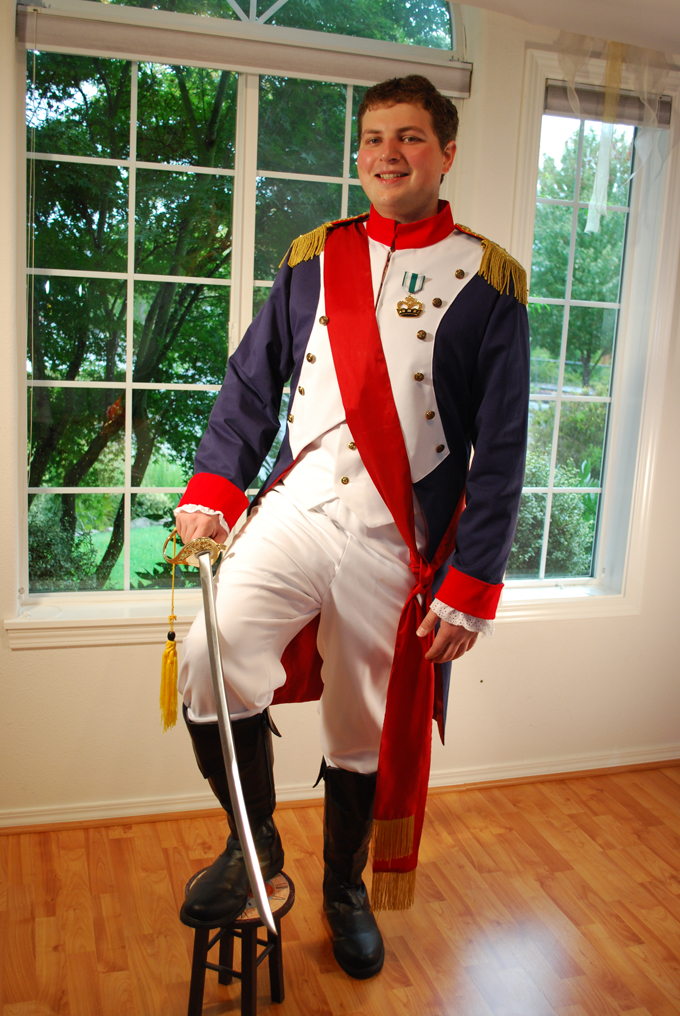
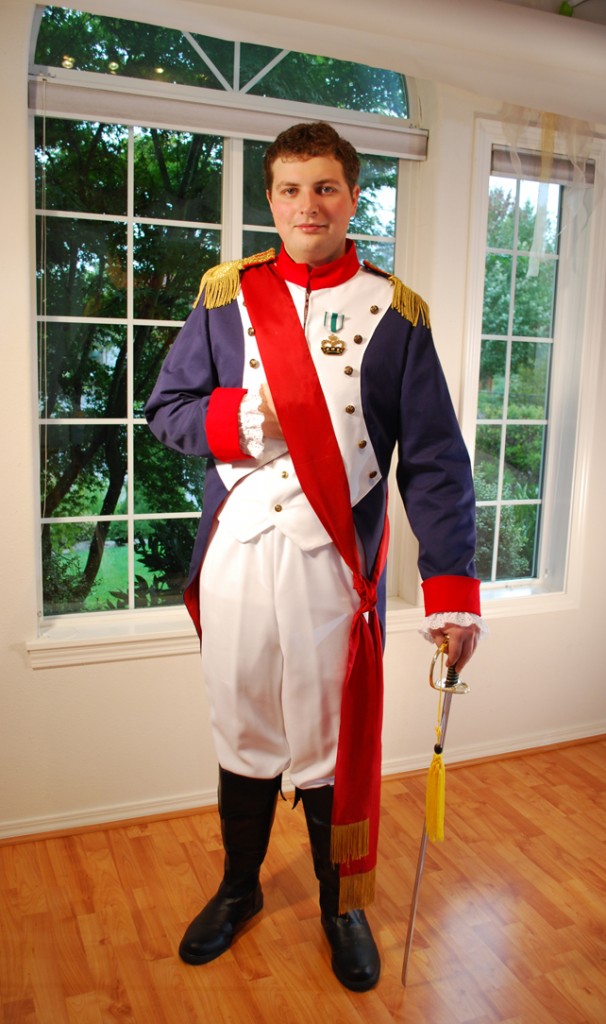
The jacket was my biggest obstacle to change up. Fortunate for me, while this pattern is considered a historical costume of a Napoleon French Revolution Uniform, it is not exact nor does it use period garment making techniques so I had free range on how I managed the changes. The pattern instructions are easy to follow and the design of it is well put together and an enjoyable sew. For the main part of the jacket, I used a royal blue denim and as per the pattern added a white garbardine overlay to the front. It is a lined jacket and so I chose the only obvious color to line it with… red! I loved working with the contrasting colors and for the first time, sewing on buttons was a treat because that’s when I began to see the jacket really become officially a uniform!
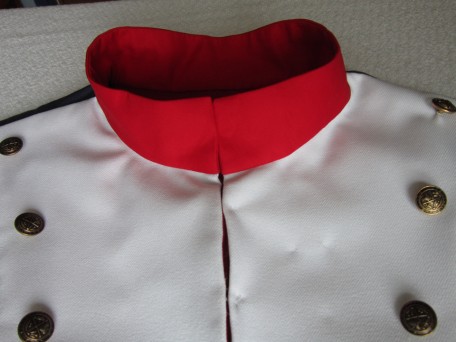
As you can see in the picture above and below, I chose to make the collar in red since that is what all the Napoleon images on the internets show it to be. I think the mandarin style makes it quite attractive. I do wonder though when the mandarin collar was introduced into military fashion. I guess I have a homework assignment!
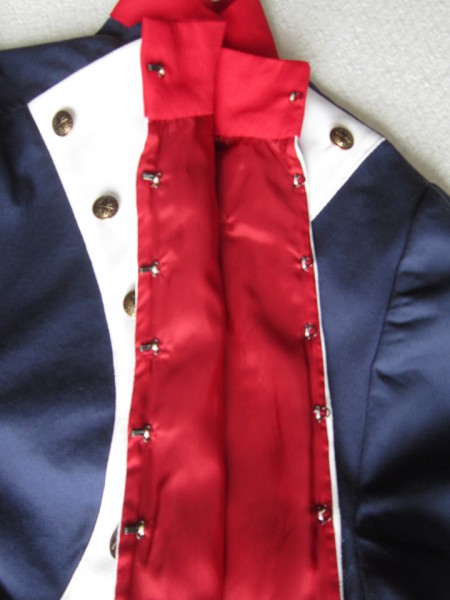
Given that this is a mens garment, I chose to use big jumbo hooks for closures.
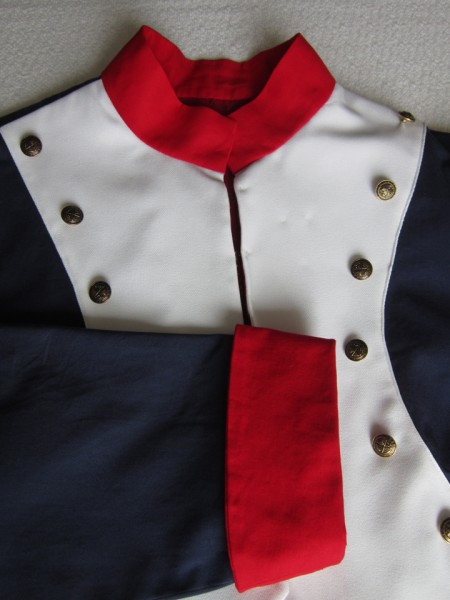
Of course the red cuffs brought it all together.
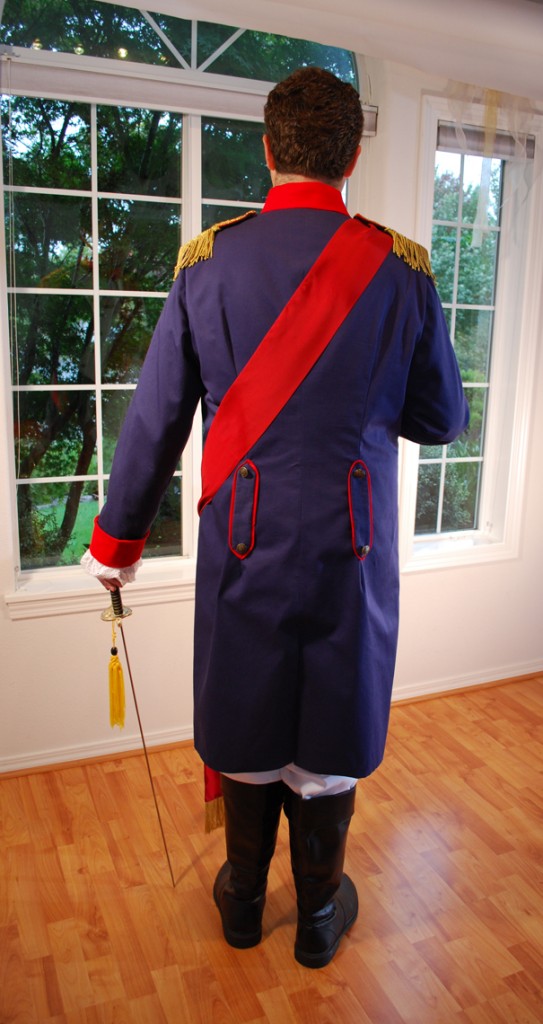
When I first made this costume, I didn’t do any research to see how close to the real deal it was, I just followed the instructions and made it! Now that I’m back re-doing it, and at the same time searching on-line, I’ve discovered that the shape of the tails, the cuffs, as well as the kind of buttons, etc, may not be correct so you can’t very well call this a true historical period costume but it certainly is easy to adapt it to what you need. For instance, the back of the jacket seemed so plain that I decided to borrow a detail from some of the images I viewed and with some scrap fabric I had left, did this.
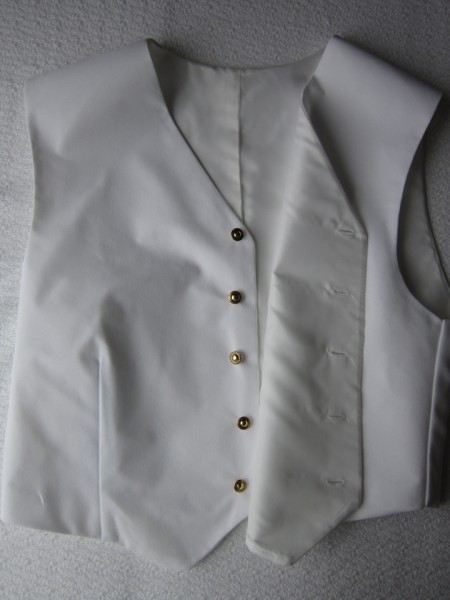
Next is the vest. It is simple and quite traditional. As you can see, I did it all in white using the same gaberdine fabric as in the pants and jacket.
The pants are nothing more than two legs with an elastic waist. I hate elastic but when I made these pants, I was following pattern instructions so I just went with it. And… the costume was for my son and I knew he didn’t care one way or the other as long as he had a costume! I thought the Gaberdine fabric I used was too thin so I lined the pants with Bemberg (Ambiance) and this made a big difference. I didn’t take a picture though because… because… I’m a nerd and forgot!
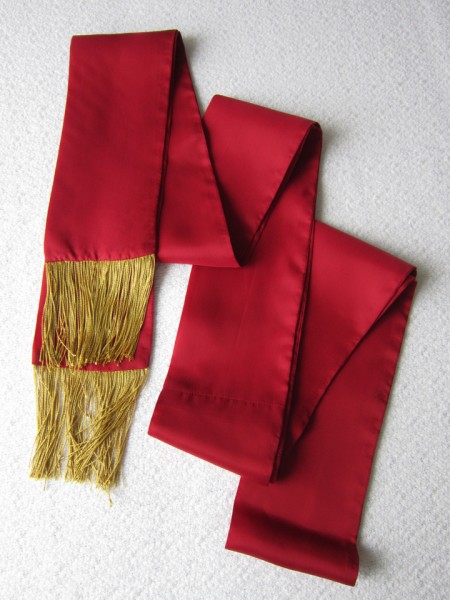
The sash definitely gives this uniform some panache! I used a lining fabric from the JoAnn store that cost me $12.99 a yard and it was not silk! The gold fringe is oh so uniform.
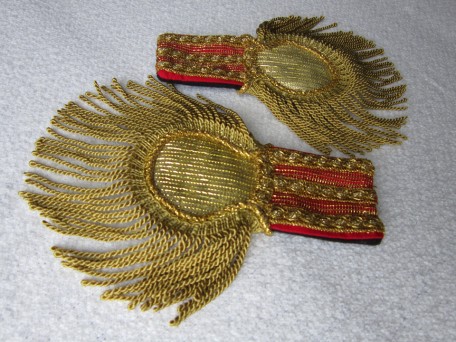
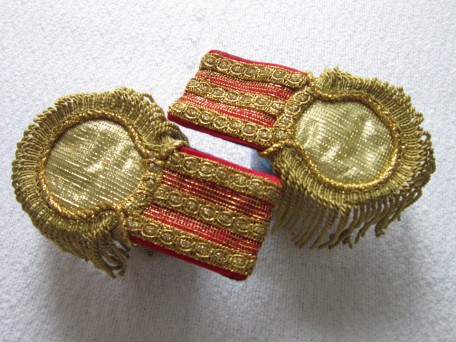
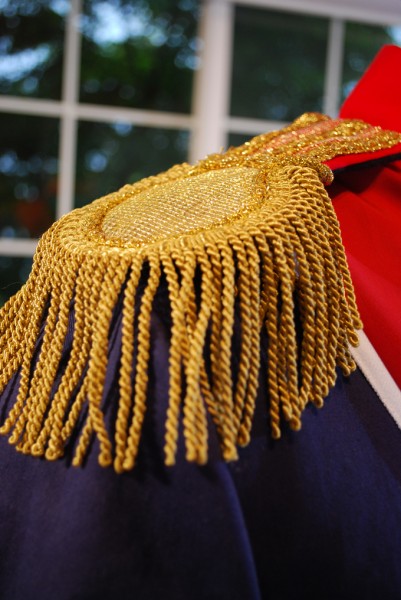
Shoulder boards seemed to be in order as I was re-working this costume. I found a gorgeous pair on a historical costume site for 400.00 euros but… I decided that it might be better to eat and have electricity so decided to try making them myself. This is what I ended up with.
Now – there is the matter of a bicorne hat. Long story short… after spending most of the week rebuilding the costume and another day making the shoulder boards, I decided to bypass the bicorne and get this posted! The hat sure would have made the costume complete but I am choosing not to stress! I think you all would agree with me! 🙂
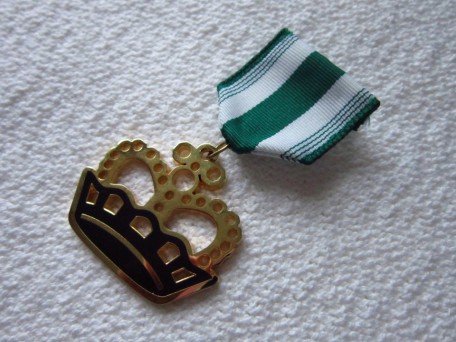
We dug up a shirt and a pair of boots from our costume collection but for the life of me, I can’t remember where I purchased them from. I do know that I found both on-line. The shirt, my son Dylan calls a “doilie shirt”. You know… like doilies that you put on tables and set nicknacks on! He has an attitude huh! We tried to find medals that looked like what Napoleon wore that wouldn’t cost a fortune… it didn’t happen. It was compromise. I created something from what Jared decided he could accept.
Now it is the time for the man of the hour in all his regalia that his mom made!
On the back are the bands that I added. They are really suppose to be a little longer based off the historical images that I’ve seen but I was working with scraps!
I think the shoulder boards or epaulettes really stand out on the costume.
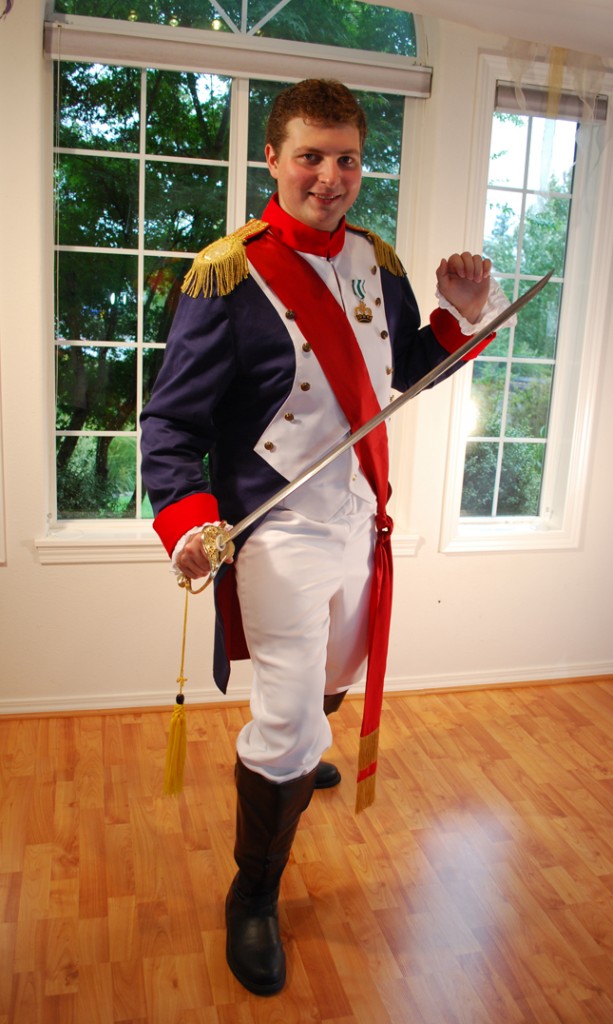
Probably need to include this one…
Jared is a fencer and so is having a bit of fun here!
Well…it is 4 1/2 weeks until All Hallow’s Eve and I’ve already started counting down! I hope you are enjoying the costumes so far. Next week’s show-and-tell will be a bit of a mix-up… a little bit of pirate, a little bit of Victorian and a whole lot of fun!
Salute! Jessica
Read MoreSimplicity 2172 Rocks Steampunk
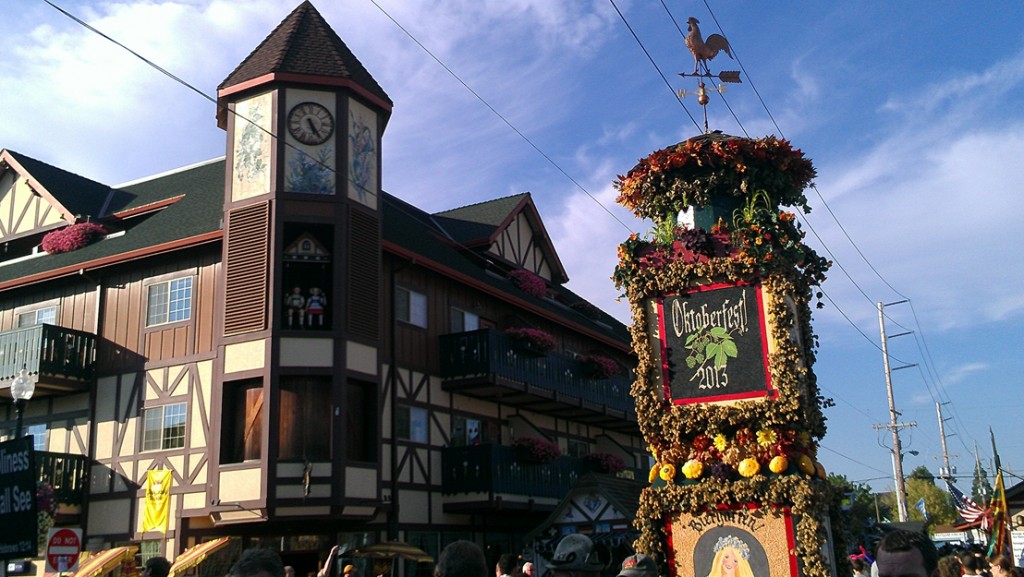
Yes in deed! I made it to Oktober Fest and had way to much fun. The Weingarten was fine, however… the Biergarten was a hands down winner! It felt like we did a non-stop conga until the cows came home! There were lederhosens everywhere (mens attire). There were also some very pretty Bavarian maidens wearing their dirndl dresses. All of this Bavarian regalia reminded me of another important up-and-coming event… Halloween! This is my most favorite time of year. It is the one day that you can be whom ever you want and wear a fantastic outfit – or in Halloween terminology, a costume.
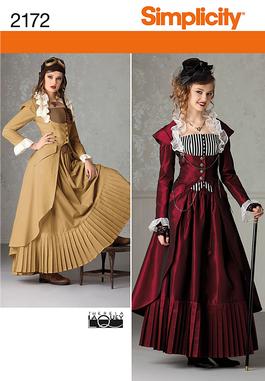
Sewing costumes opens the door to the creative part of my mind and I become so involved in the process. I find myself pouring over details. I think that’s why I have fallen madly in love with steampunk and with the Simplicity 2172 pattern.
About 1 1/2 years ago I started making this costume, the jacket to be exact. I had planned on wearing it to the 2012 Mardi Gras in New Orleans except that didn’t happen. Well the Mardi Gras part did, but I never wore the jacket. This has turned out okay though because now I can finish this ensemble exactly the way it’s suppose to be!
The fabric I chose was something I have had for over 15 years! No kidding. I don’t even know what the fabric is exactly but when I purchased it from Sprouse Reitz (don’t think they even exist anymore), I was going to use it to make curtains for a camper! Now that’s rocking steampunk philosophy eh … re-invent, recycle, re-use and make it better!
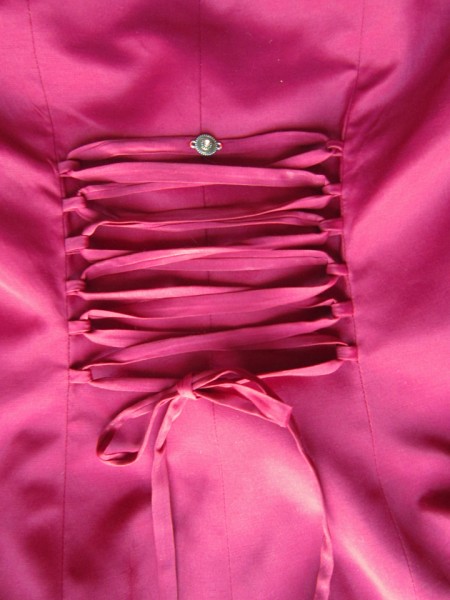
The pattern includes the jacket, a skirt, and a bustier. They are not the easiest garments to make and no matter the skill level, I think it will take some time so I would advise getting started now if this is what you would like to wear for Halloween 2013. Since I made the jacket some time back, I unfortunately can’t offer up many tips. One thing I might say about it though is that the pattern piece that is provided for making the back tie for lacing is not long enough. In my situation, this may have been because I didn’t want the jacket so wide that laces would have to pull tight to fit so I fit the jacket exactly to my back width. I wanted the lace just to be decorative and so I needed a lot more length.
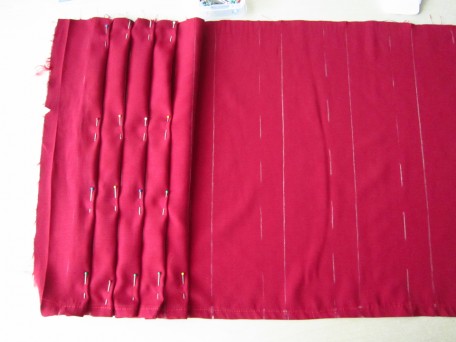
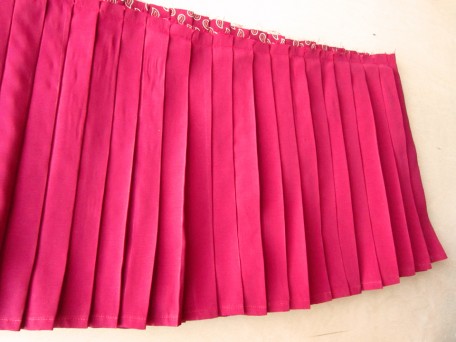
As for the skirt, get ready to do some pleating… LOTS of pleats, 108 pleats to be exact! There are 9 sections that you will have to sew end-to-end and each will hold 12 pleats, the 12th overlapping onto the next section.
TIP: I did not sew all the sections completely together into a ring or circle. Instead, I left one seam open so that I could work on a flat surface which made things a whole lot easier. It’s a little tricky sewing that last seam once you have the pleats finished because there’s a lot of bulk but I still say it’s worth it. It’s totally up to you though. There is no wrong way, just what ever ways works the best for you. I made snips at each pattern marked pleat along the top when cutting out the sections but I didn’t snip on the bottom because you have to sew in the hem before making pleats. The pleats are each 1 inch. Once you start, it doesn’t take long to find your groove!As you can see in the picture, I used chalk. Chalk is your friend!
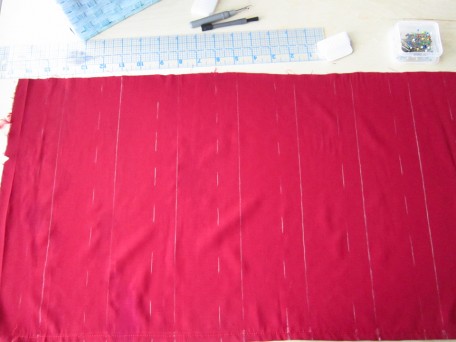
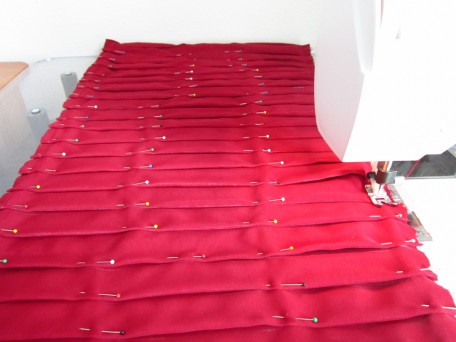
In the picture below, I have started pleating.
When I was done pleating and pinning, I laid the whole “shabang” on my sewing table that fits my sewing machine.
The best thing I can advise is to relax, be patient and realize that when you are done, you will feel like you have done something amazing!
The pattern instructions tell you to iron the pleats in before basting but I decided to baste them first. When I finished with the basting, I laid the pile of pleats gently on my ironing board and section by section, I removed the pins and ironed as I went. The thing that kept flashing in my mind was how much work it would be to iron all these pleats back in if I ever launder the skirt! Maybe I’ll be lucky and the pleats will stay even after a cleaning. Sheesh…given my luck though, this is probably a NOT!
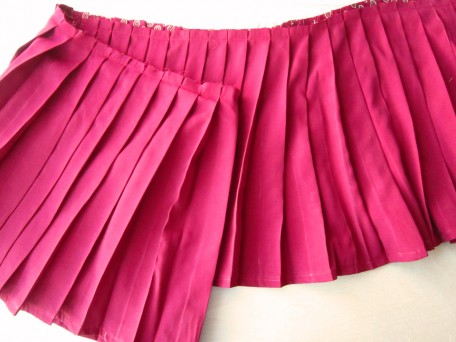
So here they are all finished!
I was so fascinated with the pleats that I kept taking pictures! I know! I”m a dork!
So as to not mess up my nicely pressed pleats, I made the main skirt with the yoke and waist band separately and when they were finished… then I sewed on the pleat section. After I did this, the skirt was finished! I did have to remove a part of one section of pleats however because I shortened the skirt and I didn’t take into account that the width of the skirt would change at the bottom. However, trying to figure how this would play into the length needed of the pleat section would likely have broke my brain!
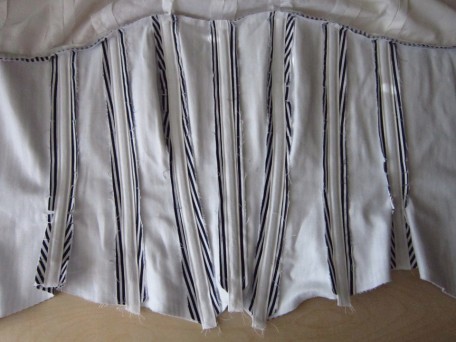
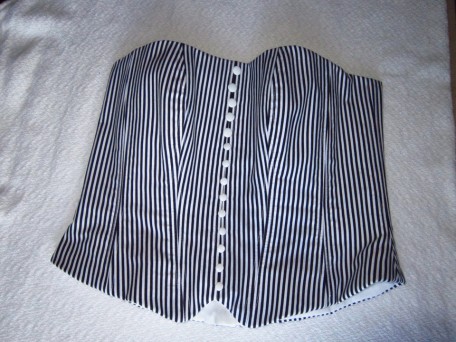
So the next order of business was the bustier. I have made more than a few bustiers and corsets and so happen to have on hand a number of corset making supplies. One of my favorite places to buy all my special goodies is Delicious LLC., Corsetmakingsupplies.com. They have pretty much anything you need. The Simplicity 2172 bustier is a really nice design. The finished front bottom reminds me of a vest and looks really spiffy under the jacket. Instead of interfacing, I used Coutil which is a fabric intended for corsets, etc. For the boning I used spiral steel boning that I purchase by the yard as well as the casing that holds it. You can buy metal ends to cover the boning after you cut it since it is pointy, but I have trouble getting them to stay on so I put glue on the ends instead. Below is a picture of the inside of the bustier after I sewed in my casings and put in the steel boning. I sewed the lining to the top, then trimmed the seam and pressed the lining flat like it would be when finished because I thought it might look better in the end. Alas… in the end I don’t think this was necessary but now I know.
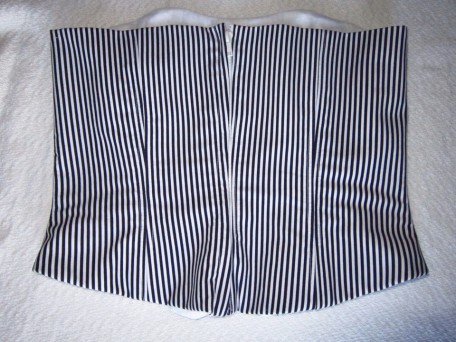
I did change up the way I installed the zipper because I wanted it more hidden though this made things a bit challenging… not to mention that my separating zipper was a MASSIVE white plastic one! (I should have known better!)
And the front…
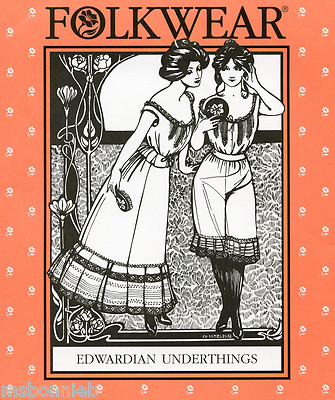
Now… remember how I feel about details. If I am a steampunk lady, then my ensemble will not be complete without accompanying the bustier with drawers! Yes, that’s what they were called. Edwardian drawers to be exact. Maybe you know them by the name “bloomers”. The pattern I used to make my drawers was the Folkwear 203 pattern.
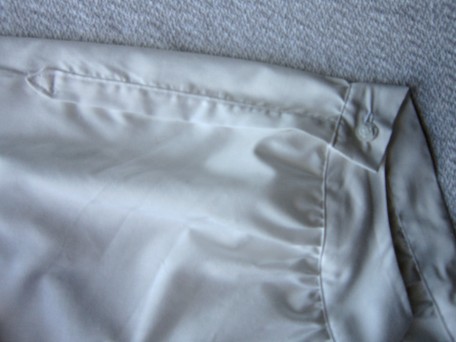
The drawers in this pattern have plackets on each side, similar to long sleeve shirts. So far, I stink at plackets which is why I have been stalling making long sleeve shirts. Also, it is recommended to finish the seams using flat felling. I figured out that if I make a whole bunch of drawers, it might help me with my shirtmaking! Hmmm…
So this is the finished placket on one side. Notice that the back waist band folds over the front waist band (yes, they are separate) and fastens onto the button sewed on the front. The placket with the point is sewn on the back and so is not connected to the front. I am sorry but I forgot to get a picture showing how they open up… Crap!
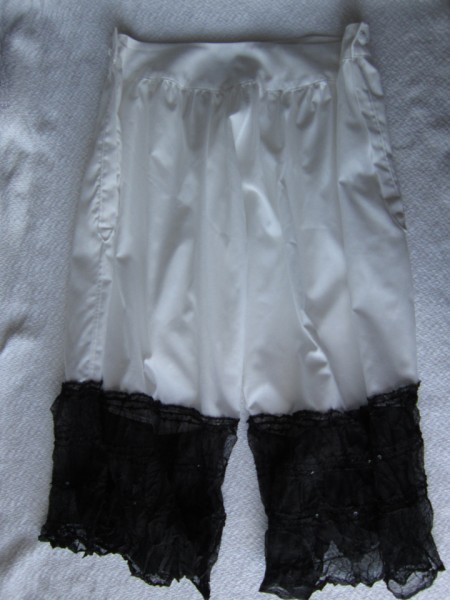
For the flounce, I decided to use some lacy fabric that I have had FOR-E-VER! The width was not quite what the pattern called for but hey… remember – this is steampunk and so you re-use, re-cycle and re-invent!
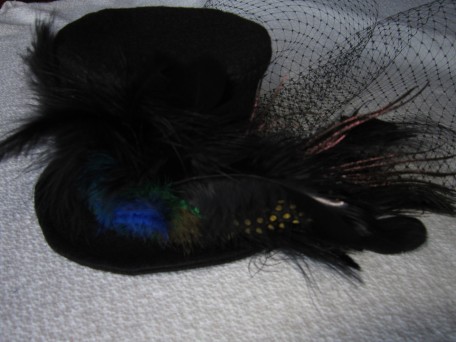
And now, last but not least, the finishing touches… A mini Top-Hat which I am still working out the bugs on… like a way to easily pin it on my head, myself!
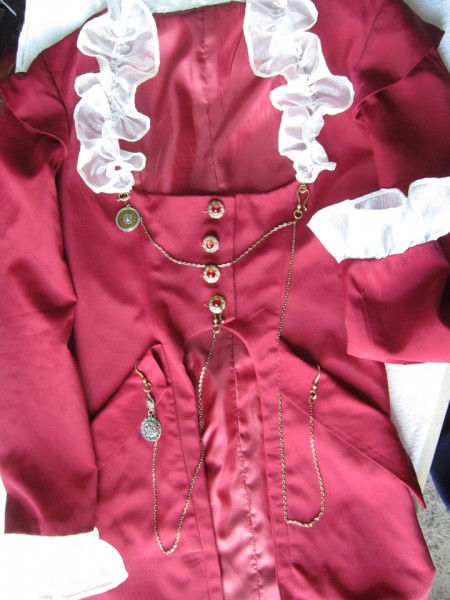
Decorative goodies…all the parts I found at a Super JoAnn store on the 60 to 75% discount racks which was so totally awesome!
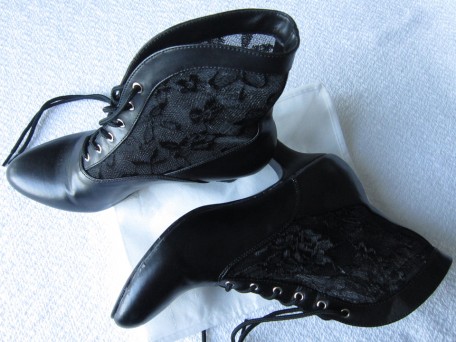
And the perfect shoes! Where did I get them? I’ve seen them on various sites but I purchased mine at Clockwork Couture.
Okay… so now I need to show you the real deal and since I made it all, I guess I will show it all! My pesty spammers are probably going to really give me fits but hey, a girl’s got to do what a girl’s got to do!
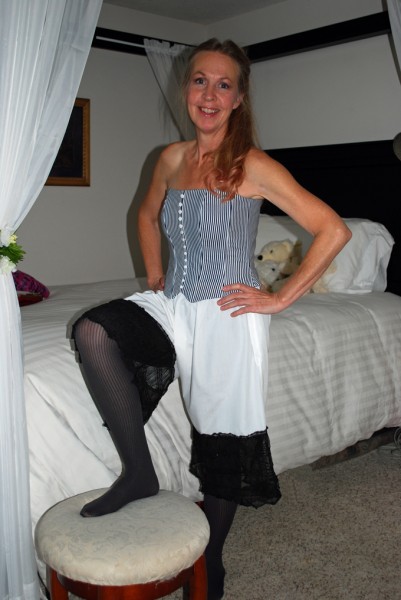
So here is my bustier and my drawers…
Now for the rest of the ensemble! Mind you I was in a bit of a hurry and so unfortunately forgot my lace fingerless gloves and walking stick which would have made the outfit so complete. Oh well… doodoo happens!
The back of course…
And the only prop I could think of was a phone. It’s not steam powered machinery but it’s sort of techy, I guess!
So there you have it. Simplicity 2172 rocking steampunk. If you decide to make any or all of the pieces in this pattern and you have any questions, please e-mail me or post a comment. I will help you anyway I can.
We have about 6 more weeks before Halloween which means I will be delivering up 6 more costumes for you to view! Be sure and come back to check it out. Next week is mens week! Until then…
Salute! Jessica
Read MorePattern Review McCalls 6705
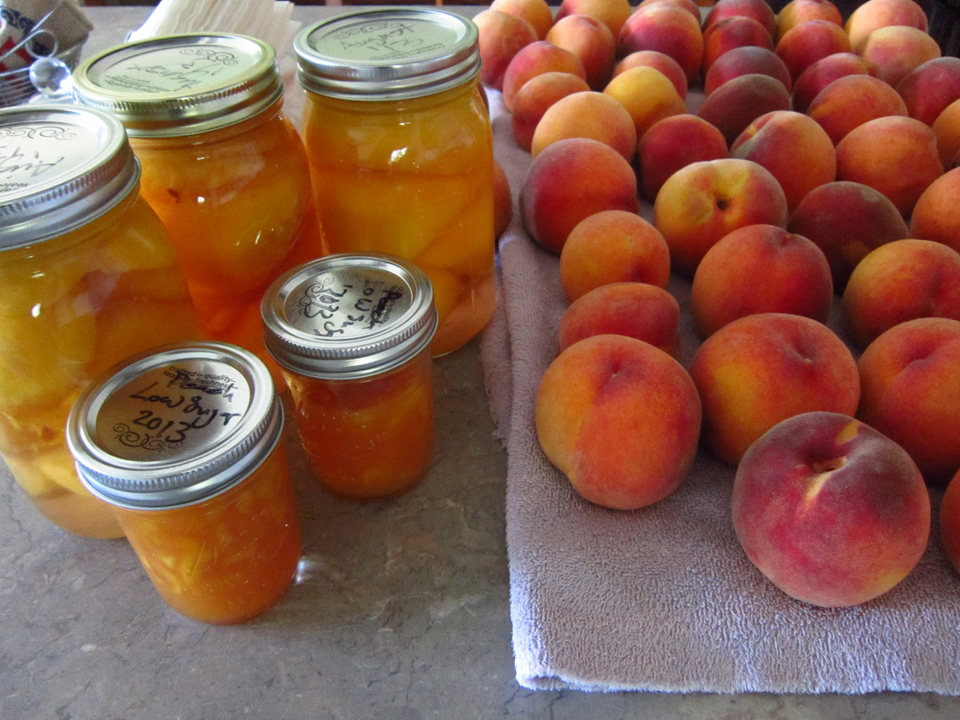
Well it’s September and you know what that means… yeah, summer is about over and school is starting but that’s not what I was thinking. The end of August and beginning of September means that the peaches have finally ripened on the trees and are ready for picking. An alternative band, The Presidents of the United States of America, rocked a song about peaches so I know I’m not the only one that’s got a thing for them! My children are also caught up in the peach frenzy so they most willingly helped me last Sunday, after our morning brunch, can 28 quarts of Canadian Harmony peaches and cook 16 jars of jam. The almost 80 pounds of peaches that we blanched, peeled, pitted and halved or chopped are now nestled in their jars and will rest in the pantry until their debut this winter. Yummy… can’t wait. Incidentally, peach jam is bodacious on scones!
So yeah, Summer is about over and for us Oregonians, the imminent rain will be arriving before long, but… I actually do look forward to the season change because this means having to spend more time indoors and getting back in full swing with my sewing. My projects have backed up on me, a basket full to be exact, and it’s going to take a bit to catch up. I’ve still managed to get a few things finished though, one being the McCall’s 6705 top which my daughter has been patiently waiting the whole summer for (I’m glad she loves me). Maybe I should rephrase my words a little and say that I made the top and THEN re-made it again! Stay with me and I will explain.
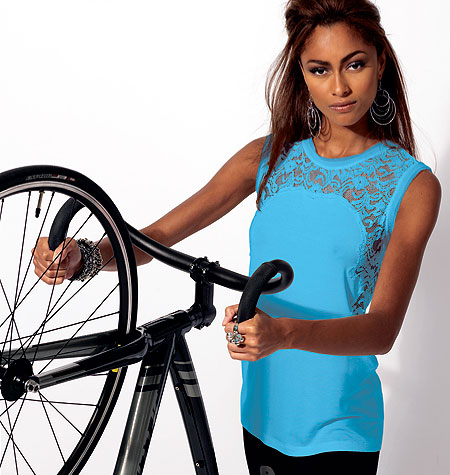
This is the McCall’s 6705 pattern.
It is designed for knit fabrics and the word “easy” on the pattern I can agree with! The instructions are easy to follow, only 3/4 of a page!
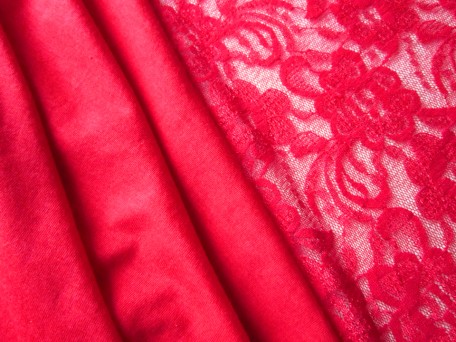
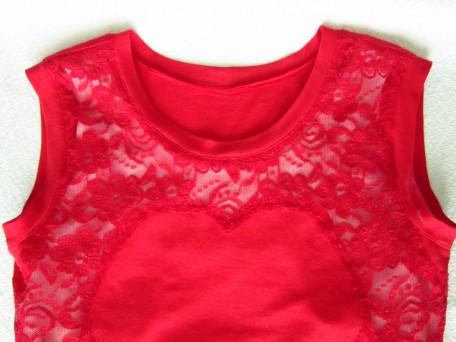
The fabric I used was a red t-shirt type of knit and for the lace overlay, a red stretch lace.
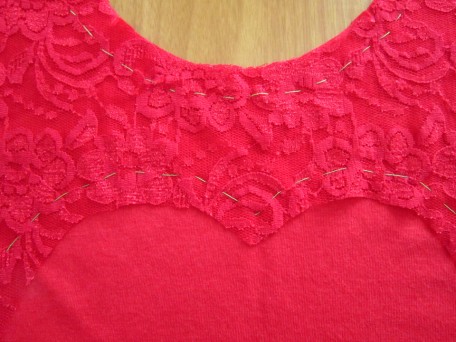
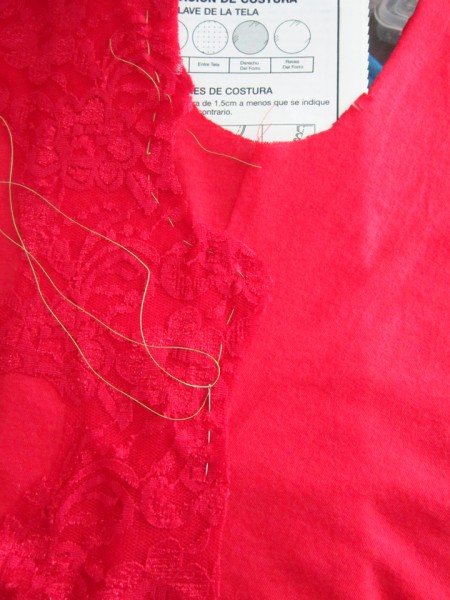
A useful tip: Baste the lace overlay onto the top, all around, and stitch the inner edges along the stitch line (1/4 inch) BEFORE sewing the front and back together. However, don’t baste and sew the lace clear to the edge of where the side seams will be; stop about 2 inches before reaching them. Remember, the lace overlay has to go over the side seams so you will have to fold it out of the way when you sew each of the side seams. With the first top I made, I did it per the pattern instructions, the 2nd time around I did it this way and it was a lot easier to stitch the majority of the inner edge of the lace before the front is sewn to the back. And when I had to finish stitching the overlay that goes over the side seams, there was a lot less sewing to contend with so it went pretty smoothly. (I still haven’t explained the top #1 and top #2 but it’s coming!)
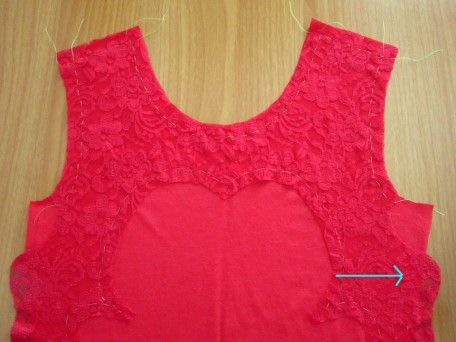
If you choose to apply the lace to the front first – remember not to baste and stitch edge of lace near the side seams. You can finish doing this after sewing the side seams.
A close-up of the basting in front.
After you sew the side seams, you can then baste the remaining lace overlay and then stitch it down permanently. The pattern directions aren’t just for directions! I inserted them between the front and back to make it easy to baste.
Okay… so this is where my dilemma started. I didn’t care for how the neck and arm bands were styled. There are 2 bands, one wider than the other, that are applied as one to the neck and each arm hole. They are a raw edge finish.
For the last several years, many RTW (ready-to-wear) tops have been made in this same fashion and quite frankly, I think its crappy looking! No doubt it’s probably part of the trendy shabby chic look that is great when all you want to do is put on some comfy kick around clothes when you are canning peaches or something else messy and work intense but… I don’t want that look on garments that “I” make! That’s just plain wrong! Against my better senses though I went ahead and made the neck and arm bands the way the pattern instructions were given so I could live to tell about it! In the end, I was not happy… not happy at all but it wasn’t the unfinished raw edges that were bugging me, it was trying to sew the 2 bands as one onto the neck and armholes and getting the finished edges equal widths from one another all the way around. If that sounds confusing, I’m sorry, but I think it’s one of those things where you have to do it to really understand.
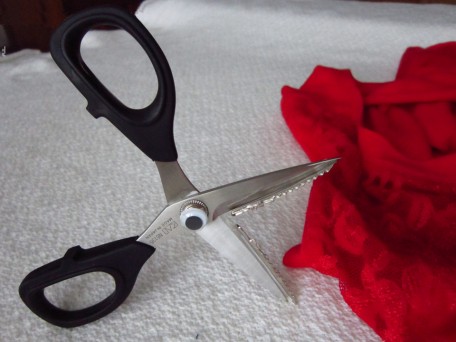
Anyways, after I finally felt I had those damn things sewn on the best I could manage (cuz that’s how I felt about them), I was nearing the end. It was now time to cut the fabric off from underneath the lace and hem the top. It must have taken me a half hour or more to so very carefully cut that fabric off and when I was nearing the end… the last little section… those nasty evil scissors took control and snipped a substantial hole in the lace!
It was over! The four letter words came spilling out. I hated my Kai scissors even though I loved them before I started cutting the fabric from underneath the lace. I was more than pissed! I contemplated many things in that moment… chopping the damn thing to pieces with my evil scissors, burning it, or better yet, laying it out in the street and letting the cars have their way with it. Then… after a deep breath and a little dread for fear of her disappointment, I went to tell my daughter what I had done. All she said was “that’s a bummer.” Okay… wasn’t sure how to react to that! Did this mean she understood or did she just not care. It was a trap! It was then my turn to say something. So I did what I thought was the mature thing to do and said – I have enough fabric to make another one if you would like me to. She was thrilled that I was willing but wondered if we could do something different with the finished look of the neck and arms. Now that’s my girl! She has taste!
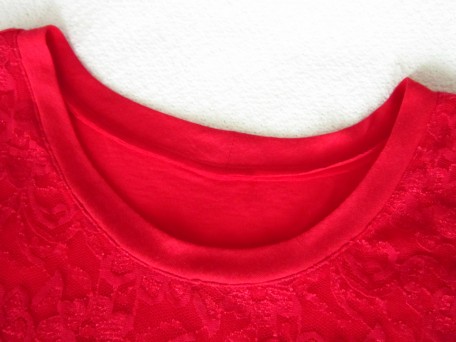
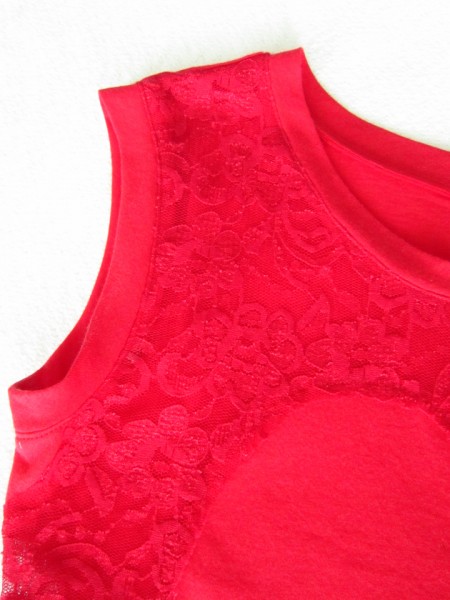
When I made the 2nd top, to change up the finished neck and armhole edges, I decided to just sew on bands like you see on a t-shirt. To do this, I took tracing paper and traced over the wider width neck and armhole bands but re-drew the pattern width of 1 1/4 inches to 2 1/2 inches. The original band is 5/8 inch wide with a 5/8 seam equaling 1 1/4 inches so by doubling this you end up with a width of 2 1/2 inches. After cutting them out, I just sewed the ends of each band together and then folded them in half lengthwise, wrong sides together so you have a circle and then applied them to the neck and armholes just like in the pattern instructions.
This is the neck band when finished…
And the arm bands…
Then it was time… being ooooh so careful, I cut the fabric off from behind the lace and it was a success. Absolutely no holes!
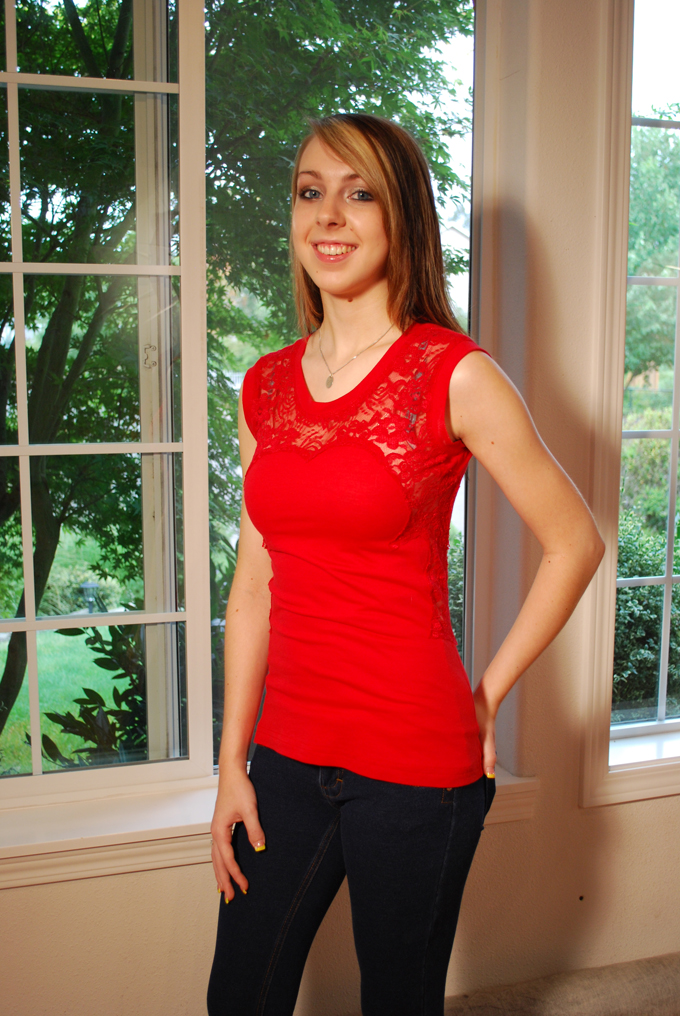
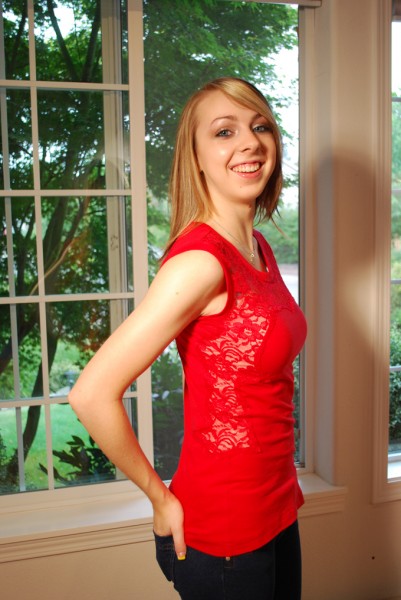
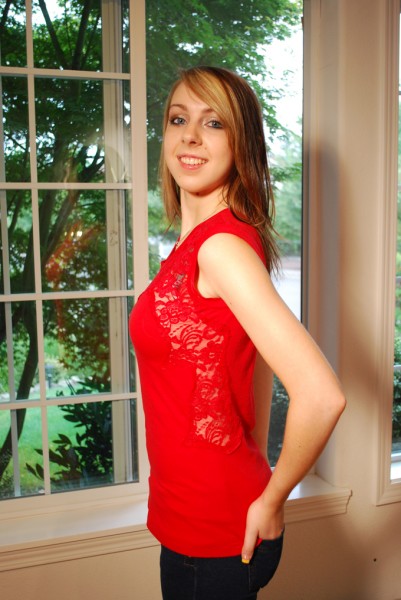
Well, there you have it. The photo shoot commenced this morning and I am happy to share with you the finished McCall’s 6705 top with my daughter wearing it!
The right side…
And the left side.
And one just because!
Calley really likes this top and wants one… or two… with long sleeves to wear this winter. Minus the lace overlay of course which is just fine by me!
I have mentioned it before, but as a news update – with October creeping up and Halloween in its grasp, costumes are going to be my focus in some of my up and coming articles! Hope you enjoy them. As for September events, the October fest at Mt. Angel here in Oregon is next weekend and yes… I am going, with my sons! They have a r-e-a-l-l-y big wine garden!
Salute! Jessica
Read More


 Portland, Oregon,


