

Blouse in Silk plus Vigoss Skinny Jeans Renewed

My Wisteria is blossoming!
There is so much I want to share and I’m not sure just where to start. I try so hard to not write monster blogs. I’ll do my best to try and keep it minimal. But I’m drinking wine while I do this so I really can’t make any promises! With the absolutely beautiful weather we are having, it seemed such a nice idea to sit on the patio, sip Chardonnay and write to you.
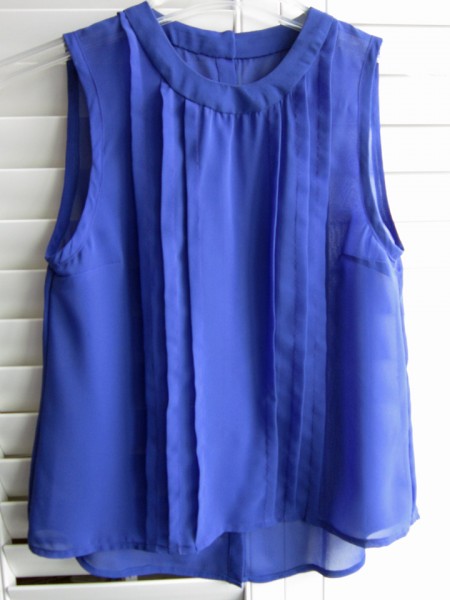
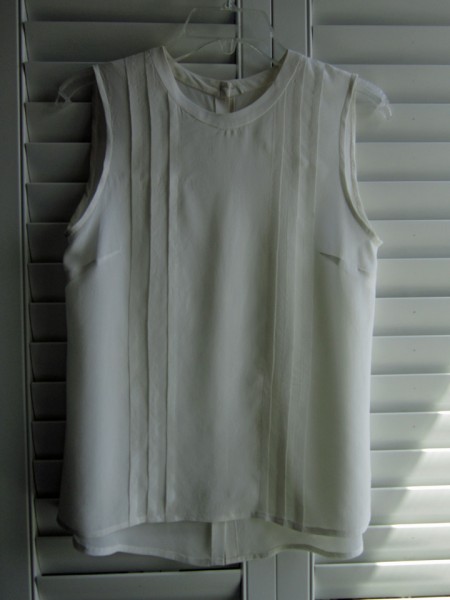
OKay… so… let’s start with the blouse that I designed, drafted and made in some inexpensive fabric that I posted about a while back. I was inspired by a blouse that Emily VanCamp wore on the TV show, Revenge. I can’t believe I’m still watching it… I hate TV because of all the commercials! It’s Netflix’s fault because that’s where I got hooked on it! No rant, promise! Anyways, there were a few discrepancies when it was finished, but overall I was happy with it. After putting it on the back burner for a bit to work on Vogue 8972 dress project, I decided to go back at it so that’s where I’ll dive in.
Here is a picture of it and if you want, you can go here to read more about it..
 There were a few things that I needed to change.
1) The front was a little shorter than I wanted. When I extended it in length on my pattern, I also had to redraw the back at the side seams to match the front side seams but that was pretty simple.
2) The pleats were in sort of weird positions when I had to apply the neck yoke so I moved them more towards the side and away from center.
3) Instead of a 1 inch neck yoke, I reduced it to 3/4 inch. Not sure if I like it the way it is now or better when it was an inch wide, but…it’s just a minor detail, nothing to get excited about. (still not super happy with how the yoke lays around the neck but that just may be the way I am sewing it on)
4) The last two changes were lowering the front and back neck lines, 1/4 inch for the front and 1/2 inch for the back.
So this time when I made it up, I used some cream silk Crepe De Chine that I had. I love sewing with silk because it feels so luscious! And it feels so nice to wear, though I did discover that it’s still pretty shear. Will wear a cami under it unless I feel really bold on a night out with the girls! Woo hoo!
Haute Couture fascinates me, so while I was making this top, I decided to pretend I was a famous fashion designer, sewer kind of person (I think the wine is starting to kick in! :P) and have some fun. I used tailor tacking to mark my pleats. It was still a bit of a challenge to get all the folds equal, and running evenly straight from top to bottom but I managed.
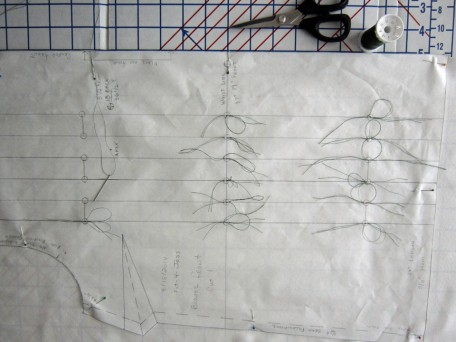
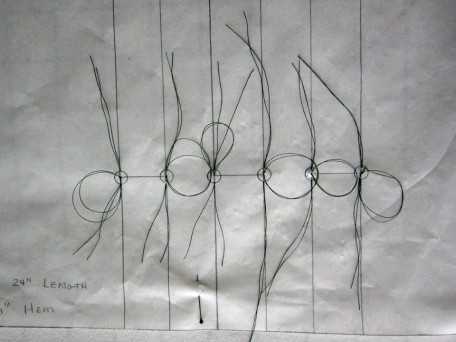
I took these pictures to show you what they look like. If you look at the picture on the right, it’s a closer view. For those that aren’t sure how to do this I’ll try to briefly explain.
I insert my sewing needle downward (like I am sewing) about 1/8 alongside the center point (this can be whatever side you want to start at) and then push the needle back up through the center point, then I push the needle back down through the center point again, and bring it back up about 1/8 inch away from the center opposite from where you started. Through this process, from the start when I first pull my thread through, I leave several inches at the end where I started, a big loop at the center and leave several inches at the end where I finished. (see the picture above on the right)
When you have finished, you pull the pattern tissue/paper away. Most of the time the tissue just slips off unless it hangs up at the center point where you stitched in and out. When this is done, you then have to clip the thread that lies between the two sides of cut fabric pieces, leaving equal parts of thread for each side.
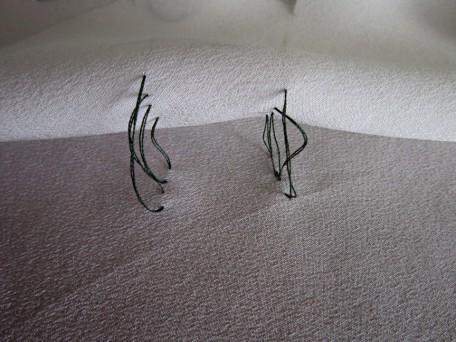
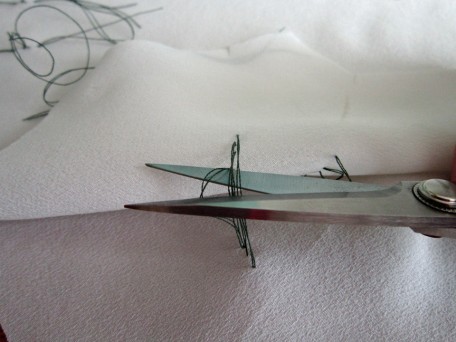
So when it was time for me to make my pleats (on the outside), I used these tailor tacks for my guides.
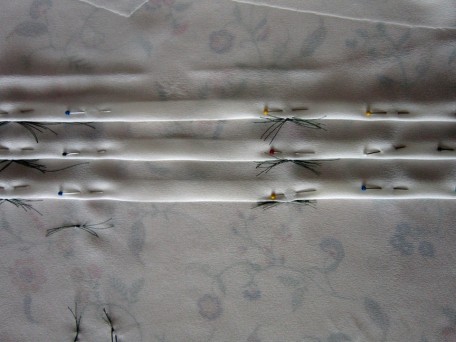 The tacks under the pleats are for the dart.
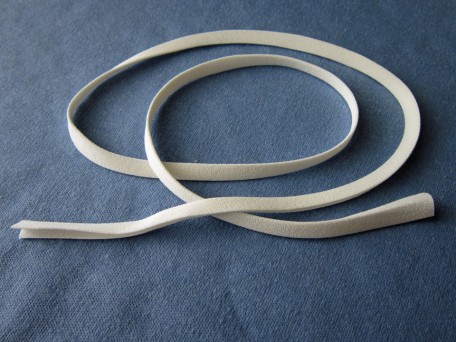
A Hong Kong finish on the seams was my first plan but I didn’t have any silk organza on-hand so I ended up using my pinking shears on the seam allowances. I did finish my armholes with bias I cut from my Crepe De Chine and then used my 1/2 inch Daisy Bias Tape maker. Silk looks so smooth so I didn’t want to use any top-stitching in my construction. This meant a lot of hand sewing but hey, I’m a famous designer sewer person and I do like to hand sew so this worked out just fine.

My silk bias tape turned out very nice… thank goodness!
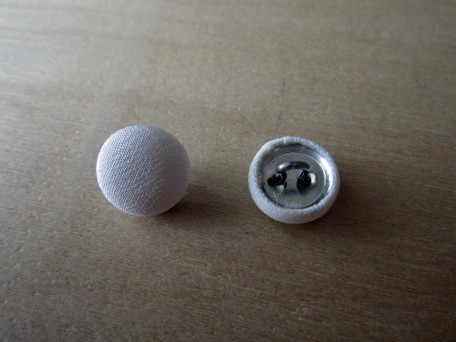
Covered buttons look so elegant so this was also a feature that I wanted to include in my silk blouse. They are not hard to do. You can buy the metal buttons and the tool to make them. Here’s how it works.
1) First, you have to cut out circles of fabric. The package that the buttons come in has a template. They don’t have to be perfect, just large enough to cover the round metal cap. I did a double layer because the Crepe De Chine was too sheer.
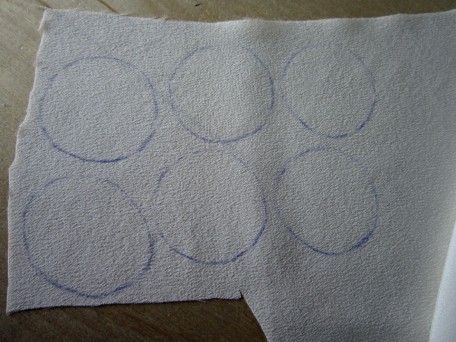 One of my circles looks a little oval. I was not drinking wine at the time!
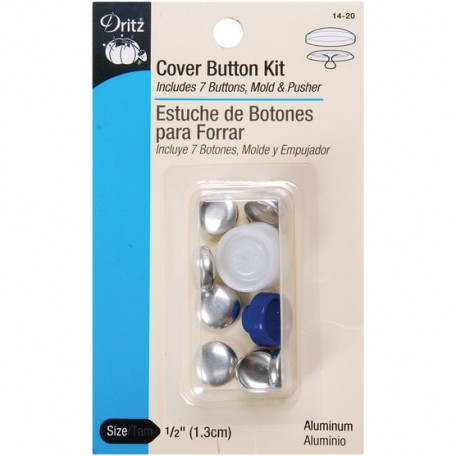
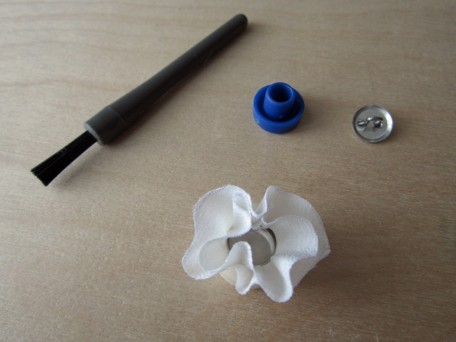
2) You gather up all your widgets. The metal button dome and matching back, the blue pusher and white mold tools that you can purchase in a package from most sewing stores including JoAnn Fabric. My sewing machine fuzz remover is my tucking weapon! You’ll see in a minute.
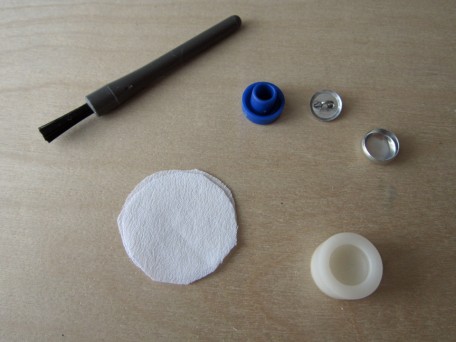
I used the #20 which is 1/2 inch.
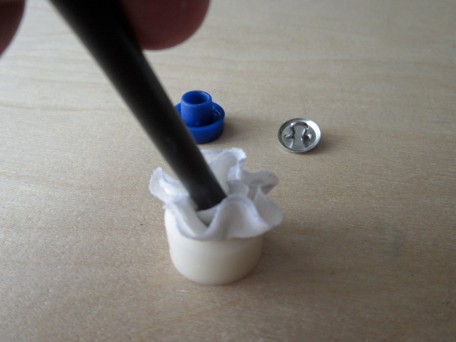
3) Next – Center the white mold over your fabric. You’ll probably figure out your own technique for doing this. I’m just trying to explain this in steps so bear with me.
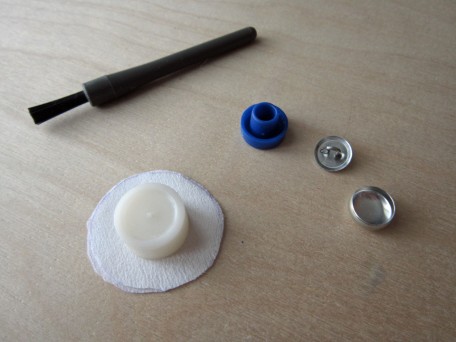
4) Now flip it over and place the dome part of the button, top down over the top of the fabric.
5) With the fabric sandwiched between the mold and the button top, now push the metal button top down into the mold.
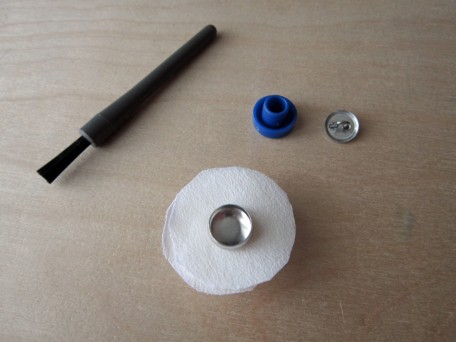
6) Here is where my fancy fuzz tool comes in. Oh… and my circles of fabric are larger than they need to be. Yes, there is a template and I could have cut out the exact size from my fabric but this is where things can go bad. The exact template size j-u-s-t fits and if the circles aren’t perfect and if everything is not centered, then it’s a bomb! I purposefully cut the circles larger to see what I could get a way with. With the non-fuzz removing end, I tuck in all the fabric as neatly and smoothly as I can.
7) The button bottom is now placed with the flat end down over the folded fabric.
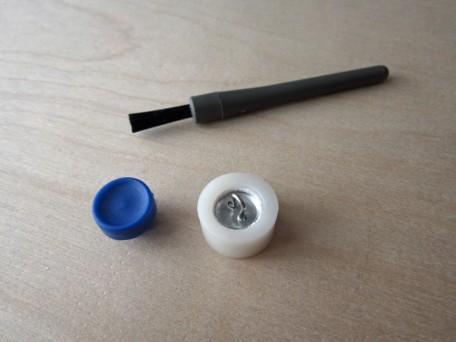
8) While holding everything in place, you take the blue pusher and place it with the opening over the top of the hook part of the button bottom and then squeeze it and the white mold together.
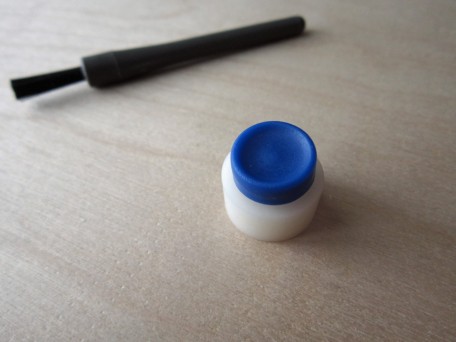
9) When you are done squeezing, then comes the moment of truth… did it work. This is how it feels to me almost every time!
Voila! Silk covered buttons. If I was really going all out Haute couture,
I would have also covered the button bottoms.
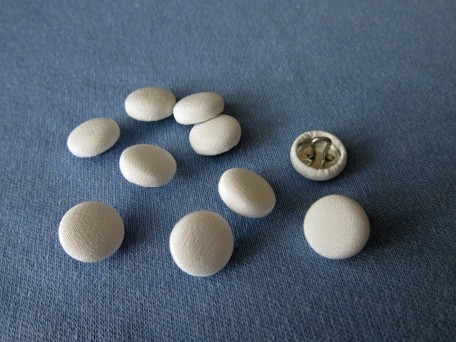
Here are all my finished buttons with several extra if one comes apart or I lose one!
Here they are sewn onto my blouse.
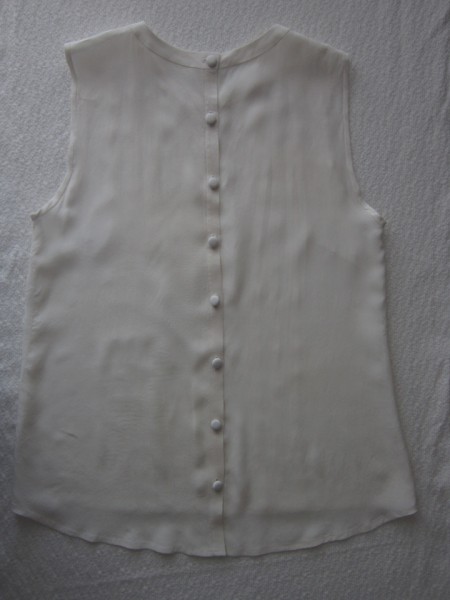
Oh yes, and I also hand bound all my button holes. They are not too bad, but with practice I know I can get better!

The front of the blouse with all the pleats…
Well I think I’ve written a monster, but… it’s all for you! With that I’m going to just keep on going because the next part is the cool part! At least I think it is!
Remember the title of this post that included Vigoss Skinny Jeans Renewed. Well… I purchased a pair last year, several pair in fact. Getting skinny jeans that fit me is tricky business. In order to get them over my thighs, I have to get a slightly larger waist. On one particular occasion, I decided to buy a pair in a waist size that fit so I wouldn’t have to wear a belt. I proudly wore them shopping for the first time a few weeks later and the legs were so too tight that as I walked, they would pull down. It was awful! My coolness that day melted into a day of hell! My first thought when I got home was to hurk them in the garbage. Then I thought, maybe I can fix them to somehow fit me so I tossed them in the “later days” project pile and forgot about them! Then, last month at the American Sewing Guild garment lunch bunch group meeting, one lady who I so adore, Lottie, suggested we do a sewing challenge. Different ideas were tossed around but I think what was most important was that we try to remake, or renew something showing our creative side. I went home and pondered this while digging through the “later days” pile and there they were, those evil skinny jeans! I knew what I was going to do… I was going to make a skirt out of them.
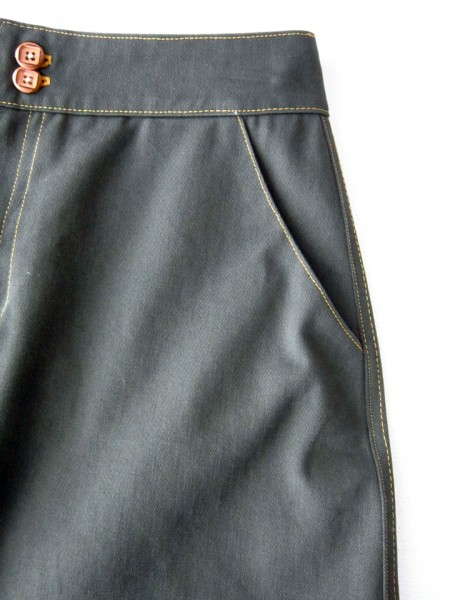
I took out the inseams first. Then I calculated how long I wanted the skirt to be including the hem, then cut off the legs! Served them right! There was now missing fabric in the center of the front and back shaped like triangles. Using pieces of tracing paper that I laid under the edges, I drew these shapes. Then I added an inch on the two sides for my seam allowances. and used them as pattern pieces. After removing the inseams from those evil skinny legs, I played with my pattern pieces until I figured out how I wanted them to look. I decided to stay on the side of caution and only cut out the back side first because it was the larger section and I wanted room for error. It took several tries on both sides until I got the fit I wanted but it wasn’t much trouble. I think the hardest part was sewing in the tip of the triangle on the top because I was sewing through the felled seam on the jeans. It’s all experimental so you just have to go with the flow.
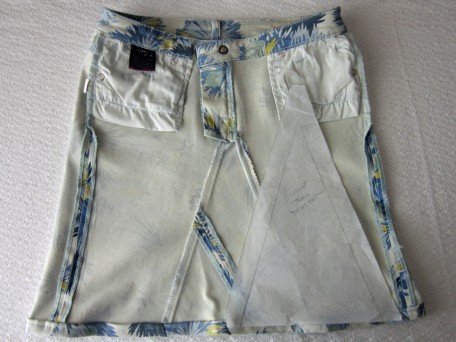
Here is my new skirt on the inside and the template.
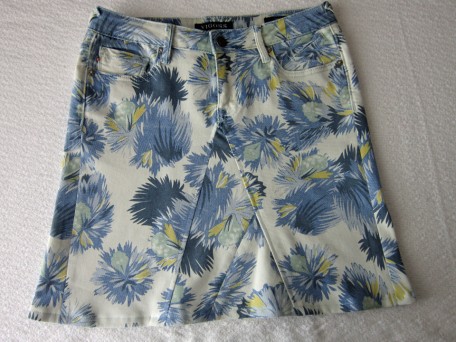
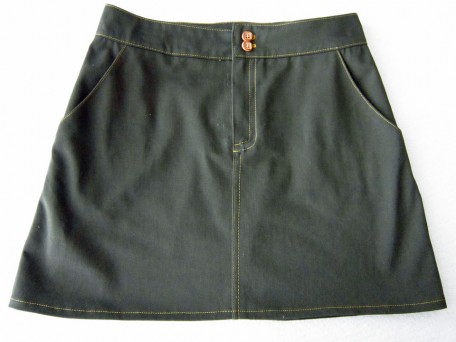
On the outside. I top-stitched along the two sides of the triangle at 1/4 inch.
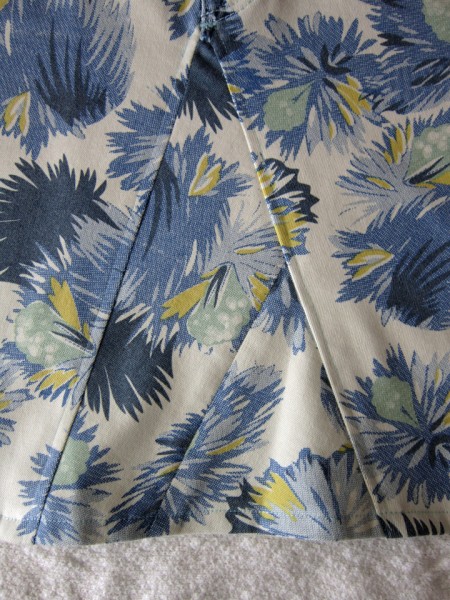
Close-up of the V
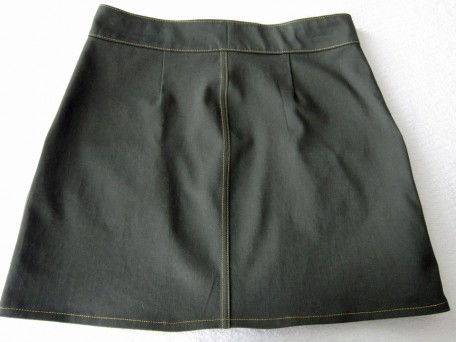
And the back on the inside…
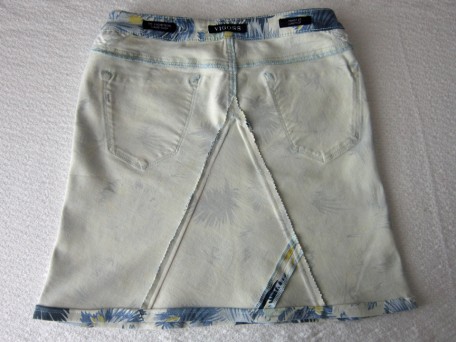
And on the outside…
Well, there it is! My very own silk blouse and newly invented Vigoss skirt! It took me a trip around Africa to explain it all but there are so many things that I wanted to share with you and by golly I did it! Take care and will be back soon!
Salute! Jessica
Read More
Sweaters and Skirts and Snow

Okay… so you are probably wondering where I have been THIS time! Remember in my last post when I signed off with “Look out 2014, here I come”? Well… I think I was the one that should have been feeling a little worried! It started last Wednesday when THEY who think they can predict weather actually got it right this time, predicting that an abundance of snow was heading straight our way. All kinds of snow came falling out of the sky on us. We are super good with rain, most of us don’t even use umbrellas which makes us true Oregonians! We understand rain and know how to work with it… but snow?!! … now that’s a whole other story! And I have come to the conclusion that home builders here in this state don’t know ANYTHING about snow either because without a second thought, they build driveways everywhere just like mine! “Shuttle launches” that give you the feeling you are laying on your back and ready to blast off when you sit down in the car and so steep that when it snows, you can’t get in or out of your driveway… for days!

But the snow was really the least of my worries because I had a bigger problem. Thursday morning right after the snow hit, I decided I better finish up my son’s taxes and that was when another event also happened… my computer gave up on me… it keeled over and died… crashed… dropped dead… bit the big one… I didn’t even get the blue screen of death… just blackness! “Awe Crap” was not exactly what I said but I will spare you from that rant!
For the next three days while I was held prisoner in my home because I couldn’t get out of my driveway, I did my best to research new computers on my phone…this was like… like… like sewing clothes for a thimble!
It was my good fortune though that Sunday afternoon, a friend with a truck helped me immensely by taking me to a computer store where I was able to replace my poor old Dell with a new sleek and sassy Toshiba so I could get back here to Sewlikeinparis and talk to you!
Believe it or not, I actually did do some sewing during the snow storm. I dug through some left over fabric from past sewing projects and decided to try my hand at making a pull over sweater and a jeans skirt. While neither I felt were masterpieces, they both turned out nice enough that I have already worn them and they are now in the laundry.
For the sweater, I used McCall’s 6708 only I made a whole lot of changes!
I didn’t want a cardigan… I wanted a pullover so I cut my front on the fold of the fabric after I calculated how much width I needed to take out. To do this I layered pattern pieces for style E over style A because I wanted the body of the sweater to be longer but I wanted the higher neck of style A. There was not enough fabric for long sleeves so I went with short sleeves instead.
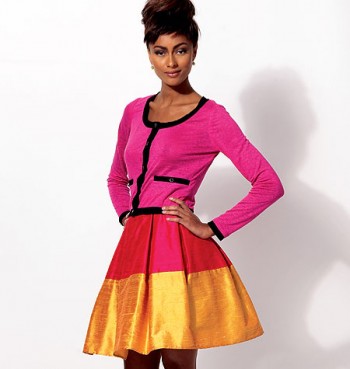
McCalls 6708 Options
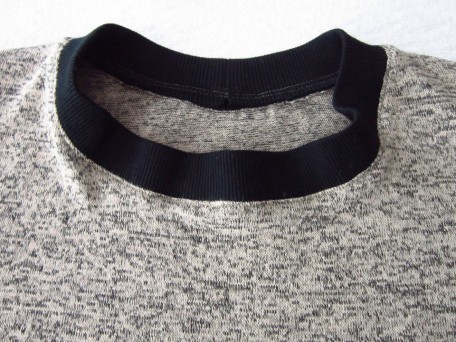
Sewing it together took me all of ten minutes. It was easy! Of course there was still the question of what to use for the binding around the neck, sleeves and bottom. I had some black ribbing, a little too heavy for this fabric, but since this was an experiment, why not! I used the same band pieces that came with the pattern, cut them out of my black ribbing and just stitched the ends together with a 5/8″ seam. I wasn’t sure how it was going to turn out but hey… I was winging it! The wine may have had something to do with the winging at this point!
Here is a finished sleeve.
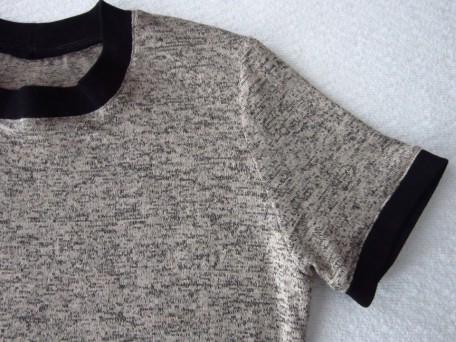
This is a close-up of the neck. I wasn’t real happy with how it turned out. I think maybe the band needs to be smaller. I thought about ripping out the seam and trying again, but I find it rather frustrating trying to remove seams from knit fabric! I put it on to see if it looked stupid and it really didn’t so I decided for sure to leave it alone. On all my bands, I top-stitched right next to the ribbing on the outside in order to keep the bands from rolling and this held them in place nicely; then I trimmed the extra fabric off.
Note for the future: I will cut the pattern pieces with a 3/8 inch seam allowance instead of 5/8 inches and then I won’t have to worry about cutting it off and it will also have a nicer more even finish.
It was debatable as to whether to put a band on the bottom or not… for whatever reason the band won so I put it on!
For the skirt, I actually started with McCalls 6361

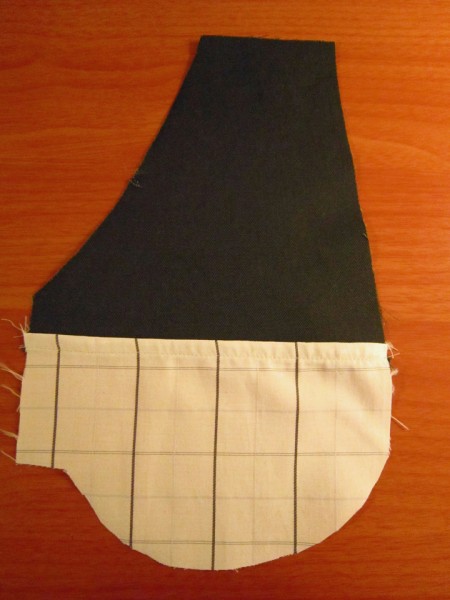
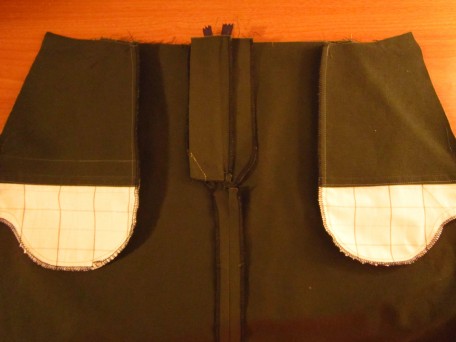
It’s actually a very nice skirt design though it didn’t have a back yoke like I was after that you see on a traditional jeans skirt. But hey, this was a trial run so I wasn’t too concerned. You start with stitching on the pockets and since I was in experimental mode, I decided to try making the lower half out of different fabric. In jeans the pocket itself is often made from muslin but for my test run I decided to use some cotton shirting.
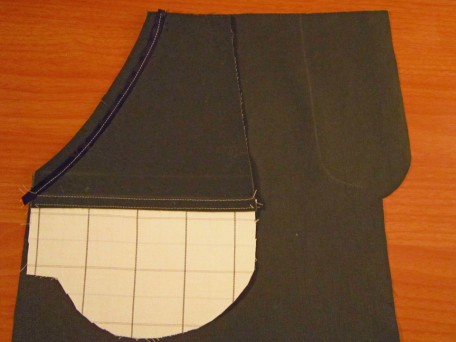
Following this, I had to stitch the pockets on the outer fronts, right side to right side and then I followed the pattern tip and additionally stitched on twill tape that I centered over the seamlines.
 This picture shows the inside of the right side of the skirt
When you flip them back over to the inside, it looks like this.
Just before the zipper stage, I switched to McCalls 6610

and dug out the right fly and fly facing pattern pieces so I could have a more jeans look zipper that McCall’s 6361 didn’t.
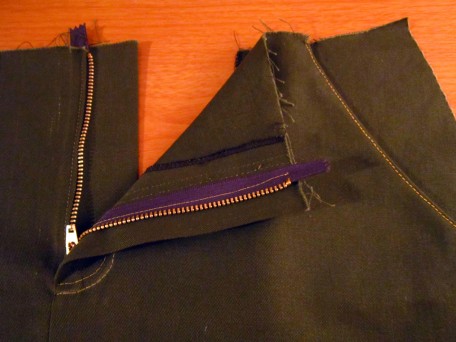
This is on the inside after I had finished with the pockets and the zipper installation. It’s not a very good picture, but you can see the inside lower part of the pockets and the fly facing that goes behind the zipper.
I top stitched all my seams with Jeans thread and boy was that a nightmare. My machine does not like to sew with it. I played with my tension a lot! I found that I needed to have it between 8 and 9 with a little extra pressure on the foot and definitely a 5.0 stitch length. Even with these adjustments, it was iffy! I pulled out what seemed like yards and yards of thread over and over, trying to get it right. Even remembered to change the sewing machine needle to a jeans needle though it didn’t seem to help that much. If the top thread was too loose, it felt really scratchy on the underside! If you look at the seams here in the waistband, you can see that they are not consistently the same.
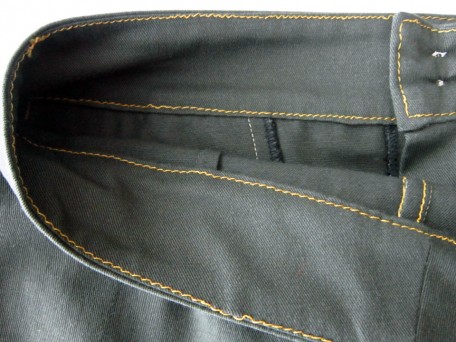
The top thread of the stitch looked good most of the time which really fooled me because I would just keep sewing along thinking that I finally had it and then… I would look underneath and it looked like crap!
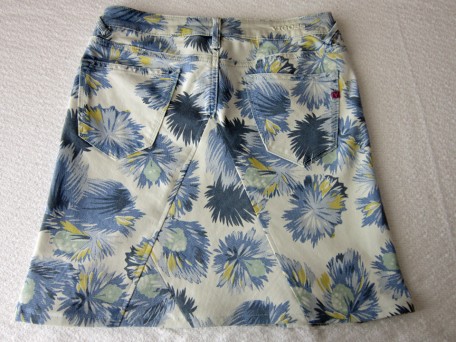
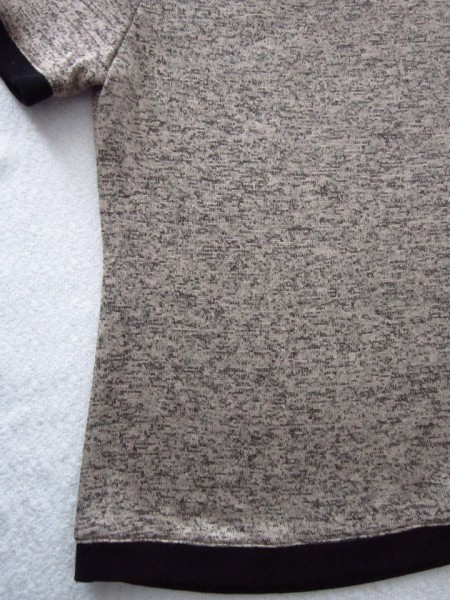
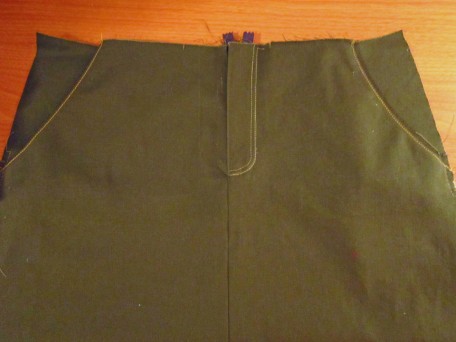
This is the front of the skirt after I finished it.
And this is the back without a yoke.
Sew there it is… Sweaters and skirts and snow! I don’t seem to have it in me this week to do the Ta-Da thing so I’m ducking out on the photo shoot! But I am thrilled to be back here on my blog talking to you about sewing. I am presently working on a new sewing project that I will share with you soon. You know… I’ve learned several valuable things in the last week…1) I can make a sweater, 2) it’s good to sometimes believe the weatherman may be right and go grocery shopping early on and 3) there is absolutely no way that I will ever conform to doing all my blogging from my phone! I love my new computer and large touch screen and hopefully it will stay with me for a while so I can keep coming back! À tout à l’heure ! ( See you soon!)
Salute! Jessica
Read MoreButterick 5613 Causes Skirt Making Madness

These are a few of our favorite beverages we like to partake of during the coming season. The Pyrat Rum is for the hot buttered rum that warms us on chilly winter days and evenings. There is a fresh batch of batter, heavily seasoned with Caribbean spices that I made last night, patiently waiting in the chillerator for us to add to the rum with steaming hot water that begins the kick off for today’s festivities. We can’t leave out my favorite… wine, the fruit and nector of the gods! And last but not least, fine scotch, Laphroaig 10 Year single malt, the water of angels!
This year, the feast is being held at my son and daughter-in-law’s home. On this day every year, my children grab the opportunity to dress up for dinner… ties, sometimes dinner coats, dresses and occasionally hats! A very fashionable and fun revelry that transcends into the New Year! And what will I be wearing? Well…
I recently purchased a new pair of leather riding boots because I decided that it’s going to be skirts and warm tights for the wearing this winter. The problem however with making this decision… there is only one winter skirt in my closet. I guess it was a DERP moment! This one and only skirt I have is a heavy cotton/spandex that I purchased from the GAP back in… try 2004! I have no explanations or excuses for the no skirts syndrome… just never thought much about them. All of that is going to change though – now that I have my Butterick 5613 pattern!

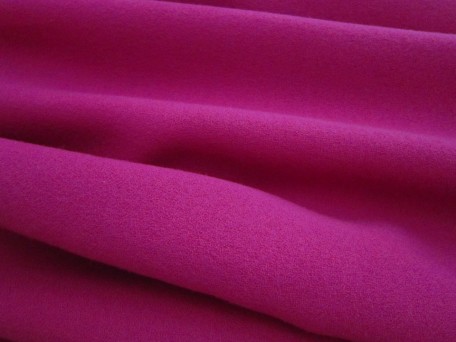
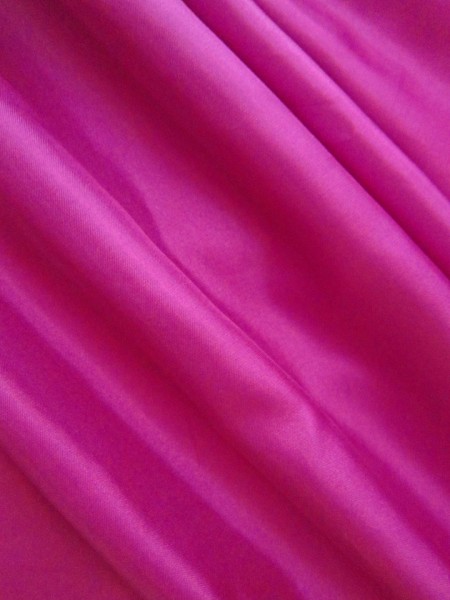
So what do I like about this pattern? For starters… the wide yoke. They seem to be feel so much more comfortable than a narrow waistband. Then there is the style options: pleats, bubble hem or a lightly gathered flare. The pattern calls for the light weight fabrics Broadcloth and Faille but also throws linen into the mix. I need winter skirts not spring/summer skirts which these fabrics work well for so… since I like to bend the rules, I decided I would try something that would be heavier and warmer… like wool flannel. But before going wild, I thought it best to practice with a fabric sort of similar and less expensive… like the wool crepe remnant that I couldn’t bring myself to throw away after making a dress out of almost two years ago. It is sort of a red rose color.
The piece looked big enough to make a skirt from but it was not going to be big enough to make the pleated skirt. I kinda figured but I had to try. My good fortune still came forth however! It just so happens that the pleated skirt has a lining if you want the bubble hem so guess what I did? Yes… I made a skirt from the lining! The beauty of this is that I made a muslin that is actually a skirt I WILL wear. An added plus is another style of skirt to add to my style options. Of course, I now also know how to line the pleated skirt which I am making next.
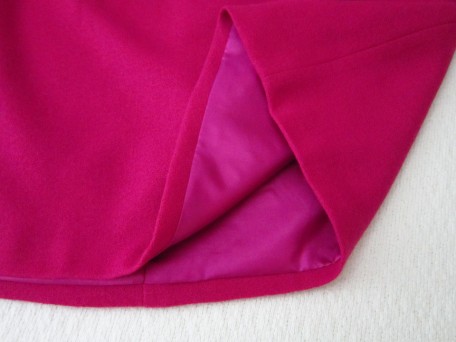
I definitely wanted to line my skirt because I find that wool crepe is scratchy on my skin. I ended up with a polyester lining that was not what I was after but the color matched so perfectly with the wool crepe that I went for it. It sure didn’t like to be ironed, even at the synthetic heat setting on my iron which is cooler than silk.
The pattern lining is really simple: A yoke styled waistband (front and back), the front skirt section (cut on the fold) with 2 darts, two skirt back sides, each with 1 dart. I cut all of these from my Wool Crepe and then a second set of all of them from my lining. Oh yeah, and also cut interfacing pieces for the yoke.
However… Before I cut out my lining (after I cut out the actual skirt), I first shortened the front and back pattern pieces 1/2 inch in length. Let me explain… the Butterick 5613 pattern “D” option for the pleated bubble skirt uses the lining to create the bubble hem by instructing you to sew the hem of the lining to the gathered hem of the pleated skirt. The lining is shorter than the pleated skirt so when you do this, the lining pulls the skirt hem up and under, giving a finished hem in the process. I wanted to do the same but since I was using the same pattern pieces for both the skirt and lining, I had to shorten the length of the skirt front and back tissues before cutting out my lining pieces.
Another cool thing … because I didn’t make pleats, the hemline width of my skirt and lining were the same and so sewing them together was easy peasy! I just sewed the bottom of the skirt to the bottom of the lining, right side to right side, then folded the lining back under to the inside that I later basted to the inside top of the skirt. But First!
Important Tip: I didn’t sew the two hemlines together until after I first applied the fabric yoke and installed an invisible zipper ( I love the finished look of these). Doing it this way made it easier to sew the lining onto each side of the zipper and gave a nicer finish. I basted the lining to the seam allowance of the yoke and top of skirt, matching seams and notches. Next, I top-stitched the outer bottom edge of the yoke, giving both a nice finish and more permanently attaching the lining. Is this a correct way to do this? Well… the art of sewing has developed through experimentation so is there a wrong? I figure that if you get what you are after… then it must have been right!
This is what the hem of the skirt looks like finished.
It was now time to add the yoke facing which I did per the pattern instructions. However, instead of under-stitching I chose to top-stitch the top of the yoke on the outside to match the bottom. I did this after I turned the facing to the inside and slip-stitched it’s pressed under edge over the seam.
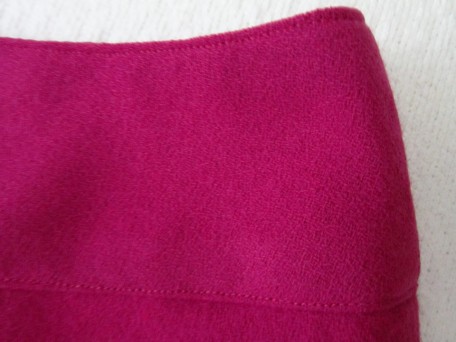
My first day of this season’s revelry attire includes my new skirt!

It’s hard to model a skirt! Maybe this is why they never get a lot of attention. They are tucked in under everything. Trying to show the darts here but it’s not working. Sure got a laugh out of my daughter though!

Up and coming soon, expect to see my black Flannel pleated skirt, my “Edith Blouse” by Maria of Denmark AND my Burda 8836 black Georgette dress. But right now… it’s time to start this season’s revelry so… with a glass of my favorite Chardonnay… here is my toast to you!
“May the coming season bring you joy and happiness in all that you do!”
Salute! Jessica
Read MoreDrafting a Peg-Top Waist Skirt

My Wisteria in full bloom
We are having such beautiful weather and to think that it is Oregon, and in April! I have had more energy in the last 3 days than I feel I’ve had in the last 3 months. I guess I’ve got the “spring fever”.
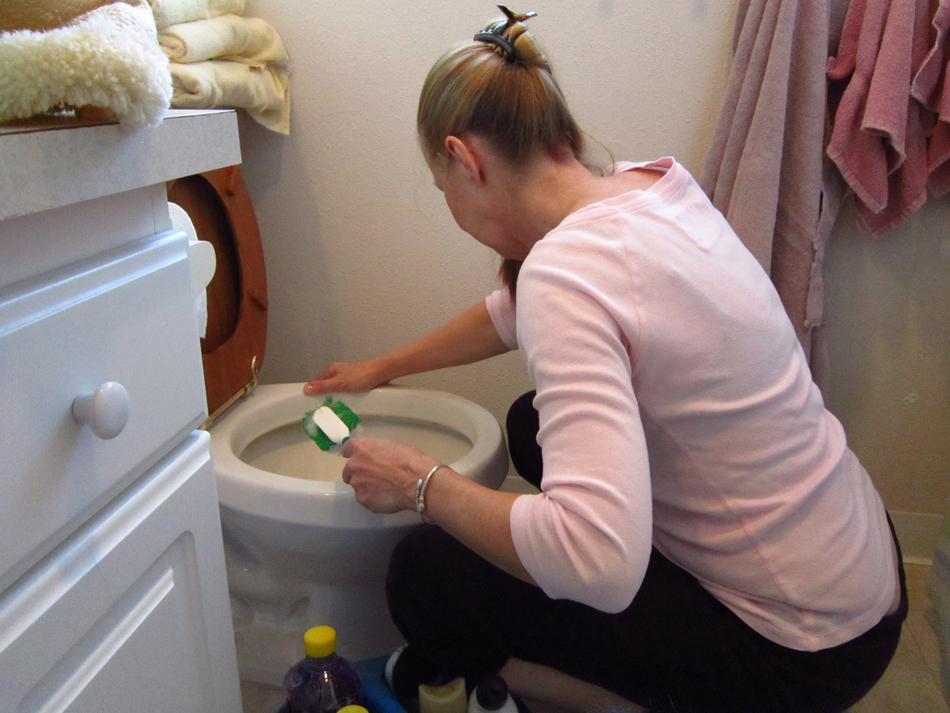
So while cleaning, cleaning, and cleaning…
I have been thinking about a dress I am going to make, a summer dress in yellow and white. Part of my inspiration came from the T.V. show “Revenge”. Yes…I am watching it but I blame it on Netflix. Believe it or not, I don’t watch television. I do however watch my “talking books” on Netflix but it really stinks when they put the first season of something on it; you watch it, and then you’re hooked and have to continue watching it on T.V. or Comcast On-Demand, both with all those obnoxious irritating crappy advertisements… uh-oh, rant coming on, shut it down- shut it down! Ahem…
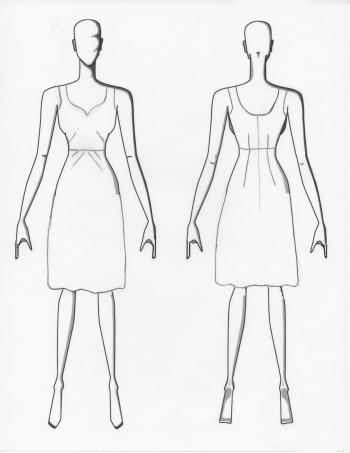
Anyways, there were several dresses that the leading actress, Emily VanCamp, wore that caught my eye. One of course was a yellow and white one, and the other was what might have been a white brocade but it was the skirt of that dress that grabbed my attention. Instead of the standard darts that start at the waist and go straight down, these were diagonal. I thought, okay, that would be easy enough — I’ll just use my skirt pattern that fits me perfectly and fold the darts diagonally. But I was so wrong! Mind you I had already drawn out my vision on a croquis…
and have been mulling it around in my head, trying to figure it all out. It was in one of those moments when my brain was fully functioning properly that I remembered a book I have. The author is Adele P. Margolis and the book is titled “How to Design Your Own Dress Patterns”.
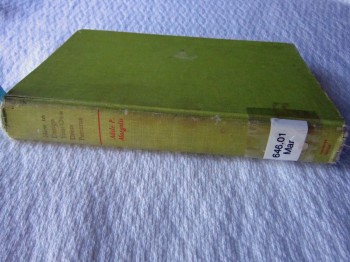
The diagonal darts that I needed to create she terms in the book as a “peg top” skirt with actual instructions for drafting it. What a score!
I was so excited that I
stopped breathing for several
seconds…
This was so big that it
demanded a glass of wine with
a toast!
So now that I am back on my feet, I thought I would share with you how it’s done. There are 12 steps to drafting the peg-top skirt and hopefully with pictures, some from Adele Margolis’s wonderful book, it will be easy for you to follow. Here goes…
DRAFTING A PEG TOP WAIST SKIRT in 12 EASY STEPS
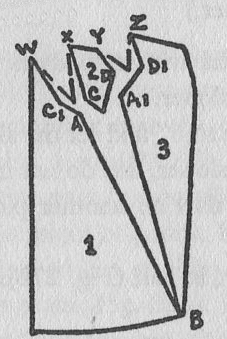
** Please note that my pictures and the book illustrations are opposite views. I did this intentionally but realized half-way through that it would be conflicting for this “how to” but I had already spent a bit of time with the drafting and pictures so decided to keep my dingy sailing in the same direction!
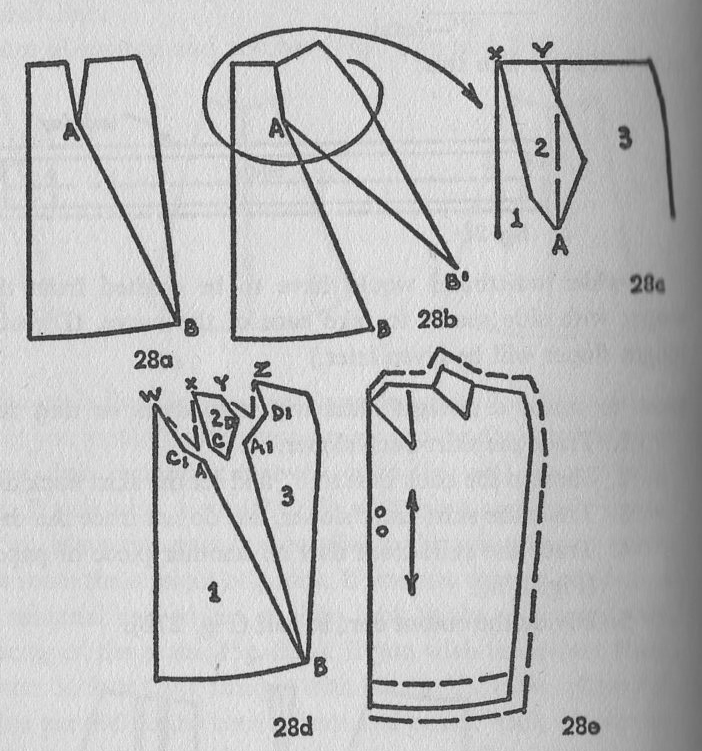
This is the whole sha-bang of illustrations for the peg-top skirt, all on one page. I have re-illustrated them individually in the following steps to make it easier to understand. Hopefully you will be inspired to go hunting for this little treasure to add to your collection if you don’t already have it. It certainly has saved my butt!
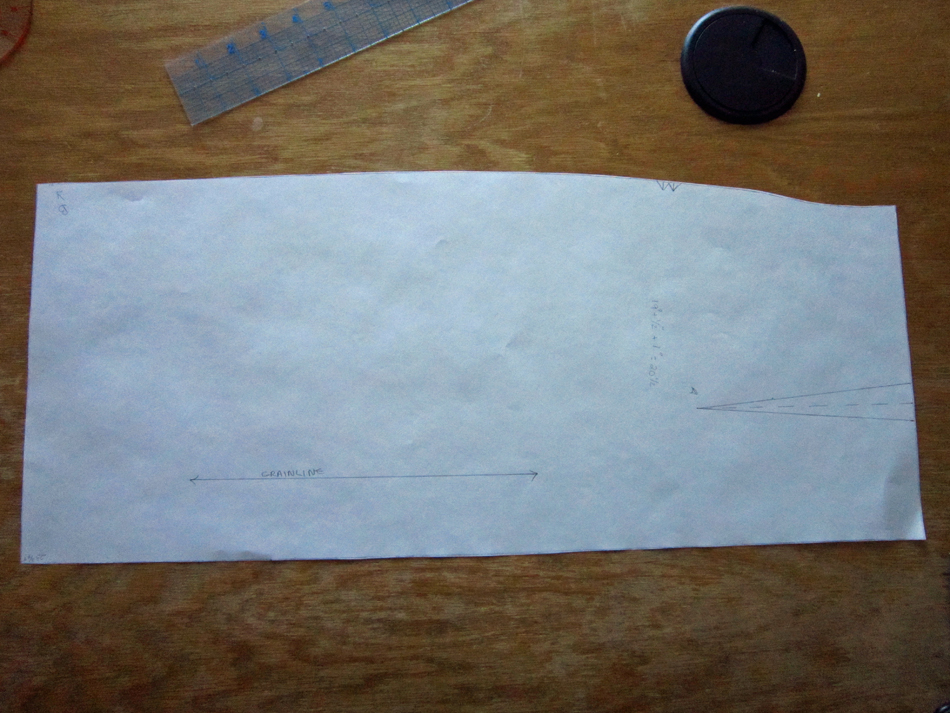
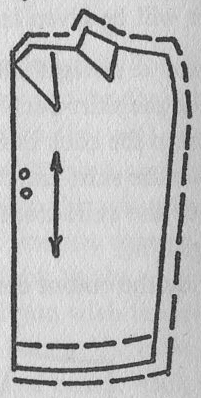
Step 1:
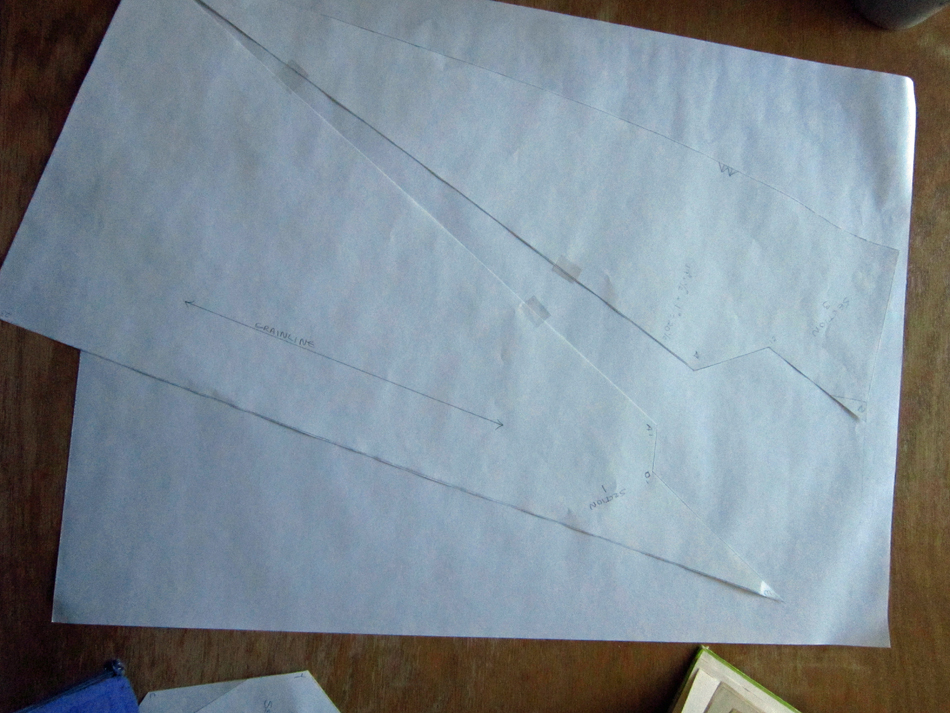
You start with a skirt front block that fits you nicely but because you’ll be cutting it up, you will likely want to trace one from your original. I traced around my original skirt block onto a piece of art paper and then drew in the dart and grain line. Keep it simple and do what works best for you.
Step 2:

Draw a line from the bottom corner of the side seam to the dart point. Then label these B and A respectively. (See above and below)

Step 3:
Cut out the original dart at the top of the waist. There is no picture for this because for some reason I forgot to take one. (It was an awe crap moment when I realized this)
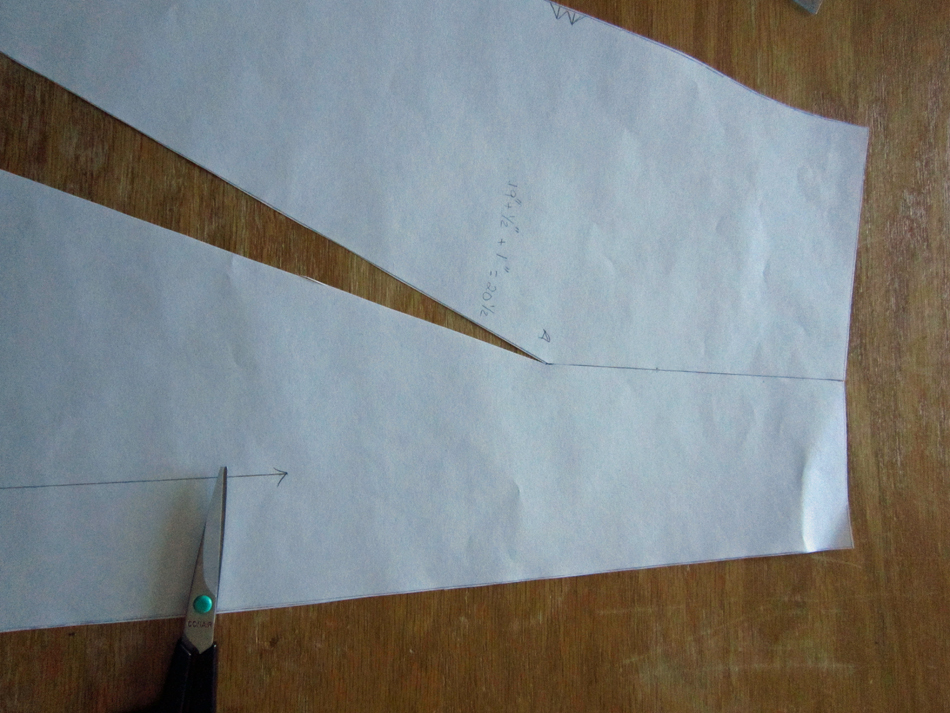
Step 4: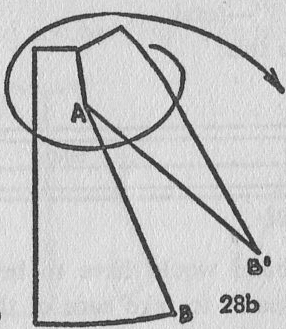
Now you are going to slash the line you drew from Point B to Point A but leave just a smidgeon of paper at Point A so the 2 sections are still connected. Then pivot or shift Point B, closing up the dart at the waist; then tape in place. Label the hem line points B (already there) and B1.
Step 5:
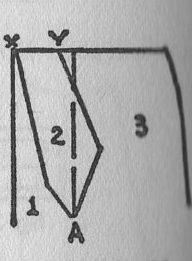
You will need to draw “style lines” as shown and label them X and Y

This is a bit tricky. There is no precise placement for these lines and no specific lengths. It is entirely up to the designer. I worked from the sample that is shown in the book and drew my lines 4 and 6 inches in length.
Step 6:
Next, connect each of these lines to A.
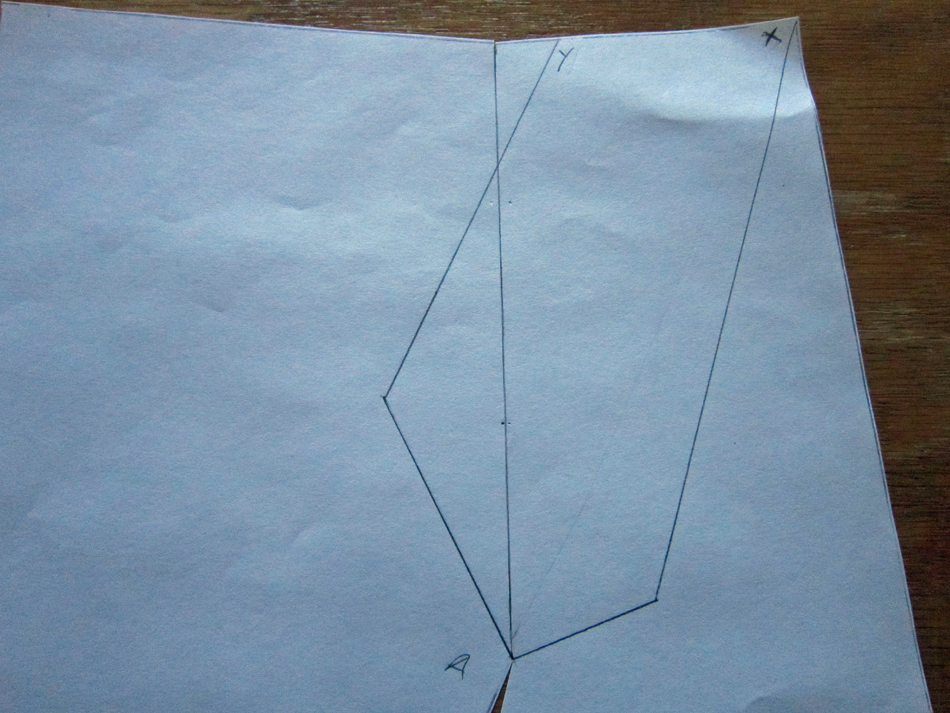
Step 7:
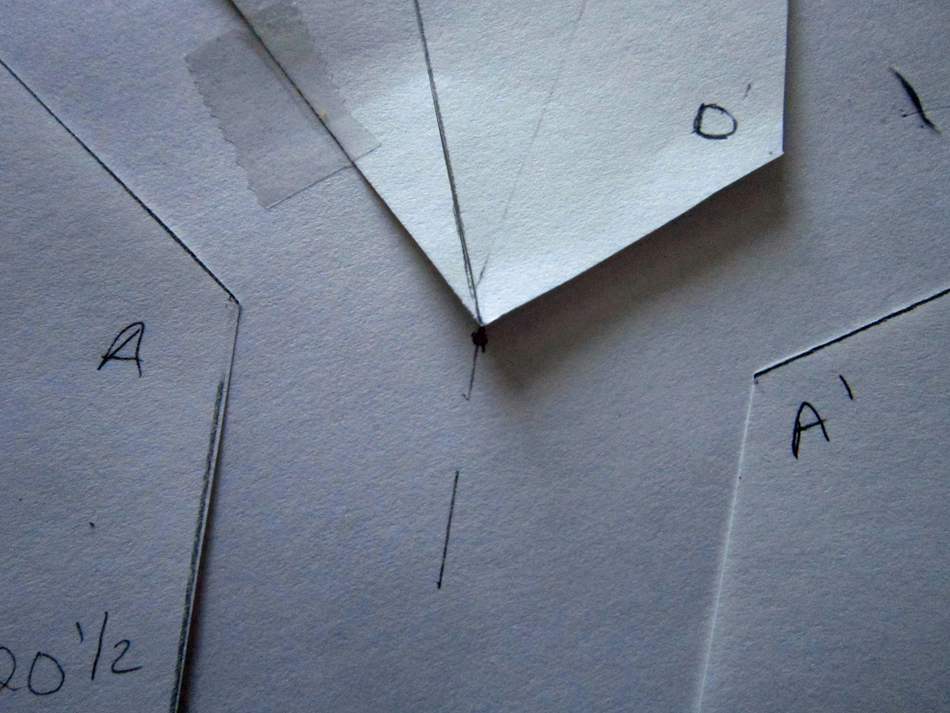
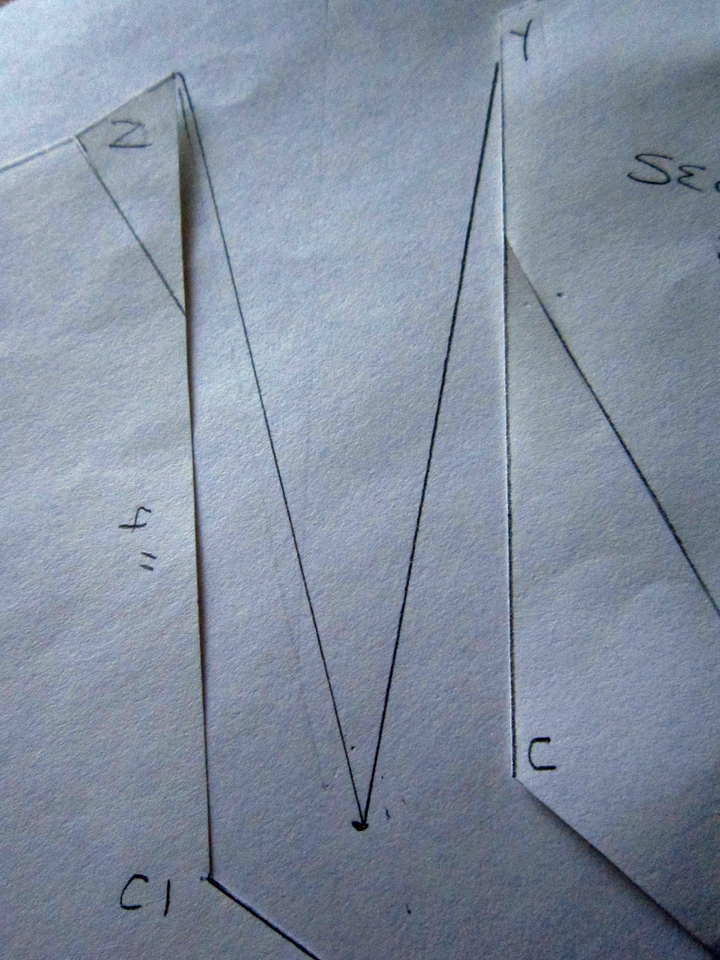
Label these sections 1, 2 and 3. Then cut them completely apart from one another. Across from A, you will want to mark A1 though not shown in the photo below.
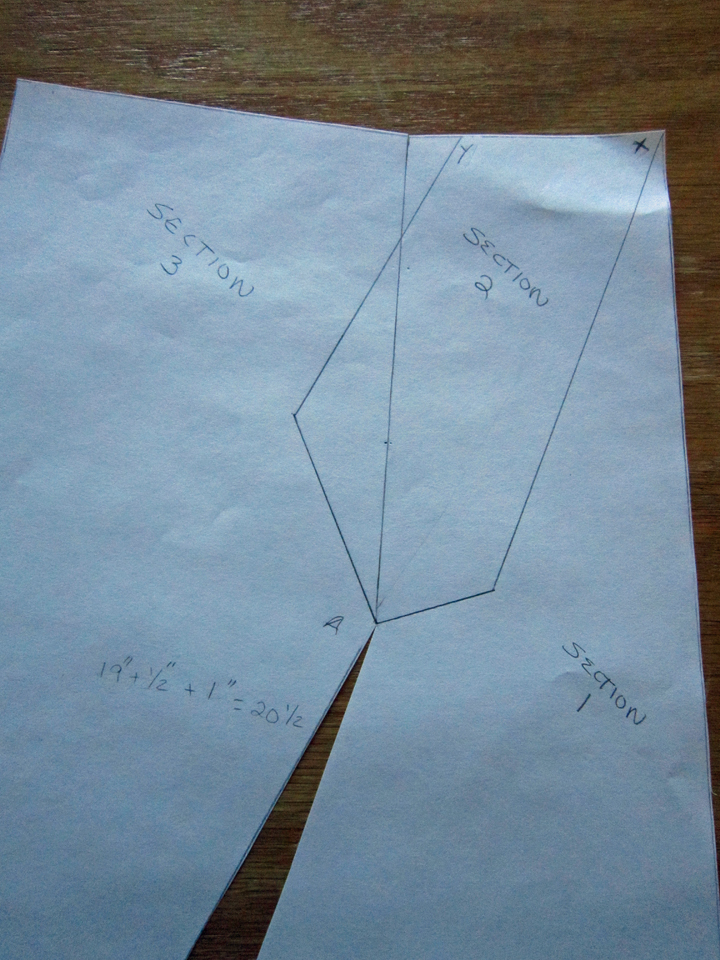
The next steps I found to be easier to manage by placing my 3 sections on another sheet of paper. There were no instructions given to do this and I struggled for a bit until I got it sorted out.
Step 8:
You start with placing sections 1 and 3 with the bottom points B and B1 touching and positioning A and A1 two inches apart. Below is how they look before I taped them on my additional sheet of paper.
Then after…
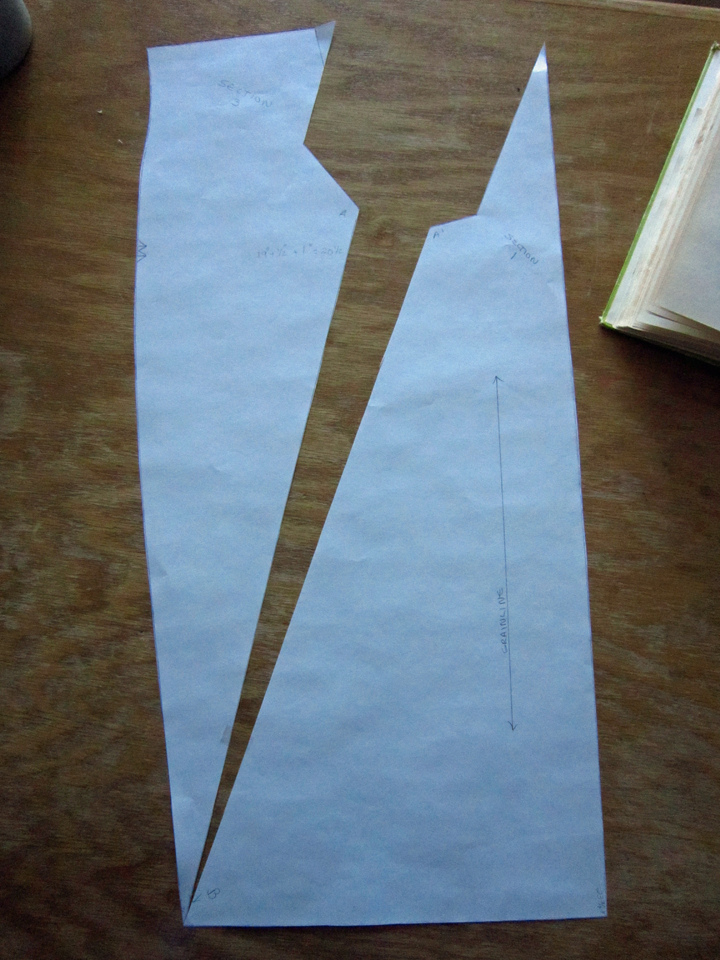
Step 9:
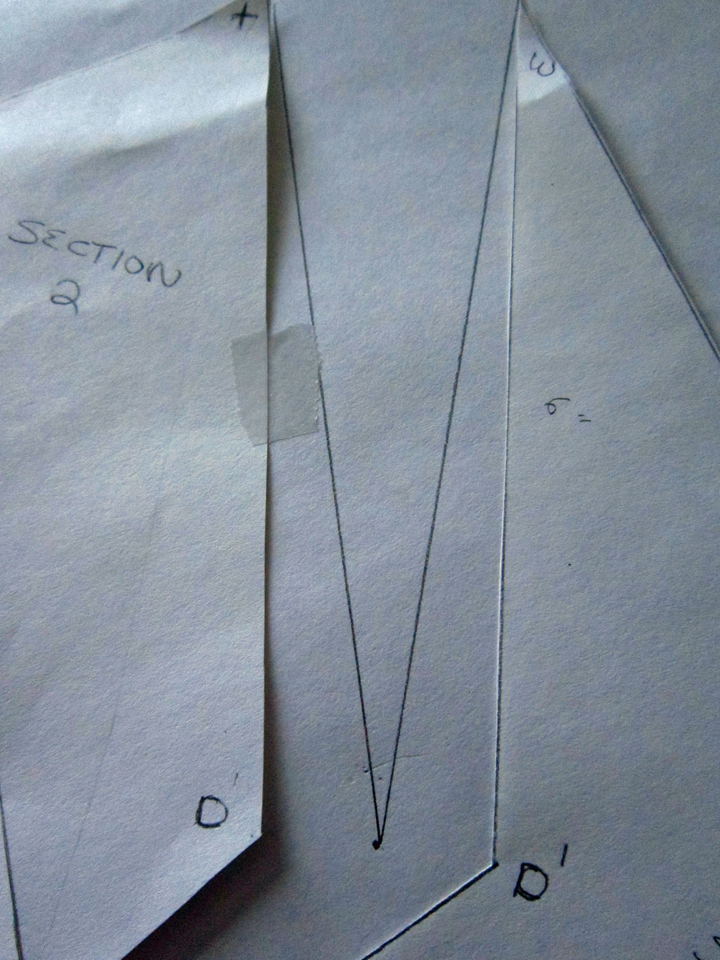
Place Section 2 between 1 and 3 so that the darts will be equal on each side at the waist line with the point touching midway between A and A1.
I don’t have a picture for the top of section2 between 1 and 3 so refer to the book illustration. It will look wonky but as long as the tip is at the mid-way point of A and A1 and you maintain an equal width for each side of Section 2, you will be fine.
Step 10:
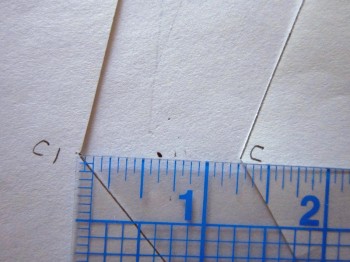
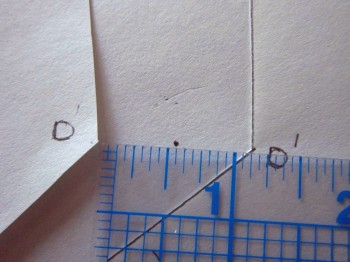
Find the center points between C and C1 and D and D1. Nothing beats a good eraser when you can’t make up your mind!
Step 11:
Draw in the 2 new darts. The dart legs need to be of equal length when measuring from the midway points at C and C1, and D and D1 to ZY and XW respectively.
Dart ZCY
and Dart XDW
Step 12:
Fold the new darts to the center and draw in the waist line. Now finish up by tracing your draft onto pattern paper and be proud. You did it! Of course you still need to draft a skirt back or obtain one that matches this one at the side seams and supplies the remainder of the waist measurement that is needed. The waist and sweep of the hem line should remain intact when doing this peg top style. Only the hip fullness is affected. It does not change, just relocates!
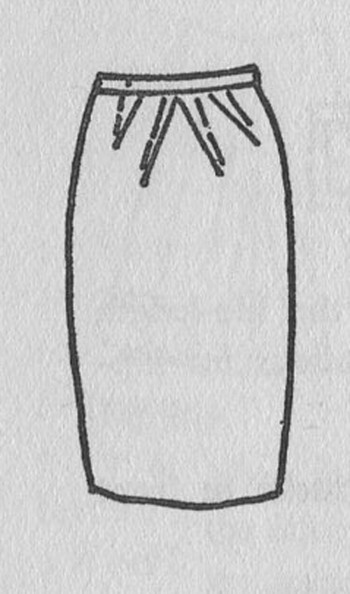
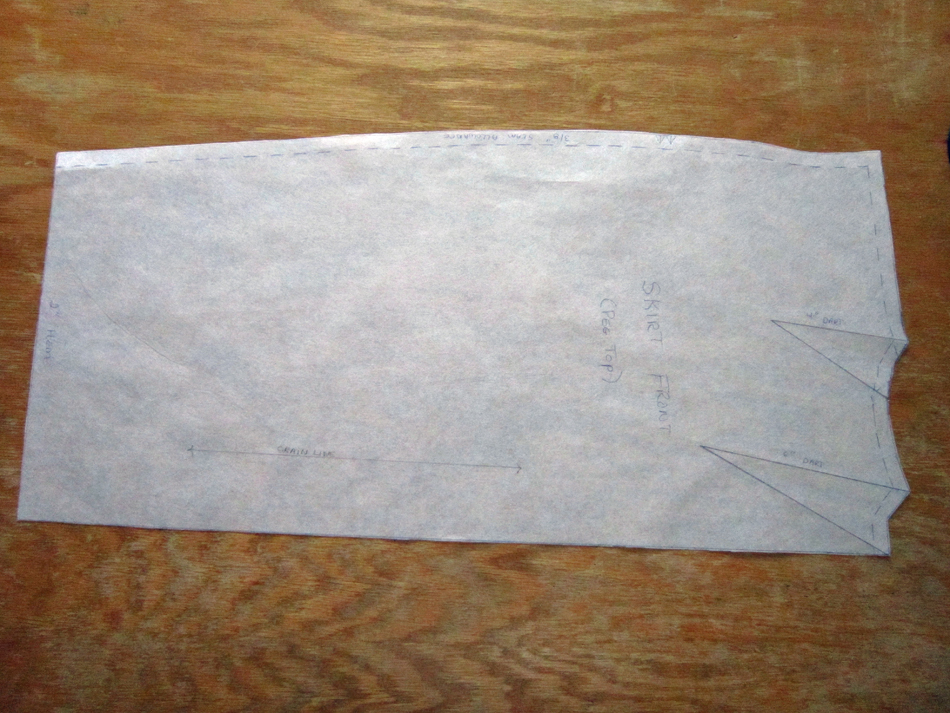
This is mine finished. I didn’t create little tabs extruding from the center part of the darts because I wanted them to be even with the waist line when they were folded. Right or wrong, it’s what I wanted and besides, I’ve always liked living on the edge!
In the near future you’ll be seeing that yellow and white dress I’ve been talking about, with this peg top skirt sewn into it of course. I am really excited about it because I have truly created my own dress pattern this time around. The bodice I designed off of my own drafted bodice block; then I did style changes giving it french darts, a sweetheart neck line and a scooped low back. I hope I haven’t shot myself in the foot by announcing this! Ehh, what’s life without a bit of adventure right? Stay tuned! Now it’s time to go enjoy the rest of my day with no cleaning!
Salut! Jessica
Read MoreAbout Me
 Portland, Oregon,
 United States
Hi there! I’m Jessica Brandon and I am a clothes-loving sewing artist. When I am not sewing, blogging or shopping for shoes for my creations, I fill in the remainder of my days spending time with my children, playing ice hockey, gardening and making and drinking wine!


Up Coming Projects:
Vogue 1426

Vogue 7881

McCall's 7089

Vogue 8997

Vogue 1431

Vogue 9006

Vogue 8991
