

Hockey Officiating Pants Made for Her
Hockey Officiating pants made for her! For my favorite hockey Referee that is!
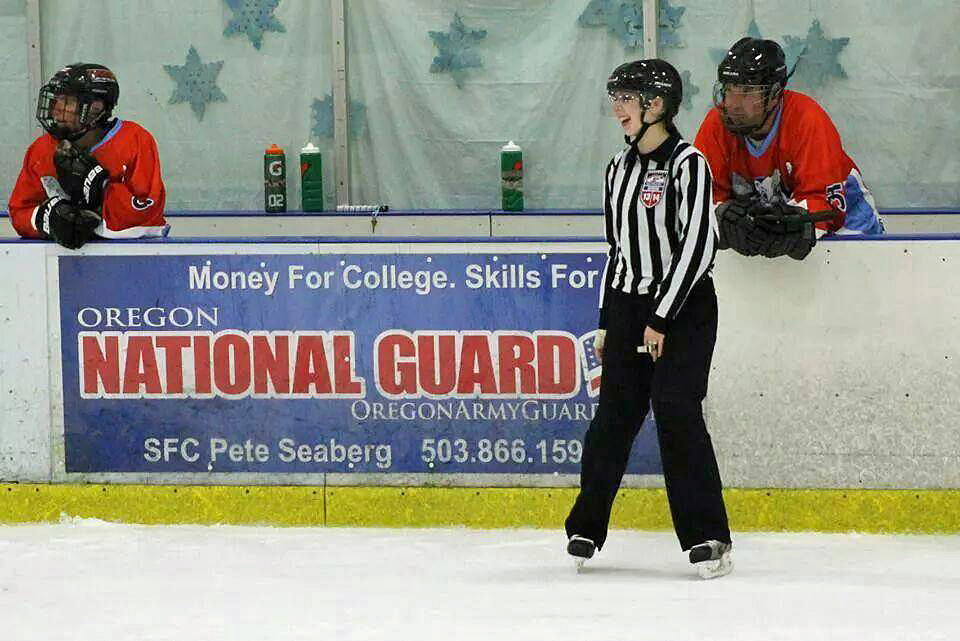
My daughter and I have been playing hockey for a number of years now. It has been a pretty awesome journey that we’ve shared, but several years ago she decided that just playing the game was not enough. As an official “rink rat” she had found her place in the hockey community and so it was no surprise when she landed herself a job score-keeping hockey games. There were some things to learn, but overall, she discovered that this new job made all kinds of sense if you know the game and she became pretty good at it. However, it wasn’t too long after spending time in her refrigerator box, that she figured out that along with doing this new job, she could also fit in another. So after seminars, tests, and lots of skating, she landed her additional 2nd job as a Referee, known in the hockey community, as a “Zebra”. Why a Zebra? Well, part of their uniform includes a “sweater” and the picture below tells the rest!
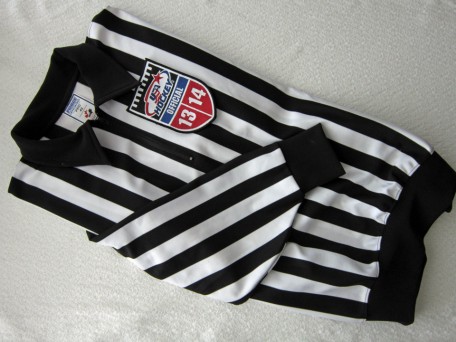
Along with this sweater, black pants are worn that are suppose to give the feeling of being suit pants but still accommodating for a physical work-out. They come in various styles based on the manufacturer and designed in different ways to allow for the padding worn underneath. Yes, even hockey referees wear padding. It can really really hurt to get hit by a puck and there are all kinds of other things that can happen too!
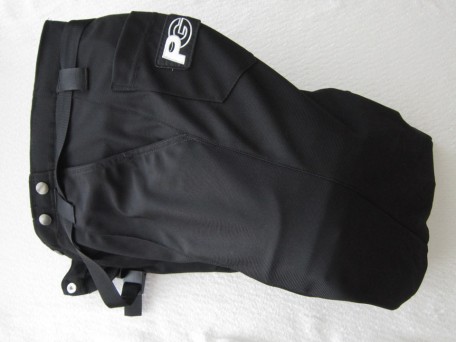
The first pair of pants my daughter purchased were an intro brand that served her well after a major re-build operation provided by moi! She wears a size 1 in juniors, and so mens size small hockey officiating pants are humongous on her. That first pair were not too expensive, about $50 dollars and so I tore into the project feeling confident. They turned out fine but after a year of reffing experience, it was time for a pants upgrade. This new pair she paid $170.00 for and of course the mens size small was way way too large! This meant only one thing… It was rebuild time… again! With a deep breath, I picked up my seam ripper and my work began. I should say that I have been working on a muslin for a dress that I’ve posted a picture of under Up and Coming Projects, but fixing these pants was also very important so the dress project got put on hold. I worried at first about what in the world I would share with you but then it occurred to me that fixing these pants to fit my daughter is sewing so why not! Oh, and get ready for some hockey lingo that you will see in italics!
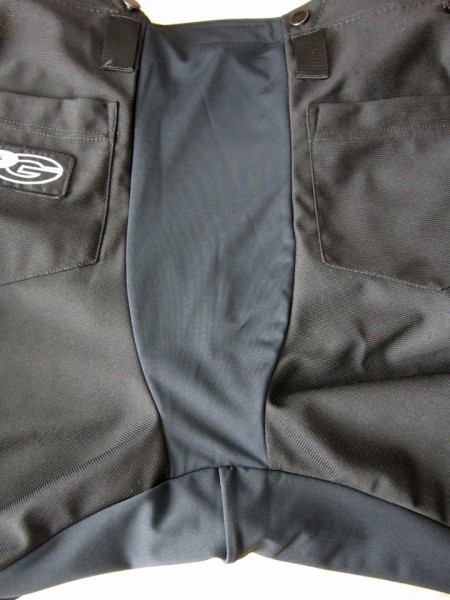
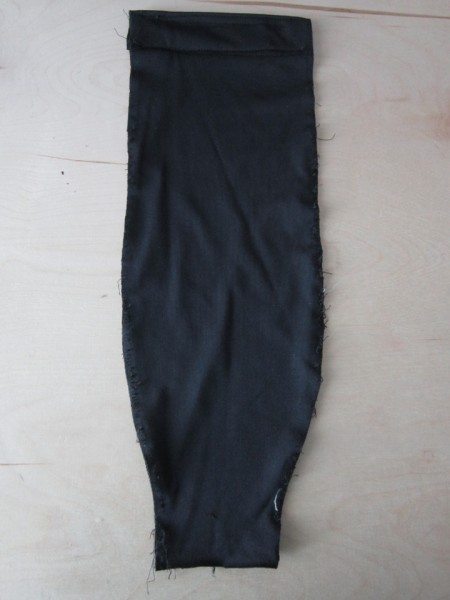
Okay… here are the back of the pants before my seam ripper started “hooking” and “slashing” the back seams out of them. We decided that the stretchy insert looked like a diaper!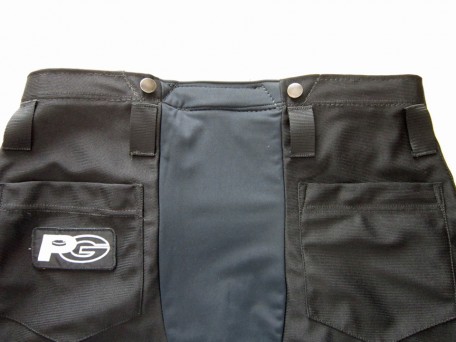
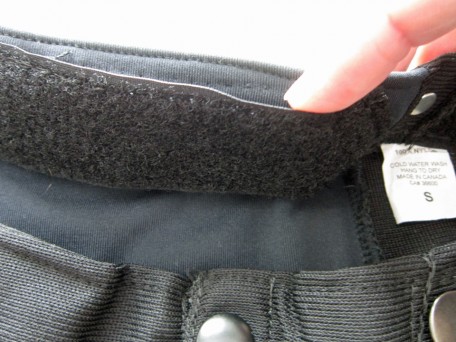
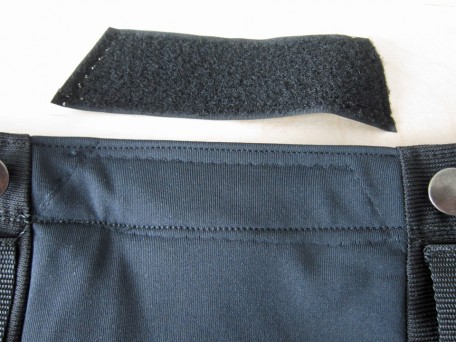
At the top of the pants on the outside, there is a seam that holds a strip of Velcro to the inside waist which padding fastens to. The padding on the back side is important for protecting the tailbone in the event of a fall sometimes caused by “tripping”. 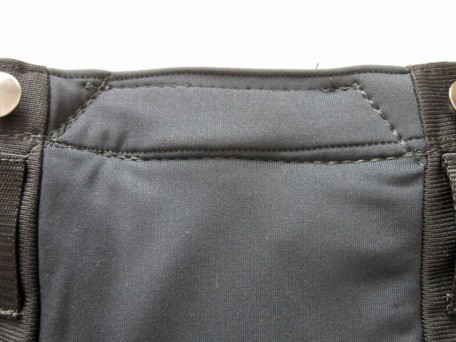
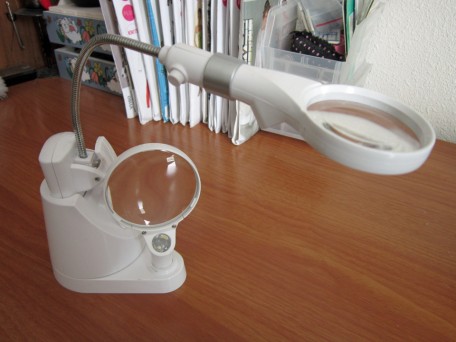
As I began trying to take out this seam, I realized that if I wasn’t careful, I could do a lot of damage and earn myself “major penalties” with my daughter for cosmetically messing up her pants! Fortunately I had my nifty Ottlite Led Magnifier Lamp that I purchased from JoAnn Fabric. It is portable and when I first purchased it, I wasn’t sure if I wasted my money, but given that it has saved MY butt so many times with it’s “assists“, I have now become quite fond of it!
It was a “give and go“, as I attacked this seam from the outside to the inside due to the thickness of the waistband, the Velcro, and the heavy-duty thread.
But eventually I got it removed.
The next step was removing the stretchy panel that was inserted between the two back sides of the pant.
Still a little nervous about tearing apart these expensive pants, I decided to start at the crotch seam first, and then work my way up the two sides.
I discovered that the front and back insert sections were double layers which sort of made me nervous at first, but as I worked through it, it turned out to be no problem at all.
Admittedly, the language I used in this part of the pants re-building process would have landed me in the “sin bin “. I think it took me about an hour to get all the seams out.
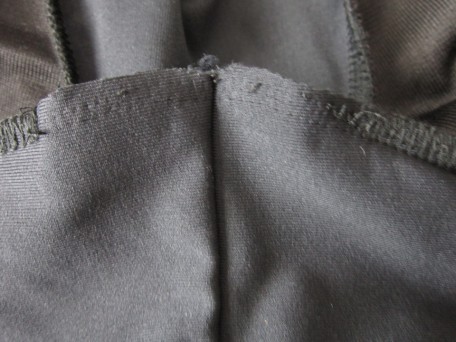
This is the insert that was sewn into the back.
At this point it felt like I was ready to do a “break away” and sew up the seat of the pants but as you can see from the picture before the insert picture, the front side of the pants and the inseams of both legs also had inserts. I decided it was the end of the “1st period” of hockey pants re-building and so poured myself a glass of chardonnay and watched Inspector Morse on Netflix with my son. These kind of projects sometimes can confound you temporarily and if you step away for a bit, afterwards, it sometimes just all makes sense!
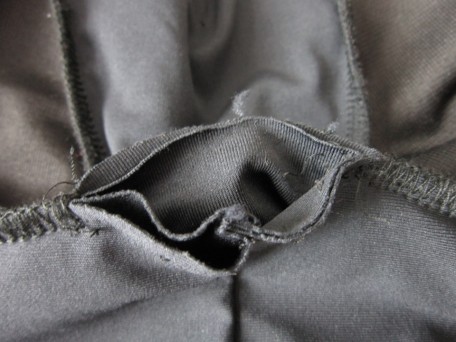
The next day… Back to the task at hand and fully charged, I knew what I needed to do. Before I could close up the back, I had to take out some of the inseam on each side of the crotch but along with this, I had to figure out how much of the front insert I wanted to remove because it made the crotch length way too long. If you look at the picture below, the open part is the back and the ruler is lying along the left inseam. The remaining inserts sewn into the inseam of each leg meet at the center and are also part of the front.

** A side bar-note for anyone that may be asking the question … **What’s a crotch length? There is a wonderful explanation along with pictures written by a fellow blogger that I would like to share. Her site is A Fashionable Stitch.
A quick definition: The measured distance from the front center waistline, down and through the crotch, continuing to the back center waistline.
These hockey pants had a crotch length of 33 1/2″ inches. The older hockey pants had a crotch length of 32″ and were a little too long. Obviously I was going to have to shorten the crotch length on the new ones but I wasn’t sure at this point exactly how this was going to work so I became the “winger” that I am and decided to take out 10″ inches of inseam on each leg and then sewed up the back of the pants. As you can see in the picture below, I also did a flat-fell seam like you would on jeans because I wanted it really durable. Working around the suspender hooks at the top was a bit of a challenge but with some hand sewing, and the use of a zipper foot, I think I’ve got it pretty good. Sewing back in the Velcro strip at the center top back was also reassuring because it extends several inches on both back sides and anchors the two sides together.

Being well into the “2nd period” and feeling strong, I pushed on to re-assess how to reduce the crotch length. I re-measured the old hockey pants, breaking down the measurements to front and back, the front being 15″ inches and the back 17″ inches. Then, starting at the front waistline on the new pants, I measured down 15″ inches plus an additional 1/4″ inch for the seam allowance. This distance landed a little ways into the insert. I marked this point with chalk and the marine blue arrow points to it. Notice how much of the insert still remains below my mark!
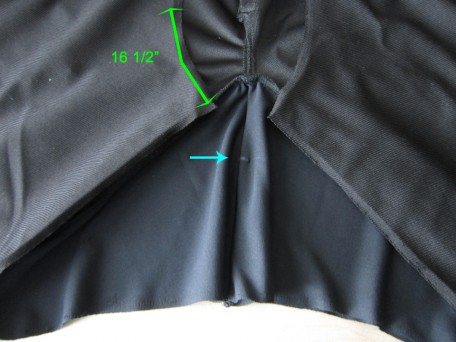
Oops! Took this picture before sewing up the back but it doesn’t change the situation I’m talking about.
Then I measured the back which was now 16 1/2″ inches in total without the insert (see above photo). Hmm… I thought… now what?!! I needed 32″ inches or a little less in total… the front of 15 1/4″ inches plus the back of 16 1/2″ inches equaled a total of 31 3/4″ inches… then if I sewed a 1/4″ inch seam, I would end up with 31 1/4″ inches which was less than 32″ inches… well, then there was only one thing to do… pin the back crotch seam to the marking I placed on the front, reposition and pin the inseams of each leg for the new crotch length, baste them together and have my daughter try them on!
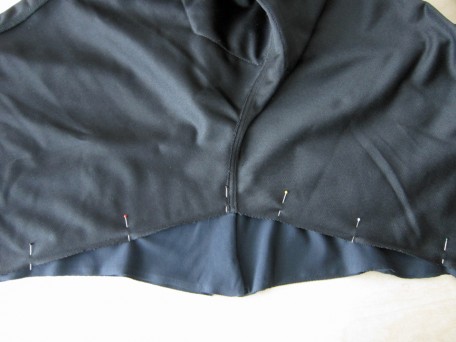
Hot damn and a woo-hoo! They fit! I made a “goal”! I was singing the “Happy” song by Pharrell Williams! I really love that song. So much so that I decided to share it with you so you can feel some happiness too! At the end of this post is a start button and you can check it out! Anyhoos… the rest is history! I stitched a solid seam where the basting was, then serged the selvedges and hemmed the pant legs since they came un-hemmed for custom fitting.
While I was writing this post, I thought it might be fun to share a few more pictures of all the gear that my daughter wears when she’s reffing a game. We’ll start with the under-undergarments. They of course include a sports bra if the ref is a female, some sort of undershorts that hold a cup for protection… yes, girls wear them too because they also need protection… and special wicking socks.
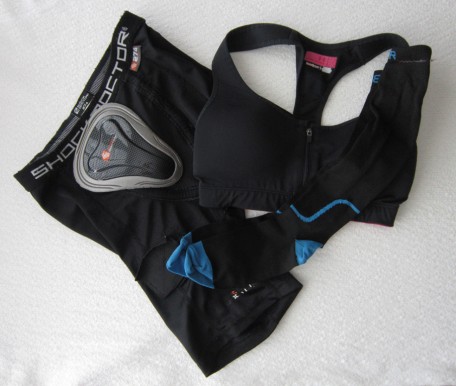
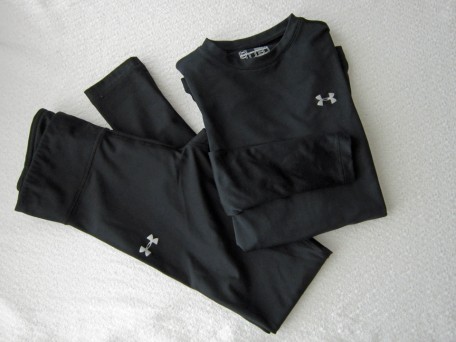
Then there are the “keep you warm” undergarments… our preferred choice is Under Armour frosty tights and long sleeve t-shirt.
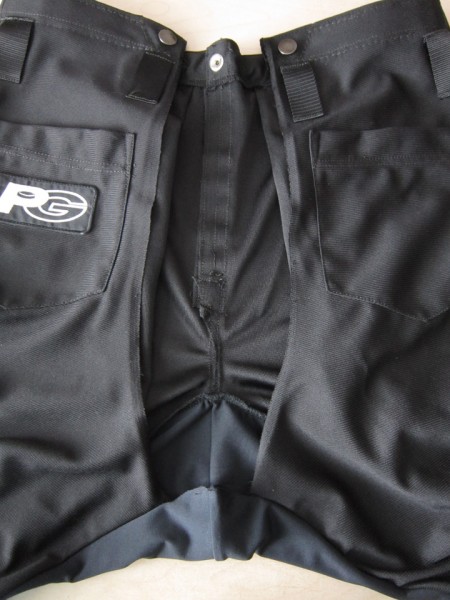
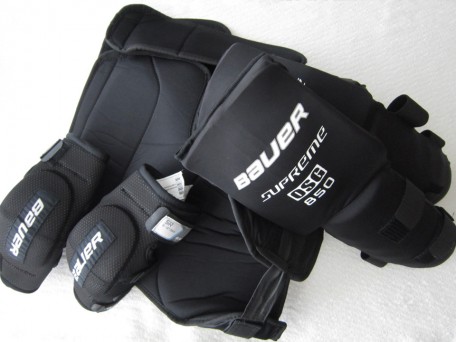
Next up is the padding. Besides the padding in the pants included in the picture below, she wears elbow and shin pads.
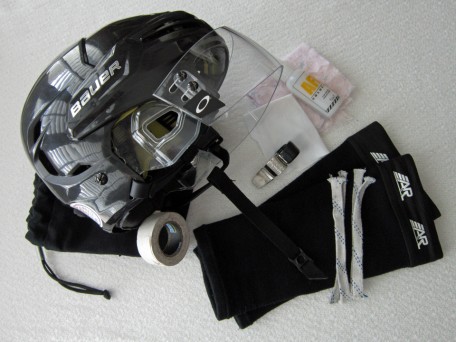
After donning the under-under garments, the warmth under garments and then all the padding, she’s then ready to put on her padded pants and sweater. But there is still a few necessary items: A certified helmet with visor and cleaning goodies to keep off fog; shin tights to keep her pants from hooking on the back of her skates, an official hockey whistle, ties to make emergency repairs on the nets and white tape for protecting fingers if she has to break up “dancing” hockey players!
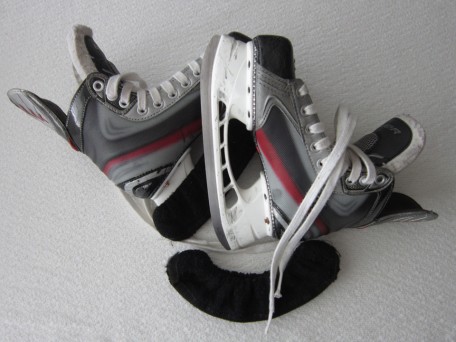
Oh! And one more very important item… the hockey skates!
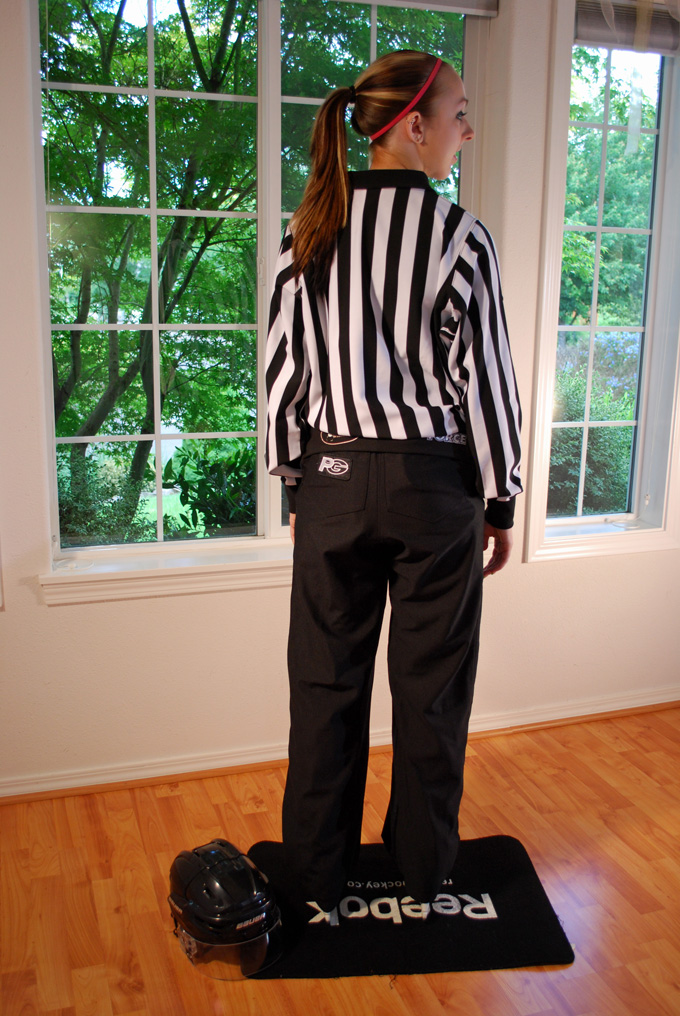
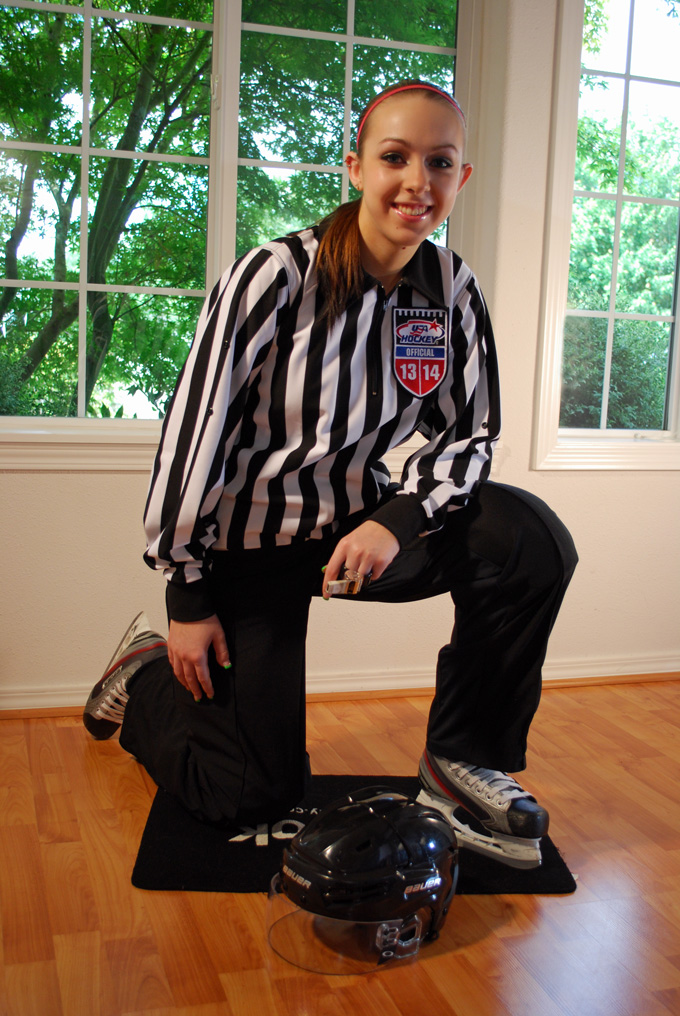
A photoshoot was in order to share with you how the pants look now that they have been custom fit for my daughter.
This is our family “Zebra”!
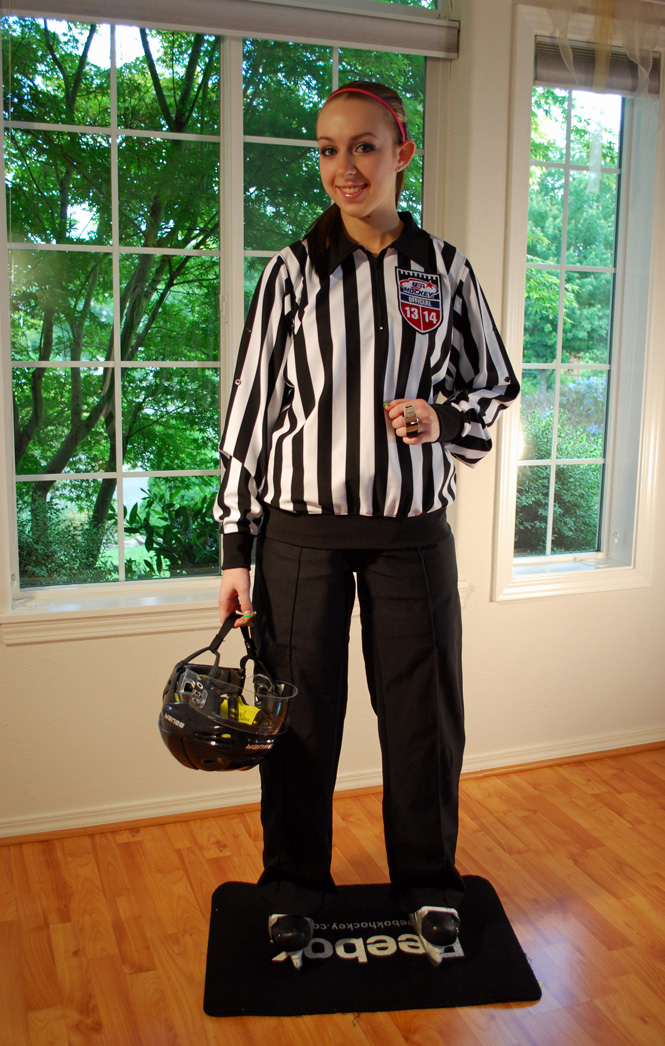
The pants fit her properly now.

And taking a knee because it’s time out!
For all of you, I also decided to include in this post an interview of my daughter that was done by one of her brothers (one of my sons!) which was a college class film making project filmed in November of 2013. Emjoy!
And here is that most cool song so you can clap along and be happy too!
Take care and hope you had a wonderful Memorial Day weekend. Will be back soon!
Salute! Jessica
Read MoreAbout Me
 Portland, Oregon,
 United States
Hi there! I’m Jessica Brandon and I am a clothes-loving sewing artist. When I am not sewing, blogging or shopping for shoes for my creations, I fill in the remainder of my days spending time with my children, playing ice hockey, gardening and making and drinking wine!


Up Coming Projects:
Vogue 1426

Vogue 7881

McCall's 7089

Vogue 8997

Vogue 1431

Vogue 9006

Vogue 8991
