

"Fashion is not something that exists in dresses only. Fashion is in the sky, in the street;
Fashion has to do with ideas, the way we live, what is happening." - Coco Chanel"
Back on Track with Simplicity 1754

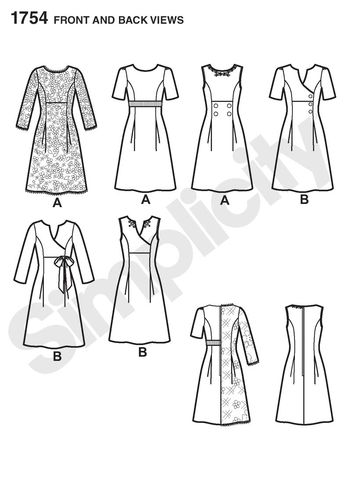
To start this party, I think I should first say that 2015 was sort of a tricky year for me in oh so many ways. Honestly, I think it left me drained as we rolled into 2016. My desire to sew took a hit but because I love to create new things to wear…well, it’s my passion so I just had to transition back into the sewing mood. I’m happy to say…I’m back on track! And in an attempt to keep things simple, I dug out an old pattern that caught my interest, but as I said, it was old, tucked away in a big bucket of patterns and unfortunately no longer in print though I found it still available through Joann Fabric on-line. It’s Simplicity 1754 with an interesting style.

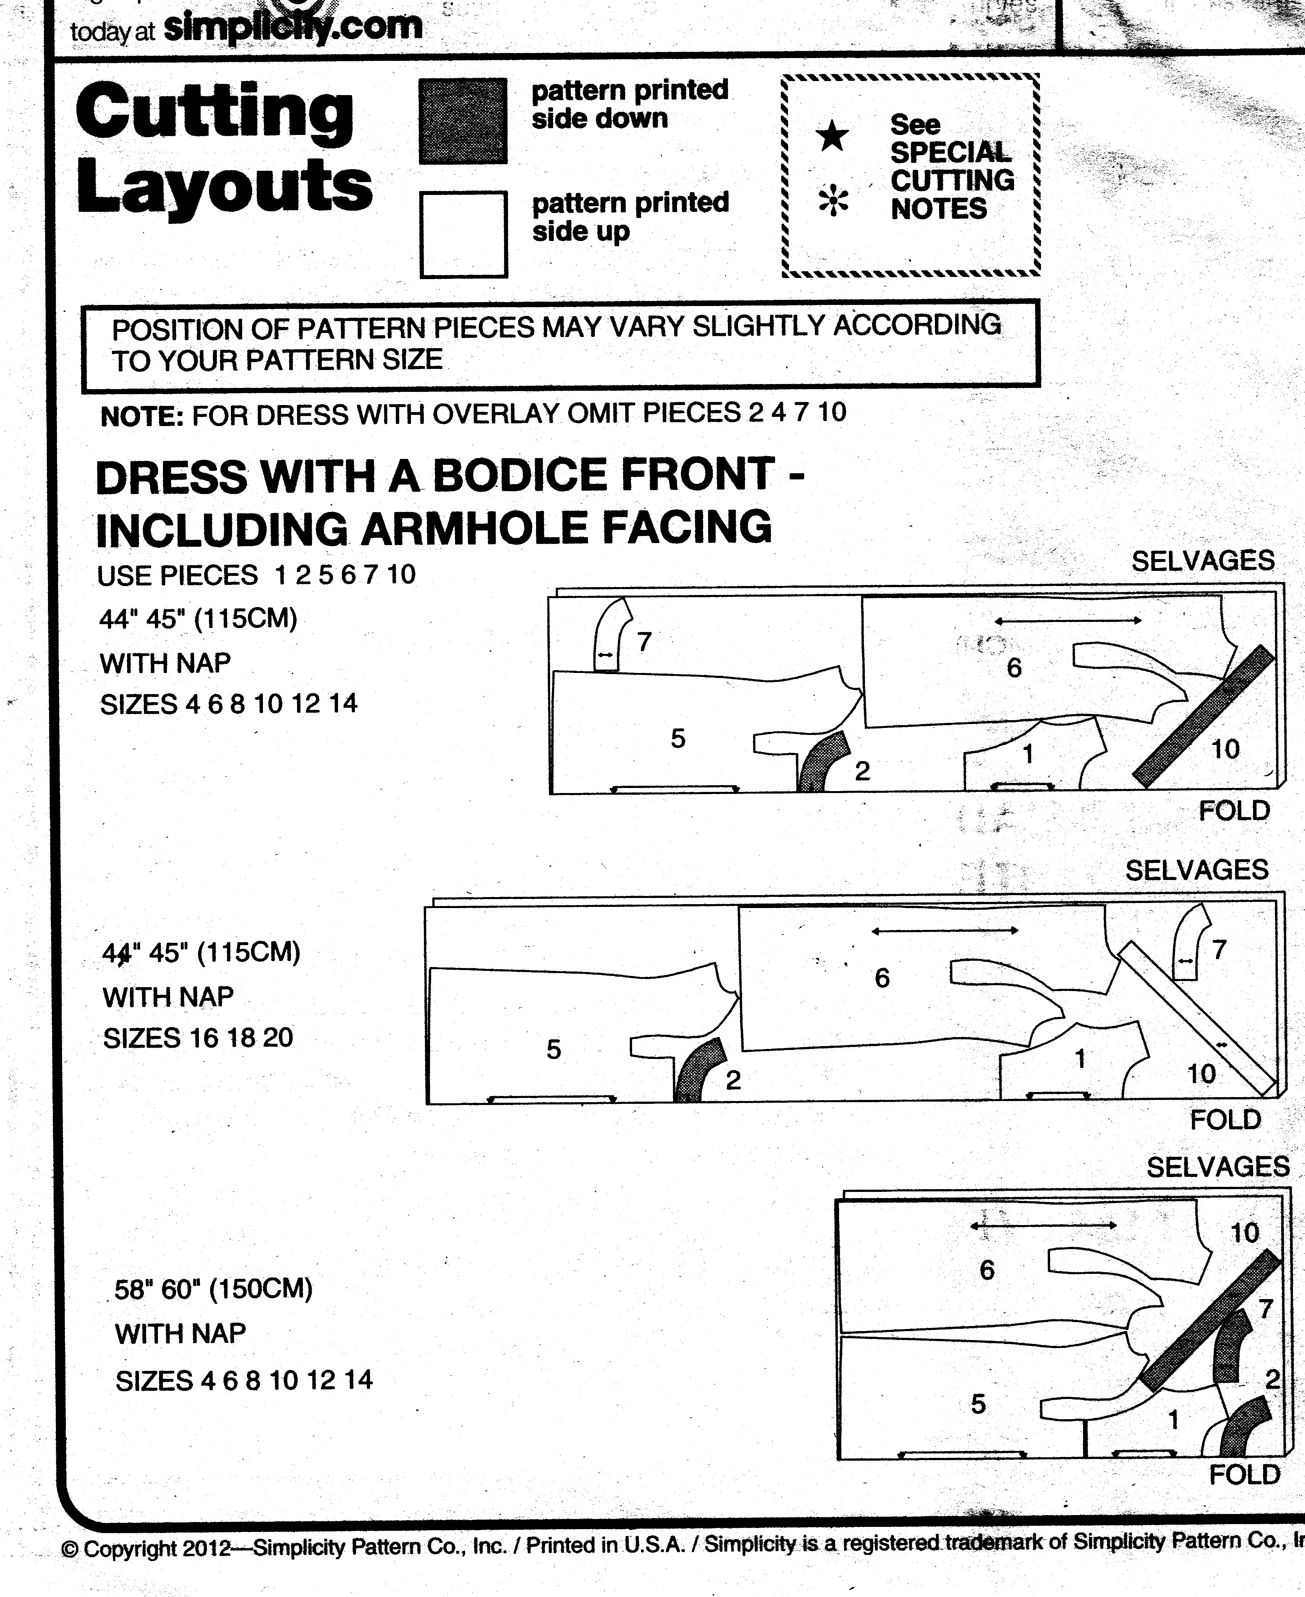
I got creative and went for option B, the little green drawing of it in the bottom right corner. Below is the pattern instruction diagrams.
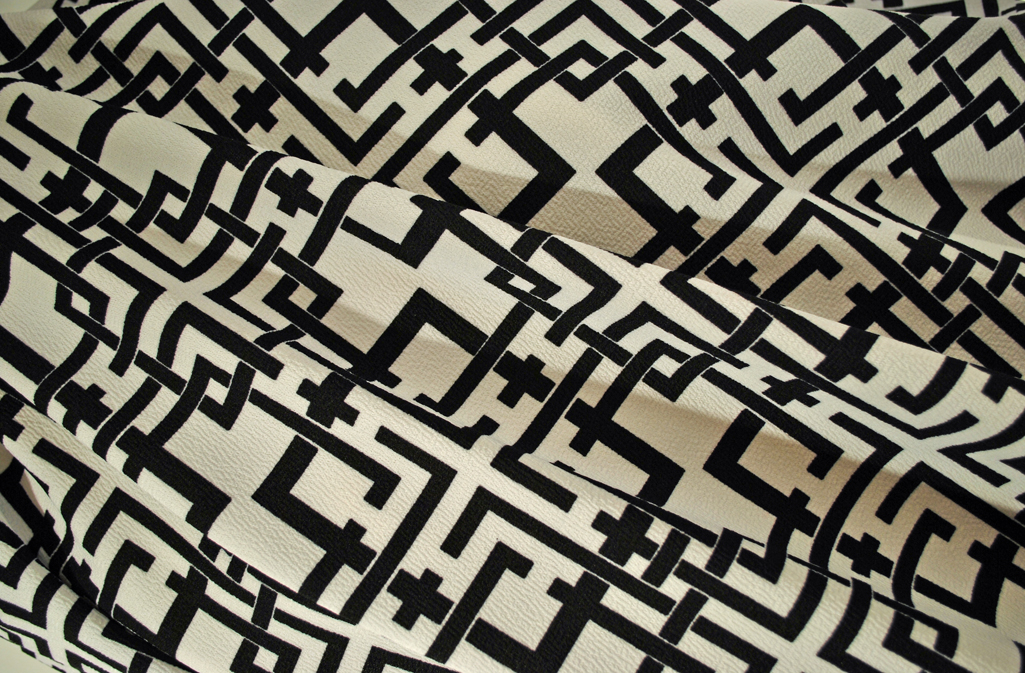
To make this dress, I had to go on a hunt for fabric. Is it just me or is there a lot of nothing available to us non-commercial sewers?! I combed through some of my local fabric stores, and had almost given up when I stumbled across this.
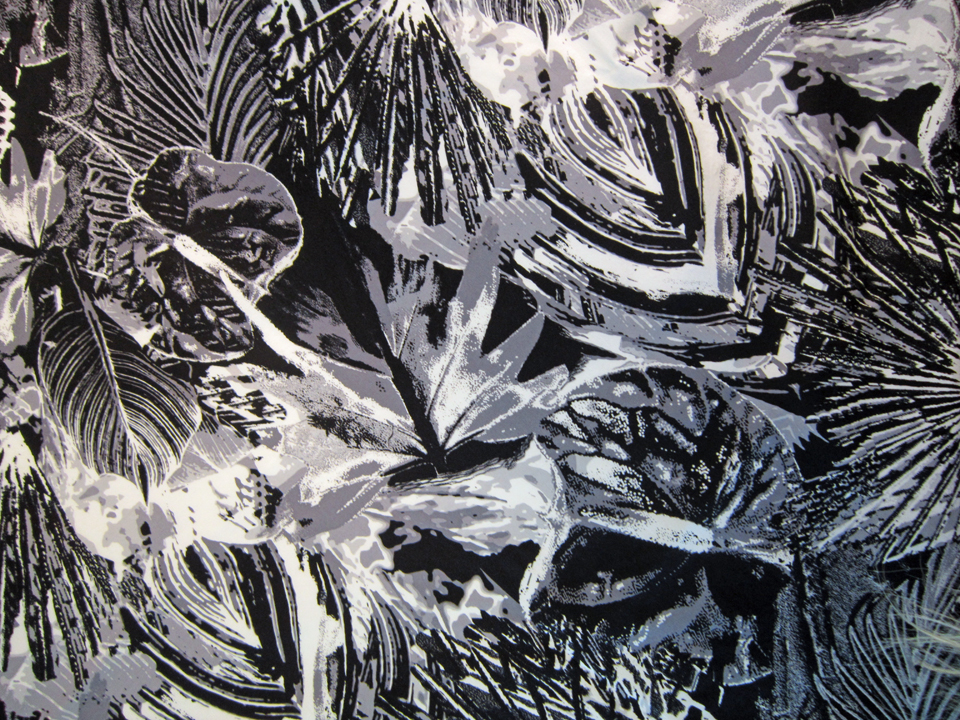
It is cotton with spandex so has a wee bit of stretch. It is soft and was very nice to sew but it does make a rumpling sound that kind of annoys me!
I have no idea why…but the lining queen forces within just won’t let me make something with visible raw seams. It would be easier to not line, but for whatever reason, my brain thinks that a garment feels so much better to wear and is more special if it’s lined! I’ve decided to not fight it, it’s truly easier that way! Naturally the pattern construction did not provide for this pin head notion so I had to be very creative. To top it off, I also decided that I wanted to use piping and of course there were no instructions for that either.
To get the job done, I relied on this…a fabulous handy dandy tool to have for sewing piping…a piping foot!
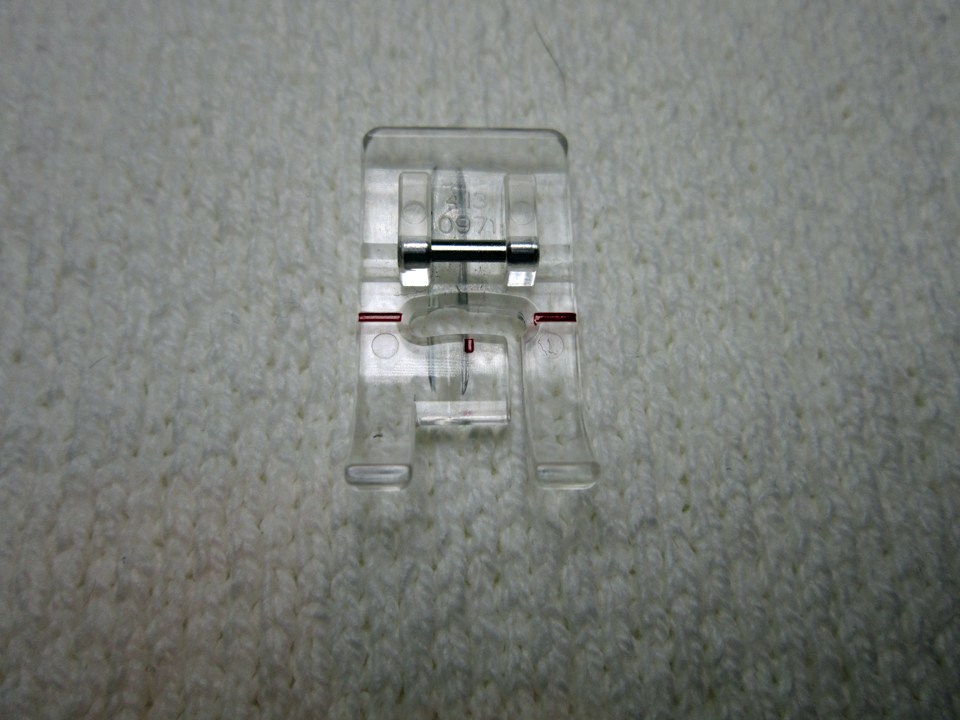
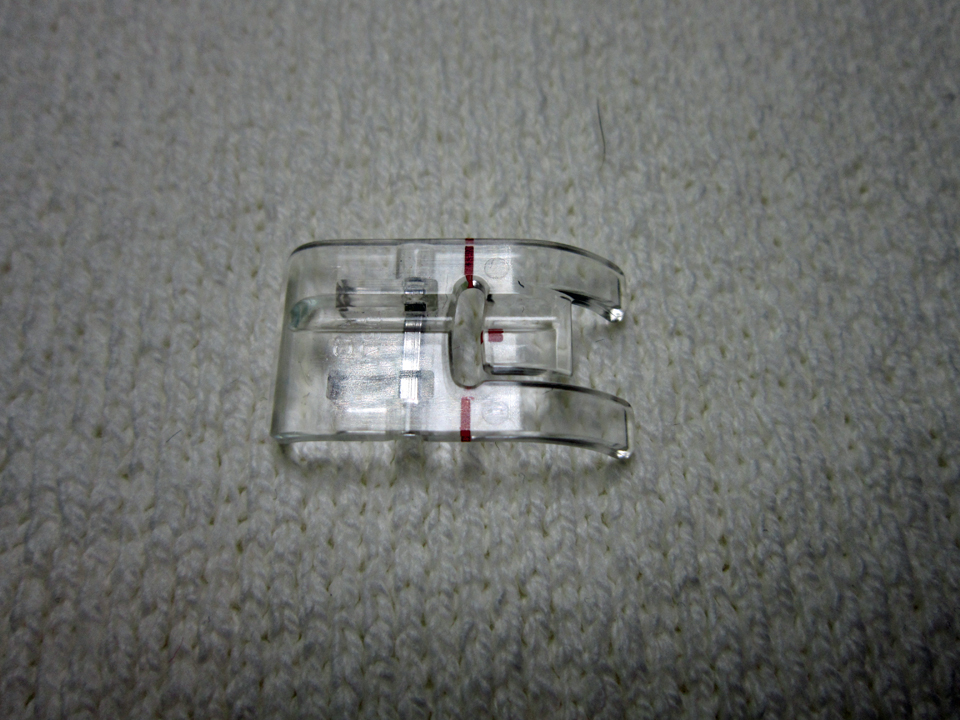
1. It took some extra time, but I first positioned the piping under my piping foot and using my 5/8″ guide on my machine, basted the piping in place, however, I moved my needle to a more narrow stitch, maybe 1/2″ because I didn’t want my final seam to overlap this basting seam because the threads get tangled and it’s sometimes difficult to pull the basted seams out.
2. I then sewed together the two fabric pieces with the piping sandwiched between, again using my piping foot and sewing the usual 5/8″ seam. I took my time and did this slowly.
3. After checking to be sure it all looked good, I removed all the basting and then clipped the piping to the seam along all the curves and sharp corners.
Dare I say…I finally learned how to apply piping properly to clothing. My corners and edges at the back of the neck were a success!
I didn’t take any pictures of the construction process because what I was doing would have made no sense in pictures. I had to throw the instructions out the window and totally think it through like it was my own design. It was slightly unnerving at first but once I sold myself on the idea that this was no different than when I make my own designed garments, I let go of any fear and just figured it out! I think that’s why I had fun…it was like not having to worry about coloring in the lines!
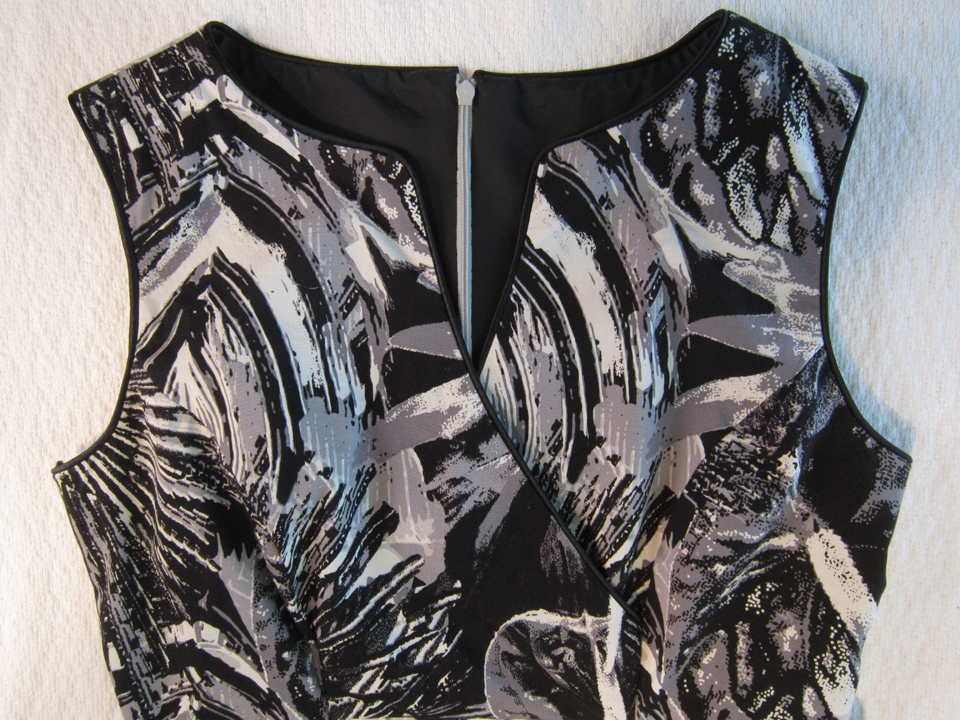
This is the front bodice of the dress. I’m thinking of adding buttons diagonally along the right front but it has to be just the right ones! HA!
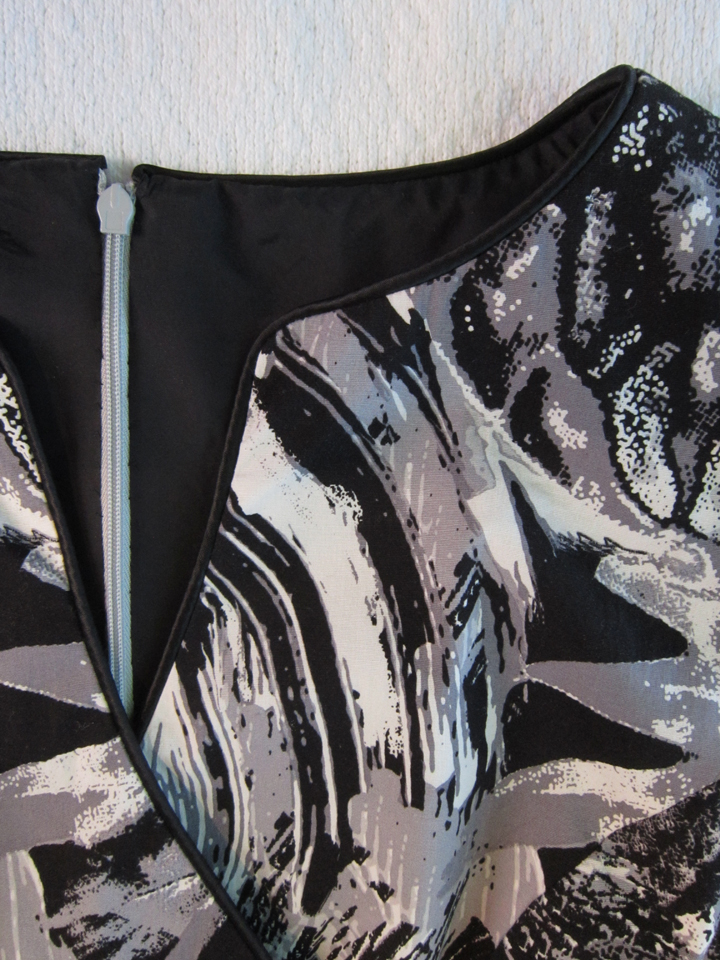
This is a close up of the neck with the piping.
The dress is designed like a sheath but the front and back cut fabric pieces are split just below the waist. When sewn closed, the seam is a princess line in the bodice of the front and back. Here is a picture of the fabric layout to show the pattern pieces. At the bottom of the split, a pleat is created when sewing the two sides together.
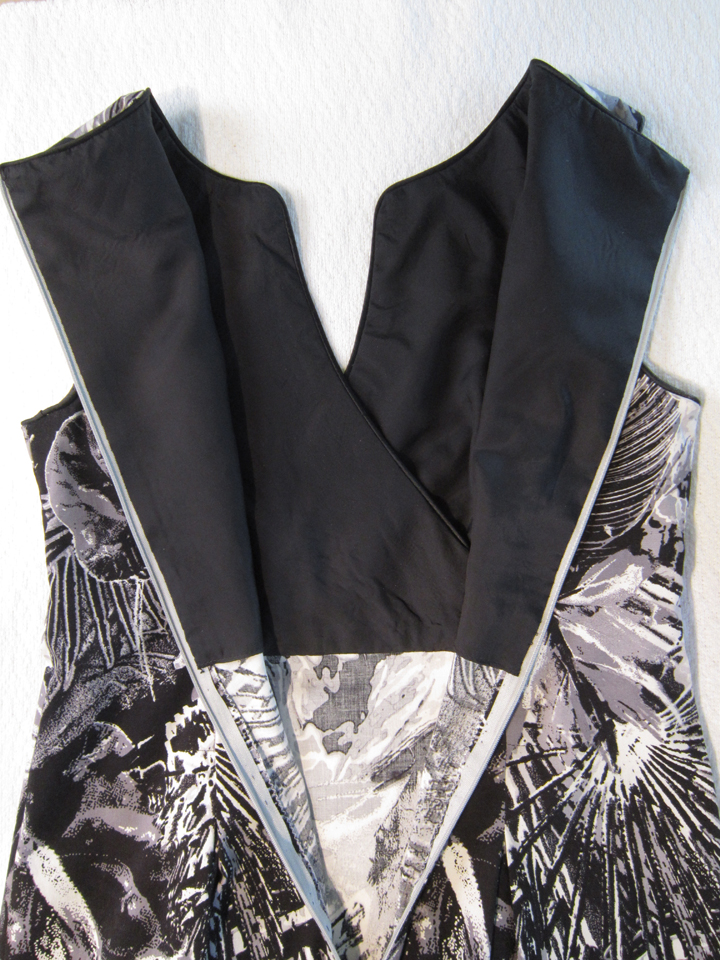
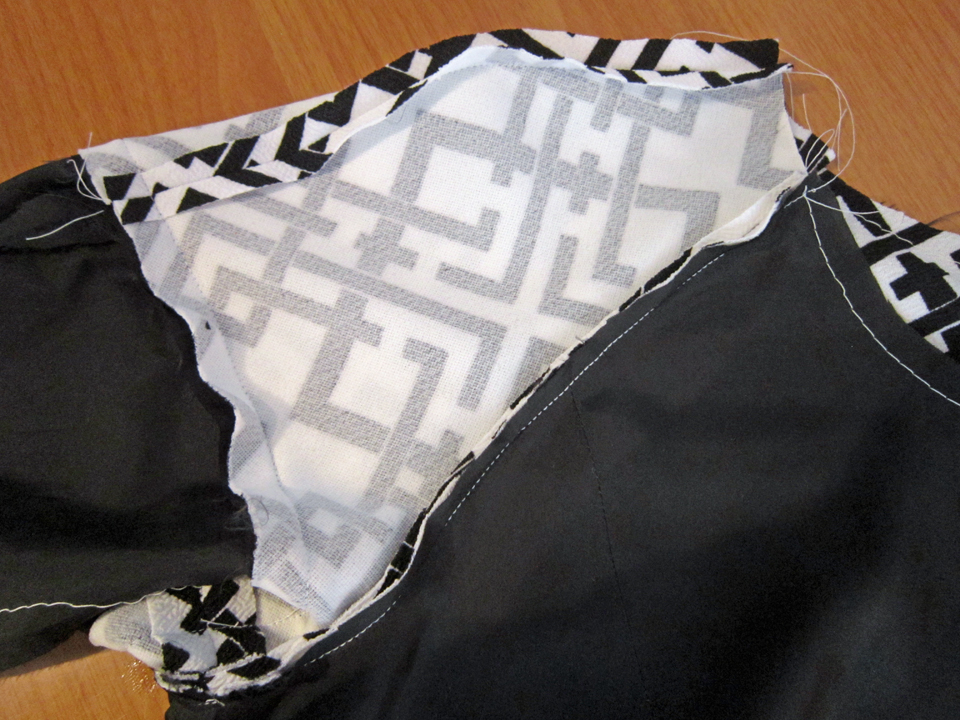
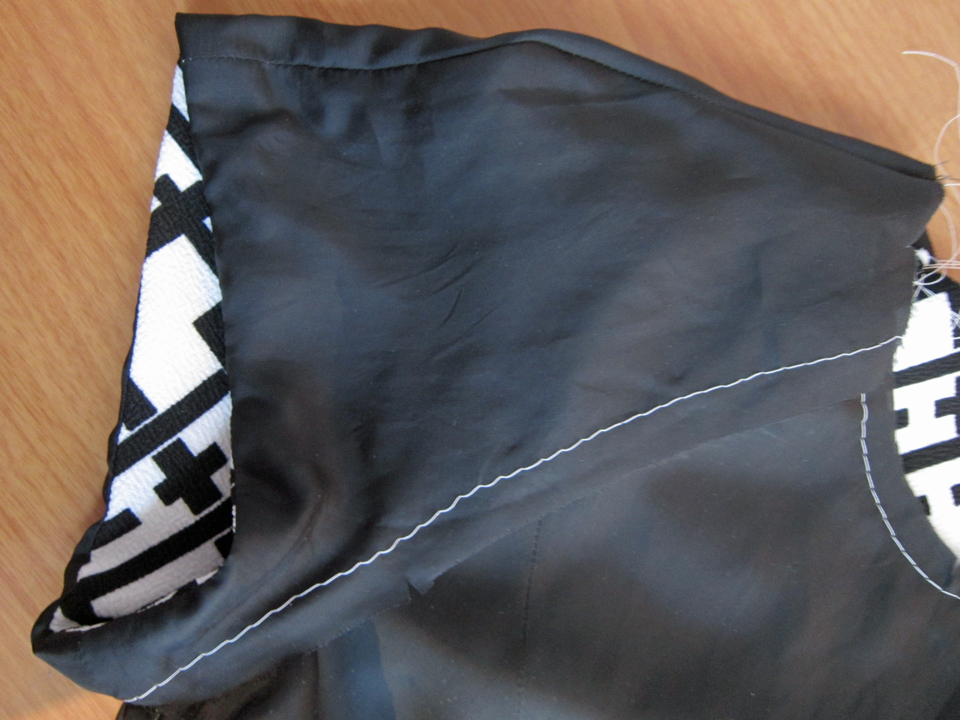
I lined just the bodice and zigzagged the seam edges below it. This is what the bodice looks like inside.
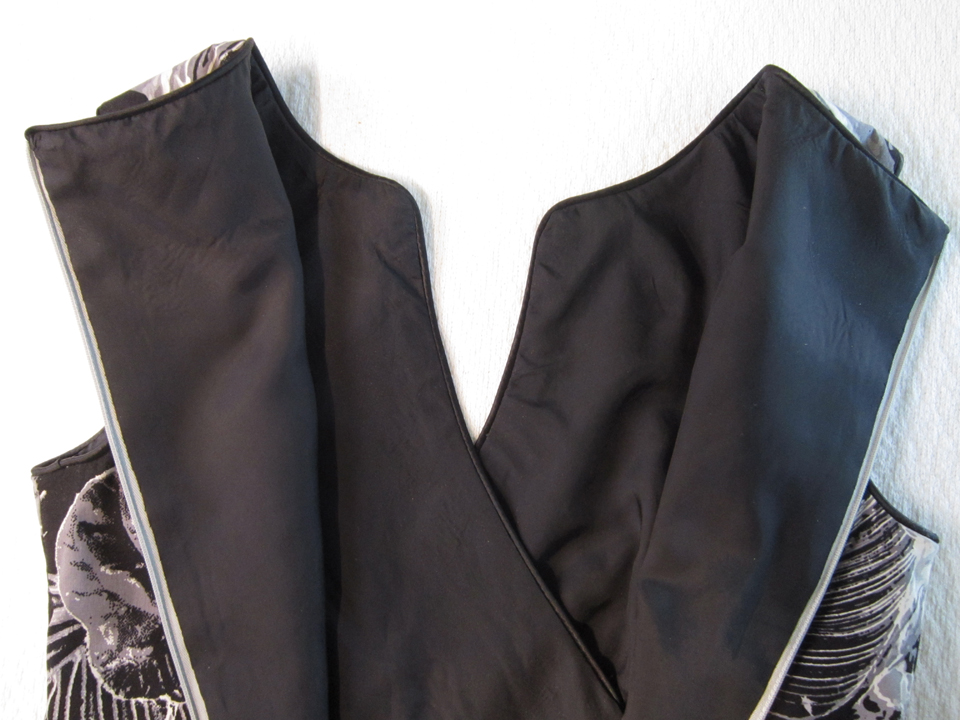
A second picture to illustrate that just the bodice has lining. I should mention that I only tacked the lining along the front bodice seam and at the center back where the zipper is placed. I finished the remaining untacked areas with a silk thread hem. I love using silk thread!
The back princess seams start just below the waist line area and are kind of hard to see because of the fabric design, but they end at about the middle of the back of the armhole.

Okay…yes, I’m going to model it. Here it is!

The back…
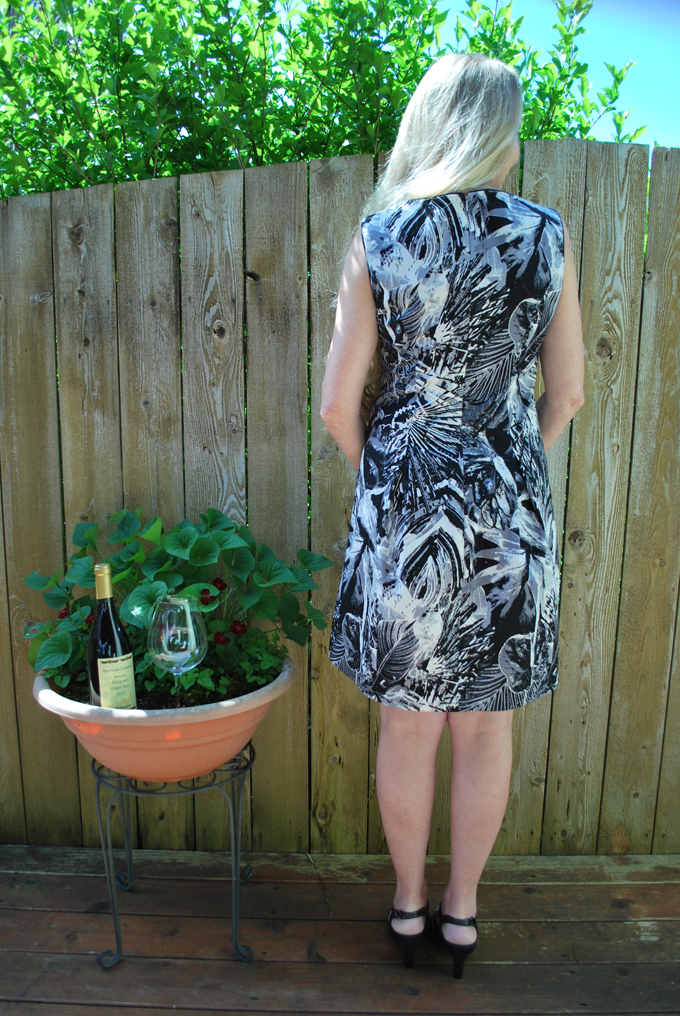
It’s going to be a nice day!

Just to much fun!

So there you have it…and thank goodness I’m back on track. I’ve really missed my sewing time; I find myself feeling more balanced in everything else I do when I’ve spent some time with my creative side! And on the subject of sewing…news flash… I just received my package from Mood Fabric, it’s arrived! Enough fabric for two different… yep… dress projects and I may even have a little extra left for several cute little summer tops! Of course, on the back burner has been the pants saga which I’m getting ready to return to! Stay tuned for that adventure!
Happy Mother’s Day to all the moms that visit Sewlikeinparis!
À la vôtre! Jessica
Read MoreRestyled Simplicity Runway 1798
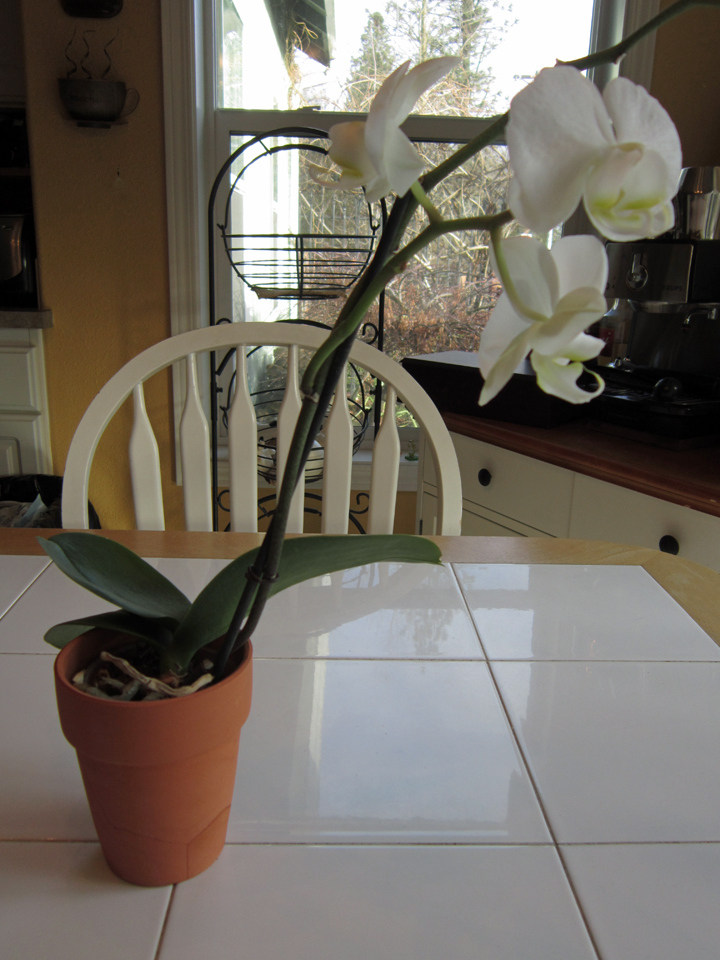
My daughter bought this orchid for me on Mother’s Day of 2015. It bloomed the most beautiful flowers again this month, January 2016! I hope this is the case for my new nose too!
Now that we are well on our way into 2016, I’d like to start things off by saying in today’s post that if you find yourself developing basal cell carcinomas on your face…take care of it immediately! Don’t fall into the medical insurance deductible trap and put off taking care of it until later, giving it time to spread! Just earned that T-shirt! I suppose I should be thankful that it was only basal cell, the “nice cancer”… but in all honesty, at this point in time, being thankful is not really working for me since my nose which is where the cancer was, is a “third eye on a cyclops” sort of scenario after the dermatologist and plastic surgeon got done with me. If Rudolph the Red Nosed Reindeer met me face-to-face, he would feel a lot better about himself! On a foggy night in the dead of winter during a snow storm on the arctic ocean I could hang off the prow of a ship as big as the titanic and lead the way! Yes…my nose is red! Bulbous! And it Glows!! And I’m four weeks post surgery! I have no idea why anyone would want to willfully endure a nose job to look better? The black eyes, swollen face and bruised cheeks that I got with the deal kept me housebound until a little over a week ago. And get this, tonight I have a concert to go to and on Sunday, a fashion show in Seattle! Yep…in the words of my daughter…”it sucks to be me!”
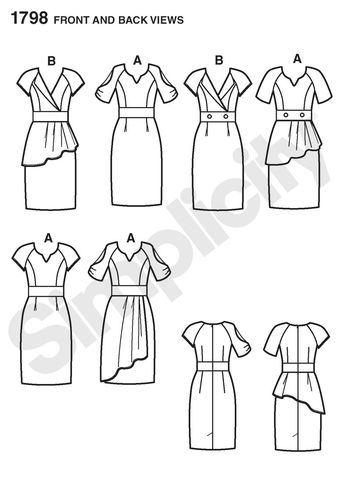
Well… ME got pretty tired of the whole ordeal about a week ago and decided to pull up my big girl panties, quit whining and get on with the program. I hit my sewing room and started a project which I had planned before Christmas. I purchased this pattern some time ago and what I really liked was the dress that had a front drape. It is the Simplicity 1798 and it is actually still available on their website!
It is the one in the bottom right corner in pale red?

Here is the pattern drawings. I made Option A with cap sleeves and a front drape (second row of A’s). BUT…I wanted a drape on the back as well which did not come with this pattern so I did a little re-designing!
*Note the back flounce on the bottom dress is just a peplum flounce, not the kind of drape I wanted.
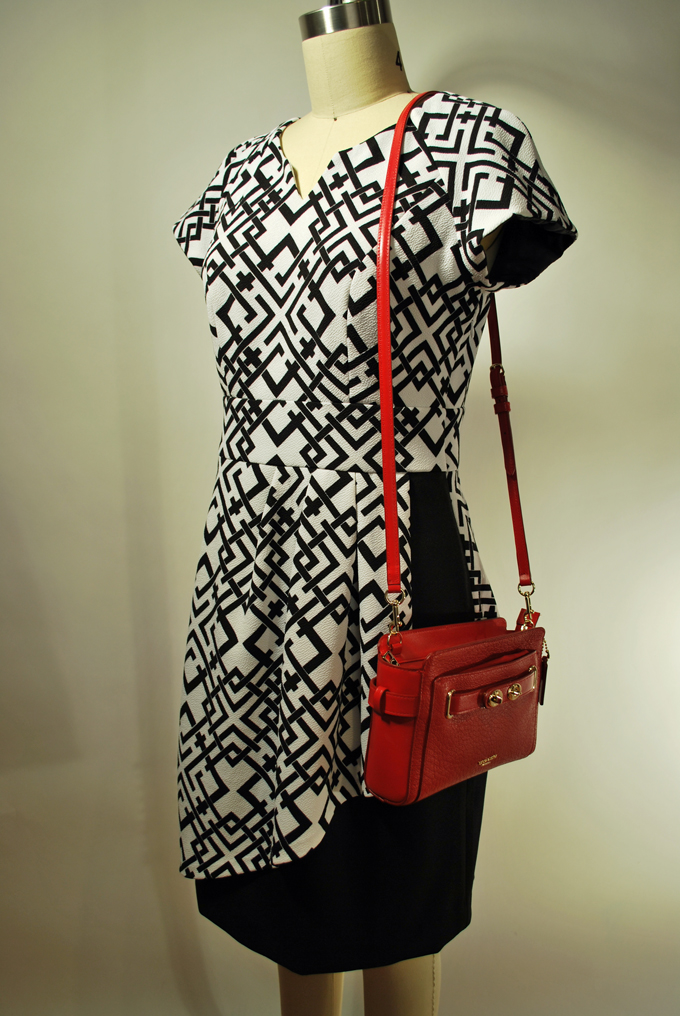
With this style and design in mind, I purchased the fabric for it back in late November which is shown in the picture below. The underskirt I decided to make out of black crepe which has a similar texture as this fabric. I envisioned wearing this new dress with black tights, black booties and a little red purse! I had absolutely no plans about including a red nose into the package but…well…I guess we’ll leave it at that!
Remember the little red purse? Yes I did buy one, more specifically, a Coach Blake Crossbody Pebble Leather in Red. A little reward to myself for not committing harikari because of my seemingly impossible situation.

Because I planned to create a back drape, I knew that I definitely needed to make a muslin. Actually, an almost finished dress minus hems, interfacing or lining. Even though I started off with first drawing the pattern for my back drape, I didn’t realize until after I finished cutting out and sewing my muslin bodice that its back zipper design wouldn’t work for my plan. The zipper had to go! Having sewn enough dresses, I knew that with this design, I could put the zipper on the left side which meant that I would have to put the dress on over my head, and of course take it off the same way. Hey, no problem…just have to remember to fix my hair after putting on the dress!
Below is a picture of my muslin. As you can see, I left open a section of the left side seam where a zipper would go.

Of course, if I put the zipper on the side, this meant that when I cut out the pattern pieces from my actual fabric, I needed to cut the back bodice on the fold which I was a small bit nervous about since the back bodice center was more a natural curve than a straight line. I laid the pattern piece on the fold of my fashion fabric and fudged as much as I could and kept my fingers crossed! I also had to do the same for the back midriff band but this was easy peasy!
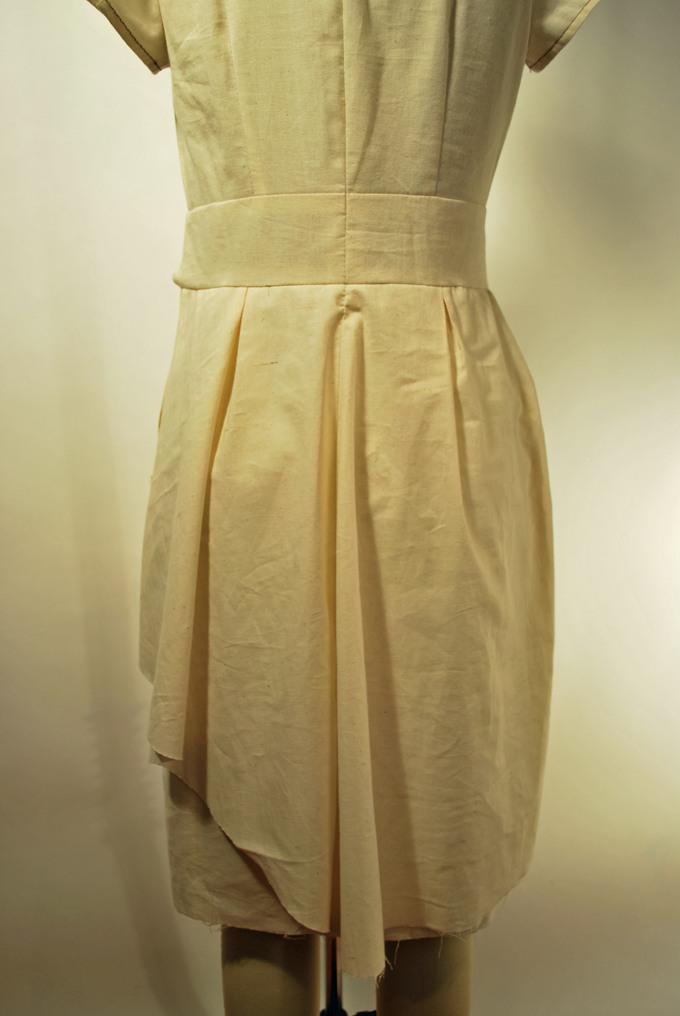
The front drape that came with the pattern, hung separately from the underskirt on the front with its hemmed side edge slightly distanced from the the left side seam where the zipper would be located. I liked this and had no plans on changing it! However, I wasn’t sure what to do with the left side of the back drape. Initially I thought I would have it hang separately like the front drape so made my muslin in that way. See the picture below. (There sure are a lot of wrinkles in the muslin aren’t there?! I did iron it as I was assembling it but it’s been through a lot since then!)
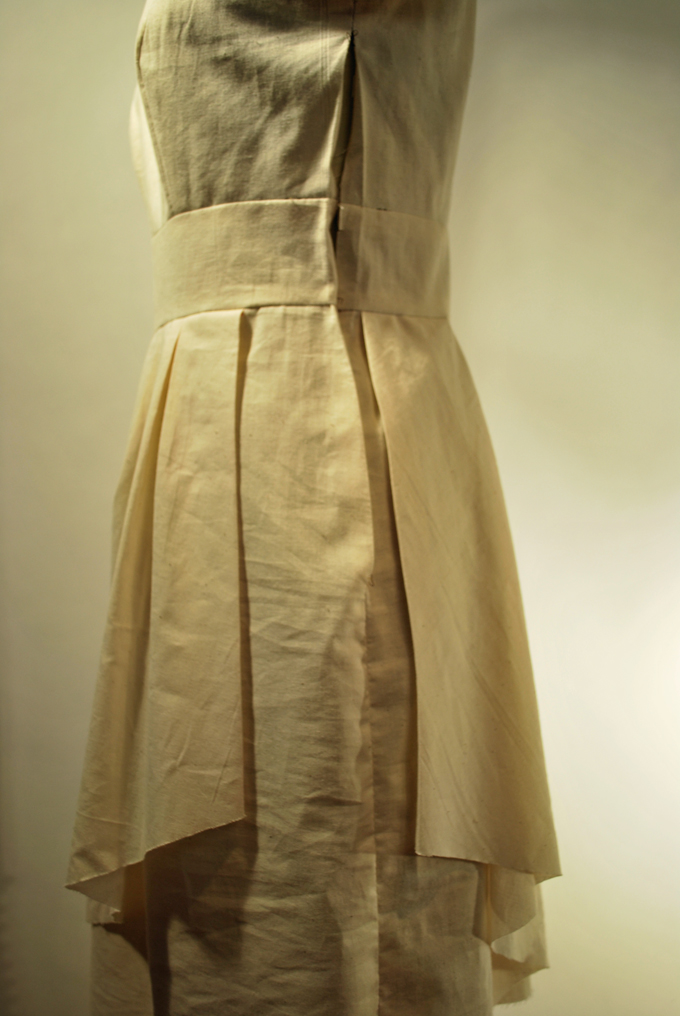
I discovered when I tried on the muslin that I didn’t like the way the left side of the back drape flared out. I worried it would make me look fat! Hey, I’m a girl and I think this way! So I decided that I would sew the left side of the back drape into the underskirt side seam on my actual dress.
After I finished with the muslin and looked at the back…I discovered that besides not having the shape and length exactly right, I also did not cut this piece on the right direction of the grain so it didn’t drape very well. I had a total “a-ha” moment and felt relieved that I had taken the time to do this mock up dress!
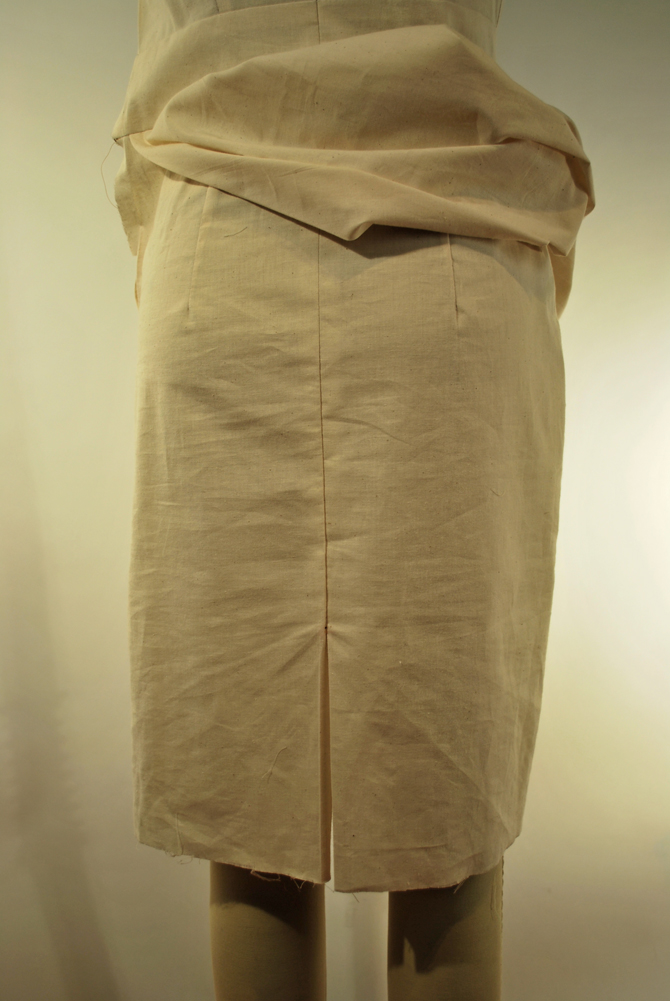
Here is a picture of the underskirt back view. The skirt is vented and I pondered whether I needed to include this feature if I had a drape over the top of it but decided to keep it in the design in case the hem of the skirt was at all narrow. The underskirt I will make out of my black crepe.
Okay…so after I figured out how to re-construct my new version of this Simplicity 1798 Project Runway Dress, I was ready to start on the real deal. One other major decision now occurred…to line or not to line! I’AM the liner queen but I knew I had to really think this through because I hadn’t built my muslin with a liner. Since my underskirt would be black, I discovered that when I put the black crepe under my fashion fabric, the white part of my fabric changed shades. I wanted consistency so I knew that I would have to at least line the bodice so I was off the hook for having to make an optional decision!
I still assembled the bodice per the pattern instructions though allowing for the side zipper placement. Remember… there was no need for a center back seam. I then cut out all the same pieces in the same way for the bodice lining, out of my black Bemburg lining fabric and assembled them. Next, I took the bodice and bodice lining and basted them wrong sides together.
Now it was time for the cap sleeves. Here is where I had to be a little creative. I essentially sewed the lining sleeve to the fabric sleeve the way the pattern instructions tell you to do with the “cold” sleeves. (Though still can’t figure out why you would even bother making these kind of sleeves if there’s going to be big holes in the shoulders of them!) Instead of folding the lining up and onto the sleeves and basting them together, I sewed only the sleeves to the bodice. Below is a picture of the sleeve lining sewn to the sleeve but not yet folded in and onto the wrong side of the sleeve.
Finally it was now time to fold the lining up onto the inside of the sleeve which is shown in the picture below. Hopefully this makes sense! The white 5/8″ basting stitch along the edge of the sleeve lining is my folding line. My plan was to hand sew the 5/8″ folded edge of the sleeve lining over the top of the bodice/sleeve seam that you can see back in the picture above.
*I use sewing machine basting stitches to mark hems which I will then press into the fabric that creates an even fold line. Then I remove the basting. It takes extra thread but it sure makes things easier! Sometimes I only finger press such as with these sleeve linings, because when a hand sewn seam is on a curve, fabric is a little more manageable when not pressed by an iron.
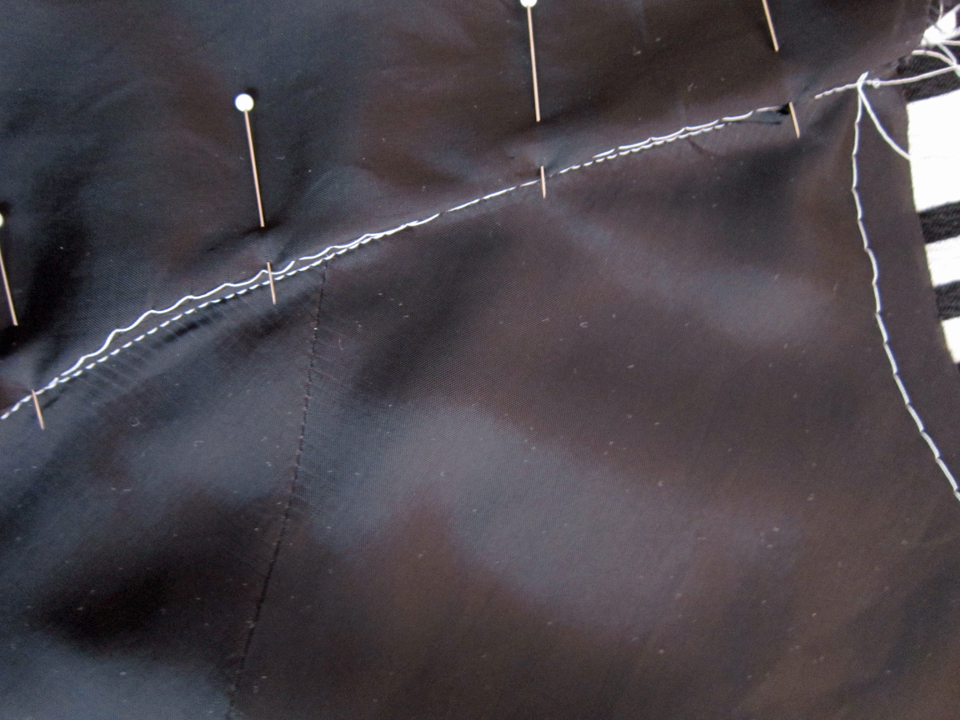
I pinned in place the folded edge of the sleeve lining, shown in the picture below.
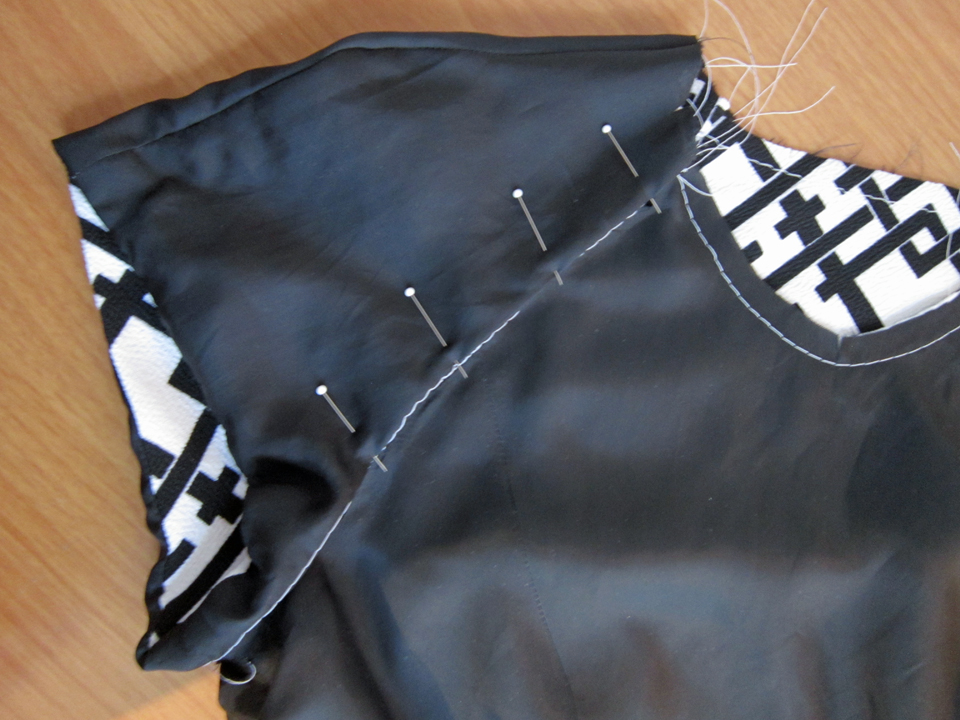
I did remove the basting before hand sewing but I left it in for the picture so that it’s easier to understand what the heck I”m doing! Here is a close up picture where you can see the side seam where the bodice is sewn to the sleeve under the folded edge of the sleeve lining.
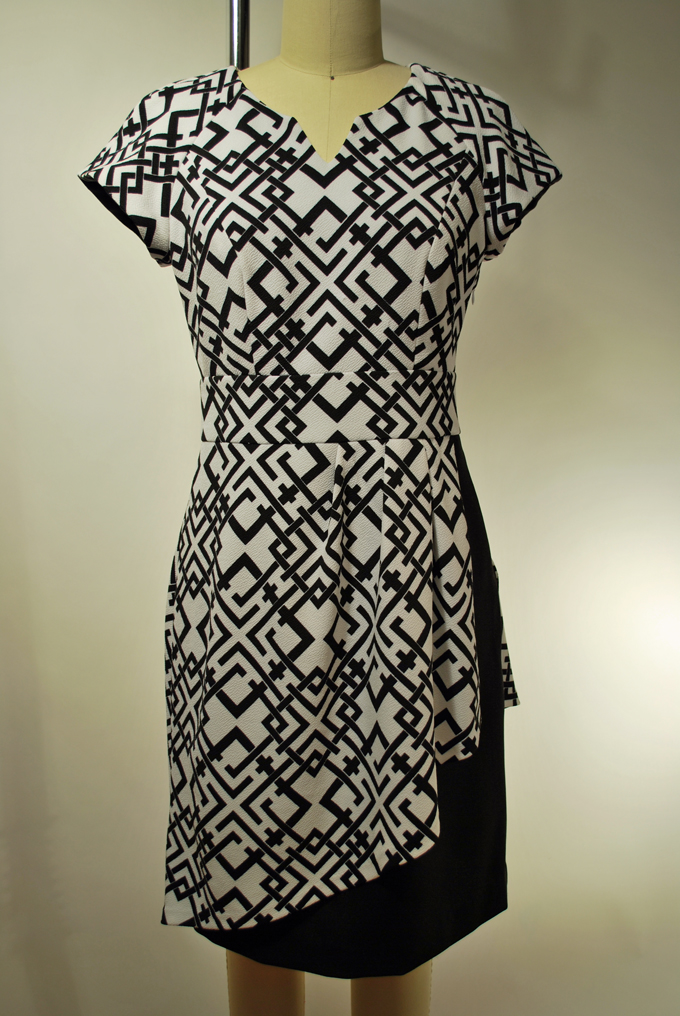
So that’s how I essentially made this dress. I’m not especially brave enough yet to plaster pictures of myself on the internets so I will show you my finished dress, worn by my other half, Phoebe!
This is the front…
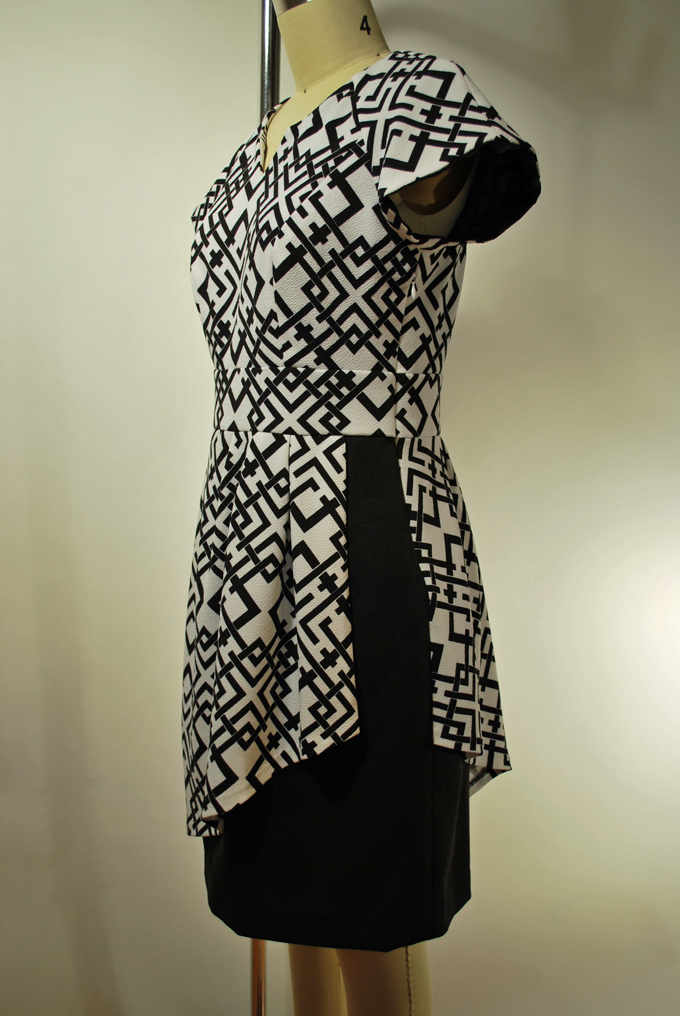
The back…which I’m not sure the drape was all that important but it satisfied my want.

The side where the drapes are the most noticeable and where the zipper got moved to. The back drape left side is sewn into the underskirt left side seam.
And a little extra of what I saw in my imagination!
Well, that wraps up another long blog post. I’m sorry I do that! For those that don’t want to read, there are certainly some pictures to look at! Big smile!
Enjoy the last two days of the month of January, and I’ll be back soon to share more of my sewing shenanigans! Might even be able to show you my new nose!
À la vôtre! Jessica
Read MoreAbout Me
 Portland, Oregon,
 United States
Hi there! I’m Jessica Brandon and I am a clothes-loving sewing artist. When I am not sewing, blogging or shopping for shoes for my creations, I fill in the remainder of my days spending time with my children, playing ice hockey, gardening and making and drinking wine!


Up Coming Projects:
Vogue 1426

Vogue 7881

McCall's 7089

Vogue 8997

Vogue 1431

Vogue 9006

Vogue 8991

![]()
Starstruck Creations LLC